Tumgik
#makingof
linestyleartwork · 11 months
Text
Tumblr media
"Arwen's Fate" - acrylic on canvas 70 x 100 cm
After three months of work, another painting, which I wanted to do especially for my stand at this year's Tolkien Days Germany, is finished now. Are you going to visit the Tolkien Days, too? If so, come visit me. I would be very happy about a chat. 😊
Tumblr media
(Royalty-free music in the making-of video: "Eternal Beauty" by www.frametraxx.de)
212 notes · View notes
art8demo · 2 months
Text
Present painting process
23 notes · View notes
guttykreum · 11 months
Text
The making of "3 AM Matsuyama".
83 notes · View notes
rafaeldearaujo · 4 months
Text
Tumblr media
18 notes · View notes
oldwoodenships · 7 months
Video
vimeo
(via https://vimeo.com/861511356)
The Last Voyage of the Demeter 2023 (Historical advisor Martin Martin on creating cinematic experience of the old wooden ship)
12 notes · View notes
taishart-arth · 9 days
Text
Tumblr media
2 notes · View notes
marcsund · 3 months
Text
youtube
3 notes · View notes
pabdesk · 1 month
Text
Tumblr media
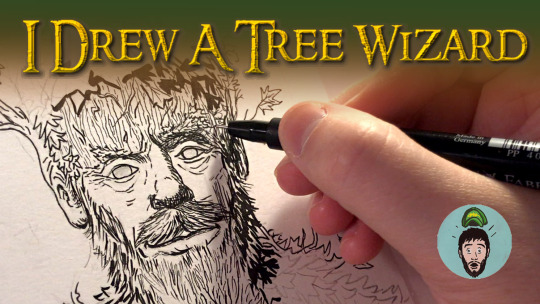
New On My YouTube Channel: "Drawing A Tree Wizard!" When tasked to draw a "Tree Wizard," is artist Philip A. Buck up to the challenge? How does he know what a tree wizard looks like? In this video, a tree wizard is designed, drawn & inked while the process is narrated & calming music is played. Do you like to invent fantasy characters? Check out the YouTube video by clicking the link in my bio & then clicking "YouTube" or by going here: https://www.youtube.com/channel/UCxK6bCFfSeJmR9sfXNY39sg
2 notes · View notes
julieboehm · 7 months
Text
Magischer Camouflage Nachtfalter - Video & Fotos
Werfe einen Blick hinter die Kulissen für die Entstehung dieses magischen Nachtfalters
Tumblr media
View On WordPress
2 notes · View notes
symphonyofeternity · 2 years
Text
Hii, Xerophi here, and I sculpt things for fun. I don’t post much in general, but I’m flattered some of you want to follow me and I’m super blown away that people thought it looked official?! I’m into clay these days, so if you don’t mind seeing some clay art floating around every now and then, welcome aboard! 
This is a making-of post, and I’m mostly putting this out there to encourage people to try their own hand at making figurines! It’s also not really a tutorial, though if anyone’s curious I gratuitously watched some Youtube videos that cover most of the way a figurine gets sculpted and put together.
Tumblr media
Tl;dr!
Materials:
Super Sculpey Firm (Gray) (about 95% of the project) + Premier Air Dry Clay for patch jobs (when I deemed the polymer would suffer brittleness from further baking)
Tamiya Polyester Putty for patching over cracks, imperfections on the surface
Armature wire- Gotta have a skeleton!
Various Tamiya Acrylic paints
A block of wood to mount figurine to (lol)
Tools:
Pretty typical clay sculpting tools 
Airbrush
Paintbrush
Sandpaper
Long post ahead!
To be honest I’ve always been really interested in how anime figurine garage kits (unofficial, unassembled, unpainted figurines) are produced, but unfortunately, most of the details are in Japanese, so I settled for following a bunch of makers on Twitter and did my best to piece together steps from their postings. Unfortunately I’m not skilled enough yet to go the full way of making molds and resin casts for a piece like this but I think I can say I’ve finally leveled up with sculpting figurines in general with this project! I learned a lot along the way. 
Tumblr media Tumblr media
I started with his face. And it was not good. The hat too. Proportions were a bit difficult to maintain when I approached it from such a piece-wise method, so I tossed them both and just... completely redid them the next day using the body as reference.
I pondered a lot about what expression I wanted him to have. Since Legends Arceus gave us the brilliant gem of seeing him smile after battle, I thought it was a largely bittersweet thing to be able to witness. I wanted to preserve the intensity of his expression, but also allow the joy of battle to shine through. So... at certain angles, he does appear to have a bit of a smile! 
Tumblr media Tumblr media
A rough addition of muscles to the armature. Clay works remarkably like skin and muscle too, stretching and flexing as I pose him. This let me envision the way his tunic would flow over the torso. Made it look a biiiit tight on him…;) Once the tunic was done, used some 91% alcohol to smooth surface imperfections over the clay, then I tossed it sans arms into the oven. Wasn’t sure how I wanted the arms yet. Legs were easier, Ingo’s pants are a little looser at the bottom now than they were in BW.
Tumblr media
Grew a brain and remembered I had perfectly good reference material to size and proportion against and wouldn’t it be cool if my figurine matched the same scale as the Best Wishes Partners series?
Dunno what BW Ingo thinks of his raggedy counterpart though. Prolly nothing good?!?!
Tumblr media Tumblr media Tumblr media
Got some sculpting mesh wire and cut and formed it in approximation of how I wanted the coat to be shaped, temporarily stuck it to the body, and then carved the rips and tears in before baking. Removed the mesh after its job was done, you can see the diamond grid pattern it left at the bottom of the coat. No worries, there’s magic for that later.
Top of the coat is sculpted directly over the tunic, and the collar is done in a similar fashion to the coat, clay over mesh wire, mesh removed, then the piece is glued on.
He gained a small metal peg at the back to help temporarily hold up the bottom half of the coat along with some helper tape.
The coat was the main reason why I decided I wasn’t experienced enough yet to attempt making a mold and resin cast. I have no idea how I’d even cast such a thin piece to begin with.
Tumblr media Tumblr media
Hands! I took a small piece of clay, flattened it into a square for a palm, and sculpted the fingers individually with a piece of metal in each to stick to the palm with. Damn the Best Wishes figurines for the gloves- meanwhile I’m here trying to get knuckles, bones, and nails to show up because they went hard on his hands in his design so I decide to as well. I also finally settled on paying homage to his iconic over the shoulder pose, finally baking the arms into place. 
The first iteration of the Sneaseler warden bracelet got added. It turned out far too thick to fit in his sleeve with the hand attached, so I wound up having to make a second one (pictured) to replace it. The base of a Hisuian Pokeball got added and later touched up to stupid levels of detail. (You can’t even see most of the damn bracelet in his sleeve >:( why did I work so hard)
Tumblr media
I struggled with getting the coat to meet smoothly across the seam, but turned out I didn’t need to. Tamiya putty turned out to be an insanely good filler and masker, I could have done fine after gluing the pieces together but I only realized this at the end. Of course if I were making a proper garage kit, it’d be bad form for me to send people something they’d have to work so hard to attach properly.
At this point I didn’t want to bake the polymer any more, too much baking and it gets brittle, and I was already working at a tiny scale and with really thin pieces, so I brought in air dry clay (Premier brand), which is reasonably capable of sticking to polymer with a little water, and sands very smoothly later, to help fill in too large gaps. 
Tumblr media
Lowest point of the project visually- I’ve never used Tamiya putty (the yellow stuff) to this extent, but I’ve seen some Japanese artists literally slather their whole project in it before seemingly sanding or carving it back down to detail. I have no idea how they manage that except what must be a shit ton of patience, but I tentatively went with the leap of faith, using it wherever I felt imperfections. The underside of the coat, marred by the mesh, got filled in at this point. 
Tamiya polyester putty is a two part putty that cures in roughly an hour and is sandable to nearly a polish. It cures to a hard surface that is easy to carve and incredibly easy to sand, hence why it gets used to fill in imperfections and cracks. It works its way into these places very nicely too, as it basically starts in a cream form.
Tumblr media Tumblr media
I sanded everything until it got smooth and flat again, then airbrush sprayed over it with Mr. Finishing Surfacer 1500 gray. This primer has the nice additional feature of settling into small areas of imperfections and smoothing them over as it dries. Places where imperfections show up were continuously patched with the Tamiya putty, sanded, and primed over until I was satisfied.
Still wasn’t happy with the length of the legs or the tilt of the head since I messed up the neck by making the wire connection too tiny to rely on, so his head kept wobbling or turning (or fALlING-). Fortunately nothing’s glued, not even the legs, so I can adjust his height and add/subtract clay to my liking until the pose is good.
Tumblr media Tumblr media
Drew in guidelines to the pattern on his coat. Added the buttons, realized he had too much of his coat still to warrant subtracting the lost button, so I shrugged my shoulders and rolled with it. 
Using painter’s tape, I masked anywhere I didn’t want to spray, then airbrushed in the black, then brown. The primer turns out to be the perfect shade of gray for his palette, so I just masked over it to keep it in the places I want. Skin got a bit of realism added to it by shading it in lightly with dust ground from a pastel, then sprayed over with finisher to seal it in.
Tumblr media
Printed out the Pearl Clan symbol, cut it out with an xacto knife, and glued it on. My printer sucks, so I darkened it with some paint. It helps at this point the paper juts up just a bit so I could carefully paint over it without touching the tunic below. Added some finisher spray over it to make sure it sticks. 
Nuked the left leg last second, and replaced it with a longer version, because I was unable to stand (haha) the poor positioning of the original. 
Tumblr media
Aaaand he’s done! 
One of the most important lessons I learned during this was not to over do it. If I started struggling, started making more mistakes than usual, I just straight up stopped then and there. I wanted to make a piece I could be proud of and forcing myself when I was clearly done mentally wouldn’t be good for me or the end result.
I’m happy to answer any questions or talk about figurines and sculpting! I’m entirely a hobbyist but I felt like it was difficult finding good information on how to sculpt anime figurines in general so if anyone’s curious about this stuff, I’d love to bounce some thoughts on the topic.
Tumblr media
Iiiin the meanwhile I want to work on a Sygna Suit idea for Ingo and Chandelure next! Maybe finally give Emmet some love too after xD, Now that we have the butler bros I feel like we’re not gonna see anything else for them for a while longer =A=
40 notes · View notes
tailiacprod · 9 months
Text
“The Making of Tailia”
-> https://www.youtube.com/watch?v=OLtQYUPrdxU
Tumblr media
Big Video all about the making of the first book in the Indie Novel Franchise “Tailia”, along with the rest of the series and some details on its future.
4 notes · View notes
guttykreum · 10 months
Text
Tumblr media
The making of "6 AM Konbini".
139 notes · View notes
Text
Tumblr media Tumblr media Tumblr media Tumblr media Tumblr media Tumblr media Tumblr media Tumblr media Tumblr media Tumblr media
Making-of
11 notes · View notes
Photo
Tumblr media
BABY WOLVERINE #detail #inthemaking #makingof #woverine #baby #babywolverine #cute #cuteanimals #animal #wildlife #illustrator #illustration #instaart #vectorart #vector #minimalism #digital #handmade #digitalart #editorialillustration #dieterbraun #brauntown https://www.instagram.com/p/CplHSt2LhJa/?igshid=NGJjMDIxMWI=
3 notes · View notes
andyparkart · 2 years
Photo
Tumblr media
This is the cover I illustrated for the upcoming “THE ART OF BLACK WIDOW“ book. I know these are late & a lot of you ask about these. Don’t fret! They’re coming… I loved leading our Visual Development team on this film & I can’t wait for all of you to see the amazing work done by all the artists who gave their all for this project! #blackwidow #yelena #scarlettjohansson #florencepugh @florencepugh #rachelweisz @dkharbour #conceptart #characterdesign #costumedesign #illustration #makingof #bts #marvel #marvelstudios #poser https://www.instagram.com/p/Cdn-g3dLH3F/?igshid=NGJjMDIxMWI=
12 notes · View notes
shinkleitus · 1 year
Text
Tumblr media Tumblr media Tumblr media Tumblr media Tumblr media
Behind the scenes of Decision to Leave
Year: 2022
Directed by Park Chan-wook
3 notes · View notes