#npm run dev
Explore tagged Tumblr posts
Visit Tumblr Blog
Explore Tumblr blogs with no restrictions, modern design and the best experience.
Last Seen Tumblr Blogs


Fun Fact
There are dozens of funny blogs to kill time on Tumblr.
Text
SysNotes devlog 1
Hiya! We're a web developer by trade and we wanted to build ourselves a web-app to manage our system and to get to know each other better. We thought it would be fun to make a sort of a devlog on this blog to show off the development! The working title of this project is SysNotes (but better ideas are welcome!)

What SysNotes is✅:
A place to store profiles of all of our parts
A tool to figure out who is in front
A way to explore our inner world
A private chat similar to PluralKit
A way to combine info about our system with info about our OCs etc as an all-encompassing "brain-world" management system
A personal and tailor-made tool made for our needs
What SysNotes is not❌:
A fronting tracker (we see no need for it in our system)
A social media where users can interact (but we're open to make it so if people are interested)
A public platform that can be used by others (we don't have much experience actually hosting web-apps, but will consider it if there is enough interest!)
An offline app
So if this sounds interesting to you, you can find the first devlog below the cut (it's a long one!):
(I have used word highlighting and emojis as it helps me read large chunks of text, I hope it's alright with y'all!)
Tech stack & setup (feel free to skip if you don't care!)
The project is set up using:
Database: MySQL 8.4.3
Language: PHP 8.3
Framework: Laravel 10 with Breeze (authentication and user accounts) and Livewire 3 (front end integration)
Styling: Tailwind v4
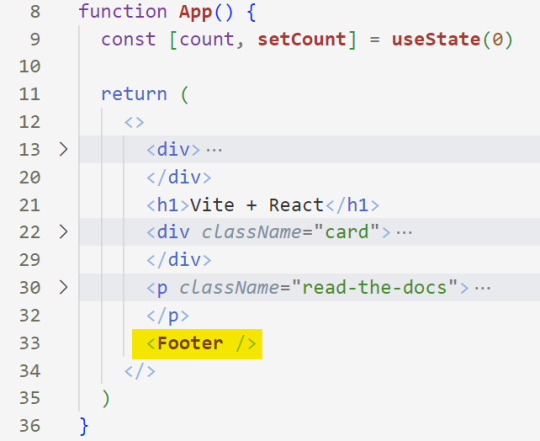
I tried to set up Laragon to easily run the backend, but I ran into issues so I'm just running "php artisan serve" for now and using Laragon to run the DB. Also I'm compiling styles in real time with "npm run dev". Speaking of the DB, I just migrated the default auth tables for now. I will be making app-related DB tables in the next devlog. The awesome thing about Laravel is its Breeze starter kit, which gives you fully functioning authentication and basic account management out of the box, as well as optional Livewire to integrate server-side processing into HTML in the sexiest way. This means that I could get all the boring stuff out of the way with one terminal command. Win!
Styling and layout (for the UI nerds - you can skip this too!)
I changed the default accent color from purple to orange (personal preference) and used an emoji as a placeholder for the logo. I actually kinda like the emoji AS a logo so I might keep it.
Laravel Breeze came with a basic dashboard page, which I expanded with a few containers for the different sections of the page. I made use of the components that come with Breeze to reuse code for buttons etc throughout the code, and made new components as the need arose. Man, I love clean code 😌
I liked the dotted default Laravel page background, so I added it to the dashboard to create the look of a bullet journal. I like the journal-type visuals for this project as it goes with the theme of a notebook/file. I found the code for it here.
I also added some placeholder menu items for the pages that I would like to have in the app - Profile, (Inner) World, Front Decider, and Chat.

i ran into an issue dynamically building Tailwind classes such as class="bg-{{$activeStatus['color']}}-400" - turns out dynamically-created classes aren't supported, even if they're constructed in the component rather than the blade file. You learn something new every day huh…

Also, coming from Tailwind v3, "ps-*" and "pe-*" were confusing to get used to since my muscle memory is "pl-*" and "pr-*" 😂
Feature 1: Profiles page - proof of concept
This is a page where each alter's profiles will be displayed. You can switch between the profiles by clicking on each person's name. The current profile is highlighted in the list using a pale orange colour.

The logic for the profiles functionality uses a Livewire component called Profiles, which loads profile data and passes it into the blade view to be displayed. It also handles logic such as switching between the profiles and formatting data. Currently, the data is hardcoded into the component using an associative array, but I will be converting it to use the database in the next devlog.

New profile (TBC)
You will be able to create new profiles on the same page (this is yet to be implemented). My vision is that the New Alter form will unfold under the button, and fold back up again once the form has been submitted.
Alter name, pronouns, status
The most interesting component here is the status, which is currently set to a hardcoded list of "active", "dormant", and "unknown". However, I envision this to be a customisable list where I can add new statuses to the list from a settings menu (yet to be implemented).


Alter image
I wanted the folder that contained alter images and other assets to be outside of my Laravel project, in the Pictures folder of my operating system. I wanted to do this so that I can back up the assets folder whenever I back up my Pictures folder lol (not for adding/deleting the files - this all happens through the app to maintain data integrity!). However, I learned that Laravel does not support that and it will not be able to see my files because they are external. I found a workaround by using symbolic links (symlinks) 🔗. Basically, they allow to have one folder of identical contents in more than one place. I ran "mklink /D [external path] [internal path]" to create the symlink between my Pictures folder and Laravel's internal assets folder, so that any files that I add to my Pictures folder automatically copy over to Laravel's folder. I changed a couple lines in filesystems.php to point to the symlinked folder:

And I was also getting a "404 file not found" error - I think the issue was because the port wasn't originally specified. I changed the base app URL to the localhost IP address in .env:

…And after all this messing around, it works!
(My Pictures folder)

(My Laravel storage)

(And here is Alice's photo displayed - dw I DO know Ibuki's actual name)

Alter description and history
The description and history fields support HTML, so I can format these fields however I like, and add custom features like tables and bullet point lists.

This is done by using blade's HTML preservation tags "{!! !!}" as opposed to the plain text tags "{{ }}".
(Here I define Alice's description contents)


(And here I insert them into the template)

Traits, likes, dislikes, front triggers
These are saved as separate lists and rendered as fun badges. These will be used in the Front Decider (anyone has a better name for it?? 🤔) tool to help me identify which alter "I" am as it's a big struggle for us. Front Decider will work similar to FlowCharty.

What next?
There's lots more things I want to do with SysNotes! But I will take it one step at a time - here is the plan for the next devlog:
Setting up database tables for the profile data
Adding the "New Profile" form so I can create alters from within the app
Adding ability to edit each field on the profile
I tried my best to explain my work process in a way that wold somewhat make sense to non-coders - if you have any feedback for the future format of these devlogs, let me know!
~~~~~~~~~~~~~~~~~~
Disclaimers:
I have not used AI in the making of this app and I do NOT support the Vibe Coding mind virus that is currently on the loose. Programming is a form of art, and I will defend manual coding until the day I die.
Any alter data found in the screenshots is dummy data that does not represent our actual system.
I will not be making the code publicly available until it is a bit more fleshed out, this so far is just a trial for a concept I had bouncing around my head over the weekend.
We are SYSCOURSE NEUTRAL! Please don't start fights under this post
#sysnotes devlog#plurality#plural system#did#osdd#programming#whoever is fronting is typing like a millenial i am so sorry#also when i say “i” its because i'm not sure who fronted this entire time!#our syskid came up with the idea but i can't feel them so who knows who actually coded it#this is why we need the front decider tool lol
24 notes
·
View notes
Text
Mini React.js Tips #1 | Resources ✨

I thought why not share my React.js (JavaScript library) notes I made when I was studying! I will start from the very beginning with the basics and random notes I made along the way~!
Up first is what you'll need to know to start any basic simple React (+ Vite) project~! 💻
What you'll need:
node.js installed >> click
coding editor - I love Visual Studio Code >> click
basic knowledge of how to use the Terminal

What does the default React project look like?

Step-by-Step Guide
[ 1 ] Create a New Folder: The new folder on your computer e.g. in Desktop, Documents, wherever that will serve as the home for your entire React project.
[ 2 ] Open in your coding editor (will be using VSCode here): Launch Visual Studio Code and navigate to the newly created folder. I normally 'right-click > show more options > Open with Code' on the folder in the File Explorer (Windows).
[ 3 ] Access the Terminal: Open the integrated terminal in your coding editor. On VSCode, it's at the very top, and click 'New Terminal' and it should pop up at the bottom of the editor.


[ 4 ] Create the actual React project: Type the following command to initialize a new React project using Vite, a powerful build tool:
npm create vite@latest
[ 5 ] Name Your Project: Provide a name for your project when prompted.

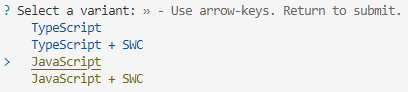
[ 6 ] Select 'React' as the Framework: Navigate through the options using the arrow keys on your keyboard and choose 'React'.

[ 7 ] Choose JavaScript Variant: Opt for the 'JavaScript' variant when prompted. This is the programming language you'll be using for your React application.
[ 8 ] Navigate to Project Folder: Move into the newly created project folder using the following command:
cd [your project name]
[ 9 ] Install Dependencies: Execute the command below to install the necessary dependencies for your React project (it might take a while):
npm install

[ 10 ] Run the Development Server: Start your development server with the command (the 'Local' link):
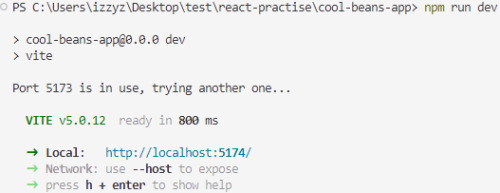
npm run dev

[ 11 ] Preview Your Project: Open the link provided in your terminal in your web browser. You're now ready to witness your React project in action!
Congratulations! You've successfully created your first React default project! You can look around the project structure like the folders and files already created for you!
BroCode's 'React Full Course for Free' 2024 >> click
React Official Website >> click
Stay tuned for the other posts I will make on this series #mini react tips~!
#mini react tips#my resources#resources#codeblr#coding#progblr#programming#studyblr#studying#javascript#react.js#reactjs#coding tips#coding resources
116 notes
·
View notes
Note
how do I set up vsc correctly? I always get project file not found error and I can't find a solution on the internet. Lmk if you have a fix :(
Hi! Thank you for the ask! I wonder in what situation this happens to you? When trying to open the file? Or when trying to run some command? Could be different reasons so maybe my answer won't really help you... But! I've had this issue sometimes; for example, once, I was trying to run a python script, but it wouldn't let me.

Here, the issue is that the folder I have open in VS code is a parent folder to the folder where the file I'm trying to run is located. Here, I'm running the script with the help of the "play" button on the top right.
What it does, I suppose, is try to run the file day-3.py in the directory/folder that is currently open in VS code, but! In the folder advent_of_code_23, there is no file called day-3.py!
So, your issue could potentially be that you are accidentally running your script in a parent folder where it can't be located, since it's in a child folder.
If you still want to have a parent folder up and running, and see all your children folders, you could use the terminal to manually access and run your script.
Step 1: open a new terminal (top option)

Step 2: in the terminal, type ls (stands for list) to see all the folders in your parent folder

Step 3: type cd (stands for change directory) and then the name of the folder you want to navigate into, where the file you want to run is located. (TIP! You can use the tab button on your keyboard to autofill the folder name)
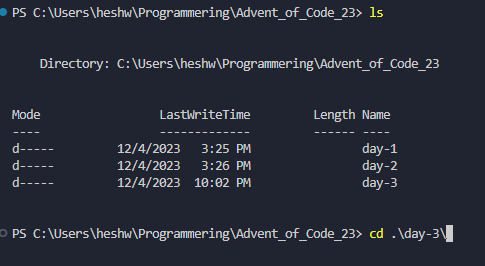
Step 4: Now you can see that your location has changed to be <C:\...\parent-folder-name\child-folder-name>, which means you are now in another folder! So for me, now the location is <C:\...\advent_of_code_23\day-3>, which means I can now directly access everything in this folder! In my screenshot I also typed LS to see what the contents of my folder is.

Step 5: In here, I can now run my python file by typing python day-3.py

If you're working in another language, I would recommend googling "how to start a [language name] in the terminal". Or, if you're running for example a React project, you may want to look in your package.json to see what scripts are available, and run those with your preferred package manager, such as yarn or npm.
In my case, this project is set up with yarn, so I would run this using the yarn dev command.
I hope this has been somewhat helpful, and if it didn't resolve your issue feel free to reach out to me personally and I'd be happy to take a look at your specific case. I can't promise a definite fix, but I can promise that I'll try! 🩷
#coding#programming#codeblr#vsc#vs code#visual studio#progblr#compsci#computer science#python#javascript#react.js#frontend developer#backend developer#backend development#frontend development#ask
14 notes
·
View notes
Text
Backend update
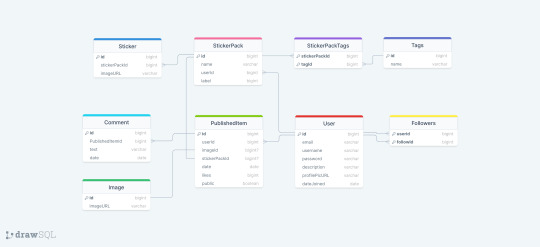
Had the most horrible time working with Sequelize today! As I usually do whenever I work with Sequelize! Sequelize is an SQL ORM - instead of writing raw SQL, ORM gives you an option to code it in a way that looks much more like an OOP, which is arguably simpler if you are used to programming that way. So to explain my project a little bit, it's a full stack web app - an online photo editor for dragging and dropping stickers onto canvas/picture. Here is the diagram.
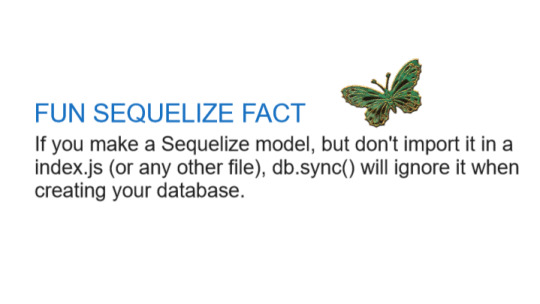
I'm doing it with Next which I've never used before, I only did vanilla js, React and a lil bit of Angular before. The architecture of a next project immediately messed me up so much, it's way different from the ones I've used before and I often got lost in the folders and where to put stuff properly (this is a huge thing to me because I always want it to be organized by the industry standard and I had no reference Next projects from any previous jobs/college so it got really overwhelming really soon :/) . The next problem was setting up my MySQL database with Sequelize because I know from my past experience that Sequelize is very sensitive to where you position certain files/functions and in which order are they. I made all the models (Sequelize equivalent of tables) and when it was time to sync, it would sync only two models out of nine. I figured it was because the other ones weren't called anywhere. Btw a fun fact
So I imported them to my index.js file I made in my database folder. It was reporting an db.define() is not a function error now. That was weird because it didn't report that for the first two tables that went through. To make a really long story short - because I was used to an server/client architecture, I didn't properly run the index.js file, but just did an "npm run dev" and was counting on all of the files to run in an order I am used to, that was not the case tho. After about an hour, I figured I just needed to run index.js solo first. The only reasons those first two tables went through in the beginning is because of the test api calls I made to them in a separate file :I I cannot wait to finish this project, it is for my bachelors thesis or whatever it's called...wish me luck to finish this by 1.9. XD
Also if you have any questions about any of the technologies I used here, feel free to message me c: <3 Bye!
#codeblr#code#programming#webdevelopment#mysql#nextjs#sequelize#full stack web development#fullstackdeveloper#student#computer science#women in stem#backend#studyblr
15 notes
·
View notes
Text
Debugging Full Stack Apps: Common Pitfalls and Fixes
If you’ve ever stared at your code wondering why nothing works—while everything looks fine—you’re not alone. Debugging Full Stack Apps: Common Pitfalls and Fixes is something every full stack developer becomes intimately familiar with, usually the hard way. Debugging can feel like detective work: sifting through clues, spotting red herrings, and slowly putting the pieces together.
Whether you’re knee-deep in React components or wrangling with PostgreSQL queries, bugs don’t discriminate. They can lurk in the front end, back end, or anywhere in between.
Here’s a look at common pitfalls when debugging full stack apps—and practical ways to fix them.
1. Miscommunication Between Front End and Back End
One of the most common issues arises from how the front end communicates with the back end. Sometimes, they seem to speak different languages.
Common Symptoms:
API calls returning unexpected results (or nothing at all)
Mismatched data formats (e.g., sending a string where the server expects a number)
CORS errors that mysteriously appear during deployment
Fixes:
Always double-check your request headers and response formats.
Use tools like Postman or Insomnia to simulate API requests separately from your front-end code.
Implement consistent API response structures across endpoints.
As a full stack developer, ensuring clean contracts between layers is essential. Don’t assume—it’s better to over-communicate between parts of your app than to be left scratching your head at 2 AM.
2. Version Mismatches and Package Conflicts
Let’s face it: dependency hell is real.
Common Symptoms:
Front-end not rendering after an npm install
Server crashing due to deprecated methods
Mysterious breaking changes after updating a package
Fixes:
Lock dependencies using a package-lock.json or yarn.lock file.
Regularly audit your packages with tools like npm audit or yarn audit.
Avoid updating all dependencies at once—do it incrementally and test thoroughly.
Even the most seasoned full stack developer gets tripped up here. Being methodical with updates and isolating changes can save you hours of frustration.
3. State Management Gone Wrong
If your app behaves inconsistently, the problem might be state management.
Common Symptoms:
UI doesn’t reflect expected changes
Data seems to "disappear" or update out of sync
Components re-render unnecessarily
Fixes:
Use debugging tools like Redux DevTools or Vuex Inspector to trace changes.
Store only essential data in global state—leave UI state local whenever possible.
Be cautious with asynchronous operations that update state (e.g., API calls).
Mastering state is part art, part science. As a full stack developer, understanding both front-end and back-end data flow is key to smooth state management.
4. Overlooking Server Logs and Console Errors
It’s easy to jump straight into the code—but logs often contain the breadcrumbs you need.
Common Symptoms:
500 errors with no clear origin
"Something went wrong" messages with no context
App crashing without traceable bugs
Fixes:
Always monitor the back-end logs (use console.log, but also tools like Winston or Log4js for structured logging).
Use browser developer tools to inspect network requests and console outputs.
Integrate error-tracking tools like Sentry or LogRocket.
A skilled full stack developer knows that logs are like black box recorders for your app—ignore them at your own peril.
5. Deployment-Specific Bugs
Your app runs perfectly locally—but breaks in production. Sound familiar?
Common Symptoms:
Missing environment variables
Static assets not loading
Database connection failures post-deployment
Fixes:
Use .env files carefully and securely manage environment-specific configs.
Ensure your build process includes all required assets.
Test your deployment process using staging environments before going live.
Every full stack developer eventually realizes: what works in dev doesn’t always work in prod. Always test in conditions that mimic your live environment.
Final Thoughts
Debugging Full Stack Apps: Common Pitfalls and Fixes isn’t just about technical skills—it’s about mindset. It’s easy to get overwhelmed when something breaks, but remember: every bug you squash teaches you something new.
Here are some golden rules to live by:
Reproduce the bug consistently before trying to fix it.
Break down the problem layer by layer.
Ask for a second pair of eyes—sometimes, fresh perspective is all it takes.
Being a full stack developer is like being a bridge-builder—you connect front end and back end, logic and interface, user and server. And in between, debugging is your glue.
So next time you hit a wall, take a breath, grab a coffee, and dig in. You’ve got this.
#FullStackDeveloper#FullStackDevelopment#FullStackCourse#TechnoBridgeFullStack#LearnFullStack#FullStackTraining#MERNStack#FrontendDevelopment#BackendDevelopment#CareerInTech#CodingBootcamp#SoftwareDevelopmentCourse#TopFullStackDeveloperCourse#PlacementAssistance#JobOrientedCourse#UpskillNow#ReactJS#ITTrainingIndia
0 notes
Photo

New Post has been published on https://codebriefly.com/whats-new-in-angular-20-key-features-and-more/
What's New in Angular 20: Key Features, Differences from Angular 19, and Major Benefits
Angular 20, released in May 2025, marks a significant advancement in the Angular framework, introducing performance enhancements, developer-centric features, and architectural refinements. This post delves into the new features of Angular 20, contrasts them with Angular 19, and outlines the major benefits of upgrading.
Table of Contents
Toggle
Key Features in Angular 20
1. Enhanced Ivy Compiler
2. Improved Developer Experience
3. Better Integration with PaaS
4. New Components and Libraries
5. Enhanced Security Features
Differences Between Angular 19 and Angular 20
Major Benefits of Angular 20
Upgrading to Angular 20
Final Thought
Key Features in Angular 20
1. Enhanced Ivy Compiler
Angular 20 continues to optimize the Ivy compiler, resulting in faster load times and reduced memory consumption. These improvements are particularly beneficial for applications deployed in Platform-as-a-Service (PaaS) environments.
2. Improved Developer Experience
The Angular CLI has been updated with new commands and options, streamlining the development process. Notably, the ng generate command now supports more templates and configurations, facilitating quicker project scaffolding.
3. Better Integration with PaaS
Angular 20 offers improved integration with popular PaaS providers like Heroku, AWS Elastic Beanstalk, and Google App Engine. The new Angular Deploy tool simplifies the deployment process to these platforms.
4. New Components and Libraries
The release introduces new Material Design components, enhancing UI development. Additionally, the Angular Component Dev Kit (CDK) has been expanded with new tools and utilities, aiding in the creation of custom, performant, and accessible components.
5. Enhanced Security Features
Angular 20 includes built-in protections against common web vulnerabilities like Cross-Site Scripting (XSS) and Cross-Site Request Forgery (CSRF). The framework now supports Content Security Policy (CSP), allowing developers to define and enforce security policies effectively.
6. Improved Testing and Debugging
Testing utilities have been enhanced, with improvements to Angular TestBed and new Protractor integration, making it easier to write and run tests.
Differences Between Angular 19 and Angular 20
Feature Angular 19 Angular 20 Standalone Components Default behavior Continued support with enhancements Reactivity Introduction of linkedSignal and resource() APIs Further optimizations in reactivity TypeScript Support Up to TypeScript 5.6 Improved TypeScript support with better type checking CLI Enhancements AI-driven suggestions and automation New commands and options for streamlined development Security AutoCSP for content security policies Built-in protections against XSS and CSRF, with CSP support Testing Utilities Introduction of new testing tools Enhanced TestBed and Protractor integration
Major Benefits of Angular 20
Performance Optimization: The refined Ivy compiler and improved reactivity lead to faster load times and efficient memory usage.
Enhanced Developer Productivity: Updated CLI commands and better TypeScript support streamline the development workflow.
Seamless Deployment: Improved integration with PaaS providers and the Angular Deploy tool simplify the deployment process.
Robust Security: Built-in protections against common vulnerabilities and CSP support enhance application security.
Improved Testing: Enhanced testing utilities facilitate easier and more reliable application testing.
Upgrading to Angular 20
To upgrade your Angular application to version 20, follow these
Use the following npm command to update Angular CLI:
Global Update:
npm install -g @angular/cli
Angular CLI in Your Project:
ng update @angular/cli
Angular Core and Dependencies:
ng update @angular/core
Verify Application Functionality: Run your application and ensure all functionalities work as expected.
Final Thought
Angular 20 brings substantial improvements in performance, security, and developer experience. Upgrading to this version ensures your applications are built with the latest advancements, providing a robust foundation for future development.
If you need assistance with the upgrade process or have any questions, feel free to ask!
Keep learning & stay safe 😉
You may like:
Testing and Debugging Angular 19 Apps
Performance Optimization and Best Practices in Angular 19
State Management and Data Handling in Angular 19
0 notes
Text
Mastering Cross-Browser Testing with Cypress: Best Practices & Challenges

Ensuring a seamless user experience across different browsers is a critical aspect of modern web development. Web applications may perform optimally in one browser but exhibit inconsistencies in another due to variations in rendering engines, JavaScript execution, and CSS interpretations. To address these challenges, cross-browser testing is essential. Cypress, a widely used automation testing framework, offers robust testing capabilities; however, it has certain limitations in the context of comprehensive cross-browser testing.
This guide provides an in-depth analysis of cross-browser testing with Cypress, highlighting best practices and potential challenges to ensure optimal test execution.
Why Choose Cypress for Cross-Browser Testing?
Cypress differentiates itself from other test automation frameworks through its unique architecture. Unlike Selenium, which operates externally and interacts with browsers remotely, Cypress runs directly within the browser. This results in faster execution and more stable test runs. Below are key advantages of Cypress:
Fast Execution – Cypress eliminates the overhead of external WebDriver communication, ensuring rapid test execution.
Automatic Wait Mechanism – Tests inherently wait for elements to be available, reducing test flakiness.
Enhanced Debugging – Built-in time-traveling and real-time snapshots facilitate detailed test analysis.
Simplified Configuration – No additional browser drivers or extensive setup requirements.
Multi-Browser Compatibility – Supports execution on Chrome, Edge, and Electron, making it a viable option for web application testing.
Implementing Cross-Browser Testing with Cypress
1. Installation and Setup
To initiate Cypress for cross-browser testing, install it within the project:npm install cypress --save-dev
Launch Cypress using:npx cypress open
This command opens the Cypress Test Runner, enabling test execution and configuration.
2. Configuring Cypress for Multi-Browser Support
Cypress facilitates execution on Chrome, Edge, and Electron. The browser can be specified within the cypress.config.js file:
module.exports = { e2e: { setupNodeEvents(on, config) { return config; }, browser: 'chrome', // Modify this to 'edge' or 'electron' as needed }, };
3. Executing Tests in Different Browsers
To run tests in a designated browser, use the following command:
npx cypress run --browser chrome
Replace chrome with edge or electron based on testing requirements. Alternatively, use the interactive Cypress Test Runner to select a browser:
npx cypress open
4. Enhancing Performance with Parallel Execution
Parallel execution significantly optimizes test efficiency, particularly when running tests across multiple browsers. Enable parallel execution using:
npx cypress run --browser chrome --parallel
Note: Parallel execution necessitates integration with Cypress Dashboard, which provides insights into test performance and execution trends.
5. Integrating Cypress into CI/CD Pipelines
Cypress can be incorporated into CI/CD workflows to facilitate automated cross-browser testing. Below is a sample configuration for executing Cypress tests on multiple browsers within a GitHub Actions workflow:
jobs: cypress-test: runs-on: ubuntu-latest steps: - name: Checkout Repository uses: actions/checkout@v2 - name: Install Dependencies run: npm install - name: Run Cypress Tests on Chrome run: npx cypress run --browser chrome - name: Run Cypress Tests on Edge run: npx cypress run --browser edge
This approach ensures early detection of browser-specific issues in a continuous testing environment.
Limitations of Cypress for Cross-Browser Testing
While Cypress is a powerful testing tool, it presents some limitations in cross-browser testing scenarios:
1. Restricted Browser Support
Cypress currently supports Chrome, Edge, and Electron. While experimental support for Firefox is available, Safari is not supported, which limits testing capabilities for macOS and iOS users.
2. Lack of Native Mobile Browser Testing
Cypress is designed for web applications in desktop environments. It does not provide native support for mobile browsers such as Chrome for Android or Safari for iOS, making it unsuitable for mobile web automation.
3. Limitations with Multi-Domain Testing
Cypress struggles with multi-domain authentication and redirection due to same-origin policy restrictions. This poses challenges when testing applications requiring cross-domain interactions.
4. No Support for Internet Explorer
Unlike Selenium, which supports legacy browsers, Cypress does not provide compatibility with Internet Explorer (IE 11 or older), making it unsuitable for organizations still relying on legacy systems.
Best Practices for Effective Cross-Browser Testing with Cypress
To maximize the effectiveness of cross-browser testing with Cypress, consider implementing the following best practices:
Leverage Feature Flags – Account for browser-specific behaviors using feature flags to enable conditional test execution.
Regularly Update Cypress – Keep Cypress updated to leverage the latest enhancements and improved browser support.
Utilize Cypress Plugins – Enhance functionality with plugins such as cypress-cucumber-preprocessor for behavior-driven development (BDD).
Run Tests in Headless Mode – Optimize execution speed by running Cypress in headless mode:
npx cypress run --headless --browser chrome
Conclusion
Cypress is a powerful automation framework that offers a streamlined approach to cross-browser testing, delivering high-speed execution and robust debugging capabilities. However, its limitations, such as restricted browser support and challenges with multi-domain authentication, must be considered. By following best practices and integrating Cypress into CI/CD pipelines, organizations can enhance the efficiency and reliability of their cross-browser testing efforts.
Need expert cross-browser testing services? Testrig Technologies specializes in comprehensive automation testing services to ensure your web applications function seamlessly across all browsers and platforms.
0 notes
Text
CodeBattle: The Ultimate 1v1 Real-Time Coding Battle Platform
Introduction
Hello coder! How are you , In the world of competitive programming and coding challenges, real-time battles are becoming increasingly popular. CodeBattle is a cutting-edge 1v1 real-time coding battle platform designed to test programmers’ skills in a fast-paced MCQ-based format. Whether you’re a beginner or an experienced coder, CodeBattle offers an exciting and challenging way to improve your coding knowledge.
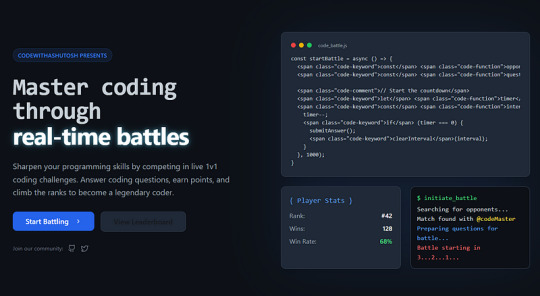
In this article, we will dive deep into the development of CodeBattle, covering project structure, technology stack, real-time matchmaking, styling tips, and live demo setup. Additionally, we will provide code snippets to help you understand the implementation better.
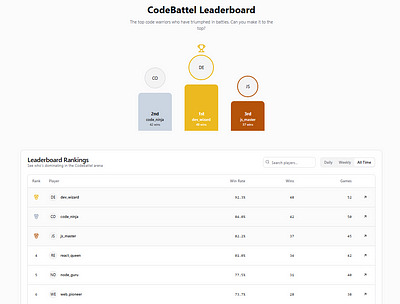
Features of CodeBattle
Real-time 1v1 Coding Battles
MCQ-based Questions with a 20-second timer
Live Scoreboard
Leaderboard System (Daily, Weekly, and All-time Rankings)
Secure Authentication (Google/Firebase Login)
Admin Panel to manage questions & users
Fully Responsive UI
Tech Stack: React (Next.js), Node.js, Express.js, MongoDB, and Socket.io
Project Structure
CodeBattel/ ├── frontend/ # React (Next.js) UI │ ├── components/ # Reusable Components │ ├── pages/ # Next.js Pages (Home, Play, Leaderboard, etc.) │ ├── styles/ # CSS Modules / Tailwind CSS │ └── utils/ # Helper Functions │ ├── backend/ # Node.js Backend │ ├── models/ # MongoDB Models │ ├── routes/ # Express Routes (API Endpoints) │ ├── controllers/ # Business Logic │ ├── config/ # Configuration Files │ ├── socket/ # Real-time Matchmaking with Socket.io │ └── index.js # Main Server Entry Point │ └── README.md # Project Documentation
Building the Frontend with React (Next.js)
1. Installing Dependencies
npx create-next-app@latest codebattel cd codebattel npm install socket.io-client axios tailwindcss npm install --save firebase
2. Setting up Tailwind CSS
npx tailwindcss init -p
Edit tailwind.config.js:module.exports = { content: ["./pages/**/*.{js,ts,jsx,tsx}", "./components/**/*.{js,ts,jsx,tsx}"], theme: { extend: {}, }, plugins: [], };
Developing the 1v1 Battle System
1. Setting Up Real-Time Matchmaking
import { io } from "socket.io-client"; import { useEffect, useState } from "react";const socket = io("http://localhost:5000");export default function BattleRoom() { const [question, setQuestion] = useState(null); const [timer, setTimer] = useState(20); useEffect(() => { socket.emit("joinBattle"); socket.on("newQuestion", (data) => { setQuestion(data); setTimer(20); }); }, []); return ( <div> <h1>CodeBattel</h1> {question && ( <div> <h2>{question.text}</h2> <ul> {question.options.map((opt, index) => ( <li key={index}>{opt}</li> ))} </ul> <p>Time Left: {timer} sec</p> </div> )} </div> ); }
Building the Backend with Node.js & Socket.io
1. Installing Dependencies
npm init -y npm install express socket.io mongoose cors dotenv
2. Creating the Server
const express = require("express"); const http = require("http"); const { Server } = require("socket.io"); const app = express(); const server = http.createServer(app); const io = new Server(server, { cors: { origin: "*" } });let rooms = []; io.on("connection", (socket) => { socket.on("joinBattle", () => { if (rooms.length > 0) { let room = rooms.pop(); socket.join(room); io.to(room).emit("newQuestion", { text: "What is React?", options: ["Library", "Framework", "Language", "None"] }); } else { let newRoom = "room-" + socket.id; rooms.push(newRoom); socket.join(newRoom); } }); });server.listen(5000, () => console.log("Server running on port 5000"));
Live Demo Setup
Clone the repo:
git clone https://github.com/ashutoshmishra52/codebattel.git cd codebattel
Install dependencies:
npm install && cd backend && npm install
Run the project:
npm run dev
Open http://localhost:3000 in your browser.
FAQ
Q1: What is CodeBattle?
CodeBattle is a 1v1 real-time coding battle platform where players answer multiple-choice questions under a 20-second timer.
Q2: How does matchmaking work?
Players are randomly paired in real time using Socket.io.
Q3: Can I add my own questions?
Yes! The Admin Panel allows you to add/edit/delete MCQs.
Q4: How do I contribute?
Check out the GitHub repository and submit a pull request.
About the Author
Ashutosh Mishra is a full-stack developer, AI researcher, and content writer with 4+ years of experience. He is the founder of CodeWithAshutosh, a platform dedicated to teaching web development, AI, and competitive coding.
For more coding tutorials and projects, follow Ashutosh Mishra.
Conclusion
CodeBattle is an innovative way to enhance your coding skills in a competitive environment. With real-time battles, an engaging UI, and a powerful backend, it stands out as a top-tier coding battle platform. Start coding, challenge your friends, and rise up the leaderboard!
0 notes
Text
Powering Search With Astro Actions and Fuse.js
New Post has been published on https://thedigitalinsider.com/powering-search-with-astro-actions-and-fuse-js/
Powering Search With Astro Actions and Fuse.js
Static sites are wonderful. I’m a big fan.
They also have their issues. Namely, static sites either are purely static or the frameworks that generate them completely lose out on true static generation when you just dip your toes in the direction of server routes.
Astro has been watching the front-end ecosystem and is trying to keep one foot firmly embedded in pure static generation, and the other in a powerful set of server-side functionality.
With Astro Actions, Astro brings a lot of the power of the server to a site that is almost entirely static. A good example of this sort of functionality is dealing with search. If you have a content-based site that can be purely generated, adding search is either going to be something handled entirely on the front end, via a software-as-a-service solution, or, in other frameworks, converting your entire site to a server-side application.
With Astro, we can generate most of our site during our build, but have a small bit of server-side code that can handle our search functionality using something like Fuse.js.
In this demo, we’ll use Fuse to search through a set of personal “bookmarks” that are generated at build time, but return proper results from a server call.
Starting the project
To get started, we’ll just set up a very basic Astro project. In your terminal, run the following command:
npm create astro@latest
Astro’s adorable mascot Houston is going to ask you a few questions in your terminal. Here are the basic responses, you’ll need:
Where should we create your new project? Wherever you’d like, but I’ll be calling my directory ./astro-search
How would you like to start your new project? Choose the basic minimalist starter.
Install dependencies? Yes, please!
Initialize a new git repository? I’d recommend it, personally!
This will create a directory in the location specified and install everything you need to start an Astro project. Open the directory in your code editor of choice and run npm run dev in your terminal in the directory.
When you run your project, you’ll see the default Astro project homepage.
We’re ready to get our project rolling!
Basic setup
To get started, let’s remove the default content from the homepage. Open the /src/pages/index.astro file.
This is a fairly barebones homepage, but we want it to be even more basic. Remove the <Welcome /> component, and we’ll have a nice blank page.
For styling, let’s add Tailwind and some very basic markup to the homepage to contain our site.
npx astro add tailwind
The astro add command will install Tailwind and attempt to set up all the boilerplate code for you (handy!). The CLI will ask you if you want it to add the various components, I recommend letting it, but if anything fails, you can copy the code needed from each of the steps in the process. As the last step for getting to work with Tailwind, the CLI will tell you to import the styles into a shared layout. Follow those instructions, and we can get to work.
Let’s add some very basic markup to our new homepage.
--- // ./src/pages/index.astro import Layout from '../layouts/Layout.astro'; --- <Layout> <div class="max-w-3xl mx-auto my-10"> <h1 class="text-3xl text-center">My latest bookmarks</h1> <p class="text-xl text-center mb-5">This is only 10 of A LARGE NUMBER THAT WE'LL CHANGE LATER</p> </div> </Layout>
Your site should now look like this.
Not exactly winning any awards yet! That’s alright. Let’s get our bookmarks loaded in.
Adding bookmark data with Astro Content Layer
Since not everyone runs their own application for bookmarking interesting items, you can borrow my data. Here’s a small subset of my bookmarks, or you can go get 110 items from this link on GitHub. Add this data as a file in your project. I like to group data in a data directory, so my file lives in /src/data/bookmarks.json.
Open code
[ King Arthur Baking", "url": "<https://www.kingarthurbaking.com/recipes/our-favorite-sandwich-bread-recipe>", "description": "Classic American sandwich loaf, perfect for French toast and sandwiches.", "id": "007y8pmEOvhwldfT3wx1MW" , "pageTitle": "Chris Coyier's discussion of Automatic Social Share Images , "pageTitle": "Automatic Social Share Images , "pageTitle": "Emma Wedekind: Foundations of Design Systems / React Boston 2019 - YouTube", "url": "<https://m.youtube.com/watch?v=pXb2jA43A6k>", "description": "Emma Wedekind: Foundations of Design Systems / React Boston 2019 Presented by: Emma Wedekind – LogMeIn Design systems are in the world around us, from street...", "id": "0d56d03e-aba4-4ebd-9db8-644bcc185e33" , "pageTitle": "Editorial Design Patterns With CSS Grid And Named Columns — Smashing Magazine", "url": "<https://www.smashingmagazine.com/2019/10/editorial-design-patterns-css-grid-subgrid-naming/>", "description": "By naming lines when setting up our CSS Grid layouts, we can tap into some interesting and useful features of Grid — features that become even more powerful when we introduce subgrids.", "id": "13ac1043-1b7d-4a5b-a3d8-b6f5ec34cf1c" , "pageTitle": "Netlify pro tip: Using Split Testing to power private beta releases - DEV Community 👩💻👨💻", "url": "<https://dev.to/philhawksworth/netlify-pro-tip-using-split-testing-to-power-private-beta-releases-a7l>", "description": "Giving users ways to opt in and out of your private betas. Video and tutorial.", "id": "1fbabbf9-2952-47f2-9005-25af90b0229e" , "pageTitle": "Netlify Public Folder, Part I: What? Recreating the Dropbox Public Folder With Netlify , "pageTitle": "Why Is CSS So Weird? - YouTube", "url": "<https://m.youtube.com/watch?v=aHUtMbJw8iA&feature=youtu.be>", "description": "Love it or hate it, CSS is weird! It doesn't work like most programming languages, and it doesn't work like a design tool either. But CSS is also solving a v...", "id": "2e29aa3b-45b8-4ce4-85b7-fd8bc50daccd" , "pageTitle": "Internet world despairs as non-profit .org sold for $$$$ to private equity firm, price caps axed • The Register", "url": "<https://www.theregister.co.uk/2019/11/20/org_registry_sale_shambles/>", "id": "33406b33-c453-44d3-8b18-2d2ae83ee73f" , "pageTitle": "Netlify Identity for paid subscriptions - Access Control / Identity - Netlify Community", "url": "<https://community.netlify.com/t/netlify-identity-for-paid-subscriptions/1947/2>", "description": "I want to limit certain functionality on my website to paying users. Now I’m using a payment provider (Mollie) similar to Stripe. My idea was to use the webhook fired by this service to call a Netlify function and give…", "id": "34d6341c-18eb-4744-88e1-cfbf6c1cfa6c" , "pageTitle": "SmashingConf Freiburg 2019: Videos And Photos — Smashing Magazine", "url": "<https://www.smashingmagazine.com/2019/10/smashingconf-freiburg-2019/>", "description": "We had a lovely time at SmashingConf Freiburg. This post wraps up the event and also shares the video of all of the Freiburg presentations.", "id": "354cbb34-b24a-47f1-8973-8553ed1d809d" , "pageTitle": "Adding Google Calendar to your JAMStack", "url": "<https://www.raymondcamden.com/2019/11/18/adding-google-calendar-to-your-jamstack>", "description": "A look at using Google APIs to add events to your static site.", "id": "361b20c4-75ce-46b3-b6d9-38139e03f2ca" , "pageTitle": "How to Contribute to an Open Source Project , Netlify", "url": "<https://www.netlify.com/docs/functions/>", "description": "Netlify builds, deploys, and hosts your front end. Learn how to get started, see examples, and view documentation for the modern web platform.", "id": "3bf9e31b-5288-4b3b-89f2-97034603dbf6" , "pageTitle": "Serverless Can Help You To Focus - By Simona Cotin", "url": "<https://hackernoon.com/serverless-can-do-that-7nw32mk>", "id": "43b1ee63-c2f8-4e14-8700-1e21c2e0a8b1" , "pageTitle": "Nuxt, Next, Nest?! My Head Hurts. - DEV Community 👩💻👨💻", "url": "<https://dev.to/laurieontech/nuxt-next-nest-my-head-hurts-5h98>", "description": "I clearly know what all of these things are. Their names are not at all similar. But let's review, just to make sure we know...", "id": "456b7d6d-7efa-408a-9eca-0325d996b69c" , "pageTitle": "Consuming a headless CMS GraphQL API with Eleventy - Webstoemp", "url": "<https://www.webstoemp.com/blog/headless-cms-graphql-api-eleventy/>", "description": "With Eleventy, consuming data coming from a GraphQL API to generate static pages is as easy as using Markdown files.", "id": "4606b168-21a6-49df-8536-a2a00750d659" , ]
Now that the data is in the project, we need for Astro to incorporate the data into its build process. To do this, we can use Astro’s new(ish) Content Layer API. The Content Layer API adds a content configuration file to your src directory that allows you to run and collect any number of content pieces from data in your project or external APIs. Create the file /src/content.config.ts (the name of this file matters, as this is what Astro is looking for in your project).
import defineCollection, z from "astro:content"; import file from 'astro/loaders'; const bookmarks = defineCollection( schema: z.object( pageTitle: z.string(), url: z.string(), description: z.string().optional() ), loader: file("src/data/bookmarks.json"), ); export const collections = bookmarks ;
In this file, we import a few helpers from Astro. We can use defineCollection to create the collection, z as Zod, to help define our types, and file is a specific content loader meant to read data files.
The defineCollection method takes an object as its argument with a required loader and optional schema. The schema will help make our content type-safe and make sure our data is always what we expect it to be. In this case, we’ll define the three data properties each of our bookmarks has. It’s important to define all your data in your schema, otherwise it won’t be available to your templates.
We provide the loader property with a content loader. In this case, we’ll use the file loader that Astro provides and give it the path to our JSON.
Finally, we need to export the collections variable as an object containing all the collections that we’ve defined (just bookmarks in our project). You’ll want to restart the local server by re-running npm run dev in your terminal to pick up the new data.
Using the new bookmarks content collection
Now that we have data, we can use it in our homepage to show the most recent bookmarks that have been added. To get the data, we need to access the content collection with the getCollection method from astro:content. Add the following code to the frontmatter for ./src/pages/index.astro .
--- import Layout from '../layouts/Layout.astro'; import getCollection from 'astro:content'; const bookmarks = await getCollection('bookmarks'); ---
This code imports the getCollection method and uses it to create a new variable that contains the data in our bookmarkscollection. The bookmarks variable is an array of data, as defined by the collection, which we can use to loop through in our template.
--- import Layout from '../layouts/Layout.astro'; import getCollection from 'astro:content'; const bookmarks = await getCollection('bookmarks'); --- <Layout> <div class="max-w-3xl mx-auto my-10"> <h1 class="text-3xl text-center">My latest bookmarks</h1> <p class="text-xl text-center mb-5"> This is only 10 of bookmarks.length </p> <h2 class="text-2xl mb-3">Latest bookmarks</h2> <ul class="grid gap-4"> bookmarks.slice(0, 10).map((item) => ( <li> <a href=item.data?.url class="block p-6 bg-white border border-gray-200 rounded-lg shadow-sm hover:bg-gray-100 dark:bg-gray-800 dark:border-gray-700 dark:hover:bg-gray-700"> <h3 class="mb-2 text-2xl font-bold tracking-tight text-gray-900 dark:text-white"> item.data?.pageTitle </h3> <p class="font-normal text-gray-700 dark:text-gray-400"> item.data?.description </p> </a> </li> )) </ul> </div> </Layout>
This should pull the most recent 10 items from the array and display them on the homepage with some Tailwind styles. The main thing to note here is that the data structure has changed a little. The actual data for each item in our array actually resides in the data property of the item. This allows Astro to put additional data on the object without colliding with any details we provide in our database. Your project should now look something like this.
Now that we have data and display, let’s get to work on our search functionality.
Building search with actions and vanilla JavaScript
To start, we’ll want to scaffold out a new Astro component. In our example, we’re going to use vanilla JavaScript, but if you’re familiar with React or other frameworks that Astro supports, you can opt for client Islands to build out your search. The Astro actions will work the same.
Setting up the component
We need to make a new component to house a bit of JavaScript and the HTML for the search field and results. Create the component in a ./src/components/Search.astro file.
<form id="searchForm" class="flex mb-6 items-center max-w-sm mx-auto"> <label for="simple-search" class="sr-only">Search</label> <div class="relative w-full"> <input type="text" id="search" class="bg-gray-50 border border-gray-300 text-gray-900 text-sm rounded-lg focus:ring-blue-500 focus:border-blue-500 block w-full p-2.5 dark:bg-gray-700 dark:border-gray-600 dark:placeholder-gray-400 dark:text-white dark:focus:ring-blue-500 dark:focus:border-blue-500" placeholder="Search Bookmarks" required /> </div> <button type="submit" class="p-2.5 ms-2 text-sm font-medium text-white bg-blue-700 rounded-lg border border-blue-700 hover:bg-blue-800 focus:ring-4 focus:outline-none focus:ring-blue-300 dark:bg-blue-600 dark:hover:bg-blue-700 dark:focus:ring-blue-800"> <svg class="w-4 h-4" aria-hidden="true" xmlns="<http://www.w3.org/2000/svg>" fill="none" viewBox="0 0 20 20"> <path stroke="currentColor" stroke-linecap="round" stroke-linejoin="round" stroke-width="2" d="m19 19-4-4m0-7A7 7 0 1 1 1 8a7 7 0 0 1 14 0Z"></path> </svg> <span class="sr-only">Search</span> </button> </form> <div class="grid gap-4 mb-10 hidden" id="results"> <h2 class="text-xl font-bold mb-2">Search Results</h2> </div> <script> const form = document.getElementById("searchForm"); const search = document.getElementById("search"); const results = document.getElementById("results"); form?.addEventListener("submit", async (e) => e.preventDefault(); console.log("SEARCH WILL HAPPEN"); ); </script>
The basic HTML is setting up a search form, input, and results area with IDs that we’ll use in JavaScript. The basic JavaScript finds those elements, and for the form, adds an event listener that fires when the form is submitted. The event listener is where a lot of our magic is going to happen, but for now, a console log will do to make sure everything is set up properly.
Setting up an Astro Action for search
In order for Actions to work, we need our project to allow for Astro to work in server or hybrid mode. These modes allow for all or some pages to be rendered in serverless functions instead of pre-generated as HTML during the build. In this project, this will be used for the Action and nothing else, so we’ll opt for hybrid mode.
To be able to run Astro in this way, we need to add a server integration. Astro has integrations for most of the major cloud providers, as well as a basic Node implementation. I typically host on Netlify, so we’ll install their integration. Much like with Tailwind, we’ll use the CLI to add the package and it will build out the boilerplate we need.
npx astro add netlify
Once this is added, Astro is running in Hybrid mode. Most of our site is pre-generated with HTML, but when the Action gets used, it will run as a serverless function.
Setting up a very basic search Action
Next, we need an Astro Action to handle our search functionality. To create the action, we need to create a new file at ./src/actions/index.js. All our Actions live in this file. You can write the code for each one in separate files and import them into this file, but in this example, we only have one Action, and that feels like premature optimization.
In this file, we’ll set up our search Action. Much like setting up our content collections, we’ll use a method called defineAction and give it a schema and in this case a handler. The schema will validate the data it’s getting from our JavaScript is typed correctly, and the handler will define what happens when the Action runs.
import defineAction from "astro:actions"; import z from "astro:schema"; import getCollection from "astro:content"; export const server = search: defineAction( schema: z.object( query: z.string(), ), handler: async (query) => const bookmarks = await getCollection("bookmarks"); const results = await bookmarks.filter((bookmark) => return bookmark.data.pageTitle.includes(query); ); return results; , ), ;
For our Action, we’ll name it search and expect a schema of an object with a single property named query which is a string. The handler function will get all of our bookmarks from the content collection and use a native JavaScript .filter() method to check if the query is included in any bookmark titles. This basic functionality is ready to test with our front-end.
Using the Astro Action in the search form event
When the user submits the form, we need to send the query to our new Action. Instead of figuring out where to send our fetch request, Astro gives us access to all of our server Actions with the actions object in astro:actions. This means that any Action we create is accessible from our client-side JavaScript.
In our Search component, we can now import our Action directly into the JavaScript and then use the search action when the user submits the form.
<script> import actions from "astro:actions"; const form = document.getElementById("searchForm"); const search = document.getElementById("search"); const results = document.getElementById("results"); form?.addEventListener("submit", async (e) => e.preventDefault(); results.innerHTML = ""; const query = search.value; const data, error = await actions.search(query); if (error) results.innerHTML = `<p>$error.message</p>`; return; // create a div for each search result data.forEach(( item ) => const div = document.createElement("div"); div.innerHTML = ` <a href="$item.data?.url" class="block p-6 bg-white border border-gray-200 rounded-lg shadow-sm hover:bg-gray-100 dark:bg-gray-800 dark:border-gray-700 dark:hover:bg-gray-700"> <h3 class="mb-2 text-2xl font-bold tracking-tight text-gray-900 dark:text-white"> $item.data?.pageTitle </h3> <p class="font-normal text-gray-700 dark:text-gray-400"> $item.data?.description </p> </a>`; // append the div to the results container results.appendChild(div); ); // show the results container results.classList.remove("hidden"); ); </script>
When results are returned, we can now get search results!
Though, they’re highly problematic. This is just a simple JavaScript filter, after all. You can search for “Favorite” and get my favorite bread recipe, but if you search for “favorite” (no caps), you’ll get an error… Not ideal.
That’s why we should use a package like Fuse.js.
Adding Fuse.js for fuzzy search
Fuse.js is a JavaScript package that has utilities to make “fuzzy” search much easier for developers. Fuse will accept a string and based on a number of criteria (and a number of sets of data) provide responses that closely match even when the match isn’t perfect. Depending on the settings, Fuse can match “Favorite”, “favorite”, and even misspellings like “favrite” all to the right results.
Is Fuse as powerful as something like Algolia or ElasticSearch? No. Is it free and pretty darned good? Absolutely! To get Fuse moving, we need to install it into our project.
npm install fuse.js
From there, we can use it in our Action by importing it in the file and creating a new instance of Fuse based on our bookmarks collection.
import defineAction from "astro:actions"; import z from "astro:schema"; import getCollection from "astro:content"; import Fuse from "fuse.js"; export const server = search: defineAction( schema: z.object( query: z.string(), ), handler: async (query) => const bookmarks = await getCollection("bookmarks"); const fuse = new Fuse(bookmarks, threshold: 0.3, keys: [ name: "data.pageTitle", weight: 1.0 , name: "data.description", weight: 0.7 , name: "data.url", weight: 0.3 , ], ); const results = await fuse.search(query); return results; , ), ;
In this case, we create the Fuse instance with a few options. We give it a threshold value between 0 and 1 to decide how “fuzzy” to make the search. Fuzziness is definitely something that depends on use case and the dataset. In our dataset, I’ve found 0.3 to be a great threshold.
The keys array allows you to specify which data should be searched. In this case, I want all the data to be searched, but I want to allow for different weighting for each item. The title should be most important, followed by the description, and the URL should be last. This way, I can search for keywords in all these areas.
Once there’s a new Fuse instance, we run fuse.search(query) to have Fuse check the data, and return an array of results.
When we run this with our front-end, we find we have one more issue to tackle.
The structure of the data returned is not quite what it was with our simple JavaScript. Each result now has a refIndex and an item. All our data lives on the item, so we need to destructure the item off of each returned result.
To do that, adjust the front-end forEach.
// create a div for each search result data.forEach(( item ) => const div = document.createElement("div"); div.innerHTML = ` <a href="$item.data?.url" class="block p-6 bg-white border border-gray-200 rounded-lg shadow-sm hover:bg-gray-100 dark:bg-gray-800 dark:border-gray-700 dark:hover:bg-gray-700"> <h3 class="mb-2 text-2xl font-bold tracking-tight text-gray-900 dark:text-white"> $item.data?.pageTitle </h3> <p class="font-normal text-gray-700 dark:text-gray-400"> $item.data?.description </p> </a>`; // append the div to the results container results.appendChild(div); );
Now, we have a fully working search for our bookmarks.
Next steps
This just scratches the surface of what you can do with Astro Actions. For instance, we should probably add additional error handling based on the error we get back. You can also experiment with handling this at the page-level and letting there be a Search page where the Action is used as a form action and handles it all as a server request instead of with front-end JavaScript code. You could also refactor the JavaScript from the admittedly low-tech vanilla JS to something a bit more robust with React, Svelte, or Vue.
One thing is for sure, Astro keeps looking at the front-end landscape and learning from the mistakes and best practices of all the other frameworks. Actions, Content Layer, and more are just the beginning for a truly compelling front-end framework.
#access control#ADD#American#amp#API#APIs#aria#Articles#astro#Blog#Blue#bread#Building#Calendar#change#Cloud#cloud providers#CMS#code#Code Editor#Collections#columns#command#Community#container#content#CSS#CSS Grid#css-tricks#Dark
0 notes
Text
A utility for automatically generating files that follow the Next.js App Router structure based on folder name patterns.
A utility for automatically generating files that follow the Next.js App Router structure based on folder name patterns. Installation # Using npm npm install --save-dev @next-file-gen/core # Using yarn yarn add --dev @next-file-gen/core Enter fullscreen mode Exit fullscreen mode Usage Running the tool From your project root directory, run: npx @next-file-gen/core Enter fullscreen…
0 notes
Link
0 notes
Text
Mini React.js Tips #3 | Resources ✨

Continuing the #mini react tips series, its components making time~!
In React, a component is like a Lego brick for building websites or apps. It's a small, independent part of the user interface (UI) that you can reuse whenever you need it. These components can be combined to create bigger and more complex applications. Examples are the header, footer, cards, asides, etc!
What you'll need:
know how to create a React project >> click
know the default React project's file structure >> click
know basic HTML
know basic JavaScript
basic knowledge of using the Terminal

What We Are Creating:
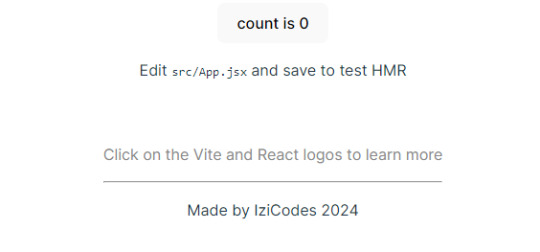
The footer at the bottom!
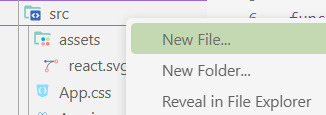
[ 1 ] Navigate to the 'src' Folder: Open your project in Visual Studio Code, locate the 'src' folder, and right-click on it.
[ 2 ] Create a New File: Click 'New File' to create the file within the 'src' folder. This file will house the code for your React component.
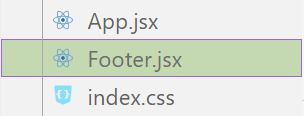
[ 3 ] Naming Conventions: Give your component a name, according to the convention of starting with a capital letter. This naming convention is essential for React to recognize your component~!!
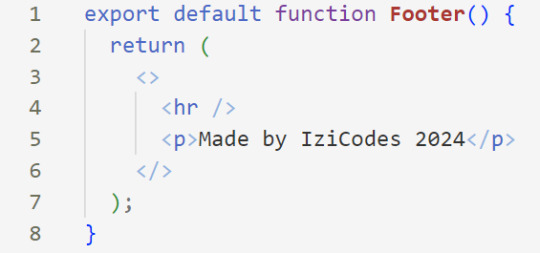
[ 4 ] Create The Initial Function: Open the file and type:
export default function [name of component]() {}

[ 5 ] Insert The return() Statement: The statement is used within a component to specify what content should be rendered when the component is invoked or used. Type:
return()

*the error is there because we haven't added anything inside yet, don't worry!
[ 6 ] Insert The Empty Tags: Inside of the return(), add empty tags (tags that don't have a specified element inside of them).

[ 7 ] Time For Some HTML: Inside the empty tags, enter the normal HTML elements that you want~!
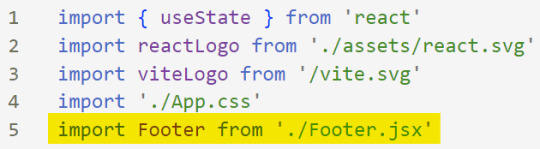
[ 8 ] Integration with App.jsx: Navigate to the 'App.jsx' file in the project, which is typically the entry point of your React application. At the top, import your newly created component. Type:
import [name of component] from './[location of the component]'
[ 9 ] Use Your Component: Inside the return() statement of the 'App()' function, include your component using the following syntax:
<[name of your component] />
[ 10 ] Run the Development Server: Start your development server with the command (the 'Local' link):
npm run dev
[ 11 ] Preview Your Project: Open the link provided in your terminal in your web browser. Witness your component in action!
Congratulations! You made your first component! Try and create some new ones and place them around in the App()~!
BroCode’s 'React Full Course for Free’ 2024 >> click
React Official Website >> click
W3School's React Components >> click
Importing and Exporting Components >> click
🐬Previous Tip: Tip #2 The anatomy of the default React project >> click
Stay tuned for the other posts I will make on this series #mini react tips~!
#mini react tips#my resources#resources#codeblr#coding#progblr#programming#studyblr#studying#javascript#react.js#reactjs#coding tips#coding resources
33 notes
·
View notes
Text
Deploying Laravel Applications to the Cloud
Deploying a Laravel application to the cloud offers several advantages, including scalability, ease of management, and the ability to leverage various cloud-based tools and services. In this guide, we will explore the steps to deploy a Laravel application to the cloud using platforms like AWS, DigitalOcean, and Heroku. We'll also touch on best practices for server configuration, environment variables, and deployment automation.
1. Preparing Your Laravel Application
Before deploying, it’s essential to ensure that your Laravel application is production-ready. Here are some preparatory steps:
Update Dependencies: Run composer install --optimize-autoloader --no-dev to ensure that only production dependencies are installed.
Environment Configuration: Make sure your .env file is configured correctly for the production environment. You’ll need to set up database connections, cache, queue configurations, and any other service keys.
Caching and Optimization: Laravel provides several optimization commands to boost the performance of your application. Run the following commands to optimize your app for production:bashCopy codephp artisan config:cache php artisan route:cache php artisan view:cache
Assets and Front-End Build: If your application uses frontend assets like JavaScript and CSS, run npm run production to compile them and ensure that assets are optimized.
Database Migration: Make sure your database schema is up to date by running:bashCopy codephp artisan migrate --force
2. Choosing a Cloud Platform
There are several cloud platforms that support Laravel applications, including AWS, DigitalOcean, and Heroku. Let's look at how to deploy on each.
A. Deploying Laravel to AWS EC2
AWS (Amazon Web Services) offers a robust infrastructure for hosting Laravel applications. Here's a high-level overview of the steps:
Launch an EC2 Instance: First, you need to create an EC2 instance running a Linux distribution (e.g., Ubuntu). You can choose the instance size based on your traffic and performance needs.
Install PHP and Required Software: Once the instance is up, SSH into it and install PHP, Composer, Nginx (or Apache), and other necessary services:bashCopy codesudo apt update sudo apt install php php-fpm php-mbstring php-xml php-bcmath php-mysql unzip curl sudo apt install nginx
Configure Nginx: Set up Nginx to serve your Laravel app. Create a new Nginx configuration file under /etc/nginx/sites-available/your-app and link it to /etc/nginx/sites-enabled/.Example configuration:nginxCopy codeserver { listen 80; server_name your-domain.com; root /var/www/your-app/public; index index.php index.html index.htm; location / { try_files $uri $uri/ /index.php?$query_string; } location ~ \.php$ { fastcgi_pass unix:/var/run/php/php7.4-fpm.sock; fastcgi_index index.php; fastcgi_param SCRIPT_FILENAME $document_root$fastcgi_script_name; include fastcgi_params; } error_log /var/log/nginx/error.log; access_log /var/log/nginx/access.log; }
Database Configuration: Set up a MySQL or PostgreSQL database (you can use Amazon RDS for a managed database) and configure your .env file with the correct credentials.
SSL and Security: Secure your application with SSL (using Let's Encrypt or AWS Certificate Manager) and ensure your firewall and security groups are configured correctly.
Deploy Code: You can deploy your Laravel application to EC2 using Git, FTP, or tools like Envoyer or Laravel Forge. For Git deployment, clone your repository and configure your environment variables.
B. Deploying Laravel to DigitalOcean
DigitalOcean provides a simple and cost-effective way to host Laravel applications. Here’s how to deploy:
Create a Droplet: Log into your DigitalOcean account and create a new Droplet with a suitable operating system (typically Ubuntu).
Install PHP, Nginx, and Composer: SSH into your droplet and install the necessary dependencies for your Laravel app:bashCopy codesudo apt update sudo apt install php php-fpm php-mbstring php-xml php-bcmath php-mysql unzip curl sudo apt install nginx
Configure Nginx and Laravel Application: Configure Nginx to point to your Laravel application’s public folder and set up SSL.
Database Configuration: Set up MySQL or PostgreSQL on your droplet, then configure the .env file for your database credentials.
Deploying the Code: You can either deploy your code via Git or use an automation tool like Envoyer to streamline deployments. You’ll also need to configure file permissions for storage and cache directories.
C. Deploying Laravel to Heroku
Heroku is an excellent choice for quick and easy Laravel application deployment with minimal configuration. Here’s how you can deploy a Laravel app on Heroku:
Create a Heroku App: Sign up or log into your Heroku account and create a new app. This will automatically provision a server for you.
Install Heroku CLI: Install the Heroku CLI on your local machine if you haven't already:bashCopy codecurl https://cli-assets.heroku.com/install.sh | sh
Configure the .env File for Heroku: Heroku uses environment variables, so make sure you configure your .env file correctly or set them directly in the Heroku dashboard.
Deploy the Code: Push your code to Heroku using Git:bashCopy codegit push heroku master
Database Configuration: Heroku offers a managed PostgreSQL database that you can provision with the command:bashCopy codeheroku addons:create heroku-postgresql:hobby-dev
Run Migrations: Run database migrations on Heroku with:bashCopy codeheroku run php artisan migrate
3. Automating Deployment with Laravel Forge or Envoyer
For smoother deployment management, you can use tools like Laravel Forge or Envoyer.
Laravel Forge: Laravel Forge is a server management and deployment service designed for PHP applications. It automates tasks like server provisioning, security updates, and Laravel deployments to platforms like AWS, DigitalOcean, and others.
Envoyer: Envoyer is a zero-downtime deployment tool that ensures your Laravel app is deployed with no interruption to your users. It handles the deployment process seamlessly, ensuring the application is running smoothly at all times.
4. Conclusion
Deploying a Laravel application to the cloud can seem daunting, but it becomes easier with tools and services that automate much of the process. Whether you choose AWS, DigitalOcean, or Heroku, each platform offers unique benefits for hosting your Laravel application. Using automation tools like Forge and Envoyer, you can further streamline the deployment process, ensuring your app runs smoothly and efficiently in the cloud.
0 notes
Text
#1 Digital Marketing Company | Dcrayons Consultancy Private Limited
Do you know about how to create a shopify partner account?
Ready to elevate your business? When you join the Shopify Partner Account , you unlock revenue possibilities and tap into a thriving network of Shopify merchants. This straightforward guide will help you kickstart your journey and maximize your Shopify Partner Account.
Joining the shopify partner account – for a successful business
Developing an application for Shopify is enjoyable and easy because Shopify provides numerous applications and resources that users can easily utilize. This guide will cover all of the steps from development environment installation to your app distribution. It has a guide for making an Instagram feed app, with step-by-step instructions. This helps understand the steps discussed.
What is the process of shopify partner account?
Here we are describing some steps of a shopify partner account. some steps of shopify partner accounts.
Step-1: Setting Up Your Shopify Partner Account
The newly launched consultation journey starts from creating a Shopify Partner account. Thus, if you did not have an account, you would have to get one before proceeding with the next steps. Here’s how to do it. Let us discuss some steps.
To open a Shopify account, start by signing up or logging in. Then, visit the official Shopify Partner Program page. If you don’t have an account yet, create one. If you already have an account, just log in.
Navigate to Apps: After logging in to the portal go to the ‘Apps’ tab.
Create a New App: Go to ‘Create App’ and enter app name and URL for the app. This process will create important credentials, such as the API key and secret key-API, that are necessary for your application.
Step 2: Initializing Your Shopify App
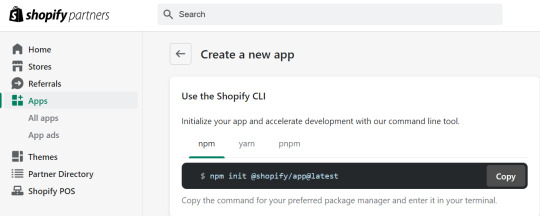
Congratulations! You have successfully opened your Shopify Partner Account. Now, it’s time to start your Shopify application. Open your terminal and run the following command:
npm init @shopify/app@latest
This command pulls up your app and creates a shopify.app.toml file. This config file contains details like client id, the name of your application, URL of your application and the scopes needed for the application. Furthermore, you will have to prepare a . file named env and then specify SHOPIFY_API_KEY.
Step 3: Installing Dependencies
To ensure your app has all the necessary dependencies to function correctly, run the following command in your terminal
npm install
This command installs all the packages needed in your application .In this case is React.js for the frontend and Node.js for the backend.
Step 4: Running Your Application
Once all dependencies are installed, you can start your development server by running
npm run dev
Step 5: Building the Frontend and Backend
Again, for our instance, we will be developing the frontend of the app using the help of the React library of JavaScript and the backend with Node. Here’s a brief overview of how to set up both. let describe some steps.
Frontend with React.js
Create React Components: Create React components to be used within your application for headers, footers and other sections of your application.
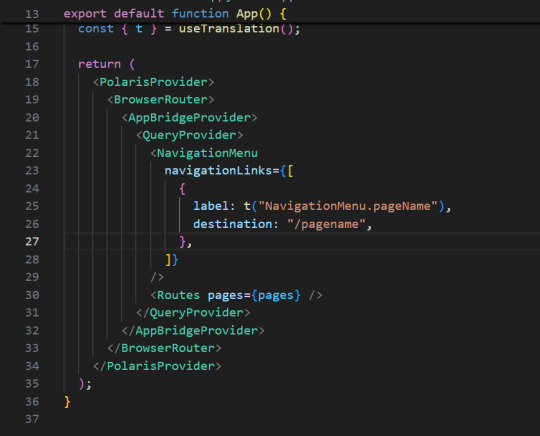
Navigation Links: As to create different pages, the labels and destinations have to be included in the navigation Link component in App.jsx. That way, you are able to surf from one area of your application to the other.
Backend with Node.js
Set Up Express Server: Please use express Js to set up your server and control the backend procedures.
API Routes: Define API routes which will handle the request and response between the front end and the back end.
Practical Example: Instagram Feed App…
Let’s apply the above steps to create a practical example: an application that is used in feeding the user’s Instagram account. This application will let the users login through the Instagram account, pull the media, and then the media can be showcased in a grid or slider view.
Main Functionality
The landing page of the app features a button which says “Connect to Instagram.” When the users tap on this button, they are transferred to the Instagram login page. If the login is complete, the app will retrieve pictures and videos from their Instagram profile and provide it in slider or grid view.
Authentication and Authorization
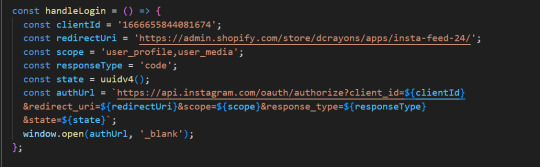
We use an authentication URL containing the following parameters: In this method, the parameters included are client Id, redirect Uri, scope, response Type, and auth Url. This URL corresponds to the redirection to Instagram’s login page. Once a user logs in, Instagram gives an authorization ID and using this ID, an access token is given by our back end..
Here is how the process works in detail.
Auth URL: Create an auth URL with the necessary parameters.
Redirect and authorization: Redirect users to Instagram’s login page. Once successfully logged in, get a license ID.
Access token request: To request an access token from the backend, use an authorization ID with client id, client secret, grant type, and redirect uri.
Introducing news reports and displaying content
Once we have the access token, we can then retrieve all the media id from the user’s Instagram profile. We use these media id to retrieve the URLs of the images and videos. These media items are then displayed in our app, which has various styling options.
Here is a detailed analysis of this phenomenon.
Retrieve Media IDs : Use an access token to retrieve media IDs from the Instagram API.
Accept media URLs : Assign a corresponding media URL (image or video) for each media ID.
Display Media: Use React components to display media objects in a grid or slider format.
Optimizing the Instagram feed
One of the main features of our app is that we can customize the Instagram feed. Here are some options to change.
Width: Adjusts the spacing between images.
Rounded corners: Apply rounded corners to images.
Viewable posts: Check how many posts can be viewed at one time.
These CSS and React state settings can be used to update the layout dynamically based on the user’s preferences.
Deploying Your Shopify App
Once your app is fully developed and tested, you can deploy it to any store created in Shopify. Here’s a brief overview of the deployment process:
Build Your App: Run the build command to prepare your app for production.
Upload to Shopify: Use the Shopify CLI or Partner Dashboard to upload your app to the Shopify store.
Submit for Review: If you intend to publish your app on the Shopify App Store, submit it for review to ensure it meets Shopify’s standards and guidelines.
How to Maximize Your Shopify Partner account?
Promote your services: Use the Shopify Partner Dashboard to promote your design services, apps or themes. Emphasize what makes your offers unique and how they benefit Shopify merchants.
Use Shopify’s resources: Take advantage of the training materials and support provided. These resources will help you stay up to date with Shopify’s latest features and best practices.
Connect with the community: Join the Shopify forums and partner communities to connect with other professionals. Sharing knowledge and learning from others can help you improve your services and grow your business.
Track Your Performance: Monitor your earning potential and performance with the Affiliate Dashboard. This will help you understand what is working and where you can make improvements..
Conclusion
Creating a Shopify app involves several key steps, from setting up your development environment to deploying your app. By following this comprehensive guide, you can create a functional and customizable app to meet various needs. Our example of an Instagram feed app demonstrates how you can integrate third-party services and enhance your app’s functionality, offering users a dynamic and engaging experience. Whether you’re a seasoned developer or just starting, Shopify provides the tools and resources to help you succeed
0 notes
Text
Today I learned: to apply arguments to an NPM package script, you must put them after two dashes. That is:
npm start -- --firefox=deved npm run dev -- --firefox=deved
Arguments before the double dash are for npm run itself, such as --if-present:
npm run dev --if-present -- --firefox=deved
Honestly, the only reason I hadn't looked this up is because I looked it up for pnpm at one point and it's not the same; pnpm puts the arguments for itself before the command, and I had assumed they would be the same:
pnpm --if-present start --firefox=deved pnpm run --if-present dev --firefox=deved pnpm --if-present dev --firefox=deved
0 notes
Note
akuse! on github. honestly i only use it for older anime which i cant source copies of both online and offline. really curious about the sources they use bc i searched extensively for some anime online and couldnt find it for years and they just. HAVE it. they dont have any appimages just a linux guide on how to build it yourself with the terminal. there's not that many steps but i'm so scared of messing up
hi. I went and looked at this github project the second I saw this ask & immediately went "OH I SEE" because oh my god the technical writing skills on display in that readme file are . let's call the overall effect "confusing". let's describe this situation like "the dev could follow the trail of breadcrumbs they left in there & they figured that pretty much was good enough." many such cases unfortunately but I THINK I have decoded it now.
here is what you're gonna do:
1. where it says "code" on the project page, click on that & yoink the zip file. you do not need to learn git today, so don't worry about "cloning" it. just download it.

(that green fucker on the right.)
2. extract it. put the extracted folder wherever. I have a folder in my "home" directory called "Programz" where I put oddball stuff like this because it makes it easy to find later.
3. MAKE / LOG INTO AN ANILIST ACCOUNT, THEN go to the "developer settings" page they link in the readme file without telling you what it is (which redirects you unhelpfully to the homepage if you're not logged in. jesus christ)
4. I cannot see the form for this because I didn't try it myself, but you want to "create a new anilist API client." find whatever button does that. When you do that, there should be a "redirect URI" field. put "akuse://index,https://anilist.co/api/v2/oauth/pin" in it.
5. in the folder you extracted, go to the "src" subfolder and then the "modules" subfolder. make a new file in there called "clientData.js"
6. the readme explains this part okay. open clientData.js and put this stuff in it.
7. open your package manager. you are going to search for 3 different things, and if any of them aren't installed, you're going to install them and any dependencies the package manager says you should also install. search for: npm, libcrypt, and rpmbuild.
8. now I am going to tell you to open a terminal window. inside the modules folder*, right-click and there should be a menu item that says "open terminal here". do that. then, in the terminal, type "npm run dist:linux rpm" and hit enter. (*I THINK? if this doesnt work try the top level folder maybe. it won't explode if you do it wrong just try stuff)
Theoretically, this should generate some kind of Something that you can run like you would run akuse on your Windows machine! I didn't get a chance to step through this process, so it's possible I am fucking something up, but I hope these instructions are at least clearer than whatever's going on in that readme file. it's worth a shot!
If you try this and it breaks down along the way somewhere, you are so totally welcome to report back here & tell me about it if you feel like it. maybe I can help! maybe I can't help but having an outlet to go "hey what the fuck" at will be nice for you anyway. either way this is awesome enrichment for me thank u
(& also I would like to thank minecraft modders for being the worst ever at documentation, instructions, and all related topics, because had I not been tried in those fires I would not be able to read shit like this at all.)
#linuxes#I think there's like an emp generator built into github that disables the part of people's brains that knows what instructions are#the second you start typing in that readme.md you black out and when you're done it says 'waga baba bobo'. and you're like 'sounds good'#every time. every fucking time. it's a miracle I can remember how to make revanced work
1 note
·
View note