#ntfs file system
Explore tagged Tumblr posts
Visit Tumblr Blog
Explore Tumblr blogs with no restrictions, modern design and the best experience.
Last Seen Tumblr Blogs


Fun Fact
28.6 is the average number of monthly visits per US mobile user.
Text
Space available but cannot copy anything in Pen Drive | How to convert file system of Pen Drive Watch video on TECH ALERT yt https://youtu.be/CbYkTRKn6SA
#TechAlert #howto #tipsandtricks #windows #operatingsystem #pendrive #filesystem #trending #viralvideo #Youtube #ssd #harddisk #FAT32 #NTFS #convert #corruptedpendrive #storage #computer #tutorial #loveislove
#Space available but cannot copy anything in Pen Drive | How to convert file system of Pen Drive#Watch video on TECH ALERT yt#https://youtu.be/CbYkTRKn6SA#TechAlert#howto#tipsandtricks#windows#operatingsystem#pendrive#filesystem#trending#viralvideo#Youtube#ssd#harddisk#FAT32#NTFS#convert#corruptedpendrive#storage#computer#tutorial#loveislove#shorts#love#instagood#technology#technical#like
2 notes
·
View notes
Text
never heard of this file system
2 notes
·
View notes
Text
Con job
Today I learned that I cannot use a subdirectory named "con" in a cross-platform project, because "con" is a reserved filename in NTFS.
The sad thing is, I'm old enough to know *why* "con" is a reserved filename: for compatibility MS-DOS, where it stood for console input/output. If you wanted to print the contents of a file to the MS-DOS console, you typed a command like "C:> COPY FILE.TXT CON".
0 notes
Text
learning how the silly numbers in the computer work together to build up the whole system is so fun:)
#was studying up on FAT n NTFS systems😸#such a nerd thing to say but idc its sooo interesting to learn how the files r structured#aether.txt
1 note
·
View note
Text
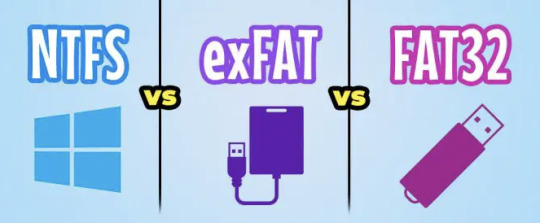
Qual'è la differenza fra FAT32 - exFAT e NTFS
In questo articolo voglio aiutarvi a fare chiarezza sui principali file System di Windows, parleremo di FAT32 – exFAT e NTFS, ora cercherò di spiegarvi le principali differenze, i vantaggi e svantaggi di ogni file System. Introduzione FAT32 è più vecchio ma offre una compatibilità quasi universale con diversi sistemi operativi e dispositivi, rendendolo ideale per unità flash e unità…
View On WordPress
#MAgodelPC#console#exfat#fat32#file system#New Technology File System#ntfs#smarttv#windows system#Xbox
0 notes
Text
also share your names with me I'm curious :3
down below is a heartfelt sob story about my favorite hard drive and also reason why I did the poll
For the longest time I only had one external drive containing everything. It was an old 256GB drive that I just named "BACKUP".
When I got my SSD I took out the old hard drive and used that as my main backup source. Because it had more storage I named it "BACKUP EXTENDED".
That drive got corrupted when I was in rehab because some guy named Kevin borrowed it for movies and used in a micro usb phone cable instead of the real one that was right on top of the drive.
So BACKUP EXTENDED was no more. A few months later I tried some usb partitioning tools (GParted my beloved) because I had some computer issues and thought I try to revive that old drive again and it fucking worked. From that day on my backup drive was known as "THE UNDEAD" (I've also been a huge Hollywood Undead fan at that time).
That name stuck with me, even after I accidentally formatted the whole drive when installing Arch, It persisted through each repartitioning session.
When I fucked up my partitioning table so hard it took several tries of fiddling to get the drive to work again, I renamed my trusty old drive to UNDEAD REVIVED because, well, I had to revive it again. Is it really undead at this point? Or is a revived thing alive again. What is a revived zombie, really? Maybe that's something for another poll...
A few weeks ago I got a few terabytes of storage for cheap and the biggest drive I got right now is 3TB. It's my new backup drive and I called it "UNDEAD EXTENDED",
But I've reached a point where having only one partition for everything isn't enough anymore. I have a macbook for work which can't write to NTFS partitions, so I had to create an exFAT for shared storage. That doesn't allow me to symlink things though, and I still need to have a Windows backup that I can just attach to any PC and boot from it, so I also need an NTFS drive. But Windows does things to the NTFS drive so that sometimes I have to sudo mount the partition which is really annoying and kinda sucks. I only use Linux on my main machine and just want to keep some of its files somewhere without other systems interacting with it at all so now I also have a ext4 partition for system backup and some games.
So, my trusty UNDEAD* hard drive that I lovingly kept and revived and extended and revived again, which stores everything that I own and love and need is now cut up into pieces and none of the partitions feel like the drive that it once was that makes me sad.
I grew very attached to that hard drive and to that name but even when the physical drive is still next to me it feels like I've outgrown it. I've had my Undead drive when I was at my lowest and it was a part of my digital life up until now. I've had iterations of it for almost half of my life. If that thing could talk, it would scream.
So, how did I name my partitions instead now?
I've named my exFAT partition "CYBERSLUT" the way it plugs into any computer and gets manhandled by it, it made me smile when I made the tough decision to retire the undead naming scheme.
My NTFS drive is called "WHYDOS" because I always ask myself why I still keep up with Windows sometimes, and I just recreated my ext4 partition that I named "PLAYGROUND", because it's only used for Wine bottles and some steam games so far, so they don't take up most of my limited SSD space.
#Is this how it feels like to outgrow your marriage?#getting sentimental over a fucking hard drive#where in the body is the soul located?
41 notes
·
View notes
Text


Are you running Windows?
Ever delete a file, empty your recycling bin, and go WELL SHIT and wish you hadn't done that?
..want to snoop around an NTFS file system and see what's been deleted then possibly recover that information?
You need Kickass Undelete!
It recovers deleted files! Usually! For free! Stupidly easy!
36 notes
·
View notes
Text
Building Your Own Operating System: A Beginner’s Guide
An operating system (OS) is an essential component of computer systems, serving as an interface between hardware and software. It manages system resources, provides services to users and applications, and ensures efficient execution of processes. Without an OS, users would have to manually manage hardware resources, making computing impractical for everyday use.
Lightweight operating system for old laptops
Functions of an Operating System
Operating systems perform several crucial functions to maintain system stability and usability. These functions include:
1. Process Management
The OS allocates resources to processes and ensures fair execution while preventing conflicts. It employs algorithms like First-Come-First-Serve (FCFS), Round Robin, and Shortest Job Next (SJN) to optimize CPU utilization and maintain system responsiveness.
2. Memory Management
The OS tracks memory usage and prevents memory leaks by implementing techniques such as paging, segmentation, and virtual memory. These mechanisms enable multitasking and improve overall system performance.
3. File System Management
It provides mechanisms for reading, writing, and deleting files while maintaining security through permissions and access control. File systems such as NTFS, FAT32, and ext4 are widely used across different operating systems.
4. Device Management
The OS provides device drivers to facilitate interaction with hardware components like printers, keyboards, and network adapters. It ensures smooth data exchange and resource allocation for input/output (I/O) operations.
5. Security and Access Control
It enforces authentication, authorization, and encryption mechanisms to protect user data and system integrity. Modern OSs incorporate features like firewalls, anti-malware tools, and secure boot processes to prevent unauthorized access and cyber threats.
6. User Interface
CLI-based systems, such as Linux terminals, provide direct access to system commands, while GUI-based systems, such as Windows and macOS, offer intuitive navigation through icons and menus.
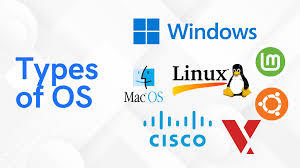
Types of Operating Systems
Operating systems come in various forms, each designed to cater to specific computing needs. Some common types include:
1. Batch Operating System
These systems were widely used in early computing environments for tasks like payroll processing and scientific computations.
2. Multi-User Operating System
It ensures fair resource allocation and prevents conflicts between users. Examples include UNIX and Windows Server.
3. Real-Time Operating System (RTOS)
RTOS is designed for time-sensitive applications, where processing must occur within strict deadlines. It is used in embedded systems, medical devices, and industrial automation. Examples include VxWorks and FreeRTOS.
4 Mobile Operating System
Mobile OSs are tailored for smartphones and tablets, offering touchscreen interfaces and app ecosystems.
5 Distributed Operating System
Distributed OS manages multiple computers as a single system, enabling resource sharing and parallel processing. It is used in cloud computing and supercomputing environments. Examples include Google’s Fuchsia and Amoeba.
Popular Operating Systems
Several operating systems dominate the computing landscape, each catering to specific user needs and hardware platforms.
1. Microsoft Windows
It is popular among home users, businesses, and gamers. Windows 10 and 11 are the latest versions, offering improved performance, security, and compatibility.
2. macOS
macOS is Apple’s proprietary OS designed for Mac computers. It provides a seamless experience with Apple hardware and software, featuring robust security and high-end multimedia capabilities.
3. Linux
Linux is an open-source OS favored by developers, system administrators, and security professionals. It offers various distributions, including Ubuntu, Fedora, and Debian, each catering to different user preferences.
4. Android
It is based on the Linux kernel and supports a vast ecosystem of applications.
5. iOS
iOS is Apple’s mobile OS, known for its smooth performance, security, and exclusive app ecosystem. It powers iPhones and iPads, offering seamless integration with other Apple devices.
Future of Operating Systems
The future of operating systems is shaped by emerging technologies such as artificial intelligence (AI), cloud computing, and edge computing. Some key trends include:
1. AI-Driven OS Enhancements
AI-powered features, such as voice assistants and predictive automation, are becoming integral to modern OSs. AI helps optimize performance, enhance security, and personalize user experiences.
2. Cloud-Based Operating Systems
Cloud OSs enable users to access applications and data remotely. Chrome OS is an example of a cloud-centric OS that relies on internet connectivity for most functions.
3. Edge Computing Integration
With the rise of IoT devices, edge computing is gaining importance. Future OSs will focus on decentralized computing, reducing latency and improving real-time processing.
4. Increased Focus on Security
Cyber threats continue to evolve, prompting OS developers to implement advanced security measures such as zero-trust architectures, multi-factor authentication, and blockchain-based security.
3 notes
·
View notes
Text
i'm in a digital forensics class rn, and i'm in a section about NTFS system files, and i've probably typed $MFT as $MTF like 40 times already
#i haven't been on tumblr much lately#but this is the type of goofy lil problem to share with tumblr. i think.#schoolblog#the other thing is that if i try to read it as the full phrase (master file table) in my head. my brain thinks ''masterfile gambit''#but for some reason that feels more like a reddit thought?
2 notes
·
View notes
Note
Thanks for the info about dual booting. This might be a dumb question, but if I have two internal drives, and I place Linux (Mint probably) on the C: drive alongside windows, will I have access to the additional drive if I boot into Linux OOB, or will I also have to partition that?
Yes, you will have access to the additional drive. I'm not sure if Mint will include the driver package for the NTFS file system by default, so you may need to install that manually.
4 notes
·
View notes
Text
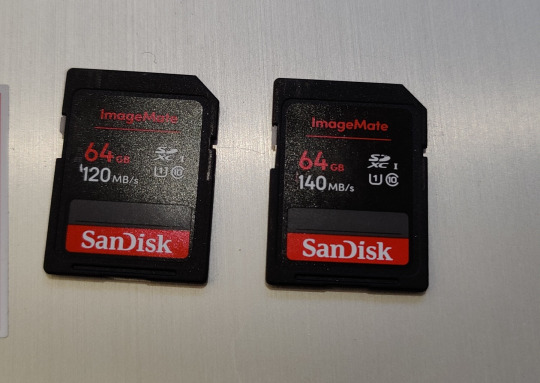
Ok so I was having a really hard time trying to figure out what went wrong with my SD card while trying to homebrew my wii
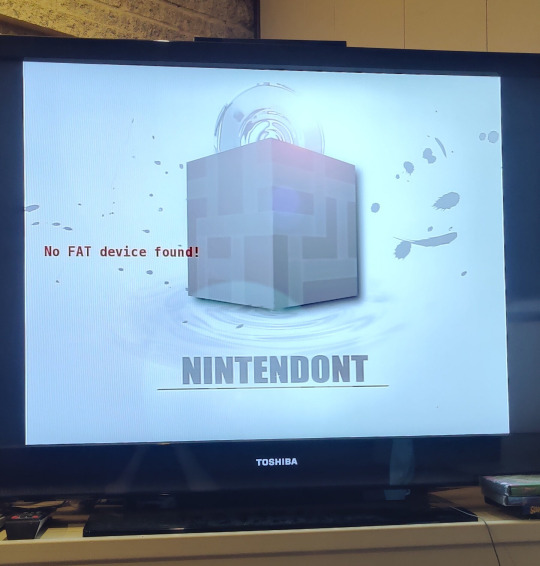
My friend figured it out so I'm posting it both for myself and anyone else that gets a No FAT device found! error on Nintendont
My formatting was incorrect, and I say this knowing NOTHING about how it works but here's how I was able to correctly format it and do it again without fail on the same type of card. It is a SanDisk ImageMate, notably the cheapest card at Walmart (hehe)
How I did it:
I used HPUSB to format to FAT32
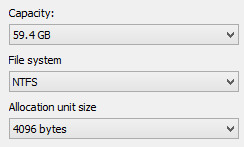
Then from Windows format the file system to NTFS (default allocation was 4k so I left it) instead of exFAT (which was my default)
Then in guiformat pick 32768 as cluster size
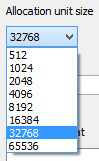
and that's it! It ended up being a really easy solution but I was having SUCH a hard time trying to figure out what to do. I literally don't know what any of this means so if this doesn't help then I'm sorry! but I also cannot help. I also don't know how much the allocation numbers matter. I just know this worked for me and I'm honestly posting this for me because I WILL forget if I ever have to do it again
#shitposting#wii homebrew#save for later#this feels so unhelpful but tbf it's literally for me in the future#hi future me
3 notes
·
View notes
Text
youtube
Space available but cannot copy anything in Pen Drive | How to convert file system of Pen Drive Watch video on TECH ALERT yt https://youtu.be/CbYkTRKn6SA
#TechAlert #howto #tipsandtricks #windows #operatingsystem #pendrive #filesystem #trending #viralvideo #Youtube #ssd #harddisk #FAT32 #NTFS #convert #corruptedpendrive #storage #computer #tutorial #loveislove
#Space available but cannot copy anything in Pen Drive | How to convert file system of Pen Drive#Watch video on TECH ALERT yt#https://youtu.be/CbYkTRKn6SA#TechAlert#howto#tipsandtricks#windows#operatingsystem#pendrive#filesystem#trending#viralvideo#Youtube#ssd#harddisk#FAT32#NTFS#convert#corruptedpendrive#storage#computer#tutorial#loveislove#love#shorts#technology#instagood#technical#like
2 notes
·
View notes
Text

Dopo anni passati a lottare con i tempi di attesa dei dischi meccanici tradizionali, ho finalmente deciso di fare il salto verso un NAS all-flash. La scelta è ricaduta sul TerraMaster F4-SSD, un dispositivo che promette di rivoluzionare il workflow di chi, come me, lavora quotidianamente con file RAW pesanti e progetti video 4K. L'idea di avere un sistema storage completamente basato su SSD, silenzioso e performante, mi ha convinto a investire in questa soluzione che si posiziona in una fascia di mercato ancora relativamente di nicchia. Logicamente al momento il top a nostro avviso è il Terramaster F8 SSD PLUS. La promessa di TerraMaster è chiara: offrire ai creator 4K e ai fotografi professionisti un'alternativa ai classici NAS con dischi rotanti, eliminando i colli di bottiglia tipici dello storage tradizionale. Con un prezzo di 569 euro su Amazon Italia (venduto direttamente da TerraMaster EU Store), questo dispositivo si propone come una soluzione accessibile per chi vuole fare il salto verso lo storage all-flash senza svuotare il portafoglio. Durante le mie due settimane di test intensivi, ho sottoposto l'F4-SSD a carichi di lavoro reali che rappresentano il quotidiano di uno studio fotografico moderno: dall'ingest di migliaia di RAW, all'editing multicamera in DaVinci Resolve, passando per backup Time Machine e container Docker per la gestione delle foto. Design e qualità costruttiva Il primo impatto con il TerraMaster F4-SSD è sorprendente: le dimensioni compatte (225 × 136 × 166 mm) lo rendono incredibilmente discreto sulla scrivania. Il peso di soli 2,2 kg senza dischi testimonia l'attenzione alla portabilità, caratteristica non scontata in un NAS a 4 vani. Lo chassis in alluminio spazzolato non è solo un vezzo estetico: contribuisce attivamente alla dissipazione del calore, elemento cruciale quando si lavora con SSD ad alte prestazioni. L'F4-SSD utilizza slot M.2 interni per gli SSD NVMe, accessibili rimuovendo il pannello posteriore con una semplice vite thumbscrew. I quattro slot sono chiaramente contrassegnati (PCIe 3.0 x1 o x2) e l'installazione richiede solo il fissaggio con le piccole viti M.2 incluse. TerraMaster fornisce alcune viti di ricambio nel caso se ne perdesse qualcuna durante l'installazione. La qualità costruttiva è eccellente, con un telaio interno in metallo che garantisce rigidità strutturale. Lo slot aggiuntivo M.2 per la cache NVMe è facilmente accessibile e ben posizionato per garantire un'adeguata dissipazione termica. La ventola singola da 80 mm PWM è posizionata sul retro e, grazie al controllo intelligente della velocità, mantiene temperature ottimali senza diventare invadente. Il pannello frontale minimalista presenta solo i LED di stato essenziali: alimentazione, attività di rete e stato dei quattro drive. Sul retro troviamo la dotazione di porte: due connettori 2,5 GbE Intel I225-V con supporto per link aggregation, due porte USB-C 10 Gb/s e una USB-A 5 Gb/s. La scelta di includere due porte di rete veloci dimostra l'attenzione di TerraMaster verso l'uso professionale del dispositivo. Scheda Tecnica Caratteristica Dettaglio Processore Intel N95 (4 core/4 thread, fino a 3.4 GHz) Architettura CPU x86 a 64 bit Grafica integrata Intel UHD Graphics con supporto H.264/H.265/MPEG-4/VC-1 RAM installata 8 GB DDR5 SODIMM (1 modulo) RAM espandibile Fino a 32 GB DDR5 non ECC Slot storage 4 × M.2 2280 NVMe (2× PCIe 3.0 x2 + 2× PCIe 3.0 x1) Tipo storage supportato SSD NVMe M.2 2280 (solo all-flash) Capacità massima supportata Fino a 32 TB totali (4 × 8 TB) Tipi RAID supportati TRAID, TRAID+, RAID 5, RAID 6, RAID 10 File system supportati (interni) Btrfs, EXT4 File system supportati (esterni) EXT3, EXT4, NTFS, FAT32, HFS+, Btrfs Rete 1 × porta RJ-45 5 GbE Porte USB 3 × USB 3.2 Gen 2 (2 Tipo-A, 1 Tipo-C, fino a 10 Gbps) Uscita video 1 × HDMI 2.1 (fino a 4K a 60 Hz) Sistema operativo TOS 6.x (Linux 64 bit proprietario) Supporto transcodifica 4K Sì, fino a 4K a 60 fps con supporto hardware Sicurezza e cifratura Cifratura AES-NI Ventilazione 2 ventole da 50 mm con controllo intelligente Rumorosità Inferiore a 19 dB in standby Dimensioni 138 × 60 × 140 mm Peso netto 0,6 kg (netto), 1,2 kg (con imballo) Alimentazione Fino a 48 W (uso), 8 W (standby) Gestione utenti Fino a 20 utenti con controllo avanzato permessi Applicazioni supportate Plex, Docker, Emby, Snapshot, Backup, Cloud Sync Prezzo indicativo Circa 399,99 USD (prezzo di listino) Differenze TerraMaster F8‑SSD Plus, D4‑SSD, e F4‑SSD Ecco una tabella comparativa tra i tre modelli TerraMaster F8‑SSD Plus, D4‑SSD, e F4‑SSD: Caratteristica F8‑SSD Plus D4‑SSD F4‑SSD Tipologia NAS SSD 8‑bay DAS SSD 4‑bay NAS SSD 4‑bay Slot SSD 8× M.2 NVMe 2280 4× M.2 NVMe 2280 4× M.2 NVMe 2280 Capacità massima Fino a 64 TB (8×8 TB) Fino a 32 TB (4×8 TB) Fino a 32 TB CPU Intel Core i3‑N305 octa‑core, 3,8 GHz Nessuna CPU (device DAS via USB4) Intel N95 quad‑core 3,4 GHz RAM 16 GB DDR5 (aggiorabili a 32 GB) — 8 GB DDR5 (espandibili a 32 GB) Interfacce 1× 10 GbE, 2× USB‑C/A 10 Gbps, HDMI 1× USB4 40 Gbps 1× 5 GbE, 1× USB‑C 10 Gbps, HDMI Throughput dichiarato ~1 020 MB/s (rete), ottimo per 4K/VM Fino a 3 257 MB/s read e 3 192 MB/s write (RAID0, USB4) – RAID supportato RAID 0/1/5/6/10/TRAID/JBOD (ZFS nei NAS) RAID software via OS (supporta RAID 0/1/5/6/10) TRAID, TRAID+, RAID5/6/10 Rumorosità Read the full article
0 notes
Text
Price: [price_with_discount] (as of [price_update_date] - Details) [ad_1] The Avolusion PRO-5X Series 10TB External Hard Drive (10-Terabyte) is the valuable hard drive upgrade kit that provides the best and easy solution to extend the storage capacity of your desktop/laptop instantly. Plug and play USB 3.0 interface provides a perfect portable storage solution for you to store and back up your game data, music, image, video and more. Avolusion PRO-5X series external hard drive designed to work perfectly with your Windows operating system computer PC, laptop. Fully compatible with any device with Windows operating system. It comes with a quiet fanless design to keep your external hard drive running quietly. Avolusion PRO-5X Series External Hard Drive Upgrade Kit features high-quality construction, advanced external interface technology, durable chassis, and state-of-the-art industrial design, assured to provide you with years of reliable performance. Features: UPC: 810064872273 Model No.: PRO5X-WH-10TB-WIN Built-in 10TB capacity hard drive Compatible with Windows 11, 10, 8, 7. Preformatted Windows NTFS File System Expand computer hard drive storage instantly! Add extra storage to your desktop/laptop PC without opening the case Specifications: Interface: USB 3.0 Built-in capacity: 10 TB Material: Plastic/PVC USB Data Rate: 5.0 Gbit/s Support platform: Windows operating system Colour: white. Dimensions: 8" L x 5" W x 1.6" H Input Power: 100V ~ 240V (50-60Hz 0.8A) Output power: 12V 2.0A Package Content: Avolusion PRO-5X 10TB External Storage (Windows OS) USB 3.0 Cable power adapter User Manual 2 years warranty Built-in 10TB Capacity USB 3.0 External Hard Drive Works for any WInauguros computer PC, laptop with USB 3.0 port Expand computer hard drive storage instantly! Add extra storage to your desktop/laptop PC without opening the case Perfect for hard drive expansion and backup storage for the entire Windows operating system! (Do it before it crashes, you never know when it will happen! "Daily schedule backup is no longer optional" ) 2 years dealer warranty [ad_2]
0 notes
Text
Windows 11 Pro VS Pro For Workstation
Windows 11 Pro and Windows 11 Pro for Workstations are both professional-grade operating systems, but they cater to different user needs. Here’s a detailed comparison:
1. Target Audience
Windows 11 Pro: Designed for general business users, professionals, and power users who need advanced features like BitLocker, Remote Desktop, and Hyper-V.
Windows 11 Pro for Workstations: Optimized for high-end workstations, such as engineers, data scientists, and creative professionals who require extreme performance and reliability for demanding workloads.
2. Hardware Support
Windows 11 Pro:
Supports up to 2 CPUs (sockets).
Maximum 128 cores.
Up to 2TB RAM (64-bit).
Windows 11 Pro for Workstations:
Supports up to 4 CPUs (sockets).
Maximum 128 cores.
Up to 6TB RAM (64-bit).
Non-Volatile DIMM (NVDIMM) support for persistent memory.
3. File System & Performance
Windows 11 Pro:
Uses NTFS (standard file system).
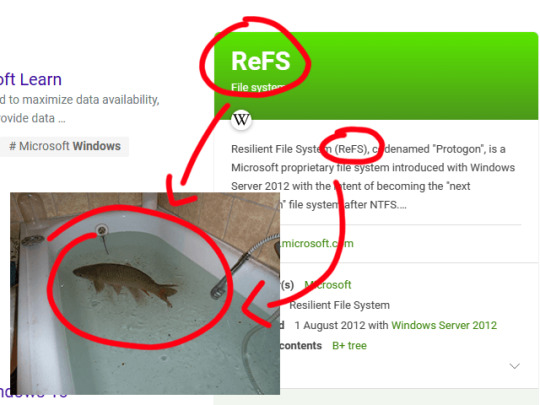
Windows 11 Pro for Workstations:
Includes ReFS (Resilient File System) for better data integrity and fault tolerance.
Microsoft’s SMB Direct (RDMA support) for faster network file transfers.
Persistent memory (NVDIMM-N) support for ultra-fast storage.
4. Storage & Reliability
Windows 11 Pro for Workstations includes:
Storage Spaces Direct (Software-defined storage clustering).
Faster file handling with ReFS (self-healing capabilities).
Better support for high-speed storage (NVMe, Optane).
5. Networking
Windows 11 Pro for Workstations supports:
SMB Direct (for low-latency, high-throughput networking).
Improved handling of large file transfers (useful for media production, CAD, and scientific computing).
6. Pricing & Licensing
Windows 11 Pro: Typically cheaper, suitable for most business users. ($35 at Keyingo.com)
Windows 11 Pro for Workstations: More expensive, aimed at enterprise and high-performance computing. ($40 at Keyingo.com)
Which One Should You Choose?
Choose Windows 11 Pro if:
You need standard business features (BitLocker, Hyper-V, Remote Desktop).
You don’t require extreme hardware support.
You’re using typical office or development workloads.
Choose Windows 11 Pro for Workstations if:
You need 4 CPU support or 6TB RAM.
You work with high-performance storage (NVMe, NVDIMM).
You need ReFS or SMB Direct for large-scale data processing.
You’re running CAD, 3D rendering, scientific simulations, or AI workloads.
Final Verdict
Most users will be fine with Windows 11 Pro.
Workstation users (engineers, researchers, media professionals) should consider Pro for Workstations for its expanded hardware support and advanced file systems.
#Windows 11 Pro VS Pro For Workstation#Windows 11 Pro VS Windows 11 Pro For Workstation#Compare Windows 11 Pro and windows 11 Pro For Workstation
1 note
·
View note
Text
btw, if you are shopping for desktop computers, be sure to look into the given components within the chassis (be it prebuilt or custom) on websites OTHER than the manufacturer. A lot of them are deliberately misleading and some companies, particularly Apple and Intel, are known for inflating their first party stats by upwards of 20% at times. Also check the chassis to ensure that it has proper fucking airflow so your components don't fry themselves. A lot of cheap cases have TERRIBLE airflow.
Check the fucking reviews for your components.
As for what I do to keep my Windows computer running efficiently, I've found that Win11 is absolutely dogshit on AMD systems, and I disable a LOT of the Microsoft bloatware. I used to do this in the Windows Registry but I don't reccomended that unless you know what you're doing since you can VERY easily trash your installation that way
Also that's literally not what formatting a USB drive is. Formatting a USB drive is when you... format the file system (ie: NTFS, exFAT, FAT32, etc)
Me: oh yeah, if you think school photography is hard now, try imagining doing this with film.
The new girl: what’s film?
Me: … film. Like… film that goes in a film camera.
New girl: what’s that mean?
Me: … before cameras were digital.
New girl: how did you do it before digital?
Me:… with film? I haven’t had enough coffee for this conversation
114K notes
·
View notes