#oauth2 authentication server
Explore tagged Tumblr posts
Visit Tumblr Blog
Explore Tumblr blogs with no restrictions, modern design and the best experience.
Last Seen Tumblr Blogs


Fun Fact
In 2020, 27% of US Tumblr users had an annual household income of over $100,000.
Text
What is Argo CD? And When Was Argo CD Established?

What Is Argo CD?
Argo CD is declarative Kubernetes GitOps continuous delivery.
In DevOps, ArgoCD is a Continuous Delivery (CD) technology that has become well-liked for delivering applications to Kubernetes. It is based on the GitOps deployment methodology.
When was Argo CD Established?
Argo CD was created at Intuit and made publicly available following Applatix’s 2018 acquisition by Intuit. The founding developers of Applatix, Hong Wang, Jesse Suen, and Alexander Matyushentsev, made the Argo project open-source in 2017.
Why Argo CD?
Declarative and version-controlled application definitions, configurations, and environments are ideal. Automated, auditable, and easily comprehensible application deployment and lifecycle management are essential.
Getting Started
Quick Start
kubectl create namespace argocd kubectl apply -n argocd -f https://raw.githubusercontent.com/argoproj/argo-cd/stable/manifests/install.yaml
For some features, more user-friendly documentation is offered. Refer to the upgrade guide if you want to upgrade your Argo CD. Those interested in creating third-party connectors can access developer-oriented resources.
How it works
Argo CD defines the intended application state by employing Git repositories as the source of truth, in accordance with the GitOps pattern. There are various approaches to specify Kubernetes manifests:
Applications for Customization
Helm charts
JSONNET files
Simple YAML/JSON manifest directory
Any custom configuration management tool that is set up as a plugin
The deployment of the intended application states in the designated target settings is automated by Argo CD. Deployments of applications can monitor changes to branches, tags, or pinned to a particular manifest version at a Git commit.
Architecture
The implementation of Argo CD is a Kubernetes controller that continually observes active apps and contrasts their present, live state with the target state (as defined in the Git repository). Out Of Sync is the term used to describe a deployed application whose live state differs from the target state. In addition to reporting and visualizing the differences, Argo CD offers the ability to manually or automatically sync the current state back to the intended goal state. The designated target environments can automatically apply and reflect any changes made to the intended target state in the Git repository.
Components
API Server
The Web UI, CLI, and CI/CD systems use the API, which is exposed by the gRPC/REST server. Its duties include the following:
Status reporting and application management
Launching application functions (such as rollback, sync, and user-defined actions)
Cluster credential management and repository (k8s secrets)
RBAC enforcement
Authentication, and auth delegation to outside identity providers
Git webhook event listener/forwarder
Repository Server
An internal service called the repository server keeps a local cache of the Git repository containing the application manifests. When given the following inputs, it is in charge of creating and returning the Kubernetes manifests:
URL of the repository
Revision (tag, branch, commit)
Path of the application
Template-specific configurations: helm values.yaml, parameters
A Kubernetes controller known as the application controller keeps an eye on all active apps and contrasts their actual, live state with the intended target state as defined in the repository. When it identifies an Out Of Sync application state, it may take remedial action. It is in charge of calling any user-specified hooks for lifecycle events (Sync, PostSync, and PreSync).
Features
Applications are automatically deployed to designated target environments.
Multiple configuration management/templating tools (Kustomize, Helm, Jsonnet, and plain-YAML) are supported.
Capacity to oversee and implement across several clusters
Integration of SSO (OIDC, OAuth2, LDAP, SAML 2.0, Microsoft, LinkedIn, GitHub, GitLab)
RBAC and multi-tenancy authorization policies
Rollback/Roll-anywhere to any Git repository-committed application configuration
Analysis of the application resources’ health state
Automated visualization and detection of configuration drift
Applications can be synced manually or automatically to their desired state.
Web user interface that shows program activity in real time
CLI for CI integration and automation
Integration of webhooks (GitHub, BitBucket, GitLab)
Tokens of access for automation
Hooks for PreSync, Sync, and PostSync to facilitate intricate application rollouts (such as canary and blue/green upgrades)
Application event and API call audit trails
Prometheus measurements
To override helm parameters in Git, use parameter overrides.
Read more on Govindhtech.com
#ArgoCD#CD#GitOps#API#Kubernetes#Git#Argoproject#News#Technews#Technology#Technologynews#Technologytrends#govindhtech
2 notes
·
View notes
Text
You can learn NodeJS easily, Here's all you need:
1.Introduction to Node.js
• JavaScript Runtime for Server-Side Development
• Non-Blocking I/0
2.Setting Up Node.js
• Installing Node.js and NPM
• Package.json Configuration
• Node Version Manager (NVM)
3.Node.js Modules
• CommonJS Modules (require, module.exports)
• ES6 Modules (import, export)
• Built-in Modules (e.g., fs, http, events)
4.Core Concepts
• Event Loop
• Callbacks and Asynchronous Programming
• Streams and Buffers
5.Core Modules
• fs (File Svstem)
• http and https (HTTP Modules)
• events (Event Emitter)
• util (Utilities)
• os (Operating System)
• path (Path Module)
6.NPM (Node Package Manager)
• Installing Packages
• Creating and Managing package.json
• Semantic Versioning
• NPM Scripts
7.Asynchronous Programming in Node.js
• Callbacks
• Promises
• Async/Await
• Error-First Callbacks
8.Express.js Framework
• Routing
• Middleware
• Templating Engines (Pug, EJS)
• RESTful APIs
• Error Handling Middleware
9.Working with Databases
• Connecting to Databases (MongoDB, MySQL)
• Mongoose (for MongoDB)
• Sequelize (for MySQL)
• Database Migrations and Seeders
10.Authentication and Authorization
• JSON Web Tokens (JWT)
• Passport.js Middleware
• OAuth and OAuth2
11.Security
• Helmet.js (Security Middleware)
• Input Validation and Sanitization
• Secure Headers
• Cross-Origin Resource Sharing (CORS)
12.Testing and Debugging
• Unit Testing (Mocha, Chai)
• Debugging Tools (Node Inspector)
• Load Testing (Artillery, Apache Bench)
13.API Documentation
• Swagger
• API Blueprint
• Postman Documentation
14.Real-Time Applications
• WebSockets (Socket.io)
• Server-Sent Events (SSE)
• WebRTC for Video Calls
15.Performance Optimization
• Caching Strategies (in-memory, Redis)
• Load Balancing (Nginx, HAProxy)
• Profiling and Optimization Tools (Node Clinic, New Relic)
16.Deployment and Hosting
• Deploying Node.js Apps (PM2, Forever)
• Hosting Platforms (AWS, Heroku, DigitalOcean)
• Continuous Integration and Deployment-(Jenkins, Travis CI)
17.RESTful API Design
• Best Practices
• API Versioning
• HATEOAS (Hypermedia as the Engine-of Application State)
18.Middleware and Custom Modules
• Creating Custom Middleware
• Organizing Code into Modules
• Publish and Use Private NPM Packages
19.Logging
• Winston Logger
• Morgan Middleware
• Log Rotation Strategies
20.Streaming and Buffers
• Readable and Writable Streams
• Buffers
• Transform Streams
21.Error Handling and Monitoring
• Sentry and Error Tracking
• Health Checks and Monitoring Endpoints
22.Microservices Architecture
• Principles of Microservices
• Communication Patterns (REST, gRPC)
• Service Discovery and Load Balancing in Microservices
1 note
·
View note
Text
How to Choose the Right Security Stack for Your Business Website
In an age where cyberattacks are growing more frequent and sophisticated, a secure website isn’t just a best practice—it’s a business necessity. Whether you're running an eCommerce store, SaaS product, or a company website, your security stack plays a critical role in protecting sensitive data, maintaining customer trust, and ensuring compliance.
A professional Web Development Company will always prioritize building a tailored security framework that addresses both current risks and future vulnerabilities. But how do you decide which tools and layers should be part of your website's defense system?
Let’s break down what a “security stack” means and how to choose the right one for your business.
What Is a Website Security Stack?
A security stack is a layered approach to website protection. It combines various technologies and tools—each targeting a specific set of threats—to create a comprehensive shield around your web infrastructure.
Think of it like a multi-lock system for your home:
One layer protects your doors (authentication)
Another secures your windows (firewalls)
And another watches for unusual activity (monitoring tools)
When configured properly, these layers work together to identify, prevent, and respond to attacks—without compromising website speed or functionality.
1. Start With an SSL/TLS Certificate
This is the most basic, yet crucial, layer. An SSL/TLS certificate encrypts the data exchanged between your website and its users. It ensures that personal information, passwords, and payment details can't be intercepted by third parties.
Make sure:
Your certificate is issued by a trusted Certificate Authority (CA)
It’s renewed automatically
All pages (not just the login or checkout) are secured with HTTPS
Modern browsers now flag non-HTTPS sites as "Not Secure"—a red flag for users and search engines alike.
2. Use a Web Application Firewall (WAF)
A WAF monitors and filters HTTP traffic between your website and the internet. It blocks common threats like SQL injection, cross-site scripting (XSS), and brute-force attacks.
Choose a WAF that:
Offers customizable rules
Supports DDoS protection
Provides real-time traffic analytics
Popular WAFs include Cloudflare, Sucuri, and AWS WAF—each with varying levels of control and reporting. Your development agency can help configure the best fit based on your tech stack and risk exposure.
3. Implement Secure Authentication Protocols
Weak passwords and poorly managed login systems are among the top causes of data breaches. Strengthen this layer with:
Two-Factor Authentication (2FA)
OAuth2 or SSO integrations for enterprise-level users
Rate-limiting and lockout mechanisms for failed login attempts
Make sure admin panels, user dashboards, and CMS backends are protected with hardened authentication protocols—not just simple passwords.
4. Harden Your CMS and Framework
If you’re using platforms like WordPress, Webflow, or custom frameworks like Laravel or Django, security starts with how well the code and plugins are managed.
Best practices include:
Removing unused plugins and themes
Regularly updating core software
Using only trusted third-party packages
Applying role-based access controls
A Web Development Company will often audit your codebase and extensions for hidden vulnerabilities and outdated dependencies.
5. Monitor and Log Everything
Security isn’t static—it requires continuous monitoring. Use log management and monitoring tools to detect suspicious behavior in real time.
Your stack should include:
Application-level logging (failed logins, unusual traffic)
Server and file integrity monitoring
Alerts for changes in configuration or permissions
Tools like Sentry, Datadog, or even open-source solutions like Fail2Ban can help detect threats early before they escalate.
6. Secure Your Hosting Environment
Your server and hosting setup must be as secure as your code. Ensure:
Firewalls are configured at the OS level
SFTP (not FTP) is used for file transfers
Admin panels are IP-restricted or hidden behind VPNs
Automated daily backups are stored off-site
Many breaches happen at the server level due to misconfigured permissions or outdated software—especially on unmanaged VPS environments.
7. Regular Penetration Testing and Updates
Security isn’t a one-time setup. Schedule regular penetration testing and vulnerability scans to identify new risks. Ensure:
Your software dependencies are up-to-date
Security patches are applied immediately
Reports are reviewed and acted upon
This proactive approach protects your business from evolving threats and demonstrates compliance with security standards and regulations.
Conclusion
Choosing the right security stack is not just about installing tools—it's about building a customized, layered defense system that protects your website from every angle. From SSL certificates and firewalls to authentication protocols and monitoring tools, each element plays a role in safeguarding your digital assets.
To ensure nothing is overlooked, work with a Web Development Company that specializes in security-first development. With the right guidance and configuration, your website can stay protected, performant, and trusted—no matter how fast your business grows.
0 notes
Text
How APIs Power Modern Websites – A Think To Share IT Solutions Insight
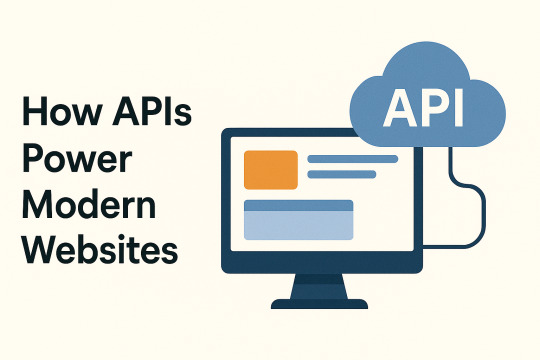
Modern websites are no longer static brochures. They’re dynamic, data-driven platforms that interact with various services in real time. At the core of this interactivity lies a powerful and essential component: the API, or Application Programming Interface.
At Think To Share IT Solutions, we engineer websites that aren’t just visually compelling—they’re functionally superior, thanks to smart API integrations that enable real-time performance, seamless communication, and scalable features.
What is an API?
An API (Application Programming Interface) is a set of protocols and tools that allow software applications to communicate with each other. In web development, APIs act as bridges that connect your website to external or internal systems.
Instead of building every function from scratch, APIs allow developers to integrate existing, trusted services—making websites faster, more reliable, and more scalable.
How APIs Power Modern Websites
1. Dynamic Content Delivery
APIs allow websites to fetch and display real-time content from a database or CMS without refreshing the page. This improves performance and user experience.
Example: A blog or news portal pulling updated articles from a headless CMS like Strapi or WordPress via REST API.
2. User Authentication and Access Control
APIs handle secure user logins and permission-based access. Authentication services like Google OAuth or Auth0 rely entirely on API interactions.
Example: "Sign in with Google" uses an external API to verify the user's identity securely without storing sensitive data on your own servers.
3. Third-Party Service Integrations
APIs enable seamless integration with third-party platforms for added functionality.
Function
API Providers
Payments
Stripe, Razorpay, PayPal
Email Marketing
Mailchimp, SendGrid
Analytics
Google Analytics, Matomo
Customer Support
Zendesk, Intercom
Maps & Location
Google Maps API, Mapbox
These integrations enhance user experience without compromising performance or security.
4. Real-Time Features and Updates
Websites that support live chat, order tracking, or instant notifications use APIs to communicate with real-time databases.
Example: Firebase and Pusher APIs power real-time chat interfaces or live delivery status updates.
5. E-Commerce Functionality
Modern eCommerce websites rely on APIs to handle inventory updates, pricing changes, order processing, and shipping logistics.
What We Implement:
Cart management via REST or GraphQL APIs
Real-time pricing and availability updates
Shipment tracking using courier APIs (e.g., Delhivery, Shiprocket)
6. Headless Architecture
In a headless setup, APIs serve as the communication layer between the front-end and the back-end. This decoupling improves performance and allows for more flexible design and delivery across platforms.
Example: Using Next.js (for the front-end) and Strapi or Sanity (as the headless CMS), data is fetched via API endpoints and rendered statically or server-side for speed and SEO.
Benefits of API-Driven Web Development
Benefit
Explanation
Faster Deployment
Plug in pre-built services instead of coding everything from scratch
Scalability
Easily add new features or services without overhauling your system
Enhanced Security
Offload sensitive functions like payments to trusted platforms
Maintainability
Isolated services reduce complexity and ease troubleshooting
Cross-Platform
Share the same API with mobile apps, web apps, and IoT devices
How Think To Share Implements API-Driven Architecture
Our development process incorporates API planning from the very beginning:
Architecture Planning: Identify necessary APIs based on business goals
Security: Implement OAuth2, JWT tokens, and rate limiting for secure access
Performance: Use caching mechanisms (Redis, CDN) to reduce API load
Monitoring: Set up logging, error tracking, and fallback handling for resilience
Documentation: Provide detailed API docs using tools like Swagger or Postman
Final Thoughts: APIs Are the Backbone of Modern Websites
APIs have evolved from technical add-ons to mission-critical infrastructure for digital platforms. Whether you're running a website, mobile app, or enterprise software, APIs allow you to build faster, scale smarter, and connect deeper with users.
At Think To Share IT Solutions, we design and develop high-performance web systems that are modular, connected, and built for long-term growth—powered by reliable, secure, and well-integrated APIs.
0 notes
Text
What is a Bearer Token? A Complete Guide for Developers
In the world of modern web applications and APIs, authentication and authorization mechanisms are critical. Whether you're building a RESTful API, working with OAuth2, or integrating third-party services, you've likely encountered the term "Bearer Token." But what exactly is a bearer token? How does it work? And one of the most common questions: Can you reuse a bearer token?
In this article, we’ll dive deep into bearer tokens — how they work, when to use them, whether you can reuse them, and how platforms like Keploy.io make working with APIs more testable and secure. Let’s break it all down.
What is a Bearer Token?
A Bearer Token is a type of access token used in HTTP authentication. It is part of the OAuth 2.0 authorization framework, which is the industry standard for token-based authentication.
Definition:
A bearer token is a string that a client uses to access a protected resource on a server. The term "bearer" indicates that whoever holds the token (the bearer) can use it to gain access to the associated resources — no further identity proof is required.
Format:
A typical bearer token is a long, opaque string, sometimes encoded in Base64 or JWT (JSON Web Token) format. For example:
Authorization: Bearer eyJhbGciOiJIUzI1NiIsInR5cCI6IkpXVCJ9
How It Works:

A client (e.g., mobile app or frontend) sends credentials to an authentication server.
The server returns a bearer token upon successful authentication.
The client uses the bearer token in the Authorization header when requesting resources from a resource server.
The server verifies the token and, if valid, grants access.
Benefits of Bearer Tokens
Because of certain advantages, bearer tokens are widely used in the industry.
Stateless: There is no need for the server to remember the user’s session.
It is suited to work with both microservices and serverless architecture.
Cross-domain is perfect for APIs that send responses to mobile, web or any other type of client application.
Secure: Your valuables are protected for only a short time and cannot be understood if stolen.
Can You Reuse a Bearer Token?
The short answer is: Yes, but it depends on the token's lifespan and policy.
Let’s break it down:
1. Reusable Within Validity Period
Bearer tokens are generally reusable as long as they have not expired or been revoked. Most APIs set an expiration time (TTL — Time to Live) for tokens, typically between 15 minutes to a few hours.# Example cURL call using a bearer token curl -H "Authorization: Bearer YOUR_TOKEN_HERE" https://api.example.com/data
As long as YOUR_TOKEN_HERE is valid and not blacklisted, you can reuse it for multiple API calls.
2. Limited Reusability for Security
There are systems that have very strict security policies in place.
Some platforms set up tokens that are designed to be used just one time.
To protect against token theft, the tokens are made to expire after just a few seconds.
Some APIs let you either manually or automatically revoke bearer tokens when they detect possible suspicious activity.
3. Token Reuse in Test Environments
In test environments, reusing bearer tokens can make development easier. However, it's crucial to avoid this practice in production unless you're handling token expiration and renewal securely.
Refresh Tokens vs Bearer Tokens
Bearer tokens are often confused with refresh tokens. Here’s how they differ:

Pros and cons of bearer token
Bearer tokens are useful and have limitations in terms of authentication and authorization.
Pros of Bearer Tokens:
They are user-friendly. The process of using and deploying bearer tokens is simple, so they’re good for developers.
Since statelessness is the norm in bearer tokens, there is no need for a server to hold on to token data. As a result, the server-side development and how the website faces increasing load become simpler.
Because of their flexibility, bearer tokens can handle access to web applications and be part of single sign on (SSO).
If the authentication is done in a centralised way, deleting the access token is a quick way to deal with compromised tokens or stop access.
Cons of Bearer Tokens:
The dependable nature of bearer tokens is closely linked to the security of the way the information is sent (usually HTTPS). If someone gets caught using them, their data can be taken advantage of.
The security risk comes from token theft, since someone who steals it may be able to access resources.
Bearer tokens are mainly defined by carrying a restricted amount of singer or application data. When there isn’t enough information, you might need to ask more questions.
It is important to handle all the bearer token actions such as issuance, renewal and cancelation with the upmost security.
Access Issues are a bit common. Bearer tokens often come with big access scopes which could create security risks if close regulation is not provided.
Best Practices for Using Bearer Tokens

Be sure to use HTTPS when sending bearer tokens.
Bound the tokens given instead of full access: This way, the risk can be lowered.
You can secure your application’s sessions by shortening their life with low TTLs and refresh tokens.
Token Storage:
Mobile/Web Clients: Don’t forget to create secure storage (such as with keychain or secure cookies).
Don’t keep tokens in your log files, only store them in your system's memory.
When a user has logged out or reset the password, the bearer access token should no longer be valid.
Rotation Strategy: Stamp and invalidate tokens after they are used.
Keeping up with the company monitor allows early detection of suspicious token use.
Code Example: Using Bearer Token in a Node.js App
const axios = require('axios'); const API_URL = 'https://api.example.com/user/profile'; const BEARER_TOKEN = 'YOUR_ACCESS_TOKEN'; axios.get(API_URL, { headers: { Authorization: `Bearer ${BEARER_TOKEN}` } }) .then(response => { console.log('User Data:', response.data); }) .catch(error => { console.error('Error:', error); });
Security Risks of Bearer Tokens
1. Token Theft
If a bearer token is intercepted or leaked (e.g., in logs), the attacker can access resources.
2. Replay Attacks
Reusing a token in an unauthorized context can lead to replay attacks.
3. Token Expiry
Clients relying on long-lived tokens may fail if the token expires during a critical operation.
Conclusion
Bearer tokens provide the foundation for today’s API authentication. They are flexible, have no citizenship and are straightforward to deploy, yet they are responsible for security aspects.
In that case, are bearer tokens usable more than one time? If it’s not revoked or has not expired yet, it’s still good. Still, handling storage, use and expiration the right way is important to decrease the risks.
Keploy.io for Secure API Testing

Testing APIs that rely on bearer tokens is one of the toughest problems developers deal with. The short lifespan of tokens means it’s hard to re-run the same tests multiple times.
That’s why tools like Keploy.io are needed.
Keploy allows you to automatically generate cases for testing and mock data, all from your true API traffic. With it, teams can complete all types of testing without the need for manual tests.
Keploy supports:
Capturing bearer tokens from live traffic
Creating test cases with saved headers and tokens
Simulating authenticated requests in test environments
Mocking dependencies like third-party services using bearer token auth
Why It Matters:
Most of the time, when testing APIs using tokens, developers have to set up fake tokens or handle test suite setup on their own. With Keploy, you are able to:
Take actual bearer tokens that are shared in live data traffic.
Repeat token-authenticated functions during the testing phase.
Makes tests for your APIs attainable and realistic.
Use Keploy when working with real software products
Test each authenticated API by creating the necessary test cases automatically.
Make testing go faster by decreasing the amount of manual setup required.
Info from API log files will allow you to see and stop signs of token misuse.
Adding Keploy to your CI/CD steps means your token-based security will be tested and solid — very useful for applications in fintech, healthcare or sensitive data areas.
Further Reading
https://keploy.io/blog/community/how-to-run-pytest-program
https://keploy.io/blog/community/best-claude-3-5-style-for-code
https://keploy.io/blog/community/understanding-json-templatization-with-recursion-for-dynamic-data-handling
FAQ’s
Q1. Can you reuse a bearer token after the user logs out?
Unfortunately, logging out does not always invalidate the token on the backend. In most cases, if the server fails to remove the token from the session, it might still be considered valid.
Q2. Can bearer tokens be shared between clients?
In theory, it’s allowed, but you shouldn’t do it. No one else can provide a token to a client—every client must generate its own. If you share your tokens, you put your system at higher risk of unauthorized use and hacking.
Q3. Are bearer tokens secure?
Bearer tokens are safe to use when you handle them correctly.
Use HTTPS to send information.
Do not place your money where it can be accessed by anyone.
Do not display your values in your URLs.
Set the expiration period for the tokens short and rotate refresh tokens.
Q4. How do I test APIs with bearer tokens?
Use tools like:
Postman: Store token as environment variable
cURL: Pass it in headers
Keploy.io: Automatically capture and replay bearer-token-authenticated calls in test environments
0 notes
Text
A Beginner’s Guide to RESTful API Design

RESTful APIs are the backbone of modern web and mobile applications. Whether you're building the backend for a web service, a mobile app, or a microservice architecture, understanding how to design a RESTful API is essential. In this guide, we’ll walk you through what REST is and how to structure APIs that are scalable, maintainable, and easy to use.
What is a RESTful API?
REST stands for Representational State Transfer. It's an architectural style that uses standard HTTP methods (GET, POST, PUT, DELETE) for communication between clients and servers. A RESTful API exposes data and services over the web using URLs, returning responses typically in JSON format.
Core Principles of RESTful API Design
Statelessness: Each request should contain all the information needed to process it. The server does not store client session data.
Resource-Based: Data is represented as resources (e.g., /users, /products).
Use of HTTP Methods: Use standard HTTP verbs for actions: GET (read), POST (create), PUT/PATCH (update), DELETE (remove).
Uniform Interface: Consistent structure and naming conventions help developers understand and use your API easily.
Representation: Resources are typically represented using JSON or XML.
Best Practices for RESTful API Design
1. Use Nouns in URIs
URIs should represent resources, not actions. Example:✅ /users❌ /getUsers
2. Use HTTP Methods Correctly
GET /users → Get list of users
GET /users/1 → Get user with ID 1
POST /users → Create a new user
PUT /users/1 → Update user with ID 1
DELETE /users/1 → Delete user with ID 1
3. Return Proper HTTP Status Codes
200 OK → Successful request
201 Created → Resource created successfully
400 Bad Request → Client error
401 Unauthorized → Authentication failed
404 Not Found → Resource doesn’t exist
500 Internal Server Error → Server-side error
4. Use JSON as the Response Format
JSON is the most widely used and supported format. It’s readable by both humans and machines.
5. Version Your API
Always version your APIs to avoid breaking changes for clients when you update your codebase./api/v1/users
6. Use Pagination for Large Collections
For endpoints that return many items, use query parameters for pagination:/users?page=2&limit=20
7. Include Error Messages
Return helpful error messages to guide developers on how to fix their request: { "error": "Invalid input", "details": "Email address is required" }
8. Secure Your API
Use HTTPS to encrypt data in transit.
Implement authentication (e.g., OAuth2, JWT).
Validate inputs to prevent injection attacks.
Tools for API Development and Testing
Postman: Test and document your APIs.
Swagger/OpenAPI: Generate interactive API documentation.
Insomnia: Alternative to Postman for API testing.
Conclusion
Designing a RESTful API isn't just about making something that works — it's about making it intuitive, reliable, and secure. By following the principles and best practices outlined here, you'll create APIs that developers love to use and that can scale with your application.
0 notes
Text
Exploring Laravel’s Ecosystem: Top Tools and Packages You Should Use

Laravel has become one of the most popular PHP frameworks due to its elegant syntax, robust features, and a thriving ecosystem. If you're working with Laravel or considering it for your next project, exploring its extensive range of tools and packages is crucial to optimizing your development process. A Laravel Development Company can help you unlock the full potential of Laravel by implementing these tools effectively. Whether you're building a small website or a complex web application, understanding the tools available within Laravel's ecosystem can significantly improve both the development speed and the performance of your project.
The Laravel Ecosystem: A Treasure Trove of Tools
Laravel is not just a framework; it’s an entire ecosystem with various tools and packages that simplify everything from authentication to deployment. Laravel’s ecosystem is known for its simplicity, scalability, and ability to integrate with a variety of technologies. It’s designed to streamline development, making it easier for developers to build web applications quickly and efficiently.
One of the standout features of Laravel is Laravel Forge, a tool that simplifies server management, allowing developers to deploy applications with ease. Forge provides a robust solution for provisioning servers, configuring SSL, and monitoring server health. This tool eliminates the hassle of manual server management, enabling developers to focus on writing clean and efficient code.
Top Laravel Tools and Packages to Boost Your Productivity
Here are some essential tools and packages that you should consider when working with Laravel:
1. Laravel Nova
Nova is a beautifully designed administration panel for Laravel applications. It provides a clean and intuitive interface for managing the data in your application. Nova allows you to create custom dashboards, manage resources, and build complex relationships between different parts of your app.
It is ideal for Laravel developers who want to create powerful and customized admin panels without reinventing the wheel. As a package, Nova offers a flexible and highly configurable UI that can be tailored to fit your business needs.
2. Laravel Echo
For applications that require real-time features like notifications, chat, or activity feeds, Laravel Echo is an essential tool. Echo makes it easy to broadcast events from your application to clients in real time. It integrates seamlessly with WebSockets, so you can push updates to users without requiring them to refresh the page.
If your app demands live updates, whether for a messaging system, live notifications, or any other feature requiring real-time data, Echo is a must-have tool in your Laravel toolkit.
3. Laravel Passport
OAuth2 authentication is a common feature for many modern applications, especially those that require API-based access. Laravel Passport is a full OAuth2 server implementation for Laravel, providing a secure and straightforward way to manage API authentication.
Passport makes it simple to issue access tokens for your API and protect routes with OAuth2 security. It’s an essential package for developers building large-scale applications with API-driven architectures.
4. Laravel Horizon
Managing queues and jobs is a significant part of building scalable applications. Laravel Horizon is a powerful queue manager that provides a beautiful dashboard for monitoring and managing your queues. With Horizon, you can track job throughput, failures, and other crucial metrics that help ensure your queue system runs smoothly.
Horizon is particularly useful for applications that need to handle a high volume of tasks or background processes, such as processing payments or sending emails.
5. Laravel Mix
When it comes to asset compilation, Laravel Mix simplifies front-end workflow. Mix provides a clean API for defining Webpack build steps for your Laravel application, making it easier to manage CSS, JavaScript, and other assets.
With its seamless integration into Laravel, Mix allows you to compile and minify your assets with ease, helping you improve the performance and user experience of your application.
6. Spatie Packages
Spatie is a renowned company within the Laravel community that has created a wide array of useful packages. Some of their most popular packages include Laravel Permission for role-based access control, Laravel Media Library for handling file uploads, and Laravel Activitylog for tracking user activity.
Spatie’s tools are known for their reliability and ease of use, making them excellent choices for developers who want to extend Laravel’s functionality without reinventing the wheel.
7. Laravel Scout
If your application needs full-text search capabilities, Laravel Scout is the go-to solution. Scout provides a simple, driver-based solution for adding full-text search to your models. It works with several popular search engines like Algolia and TNTSearch.
Using Scout, you can easily implement robust search functionality in your Laravel application without having to worry about the complexities of managing search indexes and queries.
Considering Mobile App Development? Don’t Forget the Cost
If you're planning to take your Laravel web application to the mobile platform, integrating a mobile app into your Laravel project is becoming increasingly popular. However, before diving into mobile app development, it's important to consider the mobile app cost calculator to understand the expenses involved.
Building a mobile app can range from a few thousand dollars to hundreds of thousands, depending on the features, platforms (iOS/Android), and the complexity of the app. A mobile app cost calculator can give you a rough estimate of the costs based on your desired features and functionalities, helping you make informed decisions about your project’s budget and scope.
If you’re unsure of how to proceed with your Laravel app and mobile development strategy, it’s always a good idea to consult a Laravel Development Company for expert advice and support.
If you're interested in exploring the benefits of Laravel development services for your business, we encourage you to book an appointment with our team of experts. Book an Appointment
Conclusion
The Laravel ecosystem is rich with tools and packages designed to streamline development, enhance functionality, and improve the overall user experience. From real-time events with Laravel Echo to managing queues with Laravel Horizon, these tools can help you build robust applications more efficiently.
If you’re looking for expert guidance or need help with your next project, consider leveraging Laravel App Development Services to ensure you’re utilizing the full power of the Laravel ecosystem. By working with professionals, you can save time and focus on what matters most—creating outstanding web applications.
0 notes
Text
OpenAI uses open source Ory to authenticate over 400M weekly active users
https://www.ory.sh/blog/openai-oauth2-server-open-source
1 note
·
View note
Text
Weak API Authentication in Laravel: How to Secure It
Introduction
API authentication is a critical aspect of securing web applications. In Laravel, APIs allow developers to connect with the backend while keeping things modular and efficient. However, when API authentication is weak or poorly implemented, it leaves the door open for attackers to exploit sensitive data.

In this post, we’ll explore the risks of weak API authentication in Laravel, how to identify vulnerabilities, and ways to secure your API endpoints. We’ll also guide you through a coding example and introduce a free tool for a website security test to help you identify API vulnerabilities on your site.
Why Weak API Authentication Is Dangerous
APIs are a primary target for cybercriminals due to the sensitive data they expose. When authentication methods are weak, such as using insecure or predictable tokens, attackers can easily bypass security mechanisms and gain unauthorized access to your backend systems.
Here’s why weak API authentication is dangerous:
Data Breaches: Hackers can access user data, financial information, or any sensitive data stored in your database.
Unauthorized API Calls: Without proper authentication, malicious users can make API requests on behalf of authenticated users.
Denial of Service Attacks: Exploiting weak authentication can allow attackers to overload your systems or take them down entirely.
Common Causes of Weak API Authentication
Some common causes of weak API authentication include:
Using Default Tokens: Laravel provides several ways to authenticate APIs, but many developers still use the default tokens or insecure methods.
No Token Expiration: Not setting an expiration time for API tokens can lead to long-term vulnerabilities.
Insecure Password Storage: If you store passwords in plain text or use weak hashing algorithms, hackers can easily retrieve them.
Improper Rate Limiting: Failing to limit the number of API requests from a user can lead to brute-force attacks.
How to Secure API Authentication in Laravel
Here, we’ll walk you through securing your API authentication in Laravel, step by step, using modern techniques.
1. Use Laravel Passport for OAuth Authentication
Laravel Passport provides a complete OAuth2 server implementation for your Laravel application. It is the most secure and robust way to handle API authentication.
To install Laravel Passport, follow these steps:
composer require laravel/passport php artisan migrate php artisan passport:install
After installation, you need to configure the AuthServiceProvider to use Passport:
use Laravel\Passport\Passport; public function boot() { Passport::routes(); }
Then, update your api guard in config/auth.php to use Passport:
'guards' => [ 'api' => [ 'driver' => 'passport', 'provider' => 'users', ], ],
Now, you can authenticate users using OAuth tokens, which provides a much higher level of security.
2. Enable Token Expiration
Another important step is ensuring that API tokens expire after a certain period. By default, tokens generated by Passport are long-lived, but you can customize their expiration time.
To set token expiration, update the config/passport.php file:
'personal_access_tokens_expire_in' => now()->addDays(7),
This will ensure that tokens expire after 7 days, requiring users to re-authenticate.
3. Use Strong Hashing for Passwords
Make sure that you store passwords securely using bcrypt or Argon2 hashing. Laravel automatically hashes passwords using bcrypt, but you can configure it to use Argon2 as well in config/hashing.php:
'driver' => 'argon2i',
4. Implement Rate Limiting
To prevent brute-force attacks, you should implement rate limiting for your API. Laravel has a built-in rate limiting feature that you can enable easily in routes/api.php:
Route::middleware('throttle:60,1')->get('/user', function (Request $request) { return $request->user(); });
This will limit the API requests to 60 per minute, helping to prevent excessive login attempts.
Testing Your API Security
After implementing the above security measures, it's important to test your API for vulnerabilities. Use our Website Vulnerability Scanner to check your website’s API security and identify any weaknesses in your authentication methods.

Screenshot of the free tools webpage where you can access security assessment tools.
Conclusion
Securing API authentication in Laravel is crucial for preventing unauthorized access and protecting sensitive user data. By using OAuth tokens, setting expiration times, applying strong password hashing, and implementing rate limiting, you can significantly enhance your API security.
If you’re unsure about the security of your website or API, try out our Free Website Security Scanner tool to perform a vulnerability assessment.

An Example of a vulnerability assessment report generated with our free tool, providing insights into possible vulnerabilities.
For more security tips and updates, visit our blog at Pentest Testing Corp.
0 notes
Text
Azure Data Factory for Healthcare Data Workflows

Introduction
Azure Data Factory (ADF) is a cloud-based ETL (Extract, Transform, Load) service that enables healthcare organizations to automate data movement, transformation, and integration across multiple sources. ADF is particularly useful for handling electronic health records (EHRs), HL7/FHIR data, insurance claims, and real-time patient monitoring data while ensuring compliance with HIPAA and other healthcare regulations.
1. Why Use Azure Data Factory in Healthcare?
✅ Secure Data Integration — Connects to EHR systems (e.g., Epic, Cerner), cloud databases, and APIs securely. ✅ Data Transformation — Supports mapping, cleansing, and anonymizing sensitive patient data. ✅ Compliance — Ensures data security standards like HIPAA, HITRUST, and GDPR. ✅ Real-time Processing — Can ingest and process real-time patient data for analytics and AI-driven insights. ✅ Cost Optimization — Pay-as-you-go model, eliminating infrastructure overhead.
2. Healthcare Data Sources Integrated with ADF

3. Healthcare Data Workflow with Azure Data Factory
Step 1: Ingesting Healthcare Data
Batch ingestion (EHR, HL7, FHIR, CSV, JSON)
Streaming ingestion (IoT sensors, real-time patient monitoring)
Example: Ingest HL7/FHIR data from an APIjson{ "source": { "type": "REST", "url": "https://healthcare-api.com/fhir", "authentication": { "type": "OAuth2", "token": "<ACCESS_TOKEN>" } }, "sink": { "type": "AzureBlobStorage", "path": "healthcare-data/raw" } }
Step 2: Data Transformation in ADF
Using Mapping Data Flows, you can:
Convert HL7/FHIR JSON to structured tables
Standardize ICD-10 medical codes
Encrypt or de-identify PHI (Protected Health Information)
Example: SQL Query for Data Transformationsql SELECT patient_id, diagnosis_code, UPPER(first_name) AS first_name, LEFT(ssn, 3) + 'XXX-XXX' AS masked_ssn FROM raw_healthcare_data;
Step 3: Storing Processed Healthcare Data
Processed data can be stored in: ✅ Azure Data Lake (for large-scale analytics) ✅ Azure SQL Database (for structured storage) ✅ Azure Synapse Analytics (for research & BI insights)
Example: Writing transformed data to a SQL Databasejson{ "type": "AzureSqlDatabase", "connectionString": "Server=tcp:healthserver.database.windows.net;Database=healthDB;", "query": "INSERT INTO Patients (patient_id, name, diagnosis_code) VALUES (?, ?, ?)" }
Step 4: Automating & Monitoring Healthcare Pipelines
Trigger ADF Pipelines daily/hourly or based on event-driven logic
Monitor execution logs in Azure Monitor
Set up alerts for failures & anomalies
Example: Create a pipeline trigger to refresh data every 6 hoursjson{ "type": "ScheduleTrigger", "recurrence": { "frequency": "Hour", "interval": 6 }, "pipeline": "healthcare_data_pipeline" }
4. Best Practices for Healthcare Data in ADF
🔹 Use Azure Key Vault to securely store API keys & database credentials. 🔹 Implement Data Encryption (using Azure Managed Identity). 🔹 Optimize ETL Performance by using Partitioning & Incremental Loads. 🔹 Enable Data Lineage in Azure Purview for audit trails. 🔹 Use Databricks or Synapse Analytics for AI-driven predictive healthcare analytics.
5. Conclusion
Azure Data Factory is a powerful tool for automating, securing, and optimizing healthcare data workflows. By integrating with EHRs, APIs, IoT devices, and cloud storage, ADF helps healthcare providers improve patient care, optimize operations, and ensure compliance with industry regulations.
WEBSITE: https://www.ficusoft.in/azure-data-factory-training-in-chennai/
0 notes
Text
Essential Components of a Production Microservice Application
DevOps Automation Tools and modern practices have revolutionized how applications are designed, developed, and deployed. Microservice architecture is a preferred approach for enterprises, IT sectors, and manufacturing industries aiming to create scalable, maintainable, and resilient applications. This blog will explore the essential components of a production microservice application, ensuring it meets enterprise-grade standards.
1. API Gateway
An API Gateway acts as a single entry point for client requests. It handles routing, composition, and protocol translation, ensuring seamless communication between clients and microservices. Key features include:
Authentication and Authorization: Protect sensitive data by implementing OAuth2, OpenID Connect, or other security protocols.
Rate Limiting: Prevent overloading by throttling excessive requests.
Caching: Reduce response time by storing frequently accessed data.
Monitoring: Provide insights into traffic patterns and potential issues.
API Gateways like Kong, AWS API Gateway, or NGINX are widely used.
Mobile App Development Agency professionals often integrate API Gateways when developing scalable mobile solutions.
2. Service Registry and Discovery
Microservices need to discover each other dynamically, as their instances may scale up or down or move across servers. A service registry, like Consul, Eureka, or etcd, maintains a directory of all services and their locations. Benefits include:
Dynamic Service Discovery: Automatically update the service location.
Load Balancing: Distribute requests efficiently.
Resilience: Ensure high availability by managing service health checks.
3. Configuration Management
Centralized configuration management is vital for managing environment-specific settings, such as database credentials or API keys. Tools like Spring Cloud Config, Consul, or AWS Systems Manager Parameter Store provide features like:
Version Control: Track configuration changes.
Secure Storage: Encrypt sensitive data.
Dynamic Refresh: Update configurations without redeploying services.
4. Service Mesh
A service mesh abstracts the complexity of inter-service communication, providing advanced traffic management and security features. Popular service mesh solutions like Istio, Linkerd, or Kuma offer:
Traffic Management: Control traffic flow with features like retries, timeouts, and load balancing.
Observability: Monitor microservice interactions using distributed tracing and metrics.
Security: Encrypt communication using mTLS (Mutual TLS).
5. Containerization and Orchestration
Microservices are typically deployed in containers, which provide consistency and portability across environments. Container orchestration platforms like Kubernetes or Docker Swarm are essential for managing containerized applications. Key benefits include:
Scalability: Automatically scale services based on demand.
Self-Healing: Restart failed containers to maintain availability.
Resource Optimization: Efficiently utilize computing resources.
6. Monitoring and Observability
Ensuring the health of a production microservice application requires robust monitoring and observability. Enterprises use tools like Prometheus, Grafana, or Datadog to:
Track Metrics: Monitor CPU, memory, and other performance metrics.
Set Alerts: Notify teams of anomalies or failures.
Analyze Logs: Centralize logs for troubleshooting using ELK Stack (Elasticsearch, Logstash, Kibana) or Fluentd.
Distributed Tracing: Trace request flows across services using Jaeger or Zipkin.
Hire Android App Developers to ensure seamless integration of monitoring tools for mobile-specific services.
7. Security and Compliance
Securing a production microservice application is paramount. Enterprises should implement a multi-layered security approach, including:
Authentication and Authorization: Use protocols like OAuth2 and JWT for secure access.
Data Encryption: Encrypt data in transit (using TLS) and at rest.
Compliance Standards: Adhere to industry standards such as GDPR, HIPAA, or PCI-DSS.
Runtime Security: Employ tools like Falco or Aqua Security to detect runtime threats.
8. Continuous Integration and Continuous Deployment (CI/CD)
A robust CI/CD pipeline ensures rapid and reliable deployment of microservices. Using tools like Jenkins, GitLab CI/CD, or CircleCI enables:
Automated Testing: Run unit, integration, and end-to-end tests to catch bugs early.
Blue-Green Deployments: Minimize downtime by deploying new versions alongside old ones.
Canary Releases: Test new features on a small subset of users before full rollout.
Rollback Mechanisms: Quickly revert to a previous version in case of issues.
9. Database Management
Microservices often follow a database-per-service model to ensure loose coupling. Choosing the right database solution is critical. Considerations include:
Relational Databases: Use PostgreSQL or MySQL for structured data.
NoSQL Databases: Opt for MongoDB or Cassandra for unstructured data.
Event Sourcing: Leverage Kafka or RabbitMQ for managing event-driven architectures.
10. Resilience and Fault Tolerance
A production microservice application must handle failures gracefully to ensure seamless user experiences. Techniques include:
Circuit Breakers: Prevent cascading failures using tools like Hystrix or Resilience4j.
Retries and Timeouts: Ensure graceful recovery from temporary issues.
Bulkheads: Isolate failures to prevent them from impacting the entire system.
11. Event-Driven Architecture
Event-driven architecture improves responsiveness and scalability. Key components include:
Message Brokers: Use RabbitMQ, Kafka, or AWS SQS for asynchronous communication.
Event Streaming: Employ tools like Kafka Streams for real-time data processing.
Event Sourcing: Maintain a complete record of changes for auditing and debugging.
12. Testing and Quality Assurance
Testing in microservices is complex due to the distributed nature of the architecture. A comprehensive testing strategy should include:
Unit Tests: Verify individual service functionality.
Integration Tests: Validate inter-service communication.
Contract Testing: Ensure compatibility between service APIs.
Chaos Engineering: Test system resilience by simulating failures using tools like Gremlin or Chaos Monkey.
13. Cost Management
Optimizing costs in a microservice environment is crucial for enterprises. Considerations include:
Autoscaling: Scale services based on demand to avoid overprovisioning.
Resource Monitoring: Use tools like AWS Cost Explorer or Kubernetes Cost Management.
Right-Sizing: Adjust resources to match service needs.
Conclusion
Building a production-ready microservice application involves integrating numerous components, each playing a critical role in ensuring scalability, reliability, and maintainability. By adopting best practices and leveraging the right tools, enterprises, IT sectors, and manufacturing industries can achieve operational excellence and deliver high-quality services to their customers.
Understanding and implementing these essential components, such as DevOps Automation Tools and robust testing practices, will enable organizations to fully harness the potential of microservice architecture. Whether you are part of a Mobile App Development Agency or looking to Hire Android App Developers, staying ahead in today’s competitive digital landscape is essential.
0 notes
Text
MCP Toolbox for Databases Simplifies AI Agent Data Access

AI Agent Access to Enterprise Data Made Easy with MCP Toolbox for Databases
Google Cloud Next 25 showed organisations how to develop multi-agent ecosystems using Vertex AI and Google Cloud Databases. Agent2Agent Protocol and Model Context Protocol increase agent interactions. Due to developer interest in MCP, we're offering MCP Toolbox for Databases (formerly Gen AI Toolbox for Databases) easy to access your company data in databases. This advances standardised and safe agentic application experimentation.
Previous names: Gen AI Toolbox for Databases, MCP Toolbox
Developers may securely and easily interface new AI agents to business data using MCP Toolbox for Databases (Toolbox), an open-source MCP server. Anthropic created MCP, an open standard that links AI systems to data sources without specific integrations.
Toolbox can now generate tools for self-managed MySQL and PostgreSQL, Spanner, Cloud SQL for PostgreSQL, Cloud SQL for MySQL, and AlloyDB for PostgreSQL (with Omni). As an open-source project, it uses Neo4j and Dgraph. Toolbox integrates OpenTelemetry for end-to-end observability, OAuth2 and OIDC for security, and reduced boilerplate code for simpler development. This simplifies, speeds up, and secures tool creation by managing connection pooling, authentication, and more.
MCP server Toolbox provides the framework needed to construct production-quality database utilities and make them available to all clients in the increasing MCP ecosystem. This compatibility lets agentic app developers leverage Toolbox and reliably query several databases using a single protocol, simplifying development and improving interoperability.
MCP Toolbox for Databases supports ATK
The Agent Development Kit (ADK), an open-source framework that simplifies complicated multi-agent systems while maintaining fine-grained agent behaviour management, was later introduced. You can construct an AI agent using ADK in under 100 lines of user-friendly code. ADK lets you:
Orchestration controls and deterministic guardrails affect agents' thinking, reasoning, and collaboration.
ADK's patented bidirectional audio and video streaming features allow human-like interactions with agents with just a few lines of code.
Choose your preferred deployment or model. ADK supports your stack, whether it's your top-tier model, deployment target, or remote agent interface with other frameworks. ADK also supports the Model Context Protocol (MCP), which secures data source-AI agent communication.
Release to production using Vertex AI Agent Engine's direct interface. This reliable and transparent approach from development to enterprise-grade deployment eliminates agent production overhead.
Add LangGraph support
LangGraph offers essential persistence layer support with checkpointers. This helps create powerful, stateful agents that can complete long tasks or resume where they left off.
For state storage, Google Cloud provides integration libraries that employ powerful managed databases. The following are developer options:
Access the extremely scalable AlloyDB for PostgreSQL using the langchain-google-alloydb-pg-python library's AlloyDBSaver class, or pick
Cloud SQL for PostgreSQL utilising langchain-google-cloud-sql-pg-python's PostgresSaver checkpointer.
With Google Cloud's PostgreSQL performance and management, both store and load agent execution states easily, allowing operations to be halted, resumed, and audited with dependability.
When assembling a graph, a checkpointer records a graph state checkpoint at each super-step. These checkpoints are saved in a thread accessible after graph execution. Threads offer access to the graph's state after execution, enabling fault-tolerance, memory, time travel, and human-in-the-loop.
#technology#technews#govindhtech#news#technologynews#MCP Toolbox for Databases#AI Agent Data Access#Gen AI Toolbox for Databases#MCP Toolbox#Toolbox for Databases#Agent Development Kit
0 notes
Text
25 Chat GPT Prompts for Full-Stack Developers
Today, full-stack developers have a lot to handle. They work with tools like Node.js, React, and MongoDB to build websites and apps. These tools help developers create powerful applications, but they also come with challenges. That’s where ChatGPT can come in to help. ChatGPT makes your job easier by solving problems, speeding up tasks, and even writing code for you.
In this post, we’ll show 25 ChatGPT prompts that full-stack developers can use to speed up their work. Each prompt helps you solve common development issues across backend, frontend, and database management tasks.
Backend Development with ChatGPT Prompts for Node.js
1. Debugging Node.js Apps
When your app runs slowly or isn’t working right, finding the problem can take a lot of time. ChatGPT can help you find and fix these issues quickly.
ChatGPT Prompt:
“Help me debug a performance issue in my Node.js app related to MongoDB queries.”
2. Generate Node.js Code Faster
Writing the same type of code over and over is boring. ChatGPT can generate this basic code for you, saving you time.
ChatGPT Prompt:
“Generate a REST API boilerplate with authentication using Node.js and Express.”
3. Speed Up MongoDB Queries
Sometimes, MongoDB searches (called “queries”) take too long. ChatGPT can suggest ways to make these searches faster.
ChatGPT Prompt:
“How can I optimize a MongoDB aggregation pipeline to reduce query execution time in large datasets?”
4. Build Secure APIs
APIs help different parts of your app talk to each other. Keeping them secure is important. ChatGPT can guide you to make sure your APIs are safe.
ChatGPT Prompt:
“Help me design a secure authentication flow with JWT for a multi-tenant SaaS app using Node.js.”
5. Handle Real-Time Data with WebSockets
When you need real-time updates (like chat messages or notifications), WebSockets are the way to go. ChatGPT can help you set them up easily.
ChatGPT Prompt:
“Help me set up real-time notifications in my Node.js app using WebSockets and React.”
Frontend Development with ChatGPT Prompts for React
6. Improve React Component Performance
Sometimes React components can be slow, causing your app to lag. ChatGPT can suggest ways to make them faster.
ChatGPT Prompt:
“Can you suggest improvements to enhance the performance of this React component?”
7. Use Code Splitting and Lazy Loading
These techniques help your app load faster by only loading the parts needed at that time. ChatGPT can help you apply these techniques correctly.
ChatGPT Prompt:
“How can I implement lazy loading and code splitting in my React app?”
8. Manage State in React Apps
State management helps you keep track of things like user data in your app. ChatGPT can guide you on the best ways to do this.
ChatGPT Prompt:
“Explain how to implement Redux with TypeScript in a large-scale React project for better state management.”
9. Set Up User Authentication
Logging users in and keeping their data safe is important. ChatGPT can help set up OAuth2 and other secure login systems.
ChatGPT Prompt:
“Help me set up Google OAuth2 authentication in my Node.js app using Passport.js.”
10. Use Server-Side Rendering for Better SEO
Server-side rendering (SSR) makes your app faster and improves SEO, which means it ranks higher in Google searches. ChatGPT can help you set up SSR with Next.js.
ChatGPT Prompt:
“How do I implement server-side rendering (SSR) in my React app using Next.js?”
Database Management with ChatGPT Prompts for MongoDB
11. Speed Up MongoDB Searches with Indexing
Indexing helps MongoDB find data faster. ChatGPT can help you set up the right indexes to improve performance.
ChatGPT Prompt:
“How can I optimize MongoDB indexes to improve query performance in a large collection with millions of records?”
12. Write MongoDB Aggregation Queries
ChatGPT can help write complex aggregation queries, which let you summarize data in useful ways (like creating reports).
ChatGPT Prompt:
“How can I use MongoDB’s aggregation framework to generate reports from a large dataset?”
13. Manage User Sessions with Redis
Handling lots of users at once can be tricky. ChatGPT can help you use Redis to manage user sessions and make sure everything runs smoothly.
ChatGPT Prompt:
“How can I implement session management using Redis in a Node.js app to handle multiple concurrent users?”
14. Handle Large File Uploads
When your app lets users upload large files, you need to store them in a way that’s fast and secure. ChatGPT can help you set this up.
ChatGPT Prompt:
“What’s the best way to handle large file uploads in a Node.js app and store file metadata in MongoDB?”
15. Automate MongoDB Schema Migrations
When you change how your database is organized (called schema migration), ChatGPT can help ensure it’s done without errors.
ChatGPT Prompt:
“How can I implement database migrations in a Node.js project using MongoDB?”
Boost Productivity with ChatGPT Prompts for CI/CD Pipelines
16. Set Up a CI/CD Pipeline
CI/CD pipelines help automate the process of testing and deploying code. ChatGPT can help you set up a smooth pipeline to save time.
ChatGPT Prompt:
“Guide me through setting up a CI/CD pipeline for my Node.js app using GitHub Actions and Docker.”
17. Secure Environment Variables
Environment variables hold important info like API keys. ChatGPT can help you manage these safely so no one else can see them.
ChatGPT Prompt:
“How can I securely manage environment variables in a Node.js app using dotenv?”
18. Automate Error Handling
When errors happen, it’s important to catch and fix them quickly. ChatGPT can help set up error handling to make sure nothing breaks without you knowing.
ChatGPT Prompt:
“What are the best practices for implementing centralized error handling in my Express.js app?”
19. Refactor Apps into Microservices
Breaking a large app into smaller, connected pieces (called microservices) can make it faster and easier to maintain. ChatGPT can help you do this.
ChatGPT Prompt:
“Show me how to refactor my monolithic Node.js app into microservices and ensure proper communication between services.”
20. Speed Up API Response Times
When APIs are slow, it can hurt your app’s performance. ChatGPT can help you find ways to make them faster.
ChatGPT Prompt:
“What are the strategies to reduce API response times in my Node.js app with MongoDB as the database?”
Common Web Development Questions Solved with ChatGPT Prompts
21. Real-Time Data with WebSockets
Handling real-time updates, like notifications, can be tricky. ChatGPT can help you set up WebSockets to make this easier.
ChatGPT Prompt:
“Help me set up real-time notifications in my Node.js app using WebSockets and React.”
22. Testing React Components
Testing makes sure your code works before you release it. ChatGPT can help you write unit tests for your React components.
ChatGPT Prompt:
“Show me how to write unit tests for my React components using Jest and React Testing Library.”
23. Paginate Large Datasets in MongoDB
Pagination splits large amounts of data into pages, making it easier to load and display. ChatGPT can help set this up efficiently.
ChatGPT Prompt:
“How can I implement efficient server-side pagination in a Node.js app that fetches data from MongoDB?”
24. Manage Roles and Permissions
If your app has different types of users, you need to control what each type can do. ChatGPT can help you set up roles and permissions using JWT.
ChatGPT Prompt:
“Guide me through setting up role-based access control (RBAC) in a Node.js app using JWT.”
25. Implement Caching with Redis
Caching stores data temporarily so it can be accessed quickly later. ChatGPT can help you set up caching to make your app faster.
ChatGPT Prompt:
“Guide me through implementing Redis caching in a Node.js app to reduce database load.”
Conclusion: Use ChatGPT Prompts for Smarter Web Development
ChatGPT makes it easier for developers to manage their work. Whether you’re building with Node.js, React, or MongoDB, ChatGPT can help with debugging, writing code, and improving performance.
Using ChatGPT prompts can help you work smarter, not harder!
1 note
·
View note
Text
Why Laravel is Ideal for SaaS Development: Key Benefits and Cost Advantages

Rapid Development and Prototyping Laravel's expressive syntax and extensive libraries allow developers to quickly build and prototype SaaS applications. The framework provides built-in tools like Laravel Forge and Laravel Vapor, which simplify server management and deployment processes, reducing development time and accelerating time-to-market.
Scalability and Performance SaaS applications often need to handle varying loads and user demands. Laravel supports horizontal scaling, allowing your application to scale easily as user demand grows. It integrates seamlessly with cloud services like AWS, Google Cloud, and Microsoft Azure, enabling robust, scalable solutions that maintain high performance under heavy load.
Security Features Security is paramount in SaaS applications, and Laravel comes with built-in security features such as protection against SQL injection, cross-site scripting (XSS), and cross-site request forgery (CSRF). Additionally, Laravel offers encryption protocols and secure authentication methods, ensuring your application meets the highest security standards.
Modular and Clean Architecture Laravel follows the Model-View-Controller (MVC) architecture, which promotes a clean separation of concerns and makes the codebase modular. This modularity is especially beneficial for SaaS applications, which often require frequent updates and feature expansions. Developers can easily maintain and extend the application without refactoring the entire codebase.
Extensive Ecosystem and Community Support Laravel boasts a rich ecosystem, including packages and libraries that add functionality and reduce development effort. Tools like Laravel Nova for admin panels and Laravel Cashier for handling subscription billing are specifically useful for SaaS applications. Moreover, Laravel has a vibrant community, offering extensive support and regular updates.
Seamless API Integration SaaS applications often rely on third-party services and need robust API integrations. Laravel simplifies API development with built-in support for RESTful routing, API authentication, and Laravel Passport for OAuth2 server implementation. This makes it easier to integrate with various services and enhances the flexibility of your SaaS product.
Laravel stands out as an ideal framework for SaaS development due to its rapid Laravel development capabilities, scalability, security, modular architecture, and cost advantages. Whether you are a startup or an established business, leveraging Laravel for your SaaS application can lead to substantial benefits in terms of both functionality and cost efficiency.
Read more: https://nectarbits.ca/blog/why-laravel-is-ideal-for-saas-development-key-benefits-and-cost-advantages
0 notes
Text
Microservices Programming

Microservices architecture is revolutionizing the way modern software is built. Instead of a single monolithic application, microservices break down functionality into small, independent services that communicate over a network. This approach brings flexibility, scalability, and easier maintenance. In this post, we’ll explore the core concepts of microservices and how to start programming with them.
What Are Microservices?
Microservices are a software development technique where an application is composed of loosely coupled, independently deployable services. Each service focuses on a specific business capability and communicates with others through lightweight APIs, usually over HTTP or messaging queues.
Why Use Microservices?
Scalability: Scale services independently based on load.
Flexibility: Use different languages or technologies for different services.
Faster Development: Small teams can build, test, and deploy services independently.
Resilience: Failure in one service doesn't crash the entire system.
Better Maintainability: Easier to manage, update, and test smaller codebases.
Key Components of Microservices Architecture
Services: Individual, self-contained units with specific functionality.
API Gateway: Central access point that routes requests to appropriate services.
Service Discovery: Automatically locates services within the system (e.g., Eureka, Consul).
Load Balancing: Distributes incoming traffic across instances (e.g., Nginx, HAProxy).
Containerization: Deploy services in isolated environments (e.g., Docker, Kubernetes).
Messaging Systems: Allow asynchronous communication (e.g., RabbitMQ, Apache Kafka).
Popular Tools and Frameworks
Spring Boot + Spring Cloud (Java): Full-stack support for microservices.
Express.js (Node.js): Lightweight framework for building RESTful services.
FastAPI (Python): High-performance framework ideal for microservices.
Docker: Container platform for packaging and running services.
Kubernetes: Orchestrates and manages containerized microservices.
Example: A Simple Microservices Architecture
User Service: Manages user registration and authentication.
Product Service: Handles product listings and inventory.
Order Service: Manages order placement and status.
Each service runs on its own server or container, communicates through REST APIs, and has its own database to avoid tight coupling.
Best Practices for Microservices Programming
Keep services small and focused on a single responsibility.
Use versioned APIs to ensure backward compatibility.
Centralize logging and monitoring using tools like ELK Stack or Prometheus + Grafana.
Secure your APIs using tokens (JWT, OAuth2).
Automate deployments and CI/CD pipelines with tools like Jenkins, GitHub Actions, or GitLab CI.
Avoid shared databases between services — use event-driven architecture for coordination.
Challenges in Microservices
Managing communication and data consistency across services.
Increased complexity in deployment and monitoring.
Ensuring security between service endpoints.
Conclusion
Microservices programming is a powerful approach to building modern, scalable applications. While it introduces architectural complexity, the benefits in flexibility, deployment, and team autonomy make it an ideal choice for many large-scale projects. With the right tools and design patterns, you can unlock the full potential of microservices for your applications.
0 notes
Text
Oracle Apex Oauth2 Example

OAuth2 in Oracle APEX: A Practical Guide and Example
OAuth2 is a contemporary and secure authorization framework that allows third-party applications to access protected resources on behalf of a user. By implementing OAuth2 in Oracle APEX, you can provide controlled access to your APEX application’s data and functionality, enabling seamless integration with other services.
Why use OAuth2 with APEX?
Enhanced Security: OAuth2 offers a robust security layer compared to traditional username and password-based authentication. It uses tokens rather than directly passing user credentials.
Fine-grained Access Control: OAuth2 allows you to define specific scopes (permissions) determining the access level granted to third-party applications.
Improved User Experience: Users can conveniently authorize applications without repeatedly sharing their primary credentials.
Prerequisites
A basic understanding of Oracle APEX development
An Oracle REST Data Source (ORDS) instance, if you want to integrate with ORDS-defined REST APIs
Steps for Implementing OAuth2 in Oracle APEX
Create an OAuth2 Client:
Within your APEX workspace, navigate to Shared Components -> Web Credentials.
Click Create and select the OAuth2 Client type.
Provide a name, ID, client secret, and any necessary authorization scopes.
Obtain an Access Token:
The method for obtaining an access token will depend on the OAuth2 flow you choose (e.g., Client Credentials flow, Authorization Code flow).
Utilize the Access Token:
Include the access token in the Authorization header of your API requests to protected resources. Use the format: Bearer .
Example: Accessing an ORDS-based REST API
Let’s assume you have an ORDS-based REST API endpoint for fetching employee data that requires OAuth2 authentication. Here’s how you would configure APEX to interact with it:
Create a REST Data Source:
Go to Shared Components -> REST Data Sources.
Set the authentication type to OAuth2 Client Credentials Flow.
Enter your OAuth2 token endpoint URL, client ID, and client secret.
Use the REST Data Source in Your APEX Application:
Create APEX pages or components that utilize the REST Data Source to fetch and display employee data. APEX will automatically handle obtaining and using the access token.
Additional Considerations
Access Token Expiration: OAuth2 access tokens usually have expiration times. Implement logic to refresh access tokens before they expire.
OAuth2 Flows: Choose the most suitable OAuth2 flow for your integration use case. The Client Credentials flow is often used for server-to-server integrations, while the Authorization Code flow is more common for web applications where a user is directly involved.
youtube
You can find more information about Oracle Apex in this Oracle Apex Link
Conclusion:
Unogeeks is the No.1 IT Training Institute for Oracle Apex Training. Anyone Disagree? Please drop in a comment
You can check out our other latest blogs on Oracle Apex here – Oarcle Apex Blogs
You can check out our Best In Class Oracle Apex Details here – Oracle Apex Training
Follow & Connect with us:
———————————-
For Training inquiries:
Call/Whatsapp: +91 73960 33555
Mail us at: [email protected]
Our Website ➜ https://unogeeks.com
Follow us:
Instagram: https://www.instagram.com/unogeeks
Facebook: https://www.facebook.com/UnogeeksSoftwareTrainingInstitute
Twitter: https://twitter.com/unogeeks
0 notes