#painting timelapse
Note
i am so amazed by your art. it's so beautiful!! your rendering is so smooth, and your anatomy is perfect. the little details?? the lighting?? hellooo, it's so good!! i came from your satosugu fanart, but tbh everything you produce is beautiful. i am so interested in your process. could you show us how your sketches look? or do you jump straight in with painting? incredible work, you're a very underrated and talented artist. here's a cookie 🍪
Hello! Thank you so much for your compliments! I can share some sketches, and I'll try to upload a process video from one of the paintings that I posted here (never uploaded a video on tumblr before 🙈). Some sketches are more detailed than others, it depends on the mood and patience, but I always leave it for the painting process to refine and shape things. I don't really like sketching, haha, so I try to rush it as much as I can.
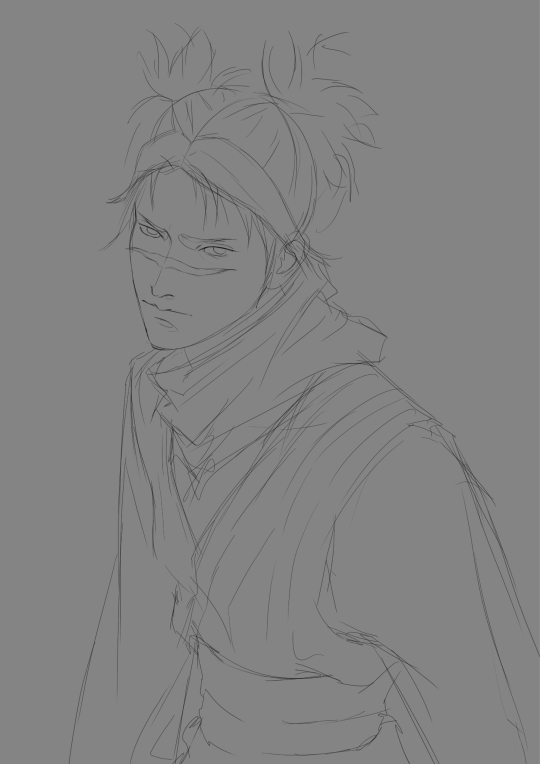

Lighting is my favourite thing to work with 🥰 I will ALWAYS recommend PortraitStudio app to all artists since it's of great help to me when it comes to light, as well posing and anatomy when I can't find a good ref image. Details are just me unwinding after the big part is over. it's like...decoration at the end. And rendering... I just really take forever with it 🙈
Thank you once again, I opened this profile not so long ago and I'm glad to see people enjoying my art because I am finally enjoying my art after so so many years ❤️
44 notes
·
View notes
Text
Some painting for the hell of it, Timelapse below the cut if you’re interested

#fhr#sidestep#fallen hero retribution#oc#fhr sidestep#character art#painting#painting timelapse#cerrísa becerra#cerrisa becerra#aka Beck
19 notes
·
View notes
Text
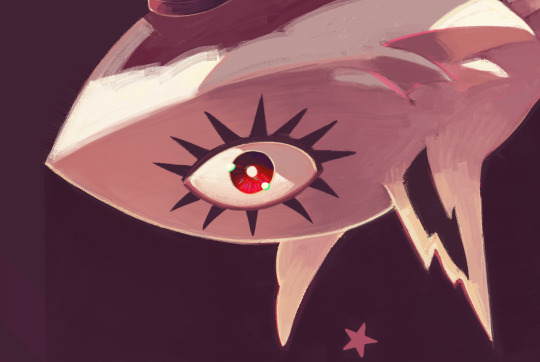
youtube
I made a little chill painting process video of Pica Stellari!
Find me and my art elsewhere!
#art video#art process#process video#painting video#painting timelapse#magpie#bird art#magpie art#magpie painting#artists on tumblr#Youtube
20 notes
·
View notes
Text


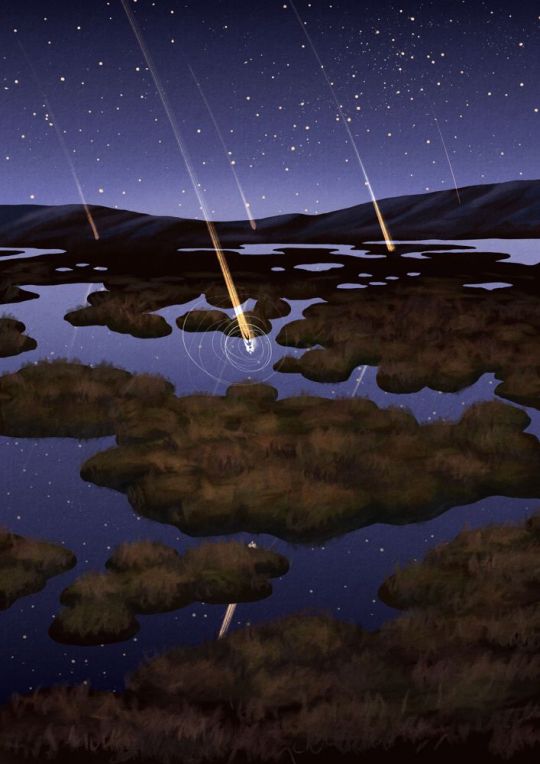
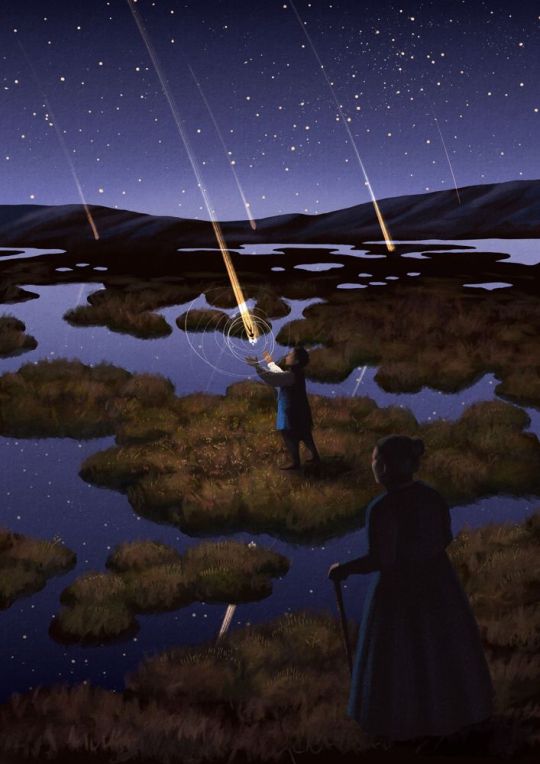
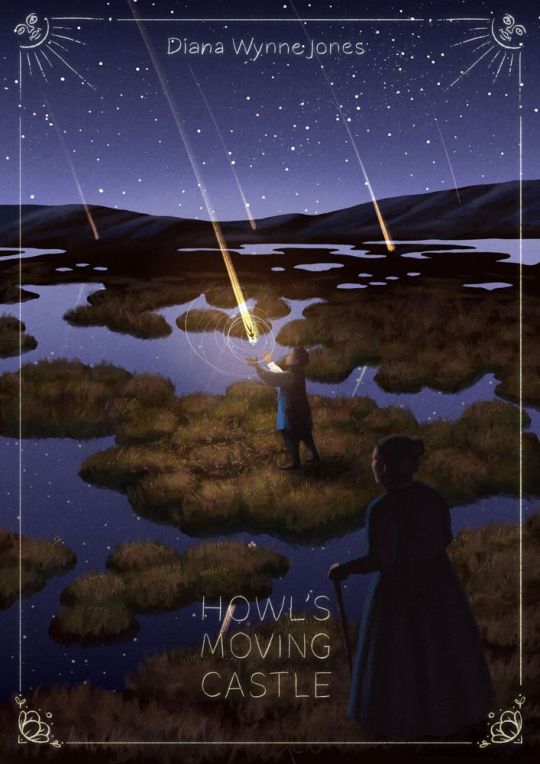
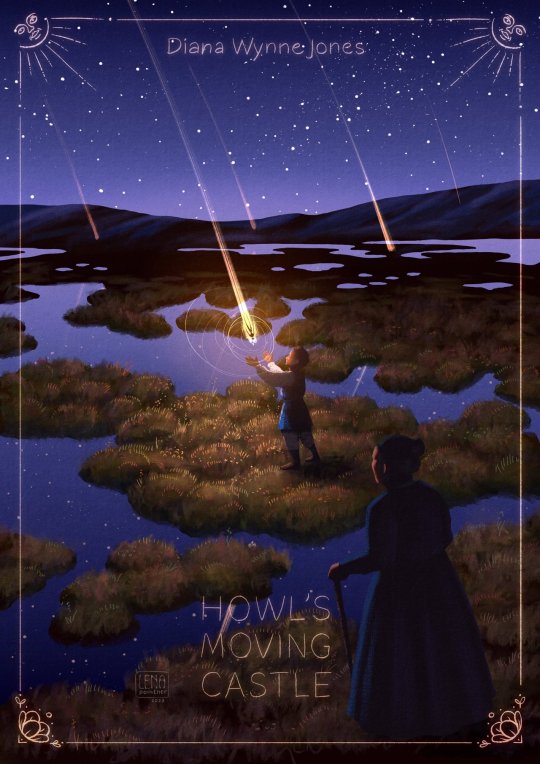
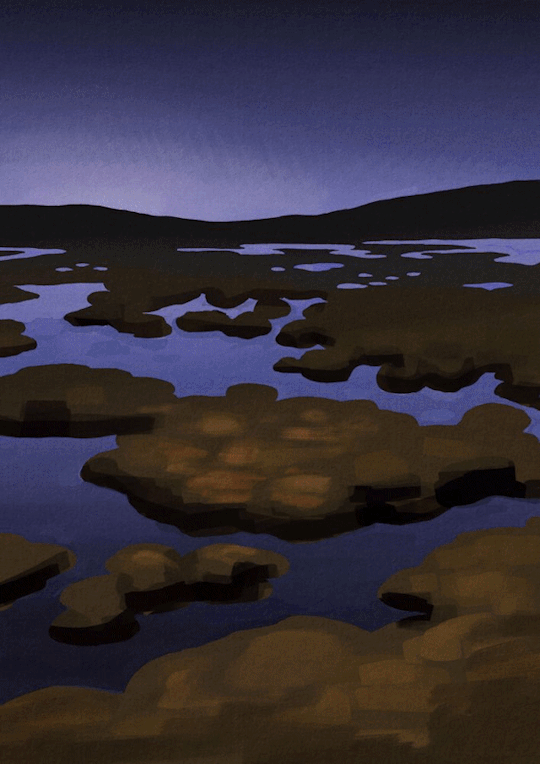
progress shots of this
#howl's moving castle#howls moving castle#diana wynne jones#painting timelapse#art timelapse#art process#timelapse
14 notes
·
View notes
Text
It's weird posting art reels. You never know what can happen
#art#art reels#artists on tumblr#discover new artists#speedpaint#speed paint#speed drawing#speeddrawing#drawing timelapse#painting timelapse#story of seasons fan art#story of seasons#story of seasons trio of towns#trio of towns#sos tot#illustrators on tumblr#anime illustrators#video games#fan art#video game fanart#video game fan art#xseed games#harvest moon#blaquepen
28 notes
·
View notes
Text

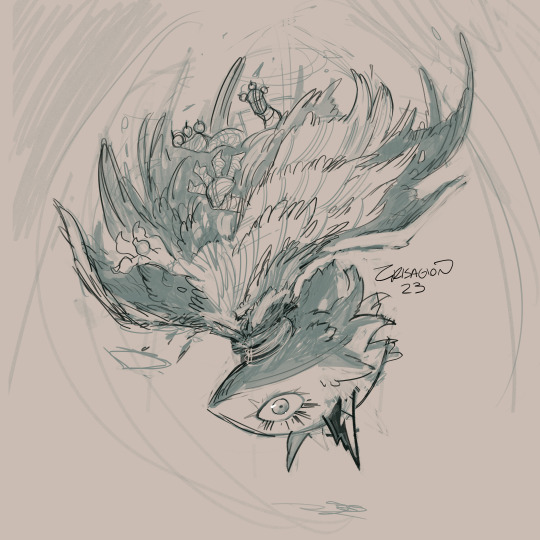
(Click/Fullscreen for a better view!)
Some friendly gift art for @lanternfishblues of their OC!
Thoughts and extras under the cut!
Mostly experimenting with these brushes by Zac Retz (the oil brushes in particular) with some of Rutkowski's brushes splashed in there.
Slower timelapse here:
youtube
Detail Shots:

Sketches:
Lots of fun experimentation here to get an interesting composition. I was dedicated to keeping the square canvas and began to mess with the sketches to create an interesting effect to work off of.

From that sketch, I started messing with gradient maps and tried to get some fun colors to build on.
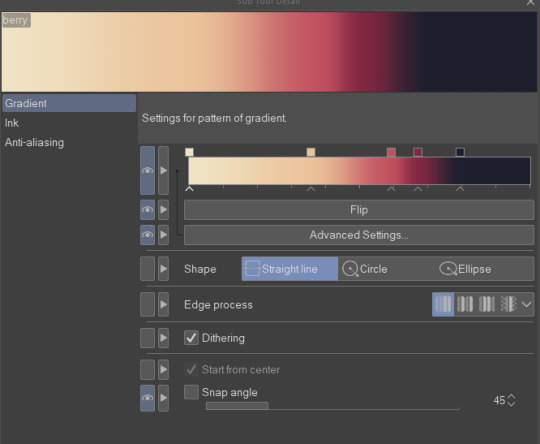
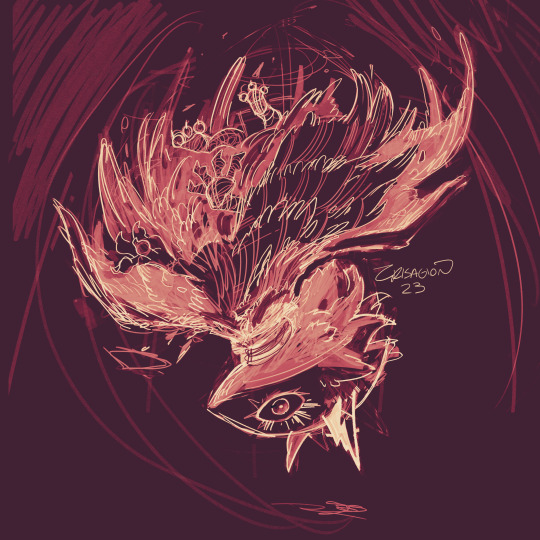
I ended up creating this yellow-red-dark blue after a while and began painting from here.
#video warning#flashing video#eye contact#digital painting#digital art#art#painting timelapse#timelapse#surreal#limited palette#zef draws#artists on tumblr#gift art#not my oc#speedpaint#Youtube
16 notes
·
View notes
Text
First layer of this Inuyasha painting is done✨ This is still a work in progress, it will probable be complete in about a month. I think after this I will want to try recreating the Fukai Mori ending.
Similar to the minecraft painting, I remembered I already have an Inuyasha song downloaded.🤗
#my art#my videos#art timelapse#inuyasha#inuyasha fanart#inuyasha anime#inuyasha x kagome#painting#acrylic painting#painting timelapse#art work in progress#inuyasha fandom#anime nostalgia#90s anime
10 notes
·
View notes
Text
Happy Pride History Month 🫶🏼🏳️🌈
Here’s a timelapse of a painting, inspired by my life-changing experience at my first ever pride festival last summer.

#lgbt pride#pride#pride art#pride month#acrylic painting#painting timelapse#lgbt history#lgbt history month#pride history month
9 notes
·
View notes
Text
Timelapse video of my art revenge on @silversynthesis with Levia Tabris 🧡
#dragon age#dragon age origins#art fight#art fight 2022#warden tabris#levia tabris#painting timelapse#alien turnip's art
316 notes
·
View notes
Text
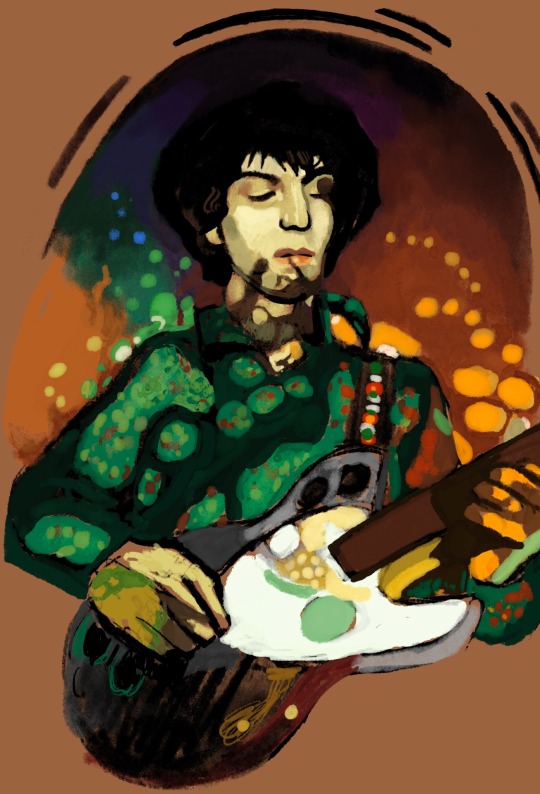
💎💎💎
Timelapse:
#Syd Barrett#Pink Floyd#digital painting#artists on tumblr#classic rock#my art#painting timelapse#photo study
11 notes
·
View notes
Text
I paint my own book covers for all of my stories! This is (most of) the time lapse for my most recent piece I made for my short story A Testament of Blood (Read It Here) I wrote for spooky season!
I made repaints of the mountains and some of the fur that is now the final book cover! I am hoping have small pocket-sized hardcovers made of this little short story.
#painting timelapse#short story#werewolves#werewolf#wulver#faoladh#folk horror#royal road#procreate#goosebumps#scotland#samhain#self publishing#book cover#horror fiction#halloween art
13 notes
·
View notes
Text
Here's a look at how I paint my characters!
This is my first desktop timelapse and I don't know what I'm doing, so it's kinda fugly. I couldn't crop out that black space on the right side, but it'll do. The total elapsed time here is about 5 and a half hours of work, squished here into about 7 minutes.
Anyway, I work in Adobe Photoshop. With these paintings, I don't do an underdrawing, I just jump right in with the paint, using the Lasso tool to create big shapes. Then, I fill in those big lasso shapes with the Paint Bucket. Once the big shapes are established, I grab a textured brush and start filling in the details, and shaping the form of the character with darker and lighter brush strokes that imply form shadow and light. I flip and rotate the canvas a bunch of times throughout my process so that I can make sure everything's nice and balanced.
I use the Lasso tool to also cut and move things like eyes and noses around, when I notice they're not quite in the right place. I also use the Lasso and Move tools to transform (enlarge/shrink/stretch) features until I like the result. On occasion I use the Warp tool to really change the shape of a selection.
On separate layers, I use soft brushes to create cast shadows and more form shadows. I clip them to the character layer beneath them, so that the shadows stay within the boundaries of the character. I play with the opacity of the shadow layers until I like the result, then I create a layer mask and paint out the shapes that I don't want to be in shadow, creating a nice edge between the shadow and the form that it's touching (that's hard to explain in words but it's shown in the video a few times). I do the same thing with light, though sometimes I set the layer to "Screen" if I want some highlights to really pop.
Finally, I use Image > Adjustments>Hue/Saturation or Replace Color to change colors and values if necessary. In this case, Cassie's arm warmers started out red, but I changed them to purple. That was done easily by selecting the red color with the Eyedropper, and opening Replace Color, then just playing with the sliders until I was happy with the result.
And there we have it! And as shown here, Cassie's last name used to be inspired by the band Hawthorne Heights! But after painting her, I really felt that was a better name for a hedgehog or something actually "thorny", rather than an opossum. It's funny how I also didn't realize that black and red wasn't the right color scheme for her until I was almost done with the painting. And so it goes!
#rock and roar#visual development#concept art#original character#art process#digital painting#painting timelapse#photoshop tutorial#artist process#fuck ai art
7 notes
·
View notes
Text
Anyone want a timelapse? From my last piece. This one’s not too chaotic (unlike most of my others 😅) and relatively short, so I thought I’d post it. :)
CW: flashing images
#dragon age#da2#dragon age 2#hawke#oc: gareth hawke#m!hawke#painting timelapse#da fanart#dragon age fanart
37 notes
·
View notes
Video
I’ve uploaded some of my Procreate time-lapses from 2022 to my Patreon in much higher resolution and slowed down so you can see all the details ✦
#art#illustration#timelapse#videos#art timelapse#drawing timelapse#painting timelapse#tiger#painting#artists on tumblr#wip#goatshrine#video art
33 notes
·
View notes
Text
Time-lapse of 'Squash_Wolf'
youtube
I just published the time-lapse video of 'Squash_Wolf' to Youtube for everyone to see. Enjoy!
#ganryuart#furry art#time lapse#speedpaint#traditional art#painting timelapse#painting process#Youtube
3 notes
·
View notes
Text
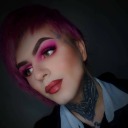
Here's an abridged version of my reel on instagram. I was even fortunate enough to remember I have a minecraft song already downloaded on my computer. Here's the completed painting 😊
It even glows in the dark!
#my art#my videos#minecraft#painting timelapse#art timelapse#timelapse#acrylic painting#acrylic paintings#minecraft creeper#mineblur#mineblr#minecraft art#minecraft fanart#minecraft ideas#minecraft lore#minecraft pc#minecraft builds#artwork#paintings#painting#creeper
45 notes
·
View notes
Last Seen Blogs

jclovemonth2020
Jiang Cheng Love Month 2020

mimoseneicapelli
Alaska

kaziee2
Background Person

gender-euphowrya
I will undoubtedly become me. No one else but me.
evirielofficial
Eviriel