#raspberrypizerow
Explore tagged Tumblr posts
Visit Tumblr Blog
Explore Tumblr blogs with no restrictions, modern design and the best experience.
Last Seen Tumblr Blogs


Fun Fact
Tumblr has a low social media market share in South America.
Photo


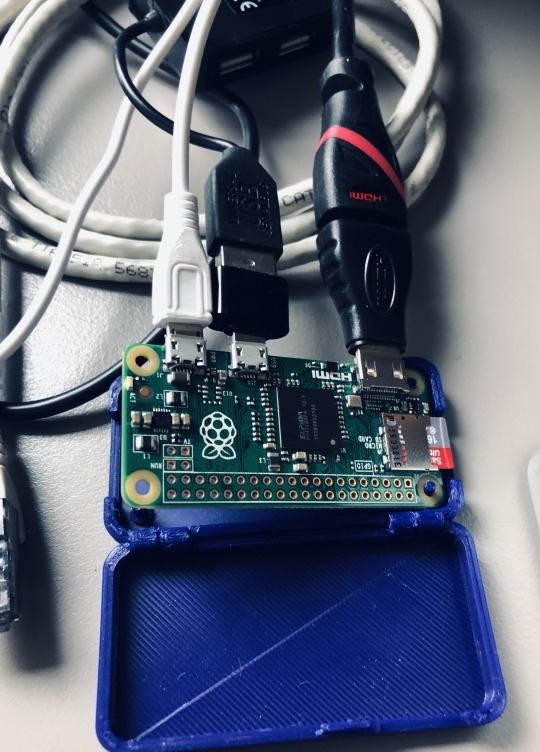
Another weekend has passed and I decided to get rid or the ugly cables connecting the raspberry pi zero to the 3d printer. For this to go well (in one end because the tri-gorilla doesn't output power in the usb-B port and in the other because the raspberry had the connections on the opposite side that I wanted) I decided to solder the 4 wires directly to the raspberry pi zero (2nd pic) and in the other end I used a female usb-b (so that I can still disconnect the whole thing easily when needed),solder the data- and data+ to the tri-gorilla and the power I connected to the aux 5v & gnd pins.
I would say the end result got pretty neat and now I'm not afraid anymore to tune the camera direction when printing since it's not so easy to disconnect the cables anymore :P
#2017#3d printer#raspberrypi zero#raspi zero#improvements#3dprinter#Anycubic#anycubicdeltaplus#raspberrypizerow
5 notes
·
View notes
Text
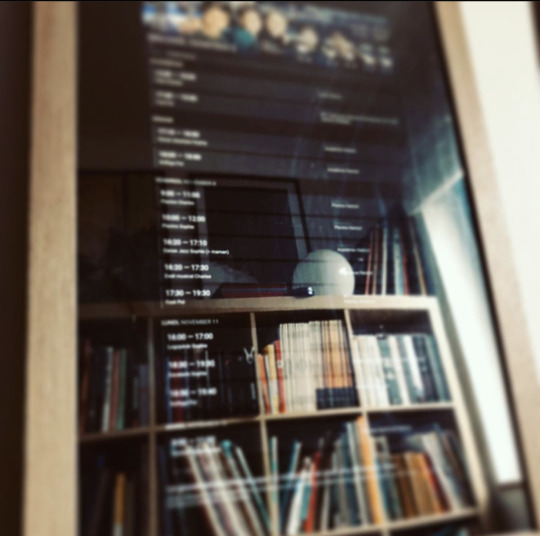
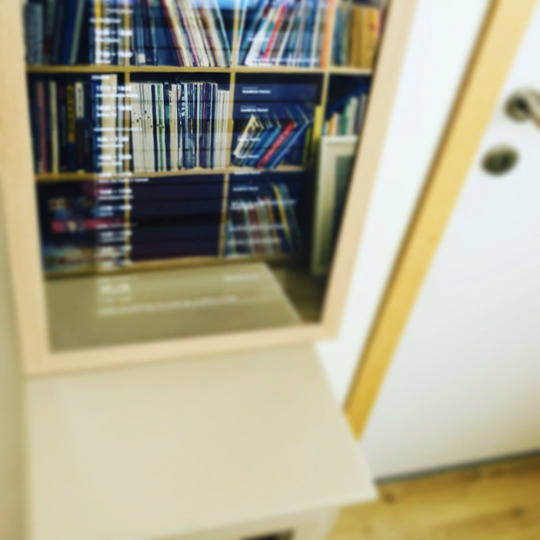
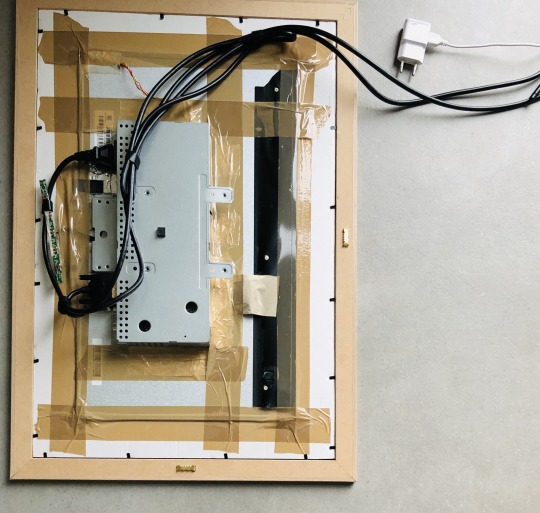
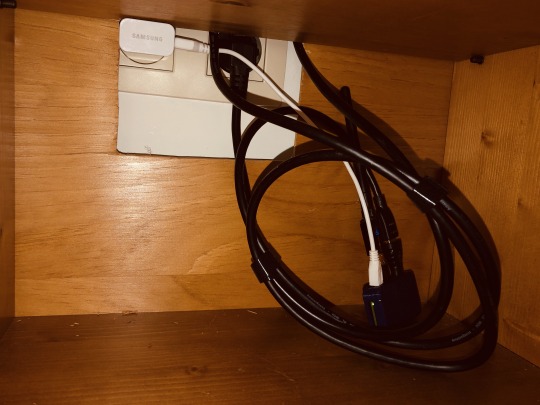
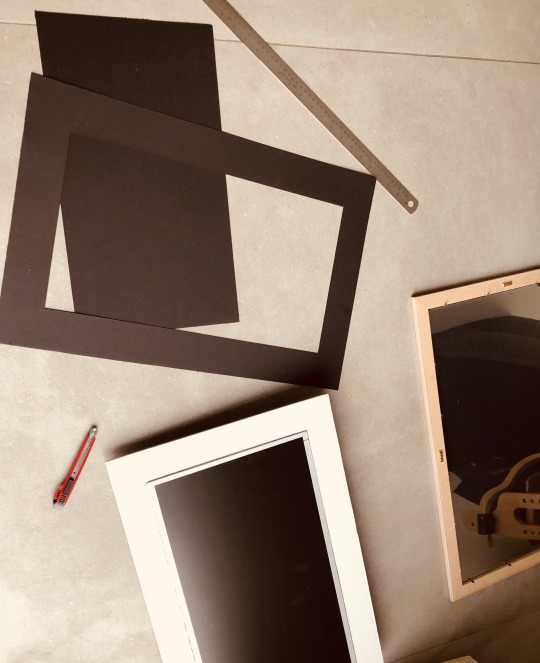
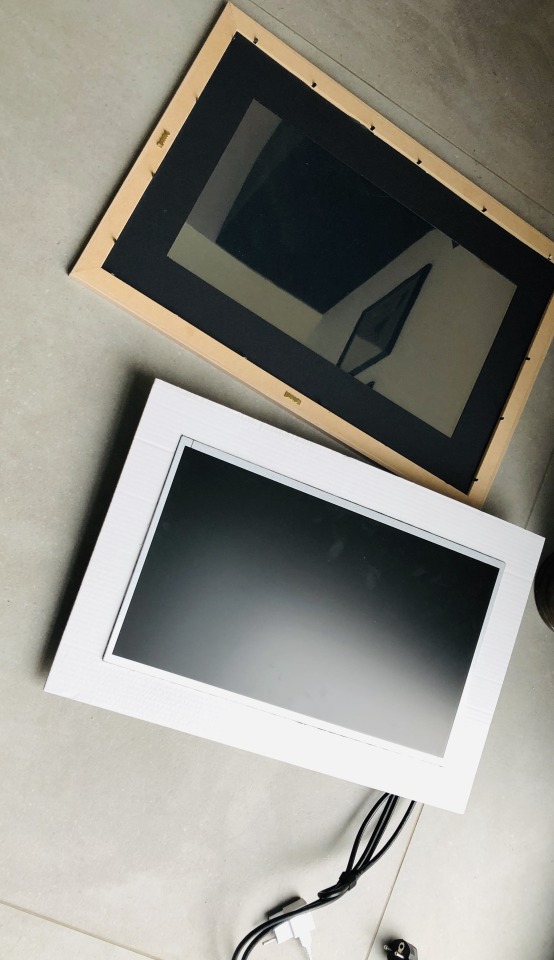
Magic mirror / Family calendar
Old monitor dismantled and placed in a photo frame. Addition of a mirror film and cutting of a black sheet for the background.
Raspbian installed on a RaspberryPi Zero W (placed in a 3D printed blue box).
Configuration :
- Download and install Raspbian (full : with Chromium)
- Setup network, timezone, user/pwd, blockpopup…
- Install Unclutter to be able to hide mouse cursor :
- Apt-get install unclutter
- Create your Dakboard (it’s free for a simple private usage) on https://dakboard.com/options/message
- Make sure that Chromium starts up full screen, the mouse is hidden :
- sudo nano /etc/xdg/lxsession/LXDE-pi/autostart
- @xset s off
- @xset -dems
- @xset s noblank
- @chromium-browser --noerrdialogs --incognito –disable-features=TranslateUI –kiosk https://dakboard.com/yourURL
- @unclutter -idle 0
- Set up a cronjob if you want to turn the Pi's screen on and off on a schedule. crontab -e that looks like this:
- # Turn monitor Off at 21:00/09:00pm during weekdays
- 0 21 * * 1-5 /usr/bin/vcgencmd display_power 0
-
- # Turn monitor On at 06:00/06:00pm during weekdays
- 0 6 * * 1-5 /usr/bin/vcgencmd display_power 1
-
- # Turn monitor Off at 22:00/10:00pm during the weekend
- 0 22 * * 6-7 /usr/bin/vcgencmd display_power 0
-
- # Turn monitor On at 08:00/08:00pm during the weekend
- 0 8 * * 6-7 /usr/bin/vcgencmd display_power 1
- Rotate your display to portrait mode :
- Sudo nano /boot/config.txt
- Add the following line to the bottom of the file :
- display_rotate=1
- how to add Google Calendar to Dakboard : https://dakboard.freshdesk.com/support/solutions/articles/35000030558-how-to-add-your-google-calendar-to-dakboard
- And reboot your RaspberryPi (sudo reboot)...

0 notes
Photo

Raspberry ZW, jugando con la computadora de control más chidita existente. #raspberrypi #raspberrypizero #raspberrypizerow #linux #3dprint #3dprintinglife #raspberrypizerowireless #computer #cdmx #tlalpan (en Mexico City, Mexico) https://www.instagram.com/p/BvAzyyCBHO-/?utm_source=ig_tumblr_share&igshid=92i3i8l9tn5e
#raspberrypi#raspberrypizero#raspberrypizerow#linux#3dprint#3dprintinglife#raspberrypizerowireless#computer#cdmx#tlalpan
0 notes
Photo

Hands up don't shoot camera prototype is working! #labspeceth #raspberrypizerow #mobile (at Media Design Practices)
0 notes
Photo


ProtoStax Camera Kit for Raspberry Pi High Quality Camera with Raspberry Pi Zero (W) https://bit.ly/ProtoStaxRPiHQCameraKit
*when you're waiting for your HQ Camera, what do you do? Mock one up using mechanical drawings, of course!
0 notes
Photo

The future ... Setting up a web server on #raspberrypizerow
0 notes
Photo

What are the differences? #raspberrypizero #raspberrypi #makers #diy #boards #wifi #raspberrypizerow
0 notes
Text
This Movement-Detecting Wildlife Digicam Was Made with Raspberry Pi
New Post has been published on https://takenews.net/this-movement-detecting-wildlife-digicam-was-made-with-raspberry-pi/
This Movement-Detecting Wildlife Digicam Was Made with Raspberry Pi
Desire a distant motion-activated wildlife digital camera with out shelling out huge bucks? You possibly can construct one your self utilizing Raspberry Pi. PiBat not too long ago constructed a pint-sized one, and it really works fairly nicely.
The construct makes use of the Raspberry Pi Zero W, an affordable and compact single-board laptop that has built-in Wi-Fi and Bluetooth.
“Now that the PiZeroW is offered, it’s now doable to make fairly small wildlife cameras,” PiBat writes. The construct additionally makes use of the Raspberry Pi Digicam Module V2.1, which has improved picture high quality.
The digital camera case is barely a little bit bigger than a pack of ordinary enjoying playing cards. On the entrance of the digital camera is a 12X telephoto lens that’s designed for cellphones, permitting for close-up pictures of animals that wander into the body.
“The digital camera module must be positioned a couple of millimeters behind the lens to keep away from vignetting of the picture,” PiBat says.
Right here’s what the digital camera regarded like previous to camouflage tape being utilized over the floor:
The free and open supply movement detection program PiKrellCam is what turns this digital camera into an computerized wildlife digital camera. Listed below are some pictures that had been triggered by the themes flying into the scene:
The digital camera will be triggered to seize video as nicely. Listed below are a few examples:
PiBat beforehand constructed a bigger Raspberry Pi path digital camera in 2013 — when you’re concerned with constructing considered one of these items your self, you could find particulars on the 2013 construct and the Python script used (to set off the digital camera when movement is detected) right here.
#birds#Camera#DIY#doityourself#motiondetection#motionsensor#pibat#raspberrypi#raspberrypizerow#trailcamera#wildlife
0 notes
Photo

Upgrading my RPi3 to 128Gb UHS-I 👏 . . . . . #raspberrypi #raspberrypi3 #raspberrypizero #electronics #raspberrypi2 #raspberry #arduino #raspberrypizerow #raspberrypi3modelb #retropie #raspberrypink #raspberrypi2b #coding #raspberrypie #raspberrypi3b #raspberrypiprojects #raspberrypistachiocake #linux #raspberrypifoundation #raspberrypistachio #raspberrypineapple #raspberrypicase #maker #computer #iot #raspberrypicking #diy #raspberrypickin #technology #retrogaming
#maker#iot#raspberrypi3#raspberrypizerow#raspberrypineapple#arduino#raspberrypink#raspberrypifoundation#raspberrypicase#raspberrypiprojects#coding#raspberrypi#raspberrypi2#computer#linux#retropie#technology#raspberrypi2b#raspberrypickin#diy#raspberrypicking#raspberrypistachio#raspberrypi3b#retrogaming#electronics#raspberrypizero#raspberrypie#raspberrypi3modelb#raspberrypistachiocake#raspberry
0 notes
Text
This DIY Furby Echo speaker will probably give you nightmares
Furby is already a tad creepy by itself, but a new DIY mod just stepped up the spookiness: Howchoo has converted a Furby toy into a makeshift Amazon Echo. The project works its dark magic by shoehorning a Raspberry Pi Zero W mini-PC into the critter’s frame, giving it the power to run Amazon’s open source Alexa Voice Service. Add a USB mic, a speaker and a stepper motor and you get a Furby that…
View On WordPress
#Alexa#Amazon#furby#gadgetry#gadgets#gear#Internet#raspberrypi#raspberrypizero#raspberrypizerow#toys#video#voiceassistant#voicecommand#voicecontrol
0 notes
Text
Raspberry Pi: Initialization
Download the latest image file
https://www.raspberrypi.org/downloads/raspbian/
Flash to Micro SD Card using Etcher or win32diskimager
Activate SSH
Re-insert Micro SD card after being ejected by Etcher
Create an empty "ssh" file in the root / of the Micro SD Card
Activate WIFI
Create a file called "wpa_supplicant.conf" in the root / of the Micro SD Card
The file should contain the following details:
ctrl_interface=DIR=/var/run/wpa_supplicant GROUP=netdev network={ ssid="Watchdog 5.1" psk="Pr1ngles01!" key_mgmt=WPA-PSK }
Insert Micro SD Card to Raspberry Pi and boot up
Connect to Raspberry Pi
SSH to pi@raspberrypi
Username:
pi
Password:
raspberry
Initial configuration
sudo raspi-config
Change default password
Change hostname
From Advanced Options, expand the filesystem
Change the memory split to 16
Swapfile (Expand or Disable)
Expand Swapfile
sudo nano /etc/dphys-swapfile
Change "conf_swapsize=100" to "conf_swapsize=1024"
Press "Ctrl+X", "Y" and "Enter"
sudo /etc/init.d/dphys-swapfile stop
sudo /etc/init.d/dphys-swapfile start
Disable Swapfile
sudo dphys-swapfile swapoff
sudo dphys-swapfile uninstall
sudo update-rc.d dphys-swapfile remove
Run update and install packages
sudo apt-get update
sudo apt-get upgrade
sudo apt-get install git htop nmap
(Optional) Disable Bluetooth
sudo nano /boot/config.txt
Add this at the end of the file
# turn bluetooth off dtoverlay=pi3-disable-bt
Press "Ctrl+X", "Y" and "Enter"
0 notes
Photo

Soldering 40 pins #sigh #soldering #raspberrypizerow #ikeahack
0 notes
Video
Raspberry Pi Necklace - PAX West - Video 1 #sorryaboutyourcats #sayc #mixer #streaming #streamer #pax #paxwest #raspberrypi #rpi #raspberrypizero #raspberrypizerow @watchmixer (at Washington State Convention Center)
#rpi#mixer#raspberrypi#raspberrypizero#sayc#sorryaboutyourcats#streaming#pax#paxwest#streamer#raspberrypizerow
0 notes
Photo


Got my hands into a raspberry pi zero w and decided to do a portable arcade machine with an snes controller.
Why an snes controller? It barely provides enough space for everything, but it does have 4 buttons + 2 triggers and it’s still flat and small enough to carry in the pocket. A nes controller would provide more assembly space, but with less buttons and a square shape.
So basically I used a raspberry pi zero w, a micro sd card, a lithium battery charger, a lithium battery from my small syma x5c quadcopter (3.7V 500mAh - if buying one there are already more powerful ones with the same form/size), an snes controller (got one on amazon), a small power button, a mini hdmi to hdmi converter and some wires.
Then it’s just some patience wiring all together and testing it. Getting a retropie distro into the sd card, adding some roms on it and configuring the snes controller to work via the gpio’s.
I inspired myself in this 2 tutorials:
https://www.youtube.com/watch?v=j5dXx0NhLxg
http://blug00.blogspot.de/2016/03/how-i-got-the-gamecon-driver-to-work-on-retropie.html
Don’t forget to configure the wifi and enable the ssh before closing the remote for further management/copying roms into the pi.
0 notes
Video
instagram
Andy's first #heatsink installation. The #raspberrypizerow is small but mighty and we have no clue what to do with it next but will give it our best shot. Just finished loading the @c4labsinc case assembly on YouTube and will load a small tease later after edit. Enjoy! . #raspberrypi #raspberrypizero @raspberrypifoundation @adafruit #PiZeroW @andystechgarage #andystechgarage #atg #c4labs #picase #bestpicasever👌 #learningbyplaying #learningthroughplay #stematg #stemandy #andystem #atgstem #stemlearning #stemeducation #raspberrypi #technology #microcontroller #microcontrollers
#andystechgarage#technology#pizerow#microcontrollers#raspberrypizerow#learningthroughplay#bestpicasever👌#atgstem#stematg#microcontroller#atg#stemandy#raspberrypizero#heatsink#stemlearning#stemeducation#c4labs#learningbyplaying#andystem#raspberrypi#picase
0 notes
Photo

Busy installing OS on #raspberrypizerow so I can start playing with it =)
0 notes