#recycled sewing
Photo
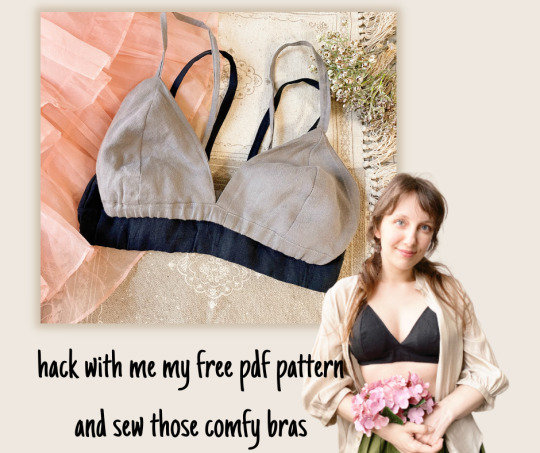
Hey there! I'm excited to share my latest YouTube video on how to hack my free bralette pattern and sew two different types of bras using a recycled linen skirt. It's a beginner-friendly tutorial with detailed step-by-step instructions, and I can't wait for you to watch the whole video. out! Don't forget to share your thoughts on these unique bras in the comments. Happy sewing!
youtube
#sew with me#sparrow refashion#sew#sewing#diysewing#diy projects#sewing community#lingerie sewing#creative sewing#diy fashion#modern sewing#recycled sewing#upcycled sewing#sustainable fashion#sewcialists#handmade#diy sewing
168 notes
·
View notes
Text
Idea: sew some cute little moths with scrap fabrics and sew them on holes you have on your clothes so you can keep wearing them :)

#diy#sewing#visible mending#textile art#DIY culture#diy punk#sewing ideas#craft ideas#eco fashion#reduce reuse recycle
22K notes
·
View notes
Text
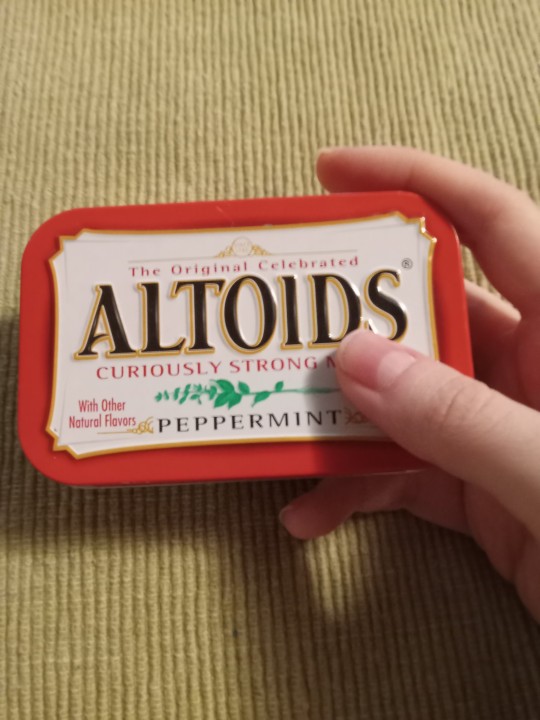
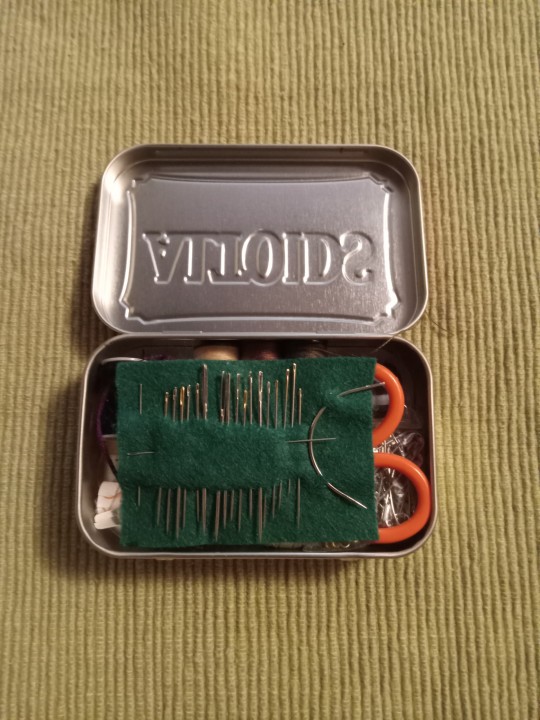
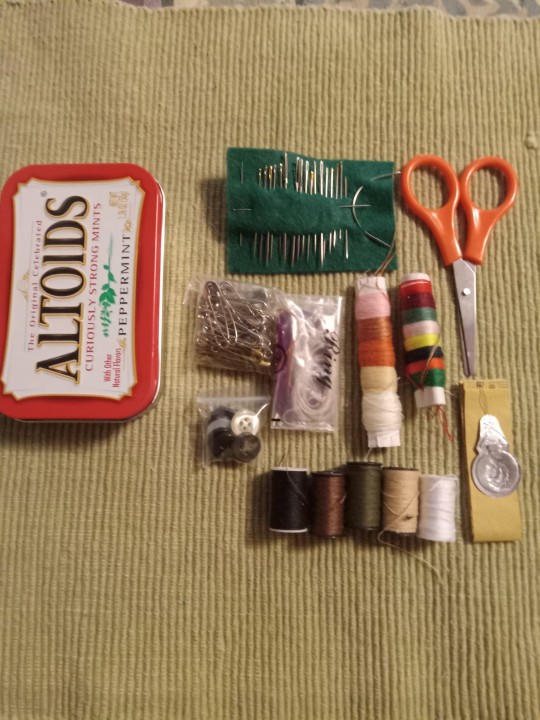
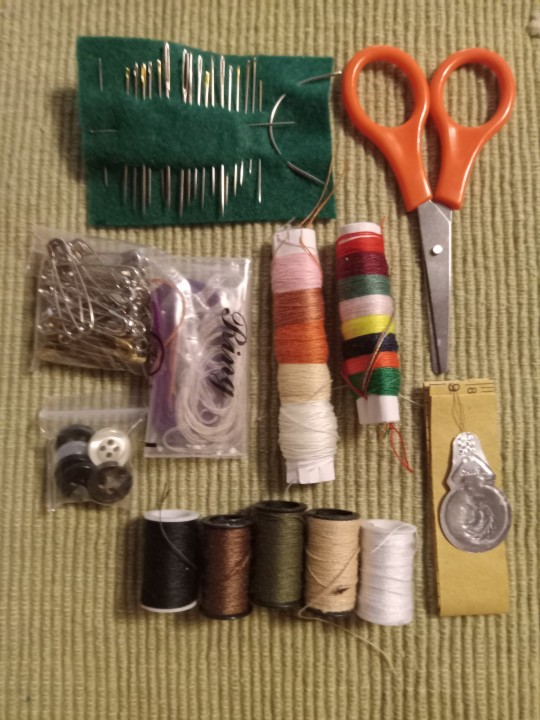
I upgraded my altiods tin sewing kit! (More details are in the image ID)
I added more needles, safety pins, thread, and a sharp pair of thread scissors just small enough to fit inside the tin. There's usually two needle threaders in here but one is in use atm. And there's enough stuff inside to fit perfectly so that the lid can close all the way and nothing slides around so that's nice
I am gonna post my little altiods tin emergency chronic pain/migraine kit within the next few days as well so keep an eye out for that if you're intrested
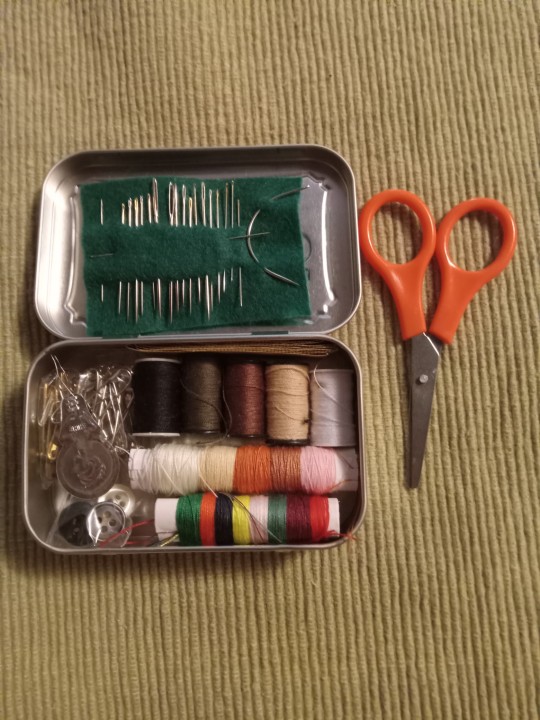
[ID: various pictures of a metal altoids tin, about 3.5 inches by 2 inches, with sewing supplies inside. A little bag of silver safety pins, varying colors of thread on 5 small spools, more colors of thread wrapped around two small rolls of paper and inside a small plastic bag, a folded piece of paper measuring tape, a small pair of orange thread scissors, a needle threader, and some buttons inside a little bag. There are varying sizes and types of sewing needles that are stuck in a small rectangular piece of green felt that fits on top of everything inside the tin. It has sharps, darning needles, embroidery needles and one curved needle.
The colors of thread included are: light pink, a muted rusty orange, white, a few shades of light brown and off white all wrapped around one piece of rolled paper. The other paper rool has more vibrant saturated colors including red, blue, yellow, dark green, and orange. The little bag had extra recycled pieces of thread i salvaged from other projects that are long enough to still be used. And the colors on the 5 small spools are black, dark mossy warm green, dark brown, light brown and white. End ID]
#solarpunk#solarpunk diy#solarpunk aesthetic#punk#punk diy#sustainability#recycling#upcycling#hopepunk#ecopunk#diy#hand sewing#sewing#hatchet makes stuff
527 notes
·
View notes
Text
After:


Before:
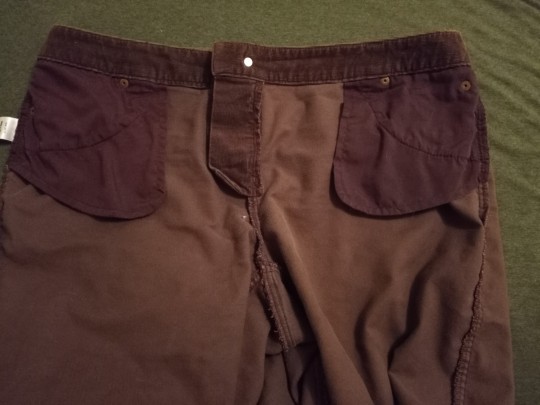
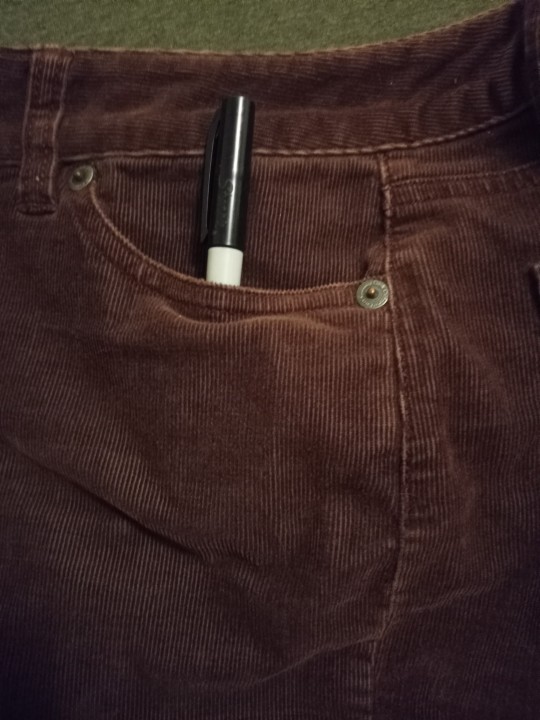
Fuck tiny pockets!! I finally got around to extending the pockets on these corduroy pants I thrifted over a month ago! My handsewing looks like shit but they're functional
305 notes
·
View notes
Text
First sewing project ✅
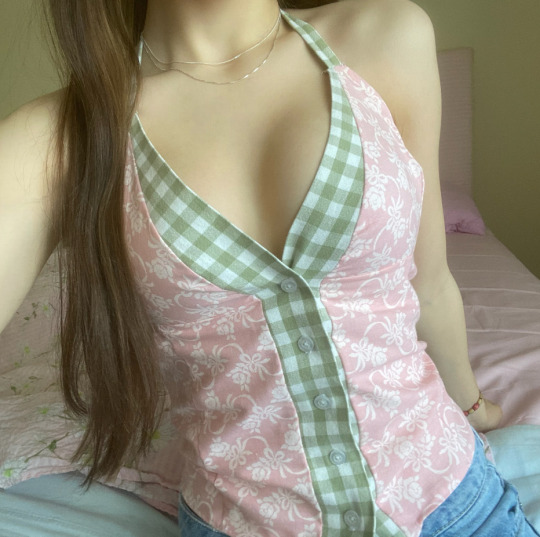
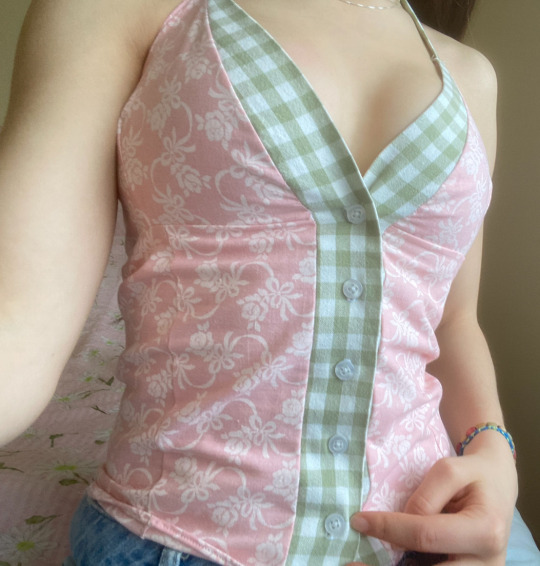

It’s a top!!! Pretty cute right? No!😡
The problem with it is that it’s not made out of clothing fabrics so it doesn’t fit very well and it turned out veryy revealing sadly. I made the halter neck too long. Oh well I’ve gotten a lot of experience from this and it’s a good first try for not having a pattern to follow. 🪡 🎀 🧵 🪡
(Also look at me doing the little coquette clothing haul scrunch on the sides of the top lmao😭)


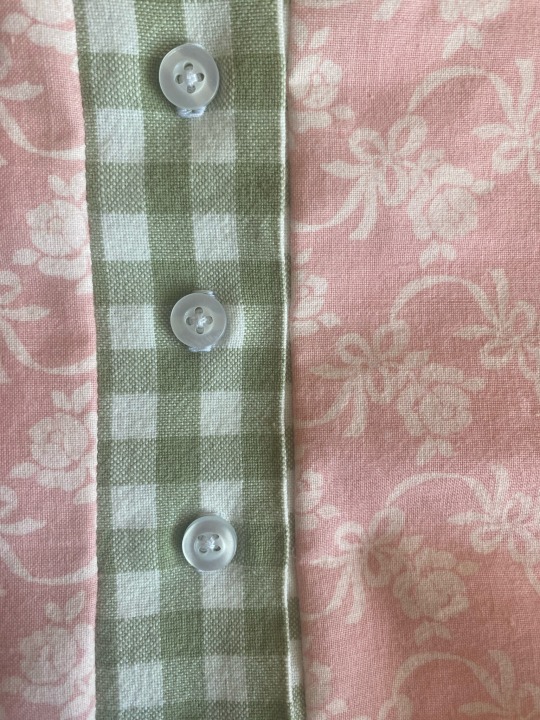
During this project I’ve learned how to sew buttonholes!!!!!! lol I always misread that word. When you sew buttonholes you use a special presserfoot. The picture in the middle are practice buttonholes. 🪡💕
That’s all!!! I’m hoping to actually find some sewing patterns soon as this was a bit of a struggle but other than that I did alright!!!😊
Also ignore how deathly pale I am!!!! Geez lol😅
I LOVE YOU💕
#sew#sewblr#sewing clothes#recycling#coquette#coquette aesthetic#girly girl#cute clothes#cute top#sewing#sewist#clothing haul#girlblogging#girly blog#becoming the best version of yourself#becoming that girl#pink coquette#pinkcore#y2k aesthetic#y2kcore#art#artists on tumblr#dream girl#girlblog#girly fashion#fashion#girly stuff#kawaii#diy sewing#pale girl
136 notes
·
View notes
Text
Quilting is punk as hell
Collaborating on quilts??? Quilt communities?? The painstaking amount of hand sewing??? Use old tshirts!! Recycle scraps!! The ideas are endless. Petition to start a punk quilt community
#diy punk#diy or die#punk shit#punk#quilting#quiltlove#sewing#recycling#punk community#punk fashion#punk aesthetic#crust punk#spechpunkshit#spechshenanigans
661 notes
·
View notes
Text
Ok solarpunks, help me out here. These are my favourite trousers, I’ve probably had them five, six years, maybe longer? They’re fraying on the thighs, as you can see. How do I, a person with a fine motor skills disability and zero handicrafts experience, go about mending this?


#solarpunk#hopepunk#cottagepunk#reduce reuse recycle#mending#visible mending#sewing#weaving#patches#handicrafts#darning#environmentalism#help
141 notes
·
View notes
Text


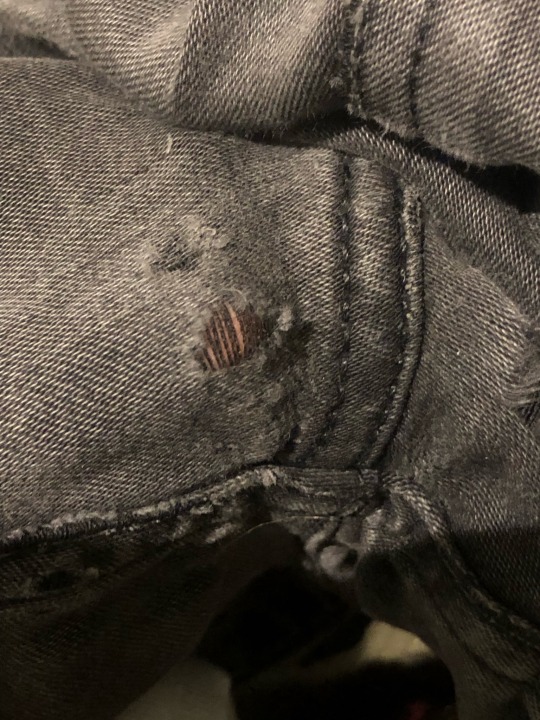
first attempt at visible mending. i started with stitching the edge of the hole and a denim patch (blue thread). i wanted to do a criss-cross pattern with the purple and green thread but the lines i drew on were hard to see so i ended up free-handing a lot.
i used embroidery thread because that's what i have on hand. i'm not sure if that the strongest option but if the stitching breaks, i'll just try again. the wrinkling in the denim bothers me a little; it's not so bad on the knee but i think for mending the inner thigh area it will be an annoying texture :p
#visible mending#clothes mending#sewing#i never threw out my worn out jeans because i was gonna recycle the fabric#then i started seeing sashiko and visible mending posts#i like not buying things and trying to be sustainable#and those were my most comfortable jeans so i wanna keep them if possible
41 notes
·
View notes
Text

This tote bag is nice and big but it had this annoying print on it because years ago i bought it at a fast fashion store to avoid a single use bag. And since i don't wanna be a walking ad and i am a little punk i am covering the print with patches. I might also make longer handles for it, so i can wear it over my shoulder. I painted most of the patches myself. This bag seems like a better place for them than my pants since i do wash my pants regularly /j. Also the weather in germany is always either too hot or too cold to wear denim jackets or vests (at least for my neurodivergent ass) so even though i do have a battle vest and a battle jacket, i barely wear them which is sad
So if u have some handy tote bags which have annoying logos on them, just cover it. U will probably use them more then since u put effort in it and they look much cooler :D
If u don't like the punk look, u could use an old shirt with a cool print on it that u don't wear anymore for whatever reason or make one big patch out of any piece of fabric big enough and paint something on it urself. It's a really fun project and hard to mess up and even if u mess it up, u can just detach ur patch and try again
#diy#diy or die#punkstyle#punks not dead#low waste#sewing#upcycle#reduce reuse recycle#practical solarpunk#solarpunk
37 notes
·
View notes
Text
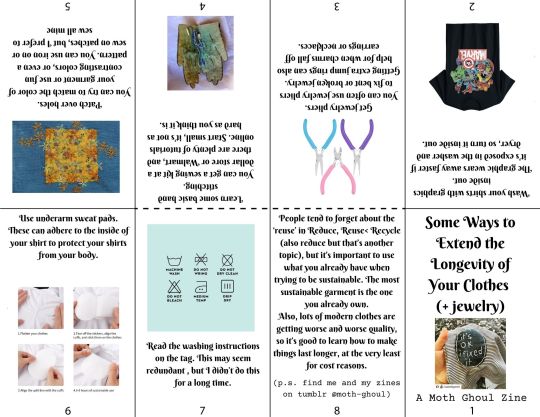
little things that i try to do to get more out of my clothes
#moth types#moth's zines#moth ghoul#zines#diy#punk#diy zine#punk zine#sewing#mending#clothing#sustainability#reduce reuse recycle#diy clothing
60 notes
·
View notes
Text

Alena: "I think this curtain valance is the right width for the pant legs. I'm going to cut the mockup pattern out of it."
Laura: "Are you about to Scarlett O'Hara your pants??"
27 notes
·
View notes
Text
Embroidered a free hat with a prickly pear

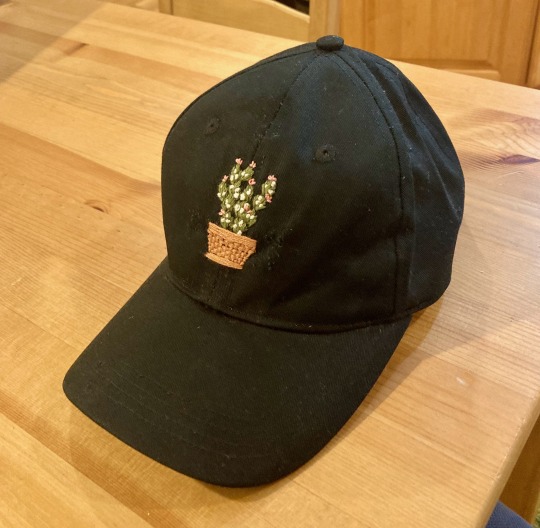
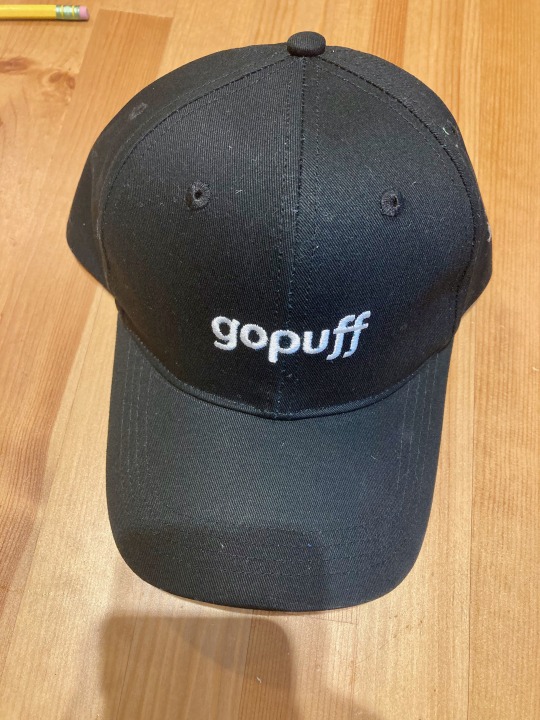

Not a big embroiderer, but this was a fun little project.
#sustainable sewing#sustainablefashion#sustainable fashion#sustainability#sustainable#sustainableclothing#hand sewing#sewing#customized#ecofriendly#reduce reuse recycle#reuse#recycle#recycling#reclaimed#upcycle#upcycling#upcycled#wastelesscrafts#wasteless crafts#diy#recycled#embroidery#embroidered#hand embroidery#crafts#succulents#succulent#plantblr#plants
74 notes
·
View notes
Text
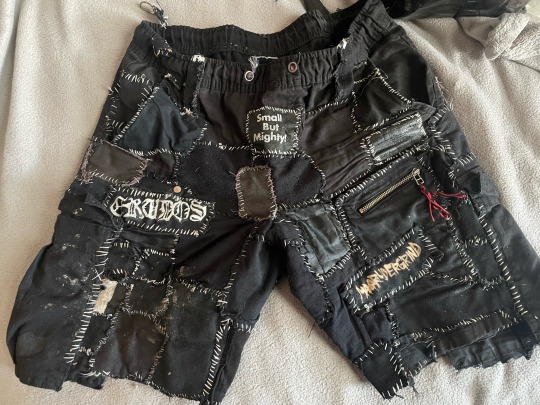
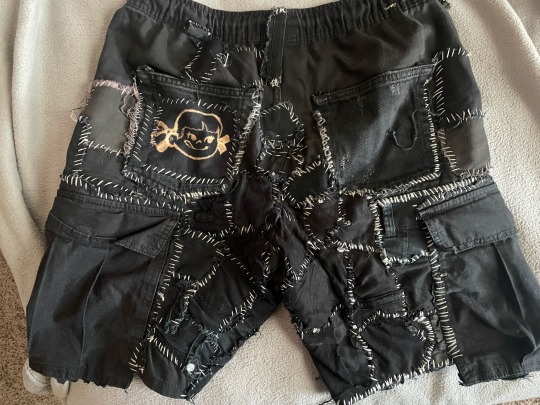
pantaloons
#diy#crust#hardcore punk#los crudos#hkfy#hong kong fuck you#patch pants#my pants#crust shorts#crust pants#punk diy#recycling#sewing#patchwork#patch#patches#magrudergrind#crustpunx#crust punk#crustcore#stenchcore#mending#visible mending
95 notes
·
View notes
Text
Patch update: I made a big sunflower patch out of an old potholder
Here's the before, when i took apart the potholder:
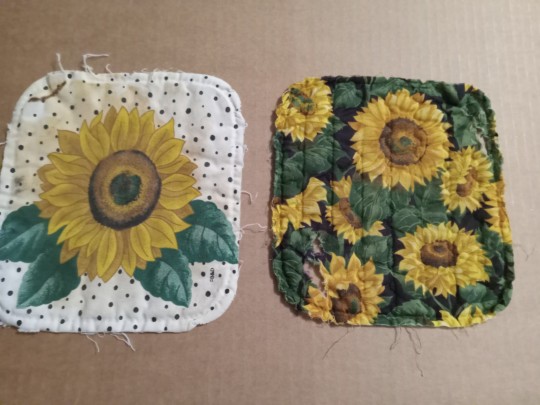

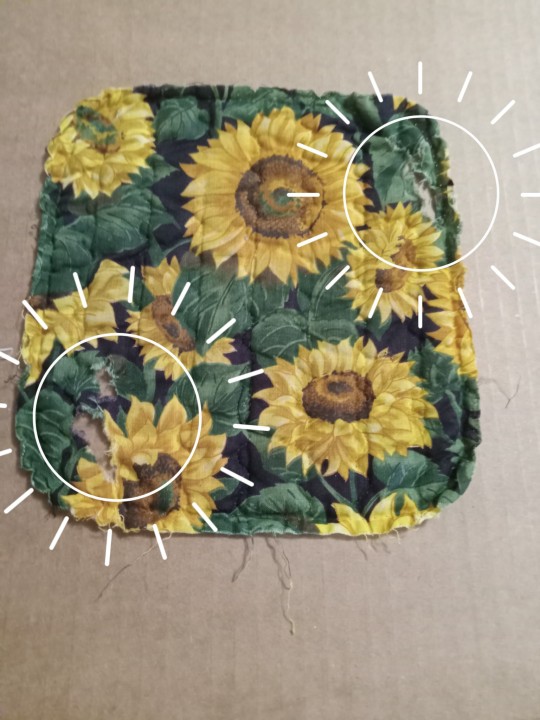
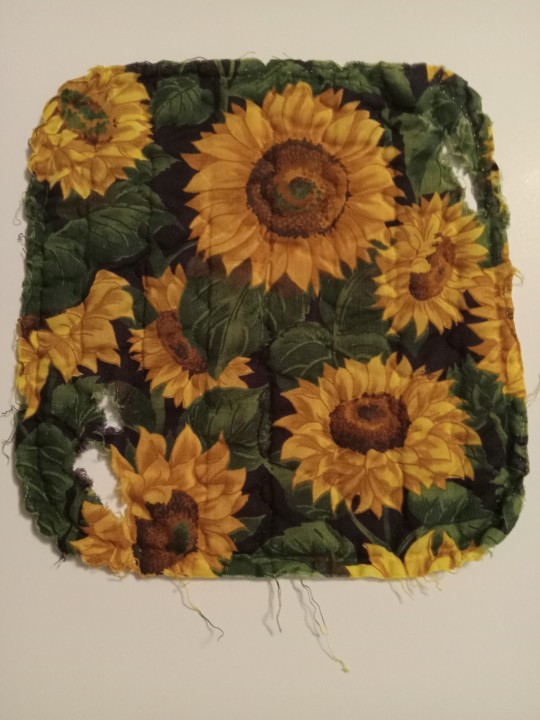
There were large holes in two opposite corners. The side with the black and white dots will be a separate piece I'll use in the future. In the bottom image I used a white background so the holes can be seen more clearly
And here's the finished patch:


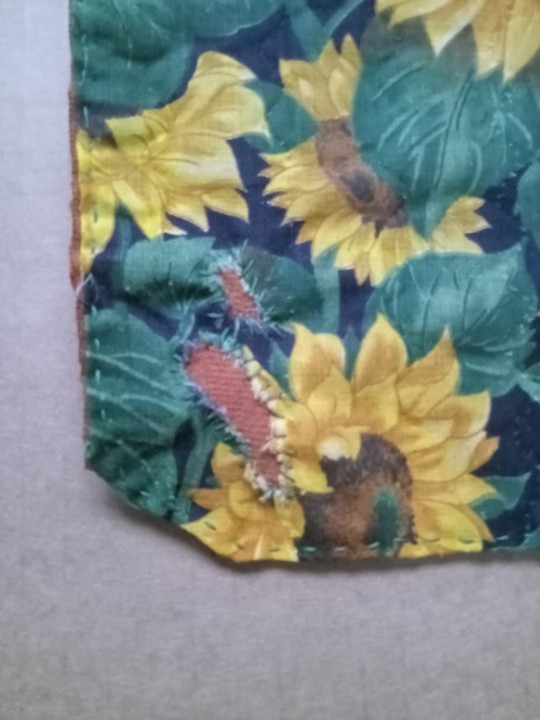

I hemmed the edges, and I stitched the sunflower fabric to a patch of rusty orange fabric for extra strength and so I could mend the holes easier. I mended them by stitching the frayed edges to the orange fabric in the back. Anything can be a patch
[Image ID: the first four images are of a potholder that I took apart so it's just two large patches of fabric. About the size of a potholder. 7 inches by 8 inches. One side has a large sunflower on a white background with black dots. It's old and stained. The other piece is just covered in green leaves and smaller yellow sunflowers, with two large rips in the top right and bottom left of the patch. In the third image I put two white circles to highlight them because it's on a cardboard background, and the last image they're a bit clearer over the white background.
In the after photos, the second piece of fabric from the other pictures is hemmed and stitched to a slightly desaturated orange fabric with green thread the exact same shade of green as the leaves in the pattern. The second image is of the patch turned around to show the orange side. And with that green thread I stitched down the edges of the holes to the orange piece which is shown closer in the last two images. End ID]
#patches#solarpunk#solarpunk fashion#solarpunk diy#solarpunk aesthetic#punk#punk fashion#punk diy#ecopunk#hopepunk#sewing#mending#visible mending#recycling#sustainable fashion#sustainability#slow fashion#hatchet mends things#hatchet makes stuff
92 notes
·
View notes
Text

Old pajama pants no longer have a hole right there. (And they're a little more colorful too :D )
Yay for darning looms!
23 notes
·
View notes
Text
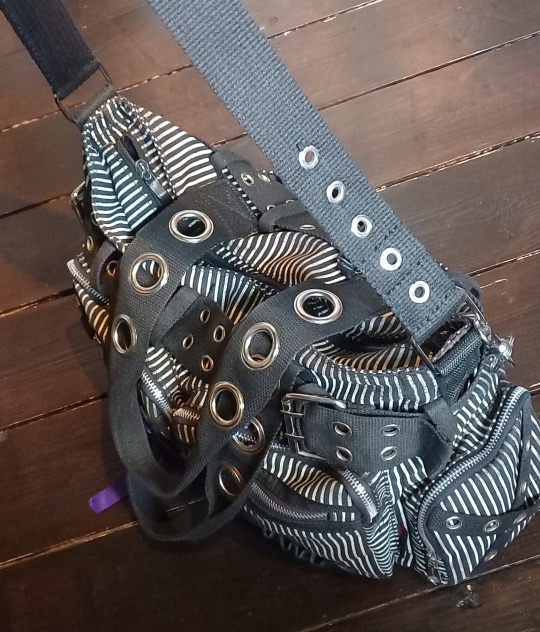
Replacing my bag strap
Unlike many of my clothes and accessories this bag isn't thrifted. It's a bag by Jawbreaker that I absolutely love the look of, it has multiple pockets, tons of space inside, and is clearly great quality as I've had it for over 10 years and it's almost good as new. It's the only handbag I own, and I've no desire to get a new one.
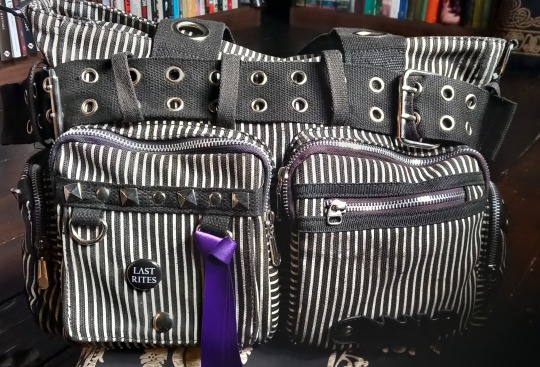
However the one bit I've had to replace multiple times is the shoulder strap, since that's the bit that gets most wear and tear.
It originally had the kind of strap which clips on, but the problem with those is that after years of metal rubbing against metal, eventually it wears away to the point where the clip is thin enough that it snaps. Last couple of times I just put a new clip on, however this time not only were the clips worn away but so were the d-rings you're supposed to attach them to, so I did a more thorough job.
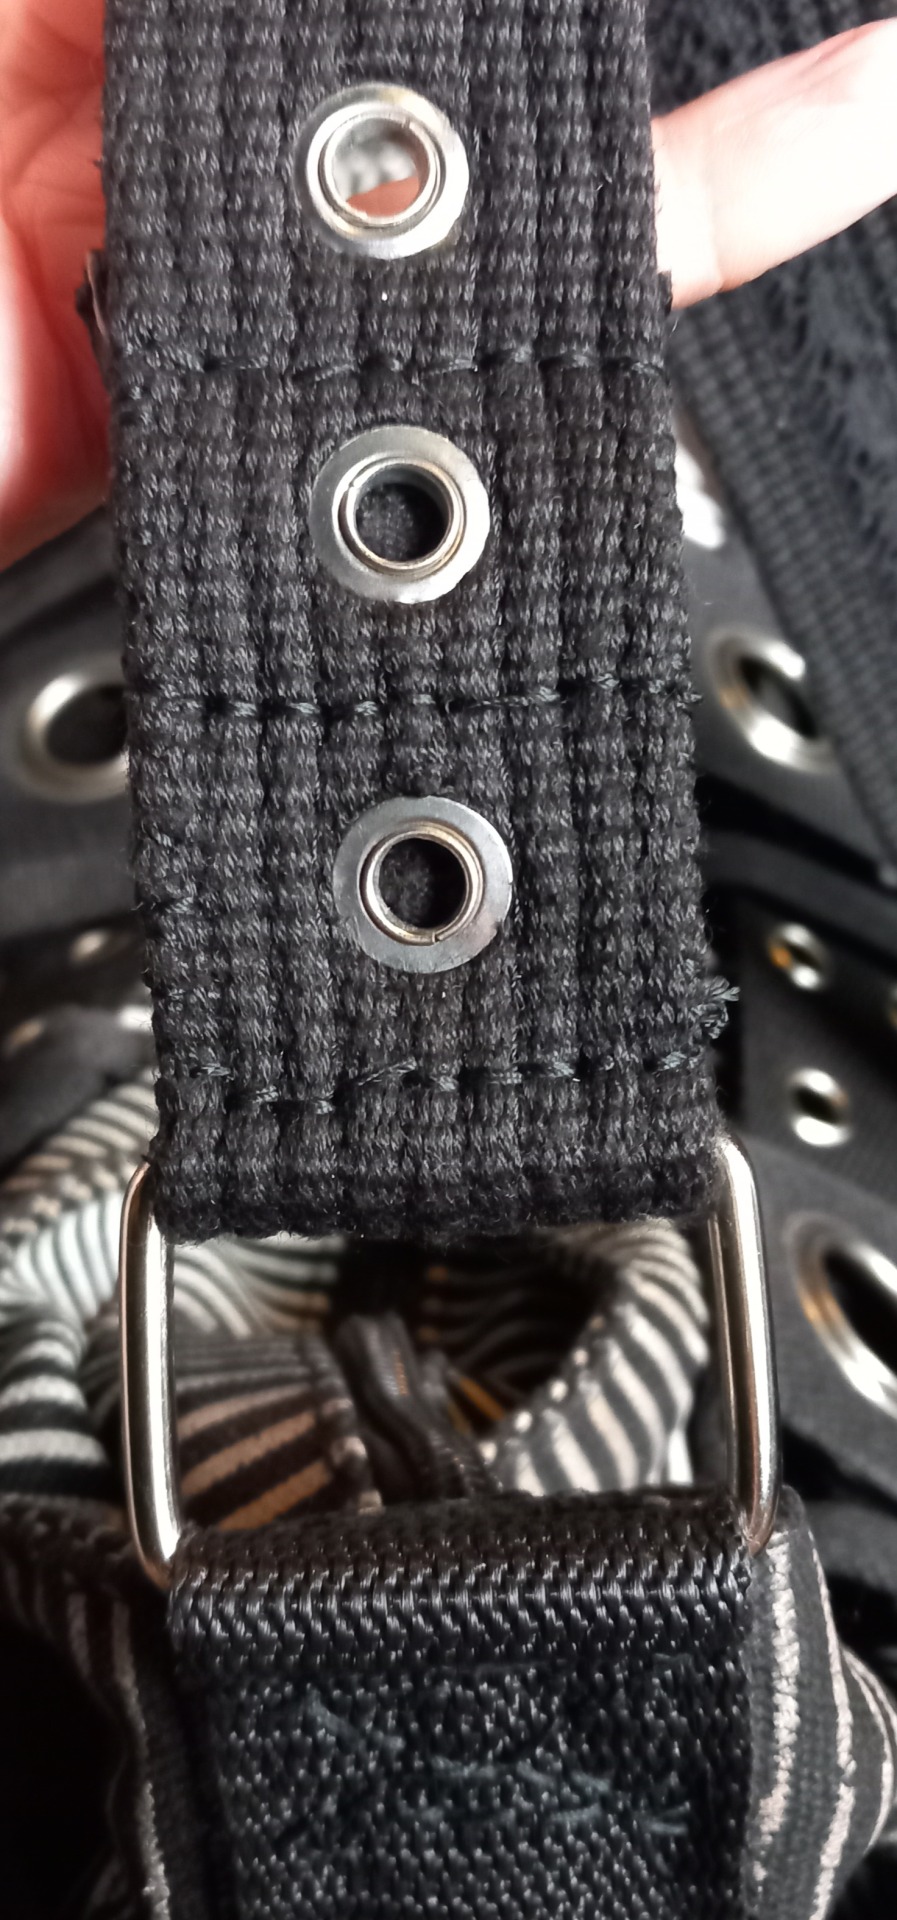
First of all I unpicked the stitching attaching the d-rings to the bag and replaced them with these large rectangular ones. I always save metal hardware from clothing items I mod or that are finally old and worn enough to be thrown away, and I think these came from a skirt. Happily I had two the same, so I used bits of the old strap which weren't too badly worn to make loops to sew them on.

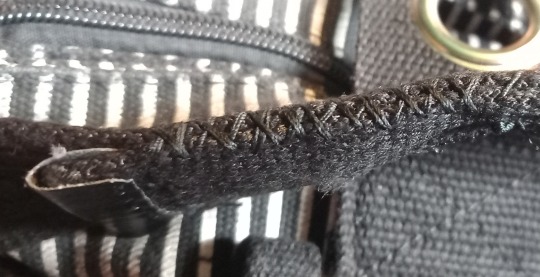
I sewed them by hand with thick top-stitch thread doubled over, and I even did those criss-cross stitching lines to make them extra secure.
I then went to a nearby charity shop hoping to find a cheap bag I could steal the strap from, but even better, I came across this belt, the construction of which was extremely similar to the detailing already on the bag. It was £1, way cheaper than a replacement strap from ebay, which I have also bought in the past.
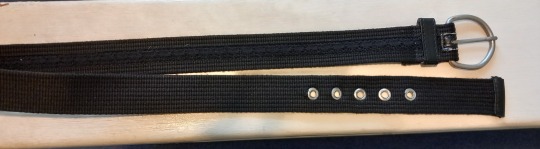
I didn’t want to cut the buckle off because the belt fabric would fray, so I unpicked the stitching around the buckle instead, and put the buckle away in my crafting box to hopefully reuse in the future - like I said, I save everything.

I wanted the eyelets on the belt to be visible as they match the rest of the eyelets on the bag, so I put the belt through the rectangle and folded it over as far as I could while still showing all the eyelets, then sewed it shut. Again, I did multiple rows of stitching to keep it secure, and I also oversewed down both sides.
I don't have a sliding buckle that would enable me to adjust the strap length, but I never adjust my bag strap anyway, so I just put the strap over my shoulder, adjusted it to a length that I liked, and sewed that end together too. This was a long belt so I ended up doubling it over quite far, but that's good as it will make this section of the new strap extra thick, so hopefully it's extra strong.

And there we go, it looks as if I bought it like this!
#goth diy#goth sewing#Goth bag#gothic fashion#goth aesthetic#goth crafting#diy#diy sewing#gothic diy#mending#sewing#reduce reuse recycle#no waste#alternative#alternative fashion#goth upcycling#upcycle#upcycling
26 notes
·
View notes
Last Seen Blogs


jasons-exposedspine
𝖆 𝖈𝖊𝖓𝖔𝖇𝖎𝖙𝖊

nightsfantasy
Nightsfantasy

weneepaw
Hoho wet dreams ✨
softnaberrie
i want to be the queen