#sewist
Text
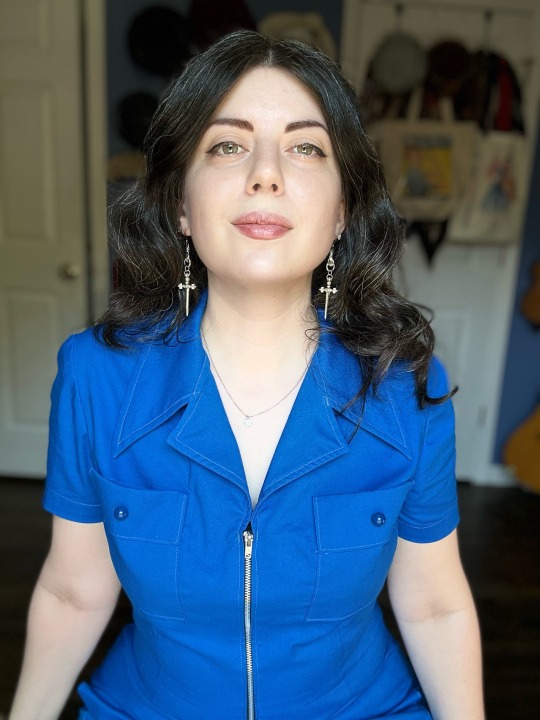
I’m just curious about the level of changes people feel comfortable making to their clothing
1K notes
·
View notes
Text
Tim Drake Red Hood
Finally got to wear my full cosplay! I have the main breakdown over on my main as I’m now trying to change my cosplay stuff over here!!
Inspired by the art of Tim Drake Red Hood by @notholaenas !
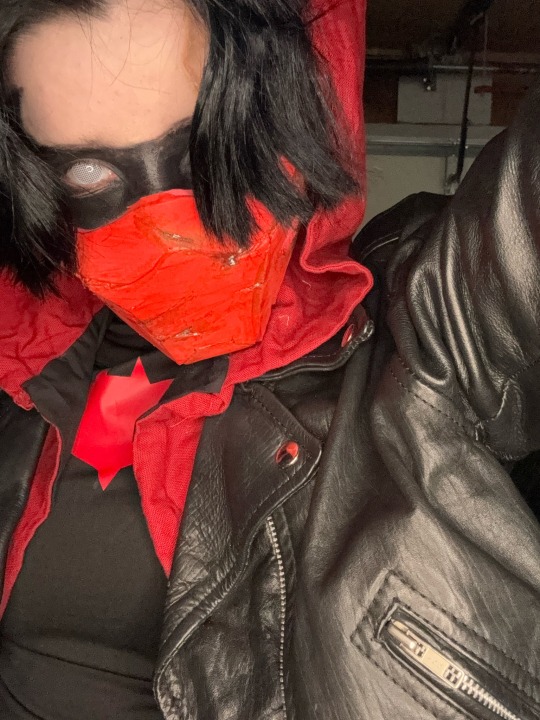


#reverse robins#tim drake#Tim Drake red hood#dc comics#dc universe#dc#tim drake cosplay#red hood#red hood cosplay#cosplay#crafter#sewist#dc cosplay#dc characters#i am so tired#I am not sorry
159 notes
·
View notes
Note
Where can I buy patterns for plus sizes?
So the big 5 patterns companies are basically all now owned by the same company. They have never had great plus size options, however this year the Know Me by Mimi G line has started and it not only has some awesome interesting plus size stuff it also features bipoc designers. So far these patterns have not been on extra sale which is annoying, but hey the other good plusize patterns out there and not going to be cheap either.
Mostly you want to look for independent pattern companies and makers. Places like Etsy are great to get pdf patterns in all sizes. Below is a link to a plus size site that has links to other patterns as well and the link for the website I've used to get patterns printed from pdfs relatively affordable. You also can invest in a projector and set up to trace your patterns directly onto fabric even. However steer clear of the ditto, because for everything I have read it only let's you use proprietary patterns.
359 notes
·
View notes
Text
First sewing project ✅
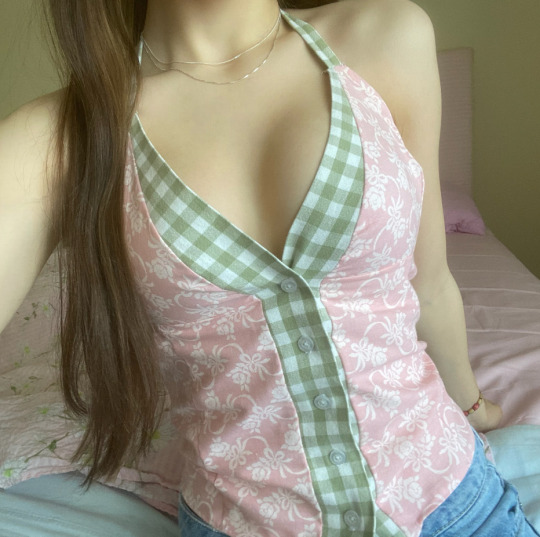

It’s a top!!! Pretty cute right? No!😡
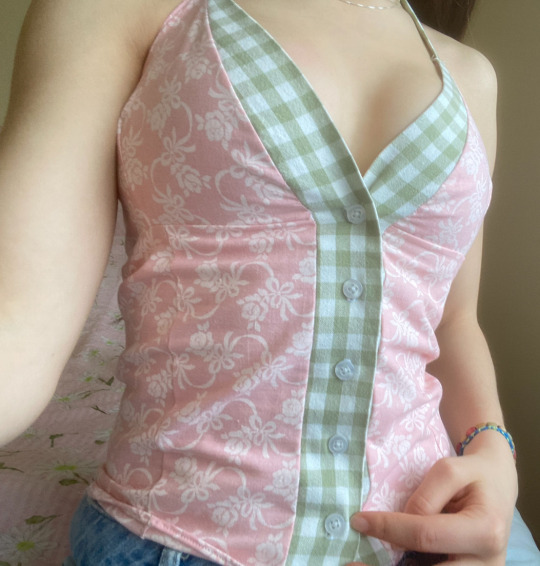
The problem with it is that it’s not made out of clothing fabrics so it doesn’t fit very well and it turned out veryy revealing sadly. I made the halter neck too long. Oh well I’ve gotten a lot of experience from this and it’s a good first try for not having a pattern to follow. 🪡 🎀 🧵 🪡
(Also look at me doing the little coquette clothing haul scrunch on the sides of the top lmao😭)


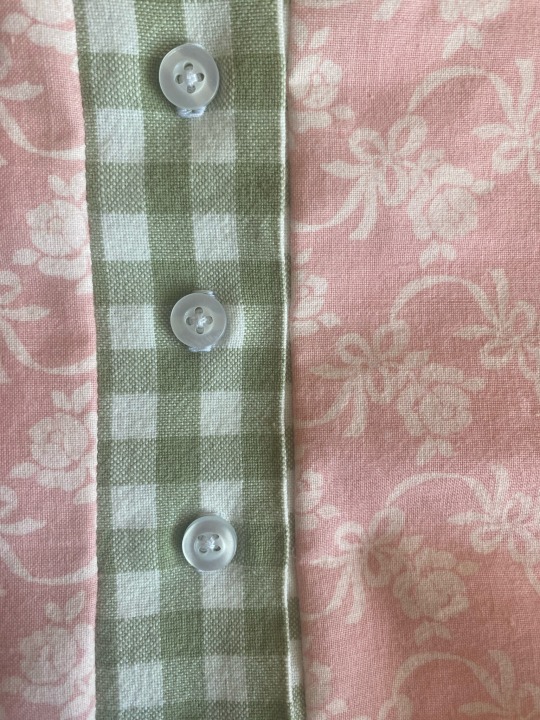
During this project I’ve learned how to sew buttonholes!!!!!! lol I always misread that word. When you sew buttonholes you use a special presserfoot. The picture in the middle are practice buttonholes. 🪡💕
That’s all!!! I’m hoping to actually find some sewing patterns soon as this was a bit of a struggle but other than that I did alright!!!😊
Also ignore how deathly pale I am!!!! Geez lol😅
I LOVE YOU💕
#sew#sewblr#sewing clothes#recycling#coquette#coquette aesthetic#girly girl#cute clothes#cute top#sewing#sewist#clothing haul#girlblogging#girly blog#becoming the best version of yourself#becoming that girl#pink coquette#pinkcore#y2k aesthetic#y2kcore#art#artists on tumblr#dream girl#girlblog#girly fashion#fashion#girly stuff#kawaii#diy sewing#pale girl
117 notes
·
View notes
Text
I am about to start teaching a sewing class with a local community centre. It's a volunteer position, so I don't get paid, but it's still a really big deal for me.
The people taking the course are low income, so I was hoping I could turn to you lovely people for spare change to help me cover some of their fabric and notion costs. Also, if you're in or near Toronto and have fabric or bedsheets sitting around taking up space, I would be more than happy to take it off your hands!
If you can drop a few bucks in my little tin cup, we would all really appreciate it!
103 notes
·
View notes
Text
Sometimes busting out the seam ripper means you are straight up not having a good time. I aim to at least make it a beautiful experience!
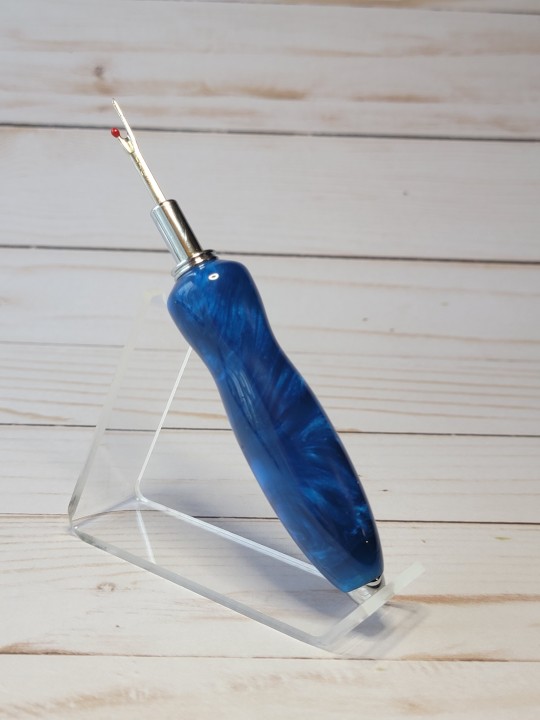
Free US Shipping
85 notes
·
View notes
Text
Bit late to share my Nanny Astoreth cosplay, but here we go! More info under the cut.
To all the folks who attended the Talent show and/or submitted: loved seing your creations! Can't wait for a next year!❤
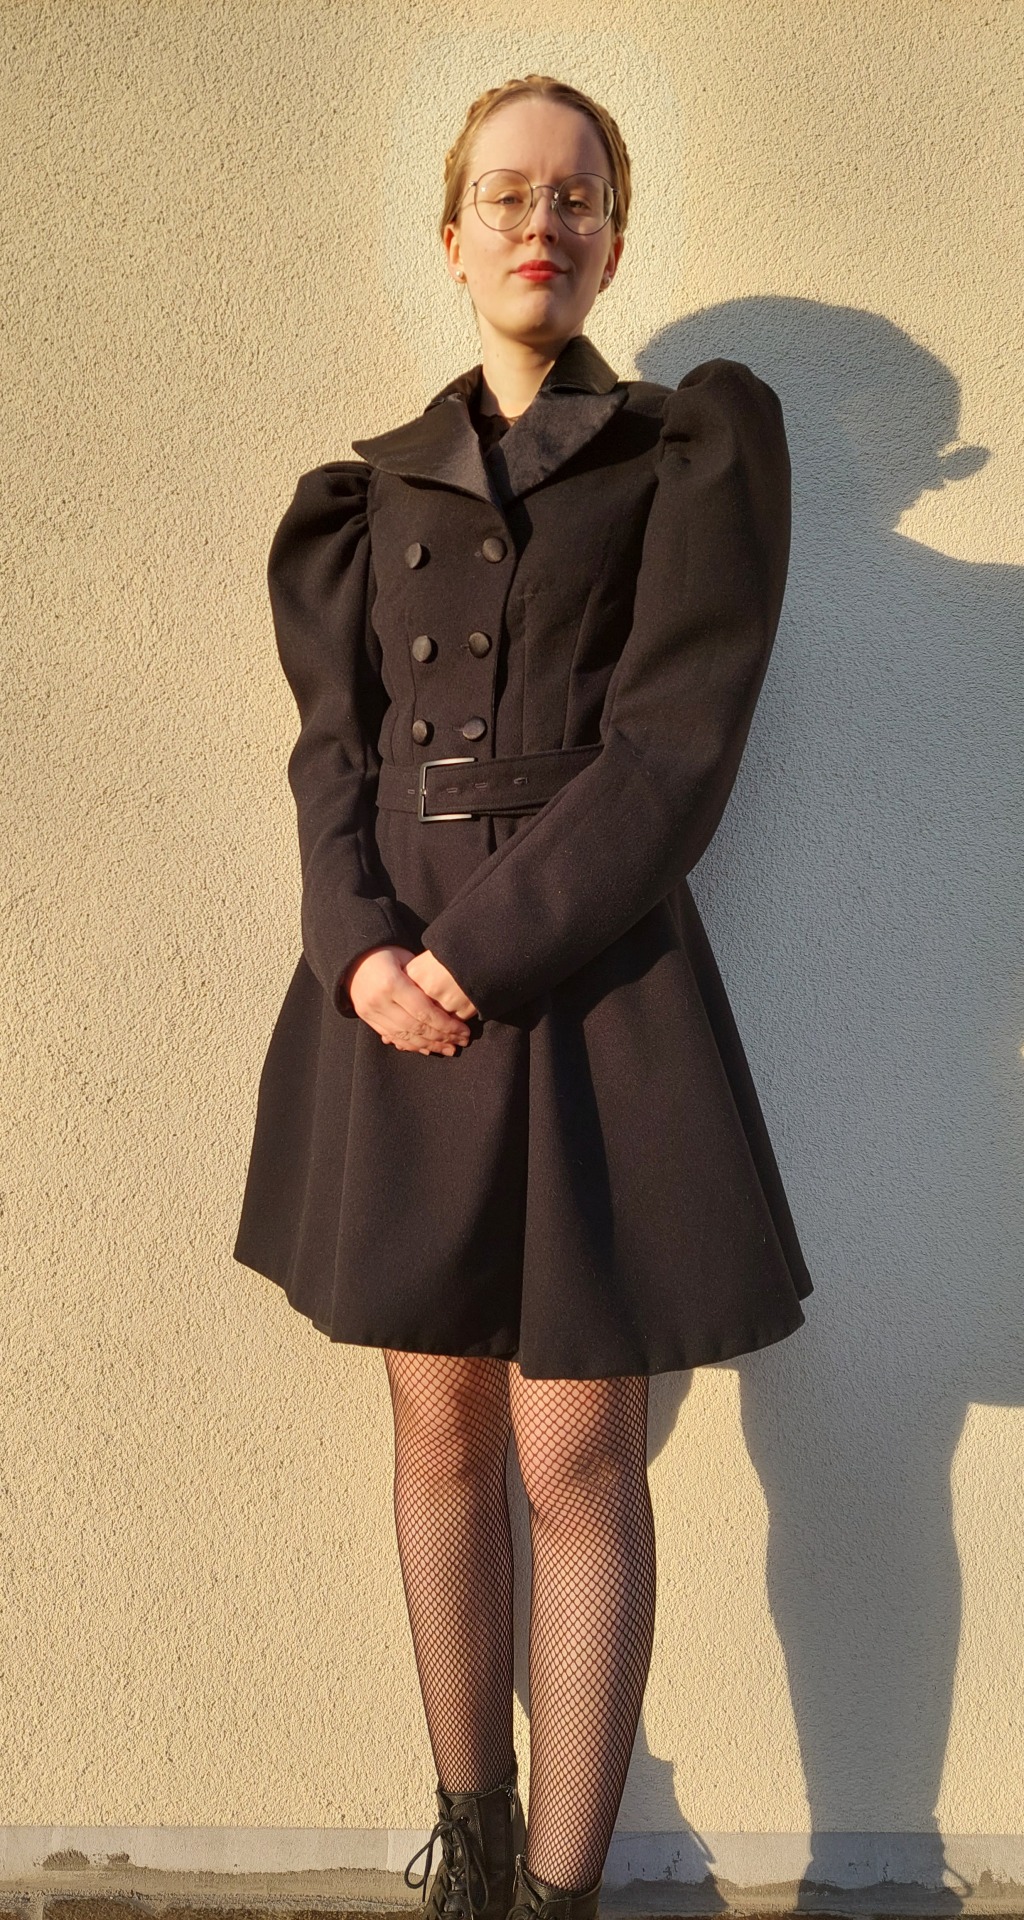


The main part of the cosplay- the coat, was made by me. From black wool, satin and burgundy nylon lining. I sewed by machine and by hand. The pattern is roughly 1890s. I wanted to make a coat that is also wearable for a normal day, not only a cosplay. (It will have it's premiere in about a week when I go to see very good production of Hamlet in the theatre.)
I always wanted to have a coat like this, so I added a little Nanny Astoreth magic to the mix and made one of my dreams come true.
Edit: I was asked about some sewing info, so there you go! Warning: I'm not a seamstress, I start and complete my sewing projects only by the inaffable audacity I posses, usually by the method of trial and error. So if you're a seamstress, please don't execute me or burn me at the stake for this, please.
The pattern is from Black Snail Patterns, it's their Victorain 1890s coat. I made few alterations: I combined the two patterns you get (with the skirt or peplum). I picked sleeves from the peplum variation but kept the skirt. (More about the skirt later.)
I made no mock up. That's it, you can crucify me. I just went for it and hoped for the best. Probably don't do that.
This was my "first" in many ways: first time using pattern with included seam allowance, first time working with interfacing, first time doing an overcoat. There were some easy part and some hard ones. I won't go over the whole process, just share a few tips I found helpfull.
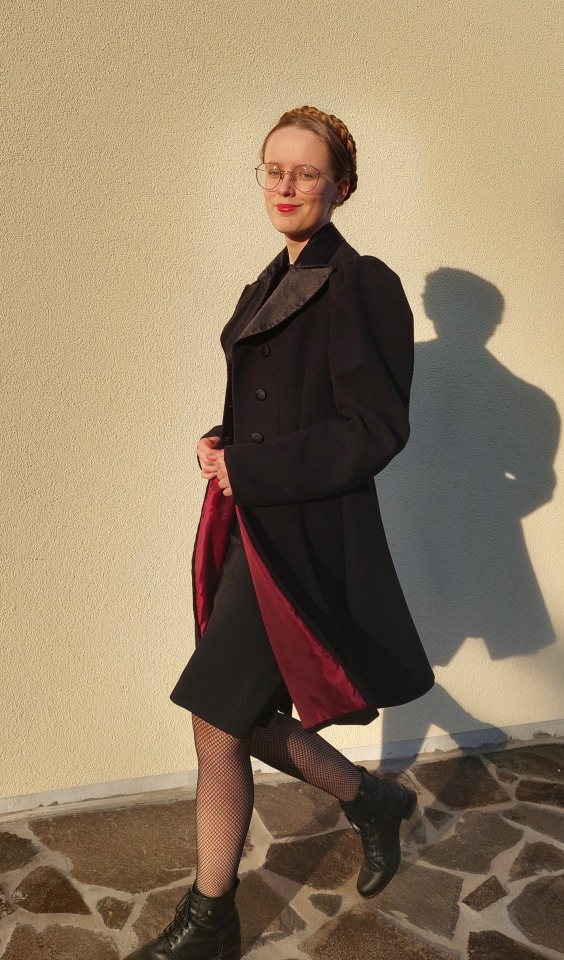
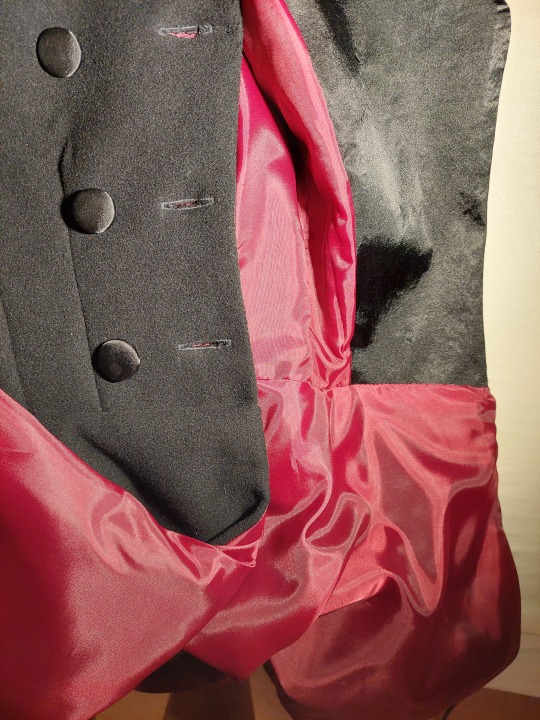
Here's the whole coat with the inside. (Colours are a bit brighter then in real life, I had quite a different lighting. It also isn't so shiny.)

Before I even started sewing, I ironed in interfacing. This makes the coat stiff and strong. (I sadly have no pictures.) The pattern will tell, where to do that. I used baking sheet, so it wouldn't stick to the iron.
To ensure I have the bodice pieces all lined up, I marked the waist-line by thread. Chalupa wouldn't hold and thread made it so easy to work with the pieces. Over all, sewing the bodice together wasn't a problem, but here comes the hard part...
The satin lapels. I had a breakdown over these. I'm not kidding. First, I just sewed them in, and to make them all nice and smooth I ironed them to the ineterfacing on the wool outer layer. That turned out to be a disaster. The seams were showing on the corners because there was more fabric. I had to carefully rip it apart and think of another solution.
I decided to iron in new Layer of interfacing, sticking just to the satin. This was achieved but putting baking sheet between the two fabrics, so it doesn't stick together. There are some photos of the interfacing pinned and not ironed and then when I ironed it. (It was honestly going back and forth, trying not to overheat and melt the fabric whilst making it stick. It took forewer.)
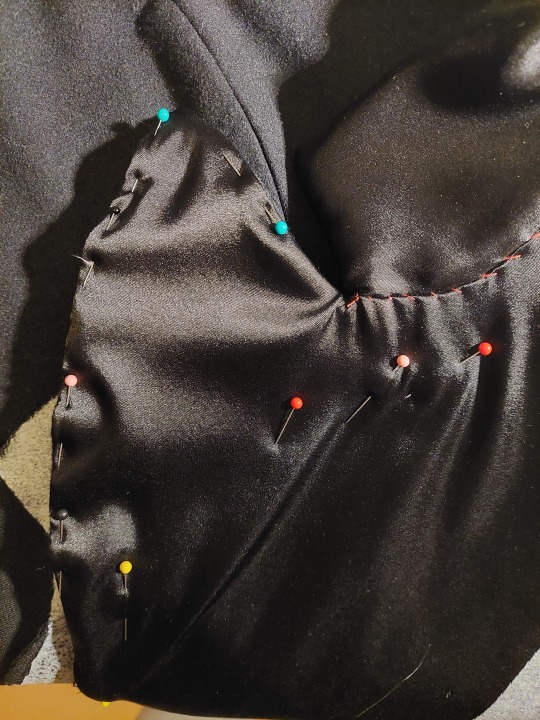

(As you can see, the collar is stitched on with red thread. That was just to hold it in place, I later handstitched it with black one. I used the same "two interfacings" method for the collar as on the lapels. You can also see a tiny bit of the interfacing in the upper left corner of the second photo.)
Sewing and sewing in the lining wasn't much of a trouble. The sleeves took a while to figure out, but it was mainly my thread ripping while I gathered them.
The skirt was the easy part. I pinned it on and tried it, saw the waist was too low and made my proportions weird. I just moved it up and trimmed the rest of the fabric. Here you can see how the inner seam is done. It was pretty easy.
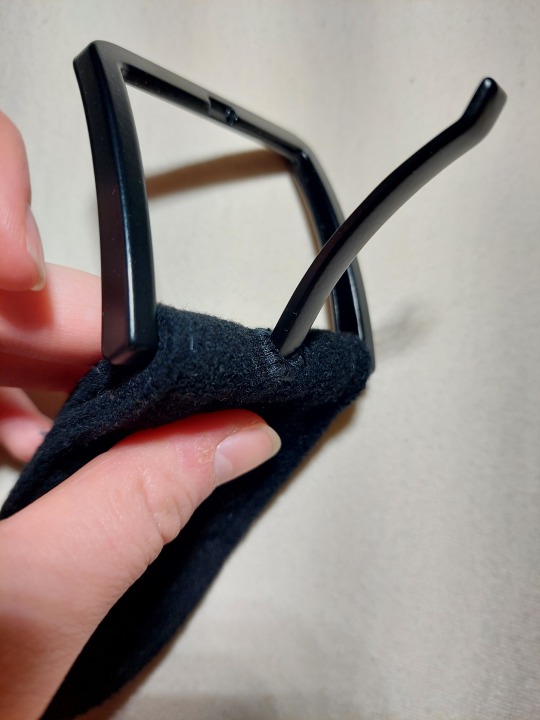
About the additional stuff - buttons, buttonholes and the buckle and belt. Buttons were made by me. I wanted them to match, so I bought a little box for making custom fabric buttons. Easy and fun! Buttonholes were supposed to be easy. First two were. The third was a disaster. What can I say? Check your foot and settings. You don't want to be undoing that. I bought the buckle in the shop, sewed the belt. The wholes for the buckle were done by sewing tiny buttonholes. I did the same for the prog of the buckle. Worked surpridingly well.
That's probably all the tios I have.
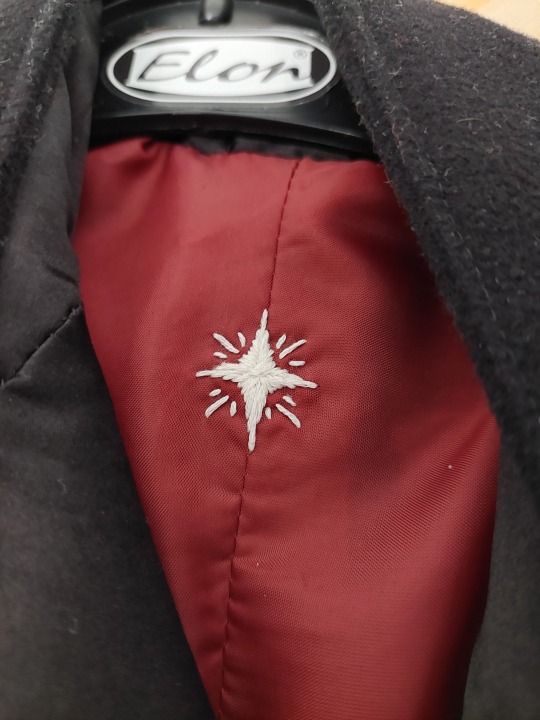
Last but not least, I have a tiny fun detail. I embroidered a little star for the starmaker! And I love it dearly!
#good omens 2#good omens#crowley#neil gaiman#ineffable husbands#nanny ashtoreth#cosplay#my sewing#sewing#go cosplay#talent show#aziraphale#aziracrow#david tennant#michael sheen#good omens season 2#seamstress#artist on tumblr#sewist#sewblr
75 notes
·
View notes
Text
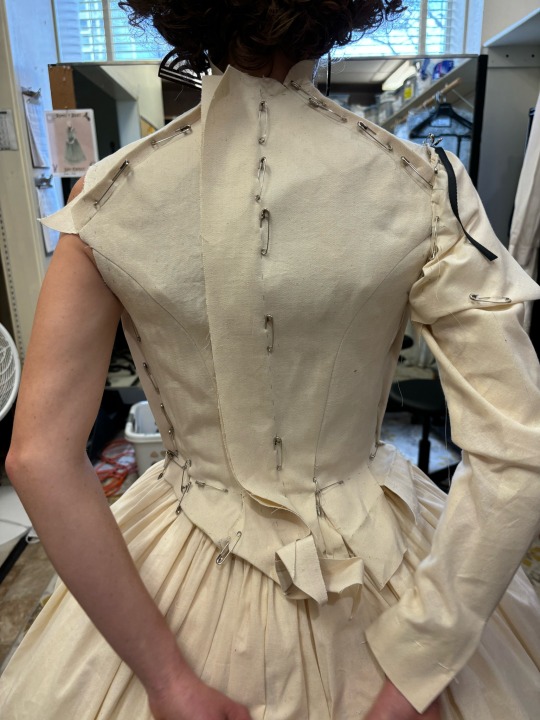
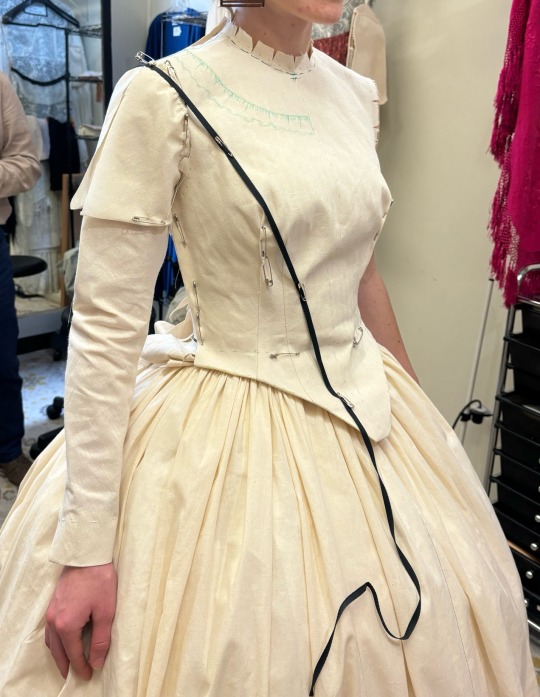
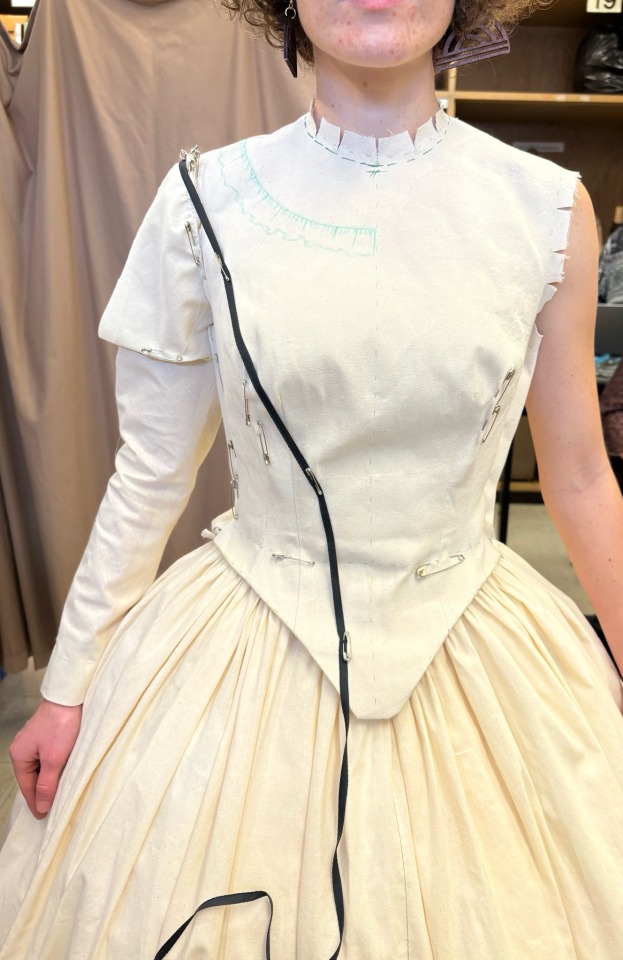
Lady Capulet fitting for 1860s (ish) inspired production of Romeo and Juliet. It’s just a mock up but I’m super happy with the silhouette and the fit was really close. The designer chose to not have any of the performers corseted which is a unique challenge to get the shape we want without any sort of support underneath. This really couldn’t have gone any better though.
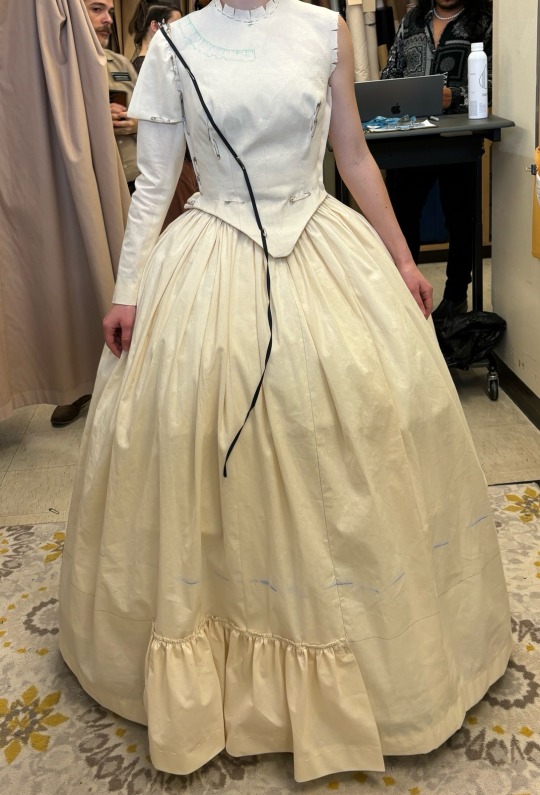
The black tape is to mark some more details I’ll drape on top of this foundation. I’m super excited to keep going! And to hopefully get to figure out some cartridge pleats in the skirt😅
86 notes
·
View notes
Text


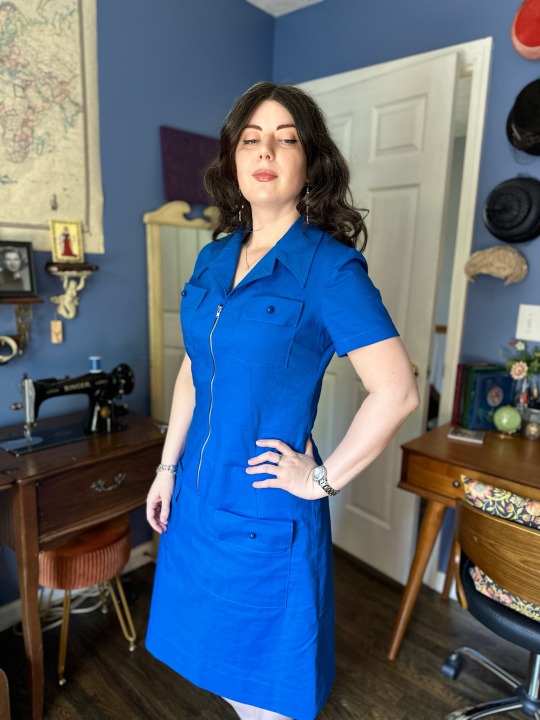
Made a new dress! Inspired by Lucy’s romper 💙 Pattern is from 1970
#lockwood and co#save lockwood and co#lucy carlyle#ruby stokes#sewing#sewist#dressmaking#handmade#me made
111 notes
·
View notes
Text
This graffiti-style Batman fabric is one of my favorites, so of course, it’s a fast seller! If you’d like to get one, check out my Etsy store NerdyCreationsStudio!
#batman#batman pillow#the joker#joker#the joker pillow#joker pillow#dc comics#dc comics pillow#dc#dc pillow#etsy#etsy seller#etsy shop#artists of tumblr#artists support artists#artists supporting artists#sewing#sewists of tumblr#sewingblr#sewist#support small business#support etsy sellers#support etsy shops#pillow#fandom pillow#decorative pillow#nerdy creations studio#batfam#batjokes
29 notes
·
View notes
Text

Finally feeling like myself and getting some sewing done. I cut this out last year and I am finally going to make my Our Flag Means Death inspired Stede Bonnet as a flapper costume. I have a wig and found a flapper dress that I think would be perfect. My cocoon coat should come together fairly quickly, though with plenty of cursing over silk and velvet...
#sewing#youtube#diy#sewist#seamstress#sewing pattern#costumes#crafts#costume#cosplay#Ofmd#stedebeard#steddy#blackbonnet#stede bonnet#edward teach#born on a beach
270 notes
·
View notes
Text
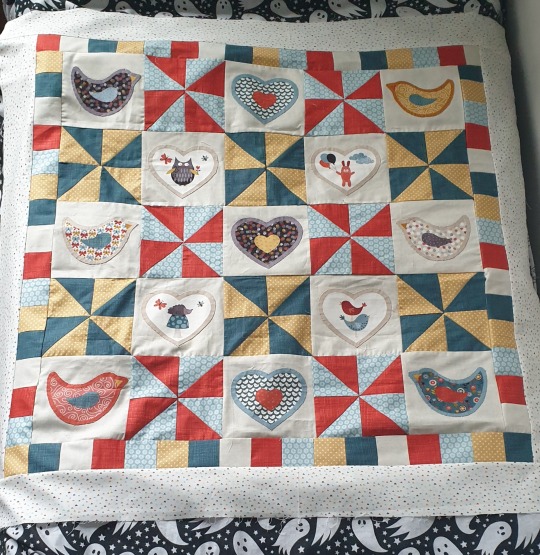
Huzzah! I've finished my first quilt top! Of course as with the previous post regarding this project it's full of mistakes and imperfections, but that's what makes it unique to me, there's no fun in an identical remake. Next up I need to figure out where I put my batting and put it all together, I'm likely just going to do a basic quilting on my machine for this project as it's my first one. The colours and the little birds make me happy.
#craftblr#sewblr#quiltblr#crafter#crafting#sewing#quilting#quilt#ftm#trans crafter#first quilt#sewist#queer crafts#disabled crafter#my content#project || windy day#crafts#craft#hand crafted#hand made#handmade#sewing project#quilters of tumblr#quilt making#handmade quilt#patchwork#textile art#quilt top#quilt pattern#quilt art
66 notes
·
View notes
Text
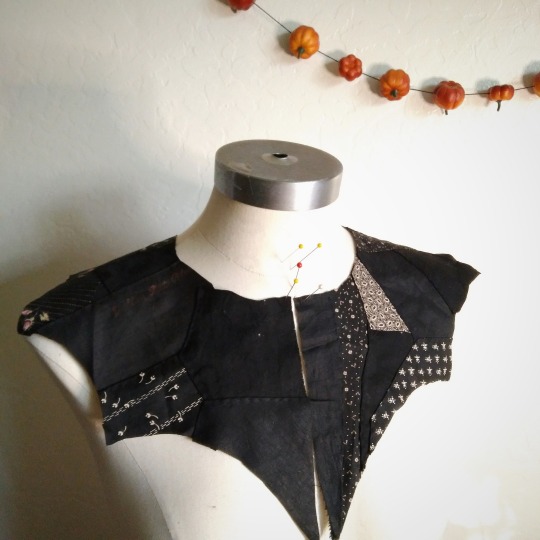
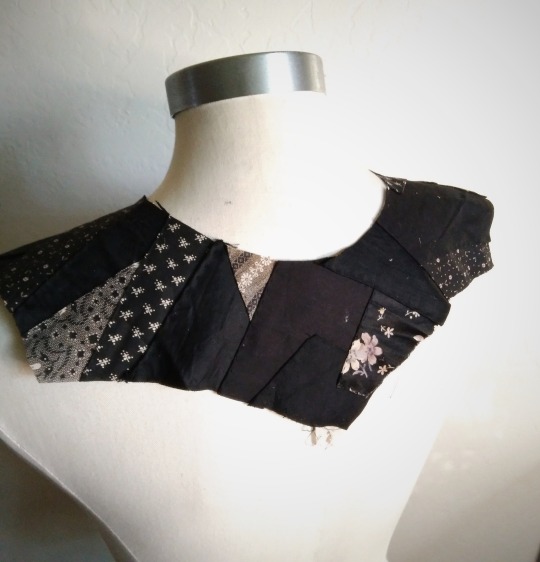
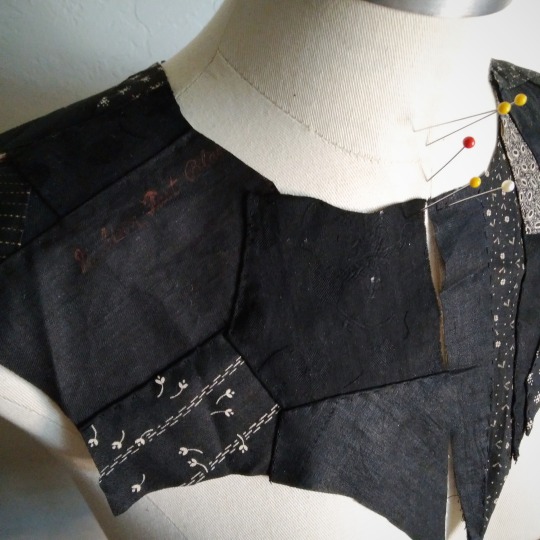
Today's WIP~
A patchwork bat collar, made entirely with antique scrap fabric and sewn on by hand.
Still a lot of work left to do on it, but its coming along.
Shop link HERE
#victorian goth#gothic#romantic goth#victorian mourning#dark academia#dark romanticism#dark cottagecore#gothic sewing#gothic sewist#sewist#thewidowshouse
77 notes
·
View notes
Last Seen Blogs
vera-simik
Local Friendly Orc

aloeila
ALOEILA

assjig
Ass
endcant
the last song youll ever sing

metaljuice43
The Journaling of From 243