#resizing pattern
Explore tagged Tumblr posts
Visit Tumblr Blog
Explore Tumblr blogs with no restrictions, modern design and the best experience.
Last Seen Tumblr Blogs


Fun Fact
Tumblr.com is the 103rd most visited website in the world.
Text
Sweater resizing
There's a million tutorials out there, but I'm just talking about what I'm working on.
In the sweater I'm working on, the sleeves seem to be on the bicep. It strongly looks like there's a box pleat at the top, which is a very common 1940's style shaping. Here's a video by Engineering Knits with a similar "make a tab at the top of the sleeve" instruction, and I strongly suspect the sleeve will sew up a similar way.
So, let's start with the instructions. For copyright, and poor quality scan reasons, I'll rewrite these in my own words. "Using a knitted on cast on, cast on 44 stitches and knit in the back of the stitches. Then increase at the start end the end of a row, working all other stitches in pattern, and work a row normally in pattern. Repeat until you have 82 stitches. Cast off 3 stitches at the start of the next 4 rows. Cast off 1 stitch at the beginning of each row until you are back at 44 stitches. Knit in pattern for 3 inches. Cast off. To sew up, connect sleeve seams, work seams into the armscye, pleat in fullness at top of arm."
The original row gauge is 6 stitches to the inch, and 6 rows to the inch. I'm closer to 6 stitches to the inch and closer to 8 rows to the inch.
So, let's do some math. The sleeve is originally 7 inches around, in a stretchy broken rib pattern. Let's look at a size chart to see how this works for standard "modern" sizing. Looking at the actual size of the stitches, you've got a 30 inch waist / high hip, a 35 inch bust (pattern mentions a 34 inch bust), and now we know the bicep ish is 7 inches. It's probably meant to be snug on the arm to not slide down and lose the poof at the top of the shoulder.
So, measure your own bicep. I like some room in my sleeves, so I measured around my arm with a finger under the tape and got about 15". My cast on is 90 stitches.
Now 38 stitches, every other row, that is between 76 to 75 rows, depending on if you end on a blank row. That'll come out to about 12 inches in height. Now, I need to calculate how big I need to go. Lazy math says it's a little under double the stitches, but let's do the proper math. 82 divided by 44 says you've got a ratio of 1.86 and some repeating numbers. That makes sense, since we already know it's a bit less than two.
Multiply it times 90, and we get 167.7272 repeating. The next nearest even number is 168, so we need to add 78 stitches over 12 inches.
If you do the original instructions of "increase pattern increase, blank row in pattern," then you'll get 78 rows. 12 times 8 = 96 rows. Therefore, add another blank row during your early increases 18 times to get yourself up to 96 rows. The slightly slower pitch will just give you more of a cuff at the bottom.
How do you decrease? You remove 12 stitches over 4 rows. That means you go from 82 to 70. The ratio of that is 70 divided by 82 = .85365. I'm at 168 and the ratio says I'm going to 143.4 - let's say that's 26 stitches removed.
Now, the upper part of the sleeve is decreased one each row from 70 to 44. That means 30 rows happen from the start of the decreases to the end of the decreases. That should be 5 inches. We instead have 40 rows to play with.
7, 7, 6, 6 = 4 rows and 26 stitches, ending at 142
2, 2, 2, 2, 2, 2, 2, 2, 2, 2 = 20 stitches, over 10 rows
2, 2, 2, 2 = 8 over 4 rows. (22 rows left, 24 stitches left)
2, 2, 1, 1, 1, 1, 1, 1, 1, 1, 1,
1, 1, 1, 1, 1, 1, 1, 1, 1, 1, 1 = 24 stitches over 22 rows
Could this be a more "elegant" decrease pattern? Sure. But this would get you close to the "size" of the decreases wanted, while preserving the ratio of puff the original wanted.
3 notes
·
View notes
Text
I enjoy it when I find out about academics who have very specific areas of interest.
If I see a quote where someone is talking shit about the Spartans, I don't even need to check, I know it's almost certainly Bret Devereaux because I read his essay series This. Isn't. Sparta. and then noticed that I saw quotes various places on Tumblr and elsewhere and it was invariably Bret talking about how the Spartans sucked and how they're overhyped. (His essays on Game of Thrones are very good, also.)
I've been getting into embroidery lately, mostly for historical doll clothing reasons, but also because it's an aspect of crafting I can do in bed when I'm not feeling well enough to sit up and sew or iron or whatever. In the process of doing this, I bought a book called Jane Austen Embroidery (it's late 18th/early 19th century embroidery but if you call something "Jane Austen" more people buy it) published five years ago, co-authored by someone named Jennie Batchelor, who is super jazzed about this one ladies' magazine from the period (and has written other academic books about it, but I'm in this specifically to embroider tiny doll dresses so that's less relevant to me).
So I go online to look for more period embroidery patterns to get a feel for the sort of stuff I might want to make because maybe Felicity needs a fancy embroidered dress. And I find this website where someone has conveniently archived a bunch of the patterns. https://ladysmagazine.omeka.net/
And after browsing for several days, I happen to scroll down a bit and see the name "Jennie Batchelor".
Then today I'm looking at an issue of Piecework magazine from a couple months ago that I commandeered from my roommate because it's all about Regency needlework, and I'm reading the first article which has some very pretty pictures of and it's by . . . Jennie Batchelor.
#it's A Very Specific Set of Skills#if I were less tired I bet I could filk 867-5309 except it's about asking Jennie to post more embroidery patterns from 200 years ago#also I've just got to say - having tried to avoid embroidery for 30 years - I'm really annoyed there aren't more patterns for AG doll stuff#what do you mean I have to resize it and work out how to do it on my own? >:(#No plan only stitch
36 notes
·
View notes
Text
idk man i dont really wanna pay upwards of ten dollars for a pattern people say is poorly written and wasn’t test-knit in my size lmao
#nowadays everyone on ravelry thinks theyre a pattern designer but like. most of them aren't and im not paying that lol#if i have to resize everything and fix their fucked up stitch counts and basically do their job for them. well then i am not doing that.#i know people argue about it being rude to riff on patterns based on their pictures but. i will be doing that and you cannot stop me.#i am not paying twelve dollars for a google translated pdf of a top down sweater. peace on planet earth.#knitting#~~~
148 notes
·
View notes
Text


i have a passionate dislike for drawing backgrounds
#i have the fabric i have the patterns but im 6'4 and built like a brick shithouse so i need to resize Everything#and i have to do most of it on the mf floor bc i don't have a dining table#i drew the reference sheet with mouse and keyboard in paintool sai (magnetic tool my beloved) and i need yall to know that#star wars#mandalorians#mandalorian#star wars art#mavla originals collection#i dont know how to change resolution in procreate#mandalorian oc#or does it count as a self insert????#i dont want to draw a proper vambrace bc holy f
23 notes
·
View notes
Text


posting these in hopes it gets my ass into gear to commit and actually Do The Thing-- I'm working on my Dimitri cosplay and I'm trying to use a method I found on youtube bc I really liked how theirs turned out, but I've been procrastinating since it's the first time I'm working with real leather 😵💫😵💫
#i have all the pieces and i think the pattern turned out well!!! but im still intimidated lol#i think im going to use pidgeon disguises as a cosplay tag so#pidgeon disguises#cosplay WIP#putting the pelt on even now with the platforms and the body suit ill be velcroing the armor to feels like im already halfway there#STILL 😵💫😵💫😵💫😵💫😵💫#i have to resize the armor pattern too since it was made for someone 5'11 and im about 10 inches shy of that
16 notes
·
View notes
Text

Javier my pookie
#i dont know why I’m drawing this but at least it makes me happy#what am I doing with my life#anyway#Javier my pookie#using the pattern on his gun for his shirt hehe#my canvas was too small and I had to resize it and now it looks weird
5 notes
·
View notes
Text
I'm resizing this pattern based on instinct 🏃♀️
#is it the correct way to do it idk#did i start looking up how to resize and decided i didnt want to deal w all that yes#did i only notice the pattern wasnt my size until now? who can say..............#singesewing
2 notes
·
View notes
Video
youtube
How to grade a sewing pattern
Grading up or down from a single size.
Now I am so tempted by some of those Vogue patterns that have caught my eye. Vogue is not size inclusive so if I want to use their patterns I will have to grade them up.
#youtube#pattern grading#industry method#no software and in paper#pattern resizing#sewing#sewing patterns
4 notes
·
View notes
Text
Just photographed all the envelopes for all the patterns I have bought in the last few months. 188 new patterns.
#I know I have had this laptop for like 6 months now but I still haven't put photoshop on it#so I might maybe make a macro on my mac at work to resize them all because I am feeling quite lazy about it#and then I will go through and re-name 188 files to match the company and number for easier organisation#and then eventually I will add them to the drive#which as always can be found at bit.ly/mypatternenvelopes#also I discovered that there is a packaging place like 500m from work that makes custom sized boxes#so I might go in there at some point and see if they do lidded boxes#because while the compact archive boxes fit the patterns pretty well I would rather a separate lid over the flap lid
9 notes
·
View notes
Text
why does this costuming book’s scale patterns have exactly the right chest measurement for me …….. im so lucky
#jordan talks#it will be a lil too short but like one less thing to resize#im also using a tudor pattern to make a very late 16th century italian gown .#they are not the same but there are not a lot of patterning resources for this specific style#but the tudor structure bust line and waist like are close . so#im using that as a jumping off point#rip to me getting into late 16th to 17th century fashion bc it is Not popular
3 notes
·
View notes
Text
I think I'm going to go back in time to punch myself for this chirithy pattern i made. What is this? What did I make?!
#tarudce talks#I cant find the full head patter either so i'm just having to wing it right now#at lest the body pattern makes sense i just have to resize it cause forgot seam allowance like a fool#hunlu's plush making saga
1 note
·
View note
Text

immaculate webpage design 10/10 no notes
0 notes
Text
What type of pokemon do I have? uh-
*looks at my wall of glitch pokemon*
...Yes
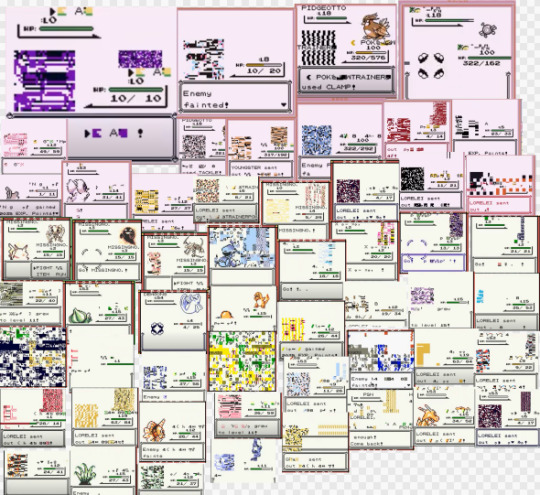
#insurgui talk#pokemon#can you tell when I stopped resizing the screenshots?#anyways just collecting a bunch of shapes and palettes and patterns and colors bc I'm bored#no I'm not trying to draw a fucked up pokemon route what are you talking about-
0 notes
Text
Oooh people wondering if I've been dancing for years is the kind of compliments I crave the most :}
#teach says#but sike!!!!!! its only been about a year!!!!!!!!!!!!!!!#PROGRESS#i wish i progressed like this also in resizing knitting patterns honestly
0 notes
Video
youtube
Resizing a Sewing Pattern up or down
This starts from a multi-size pattern, the previous video I shared works from a single size pattern (such as vintage patterns).
1 note
·
View note
Text
Quick GIF tutorial (Photoshop)


#holy shit this is perfection!!#i am so jealous of this set!#the coloring op THE COLORING!!! (original post)
alright @dontyouknowemma-itsyou and anyone interested, this was really easy to colour so I'm gonna give you a quick breakdown. (i didn't save the psd file?? so i'm redoing this i guess, but i did it on autopilot in the first place. i've been making gifs for over 15 years.)
GONNA INCLUDE A VIDEO AT THE END SHOWING OFF THE SETTINGS!!
General GIF stuff
This is in Photoshop CC. I extract a clip from a video as an MP4 file, which photoshop can open. (I use AviDemux for this, which is free, because it lets you save clips using 'copy' encoding for video output and still change from MKV to MP4 format - without losing any video quality, cause you're not re-encoding.)
Open that shit directly in photoshop as a video layer (just drag and drop), that lets you scan through it to check the colouring works overall. Convert the video layer to Smart Object, that lets you resize and edit it. (Do NOT open a full movie in Photoshop, it'll probably die and it has a max length anyway.)
Also all the colour adjustments are gonna be adjustment layers you can tweak and turn on/off whenever. There's a lil button at the bottom of the Layers window to add them quickly.
When we're done we're choosing a section of the video in the Timeline window and we're doing File->Export->Save For Web. 'Adaptive' (or selective) palette selection, 'pattern' style dithering.
Colouring
Curves layer to lighten. Just pull the curve up. Curves seem to give a much smoother lightening, since it mostly affects the middle, leaving the brights and the darks where they are.
Levels to make the darkest darks pure black, and the lightest lights pure white. Good for limiting GIF size. Don't overdo it though.
Colour balance!! My beloved, most important. So for the Shadows and Highlights, you're gonna move the sliders towards Cyan and Blue, but for the Midtones you're gonna do the opposite - towards Red and Yellow. This means you don't shift the overall colour of the picture, but trust me it does SO MUCH for the contrast and colour. I swear I do this for almost any edit, and also my art tbh. Also if the original clip is like very green or whatever, you can correct that here.
Selective colour. For this I did one thing. For 'Black' dropdown, I upped 'black' and 'yellow' sliders (the latter to counteract the blue in the darks). This in combination with:
Levels again. Bring in those darks, turn them pure black. Basically this does a couple things. It preserves GIF file size, by making sure the dark areas are static (file sizes mostly depends on pixels that are CHANGING). It ALSO makes the palette much more optimized, meaning you don't waste palette on the darks no one sees anyway, and instead uses them in the mid range colour variation, giving much smoother gradients. That's it!! That's all the colouring!!
EDIT: Uh I probably also had a Vibrance layer?? Idk. This just ups the saturation, but it's softer than upping Saturation. Makes the colours pop without overdoing it.
Other tips and tricks
Often I'll put a Smart Sharpen (50% amount, 0,5px radius) filter on the video layer, just to make it a bit crisper. Subtle but effective.
You can manually edit the palette when you save as a GIF, either to reduce file size, or because some colour areas look pixelly. See the video for how.
If your file size is huge but you don't want to shorten or resize, you can reduce the frame rate manually. To do this, FIRST save the GIF, then open the GIF you just saved. Go through in the Timeline window (which is now a Frame Animation rather than a Video Timeline), select every other frame, and delete them. When you do this, remember to select the rest of the frames and double their Frame Delay so you don't end up with a super speedy GIF. (You can also make a GIF slow-mo like this.)
Since the video is a smart object, I literally just resized it in between saving the different GIFs, to change composition between the different shots.
Selective Colour layer can be used for a lot of image tweaking. For example, if something is overly yellow or green, I may go to the Yellow and Green in dropdown and just reduce the yellow slider. (I usually then go to Red in dropdown and ADD some yellow to that, to balance out the reds to be less pink.) Or maybe the overall colours are nice but the blues are dull, so I'll just go to Blue/Cyan and tweak those specifically.
If you have a colouring you like that you want to use on lots of things, remember you can drag-and-drop layers between different images. You can also save a photoshop file with nothing but those layers, to use on later gifs and just tweak as needed. (You can also make Actions to automate stuff, but I won't go into that.)
How easy or hard something is to colour HUGELY depends on the original video, both lighting/colouring and video quality.
Finally the video showing settings!
This is like 5 minutes long and has no commentary or anything. This is mostly to show off where you find each individual thing, and what difference it makes in the colouring.
ANYWAY hope someone found this useful!!! ♥
#next to normal#gif making#photoshop#gif tutorial#photoshop tutorial#my posts#my gifs#art things#tutorials#PS if you can't afford Photoshop then just you know.... yo ho ho and all that
119 notes
·
View notes