#seed starting
Text
518 notes
·
View notes
Text


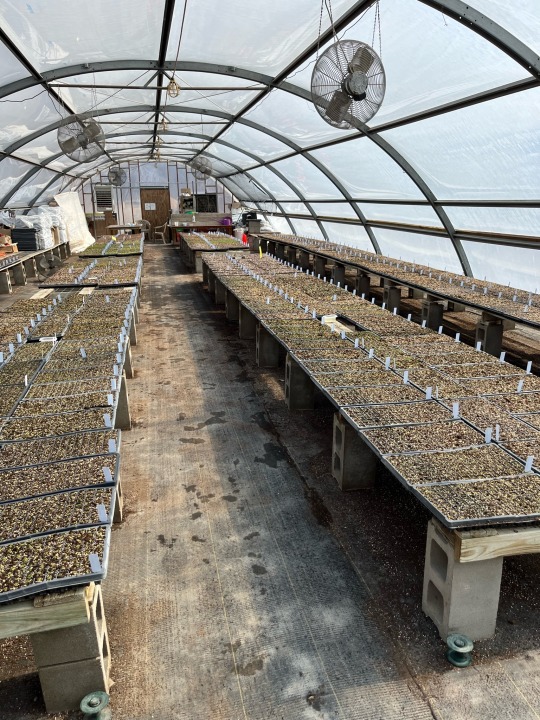
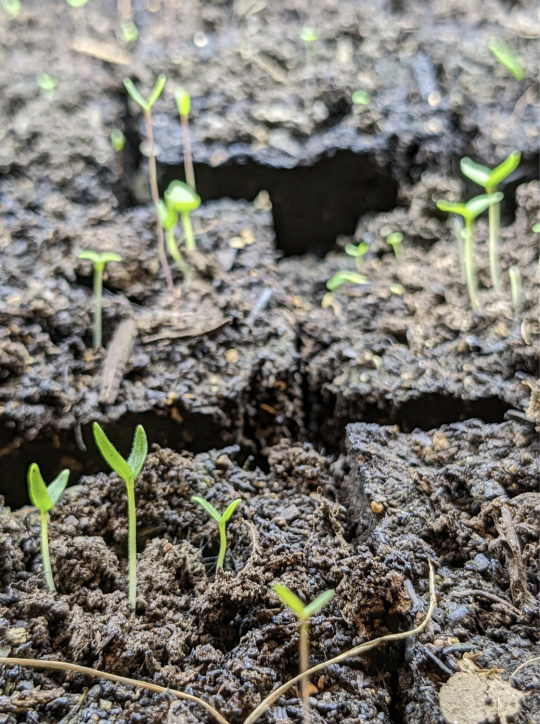
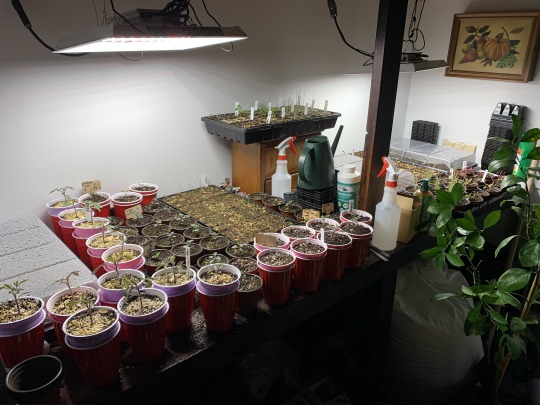
All the babies. Of the ~550 trays here, I personally seeded about 240 of them. Only the very early stuff is coming up, mostly the alliums and violets. Every single one of these was seeded by hand from seeds we stratified (unless they don’t require stratification). There are 70,040 cells in here and our germination rate is very high, we usually have just as many finished plants as there are cells started. So around 70,000 native plants will be sold to the public and some local government programs but they’ll all get planted somewhere. 70,000 more links in the chain for the ecosystem. 70,000 more chances a pollinator finds the plant they need to survive. 70,000 more root systems anchoring degraded soils. 70,000 more reminders that the earth is home for all of us, including those who cannot speak and are easily ignored.
This is the 5th season my boss has grown native plants for sale at this scale. So there may be as many as 350,000 plants out there that he ushered along into existence. To do all this work, stratifying and hand seeding, takes about two weeks (not including the 90 days the seeds just sit in the fridge). It’s not impossible, there’s very little mystery, once you find your rhythm it’s all very doable. You take the time to tediously tweezer a little gooey clump of seeds into a seedling cell 128 times and that’s one tray. You do that for 20 trays, that takes about 5 hours. You go to lunch. Repeat for two weeks. Your coworkers come in after you and do the same thing. Three people make enough plants to cover about 1.5 acres of land. It’s not changing the world but it is changing my town.
#native plants#nature#plants#gardening#greenhouse content#seeds#seed starting#spring#north america#great plains
51 notes
·
View notes
Text


This year's tomatoes. 35 varieties sown yesterday, of which 7 are new (of which 1 is a surprise variety I got extra for an order).
#tomatoes#seed starting#seed tray#gardeners on tumblr#grow your own food#gardenblr#edible gardening#garden#gardenblog#gardening#gardencore
40 notes
·
View notes
Text
Tomatillo seedlings
#grow your own food#vegetable gardening#gardening#tomatillos#seed saving#seed starting#soil blocks#myphoto
37 notes
·
View notes
Text
Seed startinggggg
29 notes
·
View notes
Text
Seed Starting for Beginners- another class I taught Pre-pandemic, edited down for posting here.
Seed Basics:
Anatomy: seeds basically consist of seed leaves (aka cotyledons), an embryo, and a seed wall. The cotyledons are food storage, and usually the first leaves that emerge and photosynthesize*. Seeds are dormant, but they are still alive and they are still exchanging gas (breathing) and using up energy stores. Ideally, most vegetable seeds are stored somewhere cold and dry. The colder and drier a seed is kept, the slower it’s metabolism, and the more vigorously it will sprout once conditions are correct (though, as this is biology, there are plenty exceptions- pawpaws come to mind). I keep my seed packets in a closed glass jar with a silica packet in my freezer. If you want to nerd out, here’s a link to a pretty famous seed vault, where seeds are kept below 0 degrees fahrenheit: https://www.croptrust.org/our-work/svalbard-global-seed-vault/
Sprouting/germinating/breaking dormancy: For most vegetables, all that is needed for seeds to sprout is warmth and moisture. Some will germinate better in the dark, some will germinate better with light (the package will tell you what is needed). For fruits, herbs, and flowers, sometimes they will need additional steps, such as cold stratification, or breaking the seed wall.
Basics of Seed Starting:
Step one is to decide what you want to grow- vegetables, herbs, flowers?
Important questions:
What do I actually (want to) eat? (Ie, don’t just grow radishes because they’re easy- will you actually eat/enjoy it?). What would I eat more of if it weren’t so expensive? Make a list.
What grows well here? What Hardiness/heat/climate zone are you in? Do you have microclimates to account for? What are they? Connect with your local extension office (in the US) to find out what grows well where you are and keys to success
Step two: Figure out when to start your seeds:
First, check the seed packet/website description and find your last frost date. Some plants, like broccoli, have a wide general time range to plant them in, but some varieties are meant for spring, or summer, or to overwinter. It’s best to get the specific variety’s information if possible.
If not that, then using a seed starting calculator like Johnny’s is next best.
Or, go to a regional planting chart like Tilth’s. Or find your local extension office, they probably have a planting calendar.
Keep track of which ones are sown indoors, sown directly, and when the switch happens. For example, you can sow cucumbers a week or two before your last frost indoors, or a week after the last frost directly into the ground. Also note when plants started indoors should be transplanted outdoors
Consider the “winter sowing” technique- Basically, sowing seeds in mini greenhouses (aka, cloches), usually made from used plastic containers, and letting the seeds come up when they will. Makes very sturdy plants, might not get as early as a start.
Step Three: How?
Containers: Please use standard plastic tray, newspaper pots, peat plugs, used food containers, etc. that have a decent amount of space and adequate drainage.
Why not egg cartons/eggshells? Because they a) do not have enough space for seeds to do much more than sprout and b) the egg cartons tend to dry soil out very quickly.
Medium: Seed starting mix, potting soil, whatever, do NOT use garden soil without killing the weed seeds first. If you use a seed starting mix, keep in mind that it won’t have enough fertility to support the seedlings for very long. It is meant to be used to germinate seeds, and then have those seedlings transplanted into a richer mix to grow on. Also, I recommend NOT using coffee grounds as part of your seedling mix, because they have been shown to inhibit germination.
Which do well with transplant, which do not: (paper pots are great for those that don’t like transplanting)
Take well to transplanting: brassicas (think broccoli family), nightshades (tomato family), leafy greens
Fussy and need help to transplant well: Squash, cucumbers, melons, etc
Just don’t: carrots, beets, other root crops.
If they don’t transplant well, focus on direct sowing. The above IS NOT an exhaustive list.
Light: Give them as much as possible, a south facing window, or indoor grow lights. If you’re using a light, look for one that says full spectrum, daylight, or says it is over 5000 kelvin.
The warmer you keep the seedlings, the brighter the light they need. Warmth determines their metabolism, and light is their fuel/food, so you can keep them from etoliating/stretching out by keeping them at cooler temperatures. Slower growth at the same light intensity yields sturdier seedlings. Keeping seedlings at cooler temperatures can help you get stocky, sturdy, vigorous plants. This is a really big key, so pay attention. A lot of people struggle with weak seedlings that have stretched out in their search for light, and that can be avoided if you match temperature to light levels.
Actually doing it:
Fill your container(s). Tamp down soil- movement of water depends on capillary action, which depends on the soil particles being close enough together. Consult package on depth, or use 3x diameter of seed. Plant. Water. Wait.
Watering: keep evenly moist, do not let them dry out. Not so much that it’s soggy though- so after you water they shouldn’t be sitting in a puddle of water an hour later. I prefer to bottom water. To do that, put your container in a tray of water, and let it soak up. If you’ve tamped it down properly, you’ll see the surface moisten.
So they’ve sprouted, now what?
If you’re using a peat or commercial seed starting mix, it likely doesn’t have enough fertility to support growth beyond the first few true seed leaves. That means that as soon as you see true leaves coming out, you have two choices: either use a water-soluble fertilizer, or gently transfer the seedlings to a more fertile soil mix.
The big day: planting outside!
Harden off first! The wee ones have been indoors, in very gentle conditions, and need to adapt to the outdoors environment before you transplant them out there. If you don’t, the cold can harm them, and they can also get sunburnt, or even damaged by wind. Acclimate them by putting them outdoors for an hour the first day, a few hours the next, gradually increasing the amount of time they spend outdoors until a week or so has passed. DO NOT transplant out frost tender plants (nightshades, squashes, pumpkins, cucumbers, etc) until the danger of frost has passed (unless you have a tunnel or greenhouse).
Transplanting, general: Water plants well the day before. Pick a moderate time of day if it’s been hot. Prepare the hole- bigger than the pot was, and deeper if tomato or brassica. If it’s one that needs extra fertility, thoroughly mix in some compost (I use one to two shovelfuls of rich compost). Loosen the plant in the pot by gently squeezing or tapping, make sure the roots aren’t circling (if they are, gently tease them apart), and put in hole. Back fill hole and press down. Water thoroughly.
For sensitive plants: all the above, but “mud in” the plant, that is, water enough that water sits on the surface for at least 15 seconds. Cover- if it’s hot, a cardboard box or light sheet to shade, if it’s cool a bucket to hold in extra warmth.
Success through the summer:
Provide fertility: some plants, like potatoes and kale likely won’t need much additional fertility beyond what’s already in your soil. Some crops, like corn, squash, and broccoli need a lot more fertility to make a decent crop. Either way, if you notice your plants aren’t growing very well, it’s likely a matter of fertility- or watering.
I prefer to provide this fertility through composts & cover crops. You can also just use a balanced fertilizer, but look into mycorrhizae before you decide how to go about it. Whether it’s organic or not, it’s generally a good idea to follow the package directions for best results. It’s just as easy to over fertilize and burn your plants as it is to under fertilize and get stunted growth.
Learning More:
Visit community gardens, visit the Master Gardener demonstration gardens, your local extension office for local information, here’s the link to Washington States: http://gardening.wsu.edu/
Facebook groups can be very helpful, gardening forums as well.
Useful websites in General:
https://www.johnnyseeds.com/growers-library/seed-planting-schedule-calculator.html seed sowing date calculator- put in your last frost, get general dates for everything. Honestly, poke around their growers library in general, they've got some cool stuff.
https://davesgarden.com/guides/freeze-frost-dates/#b for last frost dates (and a lot more).
https://garden.org/apps/frost-dates/Olympia%2C+Washington/ another last frost date site
https://www.sciencedaily.com/releases/2015/05/150515111628.htm Gardening in a polluted paradise: Is it safe?
Seed Companies I use:
Based in Western Washington:
Uprising Organics (All Open Pollinated)
Based in Western Oregon:
Adaptive Seed (All Open Pollinated)
Territorial Seed
Nicole’s Garden Nursery
Based in B.C.:
West Coast Seed
Based elsewhere:
Fedco Seeds (Co-op)
Johnny’s Selected Seeds (Employee Owned)
There are, of course, many more, but those tend to be my go-to.
*Some seed’s cotyledons stay in the soil, and the embryo is the part that emerges. Examples include snow peas, beans, and corn. Others have their seed leaves emerge as their first leaves, e.g., broccoli and sunflowers.
169 notes
·
View notes
Text

And the award for the first tomato to pop goes to the Amish Paste tomato!!! 🍅
Gonna transplant the peppers soon to bigger pots :)
101 notes
·
View notes
Text
I can't help but start seeds early- winter is far too dreary
I'm nearly out of room already and I still have loads more varieties to get going...
The double-cup tomatoes are Black Strawberry, Peron, Sunrise Bumble Bee, Crazy Cherry, and Terra Cotta.
The small pots are all Orange Hat
Tray of shallots, four cups of onion seeds,tray of lettuce, two trays of flowers, a tray of perennials, and misc herbs.
13 notes
·
View notes
Text

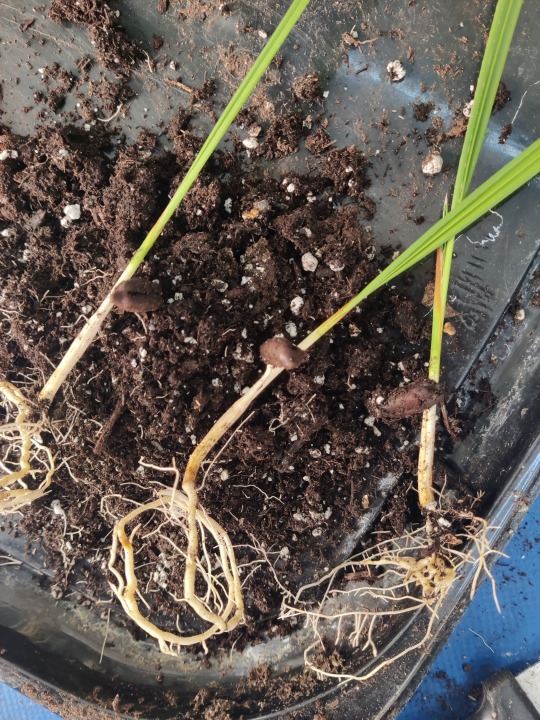
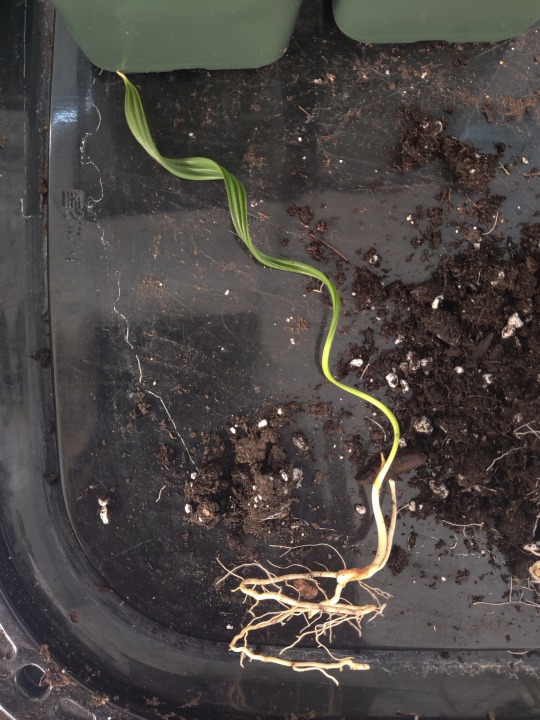
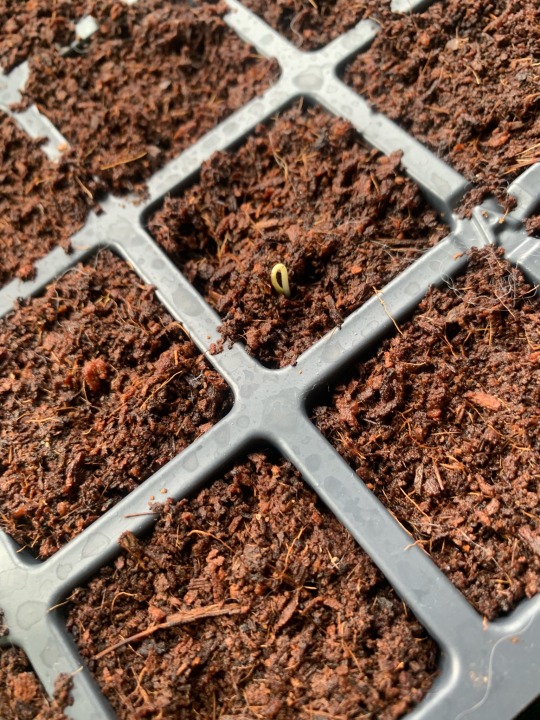
Long time no post! Haven't had much to share in the winter months, but here's a fun project I did recently: germinating dates! The packet I was eating was labeled "Medjool," from Turkey, if that's any indication of what variety they are. I've no idea who's taking these in as they're most definitely not hardy around here.
One in particular had a tough time breaking the surface of the dirt, and so corkscrewed itself up until I freed it. We'll see how it grows. Highly recommend looking at any seed you encounter and asking "Can I germinate this?" and then realizing what you grew can be 50ft tall.
15 notes
·
View notes
Text
Quick lil garden peek
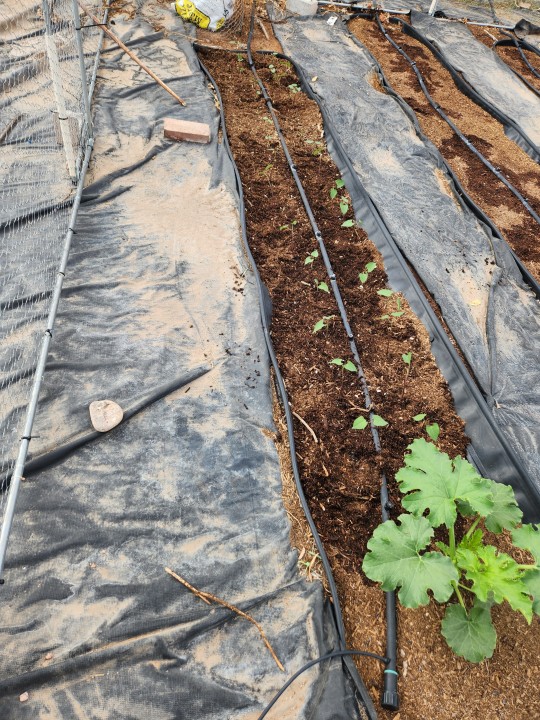
Transplanted some (bush)bean starts this morning. Just want to see if they'll do any good with transplanting. If so I may do this again for sucession planting and fill in planting.
With them I direct seeded sunflower mix I've been collecting from prior grows.
At the end is a pumpkin volunteer. I likely won't be keeping it, but I'm gonna let it grow for now and likely pull it to feed the chickens.
🌱🫘Happy Homesteading🫘🌱
9.23 2023
#homesteading#self sufficient living#thestudentfarmer#studentfarmer#self sufficiency#food#garden#gardening#variety bush bean#urban homesteading#urban gardening#urban farming#seed starting#human right to clean food#right to grow food#right to grow#fresh food#food is a human right#smalls scale differences#small scale farming#small scale solutions#green thumb#start gardening
25 notes
·
View notes
Text
129 notes
·
View notes
Text
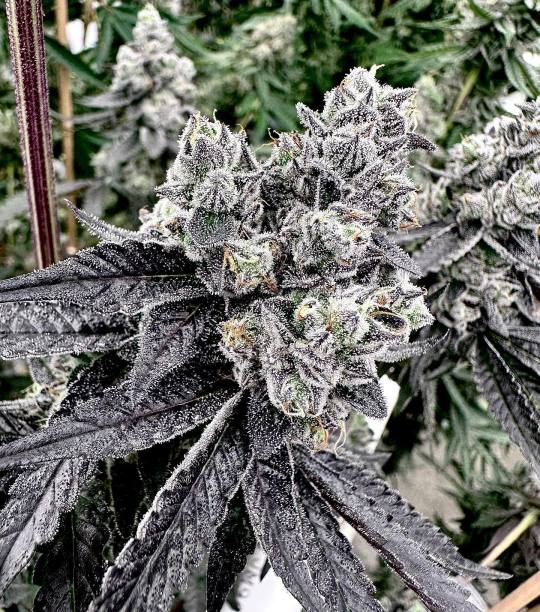
Porto leche looking extra Guicy right before the chop
9 notes
·
View notes
Text
It begins.
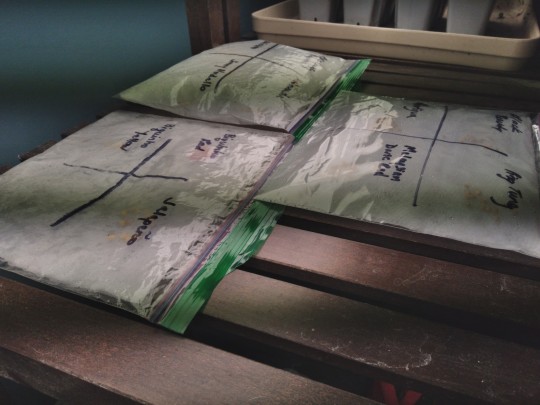
Got the pepper and eggplant seeds in their sprouting bags (zip lock baggies with moist paper towels) and got the heading cabbages (4 varieties) and 2 lettuces planted in cells for later transplant this week.
I really like the sprouting method--it's simple, you can see which seeds are duds, and can plant one viable seed per cell without wondering if they're failing to germinate for a wide variety of reasons. I've been much more successful with certain types of seeds this way.
#gardening#seed starting#germination#peppers#eggplant#cabbage#lettuce#i tried overwintering last year's pepper plants but i think last month's arctic blast killed them#they were in the basement and it got a bit too chilly
8 notes
·
View notes
Text
Going to buy grass seeds to plant in silly little containers because if I don’t make some life take form in the next week I will start biting through drywall.
10 notes
·
View notes
Text

from Appalachia's Homestead with Patara
7 notes
·
View notes
Text
Behold one of the little eggplants I started last month because I have no self-restraint when in comes to gardening sometimes:

Just potted them up yesterday, and it was an unusually fluffy, compost heavy mix for me, so I'm a little worried about compaction. It was what I had on hand though, and so because I didn't feel like mixing up a new batch, that's what they get.
Some tips for people starting seeds for the first time (and I'm sure everyone will listen to me even though I just admitted I made what may turn out to be a big mistake):
1. Use good containers for your seedlings. And by 'good' I mean something that won't wick away moisture ( so not cardboard egg cartons, terracotta, etc) and also is both big enough to support good root growth (so not egg cartons in general) and has drainage holes.
You don't have to buy these new, I got these pots from a free pile, and it's relatively easy to make holes in old food containers to create drainage. I also like making newspaper pots for some things.
2. Sow directly into the growing medium. Germinating on a paper towel adds an extra step (moving the tiny seedlings to soil) when they're at their most fragile. It is useful for germination rate tests, and some more difficult seeds, but vegetable seeds in general do not benefit from this step. It's just fun to see what's happening.
3. For vegetables, herbs, and fruits, you're going to want to get as much light as possible. A south facing window can work where I am, but the plants will be more etoliated than those grown under plant lights. The good news is that the lights last from year to year.
That's not an exhaustive list, just a few key factors.
17 notes
·
View notes
Last Seen Blogs

reversealchemy
Reverse Alchemy

trajets
Trajets

karenfordonte
Caring For Donte

naqipulexet
Untitled
bettysupremacy
so, when i die, which i must do