#the rocket launcher in that game only does damage on direct hits
Text
I got Ultrakill recently and it's great, love it to bits. In it, the only way to heal is by blood which splashes off of enemies when you damage them. So one wants to be up in their face as much as possible when at low health. Now as to how this relates to TF2: this has killed (ultrakilled one might even say if they wanted to be punny) my 'retreat/be cautious when at low health' instinct.
I had a game today in which I was at literally 1 health as Pyro and pushing forward like a moron. I didn't actually die there somehow even though I should've, got a kill even (or maybe an assist, I don't recall exactly, I was in the killfeed regardless though). A rare instance of it working out for me because most of the time, it very much doesn't. I've been dying a lot more as a result of this play style change, even on games where I'm otherwise playing pretty good.
Is that a normal thing to have happen? Having how one plays one FPS affect how they play another, even when that other one is one they've been playing for significantly longer.
#deck speaks#let's play deck#tf2#ultrakill#I also have been trying to dash jump in TF2 sometimes or dash to avoid damage#typically only in the heat of the moment of active battle though#my TF2 instincts have been helping me in Ultrakill though#the rocket launcher in that game only does damage on direct hits#and after how long I've only been using the Direct Hit on Soldier that feels perfectly natural to me
12 notes
·
View notes
Note
what's your favourite weapon (in ultrakill) and do you have any repeated actions you like?
Honestly? I think I like all the weapons equally (except the standard nailgun. Hakita pls buff. At least there’s sawcon) but if I had to choose a favorite it would be the Marksman revolver. Coins are the best non-schmovement feature of the game.
As for repeated actions I like, I’ll list them off by weapon and then get to the schmovement.
Revolver:
Coin shots! This is pretty basic, just flick the coin up and shoot it. Good in all situations, but especially with hard-to-hit enemies or while moving fast so you don’t have to deal with aiming. Also, if you toss the coin behind a Streetsweeper (flamethrower enemy) and shoot it, it’ll target its fuel canister and make it explode.
Railcoin: You can hit coins with any hitscan weapon, including rail cannon shots! Coins will always target other coins first and then enemies, so if you toss two coins through an enemy you could potentially hit it three times! Best used against big enemies like Cerberus, Malicious Face, and Hideous Mass.
This is more of a Cybergrind strategy since there’s no ceiling, but combining slam storage with tossing four coins downwards and then shooting them with an alt revolver pierce shot is a pretty effective way to deal a lot of damage to Mindflayers (blue teleporting titty enemies).
Shotgun:
Shotgun Swap: When you swap between Shotgun variants, you can skip the reload animation between shots. This allows you to fire off shots in rapid succession for heavy close range damage, and can be combined with punching your own shotgun pellets for some pretty solid ranged damage. Two rapid point-blank shots plus one red fist are enough to kill a Malicious Face, so keep that in mind for whenever those pop up.
Nuke: When you shoot out a Core Eject grenade (from the blue shotgun), you can shoot it with a hitscan weapon to make it explode for extra damage. If you combine this with the Malicious Railcannon (red exploding one), it’ll make a massive explosion that does a TON of damage to the area. Good for dealing with crowds.
Nailgun:
Rocket Magnetism: If a nail is attached to an enemy, then it will attract any Rocket Launcher shots to itself. Very useful for helping make sure you don’t miss.
Sawcon: Traps with the alternate nailgun are really great, but you don’t only have to place them on the ground. If you place them on an aggressive enemy and get it to follow you around, it could possibly get you a lot more damage than a stationary trap could. With that being said, you’ll have to figure out what works for each situation.
Rocket Launcher:
Rocket Riding: If you stop one of your rockets and land on it, you can change its direction and ride it around. You can do this up to three times before you start getting diminishing returns until you touch the ground, but those three times can get you a LOT of movement.
Rocket Jumping: You can rocket jump like in TF2 by jumping and then firing at the ground at the same time. It’s not quite as effective as it is in that game, but it is fun!
General Schmovement:
Bunny hopping can be done by hitting grind + jump when you touch the ground and repeating that whenever you land. This is personally my favorite way to get around.
You can store slams by slamming next to a wall and then wall jumping off of it. You’ll see the same yellow lines around you as if you were still slamming, but you’ll fall at a normal speed. When you hit the ground, this can be used to get massive vertical momentum (when combined with a jump) or horizontal momentum (when combined with a bunny hop).
I probably missed some, but that’s everything that immediately comes to mind.
15 notes
·
View notes
Text
the new rocket launcher in ultrakill is so awesome. i’m just going to gush about it. so, if you fire a rocket but don’t directly hit any enemies, the explosion only knocks enemies away without damaging them. you can only do damage with direct hits, although a direct hit will cause an explosion that does damage to the victim of the direct hit and anyone around them.
but here’s the thing. it has an extra feature where if you score a direct hit on an airborne enemy that can’t fly (i.e. is falling and would like to have not been launched into the air) you get a super explosion that is bright red, double blast radius, and double damage. it feels so amazing, as it should since it’s not easy to hit a moving target with a non-hitscan weapon, often from below.
this isn’t even getting into how right clicking with the rocket launcher will cause all rockets to “pause” for lack of a better term until you unpause them. time stops, but only for your rockets. you can fire a rocket, pause it, wait for an enemy to walk in front of said rocket, then unpause it to completely smoke them.
okay, here’s the best part. you wanna know what else you can do with a paused rocket? you’re not gonna believe this. okay, so, fire a rocket horizontally, pause it, and then, what you’re gonna want to do is jump on top of it, unpause it, and surf your own rocket into the sunset. that is a real thing you can do in this game. incredible
22 notes
·
View notes
Text
Halo Through its Guns: Halo CE
I think this is a bit of an experiment, but one I intend to see all the way through. I’ve been thinking a lot about this series recently, not to mention playing a lot of it, so I’ve wanted to find a way to properly discuss it. Perhaps even analyse it.
If there’s one thing people gravitate towards talking about in a first person shooter game, especially a series so long-running as Halo, it’s going to be the guns. They’re taking up a significant portion of the screen a lot of the time, and a lot of development time is going to be spent making sure they all look and sound good and are satisfying to use. As a result, I think the weapons in Halo are a good lens through which to view each entry in the series.
So, I’m going to be using one gun per game as a means to discuss each one. At this point, I’ve lined most of my picks up already (and hoping to have actually played 5 by the time I get to it), so I’m confident most of them are going to provide an interesting discussion.
Therefore, this is: Halo: Combat Evolved, through its iconic gun. No, it’s not the Magnum, it’s the Plasma Pistol.
It’s kind of hard to talk about Halo: CE without talking about all of gaming of the era, because it was kind of a huge shift in the landscape as far as FPS games went. Unfortunately, I’m too young to have actually lived through all this, but the game is kind of to 2000s shooters as Doom was to 90s shooters, and kind of as Seinfeld is to sitcoms. That is, it defined them so utterly that all the future iterations of this kind of gameplay make Combat Evolved feel a little antiquated. I suppose being a 20-year-old game doesn’t help at this point.
Something Halo: CE owes to those 90s games is the concept of the weapon sandbox. It’s the multiplayer style that I believe pretty much just Halo (and Battle Royale games, kind of) has kept going with, where you start with a couple of default, standard equipment choices and have to scrounge together the rest on the map. The majority of engagements are still going to take place using those default pieces of equipment, but either map knowledge or luck can help give you more options and turn the tide in your favour, letting you pull a more powerful weapon out of your pocket as needed.
Part of Halo’s innovation on this design is, ironically, the limitation. Specifically, only carrying two guns at a time means you can’t just run around and grab everything you see- every gun is different, and choosing to pick one up means losing the benefits of one of your others. In Team games, it pays to have different people grab different weapons, such that you’re more versatile depending on game type or what direction and distance your enemies approach from.
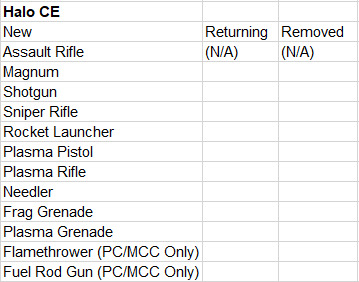
The important thing that Halo: CE got right, and that many future entries would struggle with, is that every single weapon in it has a unique niche. There’s only one Sniper Rifle for extreme range, only one Shotgun for unparalleled close-range lethality. The Assault Rifle is a solid medium/close range bullet hose that’s effective against both shields and unshielded players, and the Magnum is, while maybe a little too good, perfect for picking off damaged enemies at medium to long range. And also, close range, because it’s a bit much.
But of course, this is all from the perspective of Multiplayer, and Halo: CE obviously has a Campaign as well. And with the Campaign comes weapons you need to design for your enemies to wield, which brings us to the Plasma Pistol. The most common weapon in the hands of the Covenant’s Grunts and Jackals (and later Drones and Skirmishers), and one of (I believe) only 5 guns to appear in every entry in the series. (The others being the Shotgun, Sniper Rifle, Rocket Launcher, and Needler. I guess you could count the FRG but it’s only kind of in CE, and also the grenades).
A deliberate part of the design for Halo: CE’s Campaign and Multiplayer was an emphasis on player movement. This is kind of interesting, because the Chief actually moves pretty slowly compared to previous Shoot Men, but part of the idea was that every Covenant weapon would shoot visible, slower moving projectiles such that the player would potentially be able to predict and dodge them, allowing for a higher skill cap at higher difficulties. This also helps add a consistent flavour to Covenant weaponry, as bright glowing colours are both easy to distinguish and substantially different enough from the gunmetal of the UNSC equipment to feel alien. There will never be a point where you confuse a Grunt holding a Plasma Pistol from one holding a Needler, or an Elite with an Energy Sword from one with a Plasma Rifle.
The Plasma Pistol is the bread and butter of Halo’s enemy engagement design. Most of the time in enemies’ hands it’s effectively a peashooter, bright and distracting, but not dealing too much damage, just enough to be annoying, and to supplement more dangerous weapons carried by other enemies. It does, however, have the Overcharge mode, which ensures that every one of these little Grunts and Jackals remains a threat, with the ability to entirely strip your shields (or deal significant damage to your health bar) if they wise up and go for it. An Overcharging Plasma Pistol is extremely obvious, though, with a big green glow and an iconic noise making the enemy most threatening you easy to find. It means the enemy fights are never quite the same, and adds a sense of urgency to them as well, especially on early difficulties.
The overcharge is also the core of how the Plasma Pistol functions in Multiplayer as well, as well as taking full advantage of other innovations in Halo’s game design. In Multiplayer, the Plasma Pistol is easily best known for its inclusion in the “noob combo”- that is, Overcharge the shields, kill them with the Magnum. This is a highlight of the specialisation in weapons in Halo: CE- the Plasma Pistol is great against the first half of their health, in the form of the Shields, but it’s practically useless against the actual, well, Health. Because of this, the Plasma Pistol is not a default weapon in Multiplayer like it is in Campaign, it’s niche necessitates a role as a pickup weapon. You’re never going to want it if you already have, say, a Shotgun or Sniper Rifle, since those are such similarly specific weapons that your backup being a Plasma Pistol is not a good idea.
But of course, guns are not your only combat option in Halo. One of the most innovative points of design in this game is the constant access to three attack options at a time. In previous FPS games, the options for Grenades and Melee were usually in the form of separate weapon slots, whereas in Halo you have access to all three at the same time on different buttons. This gives the whole game a more fluid feel, and there’s a reason it’s pretty much now the default for games of this style- it looks cool, it’s less awkward, and it feels slick as hell. The Plasma Pistol gets to lean into this versatility nicely as well, as Melee damage or either Grenade type at close enough range will kill next to an overcharge. You’re never left with no way of hitting people’s health after you dunk their shields, especially since the Pistol works best at close range.
In summation. Halo: Combat Evolved was genre-defining as a first-person shooter, capturing what would become the default for gaming to come for a while. The Plasma Pistol is an excellent example of this, leaning into all the innovations of the overall game’s design and producing an iconic piece of video game firepower. It’s slick, it’s effective, and it looks and sounds extremely cool.
The rest of the series would never quite capture the exact same balance as Halo: CE, but as the games changed and technology improved, so too did the guns. Join me next time, when everything gets a bit more Two.
28 notes
·
View notes
Text
Two rockets for the price of one
The Beggar’s Bazooka is a fan-favorite rocket launcher for its ability to fire up to three rockets in quick succession, but it doesn’t truly launch more than one in one shot. If you’ve played some of the harder MvM missions, you may have met triple-Black Box soldiers who barrage your team with triple shots - and I want to see how that might play in player-versus-player games. Only, we’re starting with double shots.
I had to think first about how I wanted to handle double shots. If both come out at once, should their deviance be random, or should they fire one rocket accurately and one with deviation? Or should they always fire in the same pattern?
I opted to give the rockets random deviation. Though this is certainly a debatable choice, I decided this because the Beggar’s Bazooka already works this way. I thought it would be nice to have one rocket stay accurate and the other deviate, a bit like how shotgun spread works, but I found that made the rocket launcher far more effective at range and gave the impression of a “main” rocket rather than a duo. So, that’s how I’m doing it for now.
Additionally, there’s the question of rocket jumping, which could make or break this weapon. For now, I’ll opt to have the weapon work normally for rocket jumps, to avoid injecting the chaos of dual explosions. If the first iteration works okay, we’ll start looking at that more technical side.
Double Rocket Launcher Iteration 1
(+) Fires two rockets for each one consumed
(-) -35% damage
(-) -20% blast radius
(-) +3 degrees random projectile deviation
Simply put, this rocket launcher can spread the pain over a wide area, but struggles at attacking single targets, especially beyond medium range.
While this rocket launcher is incredibly cool, you may notice that it doesn’t really provide the burst damage that the Beggar’s Bazooka does. That’s because it has no loading mechanic, meaning that the two rockets are available as soon as you see an enemy; there’s no preparation, no need to plan ahead. Frankly, while that might be palatable to people who struggle to use the Beggar’s, I worry that this weapon would ultimately be less interesting than its counterpart. It’s certainly cool, but you could achieve a similar effect by having one low-damage, high-blast-radius rocket. It looks like we may have to look at rocket jumping to set this launcher apart.
At high levels, rocket jumping is probably one of the Soldier’s most important tools. Because of the complexity of the physics engine, it’s very easy to play havoc with balance by changing rocket jumps. Note that, barring the Beggar’s Bazooka, all of the existing rocket launchers have the same rocket jump mechanics, sending you the same distance at the same speed. This helps keep launchers accessible, since you don’t have to memorize different push forces and blast sizes - but, from a developer’s standpoint, it also makes them easier to balance. The Beggar’s itself allows crazy, literally off-the-wall rocket jump tricks by using overload jumps (where you propel yourself midair from overloading a rocket). So we tread with caution.
For this rocket launcher, the logical choice to me would be to make it propel the Soldier further, as two explosions would naturally do. I don’t want to give the jump a random direction, as it’s no fun gambling like that; so the easiest change would simply be to give it increased blast force. But there’s a catch: unless we put in an artificial penalty, the Soldier will also take more damage from a rocket jump. Normally, damage penalties/bonuses don’t apply to self-damage, but in this case I think a hidden 35% reduction in self-inflicted blast damage might be in order. That way, this rocket jump will only hit you with 30% more damage (and comparably increased push force), rather than double normal.
Is there a way this could be used to break the game? Yeah, I’m sure of it. Some maps with low ceilings might also pose particular problems. But darned if it isn’t interesting, and that’s what we want from a weapon!
3 notes
·
View notes
Text
HighFleet - Shipbuilding Guide
Learn how to build ships that have better performance and higher cost-efficiency than built-ins!
HighFleet Shipbuilding
(Initially created August 5th 2021 for game version 1.1)Building effective ships in Highfleet can be extremely frustrating to new players; but is a very rewarding task. Player ships can significantly out-class built-ins in terms of cost-performance and efficiency.
This guide is oriented towards players who are not cheating or have not racked up a giant score for new game mode. While the guide can help players who don’t care about fuel expense or cost efficiency, these items are an important consideration in the guide.
Ship Editor Basics:
Hopefully someday Konstantine will explain this ingame... I've had to tell dozens of players how to place multiple parts without going back to the parts menu every step...
-You can hold shift whilst placing parts (left click) to retain that piece on your cursor, so that you can place another immediately.
-You can create a disconnected segment of a ship, band-box select it, then right click lift the entire piece. You can place/rotate the entire piece… including shift-placement for very fast construction.
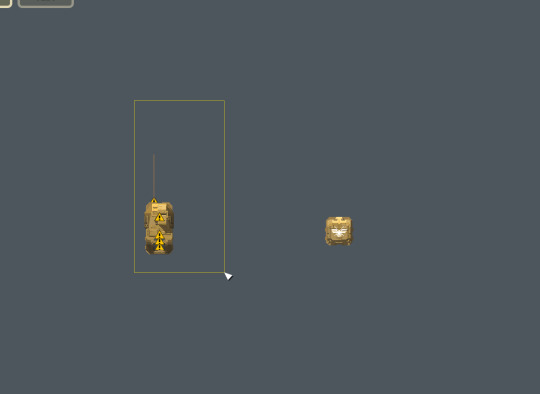
Fig.1
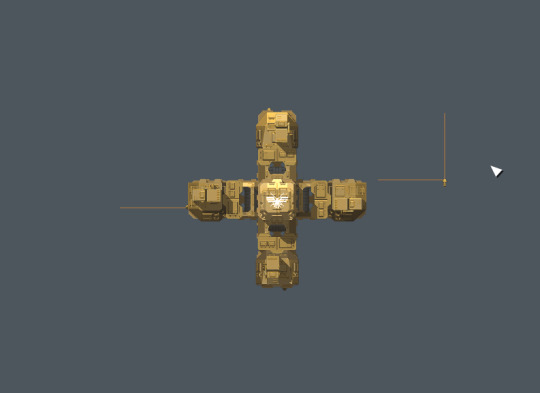
Fig.2 Incidentally, I discovered a placement bug with the antenna...
-If your editor seems to have locked up, drag select your main hull (the piece of ship containing the Bridge) and right click to attach to your cursor. Place it somewhere empty and your game should be responsive again. This is assuming you are building a sane ship under 200k of cost, ofc...
Highfleet Ship Design Theory
Hybrids suck. Do not build hybrids. Some may find this controversial, but this seems really obvious, and quite a few other players agree with me on this. TacticalShips (that are designed to duke it out in ship vs ship combat) and Strategic/Support/Auxiliary ships should be built very differently.(Other than AAW pickets, but they are a special case and the angles your opponents will start from in Air Defense Mode are far more limited than in Ship vs Ship)
Reasoning?
-In ship vs ship combat, you get to pick which ships on your team get to appear. Thus, unless you screw up badly, there is no reason for your tanker, missile carrier or sensor ship to ever have to get shot at by cannons.
-Tactical ships want to minimize cross-section, to minimize probability of getting hit and mass required for a given armor thickness. Lots of fuel tanks *greatly* increases cross section, mass, and engine count required to achieve a given design speed, making them inferior in combat.
-(Good) Tactical ships should use mostly gimballed engines to have maneuverability in combat. This means they are less fuel efficient for a given mass of ship and design speed.
-Electronics (Search Radar, ELINT, FCS Radar, IRST, and Jammer) do not function behind armor. They have reduced function through structure too, so don’t get too fancy with structural cages.
-Support ships want to use as many static engines as possible, to maximize their fuel efficiency (as well as cruise speed for a given budget).
It is my experience that a fleet of optimized tactical ships and optimized support craft is both deadlier/more durable in combat and more fuel efficient than a fleet of hybrids.
Fundamentals of Tactical Ship Design
Ships need to consider how they will fight, what class of targets they will be optimized against, and how they will protect themselves. Players must also consider their own limitations; saying “speed is overpowered and the best defense” might be true, but most players are not 11 Honor Lightning Pilots and therefore should probably not try to fight cruiser fleets in an ultralight. Similarly, if your aim is bad, pick weapon systems with faster reloading speeds and larger magazine sizes, and maybe pack more missiles.Thrusters should be placed towards the extremities of a tactical ship, for example, the corners on a boxy design. Thrusters high up above the center of mass of a ship generally improves stability, placing them below center of mass decreases stability. Increased stability makes landing easier, while decreased stability allows for doing backflips and other tricks while dodging.
As stated earlier, tactical ships want to be as compact as possible for a given amount of capability (generally measured by speed/weapons/defense), this makes you harder to hit and easier/cheaper to protect with passive defenses.
Unless you are the greatest pilot of all time, you will find yourself getting hit eventually. Losing your bridge = dead ship; losing the ammo usually results in an explosion that (depending on amount of ammo and size of ship) may instantly kill it, and having fuel tanks get hit may cause fires.
Obviously getting hit in power, engines or weapons is bad and will lead to a decrease in the ability of your ship to fight, but they are less instantly fatal than an ammo explosion. Therefore, you want to protect your ammo and bridge as much as possible, then fuel and generators. Generators and crew compartments also have more hitpoints than fuel or ammo, which makes them a decent way to protect your explodey bits.
While losing the bridge is an instant kill on that ship, it’s fairly durable and less prone to sudden death than ammo. Thus on small ships you protect the ammo even more than the bridge; i.e. hide ammo from expected direction of fire behind the bridge.
For ships with relatively few and light weapons, it is possible to spread out your ammo so that some of it exploding does not cause a chain reaction. For ships with lots of heavy weapons, that becomes impractical and the ideal is to centralize your ammunition and bury it as deep as possible behind other components.
Fig2b, examples of what -not- to do.
TLDR cram components as close to each other as possible, make ship smol as possible for same number of stuff. Put thrusters near the edges/corners for better turning. Put critical components behind less important parts to die as slowly as possible, the order of importance is Ammo & Bridge > Fuel > Generators > Everything else
Basic Design Challenge
Alright, put the above information into practice. Go build a simple ship with following (additional, make sure you incorporate the lessons learned so far) specifications:
- Cheap as possible
- 4x AK-100
- Solid top armor
- Line of 2x1 Reinforced structure on each side
- Thrust-Weight Ratio at least 3
- 2 static thrusters
- No fuel tanks or ammo directly exposed
- Range at least 750km
You should have something that looks like this:
Fig.3 Ugly, and poorly optimized, but that can be fixed!
This is a cheap and basic frigate sized bottom-fighter, one of the more powerful archetypes in Highfleet. Even with this crappy hull you can probably (with decent aiming/dodging) clear Difficulty 3/Small Tester with negligible internal damage…
But your ship is nowhere near it’s potential. Heck, it can’t even land! How to improve this? Well, get ready to read alot of words and stare at lots of pictures… First we’ll overview the parts that go into tactical ships before we swing around to advanced design methods…
Turrets
There is no such thing as best weapon, only best weapon for a given situation for a given player. Thus players will have to decide what weapons to fit to what design.
n
2A37
AK-725
AK-100
D-80
MK-1
MK-2
MK-6
A-220
Cal
37mm
57mm
100mm
130mm
180mm
180mm
180mm
220mmR
Mag
50
14
4
4
1
2
6
6
RoF (burst length)
2000 (1.51)
350 (2.4)
400 (0.6)
240
(1)
N/A
180
(0.66)
180
(2)
120 (3)
Reload (per second)
20
(2.5)
10
(1.4)
7
(0.57)
10
(0.4)
6
(0.16)
10
(0.2)
7
(0.85)
20
(0.3)
Turret Speed
Normal
Normal
Normal
Normal
Slow
Slow
Very Slow
Normal
$$$
3000
1500
2000
4000
4000
6000
24000
4000
Size
1
1
1
1
1
1
4
1
Ammo Req
1
1
1
1
2
4
8
4
Power Req
0.7
0.7
1
1
1.8
2.4
6
3
Crew Req
6
6
6
6
12
24
50
5
In terms of damage per shot (and anti-armor performance when using non-AP munitions), the weapons efficiency is:
37mm *Rocket launchers are very effective when they connect, but their rocket rounds start out slow, then accelerate, requiring a different lead reflex compared to firing guns. Their rockets are also easier to shoot down/dodge than cannon shells.
2A37
With good aim, the CIWS can be extremely potent against lightly protected opponents with it’s 2000 RPM and 50 round magazine. However, it takes 20 (!) seconds to reload it’s magazine, meaning once the readied rounds are depleted, holding down the trigger only fires 2.5 shots per second! Therefore if your aim is bad, it is recommended you open fire only when you have maneuvered into point blank range.
(The 2A37 also my recommended weapon of choice for Air Defense ships and a good secondary battery for larger tactical ships to shoot down incoming shells and missiles)
Ammo Types: HE, Incendiary
AK-725
Commonly regarded as a mediocre weapon, the 57mm lacks the stopping power of 100mm+ weapons, or the ability of the 37mm to saturate the local airspace. However, it is the cheapest gun mount, and actually fairly strong in large numbers (8+) due to it’s large magazine size (14) and great reload rate (10 seconds, or 1.4 rounds per second), extremely friendly for gunners without a disciplined trigger finger.
Ammo Types: HE, Incendiary
AK-100
On paper, the AK-100 is inferior to the D-80; both have the same magazine size and logistical footprint but the other is higher caliber and does more damage, right?
Yet the AK-100 is a fan favorite, while the D-80 is not. For one, the AK-100 fills it’s 4 round magazine in 7 seconds, while the D-80 needs 10. Next, AK-100 has a fire rate of of 400 RPM compared to the D-80’s 240, meaning a shot-cluster from the AK-100 is almost twice as tight as that from the D-80.
Faster magazine filling speed and higher ROF also make it decent in point defense, when using Proximity shells.
And of course, it is half the price of the D-80…
Ammo Types: HE, Incendiary, Proximity, Armor Piercing
D-80
For all the advantages of the AK-100, the D-80 offers non-trivially more burst damage up front and better anti-armor performance, as well as a larger proximity shell that has a bigger splash area.
If you are a very good marksman and can reliably hit a ship zooming around while flying fast yourself, the D-80 will simply kill the opponent faster on the same logistical footprint.
Ammo Types: HE, Incendiary, Proximity, Armor Piercing, Laser Guided
MK-1
The first thing you’ll notice when using Big Guns is the reduced turret speed. It just rotates slower than other weapons, making it worse at high speed close range combat. It also requires more power and crew than the standard guns.
Unpopular with most players due to it’s single-shot nature.
Ammo Types: HE, Incendiary, Proximity, Armor Piercing, Laser Guided
MK-2
Quite potent against enemy cruisers with Armor Piercing Ammunition, the MK-2 does cost the same amount as 3 AK-100s and uses more than twice the crew of 3 AK-100s, and uses almost the same power as 3 AK-100s… While there are arguments for not mounting the weight of 3x AK100, the 180mm guns are simply less flexible when not fighting heavy ships.
There is some debate whether players should use 4x MK2 or 1x MK6… it depends on your aiming skills. If you are very confident of your marksmanship then 4x MK2 can be superior.
Ammo Types: HE, Incendiary, Proximity, Armor Piercing, Laser Guided
MK-6
At the cost of a decent frigate before you even factor in logistical footprint, the MK-6 has a higher cost than it’s paper stats show; 8x Ammo requires another 4MW in power and 40 crew to operate… and those crew quarters require power too… and the power generators require more crew.
Altogether a MK-6 costs about 30,000 Gold and adds over 2000 tons of mass to a ship. This is before you consider how many more engines (and fuel and crew and power and armor to protect the huge volume!) it takes to keep the same design speed with that extra mass! To top it off, the MK-6 has the same rotational speed issues as the MK-1 and 2, but worse. Opening fire also causes white flashes and shakes to appear on your screen, making aiming more difficult.
That being said, with good aim and proper ammunition selection you can obliterate an enemy cruiser in a few salvos. Extremely destructive armament, suitable for use on capital ships to fight other capital ships.
Ammo Types: HE, Incendiary, Proximity, Armor Piercing, Laser Guided
A-220
The only ship-based rocket launcher in game, the A-220 offers excellent burst firepower on a relatively low logistical footprint. However, due to difficulty of leading targets, increased ease of dodging and vulnerability of your attack to point-defense, it’s fairly unpopular with players.
Ammo Types: I don’t actually know all the ammo types you can fit to Rocket Launchers.
TLDR: Big guns only cost efficient vs big ships (unless you are Simo Hayha II). AK-100 generally adequate vs everything and can change ammo to be better at whatever it’s facing. Use A-220 if you are a hipster.
Landing Gear Design & Propulsion Selection
Landing Gear
Landing gear (“Legs”) require at least 2 parts for good articulation. They don’t have names as of 1.1, so I will arbitrarily label them:
Fig.4a Types A, B, C, D from left to right
n
Type A
Type B
Type C
Type D
$$$
400
200
100
50
Power Req
0.4 MW
0.2 MW
0.1 MW
0.07 MW (*)
Mass
238t
80t
18t
3t
*Estimate
When piloting a very light ship (say, under 750t) and with good control, you can just use skids to land. But generally most ships should use landing gear, tactical ships to gain an edge in repair speed, strategic missile/aircraft carriers for faster reloading of expended missiles/replacement of destroyed aircraft. I even put legs on my tankers and spyships; ships without the ability to land just don’t make sense in this world.
However, especially on smaller ships, you want the lightest possible legs to avoid excessive thrust/power wastage.
For brevity’s sake I’ll just show the types of legs I find appropriate for a given tonnage of ship, though if you are very gentle (zero horizontal motion, less than 9km/h touchdown) with landing you can make do with legs that aren’t quite up to par to save mass/power.
Fig.4b Ultralight

Fig.4c “Corvette Legs” 1x Type C + 1x Type D, suitable for ships up to ~2000t mass
Fig.4d “Frigate Legs” 2x Type C, suitable for ships up to ~4000t mass
Fig.4e 1x Type B + 1x Type C, suitable for ships up to 8000t
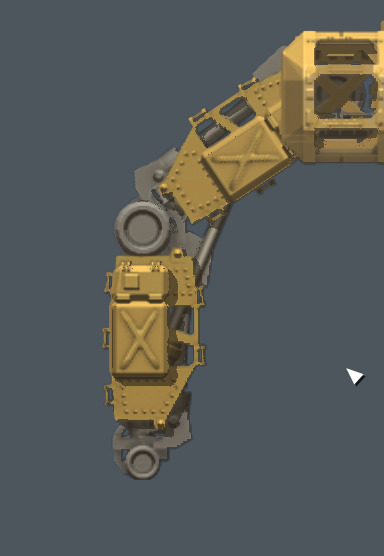
Fig.4f 2x Type B, suitable for ships up to 12000t

Fig.4g 1x Type A + Type B, suitable for ships up to 16000t
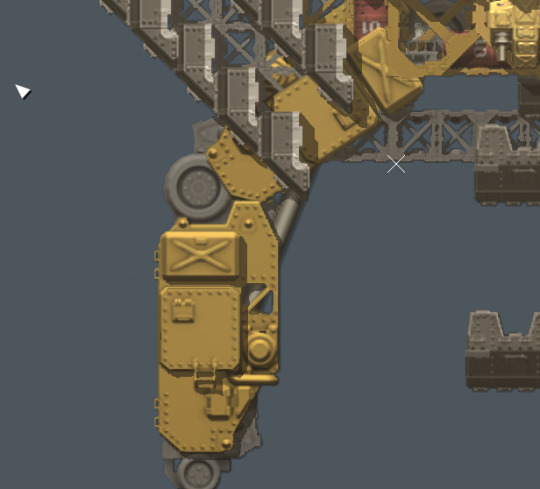
Fig.4h 2x Type A, suitable for ships up to 20000t
For ships that are heavier you can use more than 1 pair of legs to compensate, or just land *very* gently.
Propulsion
The RD series are significantly more fuel efficient but require Large Hull sections. Due to their sheer mass of Large Hull sections it becomes inefficient to build small ships with RD series engines, and very expensive to build fast ships (even if large) with them.
Faster, smaller ships will use D-30, NK-25 and D-30S engines for propulsion. Larger, slower ships should use the RD-59 and RD-51. As stated before, tactical ships will want to use mostly gimballed engines and support ships should use mostly static engines.
While it is possible to propel a large ship with small engines, the large ship will have extreme fuel consumption for its mass and design speed, not recommended when fuel is one of your biggest expenses in the campaign.
TLDR: Use small engines for small ships, strongly consider switching to big engines around 6000t of ship.
Defenses
Reinforced Hull
Reinforced hull has the same hitpoint total as an armor block, but at one-fifth of the weight. It’s not perfect, though, because it doesn’t have the damage resistance of armor; you can see this when interlaced armor/reinforced structure triangles get hit by a missile; the structure triangles go deep red or die immediately, whilst the armor triangles (that didn’t fall off from the missing structure) go pink/light red.They
Read the full article
13 notes
·
View notes
Text
⭐The Completely Arbitrary⭐
⭐Video Game Awards of 2021⭐
Hello my guys, my gals, and my NB pals.
Welcome to the first year of the resurrection of the The Completely Arbitrary Video Game Awards, awards for video games that are, in fact, completely arbitrary. For this. our least week of the year, I am going to be shining a spotlight on 7 games. Not necessarily new games, but rather games that I played this year that I feel are deserving of a completely arbitrary award. So, with that said and without further ado...
|First Award| |Previous Award|
Our final award this year is "Best Game To Still Be Better Than Doom, Fight Me"
And the winner is... Quake! (The Remaster)

Okay, I’m not going to waste your time telling you what Quake is, we all know what Quake is. id Software’s follow up to Doom, only instead of fake 3D it’s full, realtime 3D, and with all the demons and hell replaced with eldritch monsters and soul shredding dimensions. And despite the tongue in cheek name of the award, I’m not here to try and diminish Doom or to opine that Quake has been forgotten, because it really hasn’t. The recent remaster aside, Quake was a trailblazer in 3D design for video games and especially in online multiplayer, were it and its community help popularized common things like deathmatch and rocket battles and capture the flag, not to mention mods that were designed to fight against online lag or being the primordial grounds that gave us the first iteration of Team Fortress.
Quake has a legacy and it’s a legacy most games would be more than happy with. No, where Quake tends to get underestimated in my summation, is in the single player campaign potential. While Doom was an action packed metal album cover, Quake, while being just as action packed, was a lot more atmospheric and had a creepy, almost oppressive feel. This was helped both by the monsters and the players weapons.
The monsters in Quake are all designed as if they crawled out of Lovecraft’s least racist story. Large shambling monsters from another dimension, helped along by the primitive look of the game, the blocky models, low-res, pixely textures and animations that didn’t have any interpolation really just helped the monsters just look more wrong. Said monsters are also much stronger on average then they were in Doom, dishing out a lot of damage and being rather a bit spongier, most likely in response to not being able to put as many monsters in a level as you would in Doom since the real 3D engine might start to chug on 90s era graphic cards.
So monsters are stronger, if less numerous, so the player’s weapons… feel less overpowering than in Doom. That’s not to say that the weapons in Quake aren’t effective or don’t feel good to use (the rocket launcher and the thunderbolt are two of my favorite FPS weapons ever), but whereas the plasma gun or super shotgun or rocket launcher in Doom could melt an entire room of enemies, in Quake the rocket launcher or grenade launcher can often require at least two direct hits to take down even low mid-level enemies. So while Doomguy feels like a hot knife through hellish butter, Quakeguy feels a lot more vulnerable and isolated and outgunned from the start by his adversaries.

And at the end of the day, yes Quake does just wear the crown of a boomer shooter proudly. Movement is an absolute joy as the controls are tight and precise, and the weapons are a joy to use and feel impactful, especially when you manage to gib enemies. And while this comes down to personal taste, Quake’s stronger but fewer enemies does lead to different feeling encounters compared to Doom’s weaker but more numerous enemies. Combine all that with the oppressive atmosphere and primitive 3D helping sell the look of eldritch horror and I must say that Quake singleplayer is absolutely worth at least a single playthrough for any fan of FPS. The remaster is cheap on Steam and consoles and it’s honestly a bargain considering the sheer content you get with the base game and the included expansions (and the lovely full featured multiplayer suite if you’re so inclined). Give it a try and then tell me you haven’t lived without shoving a rocket launcher down a shambler’s mouth.
2 notes
·
View notes
Text

@friendliest-human Oh boy get ready
Apologies in advance for the long post there's no Read More on mobile. I'll edit it later i promise.
So like, Team Fortress 2 is a Spy-Fi set in the 60's, where two businessmen, brothers Redmond and Blutarch Mann, wage war over the right to be the sole owners of their inheritance, which their father explicitly left for them to share.
Thing is, this war had been going on since the 1800's. The Brothers Mann had invested in both the cutting edge of technology and the greatest mercenaries on Earth in order to both extend their lifespans and kill the other.
While doing so, both men hired a woman, The Administrator, to direct their forces. Playing both sides, The Administrator locked them into a stalemate to last several generations of assassins, manipulating the brother's fortunes and amusing herself with the unending bloodsport.
Now the thing is, the world of Team Fortress isn't quite the same as ours. Australia is the single most technologically advanced country, due to it being the only source of Australium in the world. A mineral that looks exactly like a bar of gold with a man punching a kangaroo on it, exposure to Australium turned even the biggest moron into an engineering genius with massive muscles, a big mustache, and bushy chest hair in the shape of Australia. It turned, in The Administrator's words, "a nation of idiots" into the most powerful force on the planet, and she used the Mann's fortunes in order to study it and used it to create their life-extending technology.
Speaking of idiots, the current crop of mercenaries are the most unstable and ridiculous batch yet. Nine of the dumbest, deadliest men in their history, all gathered to fight over what is by the 1960's a completely worthless plot of land.
Scout is a young American (specifically Boston) guy who can barely read, loves baseball enough to go to war with a bat, and was created by God to have sex with every woman on Earth. He's not very succesful in that regard. He has a crush on the Administrator's assistant, Miss Pauling. The middle child in a large family, he learned that the only way for him to ever get attention was to arrive first and be as loud and annoying as possible. He also has the amazing ability to defy physics and double jump.
Soldier is a rocket launcher using American soldier, who is heavily brain damaged due to drinking water filled with lead. He's paranoid, violent, and very stupid, but an incredible combatant and a master of rocket jumping, or the act of shooting your feet with a rocket and riding the blast upward. His roommate was the dark wizard Merasmus, who his team must battle every Halloween. He once fought a bear naked and covered in honey, and won. He also once put the whole team in mortal danger by creating a massive bread monster.
Pyro is a mask wearing pyromaniac who terrifies everyone else. Nobody knows who they are, what they're saying, or knows what they look like under the mask. Their teammates believe they are a monster and the most cruel being on Earth. Secretly, Pyro is literally unable to comprehend violence and sees the world through rainbow lens. Their axe is a big lollipop and their enemies are baby angels, and their flamethrower is a bubble blower, and they're playing around and making friends with everyone.
Heavy is a big Russian man with a bigger minigun. He's the most normal and well-adjusted of the mercs, being a fan of Russian literature, teddy bears, and good food. He is however, prone to temper tantrums and he enjoys danger a little too much. His best friend and constant partner is the Medic. His English is slightly broken, but nobody dares make fun of it in fear of their bones getting very broken. Later on the comics introduce his little sister, who's also a gigantic woman with an even greater dangerlust than he does. She gets engaged to the Soldier after they kill a few dozen men together with their bare hands. Heavy is not pleased.
Demoman is a black, Scottish explosives expert with only one eye. Despite being a raging alcoholic, he is shown to be the most succesful of the mercs, being extremely rich and housing his mother in a giant castle. He is however, a great shame to his family, who pride themselves on losing both their eyes in battle. Despite Demoman trying his best, he's simply too good a fighter to lose his other eye in combat, and his mother berates him for this daily. He's also very skilled with a sword and shield, and can build to be a melee fighter. He lost his missing eye after discovering the Bombnomicon, Merasmus' cursed spellbook, and enchanting his eye into a bomb spewing monster. His team does battle with his haunted eye every Halloween. He and Soldier used to be best friends, but suffered a bad breakup through The Administrator's manipulation.
Engineer is the grandson of the first man the Administrator dosed with Australium. A mechanical genius from Texas, his sentry guns, teleporters, dispensers, and occasional cyborg arm are often the biggest nuisances in the game. Like the Heavy, he's quite normal and well-adjusted, although maybe TOO well-adjusted to all the bullshit.
Medic is a quack doctor from Germany whose lack of morales is only matched by the sheer insanity of whatever the fuck he's up to. Having lost his medical license ages ago, he implanted his teammates with megababoon hearts in order for them to survive the steroids his medigun hits them with (which he calls ubercharge). He once sold his soul to the devil for a pen, and then scammed him in order to revive from death. He has a pet pigeon called Archimedes that he sometimes leaves inside his teammates' bodies. He keeps the severed heads of his enemies alive and inside his fridge, where they can talk to him and beg for death. He's very close with the Heavy.
Sniper is the one Australian who doesn't sport a giant mustache and a giant chest. An extremely professional assassin, he seems alright at first... Until you realize he makes bombs out of his pee. He's very focused on his job and may be a little paranoid; one of his personal rules is to have a plan to kill absolutely every single person he ever meets. He's also skilled with a bow, and likes to fight with kukri knives.
Spy is a Frenchman with the amazing ability to shapeshift and perfectly imitate anyone's appearance, voice and mannerisms. Able to kill with a single backstab, his disguises and invisibility cloak allow him to infiltrate the enemy base and take them out from the inside. He likes to think of himself as above his teammates's bullshit, but really he's one of them in every single way. He once taught Scout how to romance a woman, after Scout begged him for help since his only pickup line was "Hey we both got buckets of chicken, wanna do it?" but it went disastrously. His relationship with Scout in general is weird since he once fucked Scout's mother. He later realizes that he may in fact be Scout's father. Knowing that Scout would both never accept him and that he had no right to call himself that, he also disguised himself as Scout's idol Tom Jones in order to comfort Scout as the younger man lay dying, while telling Scout about how he had dropped a Sex Bomb on his mother. When Scout went to heaven, the angels helped preserve the lie by snapping the real Tom Jones' neck just as Scout was about to meet him. In heaven. Since the real Tom Jones was dead. To Spy's chagrin, God raised Scout back from the dead.
There's a lot more - I haven't even touched on the third Mann Brother or Saxton Hale or Miss Pauling yet - but this should be the general gist of TF2.
383 notes
·
View notes
Text
Bastion: What it means to truly move on.
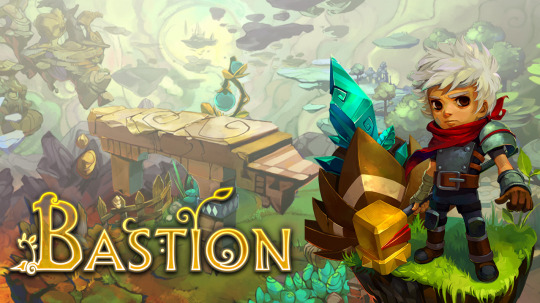
“Someday, your bird is gonna fly.”
Bastion is the first game released by what is now the critically acclaimed Supergiant Games, makers of other games like Transistor, Pyre, and most recently Hades. But back in 2011 they were a nobody. 7 developers from various backgrounds within the industry came together to make games that could focus on storytelling first and foremost more than any of their previous studios would allow. Bastion was the result of that. Starting out from the idea of a top down isometric RPG, Supergiant realized that they wanted to portray a world that was fractured and broken, and wanted to show the vast and empty sky as a contrast to that destruction, but realized the camera angle wouldn’t allow this. So they came up with the idea that the ground would come up in front of the player as they walked forward, allowing the empty sky to show beneath them since the groundwork would not originally be laid until the player walked towards it. To explain this choice and why the world reacted this way, a destructive event known as “The Calamity” was created in the game's story. Thus, Bastion found its ethos.
Bastion’s a masterpiece. Plain and simple. It's been ported to nearly everything under the sun for a reason, being playable on literally 3 different console generations as well as every OS a PC can run, but coming back to play this game for the first time within the current political and geological climate that we find ourselves within as time goes on only makes it more and more apparent how much the story has to say. Even if you could somehow ignore it’s absolutely incredible music, insanely varied and addictive and yet delightfully simple gameplay, jaw dropping art direction and set pieces, Bastion’s storytelling is at its core and the story it has to tell is one that I think a lot of people didn’t fully appreciate back in 2011. From what I could find online, most people either ignored it in favor of the gameplay, or let the meaning of it glaze over them. And that's really, deeply a shame. Because Bastion is one of the best games I have ever played. And I’d like to talk about why.
Gameplay:
“Kid just rages for a while...”
I want to start first and foremost by talking about the gameplay and how you engage with the world. Combat in Bastion is simple and not exactly groundbreaking. An isometric hack ‘n’ slash with 2 weapon slots and a single ability, with a shield that has a parry mechanic and a dodge roll with fairly lenient invulnerability frames. Player movement is very, very slow which encourages you to very quickly become proficient in dodging and blocking. It’s fun, for sure, if just a little bit easy. But it’s nothing to write home about at first. As you play, though, you’ll begin to uncover Bastion's hidden depth and variety within its combat. A lot of that depth comes from the sheer number of Weapons, Upgrades, Passives, and Skills you can equip in any combination.
You are given 11 weapons, each of which can be upgraded with collectibles found within the levels for a total of 5 times per weapon, and these upgrades form a loose “trees” of upgrades that you can switch between at will. You can make the Spear better at critical hits and critical damage and faster thrusts, or make it better at throwing with more spears per throw, for example. Every single weapon has a 2 distinctive upgrade “Trees” in this way that clearly make it better at one specific aspect of the weapon, but you are free to mix and match these upgrades as you see fit. Maybe you want the Spear to have a high critical hit rate, but also throw 2 spears per throw, you can do that. It’s also worth mentioning that there are no restrictions placed upon you on what type of weapons you want to take. You can take two melee weapons, or two ranged weapons, whatever combination you desire is up to you. The narrator even has a line for literally every combination you can have that you’ll hear upon exiting the armory. Some compare you to legends of yore from the game worlds past, others point out just how plain silly it is for the Kid to carry both a mortar launcher and a rocket launcher.
Each weapon also comes with two skills that you can use during gameplay, ranging from protective skills like one that makes you block all attacks for a few seconds, to damage based skills such as the Bow’s skill that fires a ricocheting arrow between enemies. Even then, there are other Skills that are tied to no weapons at all which brings the total of skills in the game to 30.
In addition, there’s the Tonic system in which each level up confers a slot that you can equip a drink from the bar, for a total of 10 at max level. These function as passives applied to your character that allow even further customization. Some are basic things you’d expect, such as overall more health, or more restoration or ability potions, a flat 15% damage resistance, and so on. A number of these however offer a very very strong benefit in exchange for a side effect. Werewhiskey, for example, gives you a 100% crit rate but only below 35% health. Doomshine offers a permanent 10% crit but takes away 10% of your health permanently. Or Leechade, which allows you to gain health from striking enemies, but makes your health potions only 1/3rd as effective. These can all be stacked upon each other in any order or combination. You choose and be changed at any point between missions..
All of these systems together enhance the very simple hack ‘n’ slash combat to be something with infinitely more depth than presented to you at first glance, and something that you can experiment with as much as you want, since no choice is permanent. Part of the way it encourages you to experiment are the Weapon Challenge missions that crop up each time you obtain a new weapon. They ask you to complete some sort of challenge related to that weapon with no Skills, no other weapons, and in some of them not even the ability to dodge or block. Besting these will net you 1 of 3 prizes, depending on how well you did, With the first two prizes being upgrade materials and the last being a Skill for the weapon the challenge is based on.
Beating Bastion unlocks a “Score-Attack” version of New Game+ that keeps a running overall score during the whole game and during stage specific score for each mission, with a multiplier and a timer to keep that multiplier up. This effectively turns the game into a leaderboard chasing isometric arcade game. Every enemy adds 1 to the multiplier, and resets the timer, so it's up to you to run through each mission as fast as possible and challenge yourself to see what kind of score you can get, and since it lets you replay any mission you want, you can always find ways to get a higher and higher score. One of my playthroughs of this game was on the PS Vita and even since beating it, I've found myself trying to one-up my own score while i’m just sitting around since each mission only takes about 10-20 minutes. The most challenging content in the game is a set of 4 different repeatable combat arena’s with 20 waves of some of the toughest enemies in the game. You can make this even harder by invoking each God within the games Pantheon and raising the difficulty of every enemy you encounter. Doing this raises how many points you get per kill, and in these combat arena’s I’ve regularly topped a million points in just a single stage from precise gameplay.
I think that’s what I find amazing about Bastion’s combat is that despite 3 playthroughs, I never once found myself bored or annoyed by any of it. All 3 of my playthroughs had me switching up Weapons, Upgrades, Skills, and Tonics between every mission just to experiment and see what crazy builds I could make. Every challenge was always a delight and a real test of skill, every mission a romp where I got to find a new weapon and play with it each time. Often, I would die, but that was fine! Losing in Bastion is fun. It’s part of the experience, because you can always go back and change your build to whatever you desire to try again. In a way, it’s fitting for the entire theme of the game. It’s the End of the world, and there are no more rules. Do whatever you’ve gotta do. Might as well have fun with it, while you do.
Art & Sound:
“I suppose all that's left... is to try'n remember this moment.”
I think the other reason that I didn’t get bored on any of my 3 playthroughs of Bastion was the absolutely breathtaking art and music the game features. The soundtrack, composed by Darren Korb, clocks in only at an hour and while that does sometimes mean that there are repeats of songs, I'd be lying if I told you there was a single song on that score that I didn’t absolutely love. Or that I thought was out of place during any section of the game. Each and every song is its own radically different soundscape that, in songs like “Brynn the Breaker”, invokes a feeling of complete and utter destruction around you and a sense of leaning into that destruction. It’s fitting that the first time this song plays, you are almost assuredly going to hear the line “Kid just rages for awhile...” as you wreck each and every enemy and object around you after waking up on a floating rock in the sky. Meanwhile, in other songs such as “Build that Wall”, it's clear that Supergiant was acutely aware of the impact their music could have on a scene. In Caelondia, the games world, “Build that Wall” is a jingoistic anthem meant to inspire the Cael by noting the danger they face from the outside world and from the Ura, a people who live to the east, and implores them to build walls to keep everyone else but keep themselves safe. But the first time you hear that song, you’ll be rolling through the dilapidated ruins of Prosper Bluff, a place overrun by birds ready to rip you apart and barely hanging together by literal boards between each floating island, and not a wall in sight. Guided only by the simultaneously soothing and haunting voice of an Ura girl singing the theme of the people who hate her. In that moment, it sounds much more sorrow and sad than any anthem for a nation ever could.
Darren Korb has stated that the point of Bastions music was meant to invoke a sense of the “American Frontier”, of exploring new and uncharted land, but it’s interwoven with melodic and slow moments of tragedy and despair, featuring lots of slow acoustic guitar and lots of slow vocals when there are any at all. I really cannot praise enough this choice of frontier-ism interwoven into the music itself, as it sells the entire theme of the game perfectly.
The art of the game is just as fantastic, too. Supergiant set out to make sure you could see the sky in a top down game, which sounds a little absurd and like a nearly impossible feat, and yet they succeeded with such aplomb it almost seems like it was easy. Below each stage is a blurred barrage of trees, nature, clouds, sky, sometimes ruins within those things, it reminds you constantly that the world has ended and nature has reclaimed it. Progressing further and further down the set of missions and further away from the Bastion and Caelondia sees you going more and more into what's left of those wilds and away from the ruins of civilization, before reaching the icy peaks in the east of the Ura. It creates this feeling of loss and tragedy at what's lost, a sense of exploration into this new and unknown world, before finally getting to it's cold center as you get closer to the truth of the Calamity.
In general, the art style of Bastion feels like a living breathing oil painting. Features on people are exaggerated with small bodies, yet large heads and eyes and hands or feet. Making them feel like something out of a children's book. Every single thing in the game is full of color and life, down to the animals and the foliage, with the only notable exceptions being the ruins of buildings that are oppressive and gray, and the final cold reaches of the Ura’s leftover ruins. Because of the oil painting aesthetic, the narration, even the surreality of the world coming up before you, Bastion feels a lot more like playing a fairy tale than anything else I've ever played, even things that have tried to emulate that same effect. Bastion reminds us that the presentation of a game, in both its art and its music, tell just as much about the story and the world of a game as the actual story itself does.
Story: (Spoiler Warning)
“Now here’s a kid who’s whole world got twisted, leaving him stranded on a rock in the sky.”
Bastion is a game about a lot of things, but at its heart, it’s a game about Tragedy. A tragedy you can’t prevent no matter what you do, because it has already happened. Setpieces in the game constantly remind you of this, like going through the Hanging Gardens, a place where people used to gather and finding nothing but ashen corpses. Rucks, Bastion’s narrator, will even tell you the names of these people. I remember playing this game in 2011 and being upset at this. I wanted to know about Maude the Tutor, I wanted to hear the life of Percy the Snitch, but I couldn’t. That was the tragedy. It didn’t register with me at the time, but that was the point. I was supposed to be upset I couldn’t know these people, that they died in a tragedy I couldn’t prevent.
The core story of Bastion revolves around a war that took place some 50 odd years ago. Caelondia and her people, versus the Ura. In the modern day, before the calamity, the war was over. There was an Ura named Zulf who was trying to broker peace, even. But the Caelondian’s military-science division, the “Mancers” had a secret weapon. One they intended to use to get rid of the Ura for good. It would cause a genocide of the very land the Ura lived in and cause it to literally fall into nothing, ripping apart the physical earth where it stood before. Worse yet, this weapon was being created by an Ura inventor that lived within Caelondia named Venn under threat to his daughter, Zia. Venn couldn’t stand to aid the destruction of his people and sabotaged the weapon that ushers in the Calamity with vengeance in his heart, so that it would backfire and take Caelondia down with it. Imagine Venns shock, then, when the mancers asked him to pull the trigger.
Turns out an eye for an eye makes the whole world blind. Just like that, the Calamity has already happened. The Ura who were discriminated against in every part of Cael society and the racism and cycle of vengeance and violence within the Caels and the Ura reached a boiling point that caused the literal end of the world.. And that’s where you wake up. In a world already torn apart and crumbling before you. On a rock in the sky.
Tragedy permeates everything about the game. In the Hanging Gardens, you find Zulf as he’s about to kill himself after watching his Cael wife crumble to ash right before his eyes. When you meet the second survivor, an Ura singer who just so happens to be Zia, Venns daughter. She’s mournfully singing the tune of Caelondia that was the anthem used to inspire the Caels to oppress her own people, and her sweet voice sounds like the dying breath of an entire nation. Bastion makes it very clear that these people's lives as they knew them are over. But then Bastion asks you a simple question: You have to keep going, so what are you going to do with that world?
Before you get to make that choice, though, you’re asked to decide the fate of a man who hurts you. Zulf at one point reads the journal of Venn that he obtains from Zia and learns everything about the Calamity. He learns about the Mancers plan to genocide his people. He learns about Venns sabotage. Zulf spent his entire life advocating for peace between the two peoples, and this is what he’s met with. Unable to stand it, he attempts to destroy the Bastion and flees after injuring Rucks. As you chase him, he lures you far from the Bastion and sends the signal to an entire army of Ura survivors to attack the Bastion, even persuading Zia to come with him to try and convince her to abandon the Bastion. In the end, though. You chase him all the way to the heart of the Ura nation and as retaliation for bringing someone so powerful who kills so many Ura, the Ura forces attack Zulf and leave him for dead. You come across his body and are given a choice to either leave him and carry on, or take him with you and abandon your weapon. You’re asked right then and there, can you forgive someone who hurt you and your chance at fixing the world and break the cycle of violence? Or will you press on, like Venn, with vengeance in heart. If you choose to save Zulf, you walk forward with zulf on your shoulder through multiple Ura archers shooting you nearly to death. It’s only once they realize that you’re trying to save Zulf do they stop trying to attack you. This moment of compassion, this breaking of the cycle, inspires the Ura to let you pass. If you choose not to save him, you must battle an entire army, which isn’t even hard for you at that point. It’s a bloodbath. You, a Cael kid from nowhere, end the last of the Ura outside of Zia who knows so little of her culture that she can’t even read the journal her father left over. You succeed where the Mancers failed. The cycle of violence remains unbroken within you and within your heart.
You’re given two options upon returning to the Bastion at the end. You can use the power of the Bastion to reset the world to where it was before the Calamity. You’ll lose all your memories, but everyone and everything that died will be okay and alive again. There’s a risk, though. Rucks has no way of knowing if this plan will work. If it will prevent the Calamity in the end. “Problem with a machine that sets things back to a bygone time,” he says, “Is that you can’t test it.”
Your other option is Zia’s choice, though both her and Rucks support whatever decision you make, they know it’s not an easy choice. Her plan is to turn the Bastion into a floating island ship that can travel anywhere. To forge a new world and look for survivors on other floating islands and carry on in this destroyed world and find hope within that tragedy. Make something new, and beautiful, from the ashes of something dead. Maybe that’s not possible, she thinks, but it’s better than recreating a world with institutional violence, with cycles of hate and vengeance, a world where something like the Calamity could happen in the first place.
Supergiant knew what most people would pick, though. Resetting seems like the only real choice, at first. Maybe the Calamity will happen again, maybe it won’t, but you can’t just let all those people die. The whole game has been building up to fixing the Calamity. Rucks, old and clinging to the past, is sure that resetting it will work and that things will be okay again. He’s a bit like a father figure to you, too. He’s narrated every action you took, made sure you were never truly alone in this ruinous world. So of course you trust him. An overwhelming amount of people chose to reset the world the first time they play. I did, too. I knew that maybe the Calamity would happen again, but I couldn’t just let everyone die. Maybe things would be different, I thought. Maybe this time people won’t let something like a genocide happen again. Maybe Venn won’t pull the trigger. I didn’t know, but it was better than letting everyone die, right? It had to be. I had to hope that I made the right decision. So with trepidation in my heart. I chose to reset everything.
Rucks comforts you when you choose to reset that “No matter what happens next... you done good.” Credits roll. You see pictures of the lives of each character in the reset Caelondia. The lonesome Kid continues his work as a mason on the wall built to keep the Ura out, where he isolated himself after losing everyone in his life. The only person to ever sign up for 2 tours on the Wall. Rucks continues his work on the Bastion, refining it for the future, meaning that there’s still a need for a safeguard like it in the first place. Zia plays a concert on her harp with a mournful look on her face, she found comfort in music but that comfort was equally as isolating and lonely, what with her being an Ura girl in Caelondia. Zulf gets married to his fiancee, blissfully unaware of the impending genocide on his people while he fruitlessly brokers peace. Upon seeing these credits, these images of the lives of these characters, I knew I made a mistake. History is going to repeat itself. Sure they were alive, and so was everyone else, but the cycle of violence remains unbroken and eventually, even if the Calamity that befell the world the first time doesn’t happen again, another will. Rucks final words in this ending are a simple forlorn goodbye. “So long kid... Maybe I'll see you in the next one. Caelondia... We’re coming home.”
Choosing this ending left me feeling anxious at first, and then hollow and empty. I didn’t save anyone, I just clung to the past. I expected things to be different in a world where something like the Calamity could happen in the first place. I knew, then, that for there to be any hope at all I had to move on from the old world. I had to do right by Rucks, by Zia, even by Zulf. They were my friends. They deserved better, they deserved more. They deserved a world without the conflict and violence that Caelondia brings. I understood even more clearly what I had done when, upon starting a new game, Rucks final words echoed over the loading screen. As far as I could tell, the Calamity had happened again. Rucks even makes comments of feeling a sort of deja-vu while retelling the story and is much less confident resetting will work the second go around, for a reason he just can’t quite explain.
Bastion is a story about tragedy, about generational trauma left over from a war, about the cycle of violence and all that it perpetuates. It’s a story about waking up in a world that has already crumbled and fallen apart through no fault of your own and being told there is nothing you can do about that destruction. And there isn’t. Climate change is a bigger problem now in 2020 than it ever was in 2011. People are going to die, it’s just an awful fact at this point. Those in charge continue to ignore that fact and these issues while also continuing to stoke the fires and flames of the impoverished and destitute more and more every day, bleeding them dry for any pennies they might have.
But that’s not all Bastion has to say. It’s not fair for the next generation just like it wasn’t fair for the Kid, to wake up in a world already destroyed, and yet still, people like the Kid and Zia found hope. Within Bastion, you can save Zulf and end the cycle of violence, you can choose Zia’s option and set out on a world that is better for everyone in the end, as ruined as it is. Even in the end of the world and everything you knew, there is hope. Bastion doesn’t just ask, it begs on hands and knees for the next generation to take up this dying world and make it better. Bastion, and Supergiant, believes in the next generation. that it's possible to move on from the past and make something better, to seize control and make a better world while purposefully never forgetting the cycles of violence that led us to the end of the world in the first place. Our great Calamity is already unfolding before us and there isn’t anything we can do to stop it, only delay it. Bastion tells us that it's okay, that we can make something beautiful, and new, and better from those ashes.
In the scene for the Evacuation ending, Rucks tells us that he’s not sure how to live in a world like this, but he’s willing to learn. And excitedly offers to help teach you how to fly the Bastion through the skies. The very first image you see during the credits then, is the Kid finally collapsing of exhaustion and resting while Rucks tucks him in. The next is Zia looking forward on the deck of the Bastion, a smile on her face and hope in her heart. You get to see Rucks later teaching the Kid how to fly the Bastion, finally giving the Kid the family that he so desperately needed, and finally you see Zulf. He’s got a frown on his face, he’s still lost everything in the Calamity after all. More than anyone. But he’s chopping food for everyone else still, helping out where he can. I couldn’t help but think upon seeing his expression that he might hate me for the rest of my life, and that was alright. I’d always just be happy he was alive. Seeing the smiling faces of everyone in the Evacuation made something very clear to me. In the Old World, Zia was an outcast, Zulf was a fool, Rucks was nostalgic, and the Kid was alone. In the Calamity, they found friendship, they found happiness, they found love and family in each other, they found adventure and they found hope for the future. Zia’s final words to the Kid echoed in my head:
"Any moment I'd want to live again... happened after the Calamity. Not before."
And I was at peace. I knew I had done the right thing I had chosen to move on, accepting the world for what it was and not looking for miracle solutions to fix it or change it, but to forge on ahead with what I had and make something better.
Bastion’s story is not directly told to you, especially after the ending. There is no epilogue that tells you exactly what happened, just a few lines of dialogue that you can make of what you will and some pictures of the lives after your choice. it’s never explicitly stated that the Calamity happens again if you choose to reset things. It’s meaning is in between the lines that Rucks has to say. It’s In the subtext. It's in the art, it's in the environment, like the tragedy of finding nothing but ashen corpses around a lone peace talker right before he’s about to jump to his death. It’s in the music, like the haunting melody of an outcast’s voice singing the song of her oppressors while never realizing how much the very city she was raised in tried to exterminate her. But more than anything it's in the feeling you get while you play. Bastion’s story plays out in your heart as much as it plays out in your mind and on the screen in-front of you. What you feel, what you make of it, that’s just as important to the meaning of the story as what you’re hearing and seeing. Obviously this can be said of all stories, but Bastion is maybe the one that’s resonated most in my heart and in my soul more so than any other story. It offers no simple answers, no painless choices, and no easy ways out. Move on, or cling to the past, those are your only two options and Bastion forces you to make a choice.
In the end, I chose a new world. A better world. A world with my friends that would never let the cycles of violence and the generational trauma that caused the Calamity to happen again. Sure, resetting technically brings everyone back to life, but it wasn’t until I chose to move on and move forward that I felt I could even say in my heart that I’d saved anyone at all.
Conclusion:
“I dig my hole, you build a wall.”
“Build that wall, and build it strong, Cause we’ll be there before too long.”
Bastion is, and I'm not saying this lightly, a perfect game. The gameplay loop and combat is phenomenal and addicting, the music and art and aesthetics are so top notch you could honestly create an entire art style out of them all on their own, the storytelling is amazing and has so much to say that I cannot believe something this important was just thrown out by an indie studio nobody had ever heard of while it was only 7 people strong, and how many people slept on it or completely missed the point of the tragedy of Caelondia and the Ura.
This game will live in my heart for a very, very long time and its music and messages it conveyed will stick with me even longer. My only regret with Bastion is that I’ll never get to experience it for the first time again. But, even with the spoilers here, you can. Play it, Kid. You won’t regret it.
“We can't go back no more. But I suppose we could go... wherever we please.”
3 notes
·
View notes
Text
Humans are weird: Mercenaries, the odd crazy soldiers
"Heard we’re getting some reinforcements today.” Yeah? Alive or dead this time round?”
The squad shared a hearty laugh and Yalop looked disgruntled at being mocked. Harrok was just poking fun at the youngster. He had gained a strange habit over the last several years of the trench wars on Tarlik Prime. He would always find out from his brother in high command when reinforcements were inbound. Then a few hours later the word would come over the transmitters that they were inbound and then an hour later we’d get the report that the reinforcements had been shot down by the defenders air defense network.
Harrok’s people, the Kliptec who were known for their snake like bodies, had been fighting a grueling trench war on this cursed planet now for several years. All started over trade rights or some shite like that and before he knew it the military was being called in. Now, here he was, sitting with his squad in a muddy trench waiting for the next orders to go over the top.
“No mates, this is different.” Yalop said over the dying laughter. “I heard they hired some human mercenaries this time.” “Oooooooh, human mercenaries you say?” a squad member said mockingly. “Well why didn’t you say so? Might as well pack up and leave then shall we?” Another round of laughter came as Yalop looked crest fallen.
They’d never seen humans before but they’d heard stories. The galaxy was alive with stories and ever since humanity was discovered many were about those strange little flesh sacks. How they could survive on death worlds, how they could perform feats defying logic and reason when pressed, how they made games out of carrying dead animal skin from one side of a field to another. Harrok didn’t believe half of them and lately hadn’t cared enough to even care. All he was thinking about was making it out alive one day at a time.
“And who might be these would be saviors?” Harrok asked as he coiled himself to retain what warmth he could. Yalop looked up with renewed vigor. “I heard from someone-” “Why do you never just say you heard it from your brother? We all know it’s him you know.” Harrok interrupted. Yalop flushed for a moment. “I don’t know what you’re talking about! Now do you want me to finish or not?” Harrok smiled and shrugged for the lad to continue.
“They’re called “The Devil’s Wardens”.” “What the fuck is a devil and why does it need wardens?” Yalop looked at Blist, still half asleep yet still able to sound mildly interested. “The devil is humanities embodiment of evil who rules over hell, the place bad people go when they die. The wardens keep him locked down there so he doesn’t ever escape.” Blist scoffed. “So they’re jailers of a fictional being are they? They could’ve sent us politicians and we’d have the same combat effectiveness.”
“You’ll see!” Yalop pointed a finger around the laughing squad. “When they come tomorrow you’ll see you were wrong.” “If they can make it down to the surface I’ll kiss their feet. If not, I call dibs on whatever bits survive the fall from their shot down ships.”
------------
The main problem on Tarlik Prime wasn’t that their enemy had huddled around their dome cities behind layers of trenches, weapon dugouts, heavy artillery emplacements, reinforced bunkers, and fields of anti personnel wire; no, the real problem came from their anti air defenses.
Only 1/3 of the shuttles made it to the surface intact while the rest were being shot down by roaming weapon satellites. Normally the pilots could just shot them down, but the damn things were cloaked so well that no sensors could pick them up until they start firing, at which point it was too late. Some of the larger cloaked ones could even do damage to the orbiting fleet so the general order was to keep clear of the planet unless making a supply drop or delivering fresh troops.
Harrok woke and slithered up to the parapet. The enemy had not launched a night time raid for once which allowed his men to get so decent sleep for once. He gazed at them still coiled up in their corners but noticed Yalop was missing.
Harrok quietly looked around the trench for him and spotted his tail in the trench behind theirs. He slithered over to find him staring up at the sky. “Your supposed heroes about to come in?” he asked while pulling out a tankal stick and lighting it, the smoke calming his worn nerves and sending a shudder down his spine that woke him fully. Yalop didn’t answer him but pointed towards the sky.
A black dot was descending from the sky. Harrok squinted but couldn’t make out the details. “So this is where the party is.” Harrok turned to see Blist behind him. He offered him a inhale of his tankal stick but he passed, instead following Yalop’s line of sight skywards. “Ah, our noble heroes come to save us I see. I wager they’ve got about ten ticks before they get shot down.”
Yalop turned and was about to say something when a loud discharge silenced them. “Called it. Yay me, I win again.” Blist said as he turned to leave. “The thing is Blist,” Harrok said as he placed a hand on his shoulder, “is that ship is still flying impressively well for something that just dodged a hit.”
Blist turned to see the black dot still airborne, the trail of smoke behind it not from damage but from engines being pushed to their max. As all three watched a dazzling stream of light shot out from nowhere once more at the black dot.
The black dot twirled to the side and the shot missed again. Blist whistled in surprise. “I’ll give them this, they’ve got one hell of a pilot.” The black dot was getting closer by the second now and Harrok could make out some more details. The ship was a troop transport that had been painted jet black with a white skull on the nose of the ship, its mouth wide open and flames pouring from it.
Moments later two beams of light fired at once from different cloaked locations. Yalop gasped as the ship killed its engines and dropped like a rock to avoid the shots before reigniting them. “They’re not going to make it at this rate.” Yalop shushed Blist as more cloaked positions began firing on the ship. Each shot just missing the troop transport or grazing it.
While the light show was impressive, Harrok noticed something. “Is it just me or is that ship not heading to the landing fields?” The other two looked closely. “It kinda looks like they’re headed our way, right?” “Must be mistaken, you’d have to be crazy to try landing here.”
The ship was now skimming above the surface of the treeline. From behind Harrok the enemy weapon emplacements began firing with ever increasing ferocity. Streams of solid round ammunition and trails of energy weapons lit up the sky for a moment forcing all three of the Kliptec’s to reflex duck down.
“EVERYONE UP NOW!” Harrok shouted as he slithered back to his squad. “GET UP YOU LAZY FUCKS! GET UP NOW!!!” Harrok’s squad rapidly uncoiled and grabbed their weapons, their heads peering into no man’s land waiting for the enemy to attack.
“No contact!” Blist shouted as he looked out. Harrok was confused until he followed the line of fire from the enemy. It was too high to hit them, but was instead all focusing on the troop transport. The pilot was still trying their best to evade the incoming fire but the sheer volume was beginning to take its toll. Dents and scorch marks were appearing on the nose, paint and panels chipping and flying off. With a roar of engines the ship sped even faster to the enemy, like a comet plowing through a field of asteroids.
As it passed overhead Harrok caught a glimpse of the troop doors opening and an armored figures standing inside looking out. Then the moment was gone as the ship continued speeding into no man’s land.
Without warning the ship’s engines reversed and all forward momentum stopped leaving it hovering in the middle of the killzone that had stopped Harrok’s men from advancing for months now.
A massive form leaped from the ship and landed heavily. Harrok glanced over the parapet and could make out more details. The figure had two arms and legs, was slightly larger than Harrok, and was covered in head to toe in heavy armor. A pair of red eye lenses from a thick helmet in the form of some strange snarling creature looked back at him.
Heavy weapons fire began switching targets from the ship to the figure and pouring it on from nearly every direction. Harrok was sure the figure would be ripped to shreds but as he watched the figure hefted a massive weapon that was mounted to a chassis built around his waist.
As a thousand thousand rounds of ammunition bounced off their armor the figure brought their weapon to bare and returned fire with what sounded like a heavy machine gun and began marching forward towards the enemy.
Yalop turned to Blist, both of them peering over the parapet. “I think you said something about wanting to kiss their shoes if they made it planetside.” he said smiling. “Not fucking now Yalop!” was all Blist could manage in reply as a round impacted close to his head forcing him back into the trench on reflex.
“We need to help them!” came a shout from down the line. Harrok agreed. What he assumed was the human mercenary was focusing all of the enemy’s attention on themselves. He was about to order a charge when he saw the armored human suddenly tumble forward. Harrok couldn’t make it out exactly but it looked like a round had gotten through the armor around the right leg of the human.
He watched in disbelief as the human stopped for only a second before rising to their feet once more and continue their advance into overwhelming fire. Their gun seemed to roar even louder as they limped closer to the enemy, the spent shell casings falling like rain from their gun.
The human was just about to reach the enemy when a heavy launcher was brought up and fired at point blank range by cowering enemy soldiers. The rocket impacted the human head on and enveloped them in a explosion. When the smoke finally cleared the human figure was still standing, but their head had been blown clean off leaving only a bloody stump. Despite this, the no deceased humans hands were still firmly clenched on the firing trigger.
To the sheer surprise of everyone in Harrok’s trench the decapitated figure continued standing for at least a minute continuing to return fire as the enemy continued unloading everything into them. Eventually though the body began to rock and then fell backwards. But instead of falling to the lifeless cold dirt of no man’s land it was caught by another pair of armored humans.
So focused had Harrok been on the initial humans advance he had missed the full company of similarly armed humans that had deployed from the same ship. Each donned in the same armor with the exception of their helmets. Everyone one bore the face of a different snarling creature with red glaring eyes.
As they laid the dead human to the ground the tallest of the armed giants waved their hand forward and in perfect unison all of the armed humans fired their mounted guns. The only thing Harrok could compare it to was as if he was watching a line of battletanks firing everything they had.
“OVER THE TOP!” Yalop shouted. Harrok turned ins urprise att he lads sudden voice and saw him shooting over the top with his weapon in hand. “FOLLOW THE WARDENS!” At first everyone just watched the mad lad charging after his new heroes in surprise. Then another soldier slithered over, then another, then another, and then the entire company was rushing over no man’s land.
Harrok followed after Yalop as the two charged ever closer to the enemy. The line of humans still stood as one firing into the enemy while soaking up the return fire. He could see one by one humans were being injured but still kept fighting. The tall figure Harrok had saw before gave another arm gesture and as one the line began marching forward once more. As they neared the enemy they pulled black boxes from their backs and hurled them into the enemy trenches followed shortly by explosions.
Yalop and Harrok reached the humans just as they hopped down into the enemy trenches and began clearing them one by one, their massive bodies taking up the entire trench with their size as they methodically moved and cleared every section in their advance.
--------------
About three hours later the trenches had been completely cleared and the enemy in full rout. Harrok found his squad and was thankful that no one had died in the fighting. They were battered and tired as hell, but alive.
As they coiled around each other and held each other a trio of armored humans came over being led by the tallest one Harrok had seen earlier giving orders.
The tallest one looked down at them as the rest flanked behind them. “Is one of you called...” the tallest spoke before stopping, as if trying to find the words. One of the armored humans standing behind the tallest stepped forward and handed them a datapad. They took it and read from it. “Y...Yal..Yalop..Yalop.. am I saying that right?” They turned to the one who handed them the pad who simply shrugged.
The tallest one gazed over the surrounding soldiers. “Yalop. Yeah, I was right the first time. Are any of you called Yalop or know where they are? I’d settle for pointing out their corpse at this point.” Yalop slithered over in front of them. “I am Yalop.” he spoke, a slight tremble in his voice.
“Wonderful!” Shouted the tallest as they tossed away the pad and placed both hands on his shoulders. “Your brother sends his regards and wishes you good fortune.” Yalop stood in silence for a moment. “You came all this way just to say that?”
The tall human laughed. “Hardly. I honestly don’t care who you are but we were offered a bonus if we made sure you were alive.’ They turned back to the trio and shouted “We got drinking money!!!” A rousing cheer rose from not only the trio but the other humans who were still armored and walking the battlefield scavenging from the dead or reclaiming their fallen.
Harrok coughed and moved forward. “I want to thank you for what you did here, even if it was only for money. We’ve never seen a unit like yours before.” The tallest turned back from the cheers and looked down at Harrok. “We’re called “Grenadiers”. Hard armored crazy sons of bitches who don’t mind that incoming fire has right of way.” They laughed at their own joke even though Harrok couldn’t make heads or tails of it.
As they laughed Harrok saw the humans behind them carrying off the one armored human that had lost their head earlier in the battle. “I must know something. If there are a company of you, why did you let that one march alone? Surely you could have saved them if you had fought as one.” The tall one stopped laughing and got very quiet, the others looking at the ground suddenly.
“The man had cancer. A deadly disease on our planet.” They spoke. “He knew he was living on borrowed time but still wanted to have one last fight before kicking the bucket. It’s true we could have saved him if we had marched as one...” Harrok was shocked that the humans would allow one of their own to die, but stopped short of saying such words as the body of the fallen passed them and the tallest gently placed their hand on the dead warriors chest. “We could’ve saved him, but we knew this was how he wanted to go out. Facing overwhelming odds and leading the charge on an alien battlefield, not withering away on some hospital bed in endless pain for months if not years.”
“He was the crazy one among us.” one of the trio humans spoke as the body continued on its way. The tallest laughed. “We’re all crazy boy’o. Who in their right minds decides to put on a suit of armor and walk into gun fire for a living?”
“Police officers?” “Airport security?” “New York City Hot dog vendors?” the trio chimed in one by one. “You’re all stupid as well it seems.” the tall one said to their humorous remarks.
“What will you do now?” Harrok asked. The tall one looked back in surprise, as if just remembering Harrok was there. “Win your war. We’re paid by the conflict, not by the minute.” The turned and left Harrok behind as they began rounding every human back onboard their transport to leave.
“Hold up!” Yalop shouted. “One moment please!” The tallest and the trio stopped and turned back around. Yalop looked over and Blist and motioned for him to go forward. It was a bit of back and forth as Yalop motioned Blist up but Blist subtly motioned he didn’t want to until Blist finally caved and slithered up to the tallest.
“Can I help you tiny snake man?” they asked. Blist looked up at them for a moment before sighing. He hunched down and kissed their feet. “A wager is a wager.” he mumbled under his breath. The humans just stood in silence and stared at Blist.
“So....... are you going to fuck now?” asked one of the humans. “What the fuck?!” the tallest said, turning around. The human that spoke before raised their hands into the air. “It’s a legitimate question.” they said as they backed away slightly. “Maybe it’s a cultural thing?” “Well in my culture that remark gets you a boot up the ass!” The tallest began chasing after the other human who was making a speedy escape despite their size while the other just put their hands to their faces and sighed before marching after them.
One of them stopped and went back to Blist and handed them a piece of paper. “Call me after the wars over.” they said before running after the tallest who had now grabbed the offender and was attempting to indeed wedge their boot up their ass.
Blist remained still as Yalop and Harrok came over to join him and watch the humans leave.
“Humans are fucking weird.” they said as the ship took off and left them behind for another battlefield.
246 notes
·
View notes
Text
Titanfall 2 Titan Guide Part 3
I’m back again with Part 3 of my Titan Guide. This will be the final part and will focus on the Ogre Chassis Titans ‘Scorch’ and ‘Legion’.
This is a somewhat extensive overview of each Titan & how to use them against other players. Again I am not the best player out there but I’ve played enough and have a good understanding of each titan. Hopefully at least some of you will find this guide useful. See you on the frontier pilots!
Feel free to add your own tips or correct me if you think I’ve made a mistake.
Below the cut because this is long.
First I’ll say there is no be all end all way to play the titans. Most if not all titan kits are useful in certain situations and as such you should experiment with each to find what works for you. I’ll be giving my recommendations for kits and explaining my choices at the end of each titans segment.
I’ve split each Titan up into 6 sections, going over (in order):
"Titan Name:" Quick overview & what to learn first with that Titan to get good.
Using them Against Pilots
Using them Against Titans.
Their Core.
General Tips/Tricks
My recommended Titan Kit.
Scorch: Papa himself. If he gets close enough, he becomes an unstoppable monster! First thing to learn with him though, is when to engage & when to disengage. You can't always run at your enemies with fire shield & expect to kill them. So learning when to back off is critical, & should be the most important thing to learn. Aside from that, IF you do manage to catch up to your enemies, it's safe to say they are probably dead.
Against Pilots: Learn how to hit them with your 'Thermite Launcher'. This is crucial to learn because if you constantly miss with it, pilots will eat up your 'Thermal Shield' & slowly chip your beautiful 5 bars of health away. 'Thermal Shield' is effective against pilots who are too close though, & will slightly push them back. This does wonders to pilots foolish enough to try & jump on you from the front, as they can't get through your shield fast enough to hop on (Unless they're stims flying around at 100mph. Even then you're more than likely to kill them). A regular melee hit will kill them faster however, so don't completely neglect using your punches for your new best face-melting friend.
Against Titans: Scorch can kill almost the whole cast in a matter of seconds, & that's not paraphrasing. At range, use your 'Thermite Launcher' to slowly poke at enemy health bars & keep pressure on them. As you move in, use your 'Firewall' to control ground movement, & try blocking off escape routes from your opponent. 'Incendiary Traps' are effective at this as well. Use 'Heat Shield' to force your opponent in the direction you want them to go, as they will have no choice but to try & keep the space. Once you have your opponent where you want them, use an 'Incendiary Trap' at their feet & light that sucker with any of your abilities &/or 'Thermite Launcher'. Flame wall is also great when you are close, & will melt the health of an enemy Titan away + keep your hot boi safe from harm. Something else to note is that Scorchs abilities stack, so having 2 'Incendiary Traps' down on the same titan will deal the damage from both. Use this to great effect if you come upon an unsuspecting Titan/have the flank on your enemy. Again, he struggles at range & against speed, so Titans like Tone & Northstar are hard to get. Simply avoid their line of fire until you can corner them like the grunts they are.
'Flame Core' is a burst of big damage. Use it to destroy weakened enemies, as that will ensure you the kill. It does take some time to start up though, so keep that in mind. During the startup some opponents will see it coming & try to dash away. Watch for this, & adjust the core accordingly to hit them. Against Northstar, if you are already fighting her, try to bait out the 'VTOL Hover' with 'Incendiary Traps' below her feet, & once she lands, let it rip.
General Tips:
If you're doomed with core as Scorch and are afraid of dying before you can get the core off, you can activate core and begin ejecting. The core will go off during the ejection sequence and you will survive. You can do this with all titans with automatically firing cores, but it is particularly effective on him since the core is a single attack instead of sustained.
The only bug I'll highlight here: Flame Shield pierce. Hitscans can hit through Scorch's Flame Shield if they hit his feet (and randomly in some other spots, but whatever). Be careful of Ions, Monarchs and Legions that know about this, they will continue to chip away at your health as you advance.
Kit Recommendations:
Titan Kit: Turbo Engine
Scorch is so slow he NEEDS turbo engine to get around effectively.
Scorch Kit: Wildfire Launcher or Tempered Plating or Inferno Shield
Wildfire Launcher just gives bonus damage to your weapon.
Tempered Plating is great as it’s stops you from damaging yourself with your own thermite AND removes your crit spot. Making you overall tankier.
Inferno Shield’s damage boost and duration increase allows you to basically use your heat shield as a primary form of attack. This is my personal pick.
Titanfall Kit: Drop Shield
Only two choices for this and it’s more a preference thing. Drop Shield gives you a nice safety area to retreat to if you need it.
Legion: If Scorch is the unstoppable force, then Legion is the immovable object. Legion is designed to hold lanes & slowly tear the enemy apart piece by piece. His DPS is unmatched, & can easily tear apart an enemy titan in seconds. First thing to learn is when to switch firing modes. He has a short range mode, which isn't super accurate + has limited range BUT can destroy pilots & Titans close quarters & a long range mode which is designed to provide long range fire, at the cost of using up 2 bullets per shot. Because Legion has the slowest reload time of any titan in the game, it is important to learn which mode to use & when so you don't run out of bullets unnecessarily. 'Gun shield' is also very situational. Don't pop gun shield whenever you are taking damage, as you are forced to keep it up until it's ability timer is done. This seems handy dandy, but you can't melee, run &/or sprint anywhere, & you are slowed to a snails pace (You can still dash though). I will go into more detail below in the Titan section. I also recommend a higher sensitivity if you want to main Legion, due to his mobility preventing you from being able to create space fast enough to properly aim.
Against pilots: Legion is unstoppable... for the first few seconds. If you are in CQC mode, his 'Power Shot' will one shot any pilot in a large window & kill them instantly, making him very effective at killing pilots. However, unless you have the 'Hidden compartment' kit equipped, you only get one shot, do not miss your chance to blow, this opportunity only comes once until your ability recharges. 'Power shot' has two firing rates as well, one when you simply tap the ability, & one when you tap it & then press the fire button. The first one takes a second to activate, giving pilots the time to escape, where the second one is near instant. IF you miss your power shot, or there are multiple pilots attacking you, then you can either eliminate them with the CQC firing mode, or opt for the more accurate Long Range mode (Which in my opinion is far better to kill pilots with, due to the increased accuracy.) Avoid the gun shield against pilots unless you are being bombarded by many pilots. Although you will be protected from enemy fire, you can't melee until the gun shield is put away, making you an easy rodeo target for pilots. A gun shield + reloading Legion is a defenseless Legion.
Against Titans: Oh boy where to begin. IMO Legion is the most match up based titan in the game. You have to change your play style drastically depending on the opponent you're up against. First thing first, Unless your opponent is a medium-long range fighter, a medium-long distance in front of you & already looking at you, never start a fight with 'Gun Shield'. IF any of these 3 are not met, & I mean ANY, hold off on using gun shield. Against Monarch & Tone, AGGRESSIVE SUSTAINED COUNTER-FIRE is the best way to deal with them. Tone will try to set up a lock on you & have her 'Tracking Rockets' after you. Once her Missiles are under way, throw gun shield up & keep the pressure on her. If she drops her 'Particle Shield' outside of close range, then back off. Her shield can withstand a Long range 'Power Shot', & By the time you bring it down with all of your bullets, you will need to reload. Close the distance with her first before engaging, or wait out the 'Particle Shield'. Monarch is a baby Legion, & can't deal with her father giving her a spanking for being disrespectful & will have to run away. So try to hit her with a 'Power Shot' before she can escape to put on some damage. Ronin is annoying, as he will use your lack of mobility against you. Keep him at a distance. When he approaches, use your gun shield to block his arc wave & push him back with a power shot. That way, he can't stun you & stay out of your sights. Be careful of him Phasing through you as well & keep your eyes on him at all times. Ion is hard, but not impossible to beat. It requires patience, as you have to wait out the 'Vortex Shield' before being able to damage her. Once she runs out of juice, you have a small window in which to attack. Throw a quick power shot right before she runs out of energy & her shield drops in to do the most damage, & keep the pressure up while she recharges. But please, for the love of God, don't hold the firing button down while she has it up. She wants that & will abuse that. Patience is what wins this fight. Scorch is a nightmare though. At long range, you can do some damage but he will end up running away. Medium range is ok, as you can drain his shield & do damage while he either closes the gap or runs away. But close range, Scorch will eat you. Keep him away at all times, even if it means turning around & sprinting away. His 'Thermal Shield' will eat your power shot, preventing him from being knocked back, making running away your best option until you can 360 power shot him away when he doesn't expect it. NEVER PUT YOUR 'GUN SHIELD' UP AGAINST HIM! Take the damage from the 'Thermite Launcher' so you can keep your maneuverability. Slow targets are a breeze for him. Northstar is the easiest matchup for Legion. You can just melt her health bar away safely behind your 'Gun shield', & all you need to worry about is her 'Cluster Missile', which is a simple dash to safety. Just don't engage when she has cover to work with, catch her out in the open if you can, & catch her close if you can.
'Smart Core' is amazing. Nothing else really needed to be said. It instantly kills pilots, & gives you unlimited ammo, allowing AGGRESSIVE SUSTAINED COUNTER-FIRE until kingdom come. Just be weary of enemy Ions during this, whilst you will drain their Vortex Shield, they can redirect some of your bullets and can do some damage. Save it when against easier targets, & when there are plenty of smaller infantry to shoot.
General Tips:
Flame Shield pierce. Hitscans can hit through Scorch's Flame Shield if they hit his feet (and randomly in some other spots, but whatever). If you are a Legion fighting a Scorch, a Powershot to the toes will keep the Scorch at a distance.
In Legion vs Scorch, it isn't a bad idea to use Gun Shield. T203 damage will add up if you don't, just don't activate it on reaction - getting caught in hugging distance of Scorch with Gun Shield out will hurt and you can't Flame Shield pierce when he's in your face.
Kit Recommendations:
Titan Kit: Turbo Engine.
Like Scorch, Legion is super slow so he NEEDS turbo engine to get around effectively.
Legion Kit: Hidden Compartment or Enhanced Ammo Capacity
Hidden Compartment is my personal pick. Although it does reduce power shots damage by 15%, it does give you a lot more versatility with a second shot.
Enhanced Ammo Capacity increases the amount of ammo you have in your predator cannon. This increases your damage output before needing to reload which is great as Legion has a pretty lengthy reload animation.
Titanfall Kit: Drop Shield.
Only two choices for this and it’s more a preference thing. Drop Shield gives you a nice safety area to retreat to if you need it.
7 notes
·
View notes
Text
Ideas for Talents in Overwatch 2
(From my Reddit account)
One of my biggest fears for the sequel is that talents will only be for the heroes chosen for Story missions. I wanted to see how hard it would be to make talents for all 31 heroes. It only took me a day, so if I could do it I don't see why the entire Blizzard team couldn't.
Reinhardt has at least 7 talents, so I came up with 8 talents for each hero to round it out.
(Talents with * are official talents revealed in gameplay or BlizzCon)
Tank Talents
D.va
Level 1
Game Over- When Mech health reaches 0, mech will fall apart as usual, but each piece explodes to deal 50 damage
Landing Zone- Call Mech produces larger shockwave that knocks enemies back and deals 100 damage
Level 10
Shooting Star- Ram into enemy with Boosters to set them on fire
Micro Flares- Micro Missiles shoots flares that can intercept projectiles in midair
Level 20
Build Up Charge- Mech draws in enemies before it Self Destructs
Disassembly Matrix- Barriers do not block projectiles while under Defense Matrix, enemies covered by Matrix take more damage
Level 50
Defensive Dome- Defense Matrix covers 360 degrees in 7.5 meter radius
Photon Cannon- Micro Missile fires the projectiles from Pilot D.va's Light Gun instead
Orisa
Level 1
Mobile Barrier- Protective Barrier hovers in front of Orisa instead of being placed on the ground
Charger Shield- The Supercharger is protected by a 300 HP barrier
Level 10
Fusion Charge- Critical hits from Fusion Driver charges your Ultimate faster
Cease!- Halt! stuns all enemies it passes through before it activates
Level 20
Ubercharger- Supercharger gives Fortify effect to all allies boosted by it
Citizen's Arrest- Halt! holds enemies in place for 4 seconds, but they spin around the way they used to in Zarya's ultimate
Level 50
Immovable Object- If you are hit by a melee attack while Fortified (Talon Assassin or Talon Heavy's charge) the damage is deflected back to attacker and they are stunned
Fortification- Fortify increases health by 300 Armor
Reinhardt
Level 1
*Fire Burst- Fire Strike explodes every time it deals damage, lighting nearby enemies on fire
*Frenzy- Rocket Hammer swings faster after consecutive hits
Level 10
*Impact Converter- Rocket Hammer damage recharges your Barrier Field
*Amplification Field- Barrier Field increases damage of friendly projectiles passing through it
Level 20
*Balderich's Stand- Gain armour and damage when your barrier breaks
*Fault Line- Earthshatter does more damage in a narrower cone
Level 50
*Epicentre- Earthshatter travels in all direction
Forward Assault- Charge can pin up to 3 enemies at once
Roadhog
Level 1
Barbed Hook- Chain Hook stuns enemy even after they are released
Sinker- Scrap Gun reloads automatically when you successfully hook an enemy
Level 10
Slag Metal- Whole Hog sets enemies on fire
Junk Ball- Scrap Gun alternate fire headshot does triple damage if it hits before detonation
Level 20
Stored Fat- Gain 150 additional HP if Take a Breather is used at full health, for a total of 750 HP
Funnel- Whole Hog fires in a tighter spread instead of a cone
Level 50
Chem Pump- Damage taken during Take a Breather heals for 50% of damage taken
Scrap Blast- At point blank range Scrap Gun knocks back enemy
Sigma
Level 1
Iron Core- Accretion knocks down enemy for maximum amount of time regardless of distance
Reconstruction- Experimental Barrier is restored by 50% of max health when taken down
Level 10
Asteroid- Accretion launches in straight line at faster speed
Kinetic Converter- Kinetic Grasp heals and boosts healing received from allies
Level 20
Optimal Barrier- Experimental Barrier does not take damage while it is being deployed
Gravity Anomaly- Gravitic Flux draws in enemies into area of effect and deals constant damage until the slam
Level 50
Gravity Well- Enemy is briefly held in place if both Hyperspheres hit
Black Hole- Kinetic Grasp draws in every projectile that enters a 5 meter radius and gives shields for 100% of the damage
Winston
Level 1
Primeval Rage- Surrounded by electricity during Primal Rage to deal extra damage
Take Off- Surrounding enemies are set on fire when Jump Pack is triggered
Level 10
Re-entry- Enemies get knocked down if you land on them with Jump Pack
Projector Error- Barrier Projector explodes when it expires
Level 20
Electrobarrier- All enemies inside Barrier Projector are electrocuted
Primal Beast- The extra 500 HP during Primal Rage is converted to armor
Level 50
Malfunction- Tesla Cannon does extra damage to barriers and reloads while damaging them
Giga Coils- Tesla Cannon reloads and increases damage by 33% with each kill, maxes out at 100%
Wrecking Ball
Level 1
Multi Claw- Grappling Claw has 3 charges
Blazing Speed- At high speed enemies struck are set ablaze
Level 10
Meteor Mines- Mines float above out of sight and come crashing down when enemy is detected below
Adaptive Drop- Gain 100 shields for every en enemy hit by Piledriver
Level 20
Rocketball- Use Piledriver even when on the ground
Billiards- Enemies take bonus damage if they are knocked into each other or walls
Level 50
Volatile Mines- Destroy one mine to set off entire field at once instead of each individual going off automatically
Eruptive Shield- Whenever Adaptive Shield takes damage, it explodes and deals damage to nearby enemies
Zarya
Level 1
Frontline- Damage boosted when shield health is depleted
Plasmathrower- Particle Cannon sets enemy on fire at high energy
Level 10
Power Surge- The more enemies caught in Graviton Surge the higher Particle Cannon damage is
Particle Charge- Damage blocked by barriers give extra ultimate charge
Level 20
Event Horizon- Enemies caught in Graviton Surge take extra damage
Damage Conversion- Damage blocked by Projected Barrier boosts ally's damage
Level 50
Shield Network- Projected Barrier covers up to 3 allies in a group
Energy Conversion- Plasma Barrier converts damage into healing by 50%
Damage Talents
Ashe
Level 1
Double Barrel- Coach Gun has 2 charges
Firing Squad- B.O.B will focus fire on any enemy who mark with a sniped shot, shooting with firearms on both arms
Level 10
The Muscle- B.O.B knocks enemies down
Speed Charge- Headshots give extra ultimate charge
Level 20
Sensor Fuse- Dynamite explodes automatically once it is close to enemy
Black Powder- At close range, Coach Gun burns enemy
Level 50
Nitro- Dynamite sets the terrain on fire
The Gunner- B.O.B is equipped with shotguns
Bastion
Level 1
Ironclad- Take 50% less damage during transition between Recon and Sentry
Artillery Elite- Sentry weapon can deal headshots
Level 10
Incendiary Rounds- Tank rounds set enemies on fire
Assault Shield- Use Self-Repair to deploy a 400 HP barrier in front of you for 4 seconds
Level 20
Configuration: Grenade Launcher- Tank rounds contain shrapnel
Upgraded Repair- Self-Repair heals in a 200 HP burst
Level 50
Treaded Feet- Move faster in Recon form when not firing or healing
On-Field Repair- Take 50% less damage while healing
Doomfist
Level 1
Unstoppable Force- Rocket Punch works in any direction you aim like Genji's Swift Strike
Fisticuffs- Successful damage with any ability fully restores ammo
Level 10
Perfect Defense- There is no limit to shields gained by The Best Defense
Knockout- Rising Uppercut stuns enemy
Level 20
Extinction Event- Meteor Strike has an explosion with 16 meter radius that deals 150 damage
Seismic Strike- Seismic Slam always does maximum damage
Level 50
Shatterwave- Rocket Punch can knock back multiple enemies
Newton's Law- Enemy struck by Rocket Punch damages and knocks back other enemies it rams into
Genji
Level 1
Assassin's Blade- Swift Strike damages enemy by 20/sec for 4 seconds
Hyper Agility- You can triple Jump and wall climbing is indefinite
Level 10
*Dragon's Breath- Dragonblade shoots out a projectile
Steady Blade- Deflected projectiles are automatically returned to the attacker, no aiming required
Level 20
Perfect Parry- Deflected projectiles double in power
Sojiro's Teaching- Swift Stike cooldown instant if you cut more than one enemy
Level 50
Dragon of the North Wind- Dragonblade surrounds you in a cyclone that slices up enemies that get too close
Scatter Shuriken- Fan of Blades shurikens split into 9 shurikens and ricochet
Hanzo
Level 1
Skywalk- Lunge has 3 charges and wall climbing is indefinite
Assassin's Arrow- Storm Arrows slow down enemy
Level 10
Dragon's Fang- Storm Arrows pierce through enemies and barriers
Quick Charge- Headshots give extra ultimate charge
Level 20
*Sojiro's Guidance- Arrow hunts down all enemies detected by Sonic Arrow
Taser Arrow- Sonic Arrow stuns enemy
Level 50
Dragon of the South Wind- Dragonstrike sucks in enemies that stray too near
Simple Geometry- Fully drawn arrows and Storm Arrows ricochet
Junkrat
Level 1
Parting Gift- Total Mayhem drops a trap and grenades that go off when the trap activates
Hunting Gear- Steel Trap has 3 charges and Concussion Mine has 3 charges
Level 10
Armed Trap- Steel Trap explodes when it is triggered
Scrap Frag- Frag Launcher rounds contain shrapnel
Level 20
Oil Drum- Concussion Mine sets enemy on fire
Gaspowered- RIP-Tire sets enemies on fire, runtime is longer
Level 50
Sticky Bomb Launcher- Frag Launcher shoots grenades that only explode in proximity to enemy. They don't bounce instead sticking to any terrain. Up to 10 can be on field at a time
Tire Spikes- RIP-Tire damages enemies it makes contact with, HP is Armor
McCree
Level 1
Take Cover- Combat Roll has 3 charges
Fully Loaded- Fan the Hammer always fires 6 shots
Level 10
Steady Hand- Fan the Hammer has a tighter spread, can headshot
Standoff- Taking damage speeds up time Deadeye needs to deal killing blow
Level 20
Blinding Flash- Flashbang not blocked by barriers, blinds enemy for 3 seconds
Dust Roll- Take no damage during Combat Roll
Level 50
Shootout- If killing blow is lined up before enemy gets behind wall or barrier, they are not safe from Deadeye
Crack Shot- Consecutive shots rack up damage 25%, up to 100%
Mei
Level 1
*Shatter- Frozen enemies shatter when killed dealing damage to surrounding enemies
*Cold Snap- When exiting Cryo-Freeze, nearby enemies are frozen
Level 10
*Hypothermia- Blizzard instanly kills enemies below 200 HP
*Snowball Effect- Bowl forward with Cryo-Freeze to knock over enemies
Level 20
*Frostbite- Frozen enemies take more damage
*Polar Vortex- Blizzard covers a greater area and ignores line of sight
Level 50
Spinechilling- Enemies freeze faster the lower their health
Brain Freeze- Headshots give extra Ultimate charge
Pharah
Level 1
Aerial Refuel- Jump Jet fully restores fuel
Crowd Control- If Rocket Launcher hits enemy directly, splash range is doubled to 5 meter radius
Level 10
Emergency Fuel- Hold jump to descend slowly when Hover Jets fuel runs out
Lift Off- Jump Jet burns nearby enemies
Level 20
Concussion- Concussive Blast stuns enemy on direct hit
Mortar Barrage- Barrage sets the terrain on fire
Level 50
Flash Barrage- Barrage fires flares that negate incoming projectiles
Strike Down- Enemy killed by Rocket Launcher or Barrage explodes to deal 100 damage in 5 meter radius
Reaper
Level 1
Soul Eater- Enemies drop souls that heal 50 HP
Shade Gate- Shadow Step makes you invisible for 10 seconds
Level 10
Hellstorm- Death Blossom launches 12 grenades that deal 100 damage each
Harvest- Headshots give self healing for 100% of damage dealt
Level 20
Gift from the Devil- If a shotgun is fully depleted when it's dropped, it will self destruct and spew shrapnel
Demon Form- Drain health from nearby enemies in Wraith form, deals 20/sec, heals 10/sec for each enemy affected
Level 50
Hellfire- At pointblank range shotguns set enemy on fire
God of Death- Every kill boosts damage by 30% for 10 seconds, capped at 120%
Soldier:76
Level 1
Recharge- Ammo restored while dealing damage, similar to Symmetra's primary fire, also slowly reloads over time
Focus Fire- Heavy Pulse Rifle more accurate for 6 shots instead of 3, maximum spread is tighter
Level 10
Shoulder Check- Sprint directly into enemy to knock them back
Multiple Hostiles- Tactical Visor can target up to 3 enemies
Level 20
Hyper Rockets- Helix Rocket makes enemy explode to deal 100 damage to surrounding enemies
Boosting Field- Biotic Field boosts damage by 30%
Level 50
Hardened Veteran- Tactical Visor deals more damage the less health an enemy has
Biotic Shield- Biotic Field deploys a 250 HP barrier
Sombra
Level 1
System Failure- Enemy immobilized when hacked
Firewall- Hack puts a 50 HP barrier in front of you when hand is raised
Level 10
Covert- Damage does not remove Stealth until you are under half health
Reversion- Translocator works like Tracer's Recall, restoring health to what it was when you placed it
Level 20
Marionette- If you hack an enemy that's at critical health, they fight on your side until they die
Critical Failure- EMP cuts the targets current HP in half
Level 50
Turn Coat- Targets hacked by EMP fight for your team for duration of hack
Cheap Shot- Shooting an enemy in the back deals critical hit
Symmetra
Level 1
Gamma Ray- Photon Projector attacks go through enemies, alternate not blocked by barriers
Symmetry- Up to 6 Sentry Turrets can be deployed
Level 10
Crystalline Barrier- Photon Barrier does not expire until it is destroyed
Electro Turret- Sentry Turrets shoot electric current to hit multiple enemies. Has less range but deals 60 damage per second
Level 20
Shield Generator- Teleporter replaced by Shield Generator that increases health by 50% in shield form
Nuclear Fission- Primary Fire max damage builds up faster and lasts longer
Level 50
Sentry Orbitar- Sentry Turret orbits around you at chest level, hold key to have it follow ally
Photon Fortress- Photon Barrier has 3 charges, 2nd charge requires 840 points, 3rd charge requires 420 points (nice)
Torbjorn
Level 1
Flaming Hammer- Forger Hammer damage gives twice the ultimate charge
Red Hot- Rivet Gun spews flames during Overload
Level 10
*Flame Thrower- Turrets shoot out flames
Heat Wave- Molten Core heat reaches upward to damage enemies midair
Level 20
Melting Point- When Molten Core is shot out, it goes straight through enemies and barriers
*My Babies- Place 3 miniature turrets
Level 50
Extra Supplies- During Overload, Alt and Primary Fire are combined. Fire 10 shot spread and the 70 damage rivet in one shot
Power Up- During Overload, turret is upgraded to Level 3
Tracer
Level 1
*Adaptive Reload- Pulse Pistols reload when using any ability
*Chain Reaction- Pulse Bomb triggers a secondary explosion on all enemies caught in the splash
Level 10
*Flash- Blinking through an enemy damages
*Hindsight- Recall triggers additional damage to enemies marked by Pulse Pistols
Level 20
*Vortex- Enemies are pulled towards the point of Recall and snared
*Speed Kills- Killing blows speed up cooldowns
Level 50
Slipstream- Shooting an enemy in the back charges ultimate faster
Time Anomaly- Enemies that survive the Pulse Bomb are greatly slowed down
Widowmaker
Level 1
Reposition- Grappling Hook has 2 charges
Kiss of Death- Fully charged scoped shots poison enemy during Ultimate
Level 10
Merciless- In full-automatic mode, headshots deal 2.5x the damage
One Shot- Headshots give twice the ultimate charge
Level 20
Crippling Venom- Venom Mine slows down enemy
Optimized- Scoped shots always at full charge
Level 50
Lethal Gas- Venom Mine effects last until enemy reaches half health or death
Phase Shifting Rounds- During Infra-Sight, scoped shots go through everything, even walls
Support Talents
Ana
Level 1
Heavy Tranq- Enemy does not awaken from Sleep Dart until it expires, even if they take damage
Nanobolster- Nano Boost fully heals and increases speed by 50%
Level 10
Expertise- Consecutive shots increase effects by 50%
KO Drug- 5 consecutive scoped shots put enemy to sleep
Level 20
Alchemy Grenade- Biotic Grenade heals allies over time, poisons enemies
Quick Dispatch- Kills give extra ult charge
Level 50
Nanite Darts- Nano Boost has 2 charges. 2nd charge requires 1575 points
KO Grenade- Biotic Grenade sleeps all enemies
Baptiste
Level 1
Anti-G- Hold jump in midair to glide
Matrix Shield- Amplification Matrix negates enemy damage
Level 10
Skyshooter- Healing and damage increased in midair
Reinforce- Use Regenerative Burst to make Immortality Field invulnerable
Level 20
Undertaker- Kills speed up Immortality Field cooldown time
Immortal Hero- Immortality Field heals 50 HP/sec, health does not drop below half
Level 50
Immortal Warrior- Immortality Field boosts damage 30%
Rejuvenation- Regenerative Burst increases maximum health
Brigitte
Level 1
Chain Extension- Rocket Flail extends to hit more enemies and from farther away
Suit Up- Repair Pack armor is permanent
Level 10
Booster Mace- Whip Shot can pin enemy against wall to deal 210 damage
Embolden- Inspire healing boosts the more enemies hit in one swing of Rocket Flail, Inspire heals barriers
Level 20
Shield Blast- Shield Bash can stun multiple enemies
Build 'em Up, Break 'em Down- Kills restore Repair Packs and Inspire heals in burst
Level 50
Invigoration- Armor gained from Rally restores over time like shield health until it is depleted
Deflector Shield- Barrier Shield increased to 400 shield and reflects projectiles
Lucio
Level 1
*Healing Wave- Soundwave heals 25% of allies' max health
*Mashup- Both songs take effect during Amp it Up
Level 10
*Beatmatching- Damage dealt during Speed Boost adds bonus healing to Healing Boost
*Fortississimo- Projectiles added to Primary Fire burst for each enemy struck by Soundwave
Level 20
*Power Skating- Soundwave's damage and knockback scale up based on your forward speed
*Accelerando- Critical hits speed up Amp it Up cooldown
Level 50
Blastwave- Knock enemy into wall with Soundwave to stun them and deal extra damage
Wall of Sound- Enemies caught in Sound Barrier when it's cast get stunned
Mercy
Level 1
Battle Angel- Caduceus Staff engages healing and damage beams simultaneously during Valkyrie
Get back in the Fight- Ressurect is instant and has 2 charges
Level 10
Shining Beacon- Stun enemies when flying with Guardian Angel
Herald- Double and fully restore HP when Valkyrie is triggered
Level 20
Guardian- Guardian Angel teleports you to ally
Leader's Devotion- When ally is being damage boosted, they get heal themselves for 30% of damage they deal
Level 50
Miracle Worker- Ressurect multiple allies during Valkyrie
Acceleration- Damage boosting an ally increase the rate they charge their Ultimate
Moira
Level 1
Dual Orb- Biotic Orb heals and damages, has 2 charges
Phase- Fade poisons enemies you pass through
Level 10
Biotic Bomb- Biotic Orb explodes when it expires
Cellular Increase- Ally under Biotic Grasp effect receives less damage
Level 20
Danger Zone- If you are at critical health, self heal is 100% of damage. If ally is at critical health, healing is boosted 50%
Disseverance- Choose between either doubling the damage or doubling the healing of Coalescence
Level 50
Strangle- Biotic Grasp damage increases over time like Symmetra's primary fire, goes from 50 to 100 to 150
Biotic Tracker- Healing Orb follows ally, Damage Orb follows enemy
Zenyatta
Level 1
Despair- Enemies marked by Discord Orb receive 3x the damage from critical hits instead of 2x
Emblazon- Ally marked by Harmony Orb receives 25% less damage
Level 10
Comfort- Harmony Orb can go through walls to heal ally
Amass- Amount of enemies in vicinity increase amount of projectiles in Orb Volley. 2 enemies gives 6 orbs per volley, 3 gives 7, caps off at 8
Level 20
Turmoil- Discord Orb target takes more damage the less health they have
Eradication- Orb Volley pierces though enemies and barriers
Level 50
Ascension- Team becomes invincible during Transcendence. Even heals dead allies, resurrecting them after 4 seconds
Yin and Yang- Harmony and Discord can be both be cast on target to triple respective effect, 90 healing/sec for ally, +75% damage received for enemy
(I'm looking forward to feedback and any ideas other people might have)
9 notes
·
View notes
Text
Update 2.1.0
Sandbox
Supers
Chaos Reach
Fixed an issue in which having multiple Chaos Reach beams active at one time caused their visual effects to merge together
Fixed an issue to allow Chaos Reach beams to penetrate friendly Banner Shields
Fixed an issue in which Chaos Reach did not damage Taken Blights
Note: Changes to Chaos Reach Cancellation will come with Destiny 2 Update 2.1.1, scheduled for 12/4/2018
Nova Warp
Fixed an issue in which Nova Warp would sometimes fail to detonate on release.
Sentinel
Fixed an issue in which Sentinel Shields and Banner Shields would lose energy when guarding near friendly detonations (most notably Thundercrash)
Spectral Blades
Retuned the Spectral Blades Super to increase the reliability of melee attacks in PvP and to bolster the effectiveness of Super’s stealth capabilities
More information here: This Week at Bungie – 11/08/2018
Burning Maul
Decreased camera shake and screen flash on hit in an attempt to alleviate feelings of motion sickness when using the Burning Maul Super
Thundercrash
Adjusted camera during flight sequence in an attempt to alleviate feelings of motion sickness when using Thundercrash Super
Exotic Armor
Fixed an issue in which Ophidian Aspect was not increasing the melee range on various Warlock charged melees (Igniting Touch, Ball Lightning, Entropic Pull, Devour, and Atomic Breach)
Fixed an issue in which buffs granted by Lunafaction Boots would last for only 15 seconds inside Well of Radiance rather than the entire duration
Fixed an issue on Ursa Furiosa so that Super gain from guarding is more consistent between PvE and PvP
Weapons
Warden’s Law
Replaced perks on Warden's Law that did not function properly with the weapon's archetype
Triple Tap replaced with Feeding Frenzy
Fourth Time's the Charm replaced with Zen Moment
Warden's Law now has bullet contrails
Updated the intrinsic perk text on Warden's Law to distinguish it from Aggressive Burst Sidearms
High-Impact Scout Rifles
High-Impact Scout Rifle damage increased by 1.87%
Dev commentary: Previously it was possible to, at VERY high resilience levels, survive three headshots from a high impact scout rifle. This change will ensure that players at any resilience level will be defeated by three headshots.
Note: A fix that will return High-Impact Scout Rifles to 150 RPM is planned for Destiny 2 Update 2.1.1, scheduled for 12/4/2018
Shotguns
Rapid-Fire Frame on Shotguns now increases the reload of all Shotgun shells when empty instead of just the first shell
Trench Barrel
Trench Barrel perk now deactivates after three shots
Trench Barrel description updated to reflect new behavior and also fix an error where it called out increased accuracy instead of increase reload speed
Submachine Guns
Slightly increased range on Submachine Guns
Machine Guns
Slightly increased accuracy on Machine Guns
Exotic Weapons
Prometheus Lens
Prometheus Lens damage increased by 10%
Hard Light
Fixed an issue where Hard Light could overpenetrate an enemy Banner Shield"
Ace of Spades
Memento Mori reduced to five bullets, but can now be refreshed on reload without having to get rid of all the bonus damage bullets
General
Fixed mantle animation for the Queenbreaker
Fixed an issue where some particle effects were appearing in first-person view when using One Thousand Voices
Fixed an issue where Bows would sometimes become invisible when equipped
Polished the Blade Barrage animation for when the player is holding a Bow
Buffed out a missed spot on the Refer-a-Friend Borealis ornament
Fixed an issue that would delay the nocking of an arrow when the player picked up ammo while the Bow was both stowed and out of ammo
Fixed an issue where the Headseeker perk would no longer function after being activated numerous times without dying
Fixed an issue where the Ikelos Hand Cannon and Shotgun where displaying icons for Malfeasance and Chaperone in the obituary
Polished Grenade Launcher strafing animations to remove up and down reticle veering
Polished Grenade Launcher animations while jumping to prevent stocks from blocking the first-person camera
Polished Sniper Rifle and Machine Gun animations while jumping to prevent stocks from blocking the first-person camera
Fixed an animation issue that would occur when firing and walking with a Machine Gun
Polished Tractor Cannon's sprint animation to feel more natural
Fixed an issue where Swords dropped with mods intended for Rocket Launchers, and Rocket Launchers dropped with mods intended for Swords
Rapid Hit now displays a status effect buff on activation
Known issue: Sniper Rifle precision kills will stack the perk twice; this will be fixed in a later patch
Updated Oathkeeper's Exotic perk to remove text for Bow charge speed
Tireless Blade perk description updated to match actual behavior where ammo is returned on every other powered Sword kill
Fixed an issue where the Momentum Transfer perk was not functioning properly
Crucible
Modes
Mayhem will return as a 6v6 rotating playlist with scoring support for new Forsaken Supers
Lockdown and Showdown will return as rotating playlists and have been added to Private Matches
Scorched and Team Scorched have been added to Private Matches
New Shaxx lines, spread between Rumble, Lockdown, Showdown, and a few special medals
Single round modes (Clash, Control, etc.) now end with a "Match Complete" countdown similar to those displayed at round complete in round-based modes
Added new Crucible medals and associated Triumphs for Forsaken Supers, the Machine Gun weapon archetype, and the Lockdown game mode
Added two new gold-tier medals—happy hunting!
Fixed an issue where "The Cycle" medal was not being tracked properly
Iron Banner now awards unique Iron Banner-themed medals with unique audio cues
Iron Banner uses new unique Match Complete banners
Ranks
Valor and Glory are now subdivided into three sub-ranks similar to Gambit
Valor and Glory have NOT subdivided the Legend rank
Valor does NOT require players to win at Legend
Shaxx
Shaxx has a new rotation of items available for direct purchase.
Players must earn Valor to collect these items
A new set of Seasonal Items has been added to Shaxx's inventory
Previous seasons' exclusive items have been removed
A new pinnacle weapon quest has been added to Shaxx's inventory
To allow players to make progress on any character, each step features account-wide objectives
This quest requires two types of objectives to be completed: Reach a specific Rank and complete a specific Triumph; players can complete these objectives in any order
Previous pinnacle weapon quests continue to be available on Shaxx
Gambit
Ranks
Adjusted Infamy rank rewards to better match Valor and Glory. Subdivision rank ups will now always award Gambit Legendary gear
Bounties and Quests
Infamy Rank Point rewards from all Gambit bounties have been doubled
Many bounties have had their objectives retuned to take less time and be easier to complete
Added a new daily bounty for killing Primeval envoys, and slotted it into the daily rotation
Fixed an issue where the Malfeasance quest could be progressed in Crucible modes
NOTE:
Once S5 begins and Infamy is reset, you must play one Gambit match before redeeming any bounties. Players who turn in these bounties after Season of the Forge begins, but before playing a Gambit match, will not correctly receive points to their Infamy rank from these bounties.
Primeval Mechanics
Catch-up mechanics have been adjusted to ensure that the leading team retains more of an advantage
The trailing team will now receive a maximum of only one bonus stack of the Primeval Slayer buff (previously, they received up to three stacks depending on how far behind the trailing team was)
The time before the bonus stack kicks in has been increased to 32 seconds, up from 22 seconds
Primevals will hard ping less often, to reduce stunlock against highly coordinated teams
Matchmaking
Further addressing error codes that could occur during matchmaking, leading to potential quitter penalties
Clans
General
Last Wish raid bounties are now available to anyone who has access to the Last Wish raid.
Does not require Clan Rank 4
A new season of progression is available, with new perks to pursue
Items and Economy
General
Fixed an issue where the "Rainmaker" consumable didn’t provide showers of Glimmer from defeated enemies
Fixed an issue where Public Defender Ghost perk wasn't properly applying to public events on Mars, the Tangled Shore, or the Dreaming City
Fixed an issue where Nightfall unique rewards were dropping at the rate intended for non-Forsaken owners
Fixed an issue where not picking up Prime Engrams could allow players to earn more than the Prime Attunement buff allows for, putting them in a deficit of further Prime Engrams for a time corresponding to the number of extra Prime Engrams received
Triumphs
Fixed an issue where the title of Triumph "Steadfast" was "Meet Sloane on the moon Titan" (you must still meet Sloane on the moon Titan)
Collections
Added missing Year 2 gunsmith weapons to Collections (not purchasable due to random rolls)
Fixed an issue where the BrayTech RWP Mk. II Scout Rifle was not counting towards Collections for some players
Unearned Season 4 gear is now hidden
PC
Controls
Added new "Take Screenshot" keybind (defaults to the "Print Screen" key)
Text Chat
Added new friend management commands
/addfriend
/removefriend
Added new fireteam management commands
/invite
/join
Note: The fireteam commands can target any player by providing the player's full BattleTag, allowing players to assemble fireteams without sending friend requests.
UI
General
Adjusted item tooltips to fix an issue where perks or other information was cut off on the Character Screen
Fixed an issue where the rank-up banner for Crucible and Gambit was not being appropriately displayed on 21:9 resolutions
Fixed an issue where players were unable to return to orbit while the Results Screen was up at the end of an activity
Localization
Traditional Chinese
Fixed an issue where some parts of the Traditional Chinese UI was not loading properly in-game
Misc
Performance
Improved activity and destination load times on consoles
Note: We are actively investigating load times for loading the player inventory screen, switching between UI tabs starting up the game, signing on, and selecting characters. See This Week at Bungie - 11/08/2018 for more details.
HDR
Fixed an issue where brightness was not adjusting properly for players
General
Fixed an issue with missing Transmat FX on Amanda's exchange
Fixed an issue with erroneous source strings on multiple Dawning and Crimson Days items
Fixed an issue that caused several shaders to be unavailable for bulk exchange at Rahool
Fixed an issue where some UI elements would not load properly if interacting with a vendor and launching into character inventory
Fixed an issue where the Fortunate Projection was causing visual effects issues in third person
Fixed an issue in which the IGR version of the "High and Mighty" bounty did not count wanted escapee kills
Fixed an issue in which the IGR version of the "I'm Not Sorry, I'm Lost" bounty required too many points for completion
Fixed an issue in which the IGR version of the "Through the Crucible" bounty required too few points for completion
Fixed an issue that caused high amounts of Baboon errors in the Tower
101 notes
·
View notes
Note
27, 26, 6, 11, 9, 16, 32
Hey guess who forgot she still had these sitting in the inbox!!!!!
27. Favorite weapons? (Any class)
As a Scout main, I tend to gravitate to weapons that let me be a lil shit. This includes, but is not limited to: the Scorch Shot, which allows me to bully Snipers; the Piss Rifle, which also allows me to bully Snipers and anyone unfortunate enough to wander into my sightline; the Direct Hit, which allows me to bully Engineers; and the Sticky Jumper, which allows me to get into Sniper’s faces and zoom past Engineers to take out their teleporters for optimal bullying.
As for regular weapons, I love the shotgun. Ol’ reliable never lets me down
26. Favorite voice line? (Any class)
Oh god that one Sniper charge voiceline. You know the one.
Naaaah, Doctah, naaaah.
6. Rocket Jumping or Sticky Jumping?
They’re both a lot of fun so it’s a tough call. I guess rocket jumping, since you can do that basically instantaneously and it’s easier to make a quick getaway. You can get away quickly with the sticky jumper if you plan ahead, but when you’ve got a hungry Scout on your ass you don’t always have time to place a sticky down and wait a second for it to prime.
Oh right yeah, the regular sticky launcher exists too! Definitely rocket jumping then, since you take way more damage with regular sticky jumping.
11. If you had to main any merc for the rest of your life, who would you choose?
I love Scout but honestly, if I could ONLY main one class, it probably would be Soldier because rocket jumping is just endless fun and Scout can get a bit samey after a while. Plus Soldier is more forgiving on bad aim days :b
9. Do you have a favorite NPC?
Does Zhanna count? Because I love Zhanna. Valve I DEMAND you add her as the 10th class
16. Favorite merc pet?
Heavy’s little robin is 2 cute. Plus it gave us the Chicken Kiev, which is arguably the best cosmetic in the game
32. Last map you played?
Hightower, shocking exactly nobody who knows me!!
1 note
·
View note
Text
Leon Scott Kennedy
Hello, my name is Flaberge and I LOVE video games, one of my favourite being Smash Bros., and with Super Smash Bros. Ultimate almost here, I’d like to take the time to talk about certain characters I would like to see in Smash Bros Ultimate as well as their respective movesets, trailers, and other information that would be needed for a character to be added in one of the best fighting game franchises of all time! The first entry for Smash Ultimate Wishlist will be one of my favourite characters of all time, Leon Scott Kennedy from Resident Evil!
I think Leon could work in Smash for a few reasons, one of which is because Sakurai is a big fan of video games and wants Smash Ultimate to be the biggest crossover game of all time, so why not include a character from arguably the biggest horror game franchise of all time, plus one that has had his tenure on Nintendo consoles (Resident Evil 4 was originally a GameCube exclusive and was also re-released on the Wii). I also think that Leon will be a great addition to the roster because I feel like he’d be a really unique fighter due to the fact that he could fight with a knife as well as have some of the weapons available to him in Resident Evil 4 (but no guns). Now I’m not an idiot, I know Leon’s chances to be in Smash Bros Ultimate are not great, but I still made a movelist for him as well as an idea for his trailer and other information that could be useful in the game which I will post below. I hope you enjoy it and I will catch you next time I have a new post!
Leon Scott Kennedy
Leon’s weight, speed and power will be very similar to Snake’s, though Leon will be slightly lighter and weaker but faster. He is unique as a Smash Bros character as he utilizes a knife in combat, giving his attacks more reach while still having the speed of a fist fighter.
Standard Attacks
Neutral Jab Combo: Leon takes his knife and slashes diagonally left than right in succession until he finishes with a straight stab.
Dash Attack: While running, Leon will perform a back kick (like how he does in Resident Evil 4)
Wake-up Attack: Leon gets up and slashes his knife in front of him and then behind him.
Ledge Attack: Leon gets back on the ledge with a horizontal knife slash aimed towards the ground.
Tilts
Side Tilt: Leon takes his knife and performs a strong, horizontal slash. Is slower than his Neutral Jab but does more damage (resembles the knife slashing animation from Resident Evil 4).
Up Tilt: Leon takes his knife and swings it upward.
Down Tilt: While crouched, he performs a straight stab with his knife.
Air Attacks
Neutral Air: Leon spins around with his knife drawn, slashing all around him
Forward Air: Leon takes his knife with both hands and stabs it downward. This will have a meteor effect.
Down Air: Leon kicks downward with one leg.
Backwards Air: Leon turns around and performs a reverse roundhouse kick
Up Air: Leon stabs upward with his knife.
Throws
Pummel: With while holding his opponent with one hand and his knife in the other, Leon stabs his opponent.
Up Throw: Leon puts one of his legs on his opponent for leverage and jumps, kicking his opponent in the chin and launching them upward (like how Leon escaped frontal grabs in Resident Evil 4).
Forward Throw: While gripping his knife in a reverse grip, Leon slashes his opponent horizontally.
Back Throw: Leon performs a suplex on his opponent (like what he does in Resident Evil 4).
Down Throw: Leon throws his opponent on the ground and stabs them with his knife.
Smash Attacks
Side Smash: Leon performs a powerful pivot kick (like the kick he does when he attacks an enemy struck in the head in Resident Evil 4).
Up Smash: Leon takes his knife and swings it above his head in an arch to the left and the right.
Down Smash: Leon readies two hand grenades and throws them down on either side of him, creating two explosions that hit at either side of him.
Special Attacks
Standard Special: P.R.L 412 Laser: Leon readies his P.R.L 412 Laser and charges it up, eventually firing it in three different directions. The attack hits at three different angles and does good damage and knockback, but the weapon has to be charged completely before it is fired. If Leon is hit while it is charging, he will resume charging where he was before he was hit. This attack takes 4 seconds to charge.
Side Special: Knife Throw: Leon throws his knife at his opponent. It is not very powerful, but it is very fast and Leon can use it while running, making it good for harassment and disrupting.
Up Special: Grappling Hook: Leon throws a grappling hook and uses it to get back on a ledge. It can also be used to strike enemies and if they are in the air when grappled Leon will pull them to the ground, doing strong damage.
Down Special: Mine Thrower: Leon fires a mine dart from his mine thrower, sticking to not only opponents but to the stage and items as well. Leon can hold the button input and change the angle of trajectory with the control stick but doing so does not increase its damage or range.
Final Smash: Hasta Luego: Leon dives at the opponent and if it hits the screen will go white briefly before revealing that the character hit with the final smash has been teleported to the location of the final boss fight in Resident Evil 4. While there, the opponent will be grabbed by a mutated Osmond Saddler who will trash its neck around with them in his jaws, slamming them into the ground. Then Leon will appear perched on a higher platform with the Special Rocket Launcher from Resident Evil 4 and says “Hasta Luego” before firing it at Saddler and by extension the character in his grasp, causing a massive explosion that does massive damage.
Taunts
Up Taunt: Leon takes out his knife, tosses it into the air and catches it, sighing nonchalantly while he does.
Side Taunt: Leon cups his mouth and shouts “Ashley!”
Down Taunt: Leon raises his head and puts his hand over his eyes and says “Oh no” grimly (the same thing he does when Ashley is killed).
Poses
Idle Pose #1: Leon stands there breathing slightly, occasionally taking time to look back and then forward again.
Idle Pose #2: Leon draws his knife, holds it up to inspect it, then puts it back in its sheath.
Victory Pose #1: Leon takes out his radio and speaks into it, saying “I’ve found Ashley, heading to the extraction point”.
Victory Pose #2: Leon slashes diagonally left with his knife, then proceeds to do a stab and then tosses his knife in the air, spins around and grabs it and performs a horizontal right slash (similar to what he does in his knife fight with Krauser).
Victory Pose #3: Leon looks at the camera, turns his head to the left, crosses his arms and says sarcastically “Huh, I guess you were small time”.
Design
Leon’s Design is based on his appearance in Resident Evil 4 and as such his main design is based on the main outfit he appears in throughout most of the game, with an additional red, green, blue and white colour swaps. Additionally, Leon can also appear in his jacket as he did in the first portion of the game in the village, with colour swaps of black, dark grey, light grey and dull blue. On top of that, Leon will have two alternate costumes, which would be his RPD uniform and his mafia uniform from Resident Evil 4.
Symbol
Leon’s symbol is the Umbrella logo.
Entrance
Leon gets out of the car that drove him to the village in Resident Evil 4 which will then proceed to drive away.
Stage: The Village
Leon’s stage will be the classic village from Resident Evil 4 as it is the most recognizable section of the game. The village will be very similar to the stage “Castle Siege” as it will feature transitions to different areas in the village, but aside from starting out in the same place the other areas will be chosen by random. The four different areas of the stage are;
The Town: This is the main part of the village and the first part of the stage where you start out. It is simple in layout; There is a main floor, a tall house on the left that can be climbed via a ladder and a shorter house on the right that can also be accessed via a ladder. Occasionally Ganado’s will appear on the stage and attack players, but they can also be defeated.
The Lake: This area is just a single-platform dock with a boat on the left side surrounded by water. Like the stage “Summit” a warning will be given as to which direction Del Lago will appear (as it did in Resident Evil 4) and swallow anyone in the water, knocking them out.
The Arena: This area of the stage will be a fenced off area that features two wooden shacks on either end and two wooden platforms floating in the air, the one on the left being lower than the one on the right. In this part of the stage El Gigante will come out and attack the players, but once he is defeated he will drop a Maxim Tomato.
The Church: This area has two floors, the main floor and a top floor that can be accessed via two ladders on either side of the main floor, as well as having a chandelier hanging from the top floor. Here Cultists will appear in the background and fire flaming crossbow bolts at players which they will have to avoid. The cultists cannot be defeated.
Assist Trophy: Ada Wong
Ada Wong will act as the Assist Trophy representative for the Resident Evil franchise. When summoned, she will run and jump around the stage firing explosive bolts from her Bowgun (a weapon exclusive to her in the “Separate Ways” side story in Resident Evil 4) and will also perform her Fan Kick attack in close quarters. She is also able to be knocked out like most assist trophies.
Trailer
The trailer starts out with Link running while holding Zelda by the hand through The Village. While they are running through the Village they encounter various Ganado’s, which are dispatched by Link until they are eventually cornered by a horde of them. Link readies his sword in defense, but you can see the concern on his face as the Ganado close in. However, as they are about to strike the sound of something charging up can be heard, a sound that causes the Ganado’s to turn around. There you can partially see the silhouette of Leon as he fires his P.R.L 412 laser, causing three laser beams to erupt from the gun at different angles horizontally, destroying the Ganado horde. As Link and Zelda look baffled, you can see a close up of Leon’s face as he smirks and says “I guess that’s the locals way of breaking the ice”. Then the camera zooms out, finally revealing Leon completely before they freeze the shot of his standing there with his P.R.L 412 out with a caption that reads “Leon blasts in!”
The trailer then cuts to Leon’s gameplay footage, starting out with him running towards Wario and disrupting his movement with a knife throw before Leon hits him with his dash attack and follows up with his neutral jab combo. He is then seen firing a mine dart into Chrom before performing his side smash on him, knocking him near Zero Suit Samus before the mine dart explodes, hitting them both. After that it cuts to Leon using his grappling hook to recover onto the stage, knocking Rosalina off the stage with his side tilt before meteor smashing her with his forward air before it shows him grabbing Captain Falcon, pummelling him a few times and then performing his backwards throw on him, knocking him up before hitting him with his up smash. After that it cuts to Lucario and King Dedede running towards him on opposite directions but Leon hits them both with his down smash, then it cuts to Leon on his stage The Village, showing off the various hazards before showing him on a platform charging up his P.R.L 412 laser and firing it, hitting Mario, Villager and Donkey Kong each with a different beam, causing them all to be knocked out. After all that Leon is shown to have his final smash ready and performs it on Snake before the logo for Super Smash Bros. Ultimate.
The trailer than cuts to a cinematic of Leon surveying the village before picking up his radio and contacts Hunnigan, saying “I’ve achieved the objective, where’s the extraction point?” but Hunnigan will reply saying “Hold on Leon, we’re picking up something huge on the radar, you better check it out before…” then the radio cuts out, causing Leon to respond with “Hunnigan? Come in, Hunnnigan?!” before the camera cuts to show Ganondorf in the village, pulsating with dark energy. The camera then cuts back to Leon, who puts his radio away and draws his knife, getting ready to fight before saying “Story of my life”. The trailer then cuts to a black screen that shows the date Smash Bros. Ultimate is coming out before the trailer ends completely.
The music that plays throughout the trailer will be a rock remix of the Resident Evil 4 save theme.
Snake Codec
Snake: Hey, Mei Ling, I’ve got a guy here who looks like a male model who’s… wait you’re not Mei Ling, who are you?!
Hunnigan: Easy Snake, my name is Ingrid Hunnigan. I’m the Field Operations Support agent for Leon Scott Kennedy. And I could ask YOU the same thing, considered you’ve jacked MY line and all.
Snake: Huh, we must be using the same frequency? Anyways, who’s this Leon character and why is he here in Smash?
Hunnigan: Leon is an agent for the U.S. government who specializes in dealing with bioterrorism threats. He’s dealt with Bio Organic Weapons that you couldn’t even fathom and managed to save the presidents daughter from an evil bioterrorist cult. With his achievements it was only a matter of time before he was invited to Smash.
Snake: You know, I’ve dealt with my fair share of giant monsters too. You ever hear of metal gears?
Hunnigan: Regardless, Leon is a master of combat and carries more than a few powerful weapons with him, including the P.R.L 412 laser and the mine thrower, but once you get past all that you still have to deal with him up close with his knife, which is where he’s the most dangerous.
Snake: Huh, dangerous from afar and close-up? I can respect a man like that. Maybe him and I can go grab a drink somewhere?
Hunnigan: He’s still on duty, Snake, and if you are also a soldier of the U.S. government, so are you. You both have jobs to do.
Snake: Story of my life.
End codec
Palutena’s Guidance
Pit: Lady Palutena, who’s this guy? He doesn’t look like much of a fighter to me?
Palutena: That’s Leon, Pit, from the Resident Evil game series. He’s a secret agent for the U.S. government who specializes in bioterrorism threats.
Pit: Bioterrorism? What’s that?
Palutena: Its when people use biological agents like viruses or parasites to hurt other people!
Pit: Oh, you mean like Viridi?
Viridi: What?! No way! My soldiers are composed of natural elements from the Earth! Bioterrorists use man-made agents to create horrific monstrosities!
Pit: Oh…. Sorry!! Heh-heh….
Palutena: Viridi’s right, Pit! Leon has faced some truly horrific Bio Organic Weapons, or B.O.W.’s for short, such as the El Gigante and Del Lago, and he defeated them all in his quest to save the President’s Daughter, which he managed to do despite the odds! Even to this day he remains one of the best bioterrorism defense agents on the planet!
Pit: Well, let’s not forget I have beaten the odds on several battles myself (*ahem Hades), and besides I have more than a few tricks up my sleeve to take him down!
Palutena: Careful Pit, Leon has a few surprises of his own! His P.R.L 412 laser can hit in three directions, his mine thrower can stick explosives to you and his grappling hook can drag you to the ground if you’re in the air! And even if you get past all that, Leon is a master of close-quarters combat where he uses his knife to deal some serious damage!
Pit: Oh geez! Well I have you by side, so there’s no way I’ll lose…. Right?
Palutena: Sure Pit, I have total faith in you… but if you lose, there’s no shame in it…
Pit: Ah thanks, Lady Palutena! (he says sarcastically).
End Guidance
*Note: I did not make trophy information for Leon as I had been working on this for three days and didn’t think it was necessary, but I apologize if you wanted to read it.
#resident evil 4#resident evil#leon scott kennedy#leon s kennedy#smash bros ultimate#smash bros#gaming#fanmade#fandom#fan ideas
2 notes
·
View notes
Text
Fire and don’t forget
“‘Fire and forget’ is fine, provided you never actually forget.”
from the Seventy Maxims of Maximally Effective Mercenaries
One of the unused attributes from the game files is for the Soldier: the ability to control the direction of rockets mid-flight. Sound powerful? Well, probably. Sound like it messes with prediction algorithms? Maybe, but that’s not my job.
For the sake of clarification: this isn’t a full heat-seeking missile or anything. It always continues moving forward and can’t double back; it merely turns in the direction of the cursor. The degree of sensitivity, of course, can be adjusted: it needs to be enough to give the user an advantage, but not so much that enemies can’t play against it.
Guided Rocket Iteration 1
(+) Rocket turns toward the location of the cursor
(+) Full damage on direct hit
(+/-) Shines a targeting laser while rockets are out
(-) -50% clip size
Rather than being a spammable kind of weapon, this makes you pay attention to the trajectory of each rocket. This isn’t especially noteworthy when you’re shooting at someone in close to medium range, but it gives you a great advantage in long-range combat. The enemy will have a hard time dodging a rocket that seems to always home in on them, and full damage (90, to be exact) is a lot more than most classes can deal at long range.
I have to say, I don’t especially like this weapon. Because it so greatly increases your effective range, it can make long, open corridors into death traps, especially if they’re hard to dodge in. By TF2 convention, Snipers are the only classes that really do well over long distances, and maps are balanced around this.
This iteration also cripples your damage output overall, since half a clip is barely enough to dispatch even one target. I think that the Soldier with this launcher would hang back, out of the fight, and bombard enemies from afar. Not the most entertaining way to play, although you could certainly be doing worse.
Guided Rocket Iteration 2
(+) Rocket turns toward the location of the cursor
(+) +35% blast radius on direct hit
(+/-) Shines a targeting laser while rockets are out
(-) -20% blast radius
(-) -25% clip size
This rewards you for direct hits, but it doesn’t have the same kind of long-range potential, nor does it weaken you so much in close ranges.
While this is an improvement, it still doesn’t address the inherent flaws with this attribute. Because rockets move fast, long ranges are naturally better if you want to capitalize on the guidance system - but at long ranges, your damage output is much lower. At closer ranges, you can blast a large crowd, but you only have three rockets and can’t use the targeting laser as easily. There aren’t many scenarios in which this launcher really works as a whole weapon.
An additional problem is that these targetable shots might well be frustrating to deal with. I mentioned how the sensitivity had to be just right, but it can still be very bothersome to have to devote all of your energy to avoiding a rocket that knows where you live and is outside of your bedroom window right now. Slower classes like the Heavy, poor dodgers even of normal rockets, might not be able to avoid it at all.
And what of the Soldier launching it? You would likely suffer from Wrangler-style tunnel vision, focusing on the long-term trajectory of each rocket and putting yourself in a dangerous position. In addition, because it’s easier to monitor one rocket than several, you’re incentivized to only fire one shot at a time, drastically reducing your damage output. This might be downright underpowered.
This is the kind of attribute that would require heavy playtesting because of how it alters the class and range dynamic, and it might turn out to be a really interesting weapon. But my gut instinct is that it would not be especially fun to play with or against - no matter how enjoyable the projectile physics might be.
14 notes
·
View notes
Last Seen Blogs

ma-india
Untitled

kvb222spatialart
KVB222 SPATIAL ART: OBJECT AND SITE

apexofthewrld
hero

kuzphotostudio
Kuz Photo

bey0ndr
Beyondr