#ts3 default replacement tutorial
Explore tagged Tumblr posts
Text

THE SIMS 3 TUTORIAL
HOW TO CREATE CUSTOM FOOD DEFAULT REPLACEMENT MOD USING CUSTOM MESH & WORKING GEOSTATES (FULL, HALF, EMPTY)
This is default replacement replacing existing food in Base Game or Expansion Packs using EA's recipe and custom mesh & texture. If you are not satisfied with EA's existing mesh and texture, sure you can replace them with this easy-to-follow tutorial with pictures explained one by one. No custom recipe, no CCLoader, no scripting.
This is how I created Authentic Chinese Spring Rolls Replacement Mod using custom mesh and texture.

----------------------------------------------------
This tutorial is for intermediate, which means already know the basic principle of doing default replacement mod.
If you are beginner, haven't tried default replacement mod mesh & texture before, recommended to try the Default Replacement Tutorial for Simple Object first. TSRW Workshop, Milkshape, etc. Tools to prepare on that tutorial as well.
----------------------------------------------------
I created this tutorial because there is no tutorial about default replacement food mod using custom mesh and explaining about how to do the GeoStates properly. I did trial-and-error and accidentally found the method how to replace EA mesh with edited mesh, and the GeoStates are fully working.
The challenge of doing food default replacement is that food mesh cannot be cloned simply on s3oc. There's no OBJD for "EggRolls" "Stir-Fry" etc. other food. The only OBJD available for clone on s3oc is Burger.
Sims 3 Object Export cannot replace s3asc because it keeps throwing error and cannot make 3 working GeoStates (Full, Half, Empty).
-----------------------------------
Note: You need World Adventures Expansion Pack to use my example, Egg Rolls. You can replace food from Base Game or any Expansion Pack.
✳️ Step 1: Find all Egg Rolls file strings: Cook, Eat Serve files on S3PE
Instead of cloning from s3oc, we have to find the file from game file package on s3pe.
Why? Because the food cannot be cloned simply from OBJD. You cannot find file "Egg Rolls" no matter how careful you inspect every file filtered "WA" (World Adventures Expansion Pack) on s3oc catalogue.
The only food you can clone its OBJD on s30c is Burger. You will clone that Burger OBJD later. Right now you have to find every file with word "Egg Rolls" on game package.
⚠️I suggest you make duplicate of game package for modding purpose instead of using package that is readable by game when the game is running. It is to avoid corruption because you accidentally replaced the files. If corrupt happens you have to re-install the game. ⚠️
Make duplicate of game package you find on your game installation path.
Base game:
The Sims 3> GameData > Shared > Packages > FullBuildep1.package
Expansion Pack:
The Sims 3> GameData > Shared > DeltaPackages>p02 > DeltaBuild_p02.package (Depending the release of Expansion Pack & Stuff Pack)
My duplicate of game package folder looks like this.

Open s3pe. Open FullBuildep1.package.
Type Name "EggRolls" on box.
Tick besides Name and Filter Active, then click "Set" button. It will give your result "EggRolls" filtered by its own.
Select all files until they are in blue selected, Right Click > Copy.
File > New. Right Click > Paste...
Then your files are all pasted into new S3PE document. You can delete ticks on Egg Rolls filter, as the package is no longer filtered.

File > Save .package. Give the name of the package such as "[Your username]_AmericanEggRollsEA". For my own example, "TBW_AmericanEggRollsEA."
We will use this package as a base to be replaced with new resource codes later. Put this package on Folder such as "Original EA American Egg Rolls" to make you easier to find the file which is original, which is edited.
✳️Step 2: Export Egg Rolls .s3asc and texture files from S3PE & copy the original resource codes.
Export foodEatEggRolls, foodCookEggRolls, foodServeEggRolls to s3asc.
If you are asking why this MODL should be export to s3asc, it is because we cannot clone OBJD of original EA Egg Rolls from S3oc and imported as .wso format from The Sims Workshop (TSRW). The only mesh of EA Egg Rolls we can get is from .s3asc file we can get from s3pe.
Save the s3asc file: "Cook","Eat", "Serve" on separate organized folder, name it "Original s3asc EA Egg Rolls"

⚠️Warning! The strings too long can cause error when export it.
Sometimes you tried to export the .s3asc but then disappeared and you cannot find where you save it. It is because the S3PE application crashed when you exported it because the strings are too long.
In this case, the original .s3asc you want to export is S3_01661233_08000001_0000000008780D94_foodEatEggRolls%%+MODL_filebase.s3asc
You can delete the long string then leave the "FoodEatEggRolls_filebase.s3asc" for example. Yes, you must add _filebase so it can be saved as .s3asc format.
Save, then the .s3asc will add additional files such as:
foodEatEggRolls_group00.s3ascg foodEatEggRolls_group01.s3ascg

Export the original EA .dds textures "All" and "Used" .
Copy all resource codes of each file to Notepad. Right-Click>Details...
Click Copy TGI to easily copy the codes (Type, Group, Instance) to Notepad.
Click GRID > Resources (3 Dots) > TGI Block List Editor You will see the list consists of 8 lines of_IMG, copy all TGI (Type, Group, Instance) codes to Notepad for easy copy paste later.

✳️Step 3: Copy original GeoStates codes (0, 1, 2, 3)
Click "FoodEatEggRolls" MODL. See the 4 GeoStates on the right side.

GeometryStates[0]: 0x95A36FFE
GeometryStates[1]: 0xD8918A76
GeometryStates[2]: 0x4DB2D3D2
GeometryStates[3]: 0x35B26CCB
Copy all these GeometryStates to Notepad for easy copy paste later.
GeoStates are in three forms.... Full, Half, Empty? But why are 4 GeoStates now?
You will find out later by cloning the base food OBJD in the next Step.
✳️ Step 4: Clone Burger mesh using s3oc & Open the Burger Mesh on TSR Workshop
More steps click spoiler tag “Read More / Keep Reading” below
Search "food" on s3oc.
You will get results like this. Food that can be cloned are Hamburger, Hotdog, Fries (Seasons EP). I choose Hamburger because it's Base Game and it's resembling custom food we want to create.

"Clone or Fix..."> Don't tick Renumber > Start.
Save the package. Open the package on TSR Workshop.
Open TSR Workshop > Create New Project > New Import> Next > Browse EA Burger .package > Next > Next > OK.
You will get Burger mesh preview. Take a look at Mesh tab.
Then see the Group 0 and Group 1. Both have GeoStates.
What is Group 0? What is Group 1?
If you check the the burger's .s3asc exported from s3pe or .wso exported from TSRW
You will see Group 0 is the food mesh as main mesh and Group 1 is the plate.

Go back to TSR preview. You see there are 4 GeoStates under Mesh from Group 0 tab.
By default, the Burger meshes (Full, Half, Empty) are combined into one.
Click each GeoState, from top to bottom.
0x95A36FFE is Full state
0x8A6C4E39 is Half state
0x4DB2D3D2 is Empty State
0x35B26CCB is Full state

✳️ Step 5: Create your edited mesh
Import MODL file (with format .s3asc) of Egg Rolls you exported from s3pe from Step 2 into Milkshape 3D via Sims 3 Object Import by Wesley Howe. From Milkshape, export .obj file to your favourite 3D software to make .obj file as base mesh for your edited mesh.

Create 3 States: Full, Half, Empty.
Export uvmap to editing image software to create the texture.
After you are done and satisfied with your mesh, export your custom mesh only without plate, Full, Half, Empty states in .obj format. Hide EA plate and EA's base mesh before exporting.
✳️ Step 6: Create texture
Import uvmap from your 3D software. Create texture, save in .dds format with the same name as original name of .dds exported from s3pe.

✳️ Step 7: Bone Assignment, Make Group & Export to .wso
Open Milkshape 3D. Import .s3asc of original EA Egg Roll "foodEatEggRolls_filebase.s3asc" from Step 2. Click Joints Tab, tick box "Draw vertices with bone colors" to enable bone colours.
The food shows Purple colour, the plate shows Yellow colour.
*Note that this .s3asc was imported from year 2023, the original colours are like these. If in this recent year 2025 shows different colour such as the plate is Purple, please follow this example, assign the plate Yellow colour, because my method using this Yellow bone colour has been working successfully.
Then import .obj of your edited mesh from 3D software. Delete materials of custom mesh, select custom mesh, regroup, rename to group00.

Your main task is copy Bone Assignment from original EA mesh to your edited mesh.
Check the codes on Joints tab, there are 3. Click each code then click "Assign" to see what is the Bone colour to determine rig for functionality of the object in the game.
0xFEAE6981 --> Yellow 0xCD68F001 --> Purple 0xD0DECA8E --> Light Blue
We will assign the custom mesh with Purple colour, therefore, select the custom mesh, select 0xCD68F001, assign. The custom mesh colour will turn Purple.

After you are finished with the Bone Assignment (Main Mesh is purple, plate is yellow), make sure the groups are correct. Group 00 ---> main mesh. Group 01---> plate. Export them in .wso format.
✳️ Step 8: Import the edited mesh on TSR Workshop
Open Burger .wrk on TSR workshop, import your custom mesh in .wso format. Click folder with green arrow to import .wso.

After importing, you will see your custom mesh and Geostate reset to 0 for all states.
✳️ Step 9: Create Geostates on TSR Workshop, Export to Package
If you click Geostate row, the custom mesh disappears. Because the face is 0. Click on ... dots on the right side of Geostate to open Face Selector. Face Selector is to create Geostates working, Full, Half, Empty. The mesh suddenly appears with grey colour.

Left click to give colour to the face. Colouring faces based on Geostate. Be careful because the mesh is all joined into one. When give colour to Full state, do not give colour to Half state.
0x95A36FFE for the Full State
⚠️Warning! This is the trickiest part of creating Geostates: Texturing the Geostate. Cannot undo. If you wrongly click and want to undo, you have to restart from zero again. If you feel the texture is alright, then save it. You can start from checkpoint from last save if you wrongly clicked. Cancel then load the save to restart. ⚠️
Click 'n pick to click the colour one by one. Basic Square: Drag cursor to give colour in big area. Shift + Left Click: Delete 1 face. Click "Clear" to delete all the colour in one click.

Rotate the camera to make sure all part of expected geostates are textured.
Give colour to other GeoStates.
0x8A6C4E39 for the Half State (half eaten)
0x4DB2D3D2 for the Empty State (crumbs)
After you are done with the texturing GeoStates, export to package. Edit > Project contents, Export> To .package

✳️Step 10: Export MODL filefrom Package saved from TSR Workshop
Save the package with name "SpringRolls_TSRW"
Open s3pe, import package that you saved from TSR Workshop. "SpringRolls_TSRW"
Export MODL, save.


✳️Step 11. Finalizing in s3pe & Replacing the Original MODL with Edited MODL & Correcting the TGI (Type, Group, Instance) Code As Same As Default Code
Open original package you cloned on s3pe "Your Username]_AmericanEggRollsEA"
I saved the package with different name to"[Your username]_SpringRollsDefaultReplacement." to make it modified package, while leaving AmericanEggRollsEA package as backup original base, just in case I need original file.
Replace "FoodEatEggRolls" MODL that you saved from Step 10: from SpringRolls_TSRW
Check if all resource code (Type, Group, Instance) are the same as the original. Check the resource codes inside TGI Block List Editor, are they as same as inside TGI Block List Editor in original package.
You can see the resource codes are different from original FoodEatEggRolls MODL codes you copy pasted to notepad. Delete MLOD, change the codes (Type, Group, Instance) with the original FoodEatEggRolls MODL codes on Notepad. Use "Add" to add one row, Delete to erase one row. After you are done, Save and Commit.
Replace textures with your custom texture in .dds format.

Save package.
Test the package in game.
Wait until your Sims finish all their GeoStates, are the GeoStates working properly.
The geostates are working properly except at the Half Eaten state.
All states are combined into one and the plate colour are having spring rolls texture... 😱

Don't panic. Your bone assignment is alright. Copying same codes on Data Resorce and TGI Block List Editor are working properly too.
What causing the Half Eaten state is not working is:
The "Half Eaten" geostate code you are cloning from Burger mesh is not the same as code from geostate of FoodEatEggRolls.
Burger= 0x8A6C4E39
FoodEatEggRolls= 0xD8918A76

✳️Step 12. Correcting one GeoState that doesn't work because using EA's Burger mesh
Your main task here is using Default EA's Half Eaten state code to override your custom mesh Half Eaten state code.
Data Grid > ChunkEntries> [1] ChunkEntries > RCOL Block > Meshes > (on Tab [0] Mesh) > GeometryStates (then click ... Dots on the right side) > [1] GeometryStates

Second row is [1] GeometryStates, indicates it is "Half Eaten" state.
[1] GeometryStates > Name

Delete the code 0x8A6C4E39, replaced the code of the Burger with 0xD8918A76 from FoodEatEggRolls.
Click Done. You will go back to Tab [0] [1] Mesh and Geometry States
Don't forget to correcting the code for Plate as well. Plate is in the Tab [1] Mesh. Click [...] Dots on Geometry States once again, it will bring you to Geometry States for Plate.

Repeat the step as you did for the Food State: On Row [1] GeometryStates > Name, Delete the code 0x8A6C4E39, replaced the code of the Burger with 0xD8918A76 from FoodEatEggRolls.
After you are done, click OK > OK > OK > Commit > Save the .package.
Test your package in your game again.
Half Eaten state should be working by now.
✳️Step 13. Replacing the Original "Cook & Serve" MODL with Edited "Cook & Serve" MODL & Correcting the TGI (Type, Group, Instance) Code
Create custom mesh & texture for Cook & Serve, export to TSRW, then export to MODL like Eat state before.
⚠️ Pay attention because this step is very important, otherwise the Custom Food will turn black/disappear, doesn't work in the game.
Repeat Step 11: Replace the MODL for Cook & Serve state.
If you see default TGI code you copied from "foodCookEggRolls" there are only 3 lines.
_IMG 0x00B2D882 0x08000000 0x6F93B613E7C91FD0 _IMG 0x00B2D882 0x08000000 0x6F93B613E7C91FD0 _IMG 0x00B2D882 0x00000000 0xA4D80FB45AE9066B
If you want the Cook state working in the game, you should use default TGI code of Serve you copied from "foodServeEggRolls"
_IMG 0x00B2D882 0x08000000 0x6F93B613E7C91FD0 _IMG 0x00B2D882 0x08000000 0x6F93B613E7C91FD0 _IMG 0x00B2D882 0x08000000 0x0E3D40D33CC70324 _IMG 0x00B2D882 0x08000000 0x6F93B613E7C91FD0 _IMG 0x00B2D882 0x08000000 0x6F93B613E7C91FD0 _IMG 0x00B2D882 0x00000000 0xA4D80FB45AE9066B _IMG 0x00B2D882 0x08000000 0x6F93B613E7C91FD0
instead of foodCookEggRolls, otherwise the Cooked food will turn to Black colour in the game.
Repeat Step 11: Copy all the TGI codes you copied from "foodServeEggRolls" for Cook and Serve.

Commit, Save.
✳️Step 15. Check the Geostates for Cook & Serve
Check the Geostates for Cook & Serve.
Cook & Serve Geostates are working using Burger Geostates.
0x95A36FFE 0x8A6C4E39 0x4DB2D3D2 0x35B26CCB

Leave the Geometry states, no need to change to default EA Egg Rolls (otherwise your mesh will disappear or black).
After you are done, click OK, commit, save the .package as usual.
✳️Step 16. Test the CC in the game.
If your Custom Food works well in the game: Full, Half, Empty Geostates are working without showing weird texture or black or disappear, then congratulations! Enjoy and have fun with your custom food default replacement mod👍

#the sims 3#ts3 tutorial#thebleedingwoodland#ts3 mod tutorial#ts3 default replacement tutorial#ts3 functional food tutorial#tutorial#modding#s3pe#s3oc#TSR Workshop#geostates#ts3 food
24 notes
·
View notes
Text
youtube

Tutorial : Face Preset Editor
After releasing my default replacements presets, I don't want to be the only creator to do so. Having many people share their content is amazing and that alone creates growth of custom content for the Sims 3.
Therefor, I think it is important for me to share my knowledge with you so you can be able to better understand how to use the Face Preset Editor by LazyDuchess and create your own custom presets or default replacement presets
What I'm assuming in this tutorial :
You have S3PE installed
You're familiar with the basics of S3PE.
You know what game files are
You know what a default replacement is

Download - Default Presets Folder :
SimFileShare - GoogleDrive

Questions and Answers
What's in the default presets folder ?
They're the default presets from the basegame and world adventures that I extracted from the game files and organized according to their names and categories
Can I use your already existing face presets default replacements as a base to make my own presets ?
Yes, feel free to use them all, just credit me if you do so ! - Heads Eyes Noses Lips -

Credits :
S3PE
FacePresetEditor
#ts3#sims 3#the sims 3#tutorial#siims 3 face preset editor#sims 3 face presets#sims 3 presets#ts3 face presets#ts3 face preset editor#sims 3 custom presets#sims 3 default replacement presets#sims 3 mod tutorial#sims 3 tutorial#ts3 tutorial#ts3 cas#sims 3 cas#sims 3 create a sim#ts3 create a sim#ts3 mods#Youtube#CAS : Presets#tutorials
207 notes
·
View notes
Text
My new build video is live!! Would you like to learn how to make raised garden beds? Come and check it out 😁
#youtube#the sims 3#mods#remastered#version 5#default replacements#the washburn edition#golden ennina#mod list#ts3#how to#build video#tutorial#garden#gardening#planters
7 notes
·
View notes
Text
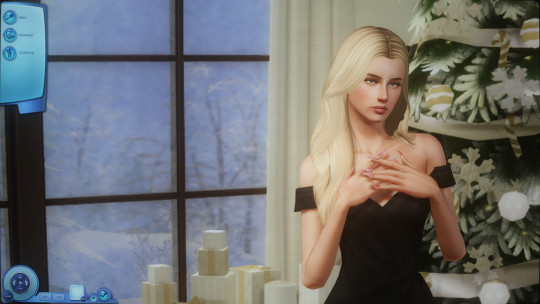
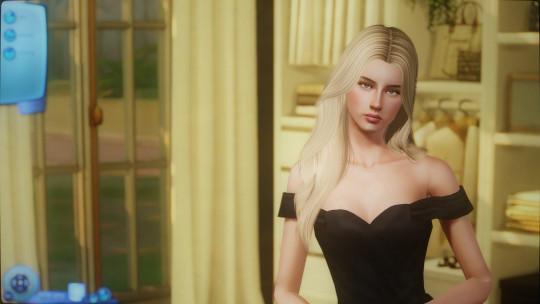
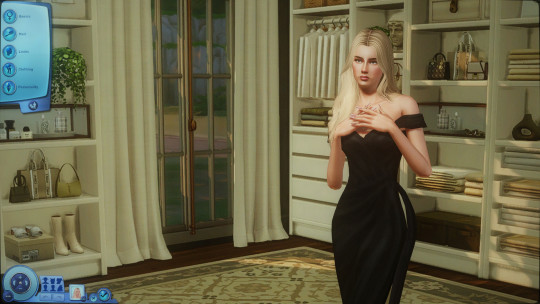
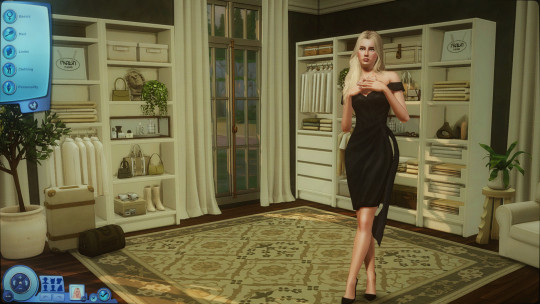
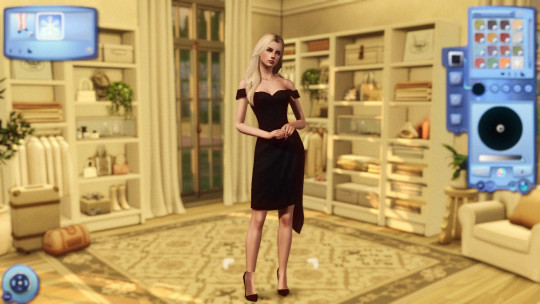
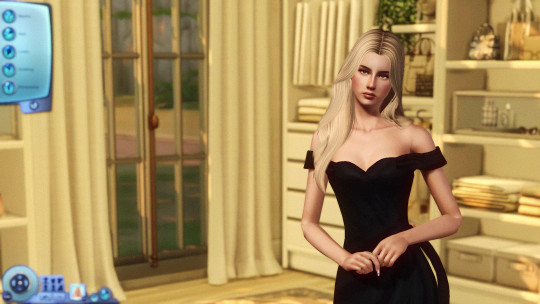
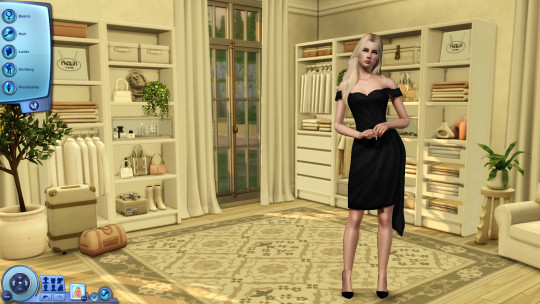
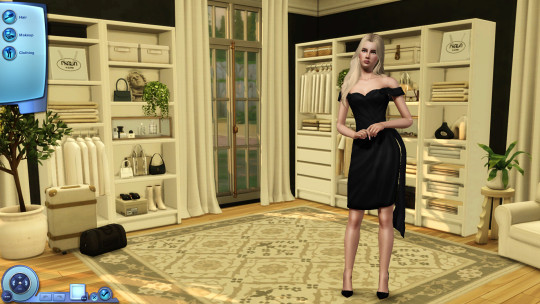
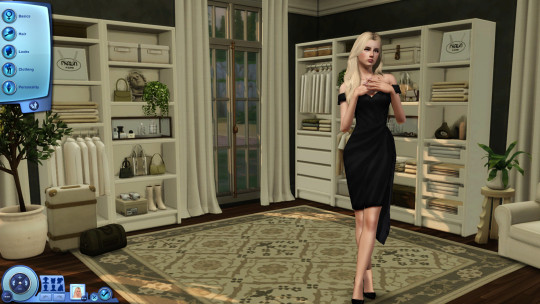
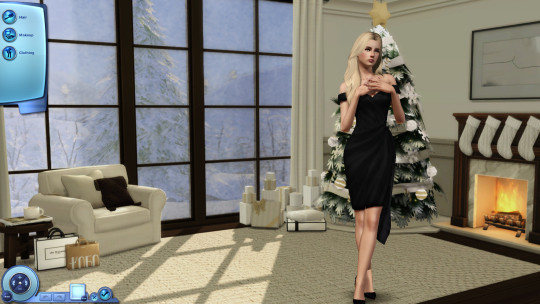
CAS Background Replacement - TS3 - Bbygyal123
This set of 4 elegant backgrounds is by Bbygyal123 on Tumblr and Patreon. They are from the "Aesthetic Closet" set and the 2023 Advent Calendar set.
The lighting in game is much more neutral, less saturated and bright than the pictures. I took these before the lighting/weather situation got fixed.
Information
The background uses a 2048x2048px image so it may slow down your computer and look blurry if graphics settings are not on high. Use at your own risk.
The CAS Room Default will replace the CAS Room, Create-a-Pet room, and the Create-a-Bot room. You can only have 1 CAS Room Default at a time.
The Stylist Room Default will only replace the Stylist Room. You can only have 1 Stylist Room Default at a time. Requires the Ambitions EP.
Credits
CherieDawn67 at Modthesims for creating the mod and the mesh used for the background.
@mspoodle1 for updating the mod.
Bbygyal123 on Patreon
Me for Photoshop work and figuring out this whole malarkey. This mod took a truly ridiculous number of hours of testing.
Make your own using my tutorial here!
Download: simfileshare / mega
459 notes
·
View notes
Text
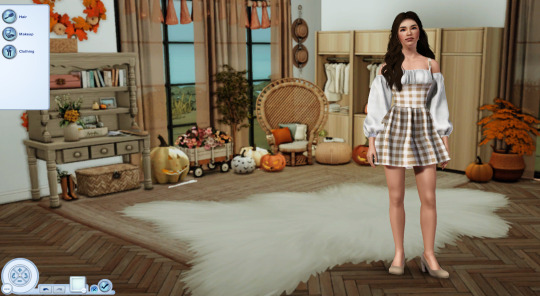
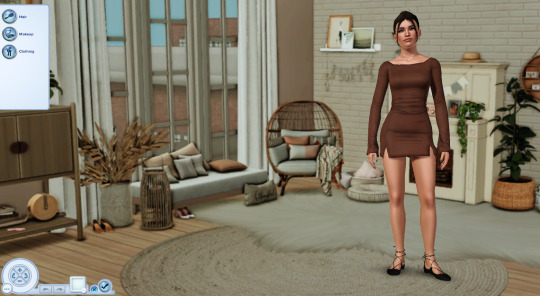

SimsDeoGloria 4t3 Pilar Leon CAS Background Replacement
Some Fall Themed CAS Background for your Sims 3 Games. More info under the cut :)

Download: simfileshare / simblr.cc
A huge thank you to Pilar Leon for allowing me to covert their beautiful CAS Backgrounds. This is the first of several I've done so keep an eye out for more.
And a huge thank you to Nectar Cellar for the tutorial!

The background uses a 2048x2048px.
The CAS Room Default will replace the basegame CAS Room.
The Stylist Room Default will only replace the Stylist Room. (The Stylist Room Requires Ambitions)
You can only have 1 CAS/Stylist Room Default at a time.
Credits
A huge thank you to @pilarleon for allowing me to covert these and for all the beautiful CAS backgrounds they have created. Originals can be found here: Autumn & Marina
@nectar-cellar for the tutorial and doing so much work to get us TS3 players some new backgrounds! I can't thank you enough! Go look at Nectar Cellar's Tutorial Here: Make your own using this tutorial!
@johziii for the beautiful sims in these pictures. Models used were Paula Benjamin and Angeline Knight
Other Mods used in photo is @boringbones CAS UI Overhaul

307 notes
·
View notes
Text
Market Day!
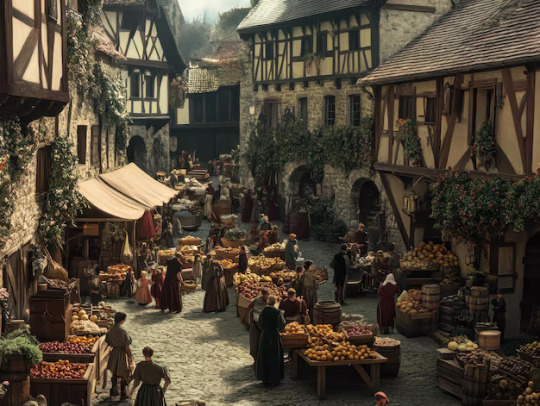
* Village Event Announcement *
Market Day at TS3 Medieval Market
This Saturday (February 22, --25), saddle your horses, load up your wagons, and head on down to the new Market to sell, buy, trade and barter your goods with other Villagers!
[This is a free event involving no real currency, just downloads]
The Tavern & Inn (Storytelling, Show & Tell, Discussions)
The Tavern always has some sort of story to tell or news to share amongst the locals, but perhaps a new tale would be nice? Share your adventures with the Village as you have a meal, sit by the campfire, and people of all ages and walks of life listen to tales of woe and foreboding, folklore, songs and dancing. Of course, say hello to your friends and catch up on the local gossip before you leave!
The Market (All the CC Categories)
There’s so much to acquire in the market that it might take a while to see everything! Make sure to ask around, people are always happy to point you in the right direction.
Have you tired of looking at the same old items around your home? There’s a stall for default replacements to help give your belongings a fresh look!
Need to upgrade or improve something? Mods will have what you’re looking for.
This Village doesn’t suit you anymore? Ask about worlds-caw, and start planning your move.
Love the Village, hate the house? There might be rentals available at lots.
A busted fence, a broken window and a squeaky door… You need build, they’ll craft something custom for you!
New furniture and home décor will be over in the buy stall.
Oh, my dear… that hair… and the young Lady will be needing a new dress for the season… of to CAS with you both!
The Castle is looking for staff. Find work in Careers.
Need someone to help around the farm? Find a helping hand in SIMS.
This horse is lame, the stable will be able to help you buy a new horse, there might be pets for sale as well.
Looking for textiles, lumber or stone? Oh yes, you’ll find those over in patterns.
What’s that lovely smell? That must be recipes-ingredients!
Our barn is cluttered with old holiday decorations… let’s free some space and dump it off at the holiday stall to resell!
Cargo (Requests, Conversions, Tutorials, Trades, and more!)
Have something you can’t find, but want? Are you willing to trade or barter? I’m sure someone will be willing to make a deal!
You could also ask in cc-requests, or the suggestion box. I’m sure there are people looking for ideas in collaborations as well.
Wanting to host an event in the Village? Put it up on the board at challenges-events.
Have too much to carry by wagon? Request a warehouse and you can store all of your stuff there! You can also explore other warehouses, just make sure not to leave your own cargo there!
Vendors
The Village Market thrives on sales and purchases alike! Be sure to come with something of value, or the merchandise may run out sooner than you’d like!
Remember, the Market accepts newly crafted items, sentimental favorites from the past, and everything in between! Just make sure not to sell granny’s quilt without permission, or we’ll all be in trouble!
See you there!
Note: There is a poll going in the "Market Day" forum over on TS3 Medieval Market!
Join us here before this weekend: https://discord.gg/e6skNu9t
______________________________________________________________
Things are moving much more quickly than I anticipated over on the Market - so if the "map" above doesn't look exactly like I posted - be kind. I'm only one person, lol. There's already a LOT to look at! Hooray!
48 notes
·
View notes
Note
Hello😊 I'm just re-doing my default replacements folder and firstly want to thank you for all the gorgeous things you've made🥰 Also, I'm interested in using your urn default replacement (as well as tombstones) but for the urns I think I'd prefer it if the moderate urn used the base TS3 mesh, all aspirations who died in platinum used the wealthy one rather than just fortune and none using the poor one, could you please guide me on how I could do that? Thanks!
Hi! Well, the cleanest option would be making a new default replacement, my quick guide for that is here. You'd need to edit the meshes a bit to get them aligned with the original ones, but that's just importing both the original and the new mesh into Milkshape and moving the new one up/down, I assume most general object creation tutorials cover as much.
Or then you can use my default replacement as a base and simply use GMDCs export/import options to export the TS3 urn mesh you want to use and import it over the mesh you don't want to use. You can change the textures linked to meshes in SHPEs and delete the ones you don't need.
Not sure how useful this is, writing a step-by-step guide with images would take me a long time with this many meshes involved, but I hope it helps you forward.
Oh and I always recommend Echo's scenegraph tutorial to everyone who works with objects and with object default replacements especially. If you understand and can read the scenegraph, you can basically do anything with them.
13 notes
·
View notes
Text
Get to know you - Sims Style
Thank your for tagging me, @daniel-fortesque & @bast-sims
What’s your favorite Sims death?
None (hate it when it happens); the most frequent one in my gameplays is the old age one.
Alpha CC or Maxis Match? A mix between the two, it depends how well the CC matches the game's art style.
Do you cheat your sims weight? Not really; what I cheat is how muscular my female sims are as I play a lot the Acrobat career in TS3 Showtime and my girls bulk up too fast and too much.
Do you move objects? Ever since I learned about this particular (and very useful) cheat, yes.
Favorite Mod? Most of the Nraas mods, all of @thesweetsimmer111 fabulous baby/toddler mods and also small ones to correct some stuff in the game (like No Mascot Camera Zoom, No Autonomous Gaming, Autonomous Wash Hands After Toilet Use, Zoom-In CaS Camera, etc)
First Expansion/Game Pack/Stuff Pack? World Adventures.
Do you pronounce live mode like aLIVE or LIVing? aLIVE
Who’s your favorite sim that you’ve made? A lot of them, for different reasons.
Selena Noble - a ballerina (now an acrobat) with no moral compass. But I think she's cute so she's my muse for the balletcore collection.
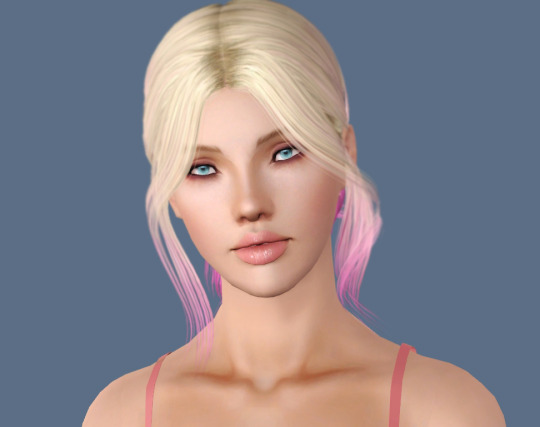
Lin Young - my fearless adventurer.
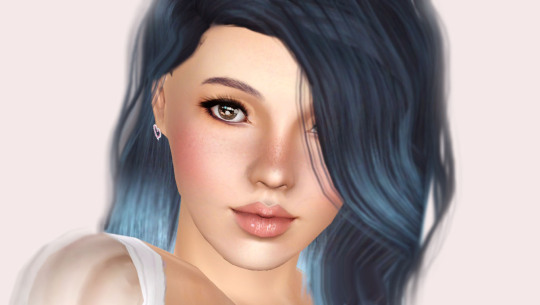
Riley Preston - my talented artist.
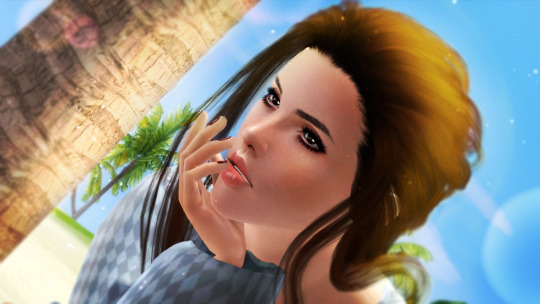
Hope London - my dedicated gardener.
These three: Mel Hada, Ren Akiba & Jace White (aka Yasu Sato). They are the MCs from "Uncertainty".
I don't have pics of them right now, but I also have to mention: Sasha Azarov, Daichi & Rei Sato, Ayanna Sato, Sebastian DeLuca.
Have you made a simself? The first sim I ever made was a simself. It did not go well.
Which is your favorite EA hair color? None; since it's TS3 I mix them according to my characters.
Favorite EA hair? Not really using the EA hairs usually, but I'd choose the Playful Updo from Late Night.
Favorite life stage? I play a lot the YA & A life stages, but also enjoy all the other ones.
Are you a builder or are you in it for the gameplay? I'm in for everything the game has to offer: gameplay, building, CAW, CC creation.
Are you a CC creator? Yup.
Do you have any Simblr friends or a Sim Squad? I wouldn't say a squad, but I do have people here that I admire and like to interact with.
Do you have any sims merch? Nope.
Do you have a YouTube for sims? Yes (as I'm an ex-machinima creator), but these days I'm only using it when I have animations to share.
How has your “Sims style” changed throughout your years of playing? In every possible way. I put a lot more thought into my builds (and worlds), my sims no longer look like aliens (I used to make them have these big anime eyes) and my gameplays are more wish-based than ever.
Who’s your favorite CC creator? So many of them since I'm a big CC hoarder. As Daniel said, everyone who brings something to this game is a champion and deserves accolades.
But to mention only a few, I'd say @simtanico for their high quality items, @enable--llamas for the awesome furniture, ArtVitalex & Onyxium over at TSR who both still create furniture for TS3, Bill-Sims also at TSR, @sim-songs here on Tumblr for their conversions, @technicallyswagpizza for their amazing plants (and tutorials that taught me a lot), @yorithesims and @bmit04 for poses; @maryjanesims3 & @agnelid for hair default replacements, and so many more. Sorry, I can't remember everyone right now.
How long have you had Simblr? Since January 2019.
How do you edit your pictures? For more aesthetic pics I use Reshade and PS (although I don't remember ever posting these types of pics), but I usually just slightly adjust the brightness, contrast, saturation and exposure in PS as I love the TS3's default art style (I'm just spicing it up a little).
What expansion/ gamepack is your favorite? Kinda all of the expansion packs?! Mainly Seasons, World Adventures, Late Night, Island Paradise, Generations. Also love all the functional store content and worlds.
Tagging: @technicallyswagpizza @chojrak-making-things @agnelid @murfeelee @simtanico @puffkins2000 @yorithesims @enable–llamas @solori @pudding-parade @faerielandsims @jazzysimlife @tiaamorosa @lordressdragoonbear @thesweetsimmer111 @bmit04 @maryjanesims3 @nornities
Feel free to ignore if not interested or have done this before! 😁😘
28 notes
·
View notes
Text

The Brokes, but genetically correct
loooooonnng picture-heavy post ahead :)
Skip to the download: CC-free Sims2Packs + .simpe face templates
Hello all! It's been awhile...I know. Life is life.
I do still love making genetically correct sims and recently I've been wanting to start a new Pleasantview. I like my old genetically correct Pleasantview, but it was a first try and I'd like to give it a bit of a refresh. Plus it's fun for me. :P
This time around I want to slowly work on each family + lots, releasing them slowly at first and then have the combined hood at the end. This allows me to really focus and expand on each one. Plus I'm generally not very motivated, but I think working small parts at a time will help this. All parents extracted from Croconaw/MeetMetotheRiver's Clean Pleasantview template. Offspring created in CAS.
A little refresher on the Newbie-Broke lineage...
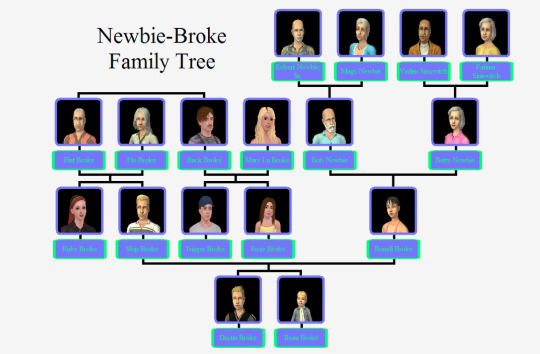
To note I only considered the genetics of the previous generation in making the current playables. For example, Betty Newbie's appearance was extracted directly from SimPe. She was not genetically created with recreated Vadim/Fatima Simovitch. I did attempt this, but found that Brandi would look too dissimilar from her original non-gc face. I still want to keep with the general aesthetics of the original faces, just obviously improved, especially for the second-gen playables like Dustin and Beau.
So first, we have the Newbies:
Bob + Betty = Brandi
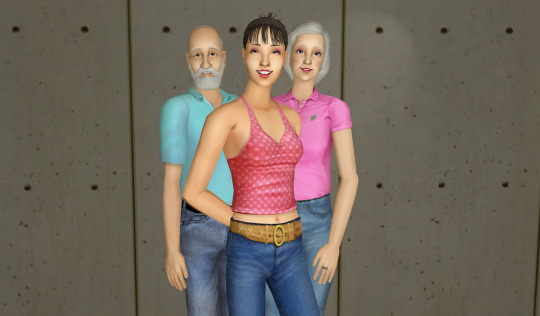
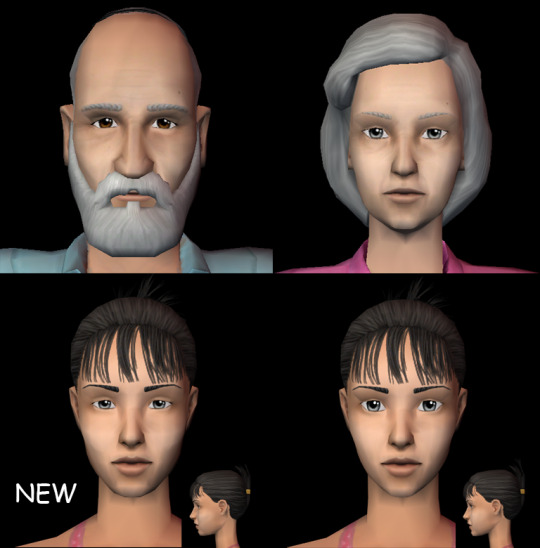
slight face shape changes, smaller less-bug eyes
The Brokes:
Flat + Flo = Skip, Ruby

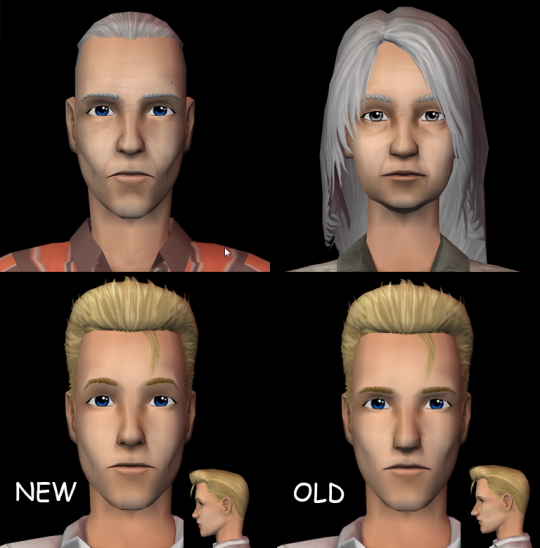
smaller Broke nose, forehead/brows from Flo
Bonus! Ruby Broke, Skip's older sister seen in TS3.
"Ruby Broke is thinking about moving out but she enjoys the convenience of having family close by."

I absolutely LOVE her face. I think it's a perfect mix between Flat and Flo. I did garner inspiration for her hair/outfit/eyes from her Sims 3 version.
And finally...the boys.
Brandi + Skip = Dustin, Beau, Unborn Baby Broke
Dustin -

looks completely different, less sad and looks far more like Skip
Beau -
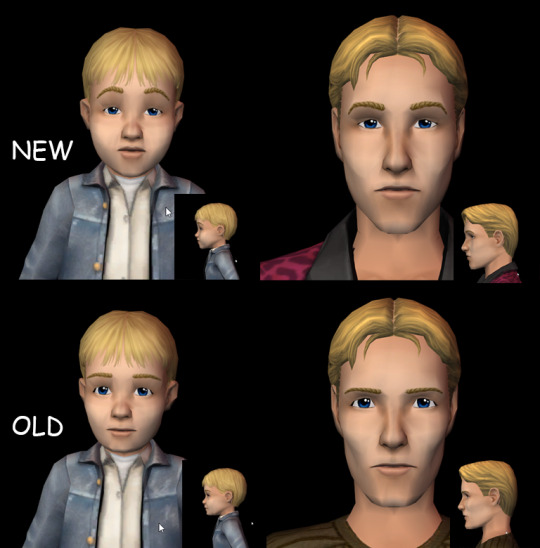
again looks very different...but now actually looks related to Dustin, yet not like twins which I thought I lacked on last time.
and there we are...
I have both the individual sims downloads, a combined package, plus the .simpe face templates that you can use to replace in any Pleasantview or other hood right now
Note: Female sims will take your default replacement makeup or lack thereof. So warning they make look a little bit crazy at first.
Credits:
Tutorial on Facial Structure Changes
Tutorial on how to extract in-game sims
DOWNLOAD
38 notes
·
View notes
Text

THE SIMS 3 TUTORIAL
HOW TO CREATE DEFAULT REPLACEMENT MOD USING CUSTOM MESH & TEXTURE FOR SIMPLE OBJECT
⚠️ Tumblr has 30 pictures limit, so I cannot include too many pictures. If you want to zoom in the pictures, click the pictures to enlarge, or save the pictures into your PC, zoom the pictures on picture viewer or zoom in the pictures on your mobile phone. ⚠️
----------------------------------------------------
I create this tutorial to make easier to follow because there are older tutorials available before but scattered on internet and usually only say "Export to replace s3asc" without explaining how to export the edited object properly.
My method is using TSR Workshop instead of exporting the object using Sims 3 Object Export/Import plug in because exporting to replace the s3asc using that plug in always giving error notification "ERR: Model has 1 groups; original had 0" and cannot be exported.
For beginners who are very new using s3pe and haven't created default replacement mod before, better start from simple object first.
Simple objects I mean in-game object that has single MODL and single texture with no morphs, no GeoStates, no presets, no CAS colour channels, and easily cloned from OBJD on catalogue. Usually as utensils that Sims holding in their hand, not buy/build objects. For example: Pencil, pan, fork, spoon.
----------------------------------------------------
Tools to prepare:
s3oc
s3pe
Milkshape 3D for bone assignment (Version I use 1.8.5 beta, discontinued by its developer, therefore feel free to download the full version with its license key provided).
Sims 3 Object Export/Import 1.01 by Wesley Howe (Milkshape plug-in. Download msS3ObjPluginsV101.rar )
TSR Workshop (Older version for TS3 only version 2.0.88)
TSR Workshop plug-ins for export.import TSRW Object.
3D Program (Blender/Maya/3dsMax)
Editing images software (Photoshop, make sure you have to install .dds plugin by Nvidia. For free software alternative, you can use GIMP with its .dds plugin)
This tutorial will not teach you how to:
Meshing object ❌
Create alpha texture ❌
Change thumbnails in-game ❌
Install programs and plug-ins ❌
This is how I created Chinese chopsticks replacement mod using custom mesh and texture.
In summary, this tutorial has 10 steps:
Step 1. Clone the Object using s3oc
Step 2. Open S3PE to Copy the Original Resource Code and Export the Files
Step 3. Export the Original Mesh as Base Mesh to .obj format
Step 4. Create Your Custom Mesh
Step 5. Bone Assignment & Create Group
Step 6. Create custom Texture
Step 7. Import the .wso of Edited Mesh on TSR Workshop & Export the package
Step 8. Export MODL file from Package saved from TSR Workshop
Step 9. Finalizing in s3pe & Replacing the Original file with Edited File & Correcting the Code As Same As Default Code
Step 10. Test the CC in your game.
-----------------------------------
✳️ Step 1. Clone the Object using s3oc
Before cloning the object, check the Game Folder for in-game object file location. Settings > Game Folders...
Take a look if the Base Game or Expansion Pack for object file you want to clone is in the right folder. For example, my The Sims 3 game are all bought from Steam, so the location is D:\SteamLibrary\steamapps\common\The Sims 3
If you want to clone object from Expansion Pack, make sure input the folder location. For example, the location for World Adventures EP is D:\SteamLibrary\steamapps\common\The Sims 3\EP1

If you are done, close the pop-up box. You can continue click Cloning then choose Normal Object...
Wait until you get the whole catalogue. Click Search...

For example, I clone object from World Adventures Expansion Pack. You can clone object from Base Game or other Expansion Packs as long it is considered as "utensil" that Sim holding on hand. For example: "Pencil" or "Pan"
Search for text: chopsticks
or if you want to clone object from Base Game, search: utensil
Tick check marks for Resource Name, Object Name, Object Desc then click "Search button"
Search result gives you results with name "chopsticks". Here is the object we are looking for: UtensilChopsticks
We need the OBJD file to clone. OBJD = Object Data.

Click "Clone or Fix" at the right bottom. Then you see the next page to determine if you want to clone with renumber or not. If you want to make default replacement, then do not check the Renumber box. Keep it blank.
Tick check box means the s3oc will generate new resource code for new item. Not tick the check means the s3oc will overwrite the same resource code, it is to replace object you cloned in-game.
I am personally a detailed person, so I usually tick as many as I want: tick "Deep clone" "Missing String Tables" and "Include Thumbnail" to include more details. Then click "Start" to proceed.

It will give you file name [CreatorName]_ObjectName_Number
Then save your package file in "DBPF Package" format in your project folder. Always make folder for any file to make everything organized.
✳️ Step 2. Open S3PE to Copy the Original Resource Code and Export the Files
Open S3pe, locate your package file you cloned from s3oc. Find the MODL of Utensil Chopsticks, Right-Click, "Details..."

On Resource Details, click "Copy TGI" to copy the Resource Code. Type, Group, and Instance will automatically be copied on clipboard. Then open Notepad, Right-Click to "Paste".
Click GRID on bottom of the s3pe (I mark it red on picture), it will give you pop-up box with Data Grid. Click "Resources", it will be highlight blue and there's 3 dots button appeared on the right side. Click the 3 dots button. It will give you TGI Block List Editor.
Inside MODL's TGI Block List Editor only has IMG. You may wondering why, but that's how the game coded. Type, Group, Instance of _IMG inside TGI Block List Editor should be the same as _IMG on the package.
Copy the TGI, Group, Instance to your Notepad.

After you copied code of MODL, do the same for the texture image (_IMG), but only copy the code from Resource Details. You cannot edit TGI Block List Editor for _IMG as the Grid button for _IMG is greyed out.
The main task is the code of your edited mesh and texture should be the same as the code you copied now from original package you cloned with s3oc.
Keep the code on notepad. You will need this code later.
Export the MODL file. Right-Click, "Export to s3asc". The file appears in long string such with name for example: S3_01661233_08000001_B619DB2238C3430B%%+MODL_filebase
Do not rename the file. Save.

Export the texture file. Right-Click "Export > To File..." The file will be saved in .dds format. Do not rename the file. Save.

✳️ Step 3. Export the Original Mesh as Base Mesh to .obj format
Open Milkshape. Import the s3asc file you saved before.
More steps click spoiler tag "Read More / Keep Reading" below
File > Import > Sims 3 Object Import v 1.01 by Wesley Howe

Locate the s3asc file, then the original chopsticks mesh appears.
Click the "Joints" tab. It has 4 codes. Check box "Draw vertices with bone colors" It will show Bone Assignment colors on the original mesh. Yellow on top chopstick and light blue on bottom chopstick. The colours are to make the object has rig and movement following the Sim's interaction.

Take a look at the 4 codes on Joints Tab. You can play around to see which colour of the code will appear, after that copy paste the code to Notepad to make it easier to comprehend.
Click Select from Tools menu, Select Options: Face. On "Right/Left/Top/Bottom 2D View", Left-click make selection of one part of chopsticks. While the part of object being selected (Red), click Joints then Choose "Assign".
0x96239247 --> Yellow 0xFEAE6981 --> Purple 0xCD68F001 --> Light Blue 0xD0DECA8E --> Red
Your edited mesh must have the exact same Bone Assignment colour later. Check again if the code and colour are correct.

You can save object mesh as .obj to other 3D software such as Blender or any other 3D software.
✳️ Step 4. Create Your Custom Mesh
Use the original .obj as base model. While you can create longer mesh or any edited version as you wish.
Make sure the scale and position of the edited mesh is same as base original mesh, because the edited mesh will be used on Sim's hand.

If you are done editing the mesh, export the UVmap.
You can export the uvmap in higher resolution, as long as it is Power of 2. 64x64, 128x128, 256x256, 512x512, 1024x1024, 2048x2048, 4096x4096. I export in 1024x1024 pixels to make the size of texture larger and have more details.
Then export the mesh object in .obj format.
✳️ Step 5. Bone Assignment & Create Group
Open Milkshape. Import the original mesh.
Check the Groups Tab. Original mesh has 1 group, "group 00". Group 00 means it is the main mesh. There is no shadow beneath the object.

Import the edited mesh as .obj file.

My edited mesh has one single name "default" name on the Group Tab. While edited mesh may have a lot of file name scattered on Group Tab. Regroup the file name to simplify your edited mesh into one single name. Select > Regroup.
The main task is replacing the EA's original mesh with your edited mesh.
Before you delete anything, you must do Bone Assignment first to the edited mesh you created.
Your edited mesh does not have Bone Assignment, so it appears white.
Remember the 4 codes you copied earlier in Notepad.

Copy Bone Assignment from original mesh to your edited mesh.
This case, your want to Bone Assign Yellow colour.
Select > Face to select one part of chopsticks of your edited mesh. On Joints Tab, double click the appropriate code 0x96239247 in blue highlight then the code box on the right side of "Rename" will appear 0x96239247. Make sure the code is correct. Then you can click "Assign".

Your edited mesh will appear in Yellow colour. Then do the same for another part of chopsticks.
Select another part of chopsticks of your edited mesh. On Joints Tab, double click the appropriate code 0xCD68F001 in blue highlight then the code box on the right side of "Rename" will appear 0xCD68F001. Click "Assign".

Your edited mesh will appear in Light Blue colour.
Then what's the other code for? With colour purple and red?
Leave them. Let the codes have the same exact codes as appear in original mesh and let the colours only assigned Yellow and Light Blue. The colours are to determine rig for interaction in-game, which only use Yellow as upper part of chopstick and Light Blue as bottom part of chopstick.
You can safely delete the original mesh with name group00 until it remains your only your edited mesh.

Rename your edited mesh to group00. Type group00 on the box then click "Rename" on the left side.

Export to TSRW Object in .wso format. .wso is format with bone assignment on object attached.

Save your .wso in your project folder.
✳️ Step 6. Create custom Texture
Import original texture you exported from s3pe to your editing image software.
Look at the original texture made by EA. 32x64 pixels. It is very low resolution, blurry and stretched, because the texture should be compressed as low as possible by game designer. As player you want it has higher detail to look realistic as possible and your PC of course can handle high resolution content, sure you can make the resolution much higher than EA's.

Import the UVMap you saved from 3D software. For example, UVmap I imported has 1024x1024 resolution. Add your custom texture. Then save it to .dds format in the same name as original texture. Save in separate folder, name it "Edited Texture" to keep it separated from original texture.
✳️ Step 7. Import the .wso of Edited Mesh on TSR Workshop & Export the package
Open your TSR Workshop.
Create New Project > New Import >Next...

Then Browse original mesh by EA in package format in your project folder.
On Open file box, you cannot see .package file because the filter is .wrk (TSR Workshop Project). Choose the .package dropdown.

Then you can see .package file.
Open the .package. After the file is located, then Next. On Project Details I usually skip without giving name of Project Name and Title. Next.
You must have seen green land with white blank sky.
Where's the mesh? It is actually there... just being zoomed in too close. You need to zoom out by scrolling down mouse.
You can see the original chopsticks mesh by EA. You can save the project file in .wrk format. After you save the file, import the .wso of your edited mesh. Mesh tab > High Level detail. Click green arrow folder icon to import. Then your edited mesh will appear replacing the original EA mesh.

As you see, the texture is messed up because the texture is still using original EA's texture. But then you check Textures tab and it has blank dropdown...
I cannot change the texture on this TSR Workshop!
Don't worry, we can replace the texture on s3pe later.
No need to change anything other than importing mesh. Click Edit > Project Contents to save as package.
You will see pop up box with number or files DDS, FTPT, LITE, MODL, OBJD, OBJK, etc. Export > To. package. Give name such as "EditedChopsticks_TSRW"

✳️ Step 8. Export MODL file from Package saved from TSR Workshop
Open S3PE, File > Open package "EditedChopticks_TSRW" that you saved from TSR Workshop.
Export MODL. Right-Click, export. It gives you file name with [StringOfNumber] .model .
Save it on project folder. Keep it organized and separated from original MODL. Name the folder "Edited MODL". Do not rename the file.
✳️ Step 9. Finalizing in s3pe & Replacing the Original file with Edited File & Correcting the Code As Same As Default Code
Open s3pe, File > Open original package that you cloned from s3oc. [CreatorName]_ObjectName_Number
Find the MODL. Right-Click > Replace...
Locate to your edited MODL with filename .model .
Then click Open.
The original MODL of the package should be replaced with your edited mesh.
Do the same for the texture.
Locate to your edited texture with filename .dds
Then click Open.
The original texture of the package should be replaced with your edited texture.
Take a look at MODL's Type, Group, Instance. It has the same code as original MODL in the original package cloned with s3oc (because it has been replaced)
Don't forget to see the code inside TGI Block List Editor.
Repeat step 2 how to check the code. Right-Click on MODL/IMG > Details... and click GRID > Resources > TGI Block List Editor.
The Type, Group, Instance of the _IMG are different compared from IMG from original package clone, which means that is the evidence of edited mesh replaced the original.
Rename the Instance with default/original Instance you copied on notepad from Step 2. Type, Group, Instance should be the same as default/original Type, Group, Instance.

Open notepad with resource code you copied from Step 2. Make sure the Type, Group, and Instance are all the same.
If the codes are the same, then your edited mesh and texture will overwrite the default mesh and texture with the same code in the game. Save, Commit, Save the package.
Check again if the texture is replaced properly. Right-Click on _IMG > ViewDDS.
ALTERNATIVES!
Yes, you can delete unwanted files in your edited package, to keep the package clean. Simply Right-Click>Deleted.
The only files needed in package are: MODL, _IMG, _KEY
They are the only files with your edited mesh/texture including codes to overwrite the default codes.
You can Start new fresh blank s3pe. Right-Click>Import from file...
Locate your edited MODL and _IMG (texture) file.
On Resource Details box, tick mark "Use resource name" > OK.
Make sure all the Type, Group, and Instance of MODL and _IMG including in the TGI Block List Editor are all the same as the code in original package.

Save the package.
✳️ Step 10. Test the CC in your game.
Put the package to your CC folder in your The Sims 3 document folder to see if the CC is working or not.
If the CC is working as your intended, with your custom mesh and texture, then test the animation. Are the chopsticks animation working as the same as original EA's? If the animation are working well too, then congratulations!
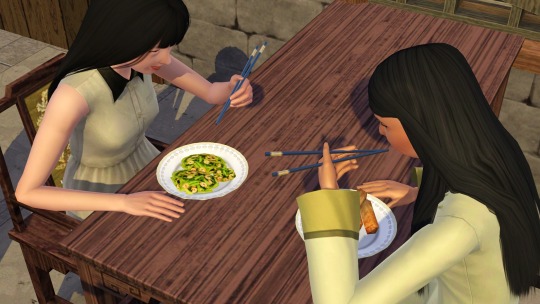
Your default replacement are working. Give applause to yourself. 👏
-------------------------------------
QUESTIONS!
Q:
Can I use this tutorial for making default replacement for buy/build object?
A: This tutorial covers basic method of using TSR Workshop and replacing the default codes (Type, Group, Instance), so you will understand the basic principle of doing default replacement mod.
Keep in mind that different object has different case. Buy / build object has MLOD (not just MODL) more than one, texture images more than one, has presets, and CAStable colour channels.
The TGI Block List Editor for buy/build object has a lot of codes, so have to spend a lot of time to do trial-and-error to make the default replacement working properly, because a lot of times the texture doesn't work (still using default EA's texture), or when the object appears right with your edited mesh and texture, after you choose the presets, the object reverts back to your edited mesh with default EA's texture.
Q:
Help! The texture is black! / still using same EA's texture when tested in the game!
A: The texture codes must be not the same. Check the Type, Group, Instance of _IMG. Do the codes are the same like codes in original package? Check the TGI Block List Editor for MODL, is the _IMG inside has the same Type, Group, Instance as in original package.
Q:
Help! The object disappears when tested in the game!
A: You must be replacing OBJD in your package. Do not replace OBJD. Just MODL and texture only.
#tutorial#the sims 3#the sims 3 tutorial#thebleedingwoodland#the sims 3 default replacement mod#modding#s3pe#s30c#TSR Workshop
120 notes
·
View notes
Text

Navigation
Where to find me •
Youtube Patreon ModTheSims (inactive, I prefer uploading on tumblr and patreon)
Other Spaces outside of TS3
NameMC (Minecraft)
My content •
Downloads Builds Tutorials
FAQ •
Q : What reshade preset do you use ? A : It's my own personal preset ! You can download it here
Q : How do you make your sims ? A : I will release a video on my youtube channel showing everything about that from my settings, to mods, to default replacements, techniques I use to make sims and more :)
*more answers to come depending on the frequency of how much the question is asked*
35 notes
·
View notes
Note
Do you happen to know of any tutorials or guides that help in making custom head meshes?
i dont ;__; again ive been meaning to do a tut but my health has kind of been [laminated paper wobble] for the past couple of days
tldr though a lot of it is in practice in weight painting because you gotta do that by hand. otherwise;
in ts4 theyre no different from other accessories other than you gotta usethe full head excludepartsflag (which is 0000000000000018 btw)
in ts3... i still gotta experiment for a non-default replacement / addon head but my advice is. do not try a default replacement head for ts3 unless you enjoy great pain
3 notes
·
View notes
Text
The Sims 2 Notion Tracker Update?
I don't promise anything for these days, but as soon as I have a free mind to be able to update the default replacement tracker (since I have to update some things) I'll also make a small update to the sim tracker, because I've had some little ideas to make it more aesthetically pleasing for certain things... (Also, for the trackers for TS3 and TS4 there is no hope for now. I'm sorry but I'm not in a good period and I don't really feel like it for now, I'm not in the best of mood)
Small example of a test I did (here it is in Italian because it is a test, but in the tracker it will be in English)

This is not a screenshot of the game, it is written with keyboard symbols, I find it much nicer instead of uploading screenshots or just writing the numbers!
I will use this thing for interests, hobby stats and skills too!
And I will also make a little tutorial on how to extract these types of images so that you can also have nice previews for your sims:


6 notes
·
View notes
Text

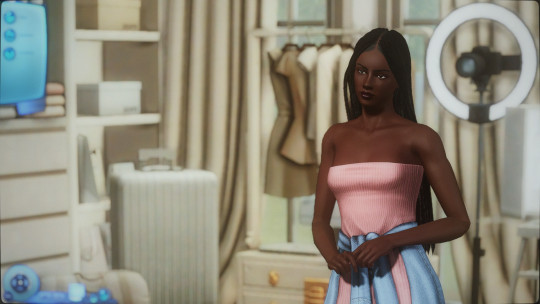

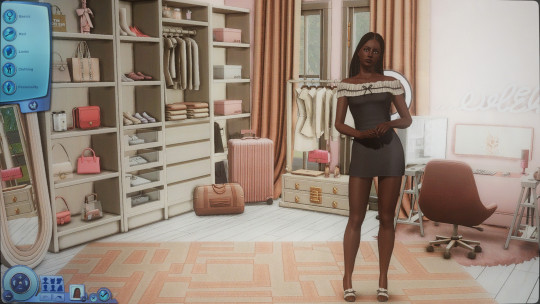

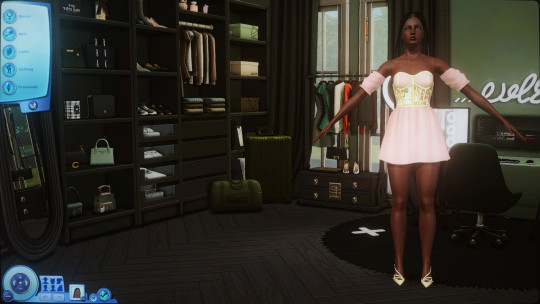
CAS Background Replacement - TS3 - Vixonspixels
"That Girl" CAS background set by Vixonspixels on Tumblr and Patreon.
Information
The background uses a 2048x2048px image so it may slow down your computer and look blurry if graphics settings are not on high. Use at your own risk.
The CAS Room Default will replace the CAS Room, Create-a-Pet room, and the Create-a-Bot room. You can only have 1 CAS Room Default at a time.
The Stylist Room Default will only replace the Stylist Room. You can only have 1 Stylist Room Default at a time. Requires the Ambitions EP.
Credits
CherieDawn67 at Modthesims for creating the mod and the mesh used for the background.
@mspoodle1 for updating the mod.
Vixonspixels on Patreon
Me for Photoshop work and figuring out this whole malarkey. This mod took a truly ridiculous number of hours of testing.
Make your own using my tutorial here!
Download: simfileshare / mega
539 notes
·
View notes
Text
SimsDeoGloria 4t3 Pilar Leon Romantic CAS Backgrounds
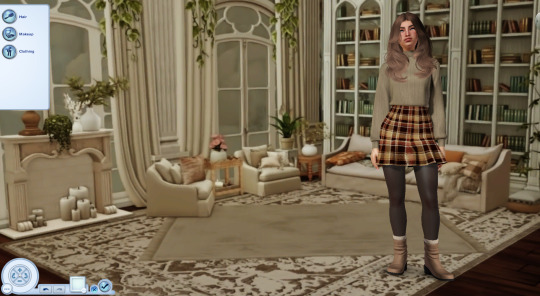
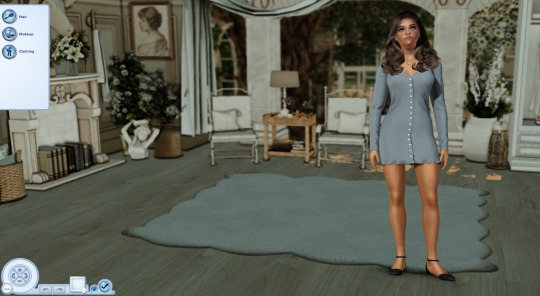

SimsDeoGloria 4t3 Pilar Leon Romantic CAS Backgrounds
A huge thank you to Pilar Leon for allowing me to covert their beautiful CAS Backgrounds. These are the beautiful Aria background and CAS Library Backgroud for some lovely Romantic Backgrounds. Just a reminder though, you can only have one CAS Room and one Stylist room at a time.

Download: Simblr.cc / Simfileshare

The background uses a 2048x2048px.
The CAS Room Default will replace the basegame CAS Room.
The Stylist Room Default will only replace the Stylist Room. (The Stylist Room Requires Ambitions)
You can only have 1 CAS/Stylist Room Default at a time.
Credits:
A huge thank you to @pilarleon for allowing me to covert these and for all the beautiful CAS backgrounds they have created. Originals can be found here: Aria and CAS Library
Thank you to Nectar-cellar for the tutorial!
Model Sims are by Johzii Brinley and EmmaDesignsStuff Melena
Other Mods used in photo is Boringbones CAS UI Overhaul
And a thank you to our wonderful TS3 CC Blogs too :) @katsujiiccfinds @xto3conversionsfinds @pis3update

157 notes
·
View notes
Note
Hello! First of all, thank you for making really beautiful default replacement CC hair! And I have a desire to make default replacement hair from TS4 mesh too, and I saw your tutorial
https://carversims.tumblr.com/post/173750559413/tutorial-default-replacement-hair-for-ts3-what
however it looks like you have deleted this, if possible would you like to teach me to make a default hair replacement? Please... But you don't have to if you don't! Thank you, have a beautiful day! ♥️
|| METHOD #1 ||
|| METHOD #2 ||
8 notes
·
View notes