#usb rtc
Explore tagged Tumblr posts
Visit Tumblr Blog
Explore Tumblr blogs with no restrictions, modern design and the best experience.
Last Seen Tumblr Blogs


Fun Fact
Tumblr’s reach among the 26-to-35-year-olds in the US is 11%.
Text
USB RTC for Raspberry Pi: The Best Way to Enhance Your Raspberry Pi's Time Accuracy

When it comes to building real-time applications with the Raspberry Pi, one of the most crucial components to ensure is timekeeping. A RTC (Real Time Clock) module provides the Raspberry Pi with a reliable source of time, even when the system is powered off. For those looking to achieve incredibly accurate timekeeping, a USB RTC for Raspberry Pi is a solution that combines the DS3231 RTC chip with a MCP2221 USB to I2C/UART converter is a perfect match.
In this blog post, we'll dive deep into what makes this USB RTC setup an ideal choice for your Raspberry Pi projects, and how it enhances accuracy, reliability, and ease of use.
What is USB RTC?
RTC is a device which is used for maintaining accurate time in the host’s system processor. With the Raspberry Pi, the internal clock relies on the system supply to track the accurate time and the main issue is when the Raspberry Pi is powered off, the clock resets. USB RTC is a solution for providing accurate timekeeping even when the Raspberry Pi is turned off or disconnected from the network. This setup allows users to easily add accurate timekeeping to their Raspberry Pi without using the GPIO pins.
The USB RTC is a device which comes with a strongly integrated DS3231 circuit that is used to consume less power and has an integrated temperature-compensated crystal oscillator. It has MCP2221, a USB-to-UART/I2C serial converter that provides USB connectivity, used in Raspberry Pi operations that contain USB, UART(Serial), GPIO, and I2C interfaces. This module can be used with Raspberry Pi, Windows, Linux or any other operating system.
Key Features & Specifications:
DS3231 RTC Circuit: The DS3231 provides a highly stable timekeeping function and includes a built-in temperature-compensated crystal oscillator (TCXO), which helps maintain accuracy across a wide temperature range.
Temperature-Compensated Crystal Oscillator (TCXO): This is a critical feature of the DS3231. TCXO compensates for temperature variations that could affect timekeeping accuracy. This ensures the RTC module performs well in a range of environments without the need for external temperature sensors.
Battery Backup (CR1220, 3V): The module uses a CR1220 coin-cell battery to maintain time even when the Raspberry Pi is powered off. This ensures your system's time is preserved even in the event of power failure or system reboot.
16-pin, 300-mil SO Package: The module comes in a compact and durable 16-pin, 300-mil SO (Small Outline) package. This size makes it easy to integrate into your projects.
Automated Backup Power Supply: The onboard battery backup power supply ensures your RTC chip continues to run and track time even when the Raspberry Pi is turned off or disconnected from power.
Fast 400kHz I2C Interface: The RTC communicates with the Raspberry Pi using a 400kHz I2C interface, allowing fast and efficient data transfer. This is crucial for time-sensitive applications, as it minimizes any lag or delay when reading the time or setting the RTC.
MCP2221 USB to I2C/UART Converter: The MCP2221 is a USB-to-I2C and UART converter that makes it easy to connect the RTC to the Raspberry Pi via a USB port. This eliminates the need for GPIO pins, making it a plug-and-play solution for Raspberry Pi users.
USB 2.0 Compatibility: The module uses USB 2.0 for a fast and stable connection to the Raspberry Pi, offering plug-and-play functionality without requiring complicated wiring or software configuration.
Plug-and-play: The device is plug-and-play, with available drivers for various operating systems, including Linux, ensuring smooth integration with the Raspberry Pi.
High Accuracy: ±2ppm from 0°C to +40°C: Offers incredible timekeeping accuracy of ±2ppm (parts per million) between 0°C and +40°C. This means that, in a typical environment, the RTC will deviate by no more than 2 seconds per day—a level of precision ideal for most hobbyist and professional projects.
Extended Accuracy Range: ±3.5ppm from -40°C to +85°C: In more extreme conditions, such as outdoor or industrial applications, this module maintains an accuracy of ±3.5ppm in the temperature range of -40°C to +85°C. Whether you're working in a chilly warehouse or a hot outdoor environment, this module ensures your Raspberry Pi’s timekeeping remains precise.
Versatile Timekeeping: The module doesn’t just count seconds and minutes; it also tracks days, dates, months, and even the year with leap year compensation valid until the year 2100. This makes it perfect for long-term projects, as you can rely on the RTC to keep accurate time for many years to come.
Two Time-of-Day Alarms: With two independently programmable time-of-day alarms, this RTC module allows you to set scheduled events. Whether you need to trigger an action, send a notification, or turn on/off a device at specific times, the alarms make it easy to synchronize with your Raspberry Pi’s actions.
Programmable Square-Wave Output: The square-wave output feature allows you to generate periodic signals that can be used to sync other devices. Especially useful in projects that require precise timing for communications or measurements.
Use Cases:
Data logging: For applications like weather stations or scientific experiments, you need precise timestamps for each data point.
Embedded systems: For embedded systems that require time-based tasks (like alarms or scheduled events), the RTC ensures that the system runs on a stable, reliable time.
Low-power applications: The RTC ensures your Raspberry Pi can operate in low-power or battery-operated setups while maintaining the correct time.
IoT devices: When building IoT applications where devices may not always have a constant internet connection, having a local, accurate time source is essential.
Conclusion:
For projects that demand extremely accurate timekeeping, the combination of the DS3231 RTC chip and the MCP2221 USB to I2C/UART converter is an excellent solution. This setup not only provides highly accurate, temperature-compensated time tracking but also integrates seamlessly with the Raspberry Pi via a fast I2C interface.
Whether you're building a weather station, data logger, or any time-sensitive project, the DS3231 with MCP2221 ensures that your Raspberry Pi has reliable, battery-backed, and accurate timekeeping capabilities that won't be affected by power outages or system restarts.
#technology#rtc#innovation#tech#iot#raspberry pi#projects#iot applications#iotsolutions#usb rtc#real time projects
0 notes
Text
RTC incorrect quotes Part 3.5 I guess I found the usb stick with the rest of them (I have to split this into 2 I have too many it will be up right after)


24 notes
·
View notes
Text
A Compact Pi Compute Module Backpack 🍓🥧📸🎒
We used to stock a PiCam Module
that would plug into a Pi CM4 or CM5 - recently we went to restock it, but the vendor hasn't replied to our emails for many months. So, it could be a good time for us to design something that works similarly but with more capabilities. So we tasked Timon
with designing something for us - we just said, "Make the best thing ya can," and he delivered! Check this board out that plugs onto the compute module and provides many great accessories: USB connection for bootloading/USB gadget, USB 3.0 host type A for CM5, micro HDMI, micro SD card for data storage on 'Lite modules, camera connection, and mount, two DSI connectors, fan connect, Stemma QT / Qwiic connection, and RTC battery. There's one shutdown button for CM5 and two GPIO buttons plus one LED. Timon's gonna try to add an EYESPI connector for our next rendering so we can get some I2C/SPI/PWM outputs easily. What do you think? We wanted to keep it compact and not too pricey (aiming for <$30 cost. We'll see if we can get it there) but were able to craft fairly complex projects in a small space.
#raspberrypi#computeModule#electronics#maker#hardware#embedded#engineering#diy#tech#innovation#pcbdesign#usb3#microsd#hdmi#camera#stemmaqt#qwiic#gpio#fan#rtc#devboard#prototyping#opensource#electronicsdesign#robotics#automation#coding#hobbyelectronics#hackerspace#geekstuff
17 notes
·
View notes
Text
Megjelent az új Raspberry
youtube
Broadcom BCM2712 2.4GHz quad-core 64-bit Arm Cortex-A76 CPU, with cryptography extensions, 512KB per-core L2 caches and a 2MB shared L3 cache
VideoCore VII GPU, supporting OpenGL ES 3.1, Vulkan 1.2
Dual 4Kp60 HDMI® display output with HDR support
4Kp60 HEVC decoder
LPDDR4X-4267 SDRAM (4GB and 8GB SKUs available at launch)
Dual-band 802.11ac Wi-Fi®
Bluetooth 5.0 / Bluetooth Low Energy (BLE)
microSD card slot, with support for high-speed SDR104 mode
2 × USB 3.0 ports, supporting simultaneous 5Gbps operation
2 × USB 2.0 ports
Gigabit Ethernet, with PoE+ support (requires separate PoE+ HAT)
2 × 4-lane MIPI camera/display transceivers
PCIe 2.0 x1 interface for fast peripherals (requires separate M.2 HAT or other adapter)
5V/5A DC power via USB-C, with Power Delivery support
Raspberry Pi standard 40-pin header
Real-time clock (RTC), powered from external battery
Power button
3 notes
·
View notes
Text
Máy Tính Mini Dreamquest Windows 11 Pro - Intel Twin Lake N150 (Turbo 3.6GHz), 16GB RAM DDR4, 1TB SSD PCIE M.2, Hỗ Trợ 4K, Dual HDMI/USB 3.2/WIFI 5/BT 5.0 - Lý Tưởng Cho Văn Phòng & Kinh Doanh
Gói Mini PC bao gồm: Bộ xử lý N150 MINI PC 16GB DDR4 +512 M.2 SSD *1 VESA Che DreamQuest Mini Tương thích PC Windows 11 Pro Hệ thống: Hỗ trợ các hệ điều hành Linux và Ubuntu. Bạn cũng có thể bật LAN-WAKEUP, RTC-Wakeup và Khởi động cuộc gọi đến tự động thông qua Cài đặt BIOSMáy tính mini được trang bị bộ xử lý Gen N150 của Intel: Với tốc độ xung nhịp tối đa lên tới 3,6 GHz và 4 lõi/4 luồng, nó có…
0 notes
Text
JL Bluetooth Speaker Chip Classification: Entry-Level 706, Mid-Range 701, High-End Auracast & Lavalier Mic Guide
AI Quick Summary
From the entry-level AC706N to the flagship JL7033A, JL’s Bluetooth chip lineup covers the full spectrum of use cases: 192MHz processing power ensures stable connections and FM reception; dual-core DSP delivers ultra-high-definition 24bit/384KHz audio; and Auracast broadcasting technology unlocks a new era in wireless audio. This document introduces the classification and application of JL Bluetooth speaker chips.
Entry-Level: AC706N – 192MHz CPU, supports FM radio, multi-device broadcasting, matches models like SSOE SSK02.
Mid-Range: JL7012C / 7016C – Dual 160MHz CPUs with proprietary sound algorithms, used in products like Anker Select 2S.
Flagship: JL7033A / 7034A – 320MHz dual-core DSP, full-featured but complex, applied in Huawei Yueying.
Auracast Support: AC6894A – Dual-core 192MHz, 24bit/384KHz audio, used in xiaomo Sound Outdoor.
Live Streaming Microphones: AC706N & AW32N – Latency <5ms, suitable for Edifier’s Xiaojinmai M1.
Karaoke Speakers – Two configurations:
1. Bluetooth Speaker Chip Selection – Entry-Level: AC706N
Advantages:
192MHz CPU provides strong processing capability
Excellent RF performance ensures stable connectivity
Supports multi-device broadcasting, FM reception, stereo output
Low-noise DAC, great sound quality and effects
Visual SDK enables fast mass production
Stable supply chain and simplified peripheral design
Specifications:
Bluetooth Version: v6.0
RAM: 136KB
RF Performance (Tx/Rx): 10dBm / -93dBm
Audio Codecs: SBC / AAC / LC3
LE Audio: Supported
DAC: 2 channels, 24bit/96KHz, SNR 103dB
FM Radio: Supported
Built-in RTC: Yes

2. Bluetooth Speaker Chip Selection – Mid-Range: JL701N Series
Advantages:
Dual-core 160MHz CPUs
Larger RAM
Excellent vocal clarity
High SNR DAC with very low noise floor
Stable Bluetooth connection
Third-generation proprietary sound enhancement algorithm
Specifications:
Bluetooth Version: v6.0 (dual-mode)
CPU/DSP: Dual 160MHz
RAM: 640KB
RF Performance (Tx/Rx): 9dBm / -95dBm
Audio Codecs: … / LC3 / LDAC / LHDC
LE Audio: Supported
DAC: 2 channels, 24bit/96KHz, SNR 105dB
ADC: Up to 4 channels, 24bit/48KHz, SNR 95dB
Broadcast (BIS): Supported

3. Bluetooth Speaker Chip Selection – High-End: JL703N Series (Not Recommended)
Note: Too complex for general use.
Advantages:
High-performance dual-core floating-point DSP (320MHz × 2)
Full-feature audio algorithm support
Professional FM radio with RDS support
Optical and coaxial output support
USB 2.0 (High Speed)
NFC and LE Audio support
Specifications:
Bluetooth Version: v6.0 (dual-mode)
CPU/DSP: Dual 320MHz
RAM: 448KB
RF Performance (Tx/Rx): 11dBm / -95.5dBm
PSRAM Expansion: Supported
Audio Codecs: … / LC3 / LDAC / LHDC
LE Audio: Supported
DAC: 4 channels, 24bit/96KHz, SNR 109dB
ADC: Up to 4 channels, 24bit/48KHz, SNR 105dB

4. Bluetooth Speaker Chip Selection – Auracast Support: One-to-Many Wireless Broadcast
Advantages:
Bluetooth 6.0 with LE Audio
Standard-compliant Auracast broadcasting
Dual-core 192MHz DSP processing
Ultra-clear audio: 24bit/384KHz
Excellent sound quality: SNR 113dB
Extremely low noise floor: 1.2uVrms
Specifications:
Bluetooth Version: v6.0 (dual-mode)
CPU/DSP: Dual-core 192MHz
RAM: 400KB
RF Performance (Tx/Rx): 13dBm / -97dBm
Audio Codecs: … / LC3 / LDAC / LHDC
LE Audio: Not supported
DAC: 2 channels, 24bit/384KHz, SNR 113dB
ADC: Up to 3 channels, 24bit/48KHz, SNR 103dB
Broadcast (BIS): Supported

Related Searches: JL Bluetooth Speaker Chip Full Breakdown, Auracast Lavalier Mic Reviews
#JLBluetoothChip #AC706NSpeakerChip #JL7016CAudioProcessor #JL7033ADSPChip #AuracastWirelessAudio #LEAudioBroadcast #LowLatencyLiveMic #KaraokeSpeakerSolution #FMBluetoothSpeaker #HiFiBluetoothAudio #24bit384KHzAudio #DualCoreDSPChip #AnkerSelect2SCompatible #EdifierXiaojinmaiM1 #OutdoorBluetoothSpeaker
0 notes
Text
UBTECH UGOT kit-AI Space Exploration version - ROBOSTEAM
https://robosteam.ro/product/ubtech-ugot-kit-ai-space-exploration-version/
Arduino GIGO R1 WIFI is the moat powerfull Arduino board ever, the GIGA R1 is based on the same microcontroller as thr Portenta H7, the STM32H747. The Arduino I/O pin can handle 40ma as an absolute maximum without damage to the Arduino. The STM32H7x7 lines combine the performance of the Cortex-M7 (with double-precision floating point unit) running up to 480 MHz and the Cortex-M4 core (with single-precision floating point unit)
- PERFORMANCE
480 MHz fCPU on the Cortex-M7, 240 MHz on the Cortex-M4, 3224 CoreMark / 1327 DMIPS executing from Flash memory with 0-wait states thanks to its L1 cache
L1 cache (16 Kbytes of I-cache +16 Kbytes of D-cache) boosting execution performance from external memories
- Security
Crypto/hash hardware acceleration, secure Firmware Install (SFI) embedded, security services to authenticate protect your software IPs while performing initial programming
Secure Boot Secure Firmware Update (SBSFU)
Power efficiency multi-power domain architecture enables different power domains to be set low-power mode to optimize the power efficiency. Embedded SMPS to scale down the supply voltage, supply external circuitry , combined with the LDO for specific use cases. USB regulator to supply the embedded physical layer (PHY).
145 µ/MHz typical @VDD = 3.3 V and 25 °C in Run mode (peripherals off) and SMPS
2.43 µA typical in Standby mode (low-power mode)
460 nA typical in VBAT mode with RTC (low-power mode)
- Graphics
LCD-TFT controller interface with dual-layer support MIPI-DSI interface for driving the DSI display Chrom‑ART Accelerator™. boosts graphical content creation while saving core processing power, thus freeing up the MCU for other application needs JPEG hardware accelerator for fast JPEG encoding and decoding, off-loading the CPU
- Embedded peripherals
Up to 35 communication interfaces including FD-CAN, USB 2.0 high-speed/full-speed. Ethernet MAC, Camera interface
Easily extendable memory range using the flexible memory controller with a 32-bit parallel interface, or the Dual-mode Quad-SPI serial Flash memory interface.
Analog: 12-bit DACs, fast 16-bit ADCs
Multiple 16- and 32-bit timers running at up to 480 MHz on the 16-bit high-resolution timer
0 notes
Text
Arduino und DS3231: Relais jeden Tag automatisch zu variablen Uhrzeiten schalten

Im Beitrag Arduino und DS3231: Relais jeden Tag automatisch zur gleichen Uhrzeit schalten habe ich dir gezeigt, wie du ein Relais zu einem fest definierten Zeitpunkt aktivierst. Aufbauend auf diesem Wissen erkläre ich dir heute, wie du das System erweiterst, um an mehreren Zeitpunkten pro Tag automatische Schaltvorgänge durchzuführen. https://youtu.be/rZtfyYJyA_0 Hinweis: Die Idee zu dieser Erweiterung entstand aus einem Wunsch eines Lesers meines Blogs, der sich eine Mehrfachschaltung des Relais gewünscht hat. Wenn auch du Anregungen, Fragen oder Wünsche hast, melde dich gerne per E-Mail oder schreibe mir in den Kommentaren.
Rückblick - Aufbau der Schaltung und benötigte Ressourcen
Für den Aufbau der Schaltung benötigt man: - einen Arduino Nano V3* - ein USB-Datenkabel* - eine RTC DS3231* - ein 2fach Relais-Modul* - ein 20x2 LC-Display mit I2C Schnittstelle* - diverse Breadboardkabel* - ein 400 Pin Breadboard*

Schaltung - Maker Nano mit DS3231 - RelaisModul und LC-Display Hinweis von mir: Die mit einem Sternchen (*) markierten Links sind Affiliate-Links. Wenn du über diese Links einkaufst, erhalte ich eine kleine Provision, die dazu beiträgt, diesen Blog zu unterstützen. Der Preis für dich bleibt dabei unverändert. Vielen Dank für deine Unterstützung!

zeitgesteuerte Schaltung mit dem Arduino UNO R3, RTC und LCD-Display Für die Schaltung verwende ich den Maker Nano welchen ich dir im Beitrag Vorstellung des Maker Nano von Cytron vorgestellt habe. Dieser hat die Abmaße des Arduino Nano bietet aber ein paar nette zusätzliche Features.
Erweitern des bestehenden Codes
Wie bereits erwähnt, habe ich das kleine Projekt bereits vorgestellt. Nun gehe ich auf die notwendige kleine Änderung ein, die es ermöglicht, pro Tag mehrere Schaltvorgänge umzusetzen. Schritt 1 - Strukturen zum ablegen der Zeiten anpassen Da das Projekt nun darauf abzielt, das Relais täglich zu festen Uhrzeiten zu steuern, ist es nicht mehr notwendig, auch das Datum zu berücksichtigen. Ursprünglich war die Struktur so aufgebaut, dass sie an einem bestimmten Datum und zu einer bestimmten Uhrzeit aktivierte – das Datum war also ein entscheidendes Kriterium. Jetzt, wo die Schaltvorgänge jeden Tag erfolgen, genügt es, nur die Uhrzeit zu prüfen. Das Datumsfeld kann daher entfernt werden, was den Code übersichtlicher und zielgerichteter macht. // Struktur für einen RTC-Zeitstempel. // Speichert Datum und Zeit als Strings, wie sie z.B. von einer Real-Time Clock (RTC) geliefert werden. struct RTC_Zeitstempel { String datum; // Datum als String, z.B. "2025-02-23" String zeit; // Zeit als String, z.B. "12:34:56" }; // Struktur für einen allgemeinen Zeitstempel. // Enthält zwei Zeitangaben: eine für das Einschalten (ON) und eine für das Ausschalten (OFF) des Relais. struct Zeitstempel { String zeitON; // Zeitpunkt, zu dem das Relais eingeschaltet werden soll String zeitOFF; // Zeitpunkt, zu dem das Relais ausgeschaltet werden soll }; // Struktur zur Darstellung eines Relais. // Speichert Informationen über das Relais und die zugehörigen Schaltzeitpunkte. struct Relais { int digitalPin; // Digitaler Pin, an den das Relais angeschlossen ist String desc; // Beschreibung oder Name des Relais int numZeitstempel; // Anzahl der aktuell gesetzten Zeitstempel im Array Zeitstempel zeitstempel; // Array, das bis zu 10 Zeitstempel (Schaltvorgänge) aufnehmen kann }; Schritt 2 - Anpassen der Funktion zum auslesen der aktuellen Uhrzeit von der RTC DS3231 Die Struktur zum speichern des aktuellen Zeitstempels habe ich umbenannt, daher musste im Code dieses an den entsprechenden Stellen angepasst werden. void loop() { ... //bleibt leer RTC_Zeitstempel zeitstempel = readRtc(); … } //auslesen der Daten von der RealtimeClock RTC_Zeitstempel readRtc() { ... } void checkCurrentTimestamp(Relais relais, RTC_Zeitstempel zeitstempel) { ... } Schritt 3 - prüfen aller gespeicherten Zeiten Die Funktion checkCurrentTimestamp dient dazu den aktuellen Zeitstempel gegen die gespeicherten Zeiten für die beiden Relais zu prüfen. // Funktion zum Überprüfen, ob der aktuelle RTC-Zeitstempel einem // der definierten Schaltzeitpunkte des Relais entspricht. void checkCurrentTimestamp(Relais relais, RTC_Zeitstempel zeitstempel) { // Schleife über alle gesetzten Zeitstempel für dieses Relais for (int index = 0; index // Aktuellen Zeitstempel (mit On- und Off-Zeit) aus dem Array lesen Zeitstempel relaisZeitstempel = relais.zeitstempel; // Überprüfen, ob die aktuelle Zeit mit der Einschaltzeit übereinstimmt if (zeitstempel.zeit == relaisZeitstempel.zeitON) { // Ausgabe an den seriellen Monitor, dass das Relais aktiviert wird Serial.println("aktivieren"); // Relais aktivieren digitalWrite(relais.digitalPin, LOW); // Überprüfen, ob die aktuelle Zeit mit der Ausschaltzeit übereinstimmt } else if (zeitstempel.zeit == relaisZeitstempel.zeitOFF) { // Ausgabe an den seriellen Monitor, dass das Relais deaktiviert wird Serial.println("deaktivieren"); // Relais deaktivieren digitalWrite(relais.digitalPin, HIGH); } } } fertiges Projekt Hier kannst du das fertige Programm als ZIP-Datei herunterladen. Quellcode /* * Autor: Stefan Draeger * Webseite: https://draeger-it.blog * Blogbeitrag: https://draeger-it.blog/arduino-und-ds3231-relais-jeden-tag-automatisch-zu-variablen-uhrzeiten-schalten/ * * Benötigte Bauteile: * - Arduino Nano V3 * - USB-Datenkabel * - RTC DS3231 * - 2fach Relais-Modul * - 20x2 LC-Display mit I2C Schnittstelle * - diverse Breadboardkabel * - 400 Pin Breadboard */ // Bibliothek zum Ansteuern des LCD-Displays via I2C #include // Bibliothek für die Kommunikation mit der RTC DS3231 #include // Bibliothek zur Kommunikation mit dem Bluetooth Modul über SoftwareSerial #include // I2C Adresse des RTC DS3231 #define RTC_I2C_ADDRESS 0x68 // Struktur zur Speicherung eines RTC-Zeitstempels // Enthält Datum und Uhrzeit als Strings struct RTC_Zeitstempel { String datum; // Datum, z.B. "23.02.2025" String zeit; // Uhrzeit, z.B. "12:34:56" }; // Struktur zur Speicherung eines Schalt-Zeitstempels für ein Relais // Definiert, wann das Relais eingeschaltet (zeitON) und wann es ausgeschaltet (zeitOFF) werden soll struct Zeitstempel { String zeitON; // Zeitpunkt zum Aktivieren des Relais String zeitOFF; // Zeitpunkt zum Deaktivieren des Relais }; // Struktur zur Beschreibung eines Relais und seiner Schaltzeitpunkte struct Relais { int digitalPin; // Der digitale Pin, an dem das Relais angeschlossen ist String desc; // Beschreibung oder Name des Relais int numZeitstempel; // Anzahl der definierten Zeitstempel im Array Zeitstempel zeitstempel; // Array zur Speicherung von bis zu 10 Schalt-Zeitstempeln }; // Initialisierung des LCD-Displays via I2C // Adresse: 0x27, 20 Zeichen pro Zeile, 2 Zeilen LiquidCrystal_I2C lcd(0x27, 20, 2); // Puffer zum Speichern von seriellen Eingaben char linebuf = {}; bool readData = false; // Definition des ersten Relais (Relais #1) // Enthält 3 Schalt-Zeitstempel Relais relais1 = { 9, // Digitaler Pin 9 "Relais #1", // Beschreibung 3, // Anzahl der Zeitstempel { { "12:48:00", "12:48:10" }, { "12:48:25", "12:48:30" }, { "12:48:40", "12:49:00" } } }; // Definition des zweiten Relais (Relais #2) // Enthält 1 Schalt-Zeitstempel Relais relais2 = { 8, // Digitaler Pin 8 "Relais #2", // Beschreibung 1, // Anzahl der Zeitstempel { { "12:48:00", "12:49:00" } } }; void setup() { // Start der seriellen Kommunikation Serial.begin(9600); // Initialisierung des LCD-Displays lcd.init(); // Aktivierung der Hintergrundbeleuchtung des Displays lcd.backlight(); // Setzt die digitalen Pins der Relais als Ausgang pinMode(relais1.digitalPin, OUTPUT); pinMode(relais2.digitalPin, OUTPUT); // Setzt beide Relais initial auf HIGH (in diesem Fall deaktiviert) digitalWrite(relais1.digitalPin, HIGH); digitalWrite(relais2.digitalPin, HIGH); } void loop() { // Lese Daten von der seriellen Schnittstelle readDataFromSerial(); // Wenn Daten empfangen wurden, verarbeite den Zeitstempel if (readData) { String timestamp = linebuf; // Das Datum wird als 10 Zeichen (inkl. Punkte) erwartet String datum = timestamp.substring(0, 10); String tag = datum.substring(0, 2); String monat = datum.substring(3, 5); String jahr = datum.substring(6, 10); // Die Uhrzeit beginnt ab dem 11. Zeichen des Zeitstempels String uhrzeit = timestamp.substring(11); String stunde = uhrzeit.substring(0, 2); String minute = uhrzeit.substring(3, 5); String sekunde = uhrzeit.substring(6); // Setzt den RTC-Zeitstempel entsprechend der empfangenen Werte rtcWriteTimestamp(stunde.toInt(), minute.toInt(), sekunde.toInt(), tag.toInt(), monat.toInt(), jahr.toInt()); } // Lese den aktuellen Zeitstempel von der RTC RTC_Zeitstempel zeitstempel = readRtc(); // Anzeige des Datums auf der ersten Zeile des LCD-Displays lcd.setCursor(0, 0); lcd.print(zeitstempel.datum); // Anzeige der Uhrzeit auf der zweiten Zeile des LCD-Displays lcd.setCursor(0, 1); lcd.print(zeitstempel.zeit); // Überprüfung der aktuellen Uhrzeit mit den definierten Schalt-Zeitstempeln der Relais checkCurrentTimestamp(relais1, zeitstempel); checkCurrentTimestamp(relais2, zeitstempel); // Kurze Pause zur Entlastung delay(500); } // Funktion zur Überprüfung, ob der aktuelle RTC-Zeitstempel // mit einem der Schalt-Zeitstempel eines Relais übereinstimmt void checkCurrentTimestamp(Relais relais, RTC_Zeitstempel zeitstempel) { // Schleife durch alle definierten Zeitstempel für das gegebene Relais for (int index = 0; index // Lese den aktuellen Schalt-Zeitstempel aus dem Array Zeitstempel relaisZeitstempel = relais.zeitstempel; // Falls die aktuelle Uhrzeit dem Einschaltzeitpunkt entspricht: if (zeitstempel.zeit == relaisZeitstempel.zeitON) { Serial.println("aktivieren"); // Relais aktivieren (in diesem Fall wird LOW gesetzt, um zu schalten) digitalWrite(relais.digitalPin, LOW); } // Falls die aktuelle Uhrzeit dem Ausschaltzeitpunkt entspricht: else if (zeitstempel.zeit == relaisZeitstempel.zeitOFF) { Serial.println("deaktivieren"); // Relais deaktivieren (HIGH schaltet das Relais aus) digitalWrite(relais.digitalPin, HIGH); } } } // Funktion zum Einlesen von Daten von der seriellen Schnittstelle void readDataFromSerial() { // Zähler für die empfangenen Zeichen byte counter = 0; readData = false; // Prüfen, ob Daten verfügbar sind if (Serial.available() > 0) { delay(250); // Kurze Verzögerung, um sicherzustellen, dass alle Daten empfangen wurden readData = true; // Solange Daten von der seriellen Schnittstelle verfügbar sind: while (Serial.available()) { // Lese ein Zeichen aus der seriellen Schnittstelle char c = Serial.read(); // Füge das Zeichen in den Puffer ein, solange es nicht das Zeilenumbruch-Zeichen ist if (c != 'n') { linebuf = c; // Stelle sicher, dass der Puffer nicht überläuft if (counter counter++; } } } // Ausgabe des eingelesenen Puffers zur Kontrolle Serial.println(linebuf); } } // Funktion zum Schreiben eines Zeitstempels in den RTC DS3231 // Übergabe: Stunde, Minute, Sekunde, Tag, Monat, Jahr void rtcWriteTimestamp(int stunde, int minute, int sekunde, int tag, int monat, int jahr) { Wire.beginTransmission(RTC_I2C_ADDRESS); Wire.write(0); // Setzt den internen Zeiger des RTC auf 0 (Beginn des Registers) // Schreibe die Zeitdaten in BCD-Format in die RTC Wire.write(decToBcd(sekunde)); Wire.write(decToBcd(minute)); Wire.write(decToBcd(stunde)); Wire.write(decToBcd(0)); // Wochentag wird hier nicht berücksichtigt Wire.write(decToBcd(tag)); Wire.write(decToBcd(monat)); // Das Jahr wird als Offset zu 2000 gespeichert Wire.write(decToBcd(jahr - 2000)); Wire.endTransmission(); } // Funktion zum Auslesen der aktuellen Zeit vom RTC DS3231 RTC_Zeitstempel readRtc() { // Aufbau der Verbindung zum RTC Wire.beginTransmission(RTC_I2C_ADDRESS); Wire.write(0); // Setzt den internen Zeiger auf 0 Wire.endTransmission(); // Fordert 7 Bytes an: Sekunden, Minuten, Stunde, Wochentag, Tag, Monat, Jahr Wire.requestFrom(RTC_I2C_ADDRESS, 7); int sekunde = bcdToDec(Wire.read() & 0x7f); // Sekunde (Bit 7 wird maskiert) int minute = bcdToDec(Wire.read()); int stunde = bcdToDec(Wire.read() & 0x3f); // Stunde (nur 24-Stunden Format) int wochentag = bcdToDec(Wire.read()); // Wochentag (wird nicht weiter genutzt) int tag = bcdToDec(Wire.read()); int monat = bcdToDec(Wire.read()); int jahr = bcdToDec(Wire.read()) + 2000; // Jahr als Offset zu 2000 // Formatierung des Datums als "TT.MM.JJJJ" char datum; sprintf(datum, "d.d.", tag, monat, jahr); // Formatierung der Uhrzeit als "HH:MM:SS" char zeit; sprintf(zeit, "d:d:d", stunde, minute, sekunde); // Rückgabe des Zeitstempels als Struktur return { datum, zeit }; } // Hilfsfunktion zum Konvertieren von Dezimal in BCD (Binary Coded Decimal) byte decToBcd(byte val) { return ((val / 10 * 16) + (val % 10)); } // Hilfsfunktion zum Konvertieren von BCD in Dezimal byte bcdToDec(byte val) { return ((val / 16 * 10) + (val % 16)); } Programm: Relais jeden Tag automatisch zu variablen Uhrzeiten am Arduino schaltenHerunterladen
Ausblick - Relais zu variablen Uhrzeiten schalten
Nachdem in diesem Projektkommentar auf Wunsch eines Lesers bereits die Funktionalität um mehrere Schaltzeitpunkte erweitert wurde, steht nun der nächste Schritt an: der Umstieg auf den ESP32. Mit dem integrierten WiFi bietet der ESP32 enorme Vorteile, denn zukünftig sollen die Schaltzeiten flexibel und benutzerfreundlich über eine eigene Webseite konfigurierbar sein. Außerdem wird die aktuelle Uhrzeit nicht mehr ausschließlich von einer RTC ermittelt, sondern direkt von einem NTP-Zeitserver aus dem Internet bezogen – für eine präzise und wartungsfreie Zeitsynchronisation. Diese Neuerungen machen das Relaissteuerungs-Projekt noch flexibler und vielseitiger. Ich freue mich darauf, in den kommenden Beiträgen mehr über die Umsetzung und die erweiterten Möglichkeiten zu berichten. Bleib also gespannt! Read the full article
0 notes
Text
Màn hình HMI eXP Series LS chức năng RTC, đa phương thức truyền thông RS-485, RS-232C, RS-422/485, có thể giao tiếp đồng thời với PLC, đầu đọc mã vạch, VFD và bộ điều khiển nhiệt độ, cổng USB ở phía trước. Xem ngay: https://hoplongtech.com/series/exp
0 notes
Text
STM32F103C6T6 Datasheet, Pinout, and Specifications
The STM32F103C6T6 is a powerful microcontroller known for its versatility and performance. It belongs to the STM32F1 series produced by STMicroelectronics, offering a wide range of features and capabilities. This microcontroller is highly regarded in the world of embedded systems and microcontroller applications due to its robustness, cost-effectiveness, and ease of use. Its popularity stems from its ability to cater to a wide range of applications, from simple DIY projects to complex industrial automation systems. In this article, we'll provide an overview of theSTM32F103C6T6, exploring its specifications, schematic, pinout, programming, datasheet, and more details.

Description of STM32F103C6T6
The STM32F103C6T6 performance line family integrates the high-performance ARM Cortex-M3 32-bit RISC core, operating at a frequency of 72 MHz. It features high-speed embedded memories (Flash memory up to 32 Kbytes and SRAM up to 6 Kbytes) and a wide range of enhanced I/Os and peripherals connected to two APB buses. All devices offer two 12-bit ADCs, three general-purpose 16-bit timers plus one PWM timer, as well as standard and advanced communication interfaces: up to two I2Cs and SPIs, three USARTs, a USB, and a CAN.
The STM32F103C6T6 low-density performance line family operates from a 2.0 to 3.6 V power supply. It is available in both the –40 to +85 °C temperature range and the –40 to +105 °C extended temperature range. A comprehensive set of power-saving modes allows for the design of low-power applications.
The STM32F103C6T6 low-density performance line family includes devices in four different package types, ranging from 36 pins to 64 pins. Depending on the chosen device, different sets of peripherals are included. The following description provides an overview of the complete range of peripherals proposed in this family.
These features make the STM32F103C6T6 low-density performance line microcontroller family suitable for a wide range of applications such as motor drives, application control, medical and handheld equipment, PC and gaming peripherals, GPS platforms, industrial applications, PLCs, inverters, printers, scanners, alarm systems, video intercoms, and HVACs.
Features of STM32F103C6T6
ARM 32-bit Cortex™-M3 CPU Core: The microcontroller is powered by an ARM Cortex™-M3 CPU core, capable of operating at a maximum frequency of 72 MHz. It delivers a performance of 1.25 DMIPS/MHz (Dhrystone 2.1) with 0 wait state memory access and supports single-cycle multiplication and hardware division.
Versatile Memories: The STM32F103C6T6 features 16 or 32 Kbytes of Flash memory for program storage and 6 or 10 Kbytes of SRAM for data storage.
Clock, Reset, and Supply Management: It supports 2.0 to 3.6 V application supply and I/Os. The microcontroller includes a Power-On Reset (POR), a Power-Down Reset (PDR), and a programmable voltage detector (PVD). It also features a 4-to-16 MHz crystal oscillator, an internal 8 MHz factory-trimmed RC oscillator, and an internal 40 kHz RC oscillator. Additionally, it provides a PLL for the CPU clock and a 32 kHz oscillator for the Real-Time Clock (RTC) with calibration.
Low Power: The STM32F103C6T6 offers Sleep, Stop, and Standby modes for power optimization. It includes VBAT supply for RTC and backup registers.
2 x 12-bit, 1 µs A/D Converters: The microcontroller is equipped with two 12-bit analog-to-digital converters (ADC) with up to 16 channels. It has a conversion range of 0 to 3.6 V and supports dual-sample and hold capability. Additionally, it features a temperature sensor.
Direct Memory Access (DMA): It includes a 7-channel DMA controller that supports peripherals such as timers, ADC, SPIs, I2Cs, and USARTs.
Up to 51 Fast I/O Ports: The STM32F103C6T6 offers 26/37/51 I/Os, all mappable on 16 external interrupt vectors. Almost all ports are 5 V-tolerant, providing flexibility in interfacing with various external devices.
STM32F103C6T6 Specifications
TypeParameterCoreARM Cortex M3
Core Size
32-Bit Single-CoreProgram Memory Size32 kBData Bus Width32 bitADC Resolution12 bitMaximum Clock Frequency72 MHzRAM Size10K x 8Supply Voltage - Min1.8 V, 2 VSupply Voltage - Max3.6 VVoltage - Supply (Vcc/Vdd)2V ~ 3.6VConnectivityCANbus, I2C, IrDA, LINbus, SPI, UART/USART, USBPeripheralsDMA, Motor Control PWM, PDR, POR, PVD, PWM, Temp Sensor, WDTNumber of I/Os48 I/O
Operating Temperature
-40°C ~ 85°C (TA)
Package / Case
48-LQFP
Absolute Maximum Ratings
SymbolRatingsValueVDD − VSSExternal main supply voltage (including VDDA and VDD)–0.3V ~ 4.0VVINInput voltage on five volt tolerant pinVSS − 0.3V ~ VDD + 4.0VInput voltage on any other pinVSS − 0.3V ~ 4.0V|VDDx|Variations between different VDD power pins50mV|VSSX −VSS|Variations between all the different ground pins50mVVESD(HBM)Electrostatic discharge voltage (human body model)2000VIVDDTotal current into VDD/VDDA power lines (source)150mAIVSSTotal current out of VSS ground lines (sink)150mAIIOOutput current sunk by any I/O and control pin 25mAOutput current source by any I/Os and control pin-25mAIINJ(PIN)Injected current on five volt tolerant pins-5/+0mAInjected current on any other pin± 5mAΣIINJ(PIN)Total injected current (sum of all I/O and control pins)± 25mATSTGStorage temperature range–65°C to +150°CTJMaximum junction temperature150°C
STM32F103C6T6 Pinout

STM32F103C6T6 Application
Motor Drives
The STM32F103C6T6 is used in motor drive systems to control the speed and direction of motors in various applications, such as industrial machinery, robotics, and automotive systems.
Application Control
It is utilized for controlling the operation of various applications, including home automation systems, smart appliances, and industrial automation equipment.
Medical and Handheld Equipment
Due to its low power consumption and high processing capabilities, the microcontroller is employed in medical devices such as portable monitoring systems, infusion pumps, and handheld diagnostic tools.
PC and Gaming Peripherals
STM32F103C6T6 is used in peripherals for PCs and gaming consoles, such as keyboards, mice, and game controllers, to provide efficient and reliable control interfaces.
GPS Platforms
It is used in GPS tracking devices and navigation systems to process location data and provide accurate positioning information.
Industrial Applications
Due to its robustness and reliability, the microcontroller is widely used in various industrial applications, including factory automation, process control, and monitoring systems.
PLCs (Programmable Logic Controllers)
It is utilized in PLCs for controlling and monitoring industrial processes and machinery.
Inverters
STM32F103C6T6 is used in power inverters, which convert DC power to AC power in applications such as solar power systems and uninterruptible power supplies (UPS).
Printers and Scanners
It is used in printers and scanners for controlling printing and scanning functions, providing fast and efficient operations.
Alarm Systems
The microcontroller is used in alarm systems for detecting and signaling unauthorized entry or other security breaches.
Video Intercoms
It is used in video intercom systems for communication and remote access control in residential and commercial buildings.
HVAC (Heating, Ventilation, and Air Conditioning)
STM32F103C6T6 is used in HVAC systems for controlling temperature, humidity, and air quality, ensuring comfortable and energy-efficient indoor environments.
STM32F103C6T6 Programming
To program the STM32F103C6T6, developers can use a variety of development tools and integrated development environments (IDEs) such as Keil, STM32CubeIDE, and Arduino IDE. These tools provide a user-friendly interface for writing, compiling, and debugging code for the microcontroller.
IDEs for STM32F103C6T6
Several integrated Development Environments (IDEs) support STM32F103C6T6, including the STM32CubeIDE, Keil uVision, and CoIDE. Each offers a unique set of features, catering to different programming needs and preferences.
STM32CubeIDE
STM32CubeIDE is an official IDE from STMicroelectronics for STM32 development. It integrates the STM32Cube library, providing a comprehensive software infrastructure to streamline the programming process.
Keil uVision
Keil uVision is another popular choice. It offers robust debugging capabilities, making it easier for developers to identify and resolve errors in their code.
STM32CubeMX is a graphical tool that helps developers configure the microcontroller and generate initialization code quickly. It allows users to configure peripherals, pin assignments, and clock settings, among other parameters. Then, it generates the corresponding initialization code in C language, which can be easily integrated into the development environment.
Another essential aspect of programming the STM32F103C6T6 is understanding the HAL (Hardware Abstraction Layer) libraries provided by STMicroelectronics. HAL libraries abstract the low-level hardware details, providing a standardized interface for interacting with the microcontroller's peripherals. This abstraction simplifies the development process and makes the code more portable across different STM32 microcontrollers. Understanding how to use HAL libraries is essential for efficiently programming the STM32F103C6T6 and leveraging its full potential in embedded applications.
STM32F103C6T6 Equivalent/Alternative
STM32F103C8T6.
STM32F103C6T6 Package

STM32F103C6T6 Manufacturer
STMicroelectronics, a global leader in semiconductor manufacturing, is the proud manufacturer of the STM32F103C6T6 microcontroller. With a strong focus on innovation and quality, STMicroelectronics has established itself as a trusted name in the electronics industry. The company's commitment to excellence is evident in the STM32F103C6T6, which boasts high performance, reliability, and versatility. STMicroelectronics' dedication to customer satisfaction and technological advancement makes it a preferred choice for engineers and designers worldwide.
STM32F103C6T6 Datasheet
Download STM32F103C6T6 Datasheet PDF.
Conclusion
In conclusion, the STM32F103C6T6 microcontroller stands out as a versatile and powerful solution for embedded systems design. Its advanced features, including a 32-bit ARM Cortex-M3 core, a wide range of peripherals, and low power consumption, make it ideal for a variety of applications. It provides developers with a powerful tool to create innovative and efficient solutions for a wide range of applications.
0 notes
Text
Pioneer600 Raspberry Pi Expansion Board: The Ultimate Tool for Learning and Prototyping

Pioneer600 is versatile HAT (Hardware Attached on Top), designed for the All Raspberry Pi Single Board Computer, It is aimed at enhancing Raspberry Pi's capabilities for learning and prototyping and experimenting with various components and sensors.
This HAT supports all types of Raspberry Pi Board with 40 pin GPIO header and it has A/D and D/A converter, USB to Serial/UART, OLED display, IR receiver and many more feature which makes it highly compatible and easy to integrate into a variety of projects.
Key Features:
Compatibility: It supports all Raspberry Pi boards with 40-pin GPIO such as Raspberry Pi Zero/Zero W/Zero WH/A+/3B/3B+.
Standard I/O Expansion: This Pioneer600 comes with variety of standard I/O Expansion to connect and control muliple devices:
Dual Programmable LEDs: to provide visual feedback or status indicator.
Joystick: Use the built-in Joystick to create interactive projects.
Active Buzzer: Use for audio outputs and ideal for making sound alerts or alarms.
USB to UART Converter: With CP2120, you can easily communicate with external serial devices and configure the Raspberry Pi via a serial terminal. It is very useful for debugging, interacting with microcontrollers, or setting up with serial interface.
0.96-inch OLED Display: Display clear text and graphics. Perfect for displaying sensor readings, system status, simple graphical interfaces and interactive information for your projects.
RTC (Real Time Clock): DS3231 RTC module allows your Raspberry Pi to keep accurate time even when device is disconnected from power. It features a backup battery holder ( battery is not included).
A/D and D/A converter: The PCF8591 provides 8-bit resolutions for both analog to digital (A/D) and digital to analog (D/A) conversion. You can connect analog sensor like temperature or light sensor and control analog devices like motors, LED dimmers etc. The PCF8591 also includes a screw terminal interface allows you to secure connections to external devices.
GPIO Expansion: The PCF8574 I/O expander allows increase the number of available GPIO pins for Raspberry Pi. Perfect for those projects that require many digital connections.
IR Receiver: The built-in LFN0038K infrared receiver enables to receive signal from infrared remote control.
Pressure Sensor: The BMP280 sensor is use for measure air pressure and temperature. This sensor provides real-time data that can be used for data logging, control systems, or creating smart environments.
1-Wire Interface: Supports 1-Wire communication, connect device like DS18B20 temperature sensor. perfect for projects requiring accurate temperature monitoring in remote locations.
Sensor Interface: designed to make it easy to interface with various sensors.
Why Choose Pioneer600 for Your Projects?
Comprehensive Learning Platform
The Pioneer600 is an excellent tool for learning about various components, sensors, and communication protocols. Whether you’re working on a beginner project or an advanced prototype, this expansion board provides all the necessary hardware to get you started.
Prototyping Made Easy
The flexibility of the Pioneer600 makes it an ideal choice for prototyping. It supports a variety of sensors and components, allowing you to rapidly test and iterate on your ideas. The ability to expand the GPIO, interface with analog and digital devices, and display data makes it a versatile choice for any project.
Compact and Compatible
The Pioneer600 is designed to fit all Raspberry Pi boards with a 40-pin GPIO header, so you won’t have to worry about compatibility. Despite its compact size, it packs a punch with numerous features, making it an essential tool for anyone looking to expand their Raspberry Pi’s capabilities.
Ideal for Remote Control and Automation
If you’re working on a project that involves remote control or automation, the Pioneer600 is equipped with an IR receiver for remote operation and a real-time clock to ensure your project runs on time. The pressure sensor and other environmental sensors provide even more data for automation systems, making this board a perfect choice for IoT-based projects.
Conclusion
The Pioneer600 Raspberry Pi Expansion Board by SB Components is an exceptional tool for anyone looking to expand the functionality of their Raspberry Pi. With a wide range of I/O options, sensors, and display capabilities, it offers endless possibilities for learning, prototyping, and creating innovative projects.
Whether you're building a weather station, a remote-controlled robot, or a home automation system, the Pioneer600 provides everything you need to get started.
#raspberry pi#electronics#innovation#technology#tech#learning#prototype#iot#iot applications#projects
0 notes
Text
✨RTC Incorrect quotes part 3! <3✨ (sorry this took so long I forgot I said I'd put the rest up, also many repeat images sorry on that as well, anyways here y'all go :D )


I haven't found the other folder with the last few but I have a guess on which usb thing that it's on so those should be up soon (that post will probably have the most images out of all of them)
38 notes
·
View notes
Text
Risc-V işlemcili yeni sistem: Milk-V Jupiter

Liliputing kaynağına göre Shenzhen MilkV Technology (Milk-V) şirketi, RISC-V mimarisini temel alan bir işlemciyle donatılmış Jüpiter adlı bir kartı piyasaya sürmeye hazırlanıyor. Yeni ürün, Mini-ITX standart boyutuna sahip ve bu da onu çeşitli kasalarla uyumlu hale getiriyor. Ürünün boyutları 170×170 mm’dir. Değişikliğe bağlı olarak, RISC-V tabanlı sekiz SpacemiT X60 çekirdeğine sahip bir SpacemiT K1 veya M1 işlemci kullanılıyor. Çip, bir Imagination BXE-2-32 grafik hızlandırıcı ve 2 TOPS'a kadar performansa sahip bir AI işlem birimi (NPU) içeriyor. LPDDR4x RAM miktarı 4, 8 veya 16 GB olabiliyor (karta lehimli, bu da yükseltme olasılığını ortadan kaldırıyor). PCIe 2.0 x2 arayüzlü M.2 2280 SSD için bir konektör ve microSD kart için bir yuva mevcut. Ayrıca bir eMMC çipi de eklenebiliyor. GPU'lar veya ek SSD'ler gibi genişletme kartları için bir PCIe 2.0 x8 yuvası da bulunuyor. Wi-Fi 6 ve Bluetooth 5.2 kablosuz iletişim desteklenmekte. Konektör seti, USB 2.0 Tip-C, USB 3.0 Tip-A (×2) ve USB 2.0 Tip-A (×2) bağlantı noktalarını, HDMI arayüzünü (1920 × 1440 piksele kadar; 60 Hz), 3,5 mm ses jaklarını içeriyor (ses çıkışı, mikrofon girişi), ağ kabloları için iki RJ-45 konnektör (1GbE adaptör), güç kaynağı için DC jakı (12 V). Kartın kendisindeki konektörler aracılığıyla iki ek USB 3.0 ve USB 2.0 bağlantı noktasını da kullanabilirsiniz. Diğer şeylerin yanı sıra, CR1220 pil için bir RTC konektöründen ve PWM kontrollü bir fanı bağlamak için bir konektörden bahsedilmektedir. PoE teknolojisi desteği isteğe bağlı olarak mevcut. Read the full article
0 notes
Text
Forlinx Officially Launches RISC-V SoM Based on StarFive JH7110!
Forlinx has officially launched their latest System-on-Module, featuring the powerful StarFive JH7110 RISC-V chip. These versatile SoM and compatible carrier board are now available for order, catering to a wide range of applications including commercial, medical, and industrial automation.
Recently, a few embedded products have emerged utilizing the same processor, including the VisionFive 2, Pine64, and Milk-V Mars. However, the FET7110 SoM will be the first product from Forlinx to feature the integrated Jinghong 7110 processor. See the JH7110 block diagram for reference.
• JH7110 – 64-bit RISC-V, up to 1.5GHz (quad SiFive U74-RV64GC, up to 5.09 CoreMark/MHz)

JH7110 block diagram
The JH7110’s GPU integrates the IMG BXE-4-32 MC1 (up to 600MHz) which offers full support for mainstream APIs like OpenCL 3.0, OpenGL ES 3.2, and Vulkan 1.2.

Regarding power consumption, Forlinx indicates that the JH7110 is segmented into eight independently switchable power domains. Additionally, the CPU frequency can be dynamically adjusted via software, allowing customers to fine-tune the frequency based on various application scenarios that require flexible control and power consumption.

The JH7110 facilitates camera access through both MIPI-CSI and DVP interfaces, with ISP support. It enables video decoding capabilities of up to 4K@60fps and video encoding of 1080p@30fps. Moreover, the SoM supports HDMI (4K@30fps) and RGB (1080p@30fps) display output interfaces, along with MIPI-DSI (2K@30fps).

Specifications listed for the FET7110-C SoM include:
• Memory/Storage:
○ 2/4GB LPDDR4 RAM
○ 32GB eMMC 5.0
○ 100 Mbps QSPI
○ SD 3.0/MMC 5.0
• Connectivity:
○ 2x GMAC for RMII/RGMII 10/100/1000 Mbps
• Display/Audio:
○ 1x HDMI 2.0 (up to 4K@30fps)
○ 1x 4-lane MIPI DSI, (up to 2K@30fps)
○ 8-lane I2S PCM/TDM
• Camera:
○ 1x 4-lane MIPI-CSI
• Expansion:
○ 1x PCIe2.0x1, 2 PCIe2.0 controllers integrated w/ PHY
• USB:
○ 1x USB 2.0
○ 1x USB 3.0
• I/O Peripherals:
○ 6x UART, 7x I2C, 7x SPI
○ 1x SDIO
○ 8x PWM
○ 64x GPIOs
○ 2x CAN 2.0B (Up to 5Mbps)
• Power:
○ 5V DC
• OS:
○ Linux 5.15.0
• Mechanical:
○ 60 x 38mm
○ B2B connectors (3x 80-pin)
Specifications listed for the OK7110-C development board include:
• Memory/Storage:
○ 2/4GB LPDDR4 RAM
○ 32GB eMMC 5.0
○ 100 Mbps QSPI
○ SD 3.0/MMC 5.0
• Connectivity:
○ 2x Gigabit Ethernet ports
• Display/Audio:
○ 1x HDMI 2.0 port
○ 1x MIPI DSI
○ 2x Speakers
○ 1x Mic
• Camera:
○ 1x MIPI-CSI
• Expansion:
○ 2x PCIE 2.0
○ 1x Micro SIM
• USB:
○ 1x USB Type-C
○ 3x USB 3.0
• I/O Peripherals:
○ 2x CAN
○ 2x RS485
• Other Features:
○ 1x Power button, 1x Reset key
○ RTC battery
• Power:
○ 12V DC (via barrel connector)
• Mechanical
○ B2B connectors (3x 80-pin)
These products are now available for ordering. Customers can find the product page for the FET7110-C SoM here.
0 notes
Text
Microchip SAM9X70 ultra-low power MPU for high-performance connectivity and user interface applications
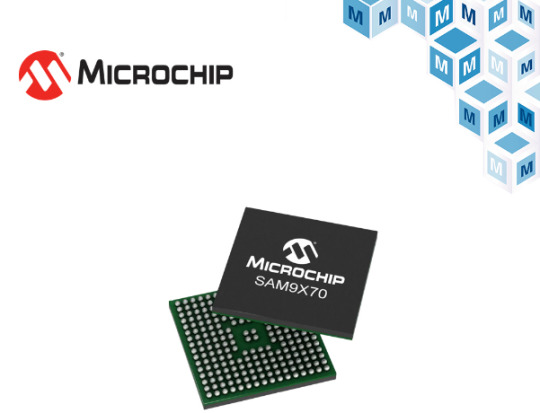
【Lansheng Technology News】On September 15, Microchip Technology released the SAM9X70 series MPU, which combines high performance, low power consumption, low system cost and high value. With the support of the powerful 800MHz Arm Thumb® processor, it provides a range of impressive connectivity options, rich user interface features and outstanding security features.
Microchip Technology SAM9X70 MPU is equipped with the ARM926EJ-S core, the CPU operating frequency is up to 800 MHz, and the system processing frequency is up to 266 MHz. On-chip memory includes 176-KB internal ROM, 64-KB internal SRAM, DDR3(L)/DDR2 controller and external bus interface (EBI). This MPU also supports various non-volatile memory (NVM) interfaces, including NAND flash, Quad SPI and eMMC flash. The SAM9X70 MPU achieves ultra-low power consumption through a real-time clock (RTC), 32-bit GP register, clock generator, power management controller, and software-programmable ultra-low power modes and optimization features.
In addition to its powerful processing capabilities and ultra-low power consumption features, what further enhances the performance of the SAM9X70 series is its rich on-chip peripheral interfaces. This series of MPUs feature 10/100/1000 Mbps Ethernet interfaces and support Time Sensitive Networking (TSN) connections, providing stable message delivery over standard Ethernet networks. The devices also offer MIPI-DSI, LVDS, RGB and 2D graphics interfaces, MIPI-CSI-2, Gigabit Ethernet with TSN and CAN-FD support for connectivity and user interface applications. Other connectivity options include an LCD controller, an image sensor controller, 13 FLEXCOMs, an ADC, a PWM controller, a Hi-Speed USB device/three Hi-Speed USB hosts, and more.
In addition to connecting peripherals, the SAM9X70 series also has powerful security features, such as secure boot using on-chip secure key storage (OTP), which can effectively prevent unauthorized users from stealing keys; high-performance encryption accelerators (SHA, AES and TDES) to protect confidential information and encrypt sensitive data. Additional security features include tamper protection and a Physical Unclonable Function (PUF) that generates keys on demand and clears them immediately after use.
Microchip Technology SAM9X70 MPU is available in a 240-ball BGA package. These MPUs are ideal for Internet of Things (IoT) applications, automotive, connected devices and user interfaces.
The SAM9X70 family is supported by Microchip MPLAB®-X development tools, Harmony, Linux® distributions and Ensemble Graphics Toolkit. When used with power management integrated circuits (PMICs) such as the MCP16501 and MCP16502, the SAM9X70's power-sequencing capabilities provide a fully tested power management solution.
Lansheng Technology Limited, which is a spot stock distributor of many well-known brands, we have price advantage of the first-hand spot channel, and have technical supports.
Our main brands: STMicroelectronics, Toshiba, Microchip, Vishay, Marvell, ON Semiconductor, AOS, DIODES, Murata, Samsung, Hyundai/Hynix, Xilinx, Micron, Infinone, Texas Instruments, ADI, Maxim Integrated, NXP, etc
To learn more about our products, services, and capabilities, please visit our website at http://www.lanshengic.com
0 notes
Video
instagram
* 🇧🇷 Projeto ZEUS - Sistema Multi Plataforma com placas tipo faça você mesmo (DIY) - REV.02 -------------------------------- 📣 ESP8266-07/12 📣 Arduino Duplo 📣 PIC 628A 📣 Fonte Múltiplas saídas 📣 Placa de Rele 📣 Placa Mãe 📣 XBee 📣 Display Nextion ... e muito mais !!! -------------------------------- Vídeo completo no YouTube da Projetos Eletrônicos -------------------------------- #sistema #zeus #multi #plataforma #arduino #esp8266 #esp07 #esp12 #pic #relay #rele #display #nokia #nextion #xbee #bluetooth #rtc #usb #ftdi #maker #diy #geek #desenvolvimento #eletrônica #walproj #projetoseletronicos #projetosmaker (em Projetos Eletronicos) https://www.instagram.com/p/B5oxBV5Fvtc/?igshid=3nwe836bt7bo
#sistema#zeus#multi#plataforma#arduino#esp8266#esp07#esp12#pic#relay#rele#display#nokia#nextion#xbee#bluetooth#rtc#usb#ftdi#maker#diy#geek#desenvolvimento#eletrônica#walproj#projetoseletronicos#projetosmaker
1 note
·
View note