#using mods is extremely easy you install
Text
The good side: you can edit pose in-game
The unhinged side:
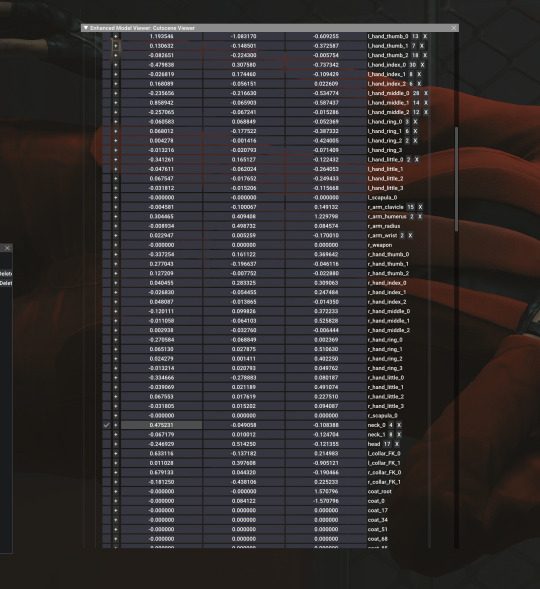
#me 5 mins into this: I'm glad I'm not a 3D animator#Sometimes I'm tempted to tell people#using mods is extremely easy you install#just spam print screen#bamf instant masterpiece photos#then drop this on them before disappearing into the sunset to munch on durian pie#'what happens next is between you and the pc modding gods'#I say as my mouth is stuffed with durian pie#re2r#colin plays
14 notes
·
View notes
Text
it continues to astound me how people my age … just kinda don’t know how to use computers. like, i was born in 2001, right? i’m an “older gen z”. what is it they say, “digital natives”? there is a significant portion of my age cohort that is proficient with computers, but the rest just aren’t. and the non-proficient share goes up and up and up the later the birth years get. it’s not that they don’t use information technology, they use it every day, but it’s phones and tablets and, at most, for school, chromebooks, which are computer-shaped but not much else. like, mostly i’m thinking about file systems. people don’t understand them.
i probably wouldn’t either if it weren’t for the fact that since i was a small kid i’ve been into (1) pc gaming and more importantly installing mods for pc games, and (2) writing, starting out with word 2004 as my primary word processor, because my dad had an old license lying around around the time i started writing longer stuff that wasn’t practical to keep in physical notebooks, and only moving on to google docs and cloud storage in my teens, when school forcibly assigned me a chromebook that i HATED because it is literally just a glorified internet terminal. that’s all it does.
like, it was modding minecraft back in 2012 when it was actually a bit difficult that taught me the basics of How Puter Work. so i was wrangling files and directories starting at, like, nine or ten years old. i used the family desktop and it sat at windows xp for so long we skipped vista entirely, because xp was fine and upgrading cost money, until i modded minecraft too hard and it caught fire and we had to replace it lmao
so i’ve always just assumed everyone else my age knew roughly as much as i did, that i wasn’t particularly adept, just kinda lower end of average. but nope! for my age cohort, i’m actually a genius! just the fact that i sometimes have intuitions about what might be wrong, and don’t need to consult the kinda arcane manuals every time, because i’ve troubleshot PCs enough times on my own, makes me a god among mortals. and i’m only slightly exaggerating.
this effect is even more pronounced for my little brother (2004). he knows more than me tbh, especially hardware-wise. and on the software end he has more practical knowledge than me, i’ve gotten kinda complacent. back in the day, i modded our minecraft clients and he set up servers for us on our raspberry pi. (we had to limit the world to a like 500x500 block square otherwise it would melt lol.)
meanwhile his friends can barely manoeuvre chromeOS because they’re used to the even more locked-down iOS. if a program isn’t on the app store, they have no idea how to install it. what’s the ‘downloads directory’. and my friends are like this too! even the very online ones! especially the very online ones! it’s so fucked!
#this was prompted by a reddit post as well as sims 4 modding and cc moving to curseforge#which is only ‘easier’ if you want EA to nanny your game even MORE#literally there’s nothing as easy as installing mods for sims 4. what the fuck#and you know i 🏴☠️ that shit and on the site i use for that sims players keep making absolute FOOLS of themselves#they don’t know what a zip file is. mainly because they can’t see the file type extension because windows hides that by default now#im guessing#people going into hysterics over a .bat file in the comments section#it’s EXTREMELY embarrassing#she speaks#simsbloggin#young woman yells at cloud?#a tentative entry into girl gamerhood#the only reason i got into pc games was because my parents did not want my brother and i to play video games at all#or at least as little as possible#so they were never going to buy a console. but the family pc was already there#so they could not stop me#… and then years down the line they ended up helping to finxance leagues more expensive gaming pcs#my birthday present a couple of years ago was 75% of my graphics card lolololol#my current pc which tbf is a monster and hilariously overkill for most games i play cost 24k SEK which was all my money at the time#like. all of it.#i had been saving for YEARS#oh! we did get a wii. in like 2012. mainly because it had movement games on it i think#like just dance and shit
14 notes
·
View notes
Note
What do you use to run/install/play mods? That's always been a barrier for me; it feels complicated and stressful to get them actually running.
the good news is that THIS ISN'T HARD THESE DAYS LET ME TALK TO YOU ABOUT HOW TO GET MODS!
the tl;dr here is "prism launcher is really easy to use and if you are playing a modpack, the people who made that modpack have already solved the 'making sure the mods run and don't crash together' problem, modded minecraft is actually pretty easy these days".
the longer answer with detailed instructions is below the cut, i just realized the many paragraphs seemed way too intimidating, and i want to be clear that "just install prism launcher" is 99% of what you need to do to have a smooth modded minecraft experience! you probably won't need most of this instruction i just talk too much.
so, since you want an easy answer to this, i am going to give you the easy version; if anyone wants the hard version, let me know. but. okay. you are either going to want to download the curseforge launcher or prism launcher; there are also a lot of other options out there (many, like prism, being a fork of multimc), but those two are the ones i recommend and that most other people will recommend.
i STRONGLY recommend downloading the prism launcher over the curseforge launcher (which is why its the only one i've linked); while this technically supports mod creators less (because you will not view the ads on curseforge), it gives you an easier way to download mods and modpacks that are only on modrinth, and also there are Good Reasons i don't want to get into why you might not want to monetarily support curseforge more than you have to in order to play modded minecraft. if there is a modpack you use a lot or a mod you use a lot, i highly encourage going to look for if that modder/team has a patreon you can support, if you have the money to do so! this is also, if you end up getting technical enough to need it, normally the place you get your first-class support for a given mod.
i am going to continue these instructions as though you've downloaded prism launcher, because that's the one i use and know best. luckily, it's really easy!
first, install prism. next, open prism. i... cannot remember if you're given some kind of setup screen at this point; if so, follow those instructions. if not, you will be greeted with a blank screen (i cannot remember if prism by default gives you a vanilla instance, you might have that, but otherwise you'll have an empty prism window). in the top right, there is a section for selecting what minecraft account you're using; log into your minecraft account by following the prompts. you will get a microsoft security alert about a new app connecting to your account that's able to read your account while you do this; this is normal, and what you want to happen.
now is a good time to make sure that you have prism set up with the correct java version and the correct minecraft installation. the easiest way to do this is to click the "add instance" button in the top left. you will be taken to a screen with a seemingly intimidating number of options. luckily, it's not actually that hard. for now, to test your installation, just immediately click "okay", which will create a vanilla minecraft instance with no mods on the latest version of vanilla minecraft. if this runs as expected, you're all good!
if this does NOT run as expected, the problem is normally either that prism needs you to give it the correct java version or you aren't actually authenticated with mojang. these can both be solved in settings! go to the "Java" tab. there, it will show both a minimum and maximum memory allocation. first, change that maximum to a much higher number; i have it at 4096 MiB by default, but if your modpacks aren't loading or are running extremely poorly, this is often going to be the culprit. it will also show a "Java path:"; check to make sure this is pointing to a Java 17 version minimum. if it isn't, you will likely need to download java 17; oracle's website sucks i'm sorry but despite it feeling sketchy i promise it's the right place.
also i know this makes setup sound overly technical but i promise it's not; you basically just have to know where files on your computer happen to be. i am just going into overly fine troubleshooting detail, just in case.
now that you know prism is set up correctly, it's time to install your mods or modpack! if you are intimidated by getting mods to work, i highly recommend playing a specific modpack rather than a random collection of mods. however, i'll go over how to do both.
if you want to install a modpack, click the "add instance" button. this pulls you to the "new instance" screen. on the side, you'll see several options. you'll want to click either the curseforge or modrinth tab; this will bring up a menu that allows you to search either of those websites for the modpack you want. click the modpack you want, hit "Okay", and congrats! you're done! you now have the modpack with all the mods, the correct Minecraft version, and the correct mod loader installed! prism's done all that for you! just start it up!
there is a chance while doing this prism will tell you that certain mods can't be downloaded before finishing making the instance. luckily, prism also makes THAT easy; it gives you direct links to those mods so you can download them yourself, and it, by default, checks the downloads folder for mods, so literally all you have to do is click all the links and then that potential hiccup is also solved. how handy!
as a bonus feature: if you want to update this modpack later, after an update, you can do this from either the "modrinth" or "curseforge" tab in the "edit" menu of the instance. there will be a dropdown with the pack version that allows you to select a specific version for prism to automatically update the instance to!
but if you want to install specific mods, NOT a modpack--say, you want to play vanilla minecraft, but you also want to add performance mods like optifine or sodium--this requires an extra step, but is just as easy.
click the "add instance" button. this time, stay on the "custom" tab. know, before creating this instance, which version of minecraft your mods work with. because you aren't using a designated pack, you ARE going to have to know that already! additionally, you're going to need to go to the second section on the bottom for "mod loader". know whether your mods are for forge or fabric, and select whatever the recommended version is by prism of one of those. (if you aren't sure where to figure this out, basically every mod will have this somewhere on the page you download it on, and both curseforge and modrinth have specific symbols on every mod for this; the community is aware that the loader split is a pain and tries to make clear which one you're meant to use.) hit "okay", and you'll create the instance!
next, right-click that instance. click the "edit" button in the menu. you'll see a number of useful tabs, but the one you want is the "mods" tab. this will list every mod you have on that instance! you have two options from here. the easier one for most purposes is the "Download mods" button. this opens a menu just like the modpack menu from before, except it searches individual mods, not packs. you can search mods, and prism will only show them if they're compatible with your current version of minecraft. hit the "select mod for download" button on every mod you want to add to the instance, and then "review and confirm". voila; you have added mods to the instance! you can even do this with pre-existing modpacks, too, if you are playing a modpack someone else made but want to add a specific mod.
and that's it! you've downloaded your mods! if you are playing with specific mods and not a pack, you may have more compatibility troubleshooting to do, but from there that's just standard stuff, not a prism launcher problem!
if you want to get more in the weeds from there, you can, but generally, this will be all you need! the nice thing about prism and other mod launchers is that it also makes different "instances" of minecraft, each with their own installation folders, which means you should never have to worry about any instance affecting another instance, or having to add or remove mods before logging into a server, for example. just make an instance in prism that matches that server and you'll be good to go!
so this is my overly detailed instructions on how to use prism launcher! I HOPE IT HELPS!
78 notes
·
View notes
Text
Hey you! Yes, you! Learn how to use GZDoom!
Also if you see this post, please reblog it if you think it's good, like I don't think Tumblr's algorithm (that kinda exists) will like it.
Hi, I'm Lynn "WJB" Beck, and I'm here to tell you about an exciting new old game engine that is extremely easy to use for not just making original games, but also mods and animations and stuff!
And this engine... is GZDoom.
GZDoom is an enhanced sourceport of the 1993 first-person shooter, demon-punching simulator and stress-test for pretty much any technology that contains a computer. As opposed to more low-key and/or "vanilla" sourceports like Chocolate Doom or Boom, GZDoom allows for a lot more options, including Build Engine-style voxels, several types of dynamic lighting, and even stuff that was originally exclusive to specific Doom Engine games, like Strife's light RPG mechanics, This means that it can be used to make extremely impressive "total conversion" mods, and even fully original games with entirely custom stuff!
This guide covers how to get started, and a basic overview of how certain things work (get ready to learn about lumps!).
Getting Started
Ok so before you can start Doing The Thing, you need to... install some software! Don't worry, it's only like 4 and they're fairly lightweight.
Go to this website here and download the most recent version of GZDoom. You will need this to actually run your game.
Go here and get Slade. You will need this to import custom graphics and audio, as well as to use text-lumps (which are basically necessary, even if you're making a basic custom level set, and I will explain why further down).
This ZDoom Forum topic is where you can get Ultimate Doom Builder. While there are other Doom mapping tools, UDB is what I personally use, and it's extremely beginner-friendly while also being fairly versatile. It even has a built-in script editor, so you can modify a script and then immediately jump into testing to see if what you've done has worked!
Finally, you need a copy of specifically Doom 2. You could use Doom 1, but in my opinion Doom 2 is better because it has a lot more stuff than the first game, and - let's be real - you'll probably be doing a lot of vanilla mapping to get to grips with the editor before you can start making your big ambitious game (which is what I'm doing over on my modding sideblog, check it out). I'll leave this one up to you. EDIT: I forgot that Freedoom exists. That's also good.
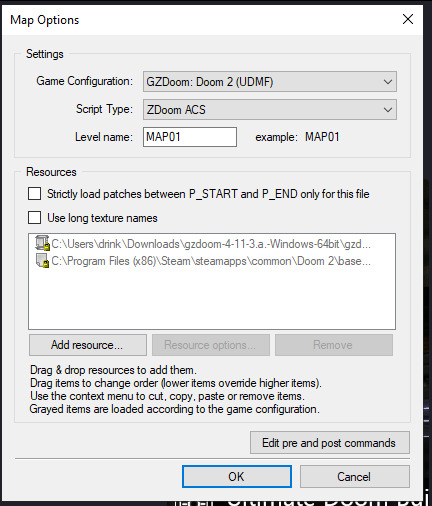
Mounting stuff into Ultimate Doom Builder
Next, you'll need to get UDB set up. This is fairly easy. First open UDB and, as soon as it starts up, go to the top-menu and click "Tools", then go to Game Configuration. Select "GZDoom: Doom 2 (UDMF)" and click "add resource"; using the attached file-explorer, locate the Doom 2 folder on your computer's file system and add DOOM2.WAD to the list of resources, then do the same with gzdoom.pk3 in the GZDoom folder (making sure to switch the "Add Resource" tab from "From WAD" to "From PK3". Click Ok, and you're done!
If you want to put your custom graphics into the game, you simply create a WAD file in Slade, put your graphics in (more on that later) and save it; then when creating a map in UDB, this box will appear:
If you click "Add resource" here, you can then select your custom wad and use any assets, code etc. in your map!
How Slade works
This bit is a bit more complex because it deals with multiple file formats and methods of importing stuff, but I'll start simply by explaining textures, flats, sprites and patches.
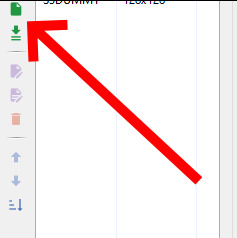
Before I do that though, I need to talk about Markers. To define images as a sprite, patch or flat, you need to put them between a pair of Markers with specific names, which you can create by clicking the "New Entry" button:

"Empty (Marker)" is selected by default, so all you need to do is name it. The naming format is [LETTER]_START to start a section and [LETTER]_END to end one; S_Start/S_End are for sprites, P_Start/P_End are for patches, and F_Start and F_End are for flats. You can, additionally, further subdivide this by making another pair of Markers inside a Start/End pair with a number after the letter, but I'm not sure if this does anything (my only experience with it is that the Doom 2 wad file does this).
Now to explain how these things actually work! First, sprites. A sprite is an image that represents an object or creature in the game, and a cool thing that GZDoom does is let you use generic PNGs instead of Doom's proprietary GFX format. Sprites use the following naming scheme: a four-letter identifier, a single character denoting what frame of the animation the image represents (the Arch-Vile, which has the most sprites out of any monster in Doom 2, has frames that go from A all the way to Z, and then [, \ and ]), and finally a number from 0-8 that indicates the angle the Thing (that's the technical term for a Doom Engine entity, by the way) is at. Using the Imp as an example:

The "0" angle just means that the sprite should look the same regardless of the player's angle; this is used for items, decorations, the death animations of all monsters (including players), and the two sprites used for Doom II's final boss.
A cool thing about sprite angles is that you can actually make a sprite work for multiple angles; by adding an extra frame-letter and angle-number after the first set, you can do things like have a monster whose left and right walking frames are the same but mirrored by formatting the sprite's name as something like NAMEA2A8 (in fact, the Imp uses this technique for all its sprites apart from its death animation).
Next up, flats! Flats are square textures that are designed to go on floors or ceilings (though you can use them anywhere, including as sky textures!) but lack the flexibility of patch-based textures. You literally just. Import your texture and put it between F_Start and F_End. That's it. That's how a flat works.
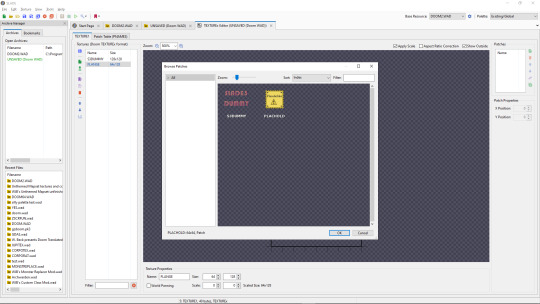
And finally, patches. Patches are complicated, but very easy to use when you know what you're doing. First, put your image between P_Start and P_End, then right click it, put your mouse over the "Graphics" dropdown, and select "Add to Patch Table". You will then be prompted to create a TEXTURES lump; click "Ok" with the default settings. This creates a Texture1 lump, and the "Patch Table" (which is just a list of patches, which I will explain soon), alongside P_Start and P_End if they aren't already present (and a dummy texture). Double-click Texture1 to open it, and then select "New Texture" (you can adjust the scale, too):
Once this is done, go to the top-right corner and click "Add patch":

By default, you only have access to any patches you have assigned, but a cool trick I use in my own mapsets whenever I want to modify an official texture is to copy its Texture1 entry from the Doom 2 WAD, then paste it into my WAD's Texture1 and rename it. This does create copies of the constituent patches in your own wad's P_Start/P_End section, but you can delete those and it will still work fine.
Both patches and Flats are limited to 8-letter names, so be warned.
The actual final thing to talk about is converting PNGs to GFX; this is a simple process, but it can cause issues with colour. Basically, Doom has a very specific palette:

While this can look pretty good, on images it wasn't designed for or that use colours it doesn't feature, it can look pretty bad. For example, if I put this random image I made through the conversion process:
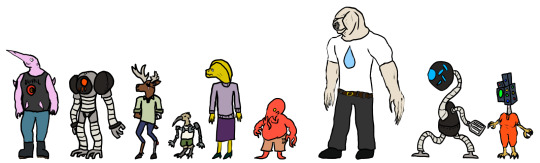
Then it comes out looking like this:
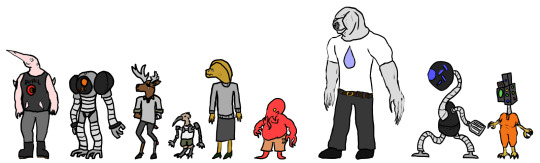
All the more cyan-adjacent hues become more blue, it nuked the antialiasing, and some of the gaps in my colouring are now much more obvious (especially on the fifth character's head and legs).
My point is, only do this if you want your mod to be compatible with more vanilla sourceports, or if you want to reduce the filesize. Otherwise, you're better off just using a strict palette when making the sprites and keeping them as PNGs.
Custom palettes are possible, but like. Literally all you do is click "New Entry", select "palette", name it, click the "Import from" button (purple page with a diagonal arrow on the top-middle of the palette-view window), set the filetype on the file explorer to "PNG", and import your custom palette image (which should be square (non-square images get squished and lose some colours) and 16x16 at the smallest, though the images I normally use are 128x128 because for some reason they're scaled up by a factor of 8, even though they display the same when imported regardless of size). You can even test them out or add them to the in-built palette list, which is nice. If you want it to override the default palette when your WAD is loaded, name the lump "PLAYPAL", which is what Doom's palette is called.
Now we get to talk about text lumps! I don't have much to say. Do the "New Entry" thing, select "Text", and name the file. The ZDoom wiki - which I will be linking to at the end - has information on each type, so check those out.
Map making
This is the final main section of this, and I'll try keeping it fairly brief and simple. Doom maps use four main elements; Vertices, Lines, Sectors, and Things. A Vertex is, well a vertex; it's a point in 2D space that acts as a starting or connecting point on a Line. Lines can be either walls or walkover triggers, depending on how you use them. Sectors can be rooms or shapes on the floor, and have properties such as damaging floors, being "underwater" (the player can swim and sound is muffled), or even having different gravity. Finally, a Thing is any entity that isn't one of those, ranging from monsters to player-starts to decorations, plus some complex technical ones I can't even begin to explain.
Useful resources
I am not good with words, but these places are!
ZDoom wiki - covers both regular ZDoom and GZDoom, plus other sourceports like the multiplayer-focused Skulltag and Zandronum. It has guides about ACS and ZScript, two of GZDoom's most useful tools for scripting maps and Things, respectively, as well as the obsolete "DECORATE" language which ZScript incorporates many elements of.
Dragonfly's Doomworks - mapping tutorial resource. I use their portal tutorial a lot whenever I want to put portals in a map.
Doomwiki - good for looking up monster and weapon stats for if you're making custom Things.
18 notes
·
View notes
Text
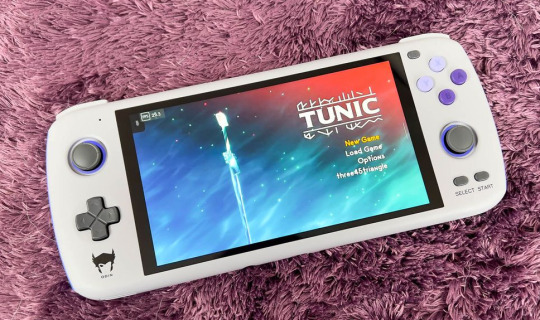
the best handheld gaming options today
ohyesididnotjustdothat: Idk if u were serious or if this is even a good time, but that rec list for handhelds sounds like it'd be baller ngl
yeah sure, i like to do the research so others don't have to. it's turning into my gimmick
Let's do this by
Best Starter Device
Best Midtier Device
"But What About Sony" Device
Best Thing If You Don't Want To Invest In A Steam Deck
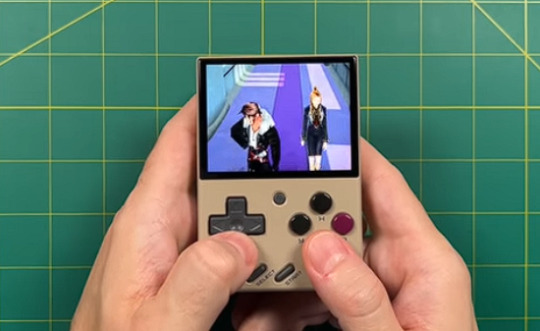
Best Starter Device/Low Budget: Miyoo Mini
as soon as this fucking thing came out, everyone was talking about it and I can see why. This thing is adorable, it's sturdy, it is the most pocketable device in the space, and it reliably plays anything up to the PSX generation. It has shoulder buttons on the back, comes with a very decent user interface out of the box, and that screen is both gorgeous and it has extra lamination so it's well protected.
And it sells for less than 70$. There's a very loving fanbase around the Miyoo Mini with people pushing the hardware to its limits and supporting it, so it's a good pick.
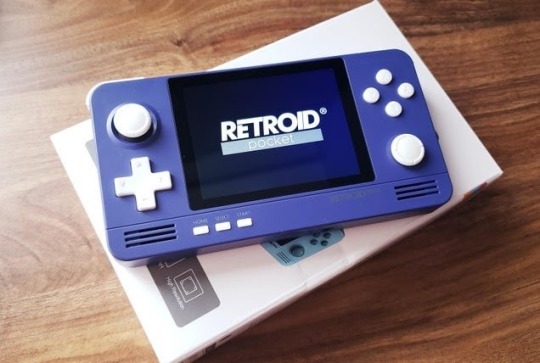
Best Midtier Device: Retroid Pocket 2+
the + is important, this is a refresh and update to the original RP2 with a lot of improvements.
Full disclosure, I wanted to get myself a Powkiddy RGB10 Max 2 (a mouthful) because it has super good ergonomics and a huge screen. But its not about the screen, it's what you do with it, and RP2+ is just head and shoulders above the competition and tends to be priced at 99$, which is cheaper than the competition as well. That this thing exists while the Ambernick RG552 has the audacity to ask for 225$ is staggering.
This fucking thing will play SNES, GBA, PSX, sure. But thanks to its chipset, it'll also play N64, Nintendo DS, Dreamcast. There is a community-maintained GDoc with testing of the device with advice on how to wring the best results out of the RP2+. Also its one of the only devices where the manufacturer lets you buy spare parts if something breaks, which is something more folks should do. Also this thing is getting active updates both officially and from the community. Like.... it's a good fucking purchase.
This is what I'm getting and I'm planning to explore the NDS and Dreamcast libraries for the first time.
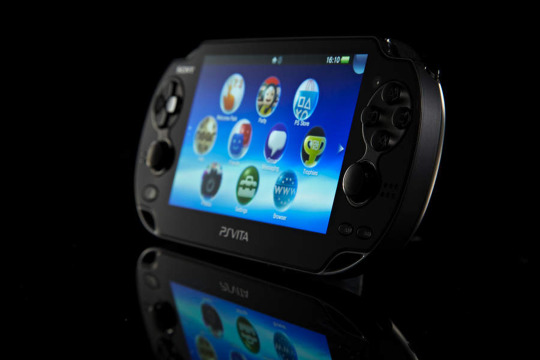
"But I want to play PSP as well as older generations!": CFW PS Vita
This was my first foray into the space and I fucking love it. The amount of shit you can do with a custom firmware (CFW) Vita is mind boggling. I just downloaded a free port of Fallout 2 from the Homebrew Browser that's runs on the Vita itself. Last night, I opened Adrenaline, which is Sony's own PSP emulation software and booted up Chrono Cross. There is a very sneaky little app I won't name that literally just lets you directly, cleanly download any PS Vita game onto the device.
The screen is fucking beautiful, the device feels luxury, it's got bluetooth, it can run older libraries all the way up to N64 (though it chugs on some GBA games for some reason).
And while a lot of other custom handhelds are trying to get PSP games to run, this is the device that was BUILT to run them, and it cannot be beat. No fucking with settings, no swapping cores in hopes another will run better. It just works for that amazing fucking library. And setting up the CFW is very fun and has a great step by step guide online.
Honorable Mention: CFW 3DS/3DS XL
One of the things these handhelds struggle with is emulation of the dual screen Nintendo devices. It's super easy to emulate the top screen, and for many games the bottom screen isn't actually necessary to play. But for the ones where it is, there are few viable handhelds you can really use.
But much like the Vita, the 3DS has a vibrant and thriving mod community. Once you have it set up, it's the most reliable avenue for the Nintendo catalog, and with Nintendo shutting down support for it, that's two generations of extremely large catalogs at risk of disappearing.
Also, once you've got it set up, you can go to hshop, pick the game you want to play, scan a QR code with your 3DS, and just install it. The pirate game is so fucking advanced. The only reason I don't play mine more is the battery life bugs me. If I put my vita to sleep, in a month it'll still have power. If I put my 3DS to sleep, it's dead in 2 days.
The "I Don't Mind Spending For the Best Option That Is Fully Futureproofed" Option: The AYN Odin
Starting price 230$ before shipping and you'll be waiting at minimum 3 months for it to arrive.
This will play everything. This is right now the only device to reliably run the PS2/PSP generation. It will also flawlessly stream Game Pass, PS Now (or whatever they're calling it these days), Stadia, Moonlight, Parsec, and Nvidia's service I forget the name of. If you're daring, you can sideload windows and play a respectable amount of full PC games. It has very good controls, super nice shoulder buttons, a turbo mode with a cooling fan, and that enormous fucking screen.
This is the device every motherfucker wants but you will be paying and you will be waiting to get your hands on it. It's the best device you can get without investing in a Steam Deck. (Also you can very easily get away with the Odin Lite over the Odin Base or Pro unless you are planning to sideload Windows, just FYI.)
Final Thoughts: There's a lot of good options out there and a lot of people covering them, but I personally like Retro Game Corps the most. He has in depth reviews of goddamn everything as well as video guides to setting up specific devices, learning Retroarch, exploring firmware options as they release, and WRITTEN GUIDES to everything on his site. Dude is a marvel. I would watch his stuff to see what sounds good, then watch other reviews for the same device. (This is what talked me out of the Powkiddy and into the RP2+.)
460 notes
·
View notes
Text
Ok this is a bit of a wordy post but bear with me. I've been reading up on the tech literacy discourse and I thought I'd add my two cents, and how it connects to piracy. LONG post under the cut!
I was born in the year 2000, which puts me on the border of being a digital native. I was brought up on tech, but only in my later childhood and teens. I've always considered myself "tech literate," but no more than the usual kid my age.
The first time I ever truly experienced tech illiteracy with my peers was when I was 23, when in one of my college classes a MacOS update rendered the software we used for said class unusable. After a few days a temporary patch was released, which by that point an assignment that utilized the software was due the next day. I followed the patch instructions, which involved navigating to the software files and substituting a designated file with the provided patch. A bit more complicated than a simple update, but the instructions were clear and intuitive enough to easily understand where the file went. The next day, during a class study session, I overheard multiple people come up to the professor complaining that the software wasn't working. After the second person complained with the professor being clueless, I asked the student what MacOS version they were on. Sure enough they were on the latest version, which as we already know is incompatible with the software. I then walked the student through the patching process step-by-step, with them needing to essentially be hand held through the entire process (almost to the point of me doing everything for them). After the patch was implemented, the student thanked me and said "Wow! How did you figure all of this out?" and to me that question was stupid- I just googled "[software] [version] MacOS [version] fix", went to the first result (which was the company website), downloaded the patch zip file, and followed the instructions on the README.txt file. It was so easy, and I couldn't comprehend that this was somehow complicated for other people, especially those my age. I mean we literally grew up using computers. It wasn't until I started learning about tech literacy and learned helplessness that I finally started connecting the dots.
Tech in general is becoming extremely user friendly, almost to a fault. UI and UX simplicity is taking away any critical thinking needed to use any sort of tech. My peers are so used to one-click and/or automatic updates, so the fact that this required slightly more effort than a simple update triggered their learned helplessness. The professor was no help in this case either, since he just extended the due date for those affected with no penalty. I actually ended up making a very detailed (and I mean idiot proof detailed) step by step picture guide with screenshots on how to install the patch for the software for the class. Anyways, back to the main point- How can I blame my peers for not knowing how to install a "complicated" update when they're so used to being spoon-fed simplicity?
But hang on- how was I the exception? I'm just as used to tech simplicity as anyone else, it's not like I'm using anything differently or making things harder for myself on purpose (I'm looking at you, linux users). So why was I the only one who knew how to install this update? It wasn't until I had a discussion many months later with my mom about this tech illiteracy epidemic that I finally thought it through. I acquired problem solving skills through piracy. To start off: not piracy but adjacent- learning to install mods in Minecraft when I was 11 taught me file navigation and what a README.txt file was, as well as the importance of version specificity/compatibility. Figuring out how to play Pokemon roms on the family computer and my iPod touch when I was 12? That's piracy, and it also taught me how to work with different platforms and the art of jailbreaking. Installing custom firmware on my 3ds so I could pirate games when I was 16 taught me how to follow written tech instructions without any visual guidance. Pirating Adobe software on my MacBook in high school taught me about patching files on MacOS. All of this knowledge and inherent googling that came with it made installing the patch for my class software look like a tiny drop in the bucket in terms of complexity.
So why am I saying all of this? Am I suggesting people learn to pirate to become tech literate?
yes.
With everything becoming pay-walled, subscription services running rampant, the proliferation of closed-source "ecosystems" *cough* Apple *cough*, and (arguably) most importantly media preservation, piracy is a skill that will serve you well in the long term. It will teach you critical thinking in the tech sphere, and if enough people learn then we can solve this ever growing epidemic of tech illiteracy. I'm not really sure how to end this post, so if anyone has anything else they'd like to add please feel free to.
Thank you for coming to my ted talk.
18 notes
·
View notes
Text
Sims 3 Error 12 "fixes"

Been looking at the infamous error 12 today while playing bald gate and have made a lil bit of progress that I think I should put somewhere, mostly so I don't forget. (AKA just use dxvk for smoother gameplay AND less crashes!)
While none of this is really a complete fix, I think it's a step in the right direction and someone smarter than me might be able to skip a couple steps on their path as a result.
The issue:
Sims 3 is a 32 bit game and has a hard limit of 4gb RAM. I have no idea what happens if it hits that limit because I don't have a save bloated enough (yet), but I'm guessing it'd crash. The base game on an extremely bloated save (for me) sits around 2600mb-3100. For whatever reason, saving the game causes a spike in RAM usage ranging from 50 - 400mb+, which if you're lucky will error 12 you, and if you're unlucky will crash you, throwing your last hour+ of gameplay into the bin.
In general, if you're around 3200mb usage, you should've saved 10 minutes ago.
A couple "fixes":
Part of the issue is that the game seems to load certain objects/textures into RAM, with VRAM being capped at around 840~mb on a good day, and (maybe?) contributing to the overall limit. Easy way to fix this seems to be using DXVK, which, for me at least, removed the RAM bump when objects are loaded. 0 lots detail loaded? 2700mb, 13? 2700mb. I might write a proper installation guide for it, but for now there's a bit in my general performance tweaks post, along with my config.
Another fix is, of course, the tried and true, quit your game every hour, clean your save, pray to god thing, but at certain family/save sizes it does seem like you're just kind of circling the drain.
I would recommend if you are playing a 300 person household who own the entire town, dropping ObjectSizeCullFactor down in your graphics.sgr file (also in my tweaks). It's personal preference but 20~ should be mostly unnoticeable while greaaattly helping the initial bloating. I've noticed around a 250mb~ drop from the default settings, but that could just be luck. The rest of my settings don't(and shouldn't) have any impact as far as I can tell, but I'll look more later.
Another thing that might help if you're already getting the error and desperately need to save, is unloading lots. There's probably a cooler way of doing this, and there's potential for a mod, but try flying your camera into a far corner, entering the map mode, pressing tab and looking up into the sky/towards nothingness before saving. This gets me around 150-200mb
Setting max detail lots to 0 also helps, but isn't exactly doable for most people (lowest is 1 in game). TS3W.exe+86C647 writes to the value if you're feeling zesty. There's other addresses that could potentially help but ¯\_(ツ)_/¯. Ideally this would be automatically set when saving, or even more ideally, we could just call a purge/reinitialize every so often. I'm pretty sure the game can reclaim memory, I've seen it happen, I just have no idea what triggered it.

Other basic render-based settings seem to have no impact on RAM/VRAM, which is in line with my sgr stutter findings about clipping distance and fog. Still need to test more tho.
Anywhoo that's all for now. I'll probably keep at it tomorrow, I'd like to see what exactly is causing the bloating and if it's vram based or ram, I feel like it's something really silly that should be easy to fix, but we'll find out
10 notes
·
View notes
Text
okay, final thoughts on beating inquisition. good stuff first:
the game is of course very beautiful. it is realistic without being drab, full of color, and very good at atmospheric environments and dungeons. the incidental art--the character tarot cards in particular--also have a very distinct and delightful style.
the sound design is also terrific, and that's something i usually never notice. the music is great, too.
the characters are all great. special mentions to Ms.-Killing-For-Jesus-Or-Possibly-Just-For-Fun, Captain-Buzzkill-The-Lady-Cop, The Ancient Furry Who Is Also an Elven Fascist, Mr.-Gets-An-Erection-Every-Time-We-Fight-a-Dragon, and the Necromancer with Daddy Issues. all of them would be exhausting as hell in real life.
many of the mechanics, like recruiting agents, the war table, and the way skyhold changes over time do make you feel like you’re building up a big organization, and that’s quite fun. it’s a pity it mostly goes to waste when it comes to the actual plot.
the game develops the backstory to the setting in tantalizing ways. the plot in some ways feels like it’s obviously setting up a sequel, but it manages to do so without feeling incomplete. the bioware method of storytelling and incorporating player choice is fraught in a lot of ways, just because of the limits of what video game designers can reasonably do with those choices, but overall i think dragon age as a franchise and DA:I handle those limitations well.
the meh stuff:
not wholly bioware's fault, but the fact that the only mod manager for DA:I is extremely hit-or-miss seems to be down to the fact that an awkward rube goldberg machine of software must kick into gear for da:i to start. if you are going to force me to use your storefront rather than selling me a standalone piece of software, *it had better run flawlessly.* as it is, i cannot recommend buying any game that isn't available solely through steam. (DA:I wasn't available on Steam when I originally bought it; it seems to be again, but if it's like DA2, you still have to install EA Desktop and run it every time you play). unfortunately, mods are a must for reasons i covered elsewhere. they help sidestep some of the boring padding, like idle mechanics and bad map design. otherwise, though, i think moddability in an RPG like this is a strength: one reason Skyrim has had such a long afterlife is that Bethesda has made modding relatively easy, allowing people to customize and embellish their gameplay experience in countless ways (only some of which involve giving the Dragonborn a monster hog).
shallower ability trees and thus less interesting combat. give me more tools, not less!
took away attribute customization for no good reason. let me minmax, dammit!
in general, despite the crafting system (thbbbbt), the armor and weapon customization still feels pretty shallow. you just don’t have that many options for stats, and since i can’t minmax my underlying stat scores, the benefits are limited.
the stuff that i think really fails:
all those zones are a fuckin' slog, lemme tell u. it would be one thing if the zones' quests fed in an interesting way back into the main quest, or if the zones had unified and compelling stories, but it's honestly mostly fetch quests and random collectibles. DA:O was *really* good about having narratively unified side/sub-quests as part of the main quest; there were other small tasks you could accomplish while doing those, but they didn't require taking a break from the main action. They were woven into it.
doesn't help that the zones aren't differentiated enough, and there's too many of them. why do we need three desert zones, all next to each other? why not have fewer, larger zones?
and on top of all that, the main quest is actually kinda sort! it's 1) join up, 2) recruit the mages or templars, 3) close the breach, 4) go to a party in Orlais, 5) visit the Temple of Mythal for a surprise macguffin not foreshadowed at all elsewhere, 5) kill the final boss. The only reason the game is as long as it is is that next steps are usually gated behind large amounts of inquisition power, so rather than the story carrying you along as it did in DA:O and DA2, it's "do a ton of filler quests and then have a major story beat as a treat." That structure sucks ass! and the recruitment/inquisition-building work you do only shows up in the background of quest 5. it doesn't take you to open-world locations much, mostly to one-off specialized zones like halamshiral, the temple of mythal, or the breach.
despite gating main quests behind inquisition power, i did a ton of sidequests and was swimming in it by the end. i had like 200+ power. i couldn’t tell you what those side quests were about, really; they certainly weren’t memorable, and didn’t affect the main plot at all. i wish all the time poured into those side quests had gone into developing the main story.
even da:o had a way for the armies you recruited to matter in the final battle; your forces are explicitly absent in DA:I (but it’s ok because the villain shows up to the final confrontation alone anyway??), which means that, narratively, it feels like all the side stuff you do to build the inquisition is mostly pointless. the final showdown is a 4-on-1 slugfest, and not even an especially interesting fight. and this is related to the next point:
last quest is kinda random and makes no sense. we made a huge stink about closing the breach earlier; but surprise! it's open again! and suddenly we transition to a boss battle, with very little intro. it feels *very* rushed, like they had to cut out a bunch of stuff in the middle. (also why dos a guy who can lift mountains into the air need an army to conquer Orlais?? he could just turn Val Royeaux upsid-down if he wanted) visually, it looks like a lot of the assets meant it was gonna take place in the Fade or something, but they changed it up at the last minute. Where do those towers in the distance come from? There isn't anything like that around Haven or the Breach.
there are no decision points, no interesting mechanics, and no stakes other than “lol the breach is open again i guess kill this guy or the world ends.” compare the battle of denerim in DA:O, where you’re defending a whole city, or the last quest in DA2, which (though it starts with little buildup), has immediate fallout with your companions, and forces you to pick a side, with repercussions for the game’s ending.
also this feels like kind of a minor writing quibble in comparison, but corypheus seems to go from "self-aware and very much in control mustache-twirling villain" to "gibbering megalomaniac" in the last mission, and it's pretty jarring
we got a moment with each companion before the climax in da:o and da2, and we don't get that in da:i for some reason. i guess it's in part bc the game doesn't actually end like in previous installments--you can finish up side quests after if you want--but it really contributes to the rushed feeling.
all the language in the post-battle scene about "just getting started" feels very strange knowing they shut it all down in the trespasser DLC just two years later. i still think that's a terrible ending--they should let a dragon age protagonist rest on their laurels a bit for once!
seriously, why the FUCK do i not get a mabari in this one?!
despite all the things i like about inquisition, it’s just not as good a game as da2! or even da1! i don’t know if the team was bigger and the franchise so popular by 2014 that it was harder for a single creative vision to cohere, what development was like and what executive mandates were handed down from above, or what constraints the frostbite engine imposed. i worry that with the departure of david gaider and the game’s financial success, those problems might only get worse with dreadwolf as commercial demands trade off against creative consistency. as it stands though i’m hoping dreadwolf is much more structurally linear--the three act structure in da2 was actually kind of a godsend from a narrative perspective, since each act had to have its own contained arc, and you had room for time to pass between them, and i would very much welcome something like that showing up again in dreadwolf.
40 notes
·
View notes
Text
There's a clicky button and d-pad mod for Steam Deck!

It's really wonky to put on but it works. It also "kind of" works for Steam Deck OLED despite being billed for LCD models, and by "kind of" I mean the connector port doesn't latch in quite as it should, but it's still functional if plugged in. It will stay put if the machine isn't put under any extreme jostling or drops or anything, and it's easy to reattach it if it does (but you dropped it in this scenario, so you've probably got bigger problems). Get some sublimation tape to keep it down if you don't trust it, but it's screwed in tight enough there shouldn't be any problems; and reminder this is ONLY for a Steam Deck OLED, an LCD won't have these issues at all because of the proper connector type.
It bears mentioning:
Watch the installation guide! Otherwise you won't know what the two plastic rings on a sticker sheet it comes with are for.
You CANNOT get around using the membranes provided for the buttons and d-pad provided. The thinner membrane is needed because the clicky switches create clearance issues with the d-pad if you try to use the original membranes.
The PCBs for both the original d-pad and button pads and the replacement clicky pads are a thin "sticker" attached to the framework that makes up the analog triggers and shoulder bumpers. Be extremely careful in removing the PCBs if you want to preserve them or change them back.
It's kind of a sidegrade rather than an upgrade, really. It ain't no Vita d-pad (that would be dome switches + rubber membrane, not mouse click switches) but it gives a much more definite tactile sensation. People complain the Steam Deck's d-pad is "mushy" but I don't feel it any more than I would for a SNES controller.
https://www.amazon.com/dp/B0CQ29423Q
4 notes
·
View notes
Text
Enhancing Architectural Beauty with Eurobond ACP Facades

The façade of a building plays a crucial role in its overall aesthetics and functionality. It is the face of the structure and the first thing people notice. One of the materials that have gained popularity in recent years for building facades is Eurobond Aluminum Composite Panels (ACPs). Eurobond ACPs are known for their versatility, durability, and aesthetic appeal, making them a favored choice for architects, builders, and designers worldwide. In this article, we will explore the advantages of using Eurobond ACPs for building facades and how they contribute to enhancing the architectural beauty of structures.
What is Eurobond ACP?
Eurobond ACP is a sandwich panel consisting of two aluminum sheets bonded to a core material. The core material can be made of a variety of substances, including polyethylene, polyurethane, or mineral-filled core. The aluminum sheets protect the core material from environmental factors and provide a visually appealing surface for the facade.
Advantages of Eurobond ACP Facades
Aesthetic Versatility: Eurobond ACPs offer an extensive range of colors, textures, and finishes, providing architects and designers with the creative freedom to bring their visions to life. Whether you are aiming for a sleek modern look or a traditional aesthetic, Eurobond ACPs can be customized to meet your design goals.
Durability: The use of aluminum as the outer surface makes Eurobond ACPs highly resistant to corrosion, fading, and wear and tear. This durability ensures that your building facade will maintain its attractive appearance for years, reducing maintenance costs and efforts.
Lightweight: Eurobond ACPs are remarkably lightweight, making them easy to handle during installation. This can result in reduced installation time and cost, as well as decreased structural load on the building.
Weather Resistance: Eurobond ACPs are engineered to withstand various weather conditions. They are not only water-resistant but also resistant to UV rays and extreme temperatures. This means that the façade will remain intact and retain its beauty even in harsh weather conditions.
Energy Efficiency: The core materials in Eurobond ACPs can be chosen for their insulating properties, which can improve the building's energy efficiency. This thermal insulation can help in reducing heating and cooling costs, making it a sustainable choice for building envelopes.
Fire Safety: Eurobond ACPs are available with fire-resistant core options, making them suitable for applications where fire safety is a primary concern. This adds an extra layer of protection to the building and its occupants.
Applications of Eurobond ACP Facades
Commercial Buildings: Eurobond ACP facades are commonly used in commercial buildings such as offices, retail outlets, and malls. The attractive and versatile design options help businesses create a welcoming and eye-catching storefront.
Residential Buildings: Many modern residential buildings feature Eurobond ACP facades to give them a contemporary look and feel. The durability and low maintenance of these facades make them ideal for homes.
Institutional Buildings: Schools, hospitals, and other institutional buildings benefit from the durability and safety features of Eurobond ACP facades.
Hospitality Industry: Hotels and restaurants can use Eurobond ACPs to create a stylish and inviting appearance, attracting guests and customers.
Conclusion
Eurobond Aluminum Composite Panels have revolutionized the world of architectural design by providing an array of benefits for building facades. From their aesthetic versatility to their durability and energy efficiency, Eurobond ACPs are a popular choice among architects and builders. They not only enhance the architectural beauty of a structure but also offer a cost-effective and sustainable solution. When it comes to creating striking and long-lasting building facades, Eurobond ACPs have become an essential choice for the modern architect.
#eurobond acp#acp sheet#eurobond acp panels#aluminium composite panels#building materials#Building facade#eurobondacp for building facade
2 notes
·
View notes
Text
So you want to mod FFXIV and see the mods your friends are running
AKA: A quick and dirty guide to set up XIVLauncher, Dalamud Plugins, Penumbra, Glamourer, and Mare Synchronos.
Alternate easy-to-digest guide (not by me) can be found here.
Why use Penumbra instead of Textools?
While Textools is a fine modding platform, it directly injects files into the game, replacing its files with the modded content. This works - quite well in fact - but it means that switching out mods on the fly is extremely difficult (and time consuming!) or will break your game install, forcing a repair of the files or a clean reinstall.
Penumbra pulls the files from your computer as you load them in; they’re essentially overlays much like a shader and can be easily swapped, activated/deactivated on a whim, and can be selectively applied to certain characters, such as your own charas and no other pcs/npcs, and so on.
This means that not only can you test mods and mix and match them much more easily (there is a built in priority system for conflicts) but you can personalize your experience by way of making your own character or your friends’ characters look completely unique, while not putting any additional strain on the game itself and its loadtimes.
NOTE - BECAUSE TEXTOOLS MODIFIES THE GAME FILES IT DOESN’T PLAY NICE IF YOU USE BOTH IT AND PENUMBRA. I highly recommend you uninstall any
Getting started
You will want to ensure you launch the game using XIVLauncher, with Dalamud plugins enabled. XIVLauncher can be found through this link. The Readme has a list of instructions as well as a linked FAQ, but essentially, the game should locate your XIV install and be able to connect to that. You will have a variety of options such as automatically logging in so that you do not have to type in your password every time you start the game and so on.
Now to the meat of the matter - Dalamud.
Installing the required Plugins
Dalamud, which comes with XIVLauncher, is what will allow us to do all of this. It has a very solid library of plugins you can install off the bat, but you will need to add a few more repositories so that it knows how to get you what you really want here.
Use ESC - Dalamud Plugins - Settings (at the bottom) - Experimental, and then take a look at ‘Custom Plugin Repositories’.


You will want to put in the URL of each repository, and then hit the plus button.

The URLs are as follows:
https://raw.githubusercontent.com/xivdev/Penumbra/master/repo.json
https://raw.githubusercontent.com/Ottermandias/Glamourer/main/repo.json
https://raw.githubusercontent.com/Penumbra-Sync/repo/main/plogonmaster.json
Penumbra is the mod framework, Glamourer will allow you to set glams specific to each set including items you may not have or cannot wear together (I use this, admittedly, to match canonical outfits worn by NPCs related to my character, and it is also good for testing mods that replace certain articles of clothing), and Mare Synchronos will be what allows you to sync up with your friends and see what they look like.
Once they’re all added, you should be able to go back to the main plugin menu, hit ‘all plugins’ to the left, and search each one and install them ingame.
Setting up Penumbra
Setting up each plugin works with a text command. Start with:
/penumbra
In order to establish where it’ll pull mods from.
For the sake of keeping things organized, I recommend somewhere close to where your game is, without actually putting it into the game folder, such as this example:


The folder linked to Penumbra here would be the ‘Mods’ folder.

Adding mods to Penumbra is a simple task; go to the ‘Mods’ tab.

The second icon from the bottom left on the tray of mod folders/names will allow you to input TTMP/TTMP2 files - either one or multiple at a time. You can move them around much like in a normal file explorer, and as you can see, mine are organized to be easy to file through.
All mods have the enabled/disabled option, as well as a Priority number; higher priority mods load over lower priority mods, which is one of the ways you can resolve a file conflict.

NOTE: WHEN YOU LOAD MODS IN BE SURE YOU UNCHECK AND THEN CHECK THIS! It essentially forces a refresh and will save you a lot of grief in the future.
See the ‘Default Collection (Default)’ button and the dropdown that says ‘(___) Mode’ on the upper right portion of this image? Clicking the Default button will set the collection to Default, and the dropdown on the right shows which collection is currently selected and being modified. Every mod you load in will be available for every collection, but only activated in the ones you select.
Collections are an important tool that you will want to learn early, so:
Penumbra 2: Collections
The Collections tab is right next to the Mods tab.

This will show you a list of character groups and individual characters that you can input individually. Each collection is a series of mods that you manually set to appear exclusively for that character. For example, if I had a character named ‘Meteor Finalfantasy’, I would type the full character name Meteor Finalfantasy into ‘Character Name...’ below the drop-downs, hit ‘Assign Character’, and then proceed to making a collection for him.
The bottom section, Collection Settings, will get you set up.

Strictly speaking, all you really need to do is write a collection name, hit ‘Create Empty Collection’, assign it to the character, choose it as you pick mods, and that’s it - the mods will only affect that specific character. This is a powerful tool for body headcanons, transgender characters, and so on.
For the sake of convenience, I recommend you put the character’s name in the collection; my naming scheme is simply ‘Meteor Mode’ and so on. You can make a collection to only affect other PCs, NPCs, or both if you desire - for this I prefer to just use the Default collection and enable mods such as TBSE/Bibo (body replacement/HD mods) as well as the Mani-Pedi pack (to make fingers look less horrible) and Scions of the Melanin Dawn (to add some diversity to the main cast).
Now you can get started on setting up Glamourer, which is a handy tool in many ways - to test looks, to ensure your modded appearance is at least somewhat close to your unmodded one based on what items are replaced, and so on.
Getting started with Glamourer:
Typing /glamourer will show you a list of people and monsters in your vicinity. You can click on one (preferably yourself) to see their character customization and equipment appearances.
This is an example of my appearance - one made to mimic the Buduga tribe in this example - which cannot be replicated exactly in game.

Left clicking the dye slot will allow you to choose a color, and right-clicking will allow you to remove the dye.
At this part, I mostly encourage you to play around and test with what is possible. Keep in mind that this will only be visible to yourself and to others who add you on Mare (more on that later). I find it most useful as a tool for pictures, combining gearset appearances that can’t go together normally (despite NPCs wearing them), and for approximating something appropriate to what I have modded; for instance, if I modded a character to have special hair, and I didn’t like what hair it replaced, I would set it to something as close as possible in vanilla and then set it to the hair I dislike in Glamourer. This would allow vanilla players to see the vanilla hair and people who see the mods to see the hair mod, and for nobody to have to see the vanilla hair that’s being replaced.
When you’re satisfied with a look you’ve crafted, don’t forget to save it:

And then check out your Designs.

In Fixed Designs, you can apply a design that won’t go away when you change areas; they can be set to apply to certain classes, such as All DOW, All DOM, any class, or specific ones. (Note; having designs using specific weapons will look weird on other jobs, so I recommend job-specific designs, as I’ve done here - will update the guide if I figure out how to make it not overwrite a weapon lol.)

Now for the most exciting part - getting this set up so that your friends can see.
Setting up Mare Synchronos
Mare Synchronos makes a cache on your computer of the mods that your friends are running; it actively updates and downloads the files necessary to display them as they appear.
To start up, type:
/mare
You should be directed to create a cache folder on your computer somewhere close to its root. I put mine straight in C:/

To connect to the server, you will have to verify using a bot on its discord (linked here) and your lodestone account. (You’ll have to get the page with your character ID; clicking on your fullbody on this page should get you the proper url.)
(The reason for this is because the server was under extremely heavy DDOS for several days, and even now, its old server is still under attack. It’s moved recently to a new one, protected by cloudflare, but verifying your humanity by way of Discord and Lodestone activity is another layer of protection.)
In #registration, follow the instructions in the first post. The bot will send you messages only visible to you in that channel; it’s completely safe. Once you’ve got yourself set up, you will obtain a many number long secret ID that you should save somewhere safe, because if you lose it it is gone for good and you have to set up from scratch again, including re-adding all of your friends.
Now, with Mare enabled and with an account on the server, you should see something like this:

The top set of numbers and letters is the code you’ll be giving to your friends, your UID. You can simply copy it with the left button, as well as paste your friends’ UIDs into the section below it. Hit the plus button, and until they’ve added you back, they’ll have a red marker instead of a green check mark. Verification with friends is a two-way street.
The names displayed here are nicknames assigned by me; you need to right-click to add them and I recommend doing so early and often so as to keep them organized. If you need to see the UID again, you can left click to toggle the name display.
And that should be it! Note that some mods may require you to leave an re-enter an area, or even the game itself, to display properly, either due to it not picking up in the cache (if it’s friends displaying wrong) or other issues.
Will update and add at the bottom here notes on what’s been changed if necessary. Enjoy!
30 notes
·
View notes
Text
wb p3
NOW im going to get into the types of modifications in cyberpunk. im going to cheat with this though and use photo text of the lore book i have.
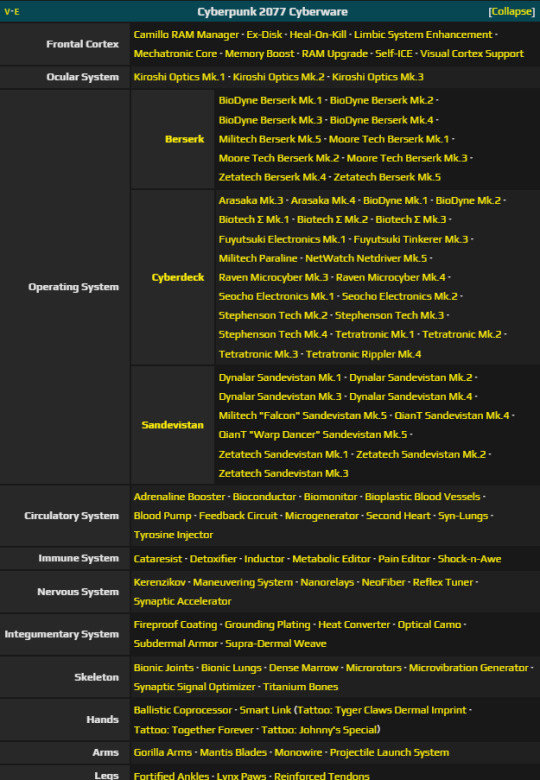
before that: this here is a list of the cyberware you as the player can access in game. you can see why i have so much fun giving the humanformers this shit. particularly stuff like gorilla arms, mantis blades, monowire and projectile launch systems.
alright so to the copy paste: (I LOVE READING THIS TYPE OF STUFF I HOPE U DO TOO)
MOST COMPANIES OFFER A WIDE selection of off-the-shelf implants, pejoratively known as "shelfware.' Though often scorned by professionals who prefer to tune and modify their own stuff, those implants are reliable, widely available, and generally affordable. They function in modern culture like tattoos and cellphones did at the beginning of the twenty-first century: as a method of expression, a trendy addition to one's image, and a useful gadget-usually all in one. Basic cyberware is easy to obtain nowadays. Shops and cosmetic clinics install "lite" implants on the spot. You walk in off the street, make an appointment, sit through a quick procedure and some calibrations, and voilà: now you've got your very own cyberaudio implant. Other add-ons can be bought at the store and installed at home. More complicated cyberware needs to be installed in specialist clinics, but the whole procedure isn't more complicated than a visit to the dentist's office. Yes, they have to check that your medical condition won't cause any complications during the procedure, but they know that you can always install the same implant at a ripperdoc's place for about 60 percent of the price, so they usually aren't too strict.
The most complex cybernetic and biological enhancements-like full-body conversions or organ and limb replacements-are only performed by specialists in branded clinics. Most people pick something from the Docs R Us catalog, but you can also choose one of the black clinics, depending on your preference, the state of your wallet, and your risk assessment. If you're feeling lucky and you want to have some ripperdoc from Kyrgyzstan remove your heart and replace it with cheap second- hand junk, go for it. Also, having your arm cut off to get yourself a cyber replacement isn't something that most people do on a daily basis. You have to be pretty fucked up or have a serious reason-like a loan to pay-to come to that decision. Things are different when you're rich though. Rich people do much weirder stuff just to show off. Removing or replacing an implant is almost always an option, but there are no refunds. Think twice before you make the decision to mod, especially with complex cyberware. If you can't afford to buy a new model, or you haven't kept your old lungs in the fridge, you may have serious problems-you know, with breathing and stuff.
COMPATIBILITY: Modern implants all have similar technological foundations, because they need to be compatible with each user's nervous system. The interfaces are all industry standards, so there is no problem with compatibility between competing platforms from different manufacturers. You have an Arasaka-made learning processor but a chipware socket from Biodyne? No problem.
Cyberware was created as an evolution of medical prostheses. At the beginning of the twenty-first century, implants were mainly used to replace missing or damaged limbs and organs. Artificial heart valves, extremities, vertebrae-they were all designed to save human lives or to allow the patient to function more normally after severe body trauma. The development of cyberware sped up after the First Central American War, when thousands of veterans came home injured. Technological progress and miniaturization allowed for "medical" cyberware to become more sophisti- cated and widespread, but it was still quite expensive and not very intuitive to use. The first prosthetic arm was a heavy mechanical contraption with a crude gripper instead of a hand and fingers. Today we refer to such cyber- ware as "Generation Zero." It is completely obsolete compared to modern technology.
CYBERWARE REVOLUTION AND GENERATION ONE Postwar medical cyberware prosthesis development helped to speed up the miniaturization process. The first nonmedical implants to be designed and successfully tested were reinforced spines and joints for heavy labor workers and air filters grafted in upper respiratory tracts for those working in polluted environments. Still, the high rate of implant rejection remained the main obstacle for the further cybernetic enhancement of society. Cyberware found its way to the battlefields in the second decade of the twenty-first century. The Second Central American War and the Second and Third Corporate Wars were the crucibles that forged the first combat implants. Militech was first to seize the opportunity. Their enhanced cybersoldiers-with increased carrying capacity and direct connections to personal motion trackers and range finders-proved to be superior to their opponents in almost every way. Each sideEnterYou sentof those conflicts soon started to design and employ combat cyberware. Those wars started an arms race between the private armies of the megacorporations that continues to this day. That early combat and industrial cyberware is now referred to as "Generation One" or "Gen 1." Made of metal and plastic, they exceed the Generation Zero, but are inferior even to the old-fashioned Generation Two. Nowadays Gen 1 can only be seen on the black market, sold cheap to the poorest of people who can't afford better cyberware.
GENERATION TWO AND THE ANTIREJECTION SOLUTION-IMPLANTS HIT THE STREETS As has often been the case in human history. war would play a pivotal role in the develop- ment of a new technology. The battlefield dust had not yet settled before the cybermedical market started booming. The same corpora- tons that participated in the Corporate Wars now saw an opportunity for profit, and expanded their lines to produce medical implants for veterans. Right after that they introduced cheap models for the industrial market, and the first models for the masses were designed simultaneously. The first cyber weapons appeared too, thanks to their still federally unregulated status. These events all coincided with the invention of antirejection treatment, the development of the new cultural style called "kitsch," and the boom of braindance technology. Society, weary from recent wars, wanted to party again, and to look like the heroes in the newest braindance productions. The age of cyberware had begun. Generation Two cyberimplants are the most common type of augmentation you will encounter on the street. They are functional and relatively cheap. Gen 1 pistons and hydraulics were replaced by artificial cybermuscles that allowed for greater actuation and strength. Then RealSkinn technology entered the market and immediately became a high-end status symbol
The rise of the megacorporations also played a role in cyberware's continued technological development. The invention of Gen 3 cyberware was instigated by the corporate "cold wars” arms race. Every corporation wanted to have better equipped soldiers and enforcers to keep their competitors at bay and their own business secure. Lighter and more durable carbon fiber and ceramic poly- mers replaced heavy metal. Concealed subdermal armor and retractable weapons were designed for black ops and assassins Bullet, blade, and fireproof armored variants of RealSkinn were developed and are widely used today among corporate forces. This period also saw the invention of bioware-technology that uses biologicalEnterYou sentenhancements instead of cybernetics Skinweave armor, nanosurgeons, toxic binders, and synaptic upgrades became ever more popular. Though biomodified muscles and organs are not as powerful as their cyberware counterparts, they are immune to EMP attacks, are not detectable by regular scanners, and are less likely to cause cyberpsychosis. Individuals combining cyberware and bioware became some of the most dangerous corporate agents and special operatives. I wouldn't recommend buying any bioware from an unchecked source-unless you want an infection from some crazy, convict-tested nanobots that eventually attack your nervous system In the last thirty years, cyberware has become widely used in every aspect of life across all social strata-from the military, medicine, and manufacturing to family life, sex, and entertainment. Its development created legal and illegal business, from braindance and cyberfashion to the black market of Cyberlimbs and bioengineered organs. Humanity has been forever changed
8 notes
·
View notes
Photo

New Post has been published on https://www.vividracing.com/blog/best-cold-air-intake-for-the-toyota-gr-supra-a90-a91/
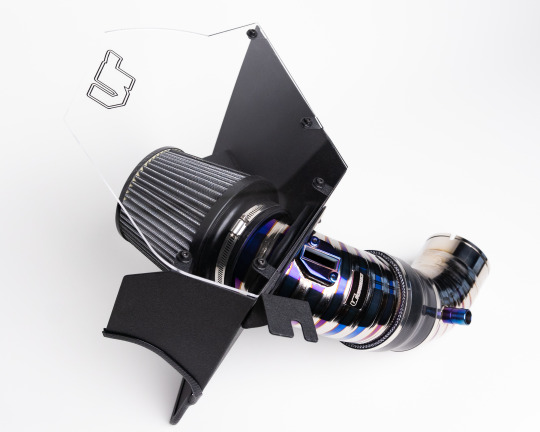
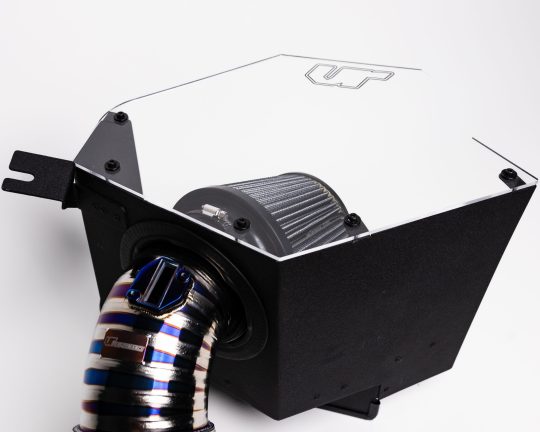
Best Cold Air Intake for the Toyota GR Supra A90/A91
For 2020+ Toyota GR Supra enthusiasts looking to take their A90/A91 to the next level, the VR Performance Cold Air Intake System is an absolute must-have. Crafted from high-quality titanium, this intake system is designed to play a critical role in optimizing your Supra’s performance and add some great aesthetics to your engine bay.
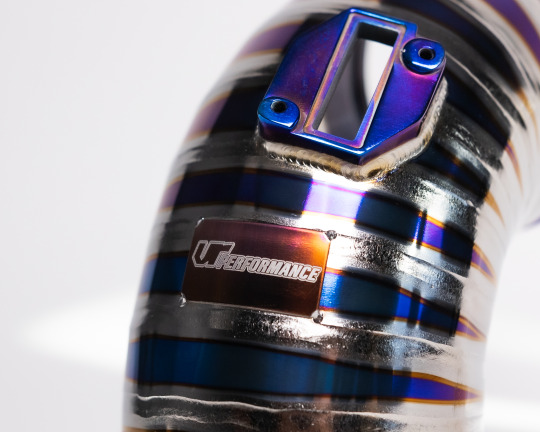
Why Choose A Titanium Intake Pipe?
Titanium is renowned for being lightweight and exceptionally durable, making it ideal for high-performance modifications. The VR Performance Cold Air Intake System is a prime example of this, standing out for its ability to withstand extreme conditions. The titanium intake pipe, metal filter shield, and Lexan glass top offer superior heat resistance for temperature pollution from the engine bay, resulting in colder air induction. This leads to improved combustion efficiency and optimal power output. Additionally, the transparent top of the enclosure showcases the air filter, providing a unique visual element that sets it apart from most other cold air intakes.

Maximized Airflow for Peak Performance
The VR Performance Cold Air Intake System features a high-flow air filter and titanium piping designed to maximize airflow to the B58 powerplant. The precision fitment of the heat shield and intake routing ensures a seamless installation process. All necessary hardware is included, making it a hassle-free upgrade for any Supra owner.
Form, Function, and Aesthetics
This intake system isn’t just about performance. It’s designed to enhance the overall look of your engine bay. The titanium finish adds a striking visual element that pairs perfectly with other titanium components like turbo inlet pipes and charge pipes. When you pop the hood, the VR Performance Cold Air Intake System makes a statement, combining functionality with style.
Features and Benefits
High-quality titanium construction: Ensures durability and lightweight performance.
Superior heat resistance: Maintains cooler air intake temperatures for better combustion.
High-flow air filter: Maximizes airflow for increased horsepower and torque.
Precision fitment: Guarantees easy installation with all necessary hardware included.
Stunning titanium finish: Adds a sleek and modern look to your engine bay.
Upgrade Your Supra Today
Elevate your Toyota A90/A91 Supra’s performance with the VR Performance Titanium Cold Air Intake System. Experience the perfect blend of power, durability, and style. Whether you’re hitting the track or cruising the streets, this intake system ensures your Supra performs at its best while looking incredible under the hood.
Upgrade your Supra with the VR Performance Titanium Cold Air Intake System and feel the difference in performance and style today!
Let us help!
There is no doubt this all-new titanium cold air intake kit for the B58 is a no-brainer upgrade for your GR Supra. As always, if you have any questions regarding upgrades for your vehicle or this VR Performance part specifically, we are enthusiasts who genuinely believe in supplying fellow enthusiasts with the best mods to meet your driving goals! We have almost 12,000 5-star reviews and a 4.6/5 review on Google to prove it 😏
You can chat with us – HERE (Live Chat). We’ll get back to you like, spooky fast.
Reach out to us at [email protected] or give us a call at (480) 966-3040 📞 and we’ll be happy to help with your questions or be a shoulder to cry on.
0 notes
Text
So this is my thoughts on the Sonic Forces DLC– Long overdue due to some IRL business, but I'm ready to get this out so I can finally transition this blog onto the next game I wanna live blog. Be warned that spoilers are beyond the read more!
So… I have… a lot of mixed feelings on this DLC. As you might have been able to tell— I myself had so much trouble with this thing that I had to use mods just to get through it after Sonic's first trial! Which is sad to me– I had such high hopes for it, and I was having fun… until all the issues came trickling in. Which is a shame– because there's so many ways in which it's really great extra content… and then so many ways it kind of… falls flat in the end to me? Like they bent back to a lot of needless criticisms of the game to… in my opinion, kind of a version of the game I don't really like all that much.
To get it out of the way right here right now: The dlc is just insanely unfairly hard. And to clarify: if this was even fair at all, I wouldn't mind. Personally, I would have preferred this difficulty be reserved… for hard. And you know. Not for people playing on easy, let alone the kids doing that? My issue isn't even just that it's hard– it's that the difficulty is made for a system that won't accommodate it. This is NOT a system made for like, the level of intensity or precision that these challenges want you to do. It feels like a desperate attempt to appear more 'hardcore' and… kind of strangely rushed? For a free DLC? Like some of it doesn't feel… all that playtested.
Now, thankfully, much of the writing is still sosososoossoooooo solid to me. I did like that Sonic's friends took more precedence here– rescuing themselves and working to help Sonic, and god, Amy's VA just NAILED IT AND WENT OFF. But these character interactions without Sonic– as much as I love him– were a treat to see, and to see different dynamics was so refreshing. If this is a step into the water of possibly having more interactions like this… then I'm all for it. However, despite how much I liked all that… the writing near the end was… how do I put it. On one hand, I love Sonic and friends and Eggman and Sage all being involved in the final battle! On the other, as cool as Sonic going all out was, removing Sage vs The End feels more… generic?
Other than all that– It did feel like there were way more issues here than in the original game, at least I swear there were– but I will be transparent and say I have this game on an external drive so I will account for if that caused any errors at all. Regarding how Sonic's friends played: Amy's is the best, and actually feels like she was playtested/the best balanced? Knuckles was just frustrating for me, and Tails was fun but also extremely OP in ways that I'm not sure were intended? But the cyber levels of what I've played are fantastic. Way more objectives with extremely fair level design and BANGER tracks in all of them!
I dunno, it feels like on some level they got scared of people reacting negatively to how experimental the game was, how 'easy' it was– so they tried to appeal to an audience of people who wouldn't really even like this game anyway. It feels like a really awkward hybrid of both that uh– the 'hardcore' video game people aren't… going to even look Sonic Frontiers's way, or at least they likely won't like how they balanced the game and are more likely to install their own mods. And the regular audience is obviously not going to like having to slog through the sudden 'difficulty' shift either! So… unfortunately– while the writing is easily a 4/5 to me… this DLC gets a 1/5. I could only recommend it either to people who really think they can handle the 'challenge' or are patient for it– or for the most dedicated of sonic players. Or at the very least– just get to Sonic and at least play the cyber levels. Those seem pretty solid. I guess the other cutscenes if it gets to you too much you can watch on youtube but even then, imo, I liked the original ending better– even if again I did like the character interactions here.
#sonic forces the final horizon#Sonic forces review#sonic forces thoughts#Sonic forces the final horizon spoilers
0 notes
Text
[Angry Birds 2 Gems Generator] 2023 ~(Angry Birds 2 Gems Mod) Angry Birds 2 Gems Android iOs
Angry Birds 2 Gems Mod Generator Hack Cheats 2023 for Android iOS No Human Verification.Angry Birds 2 Hack Cheats 2023 is available today! Get unlimited free Gems and enjoy your game even more! With this tool, you will be able to get your resources instantly and securely. No download, no risk and super easy. Our editors have reviewed more than 20 generators. Now we bring you one of the best and most effective tools available online (with 98% effectiveness).
✅🅶🅴🆃🅵🆁🅴🅴 🅂🄴🅁🅅🄴🅁 1️⃣ 👉 🅶🅾 🅷🅴🆁🅴
✅🅶🅴🆃🅵🆁🅴🅴 🆂🅴🆁🆅🅴🆁 2️⃣ 👉 🅶🅾 🅷🅴🆁🅴
Are you a fan of the popular mobile game, Angry Birds 2? Have you ever wished you could get free gems, coins, and other rewards without having to work too hard for them? If so, then you’re in luck! The Angry Birds 2 Gems Generator, Angry Birds 2 Hack, Angry Birds 2 Cheats, Angry Birds 2 Free Gems, Angry Birds 2 Generator 2023, and Angry Birds 2 Gems Free Cheats are here to help you get all the gems, coins, and other rewards that you need and more!
The Angry Birds 2 Gems Generator and other hacking and cheating tools have been specifically designed to help you get more out of your gaming experience without having to break any rules. These tools are designed with advanced algorithms that allow you to generate free gems and coins quickly and easily. With the help of these tools, you can easily get extra gems and coins that can be used to purchase power-ups, levels, and other items in the game.
Angry Birds 2 is one of the most popular games on mobile devices. No wonder then that a lot of people are looking for all kinds of codes and hacks for this game. Unfortunately, without this type of ‘support’ it is difficult to be among the top players.
In order to help all players, we decided to create a Angry Birds 2 Hack Generator, which allows you to generate as many Gems as you want. The generator is extremely easy to use and very intuitive. We use it completely online, you don’t have to install anything on your device, and what’s better, it works on any mobile device based on Android as well as iOS.
We haven’t had a single negative feedback yet, everyone who has used our generator so far has praised it highly. If you are stuck in a game, don’t wait any longer – this is the best time to use this Angry Birds 2 Gems hack generator. This generator is of course absolutely secure, mainly thanks to the proxy servers we use to connect to the game servers as well as the so called anti-ban protection. Every such connection is fully encrypted.
Angry Birds 2 Hack – Generate Free Gems
There is no denying that our Angry Birds 2 Hack Generator makes playing easier and more fun. We can generate the desired amount of Gems at any time. We are sure that after the first use of Angry Birds 2 Hack it will become an inseparable part of your fun in the game.
All you need to do is simply run the generator on your Android or iOS mobile device to enjoy the desired amount of Gems after just 2-3 minutes.
Main Features of Angry Birds 2 Hack Generator
Gems: Instantly obtain unlimited Gems in Angry Birds 2.
Quick Process: Resources are immediately added to your player account.
Security: Using the generator will not infect your devices with viruses, spyware or anything that could harm your device.
Membership: You will have in-game VIP status for a full 12 months for free.
No Verification: We do not require any proof of identity or account information.
Untraceable: The generator is untraceable by the official Angry Birds 2 servers.
Online: No need to download or install any hack as it is a fully online tool for all players.
Free: The generator is completely free of cost. So you can share it with your friends without any hesitation and benefit from it together.
How to use Angry Birds 2 generator?
It is a standalone generator. It can be used on both desktop and mobile devices. It is ideal for anyone who wants to increase the amount of their assets in the game. To do so, simply follow the step-by-step instructions below which will get you started with the whole hacking process.
Here’s what we need to do sequentially to get your resources:
The Angry Birds 2 Hack and Cheats also give you access to unlimited gems and coins without ever having to spend a dime. These tools allow you to create an unlimited number of gems and coins without having to spend a single penny. With these tools, you can easily become one of the top players in the game and enjoy the benefits that come with it.
If you’re looking for an easy and convenient way to get your hands on free gems, coins, and other rewards in the game, then the Angry Birds 2 Gems Generator, Angry Birds 2 Hack, and Angry Birds 2 Cheats are the perfect choice for you. These tools are easy to use and require no technical skills. All you need is a computer or mobile device and an internet connection, and you’re ready to start generating free gems, coins, and other rewards in the game.
The Angry Birds 2 Gems Generator, Angry Birds 2 Hack, Angry Birds 2 Cheats, and Angry Birds 2 Free Gems are the ultimate tools for getting the most out of your gaming experience. With these tools, you can get all the rewards that you need and more. Plus, you won’t have to worry about spending any money, as these tools are free to use!
0 notes
Text
ANGRY BIRDS 2 GEMS [Angry Birds 2 Gems Generator 2024]
Angry Birds 2 Gems Mod Generator Hack Cheats 2023 for Android iOS No Human Verification.Angry Birds 2 Hack Cheats 2023 is available today! Get unlimited free Gems and enjoy your game even more! With this tool, you will be able to get your resources instantly and securely. No download, no risk and super easy. Our editors have reviewed more than 20 generators. Now we bring you one of the best and most effective tools available online (with 98% effectiveness).
✅🅶🅴🆃🅵🆁🅴🅴 🅂🄴🅁🅅🄴🅁 1️⃣ 👉 🅶🅾 🅷🅴🆁🅴
✅🅶🅴🆃🅵🆁🅴🅴 🆂🅴🆁🆅🅴🆁 2️⃣ 👉 🅶🅾 🅷🅴🆁🅴
Are you a fan of the popular mobile game, Angry Birds 2? Have you ever wished you could get free gems, coins, and other rewards without having to work too hard for them? If so, then you’re in luck! The Angry Birds 2 Gems Generator, Angry Birds 2 Hack, Angry Birds 2 Cheats, Angry Birds 2 Free Gems, Angry Birds 2 Generator 2023, and Angry Birds 2 Gems Free Cheats are here to help you get all the gems, coins, and other rewards that you need and more!
The Angry Birds 2 Gems Generator and other hacking and cheating tools have been specifically designed to help you get more out of your gaming experience without having to break any rules. These tools are designed with advanced algorithms that allow you to generate free gems and coins quickly and easily. With the help of these tools, you can easily get extra gems and coins that can be used to purchase power-ups, levels, and other items in the game.
Angry Birds 2 is one of the most popular games on mobile devices. No wonder then that a lot of people are looking for all kinds of codes and hacks for this game. Unfortunately, without this type of ‘support’ it is difficult to be among the top players.
In order to help all players, we decided to create a Angry Birds 2 Hack Generator, which allows you to generate as many Gems as you want. The generator is extremely easy to use and very intuitive. We use it completely online, you don’t have to install anything on your device, and what’s better, it works on any mobile device based on Android as well as iOS.
We haven’t had a single negative feedback yet, everyone who has used our generator so far has praised it highly. If you are stuck in a game, don’t wait any longer – this is the best time to use this Angry Birds 2 Gems hack generator. This generator is of course absolutely secure, mainly thanks to the proxy servers we use to connect to the game servers as well as the so called anti-ban protection. Every such connection is fully encrypted.
Angry Birds 2 Hack – Generate Free Gems
There is no denying that our Angry Birds 2 Hack Generator makes playing easier and more fun. We can generate the desired amount of Gems at any time. We are sure that after the first use of Angry Birds 2 Hack it will become an inseparable part of your fun in the game.
All you need to do is simply run the generator on your Android or iOS mobile device to enjoy the desired amount of Gems after just 2-3 minutes.
Main Features of Angry Birds 2 Hack Generator
Gems: Instantly obtain unlimited Gems in Angry Birds 2.
Quick Process: Resources are immediately added to your player account.
Security: Using the generator will not infect your devices with viruses, spyware or anything that could harm your device.
Membership: You will have in-game VIP status for a full 12 months for free.
No Verification: We do not require any proof of identity or account information.
Untraceable: The generator is untraceable by the official Angry Birds 2 servers.
Online: No need to download or install any hack as it is a fully online tool for all players.
Free: The generator is completely free of cost. So you can share it with your friends without any hesitation and benefit from it together.
How to use Angry Birds 2 generator?
It is a standalone generator. It can be used on both desktop and mobile devices. It is ideal for anyone who wants to increase the amount of their assets in the game. To do so, simply follow the step-by-step instructions below which will get you started with the whole hacking process.
Here’s what we need to do sequentially to get your resources:
The Angry Birds 2 Hack and Cheats also give you access to unlimited gems and coins without ever having to spend a dime. These tools allow you to create an unlimited number of gems and coins without having to spend a single penny. With these tools, you can easily become one of the top players in the game and enjoy the benefits that come with it.
If you’re looking for an easy and convenient way to get your hands on free gems, coins, and other rewards in the game, then the Angry Birds 2 Gems Generator, Angry Birds 2 Hack, and Angry Birds 2 Cheats are the perfect choice for you. These tools are easy to use and require no technical skills. All you need is a computer or mobile device and an internet connection, and you’re ready to start generating free gems, coins, and other rewards in the game.
The Angry Birds 2 Gems Generator, Angry Birds 2 Hack, Angry Birds 2 Cheats, and Angry Birds 2 Free Gems are the ultimate tools for getting the most out of your gaming experience. With these tools, you can get all the rewards that you need and more. Plus, you won’t have to worry about spending any money, as these tools are free to use!
0 notes
Last Seen Blogs

jsxtype
Untitled

seeclam
Untitled

gaze100cmelaniefisher-blog
Photo Class

wearetreze
TREZE
marinememes
Silly Little Ocean Posts