#web tutorial
Explore tagged Tumblr posts
Visit Tumblr Blog
Explore Tumblr blogs with no restrictions, modern design and the best experience.
Last Seen Tumblr Blogs


Fun Fact
There are dozens of funny blogs to kill time on Tumblr.
Note
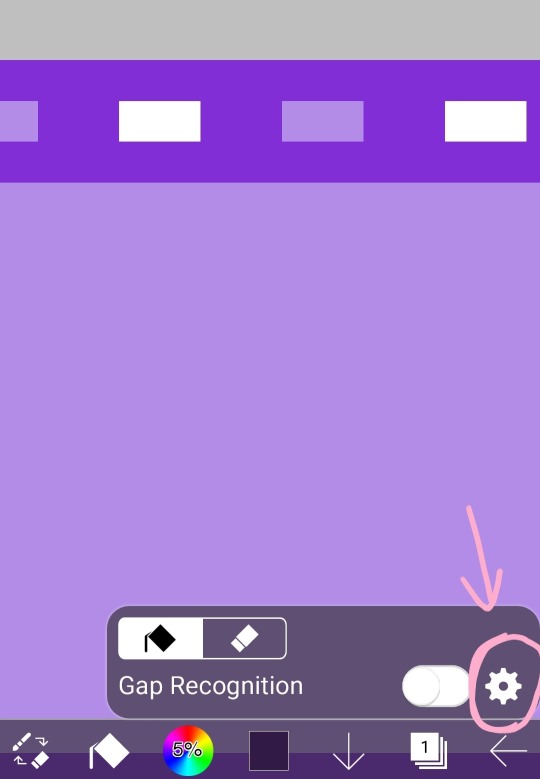
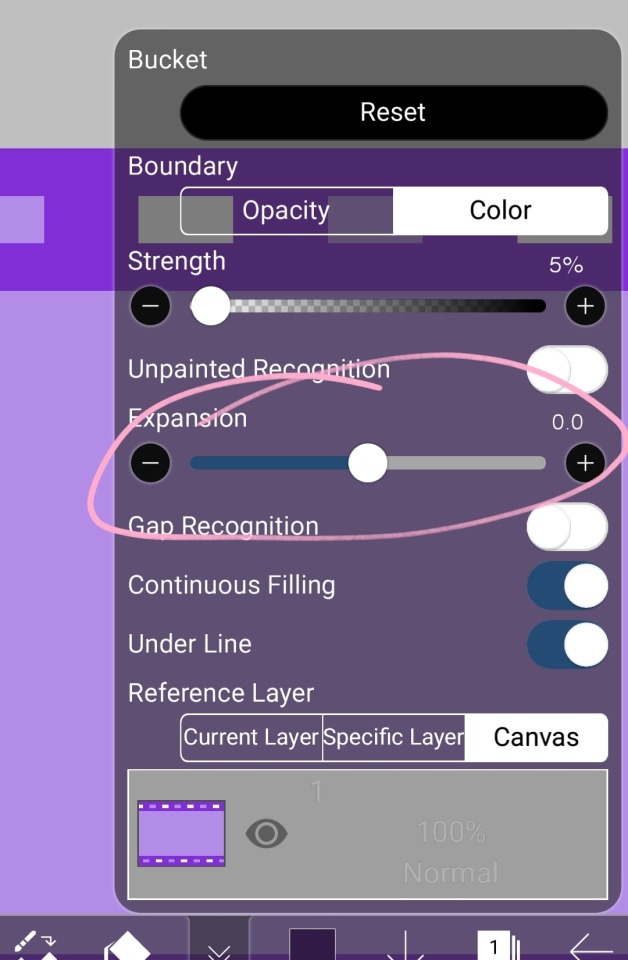
How do you make your stamps? :0
Disclaimer: this is an obscenely long explanation, with pictures. Efficiency is stupid
So, for the static ones, I make a 99x56 px file on ibis paint x. Other programs are probably available online but I don't use them.
After that, I either upload an image I want to make into a stamp, or I draw one.
Then, I find a frame I want to use. Ill upload them here but let it be known I stole all of these right from deviantart


Most of them are from Lil-Devil-Melii on deviantart. The rest i have no idea. They're not all 99x56px but you can crop the canvas it's fine
Make sure to erase the edges of the picture , so they're transparent. It's not as cute otherwise
Upload those frames over your image in whatever art program you're using and viola, stamp.
For moving ones, it's a lot harder. Mostly because I refuse to download Photoshop.
There are a couple ways to do this. Some are simple animations, like with flashing text and whatnot. For these, you download the individual animation frames from your art program. Make sure it's transparent.
Then, upload each frame to ezgif.com under the option "GIF maker." You can play around with how fast each frame goes and whatnot but in the end, it'll be a stamp with some rad text that moves. This is easy, and doesn't make me want to shit my pants and cry. If you're new, do this. This is fun. This is good. This does not kill me inside
I made that↓ stamp with this method :)

this next one is how we turn gifs into stamps. This one makes me sad. It involves math and sucks. But we gotta do it. For the vibe
First, grab your gif. I'm using this cow gif because it's awesome

Then, I resize it using ezgif. Literally everything for this will be using ezgif. I am a simple man
At this point you should decide what frame to use. I'm using this one because its the first one I clicked
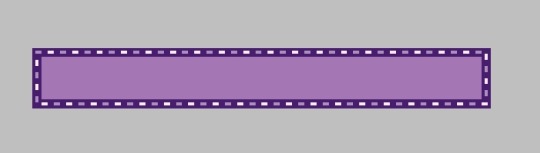
Figured out what size the inside of the frame is. That's what I resize the gif to, so the edges can be transparent. The inside of this one is 93x50 px, so those are the dimensions I'm making the gif.
Figure it out by putting the frame into ibis paint and realizing the canvas to fit just the inside of the frame, then seeing what the dimensions are. But there could be easier ways

Woah it's so small now
Then, still on ezgif, I go to the "crop" option.
Make sureeee to upload the smaller gif
press the button that says "extend canvas size", and then put the "width" and "height" as the dimensions for your FRAME. This'll put a bit of a transparent border around the gif. For this frame, I did 99px and 56px.
The "left" and "top" boxes show how many pixels the cropping happens from the edges of the canvas. The formula for finding that is
(width of gif / 2) - (difference between gif width and frame width / 2) = left box
For me it's (93 / 2) - (6 / 2) = 43.5
Then you do the same.for the height, which for me ends up being 22 from the top
This is reallyyy touchy and annoying though
Here's my result , with no visible difference

Okay so THEN you go to the "overlay" option, under "effects." And upload your frame. If the cropping was done right, you shouldn't have to move the frame at all and can just download it
Here's my result:

if you don't care about transparency, you can resize your gif to be the same size as the frame, and then put the frame over it. But I'm a slut for transparency
Anyways. I'm sorry if anything was unclear, it's two am. And I hope this was helpful :) these really are fun to make once you get it down
also if anyone has an easier way to make stamps from gifs, please god tell me
#web graphics#old web#neocities#custom#custom blinkies#stamps#page decor#web resources#da stamps#deviantart stamps#blinking gif#How to#tutorial#How to make stamps#Spacehey#deviantart#rentry graphics#old internet#early internet#stamp collecting#ezgif#stamp making#stamp template#Stamp frames#blinkies
6K notes
·
View notes
Text
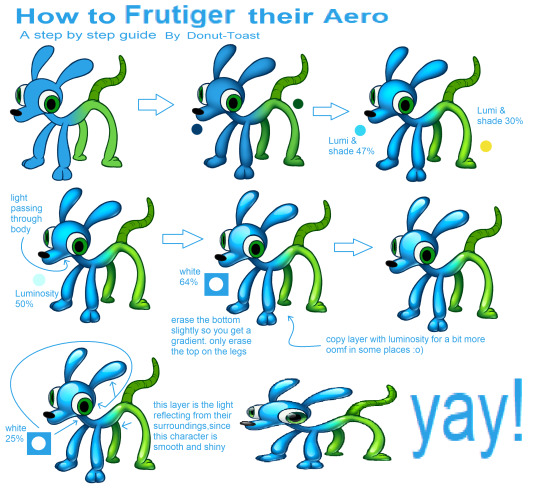
Made a quick tutorial for how to apply that Frutiger Aero Button texture to living creatures, since I made an entire design with it!
#art tutorial#frutiger aero#art tips#art help#art resources#art research#drawing tutorial#tutorial#resource#art resource#digital art#art#aesthetic tutorial#aesthetic#frutiger aesthetic#y2k#spore 2008#spore#old web#donutdrawsthings#character design
514 notes
·
View notes
Note
HIIIIIII!!!! sorry if this is like a stupid ask lol, but could you do a stamp tutorial? your stamps are always so high quality oml, how do you resize your gifs and images???


HIIII and no worries, I can totally make a stamp tutorial! (⌒▽⌒)
I’ll be going through on how to make a normal image stamp and then a gif stamp. By following these two tutorials, you’ll be able to make stamps just like these!


PROGRAM USED ★ Ibispaint
STAMP TEMPLATE BY ★ AHMED-ART on Deviantart.
To start off, you must find an image you’d like to make into a stamp. Then, find a stamp template you think would pair well with your image. There are many different types of stamp templates out there and you can find a lot of them on Deviantart.
Make sure to read the terms of use for the template before using though! Here is the template I will be using for this tutorial.

Making stagnant stamps is easy once you got the steps down. You can use any art program and follow a similar process, but I only use Ibispaint to create mine.
First, create a canvas that is the same width and height as your stamp template. This one is 97x57. Most stamp templates have super similar proportions. If you are unsure of your stamps dimensions, you can create a 100x100 canvas then crop it around the stamp template once you have inserted it.
(Brush icon -> Canvas button -> Trim)
To get higher quality on the image inside your stamps: the closer the better! For example:


See how the first stamp’s image is rather far away? This makes the quality appear much lower. However, once you zoom in, it becomes higher! So I recommend finding images to create stamps out of that you are able to zoom in on so the quality can pop.
You’ll need to erase the parts of the image that don’t fit inside the stamp so it remains transparent around the border.
If you want to change the border color of the stamp, fill in the canvas with the color you want. Then, clip it to the stamp border. Lastly, go and set it on multiply. This will change the stamp borders color!

If you want to put a line texture on your stamp, you can utilize the ruler tool in Ibispaint to draw lines over your stamp.

I’ll add these every once and awhile to my stamps for fun. If you set the opacity of the lines to 10%, it’ll end up looking something like this.
And that’s the completed stamp!
Changing the border color and adding the line texture is completely optional, though it’s always fun to customize stamps!

PROGRAMS USED: Ibispaint, Ezgif
GIF stamps are a little trickier, but the process is not too difficult once you got it down!
First, find a gif that you would like to make into a stamp. I’ll be using this one!

if you want to have a different colored or customized stamp border, you must edit it on Ibispaint before like explained above.
You can combine the layers and save them transparently so it’ll end up looking something like this.

I made this one blue and added a gradient to it to match the gif I want to make into a stamp! You can add a gradient to the border by adding a darker color onto the multiply layer then using an airbrush to blend both colors together in the middle on both sides of the template.
Now, open up Ezgif and click the tab called Crop. Then, insert your stamp template there. The way I find the dimensions of the inside of the stamp is by cropping my way around the inside of the template.
The dimensions inside this template in particular are 91x51. This is what we will resize our gif to! Before we can do that, click the crop tab again at the top of the page to refresh it and then insert your gif. This isn’t required to do, but I like to crop my gifs a bit so they focus more on what is going on inside my stamp. Like I said before, the closer the better, as it will make the quality higher!

Now that we have our cropped gif, click the tab called resize at the bottom of the page. The dimensions of the inside of this stamp are 91x51, so insert those numbers in the width and height boxes to then resize the gif.

Next step is to click the overlay tab at the bottom. You will need to click the button that says “extend canvas size” so we have room to overlay the stamp template on top of the gif. After extending the size, upload the stamp template as an overlay where it says choose file.

On computer, after clicking upload image, you can just drag the stamp template over the gif and situate it. However, you can also figure out the number coordinations to fix the template ontop of the gif by messing around with it a bit. I make my graphics on my phone so I use the numbers instead of dragging.

Left means to move the template left or right depending on the numbers you insert. Top moves the template up or down. The left for this template is 42 and the top is 21. It takes a bit of messing around to find the exact numbers.
Now that the template is ontop of the gif, all that is left to do is to crop the space around it. Click the crop tab again at the bottom of the page and then click where it says “trim transparent pixels around the image.” This will easily crop the extra space around the stamp.

Click download to save your gif and that’s it! Here is the finished product!
The whole process for making gif stamps is always the same, the only things that can vary or change are the dimensions of the gif (so it can fit inside different templates) and the left/right.
I hope you find this tutorial helpful and if anyone needs anything else explained, let me know. These stamps are free to use if anyone would also like to use them.
Happy stamp making everyone! 🩷
Dividers (c) @coco-coquette

#tutorial#web graphics#graphics#webcore#old web#rentry#stamps#web decor#gif stamps#alien stage#alien stage till#strawpage#spacehey#ᯓ ᡣ𐭩🐚asks
336 notes
·
View notes
Text
========================================================
[tutorial: build your own neocities/nekoweb page]
========================================================
a beginner's guide for making your very own home on the indie web—retro, personal, weird, and 100% yours.
this ain’t an average wix, squarespace, or tiktok aesthetic.
we’re talking full html/css with soul and attitude.
[ prerequisites ]
------------------
> an idea
> basic text editor (vscode, notepad++, or even notepad)
> account on https://neocities.org or https://nekoweb.org
> some gifs or tiles you love (dig deep or make your own)
> optional: image host or gif repo (or self-host everything)
[ feeling overwhelmed? read this. ]
-----------------------------------
you do *not* need to know everything.
html is not a mountain. it's a garden.
you plant one tag. then another. then a style. then a button.
you can build your site piece by piece.
and every piece is a portal to somewhere personal.
you are allowed to make broken pages.
you are allowed to use templates.
you are allowed to start over as many times as you want.
this is *your* world. you control the weird.
[ step 1: create an account ]
-----------------------------
> neocities: https://neocities.org
> nekoweb: https://nekoweb.org
register a name, log in, and enter your file manager.
this is where you upload your files and see your site live.
[ step 2: your first file - index.html ]
----------------------------------------
make a new file: `index.html`
basic starter:
<html>
<head>
<title>my weird little corner</title>
<link rel="stylesheet" href="style.css">
</head>
<body>
<h1>welcome to the void</h1>
<p>this is my page. it’s strange. like me.</p>
<img src="mygif.gif">
</body>
</html>
> upload to the dashboard
> boom. you’re live at
https://yoursite.neocities.org
or https://nekoweb.org/u/yoursite
[ step 3: add a style sheet - style.css ]
-----------------------------------------
create a file called `style.css` and upload it.
here’s some nostalgic magic:
body {
background: url('tile.gif');
color: lime;
font-family: "Courier New", monospace;
text-shadow: 1px 1px 0 black;
}
img {
image-rendering: pixelated;
}
marquee {
font-size: 20px;
color: magenta;
}
link it in your html and the vibes activate.
[ step 4: decorate it like a haunted usb ]
------------------------------------------
> use <marquee> for chaos scrolls
> embed gifs from https://gifcities.org/
> steal buttons from https://cyber.dabamos.de/88x31/
> set up a guestbook at https://www.smartgb.com/
> loop audio with <audio autoplay loop>
> add fake errors, 90s web lore, random link lists
[ step 5: resources, themes, and comfort ]
------------------------------------------
> templates & layouts: https://numbpilled-themes.tumblr.com
> glitchy gifs & buttons: https://glitchcat.neocities.org/resources
> layout builder: https://sadgrl.online/projects/layout-builder/
> free tiled backgrounds: https://backgrounds.neocities.org/
> beginner html intro: https://www.w3schools.com/html/
> pixel fonts & cyber assets: https://fontstruct.com/
remember:
you don't need to know js. you don't need to be a coder.
you just need a mood, a direction, a dream.
the html will follow.
[ bonus concept: shrine pages ]
-------------------------------
> a page just for one character you love
> a room to house digital fragments of your identity
> embed quotes, music, images like altars
> call it shrine.html and link it from your homepage
[ closing mantra ]
------------------
you are not here to be optimized.
you are not a brand.
you are a ghost inside the machine,
carving your initials into the silicon void.
welcome to Your website.
========================================================
#webcore#old web graphics#neocities#web graphics#carrd graphics#carrd resources#rentry decor#rentry graphics#carrd moodboard#carrd inspo#neopets#indie#indie web#early web#webdevelopment#web development#web resources#web design#old internet#old web#oldweb#nekoweb#transparent gif#tiny pixels#pixel gif#moodboard#tutorial#html page#html theme#htmlcoding
307 notes
·
View notes
Text


jagged, crystalized and pixelated tumblr banner masks!
for the 2 anons that asked!
okay to repost, just dont claim as yours. and free to use (its what they were made for, duh!)
keep in mind gifs dont mesh well with translucent colors if youd like to use these with them :0
#🌫️ i know what you dread | creations#anonymous#carrd resources#rentry resources#rentry#web graphics#rentry tutorial#rentry inspo#rentry gif#rentry decor#rentry graphics#rentry template#image masks#edit resources#editing resources
1K notes
·
View notes
Text
Digital Stamp Making Tutorial
Hello, and welcome to the long-awaited(at least on my part) digital stamp-making tutorial from neosprites! I’d like to preface that I learned what I was doing from this tutorial so it may be a bit redundant, but if anything I get a bit more specific. Thank you so much to @graphic--horde for your work, it changed me as a graphic maker. This is gunna be a long post so feel free to bookmark it for later. Now, onto the show!

The frame I will be using for this tutorial (which is the frame I use on 99.9% of my stamps) I found from the above linked post, which I believe is from a creator that OP lost track of. Its inner dimensions are 94x50 pixels and its outer dimensions are 99x56 pixels. Here it is!

Find your material! - I recommend using websites like Tumblr and searching with the “GIF” filter only on, or alternatives such as Giphy or Tenor. Your browser may let you directly save the .gif file; if not and you are noticing it restricts you to save it as a .webp file you can try an extension like “Save webp as PNG or JPEG” (for Firefox but I image other browsers have similar functions, but I really recommend you switch to Firefox). To use this you will right click on your source .gif like normal but instead of clicking on “Save image as…” click “Save webP as…” and then click “GIF”. You should be redirected to the website ezgif.com where we will actually be doing all of our editing! Here’s the .gif we’ll be working with.

Convert to GIF (optional) - if you used the extension from the above step you should already be ready to click the blue “Convert to GIF” button. If not, go ahead and open ezgif.com and click on “webP” and then “WebP to GIF”; then convert to a gif with the blue button.

Resize the GIF - now that we have a gif ready to edit, let’s make it the right size. The easiest method I have found is to change it directly to the frame’s inner dimensions, 94x50 pixels. [EDIT: Make sure in the aspect ratio drop drop menu you select "stretch to fit" and not "center and crop to fit" like I did in the photo example.] Click “resize” and then type [94] in for the width and [50] for the height. Next press the blue “resize image” button.


Add the frame - next click “overlay” then click the thin blue button that says “Extend canvas size(use if overlay exceeds GIF sizes)”. This will give us some extra room to add the frame onto the design. Next click “Browse…” and find the frame you have saved onto your device, then click the blue “Upload image” button.


After that it’s going to be misaligned, that’s normal! It will say you have the option to drag it into place, but don’t bother. That’s one of the reasons my old stamps look wack, it’s just harder to do. Instead type [44] in for the Left box and [22] in for the Right box. It took me a while to figure out these dimensions to be honest, and I’ve only tested it with this frame so I don't know if it works with others. Then click the blue “Generate image” button.


Crop the transparent edges - click on “crop”. You will have the option to check a box that says “trim transparent pixels around the image” however, I don’t recommend this as it tends to crop a few of the frame’s pixels with it sometimes. Next, set the Left position to [44] and the Right position to [22]. For the other dimensions we will use the outer dimensions of the frame which are 99x56 pixels, this will trim everything except the tiny spaces in between the stamp frame’s spikes. Type the width as [99] and the height as [56] and click the tiny blue button that says “set”. After that click the blue “Crop image” button.


Save and use! - all that's left is to click “save” and upload the graphic to your liking. (best seen on dark mode obviously)

If you’d like to tag me in stamps you’ve made using my tutorial I would love to see them, but it’s not required!! Make sure to always give credit for pictures/gifs when you can and try not to make stuff out of personal/fan art. Thank you to the person in my inbox who requested this tutorial, I had been meaning to for a while but it was just the kick I needed. :)
#carrd graphics#carrd resources#carrd stuff#rentry graphics#rentry resources#rentry decor#rentry pixels#rentry stuff#rentry inspo#deviantart#neocities#mine#my graphics#my tutorials#resources#tutorials#tutorial#how to#stamps#blinkies#graphics#web graphic#old internet#early internet#spacehey#da stamps#page decor#custom#old web#frames
349 notes
·
View notes
Text
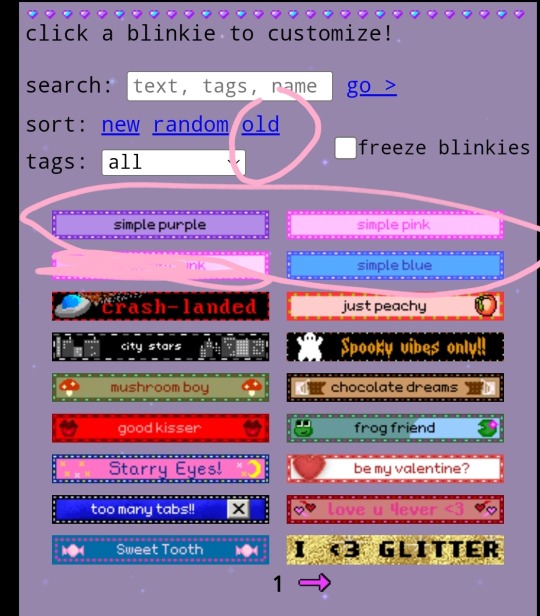
EXPLAINING HOW I MAKE BLINKIES :3
like these guys


websites / apps: blinkies.cafe , ibis paint x , ezgif.com !
STEP ONE !! go to blinkies.cafe and select a blinkie. i reccomend going to old and selecting one of the very simple ones !! DO NOT SELECT THE GRADIENT ONE YOU WILL SUFFER
STEP TWO !! click on it btw. anyways, since spaces won't work, put " " !! it will register !! this is also how to make videos on yt title-less i think... anyways, choose the biggest size
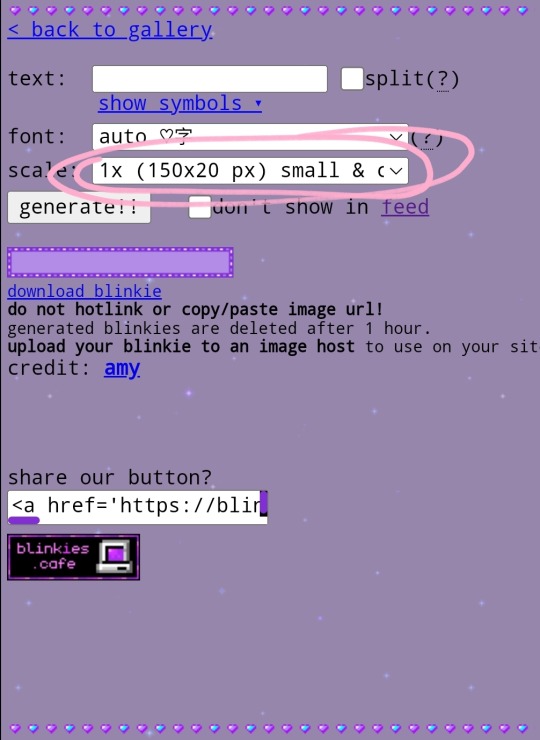
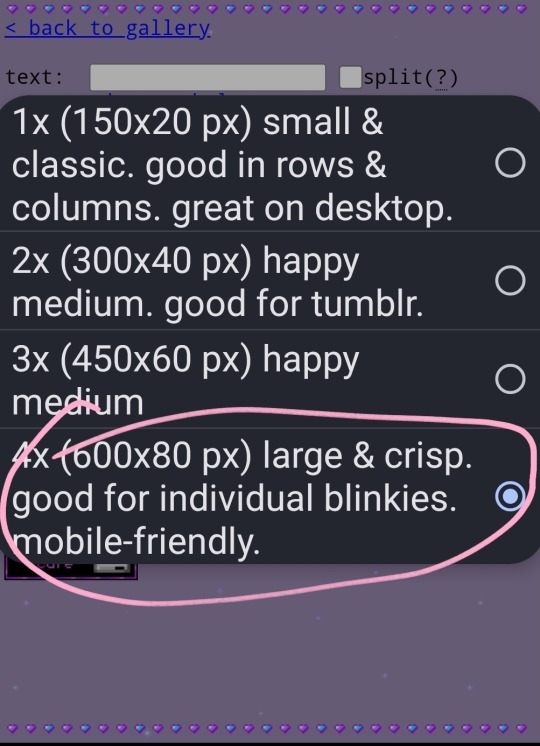
then click generate and download the blinkie!!
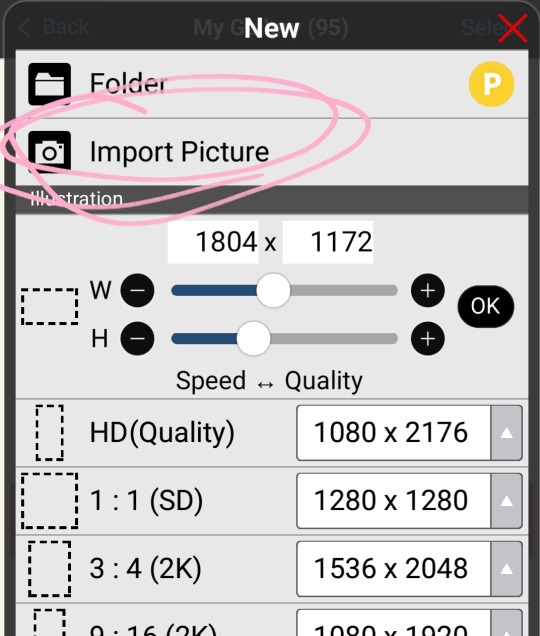
STEP THREE !! import into ibis paint !!
now i reccomend putting a reference of whatever character in your ref window. won't explain that, look it up.
STEP FOUR !! choose colors and recolor with bucket tool on 0
wow, look at that !!
STEP FIVE !! import a transparent image of your character and put the text of your choice.
heres the font i use !!
advice for choosing colors of the text: make the body the color of the blinkies border and the outside the brightest light !!
STEP FIVE AND A HALF !! this is optional, but i make a very small border around the text. duplicate layer and bring it on top, make all other layers invisible, alpha lock, make it the color of the border, turn off alpha lock, use bucket tool on expand 0.5 or 1 and tap a few times on the blob, turn other layers back on, put the duplicate under the original thing and merge so it's a small border. it's very subtle but i like it.
see the difference?


STEP SIX !! download it, then flip ONLY THE BLINKIE LAYER horizontal and vertical then save again

if you want another set of words, add them now!!
STEP SEVEN !! go to ezgif.com and imput them
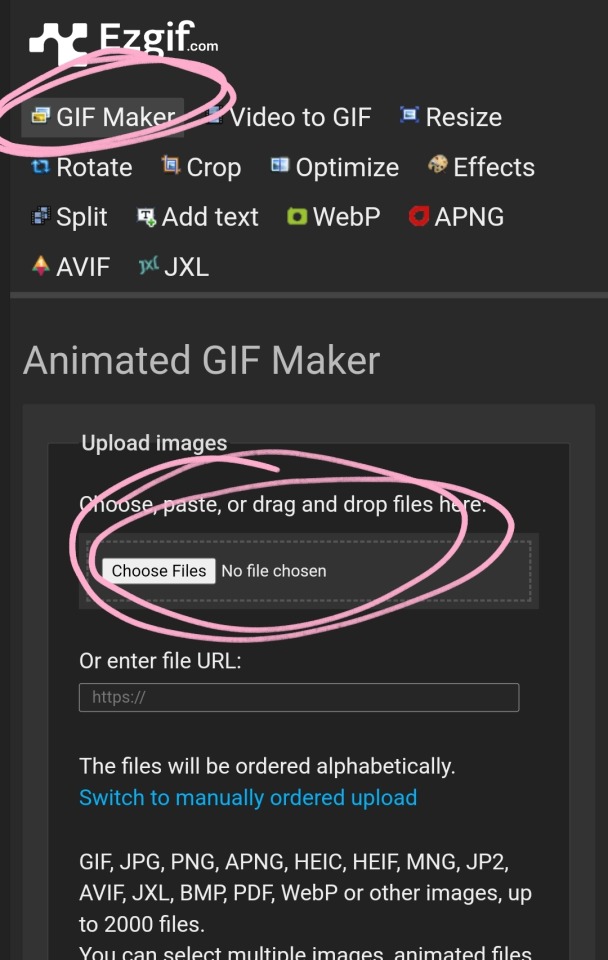
the click upload files. then click make a gif :3

the end (≡・x・≡)
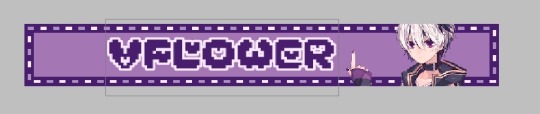
#🧁 sweet shenanigans#jiraiblr#vflower#blinkie#blinkie tutorial#web graphics#web resources#blinkies#tutorial
157 notes
·
View notes
Text


pokedoll 60x60 pixels. f2u no credit needed 👍👍👍
#⏜͡︵ㅤׅㅤׄㅤmınᧉ ㅤ⸸#pixel#pixels#small pixels#web graphics#rentry#rentry resources#(?) im not sure if this could be used for a rentry but yeah#pokemon#fennekin#sprigatito#scorbunny#snorlax#lapras#mimikyu#rowlet#popplio#zeraora#thank you so much togamicchi for the pixel tutorial :3333 <3
460 notes
·
View notes
Text

I couldn't fit the tutorial on a reply lmao, here's a full post explaining my process :]]
STAMP TUTORIAL (TF2 edition, but works for everything)
99% of the process is done on the website ezgif. Ezgif carries the stamp-making process lmao
1. Get your GIF
Tenor: Ok place to grab your GIFs. Average quality of the GIFs is good enough, and looks ok when resized to the size of the stamp. You'll find like 1 normal GIF every 4 buff characters GIF tho.
GIPHY: Average quality of the GIF is better (I don't think the web compresses the GIFs that are uploaded)… If you find what you're looking for. You'll have to SCROLL before finding what you're looking for because there are always non-related GIFs on the top of your searches or the same GIF multiple times, it's crazy.
makeagif: You will find cool GIFs, but the quality is pretty low (I think the web itself compresses the GIFs a lot). It looks bad even when resized down. And it has a watermark, which I recommend cropping because it's not even visible when resized, it just looks like a gray blob on the corner.
Google: Best option by far, quality is pretty good and the ratio of “things I was looking for/things I actually find” is SLIGHTLY in favor of “things I was looking for” (and most of “things I actually find” are just the characters rotating, not NSFW, so that's only a nice change from Tenor). You won't have to scroll much to see different and interesting GIFs. JUST REMEMBER TO FILTER BY GIFS.

You search whatever > Images > Tools > Type > GIF
Make it on your own: Aka, you download your video, go to ezgif's “Video to GIF” (then you can crop it, CUT IT. THIS IS IMPORTANT, YOU DON'T NEED TO GO ANYWHERE ELSE TO CUT YOUR CLIP, YOU CAN DO IT ON EZGIF ITSELF). Ok, I lied, it wasn't Google, this is the best oftion by far. You get exactly what you want, the best quality if you don't compress it much until after the GIF has been resized into the size of a stamp… It's just super time-consuming, and you'll have to spend like an entire hour just watching a video to find the clips.
OK, I HAVE MY GIF NOW
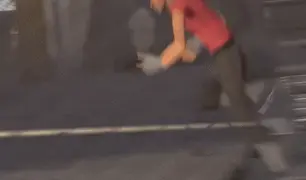
Hehe, his legs go pipupipu
2. Resize
Go to ezgif, this is where the fun begins (if you weren't on ezgif already). You download your GIF, or copy the link and insert it, or you'll have it there if you made it yourself.
A STAMP MAKES 99px × 56px
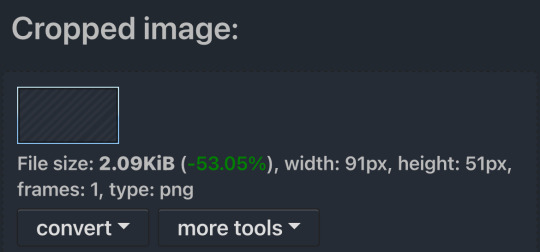
THE INNER PART OF THE STAMP MAKES 91px × 47px
I RECOMMEND MAKING YOUR GIF 92px × 48px
BTW, THESE MEASURES ARE FOR THE TEMPLATE I'LL GIVE YOU LATER. If you use another template, just go to an image editor and see what the inner size of the stamp is.
So, you set your GIF's width to 92px.

Then crop it, so your height is 48px.

Or you can resize it so it's directly 92px × 48px, but the crop will be in the center, and SOMETIMES YOU DON'T WANT THAT.
For example:

It's a vertical GIF whose area of interest is not in the center, so if we resize it directly-

oops-
ANYWAY
Once you have your GIF resized:
IMPORTANT: BEFORE THE NEXT STEP, REMEMBER TO CONVERT TO GIF IF THE FILE YOU'RE WORKING ON ISN'T A GIF ALREADY
Sometimes you'll be working with a webp without even noticing (EW, I hate webp) and transparencies don't work particularly well with that extension.
3. Overlay

Click on this icon.
Ok, now that that's fixed:

Extend the size of the canvas.

Select your template and Upload image!

This is the template, btw.

Then move the overlay around until it contains the GIF nicely, or just set Left to 43, Top to 20 and Generate image! (I have these numbers memorized, it saves you like 20 seconds lmao)
Also, again, these numbers work on MY template, if you use another one, you'll have to figure it out yourself.
4. Crop

THIS OPTION IS A TIME-SAVER FR
5. Optimize (optional, highly recommend)

I always set my optimization method to Lossy GIF and level 10 because I find that there is no quality loss, and the file size might drop by 30%-70% (actually crazy). These percentages don't change much in higher compressions, even though you'll start seeing a drop in quality around level 35 of compression (the default).
6. Save

YIPPE!!! Your stamp is done :D
You can save it and look at it and place it on your profile or website.


Here it is btw, in case someone wanted it :]] The Sniper GIF but correctly cropped and made into a stamp as well.
Now do that another… eleven times, and you'll have a stamp pack to make into a Tumblr post... Oof TT
There's no website that lets you make stamps faster lmao (I wish)
@sir-broken-bones (I'm @ them so they actually see it, I made this tutorial for them after all lol)
#team fortress 2#tf2#tf2 scout#tf2 sniper#stamps#da stamps#tutorial#graphics#old graphics#neocities#old web graphics#old web
177 notes
·
View notes
Text
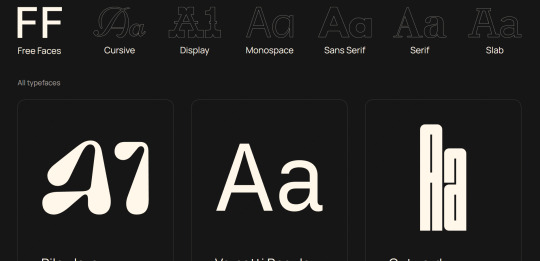
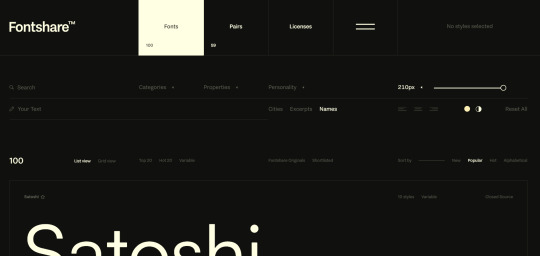
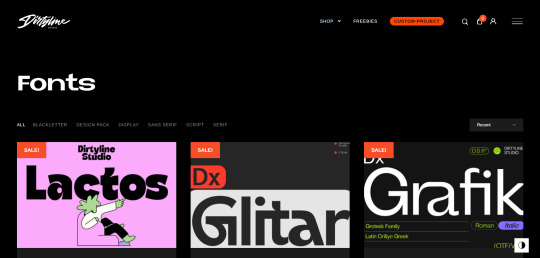
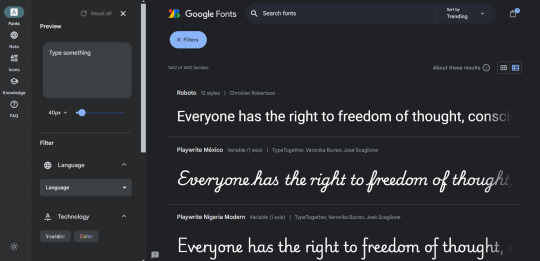
RESOURCES FOR FONTS
KernClub
FREEFACES
FontShare
DirtyLineStudio
FontsGoogle
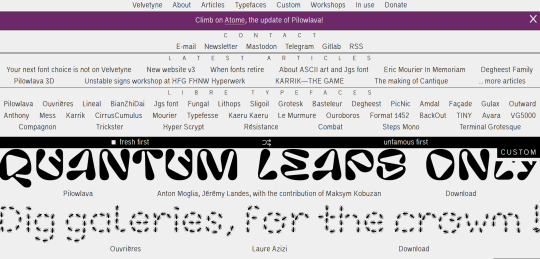
Velvetyne.FR
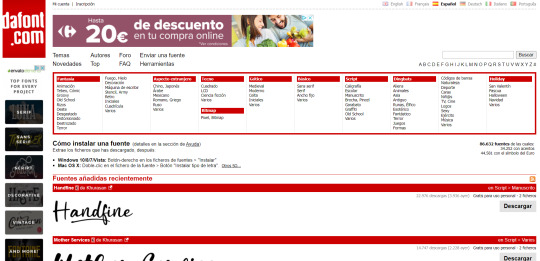
Dafont
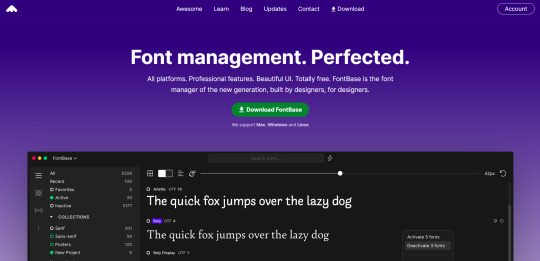
FONTBA.SE
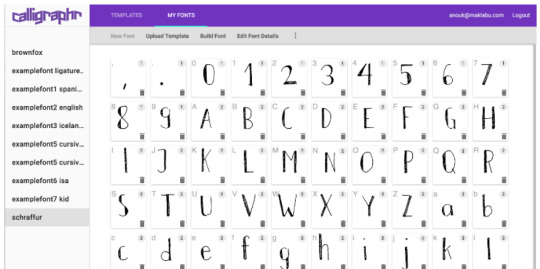
CALLIGRAPHR (to create your own fonts)
ADOBE FONTS
#reference#tutorial#art#art reference#concept art#illustration#artist#resources#web#websites#design#designer#fonts#font#typography
4K notes
·
View notes
Text

🧡 Tuesday Tips #2 🧡
What Are RSS and Atom Feeds?
The Small Web movement is about reclaiming personal control over the internet, moving away from the corporate, ad-driven platforms that dominate the online space today. One of the biggest advantages of using RSS or Atom is that you can follow nearly any type of content from all over the web—blogs, news websites, YouTube channels, podcasts, even academic journals! As long as the site provides an RSS or Atom feed (which many still do), you can add it to your reader and automatically get updates when new content is published. You have full control over the flow of information, making it possible to keep up with your favorite creators and websites without being tracked or bombarded by irrelevant content suggestions (Facebook, I’m looking at you).
RSS and Atom feeds are a perfect fit for curating personal content feeds in this movement. You can even follow your friends across the small web as well! It’s like having your own personal news feed of all your friends, except there’s no corporation deciding when, how, or if you’ll even see their posts. You curate your own personalized feed, and using either RSS or Atom ensures that no algorithms can ever manipulate what you see.
So what exactly are RSS and Atom feeds? Both RSS and Atom are web feed formats used to publish updates from websites. They allow you to subscribe to blogs, news sites, podcasts, or any site with frequent updates so you can get all the latest content in one place, typically through an RSS reader.
RSS (Really Simple Syndication): One of the oldest and most popular formats for delivering content updates to users. Websites publish RSS feeds in XML format, which feed readers then display for you.
Atom: A more recent alternative to RSS, designed to address some limitations of the original RSS format. Atom feeds use XML like RSS but have a different structure and were developed to offer more features and flexibility.
Both formats serve the same purpose: they help you get content updates automatically.
Can Your RSS Reader Read Atom Feeds?
The good news is that most modern RSS readers support both RSS and Atom formats. This means you don’t have to worry about whether a website offers an RSS or Atom feed—most readers will be able to handle both seamlessly.

RSS & Atom Feeds vs. Big Tech Social Media News Feeds
Most social media platforms do not display posts in chronological order. Instead, they use algorithms to determine what content to show you based on your behavior—what you click on, like, or share. These algorithms analyze vast amounts of data and prioritize content that’s most likely to keep you engaged for as long as possible. This manipulation works to increase user engagement and, ultimately, profit for these companies, but it also has a profound impact on what we see and believe. Here are a few examples:
Echo Chambers and Polarization Algorithms tend to show us more of what we already like and agree with. Over time, this creates echo chambers—digital spaces where we are surrounded by similar viewpoints. When people only see content that aligns with their own opinions, it reinforces their beliefs and prevents exposure to different perspectives. This phenomenon can fuel political polarization, as users become more entrenched in their viewpoints, leading to heightened social division.
Amplification of Emotional and Sensational Content Algorithms are designed to promote content that triggers emotional responses, particularly outrage or fear, as these emotions tend to generate more engagement. This is why sensationalized news and emotionally charged political content often appear at the top of feeds. For example, Facebook’s own internal studies, revealed in the 2021 Facebook Papers, showed that its algorithm was amplifying divisive, angry content because it kept users engaged longer. This is particularly harmful when it comes to false narratives, as these stories are more likely to be shared when they evoke strong emotional reactions, leading to widespread public deception.
Surveillance and Data Harvesting Another corrupt aspect of Big Tech’s manipulation is the way these companies harvest vast amounts of user data to further refine their algorithms and maximize ad revenue. Companies track every click, scroll, and interaction to build a detailed profile of each user. This information is sold to advertisers or used to tailor the content in your news feed to keep you hooked. Beyond mere advertising, this data can be used for more insidious purposes, such as political manipulation. More broadly, Big Tech can shape the course of social movements by giving disproportionate visibility to certain voices or downranking others. This power can be used both to promote grassroots campaigns, but also to suppress dissenting voices.
Surveillance Capitalism This term describes how Big Tech companies monetize personal data by surveilling users and creating predictive models of human behavior. By using data harvested from news feed interactions, tech companies can sell detailed user profiles to advertisers, who use these insights to target individuals with precision ads. This economic model, built on constant surveillance, makes it nearly impossible for users to avoid being tracked online. Surveillance capitalism turns user behavior into a commodity, violating privacy in the pursuit of profit. Worse yet, this behavior-modifying system can be used to influence not just what we buy, but how we think and act.
The “Filter Bubble” Effect The term “filter bubble,” refers to the personalization algorithms used by Big Tech to show you only content that aligns with your previous preferences. This isolation of information creates a self-reinforcing loop where users are insulated from viewpoints that challenge their assumptions. This leads to a distorted reality in which everything we see online confirms our existing beliefs, regardless of whether those beliefs are factual. For instance, someone interested in a certain political ideology will be fed more and more content supporting that viewpoint, while dissenting or critical information is filtered out, creating an illusion that everyone shares the same perspective.
RSS & Atom feeds offer a stark contrast to Big Tech news feeds in several key ways:
No algorithms.
No tracking.
No targeting.
No data harvesting.
No distractions.
You’re in full control the content you consume without external corporate influences and manipulation.
RSS and Atom feeds allow you to escape the grasp of these algorithms, trackers, data harvesting, as well as corporate and political agendas. When you use an RSS reader, no one is tracking what you’re reading or recommending content to you based on targeting you and your activity. You can browse in peace, knowing you’re not being manipulated by a hidden algorithm. Using RSS and Atom feeds gives you complete control over the content you consume. Instead of relying on a platform to decide what’s relevant or interesting to you, RSS and Atom empower you to curate your own digital experience. Isn’t that great? You can subscribe to as many or as few feeds as you like, organize them into categories, and stay informed on your own terms to the content and people that matter to you most.
TIP: As you subscribe to multiple RSS feeds, organization becomes key. Most RSS readers allow you to categorize feeds, grouping them by topic or priority. For example, you might have separate folders for news, tech blogs, personal interest websites, or even specific topics like web development. Organizing your feeds ensures that you never miss important updates while keeping your content stream manageable.
...........................................................................
Choose Your RSS Feed Reader
Browser Extensions:
If you’re looking for a list of user-friendly, privacy-focused, fully free and actively updated open-source RSS feed readers for (primarily) Firefox and Chrome-based browsers, you’ve come to the right place. Let’s dive right in! ........................................................................... FEEDBRO Feedbro is an RSS feed reader that is compatible with both Firefox and Chrome browsers. It offers a user-friendly interface and has features such as feed filtering, sorting, and a built-in search engine. > Get it for Firefox > Get it for Chrome > Get it on Microsoft Edge ........................................................................... SMART RSS Smart RSS allows you to follow new posts on your favorite websites exposing RSS and Atom feeds in a three pane view, providing background loading of new articles and allowing you to organize sources into folders. > Get it for Firefox > Get it for Chrome ...........................................................................
Android & IOS Apps:
Mobile apps are notorious for tracking and harvesting user data, possibly even moreso than pc given the modern smart phone’s ability to record audio, video, and keep track of your location in real time. Here is a list of free, open source, privacy-focused RSS feed reader apps for both Android and iOS so you can enjoy your favorite RSS feeds on the go. ........................................................................... FEEDER Feeder is a fully free/libre feed reader. It supports all common feed formats, including JSONFeed. It doesn’t track you. It doesn’t require any setup. It doesn’t even need you to create an account! Just setup your feeds, or import them from your old reader via OPML, then get on with syncing and reading. > Get Feeder on Google Play (Android) > Get Feeder on F-Droid (Android) ........................................................................... Flym News Reader While no longer being updated, Flym News Reader is still an excellent news reader for Android. Flym News Reader is a simple, modern, totally free (no ads) and opensource project which keeps you inform by fetching your websites/blogs and displaying them in a mobile-optimized way. > Get Flym on Google Play (Android) > Get Flym on F-Droid (Android) ........................................................................... Fiery Feeds Fiery Feeds is a powerful and highly customisable feed reader and read-it-later client that syncs with most services. It features article view modes, feed management, flexible layouts, smart views, color themes, and more! While I wasn’t able to uncover if it was open source, the developer does have a good privacy-respecting policy here. It’s one of the better alternatives for IOS. > Get Fiery Feeds for IOS ...........................................................................
Other PC Software:
So, it looks like you’re on the hunt for the perfect RSS feed reader. Luckily, there are a ton of great open-source options out there that are user-friendly, privacy-focused, free, and actively updated. Let’s dive in! ........................................................................... QuiteRSS First up, we have QuiteRSS. This RSS feed reader is available for Windows, Mac, and Linux, making it a great option for those who use multiple operating systems. The interface is simple and intuitive, with a clean layout that’s easy to navigate. To add a new feed, simply click on the “Add Feed” button and enter the URL of the feed you want to subscribe to. You can learn more about their features here. Pros: • QuiteRSS is lightweight and doesn’t use up a lot of system resources. • Available for multiple operating systems. (Windows, Mac, and Linux) Cons: • Some users have reported issues with syncing across devices. > Download QuiteRSS ........................................................................... FEEDREADER For those who want a simple, no-frills RSS feed reader, there’s FeedReader. This reader is available for Windows and Linux. The interface is clean and easy to use, with a basic layout that won’t overwhelm users with too many options. Pros: • FeedReader has a built-in browser, making it easy to view articles without leaving the app. • Available for multiple operating systems. (Windows and Linux) Cons: • Some users have reported issues with syncing across devices. > Download FeedReader ........................................................................... Tiny Tiny RSS Another great option for those who want a privacy-focused RSS feed reader is Tiny Tiny RSS. This reader is self-hosted, which means you’ll need to have your own server to run it on. However, this also means that you have complete control over your data and can ensure your privacy. Adding a new feed is as simple as clicking on the “Add Feed” button and entering the URL. Pros: • Tiny Tiny RSS supports plugins, allowing you to customize it to your needs. Cons: • Setting up a self-hosted RSS feed reader can be daunting for users who are inexperienced with self-hosting their own servers. Best avoid Tiny Tiny RSS if you are unfamiliar with this process. > Tiny Tiny RSS Installation Guide ........................................................................... Feedly Last but not least, we have Feedly. This RSS feed reader is available for Android, iOS, and web, with a paid version available for those who want even more features. Feedly is known for its clean, modern interface that’s easy to navigate. Pros: • Feedly integrates with a ton of other apps and services, making it easy to save articles to read later or share them on social media. Cons: • Some users have reported issues with the free version being limited in features. > Sign Up For Feedly ...........................................................................
Getting RSS feed URLS
In order to subscribe to a website’s RSS feed and add it to your feed reader, you will first need to get the RSS URL (aka link or web address) to the feed you want to follow.There are a few ways to do this, so if you’re totally new to RSS, let’s start with the easiest way first.
First, you’ll need to know what website or blog you want to subscribe to. If you’re not sure, try searching for it in Google.
Once you’re on the website or blog, look for the orange RSS feed icon. It looks like this: Sometimes it’s located in the top right corner of the page, or at the bottom of the page.
Click on the RSS feed icon. This will take you to a page with a lot of code on it. Don’t worry, you don’t need to understand any of this code!
Look at the address bar in your web browser. This is the URL for the RSS feed. Copy this URL.
If you’ve chosen an RSS Reader from the options previously discussed, open your RSS reader. This could be an app on your smartphone, browser extension, or a website or program on your computer.
In your RSS reader, look for an option to add a new feed. This option might be called “Add Subscription” or “Add Feed”.
Paste the URL for the RSS feed into the field provided in your RSS reader. Then click “Add” or “Subscribe”.
Congratulations! You’ve successfully subscribed to an RSS feed. Now you’ll be able to read new articles from this website or blog as soon as they’re published.
What if there is no RSS feed icon on a website I want to follow?
Unfortunately while many websites are RSS compatible, many websites do not offer RSS directly as a subscription option (ex. Youtube, certain blogs, etc). In this circumstance, it gets a little trickier if you aren’t very tech savvy. Have no fear! I will walk you through the process.
The easiest solution if you are not tech savvy is to use the Get RSS Feed URL extension below for your web browser. This extension will automatically grab the rss feed of the page you’re currently visiting (if it has an rss feed available), and then you can simply copy and paste it from your extension to your reader if your RSS reader is on PC. If your RSS reader is on mobile, however, you can use your PC to create a list of all the feed URLs you want to follow, email the list to yourself, and the copy/paste each url from your list by accessing your email from mobile.
> Get RSS Feed URL for Firefox > Get RSS Feed URL for Chrome
If you are a bit tech savvy, however, there is a more straightforward way to get RSS URLs that is much faster.
If you are on PC, check the source code: If you can’t find the RSS icon, you can check the source code of the website. Right-click on the website and select “View Page Source” or “Inspect Element”. Look for the “” tag with the type “application/rss+xml”. The URL located in the “href” attribute is the RSS feed link. Copy and paste the link into your preferred RSS reader.
One other thing you can try is experiment with adding each of the following to the end of the URL of the page you want to follow: /feed /feeds /rss /rss.xml /atom.xml .atom In most cases where an RSS feed is available, adding one of these options to the end of the page’s URL will bring up the page’s RSS feed. This method is hit or miss but always worth a try as it often comes up successful.
For example, if you wanted to subscribe to my status updates (located at https://status.cafe/users/thecozycat) you would add https://status.cafe/users/thecozycat.atom into your RSS feed reader. Or if you wanted to subscribe to my website activity feed (located at https://smallweb.thecozy.cat/activity/feed/), you would add https://smallweb.thecozy.cat/activity/feed/ into your Feeder app. Now, you’re probably asking, how do you know which one is the right one? You will need to test each of the six options in your web browser by trying each of those options at the end of the url you want to add to your feed. If it’s wrong, you’ll likely get an error page. If it’s right, you’ll see a page with code on it OR your browser may prompt you to download the feed file. That’s how you know you’ve got the right one.

How to Make a Website RSS-Compatible
If you’re building a website and want to offer RSS feeds:
WordPress: By default, WordPress generates an RSS feed at yourwebsite.com/feed. You can also customize it using plugins like RSS Post Importer.
Static Site Generators: Static site generators like Jekyll and Hugo support RSS feeds natively, allowing you to create them automatically as part of your build process.
Custom Websites: For custom sites that don’t offer automatic RSS or Atom feed functionality, you can create an XML file that complies with RSS or Atom feed standards, which includes your website’s content updates.
The RSS feed is essentially an XML file that contains metadata about your website’s posts and updates. This file is structured in a specific format so that RSS readers can interpret and display your content.
Example of a Basic RSS File:
<?xml version="1.0" encoding="UTF-8" ?> <rss version="2.0"> <channel> <title>Your Website Title</title> <link>https://yourwebsite.com</link> <description>Your website description goes here</description> <item> <title>Post 1 Title</title> <link>https://yourwebsite.com/post-1</link> <description>Summary of your post goes here</description> <pubDate>Mon, 01 Jan 2024 12:00:00 GMT</pubDate> </item> <!-- Repeat the <item> block for each new post --> </channel> </rss>
Step 2: Modify the Feed for Your Site
Replace the text between the , , and tags with details about your site.
Each tag within the block corresponds to a single blog post or update. Add or remove these as necessary.
Ensure the reflects the correct format as shown in the example above.
Step 3: Save and Upload Once you’ve created your RSS file, save it as rss.xml (or another name you prefer, like feed.xml). Upload this file to the root directory of your website so that users can access it via https://yourwebsite.com/rss.xml.

Making Your Feed Public
Now that your RSS file is live, you’ll want to let people know they can subscribe. Add a link to the RSS feed URL on your website, usually in the header, sidebar, or footer (though, you can place it wherever you like). Many sites use an orange RSS icon, which is easily recognizable.
Keep It Updated
Since this is a static feed, you’ll need to manually add new posts to the RSS file as you create them. Simply update the feed XML file with new <item> blocks whenever you add new content, then re-upload the file.

Big Tech and RSS/Atom Restrictions
RSS and Atom are incredibly useful, though you’re probably wondering: if it’s so great, why aren’t more people aware and using it? Personally, and this is just my belief due to what I’ve witnessed with big tech censorship over the years; it is by design that it is not often spoken about anymore. Big tech (and/or “big brother”) companies want everyone to stay stuck in their own information silos, because it is much easier for them to control narratives and the information you consume there, as well as have more control over your private data for their own capitalistic gains. Those who control the flow of information ultimately control the minds of the masses, and that control can make them a heck of a lot of money.
Unfortunately it is big tech websites such as Facebook that block people’s access to retrieving RSS/Atom feeds from their websites, because if they allowed you access to their RSS/Atom feeds from outside of their website, then they wouldn’t be able to contain you to their controlled information silos, track you, or profit off of you using your data. It’s against their own best interests to allow you this freedom, as keeping you contained to their walled gardens allows them to continue their data harvesting monopolies. So that is probably the biggest downside about RSS and Atom feeds when it comes to big tech social media platforms, is that if the information you care most about comes from your loved ones whom are contained within the walled gardens of these big tech social platforms, you won’t be able to retrieve RSS/Atom to create feeds from your friends there.
Not all social platforms are like this, however. You will just have to experiment with retrieving the feeds from different platforms to discover which big tech platforms have blocked RSS access and which ones haven’t.
Conclusion
I think that covers all the bases! The reason for this article, while a bit lengthy, I feel it is important to teach those who may not be tech-savvy in simple terms that are easy to understand. I think it is important for everyone to know how to use RSS and Atom, and create their own feeds independent of Big Tech social media platforms. Especially in this day and age where Big Tech has so much control and grasp on the information we consume and our private data is so heavily abused, there has never been a better time to start using RSS and Atom feeds. Aside from TheCozy.Cat being my own personal space, I also want it to double as my personal contribution to helping folks break free from their relationships with corrupt corporate entities.
If you have any questions or suggestions to add to this post that could make it even better, leave me a comment letting me know! As I receive feedback, I will make adjustments accordingly to make this article as simple as possible for those who are just getting started with RSS/Atom feeds.
And as always, if you found all this information useful, be sure to bookmark this page so you can easily find it again. Consider sharing it with your friends as well so they too can discover how to curate their own RSS and Atom feeds!
This post was originally shared from my small web blog here.
-----------------------------------------------------------------
Love the Small Web movement? Want to see it thrive? Help us grow on social media! Every follow, like, comment, and share helps spread the word and brings more people into the movement. 💜 Your support makes a difference—thank you!
➔ FB Page: https://www.facebook.com/thesmallweb/ ➔ FB Group: https://www.facebook.com/groups/thesmallweb/ ➔ X: https://x.com/SmallWebLove/ ➔ Tumblr: https://www.tumblr.com/communities/thesmallweb/ ➔ Website: https://smallweb.thecozy.cat/
#rss#rss feed#tutorial#masterpost#small web#indie web#webcore#web revival#neocities#old web#early internet#internetcore#2000s web#decentralizedfuture#decentralized social media#decentralization#blog#old internet
59 notes
·
View notes
Text
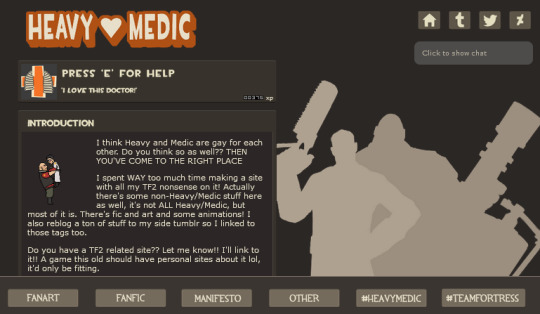
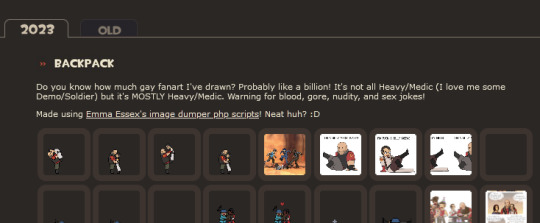
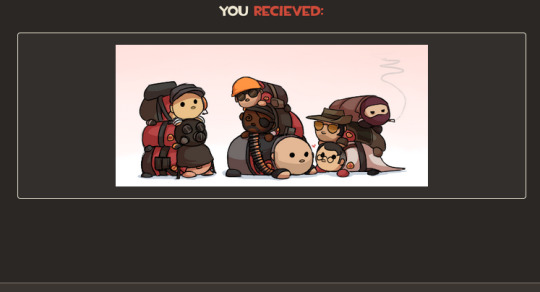

So I spent the last couple days making a HeavyMedic fansite and it is the most ELABORATE SITE I'VE EVER MADE and I'm so unbearably proud of it, it looks SO COOL!! Especially the Fictracker page!! It's even responsive!! You have no idea how long it took to get everything looking right and spacing it and everything. I've never made a site that looks this fancy before! I'M SO PROUD OF IT LOOK AT IT!! LOOK AT IT!!! LOOK AT IIIITTTT plz


Also made some link buttons! Still don't really have an official name for the site as it is but WHATEVER maybe I'll decide on one later. YOU CAN USE THESE TO LINK TO IT FROM YOUR OWN SITE you have your own site right, you should make onneeee (here are some resources if you don't know how) and if it's a TF2 site TELL ME AND I WILL LINK BACK TO IT
[patreon]
#team fortress 2#heavymedic#red oktoberfest#there are some easter eggs on the site too :3#try and find them!!#i just have this open in a tab and keep looking at it and being like man this is so cool#web design can be so tedious and yet so rewarding#have a new appreciation for how slick the tf2 ui is#absolute goldmine for site design#lol comparing this to the huntersmoker site or ghost tutorial that's as barebones as you can get
725 notes
·
View notes
Text

꧁★꧂
#makeup#makeup tutorial#hair#dyed hair#glambot#myspace#rave fashion#raver#cybergoth#flickr#oldweb#old web#2009
201 notes
·
View notes
Note
if its alright how did you make the status boxes? i.e. in your gyaru/gyaruo post >_<


Hiya!! My BF created the IMVU status boxes / buttons from that post so he made a tutorial detailing how to make them as well!
📖Programs/sites used ☆ Clip studio paint & ezgif (I use ibispaint to make shiny buttons and the process is the same).
⭐️This button doesn’t include these but if you want to have a symbol (like the star from the gyaru buttons) at the front of yours, find an imvu status button (one from the game to use as a base) that includes the symbol you want and in the backgrounds layer recolor it along with the background so they are the same color.
Here’s the finished button from the video with a few alternate color schemes if anyone would like to use them!


I hope this helps & let me know if you have any questions! ♪

#web graphics#graphics#tutorial#rentry graphics#rentry#imvu#buttons#blinkies#old web#pixels#graphic resources#oceancore#starfish#imvu status#gif#decor#shiny buttons#ᯓ ᡣ𐭩🐚asks
429 notes
·
View notes
Note
can i have a blinkie tenplate? thanks xx


here u go ^^
#my graphics#blinkie tutorial#blinkie template#neocities#blog resources#carrd resources#carrd stuff#carrd graphics#rentry graphics#rentry resources#rentry graphic#blinkies#web graphics#graphics#old web graphics#web graphic
88 notes
·
View notes
Text

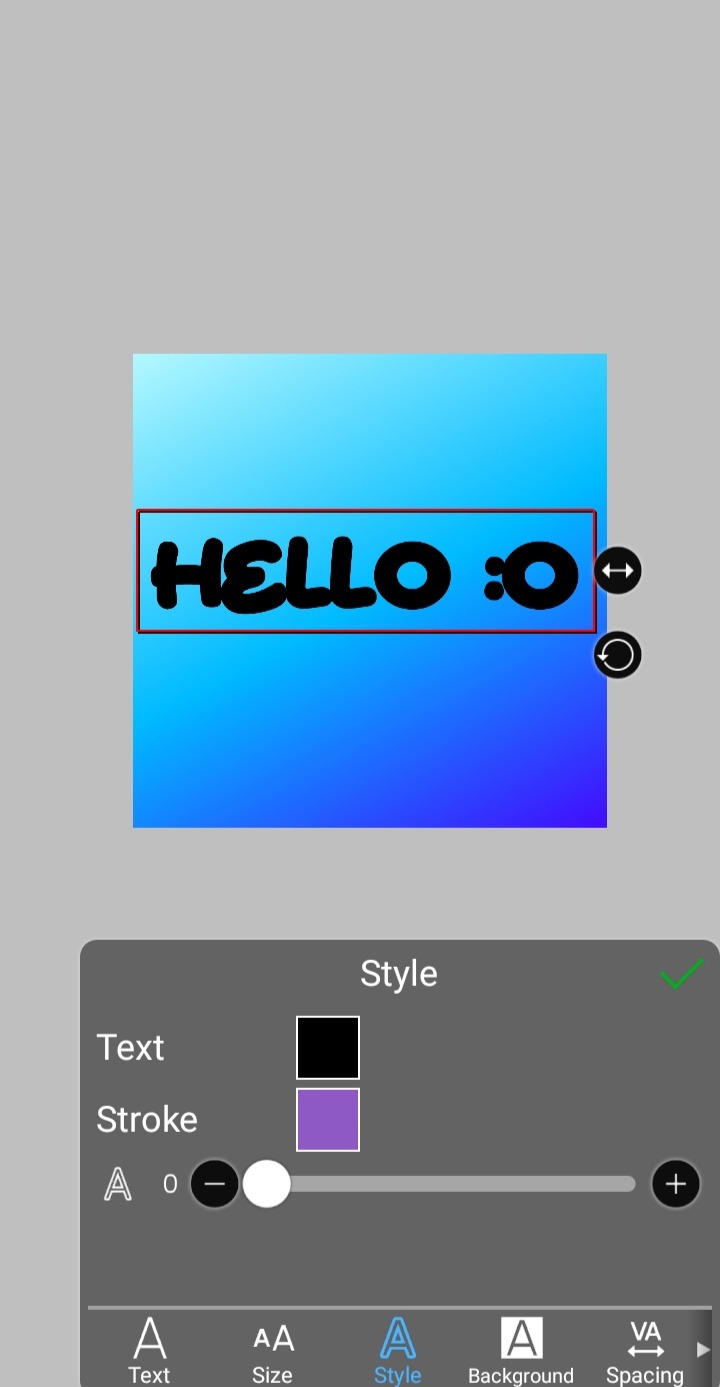
jelly text tutorial! (works with shapes as well)
what you need: ibis paint x, premium or free version doesnt matter
step 1: color
yes we're starting with color! I highly suggest using multiple colors for a prettier finish. I prefer parallel gradiation but as long as its blurry anything should look nice. pick analogous colors for the best result.

step 2: write the text or draw/import the shape.
as it says! if youre drawing it, make sure its on a new layer above the gradient! I suggest using rounder, bubblier fonts/shapes, one of my favorites to use is starborn on all uppercase. the color you use does not matter as it will be the background color in a short bit
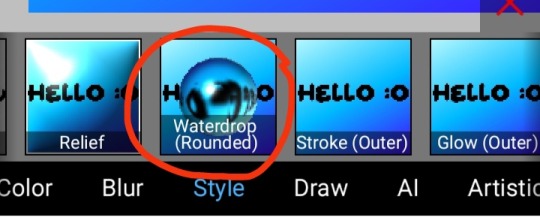
step 3, the jellificationing
this little friend called "water drop (rounded)" in effects under style is your best pal. its here to help you and make the process so much easier.
so just press it and fiddle around with it until you're happy with the result.
step 4 (optional): refracting
to help it make look more 'realistic' I tend to add another layer of the water drop. to do this I simply copy the previous one and go do the same effect on the top layer
step 4.5: tips
you need to make sure the refractive index for the second one is turned down all the way, or itll look weird, streaky, etc. make sure the highlight and highlight size settings are lower than the previous time you used this effect. and make sure the little sun symbol (the light source) is on the edge of the opposite direction of the previous time you used the effect. so if the first layer of jelliness had the light source coming from the top right, the second layer should br on the very edge of the bottom left.

step 5: begone, background
yeah, we're done with that, this will also be the big reveal of the final image

and then you just crop to fit and then save as a transparent
bam! heres the final thing!

I dont know how good I am at explaining but I hope this helped! if youre confused dont be afraid to ask!
#🌫️ i know what you dread | creations#rentry#rentry inspo#rentry resources#editing resources#editing#editing tutorial#edit tutorial#edit resources#rentry decor#rentry graphics#carrd resources#web graphics
592 notes
·
View notes