#wordpress error log
Explore tagged Tumblr posts
Visit Tumblr Blog
Explore Tumblr blogs with no restrictions, modern design and the best experience.
Last Seen Tumblr Blogs


Fun Fact
Forty percent of Tumblr users are between the ages of 18 to 25.
Text
i can't even like. be too terribly mad about this because 1) it made me laugh, and 2) i Do Not expect the common layman to understand the intricacies of wordpress theme building but. a coworker reached out to me all frazzled bc he bricked a site, like so bad i couldn't log in to poke around. keep in mind he's a comms coordinator. no coding experience. so i looked in the error logs to see how he possibly could have bricked it when he really only interacts with the site on a content level (most coding he does is light html with inline css which can make a site look ugly if it's wrong, but it can't brick it) and GOOD GOD MAN he said he'd edited functions.php using a script he found on stack overflow. i AUDIBLY laughed. boy. that's a load-bearing coconut!! STAY AWAY FROM HER
#bug.txt#didn't even have to do any hand-slapping he was SO embarrassed lmao poor guy#i can't even be mad. absolute zero stress response from me. particularly because i wasn't the one who bricked it HAHA
4 notes
·
View notes
Text
omg, kidteen has saved my life! after I told her that I was missing the external harddrive, she immediately went looking for it and found it!! I have my things back!
I also re-started modding for Stardew Valley, but I cannot log into Nexusmods because of the stupid Cloudflare thingy on my Win10 computer. It works on Win11, with the same addons mind you, but my Win10 pc just gets an error. I tried all I could except another browser (might try Brave though).
So I can neither update all the mods I worked on, nor comment to people that I am currently working on the updates, nor download the updates for the mods I already have. -.- Which is not too bad because my Stardew Valley is still 1.6.8 (as I didn't get it via Steam I cannot update it, because the only way to update it is via Steam, which I can't have on my Win10 computer due to lack of- basically everything. Don't laugh. It's a mini-pc and I'm glad that it's capable to run Stardew 🙈).
So the current SMAPI tells me it doesn't work because the lowest it will work with is 1.6.14 and I can't get the new Content Patcher - or any other mod.
Good thing I mostly used my own, except for the Better Shipping Bin and the NPC on Map ones.
I might look for an alternative to upload my mods, because why not. Maybe make a wordpress for it. Which won't help with the update issue, but at least I could have a place where people can download my mods besides the Nexus.
I cannot express how i hate all those "are you a bot" mechanisms. It disrupts my experience so much. There's so many times software has told me that I had clicked too fast to be human. -.-
#krisrisk#itblr#Stardew Valley modding#Nexusmod login issue#fuck cloudflare#although it might prevent nexusmods from being scraped#so that might be a win
2 notes
·
View notes
Text
WEEK NINE - 1/48 Kitty Hawk AH-1Z “Viper” – The Build is Finished!!
After nine weeks this commission build is complete! I spent the week adding the final open panels and installing the main rotor. I also had to remount the weapons due to another error in the kit instructions. You can see all the photos and details from start to finish in my build log at: 1/48 AH-1Z Viper Next up is another commission build. This one I will be using a Revell/Monogram 1/48 AV-8B…

View On WordPress
10 notes
·
View notes
Text
What Defines a Truly Secure Website?

In today's digital landscape, a website is often the front door to a business, a personal brand, or vital information. With cyber threats constantly evolving, the question isn't just "Is my website online?" but "Is my website truly secure?" Many users look for the padlock icon and "HTTPS" in the address bar and breathe a sigh of relief. While essential, that green lock is merely the beginning of true website security.
HTTPS signifies that the connection between your browser and the website's server is encrypted, protecting data in transit. But a truly secure website goes far beyond encrypting data between two points. It's built on a multi-layered defense strategy, addressing vulnerabilities at every level of the application and infrastructure.
So, what are the characteristics of a website you can genuinely trust?
1. Always Uses HTTPS with Strong TLS Protocols
This is the foundational layer, but its proper implementation is crucial.
What it is: HTTPS (Hypertext Transfer Protocol Secure) encrypts the communication between the user's browser and the website's server using TLS (Transport Layer Security, the modern successor to SSL) certificates.
Why it's essential: It prevents eavesdropping, tampering, and message forgery, ensuring that the data you send (like login credentials or credit card numbers) and receive remains private and integral. Modern browsers flag sites without HTTPS as "Not Secure." Crucially, truly secure websites use strong, up-to-date TLS versions (like TLS 1.2 or 1.3), not older, vulnerable ones.
2. Robust Input Validation and Output Encoding
These are fundamental defenses against some of the most common web attacks.
Input Validation: Every piece of data a user submits (forms, search queries, URLs) must be strictly validated before the server processes it. This prevents attackers from injecting malicious code (e.g., SQL Injection, Command Injection) that could manipulate the database or execute commands on the server.
Output Encoding: Any data retrieved from a database or user input that is displayed back on the website must be properly encoded. This prevents Cross-Site Scripting (XSS) attacks, where malicious scripts could be executed in a user's browser, stealing cookies or defacing the site.
3. Strong Authentication & Authorization Mechanisms
Security starts with knowing who is accessing your site and what they are allowed to do.
Authentication:
Strong Password Policies: Enforce minimum length, complexity (mix of characters), and disallow common or previously breached passwords.
Multi-Factor Authentication (MFA): Offer and ideally mandate MFA for all user accounts, especially administrative ones. This adds a critical layer of security beyond just a password.
Secure Session Management: Use secure, short-lived session tokens, implement proper session timeouts, and regenerate session IDs upon privilege escalation to prevent session hijacking.
Authorization: Implement the principle of least privilege. Users should only have access to the data and functionalities strictly necessary for their role. Role-Based Access Control (RBAC) is key here, ensuring a customer can't access admin features, for instance.
4. Regular Security Updates & Patch Management
Software is complex, and vulnerabilities are constantly discovered.
Continuous Patching: The website's underlying operating system, web server software (e.g., Apache, Nginx), Content Management System (CMS) like WordPress or Drupal, plugins, themes, and all third-party libraries must be kept up-to-date with the latest security patches.
Why it's essential: Unpatched vulnerabilities are a common entry point for attackers. A truly secure website has a rigorous system for identifying and applying updates swiftly.
5. Comprehensive Error Handling & Logging
What happens when things go wrong, or suspicious activity occurs?
Generic Error Messages: Error messages should be generic and not reveal sensitive system information (e.g., database connection strings, file paths, or specific error codes) that attackers could use to map your system.
Robust Logging: All security-relevant events – failed login attempts, successful logins, administrative actions, suspicious requests, and critical system events – should be logged. These logs should be stored securely, centrally, and monitored in real-time by a Security Information and Event Management (SIEM) system for anomalies and potential attacks.
6. Secure Development Practices (SDL)
Security isn't an afterthought; it's built in from the ground up.
Security by Design: A truly secure website is born from a development process where security considerations are embedded at every stage – from initial design and architecture to coding, testing, and deployment. This is known as a Secure Development Lifecycle (SDL).
Code Reviews & Testing: Regular security code reviews, static application security testing (SAST), and dynamic application security testing (DAST) are performed to identify and fix vulnerabilities before the code ever goes live.
7. Web Application Firewall (WAF)
A WAF acts as a protective shield for your website.
What it does: It monitors and filters HTTP traffic between the web application and the internet. It can detect and block common web-based attacks (like SQL injection, XSS, DDoS, brute-force attempts) before they reach the application.
Why it helps: It provides an additional layer of defense, especially useful for mitigating new threats before a patch is available or for protecting against known vulnerabilities.
8. Data Encryption at Rest
While HTTPS encrypts data in transit, data stored on servers needs protection too.
Sensitive Data Encryption: Databases, file systems, and backups containing sensitive user information (passwords, PII, financial data) should be encrypted.
Why it's important: Even if an attacker manages to breach your server and access the underlying storage, the data remains unreadable without the encryption key, significantly mitigating the impact of a breach.
9. Regular Security Audits & Penetration Testing
Proactive testing is key to finding weaknesses before malicious actors do.
Vulnerability Scanning: Automated tools scan your website for known vulnerabilities.
Penetration Testing (Pen-Testing): Ethical hackers simulate real-world attacks to exploit vulnerabilities, test your defenses, and assess your overall security posture. These should be conducted regularly and after significant changes to the website.
10. Clear Privacy Policy & Data Handling Transparency
While not a strictly technical security feature, transparency builds user trust and demonstrates responsible data stewardship.
What it includes: A clear, easily accessible privacy policy explaining what data is collected, why it's collected, how it's used, how it's protected, and who it's shared with.
Why it matters: It shows commitment to data security and respects user privacy, a fundamental aspect of a truly trustworthy online presence.
A truly secure website is not a static state achieved by checking a few boxes. It's a continuous commitment to vigilance, proactive measures, and a deep understanding that security is an ongoing process involving people, technology, and robust policies. In a world where digital trust is paramount, building and maintaining a genuinely secure website is an investment that pays dividends in reputation, customer loyalty, and business continuity.
0 notes
Text
Warrior Funnels Review: Done-for-You Funnel System

Introduction
Hey there! I’m Rimon, and today I want to share something that helped me a lot — it’s called Warrior Funnels. Let’s see the full Warrior Funnels Review. Making money online sounds fun and easy. But when you actually try it? It gets hard fast.
You need to write content. Build funnels. Set up emails. And somehow get traffic. It’s confusing. And for most people, it feels like hitting a wall. That’s what happened to me.
Every “simple system” I tried left me more stuck. But then I found WarriorFunnelsBundle — and everything changed. It’s not a tool you have to build from scratch. It’s already done for you.
No writing, Not designing, No tech skills needed
You just log in, follow a few steps, and your funnel is live — with traffic, giveaways, and emails already built in.
Think of it like this: You get a full online business, ready to go, without the stress. Even if you’ve never made a sale before, this could help you finally start.
I’ll break it all down in this post — what it does, how it works, and why it might be perfect for you.
What Is Warrior Funnels?
WarriorFunnelsBundle is an all-in-one system that helps you earn money online with affiliate marketing. It gives you three complete websites that collect leads, provide free AI tools, promote affiliate offers, and send follow-up emails for 30+ days — all on autopilot.
You simply connect your WarriorPlus account, share your link, and let Funnels do the rest. It’s easy, fast, and perfect for beginners.
It’s simple, fast, and made for people who want results without the stress.
Warrior Funnels Review — About the Author
Cindy isn’t just another face in the world of online business. She’s a true Australian mom who started with no special skills, no technical background, and no shortcuts — just a dream and a ton of determination.
When Cindy started her journey over 18 years ago, building an online business meant doing it all herself. Writing long sales pages, learning to code, and hoping something would work. It wasn’t easy — but she didn’t give up.
After much trial and error, Cindy built a small website in 2009 that was making over $1 million in revenue in a year.
But here’s what really changed her life: It wasn’t the money. It was her first sale.
That one little moment showed her that it was possible — and it lit a fire inside her.
Now, Cindy’s biggest passion is helping others experience the same excitement. That’s why he created WarriorFunnels — a made-for-you affiliate funnel system designed for complete beginners.
How Warrior Funnels Works (Even If You’re Totally New)
Starting with WarriorFunnels is as easy as sending a text. You don’t need tech skills. You don’t need marketing experience. Just follow three simple steps, and you’re in business.
Step#1: Plug In Your WarriorPlus ID First, you’ll connect your free WarriorPlus account. Don’t worry — it’s super quick. Just grab your affiliate ID and paste it into your dashboard. Never used WarriorPlus before? No problem. You’ll get clear, step-by-step instructions to set it up in minutes. It’s free and beginner-friendly.
Step#2: Get Instant Approval to Promote Next, choose one of the products inside your bundle and request approval. Here’s the best part: you’re working with the product creators directly, so you don’t have to wait long. Most people get approved in less than a day.
Once you’re in, you can promote all 9 offers already loaded into your funnel. Each customer could earn you up to $330.80. Yes, really.
Step#3: Start Getting Visitors Now let’s turn on the traffic. Inside your dashboard, you’ll find a full set of promo tools waiting for you:
Eye-catching banners, Plug-and-play social posts, Viral share tools to spread the word, Even a WordPress plugin (for bloggers)
You don’t need to write a single word or design anything. Just copy, paste, and promote — and watch the clicks come in.
Warrior Funnels changes all of that.
It’s not just another funnel tool. It’s your whole business — already built and ready to go. You don’t have to make a website. You don’t need to write a bunch of emails. And you definitely don’t need to know tech stuff.
You just turn it on, share your link, and let the system handle the heavy lifting.
That means it sends follow-up emails for you. Delivers the free tools. Even helps bring in traffic. For example, when someone signs up for a free AI tool through your link, you earn money if they upgrade. Easy.
You also get weekly live training, fresh tools, and tips from people who’ve already done this. So even if you only have a few minutes a day, you’re still moving forward.
If you’re just starting out — or if you’ve tried and failed before — this bundle could finally be the thing that clicks. No more guessing. No more grinding. Just a real chance to grow something that works.
Get More Info>>>>
#WarriorFunnelsReview#WarriorFunnels#WarriorFunnelsBonus#WarriorFunnelsoto#WarriorFunnelsupsells#WarriorFunnelspricing#AffiliateMarketing#MakeMoneyOnline#OnlineBusiness#PassiveIncome#DFYFunnels#WorkFromHome#FunnelBuilder
0 notes
Text
Is Pokemon TCG pocket down? How to check the status of the server - Destructoid
Photo via Pokemon | Posted: June 12, 2025 03:42 pm If you are trying to log in Pokemon TCG Jeep But getting errors, it is possible that you are not alone, because the servers are currently in the pickle. Due to the nature of the game, you should always be online to enjoy the content. Online connection is a must, whether you are playing against robots, escalating against random strangers, or…

View On WordPress
0 notes
Text
Top SEO Plugins for WordPress You Should Use in 2025

Having a WordPress website is only the beginning—getting it discovered by search engines is where the real magic happens. With millions of websites competing for attention, optimizing your site for SEO is essential.
Thankfully, WordPress has an incredible range of SEO plugins that simplify the process. Whether you’re a blogger, business owner, or eCommerce seller, these tools help you rank higher, drive more traffic, and grow faster.
In this guide, we’ll cover the top SEO plugins for WordPress in 2025, how they work, and why you should consider installing them. For professional setup, a trusted WordPress Development Company in Udaipur can help you implement them flawlessly.
1. Yoast SEO
Best for: All-purpose SEO, beginners to advanced users
Yoast remains one of the most popular SEO plugins for WordPress, and in 2025, it’s better than ever.
Key Features:
On-page SEO suggestions
Keyword optimization
XML sitemap generation
Meta title and description editor
Breadcrumbs and canonical URLs
Yoast offers a real-time SEO analysis tool that guides you as you create content—perfect for bloggers and marketers alike.
Free version available | Premium from $99/year
2. Rank Math
Best for: Power users and those who want more control
Rank Math is quickly becoming the new favorite in the WordPress SEO world—and for good reason.
What sets it apart:
Track up to 5 keywords per post (even in the free version)
Built-in schema markup
Advanced redirection manager
Integration with Google Search Console & Analytics
Local SEO module for businesses
It’s powerful, lightweight, and packed with features that were previously only available in paid plugins.
Free version available | Pro from $59/year
3. All in One SEO (AIOSEO)
Best for: Business websites, eCommerce stores
AIOSEO is another long-standing plugin trusted by millions. Its latest 2025 update focuses on performance and deeper WooCommerce integration.
Highlights:
TruSEO on-page analysis
Smart XML sitemaps
SEO audit checklist
WooCommerce SEO tools
Social media integration with Open Graph and Twitter Cards
The setup wizard makes it easy to configure in minutes—ideal for beginners.
Free version available | Pro from $49/year
4. SEOPress
Best for: Developers and agencies
SEOPress is a clean, lightweight, and privacy-focused SEO plugin that rivals both Yoast and Rank Math in power.
Notable features:
Content analysis and optimization tips
Schema (structured data) integration
Broken link checker
Google Analytics and Tag Manager integration
White-label options for agencies
If you want an ad-free, developer-friendly SEO solution, SEOPress is a strong contender.
Free version available | Pro from $49/year
5. Schema Pro
Best for: Advanced schema markup
Structured data helps Google understand your content better—and plugins like Schema Pro make it easy to implement.
What it does:
Adds rich snippets (reviews, FAQs, recipes, etc.)
Supports 20+ schema types
Integrates with Elementor and other builders
Visual interface for mapping schema fields
Great for businesses and blogs that want to improve click-through rates with rich results.
Premium only | Starts at $79/year
6. Redirection
Best for: Managing 301 redirects and broken links
SEO isn’t just about adding keywords—it’s also about maintaining clean URLs. Redirection helps manage URL changes and avoid 404 errors.
Key Features:
Easy setup of 301 redirects
Monitor 404 errors
Conditional redirects based on login status, browser, or referrer
Full logging for troubleshooting
It’s a lightweight plugin that plays a big role in preserving SEO equity during site migrations or redesigns.
Completely free
7. WP Rocket (for Speed & Core Web Vitals)
Best for: SEO through performance optimization
While not an SEO plugin in the traditional sense, WP Rocket improves page speed and Core Web Vitals, both of which are crucial for SEO rankings in 2025.
Features:
Page and browser caching
File minification
Lazy loading for images
CDN support
Database cleanup
Google ranks fast sites higher, so using WP Rocket in tandem with SEO plugins is a smart strategy.
Premium only | Starts at $59/year
8. Broken Link Checker
Best for: Fixing dead links that hurt SEO
Broken links frustrate users and damage your SEO. This plugin scans your posts, pages, and comments to detect and fix them.
Benefits:
Scans internal and external links
Notifies you via dashboard and email
Offers quick editing interface
It’s a must-have for content-heavy websites and blogs.
Free version available
9. Google Site Kit
Best for: Integrating Google’s tools into WordPress
Google Site Kit brings essential SEO tools right into your WordPress dashboard.
What it connects:
Google Search Console
Google Analytics
PageSpeed Insights
Google AdSense
Tag Manager
Use it to monitor traffic, performance, and crawl errors in one place—no code needed.
Completely free
10. Squirrly SEO
Best for: Beginners and content creators
Squirrly is like having an SEO coach inside your dashboard. It’s ideal for non-technical users who want real-time tips as they write.
Features:
SEO Live Assistant with suggestions
Keyword research built-in
Weekly site audits
Competitor analysis
Google SERP checker
It also helps you optimize content for both users and search engines.
Free version available | Pro from $71.99/year
Final Thoughts
If you’re using WordPress, you already have a head start in SEO—but the right plugins can elevate your site’s performance, visibility, and traffic dramatically.
0 notes
Text
How to Update PHP in WordPress: A Complete Guide for a Faster, More Secure Site Updating PHP in WordPress may not sound like that newsworthy topic, but absolutely must be done. PHP is a language that runs your WordPress site: older versions can slow you down while keeping security vulnerabilities open and create incompatibilities with other plugins and themes. This guide will cover everything you need to consider when working on PHP in WordPress from start to finish in a safe and effective way.

What is PHP, and Why Should One Update It? Let's first look at some basics before moving to the steps:
PHP is a programming language through which WordPress is built. All those themes, plugins, and core files, basically, run on PHP.
By virtue of being newly released, PHP versions are better and are fast and supported.
Time and again, an outdated PHP leads to slow load times, errors on your site, and the like: security vulnerabilities. Updating PHP doesn't update your tangible WordPress content; it just upgrades the software that makes it all work more efficiently. Check Your Current PHP Version First thing first, make sure you identify which PHP version your site is running currently. How to check:
Through WordPress Dashboard: From WordPress, go to the admin panel, Tools > Site Health > Info, and under the Server section, you will see your PHP version.
Via Hosting Control Panel: Most hosting providers usually display their version of PHP directly in their dashboard (cPanel, Plesk, or other custom panels). Why Updating PHP Is Vital for Your WordPress Site Still wondering why you should care? Here is what updating PHP will do for you: Better Performance:
Newer versions of PHP, such as PHP 8.2 onwards, are considerably faster. What this means is fastidious speed in loading your pages, better SEO, and happier visitors. Improved Security: Each new release fixes security holes found in older versions. Therefore, if one is running an old version, he is basically leaving his site open to known exploits. Plugin and Theme Compatibility: Since many plugin and theme developers support only the newer versions of PHP, by not upgrading, you may find some features aren't working properly. Future-Proofing: In the best experience possible, WordPress recommends using the most recent PHP version supported by your hosting provider. Back Up Your Site Before doing anything, make sure to back up your website. Sometimes, updating PHP can cause incompatibility issues with older plugins or themes, so it is wise to have a full backup so you can restore your site just in case. How to Back Up:
Do a backup using a plugin like UpdraftPlus or Duplicator, for both your files and the database.
Or, check your host service for backup options-Most hosts offer daily backups you can restore from. Test PHP Compatibility You now need to check for compatibility between your current setup—plugins, theme, custom codes—and the newer PHP version. Tools for Testing:
PHP Compatibility Checker: Plugins capacity like "PHP Compatibility Checker" from WP Engine scan your site for all potential issues really going to arise prior to your update of php.
Staging Environment: If your host does provide a staging environment, give the site a try with the new PHP version in that environment. Update PHP Version via Hosting Panel
Now, the main event: updating PHP itself. How you do this update depends on your hosting provider, but most will follow a similar process. For cPanel Users:
Log in to your cPanel dashboard.
Look for "Select PHP Version" or "MultiPHP Manager".
Select a domain you want to update.
Choose the latest PHP version available (say, PHP 8.2).
Save or apply the change. For Managed WordPress Websites: Managed hosts such as Kinsta, WP Engine, SiteGround, or Bluehost typically offer a PHP update option with a single click in their hosting dashboard. Please, refer to your hosting documentation for more information. Test Your Website Thoroughly After completing a PHP update, go ahead and check your website thoroughly:
Frontend Pages: See that everything looks as intended and loads fine.
Admin Dashboard: Go through menus, publish a post, update plugins, etc., with the system, and watch out for any errors.
Contact forms, eCommerce pages, and more: Check if vital functions still work correctly. If anything appears wrong, do not worry! Most errors after updating PHP usually arise because of outdated plugins or themes. Fixing Common Problems Here are a few simple steps in case you find yourself with a problem: White Screen of Death/500 Error:
Revert from a backup, or downgrade your PHP from the hosting panel.
Find out which plugin/theme is causing the conflict. Plugin or Theme Issues:
Ensure all plugins and themes are up-to-date.
If issues remain, then replace outdated plugins with counterparts that are currently being maintained. Keywords for Smooth PHP Update Update Everything First: Before you go on upgrading from a version, it pays to have your WordPress core, themes, and plugins updated. Use Staging: One big reason to test in a staging environment is to root out anything that might break before you push the changes to production. Reach Out to Your Host: There are times when you might not want to upgrade PHP yourself; many hosting providers will assist you with this. Reasons to Keep Your PHP Updated: By now, you realize that upgrading PHP is not simply a tick-box action but rather an enormous improvement of performance and security. Let's do a brief recap:
Speed: These are important criteria involving loading time and should result in the increasing of SEO ranking and user experience.
Security: Known security disclosures are patched so your site remains secure.
Compatibility: Ensures that your plugins and themes, If any, keep functioning well.
Peace of Mind: Having an up-to-date PHP version guarantees that your site is fundamentally sound. Take Charge of Your Site's Health! Upgrading PHP in WordPress is one of those things that might sound overly intimidating for some but is really one of the most simple changes with weighty impacts on the security and performance of your website. Ideally, performing compatibility testing on the codebase of your website, backing up the website, testing it, and updating through the hosting control panel are setting the website up for success in the long run.

This really is the ideal time. Back up the website, do the compatibility testing, and update our PHP. Would you ever get stuck or are unsure, please ask for support from the hosting provider support team! Ready to take your website to the next level? Partner with a trusted Digital Marketing Company in Chandigarh to boost your WordPress site’s reach and drive real results!
0 notes
Text
Top 15 Features to Include in a Classified Listing Website Development

A classified website is much more than a digital bulletin board - it's a full-fledged online marketplace connecting buyers and sellers across multiple categories such as real estate, jobs, electronics, beauty, clothing, forums, and more. These platforms offer users a space to post, browse, and respond to listings, but to thrive in today’s competitive market, a classified site must be designed with intelligent, user-centric features.
This blog outlines 15 essential features that serve as the foundation for building a robust, scalable, and SEO-friendly classified website or mobile app. These features are not only helpful in improving user experience but also essential for the long-term growth and success of your platform.
The user interface (UI) must be intuitive, enabling users to navigate listings and post ads easily. A responsive design ensures that your site looks and works well across all devices, particularly on mobile phones, which generate most traffic today. Advanced search and filtering help users find what they need quickly, enhancing satisfaction and usability.
Real-time notifications keep users informed of new messages or listing activity, boosting engagement. Profile personalization gives users control over their dashboard and preferences, increasing repeat visits and trust. Secure and smooth payment integration with popular gateways like PayPal or Stripe is vital for user trust and safe transactions.
Scalability and security are core technical pillars. From SSL encryption to fraud protection and routine security updates, these measures ensure a safe and reliable platform. User management tools with defined roles help admins monitor content and prevent misuse, while automated inventory and order management reduce manual tasks for sellers, preventing errors like overselling.
Analytics and reporting tools allow administrators to track user behavior and platform performance. These insights are invaluable for optimizing features and marketing strategies. Social media integration helps users share listings and log in via platforms like Facebook and Google, broadening reach and simplifying access.
Customer support and live chat enhance user confidence by providing immediate help when needed. To improve visibility, SEO optimization through clean URLs, meta tags, and quality content ensures better search engine rankings. Loyalty programs reward users for activity, encouraging long-term engagement. Lastly, recommendation algorithms personalize listings based on user behavior, keeping users browsing longer.
In conclusion, while many platforms offer free ad posting, successful classified websites differentiate themselves with a powerful mix of features. By integrating user-friendly interfaces, strong search capabilities, secure payment systems, social tools, and personalized recommendations, developers can create a platform that is not only functional but also trusted and loved by its community. Leveraging platforms like WordPress or SocialEngine with listing plugins can streamline this process and deliver professional results quickly.
For more details, kindly visit:- Top 15 Features to Include in a Classified Listing Website Development
Mail us at [email protected] to schedule a quote and become the owner of your SocialEngine Website.
#Classified Listing Website#Listing Management Software#Classified Listing Plugin#classified website development#Classified App Development#Classified Listing site
0 notes
Text
How APIs Power Modern Websites – A Think To Share IT Solutions Insight
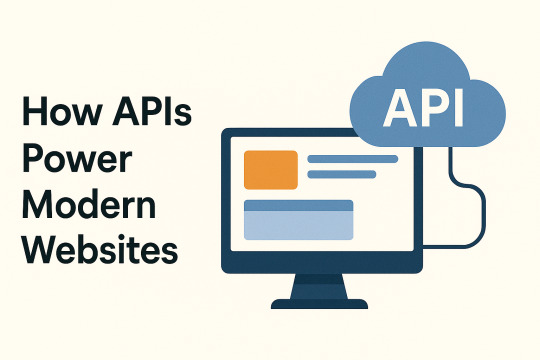
Modern websites are no longer static brochures. They’re dynamic, data-driven platforms that interact with various services in real time. At the core of this interactivity lies a powerful and essential component: the API, or Application Programming Interface.
At Think To Share IT Solutions, we engineer websites that aren’t just visually compelling—they’re functionally superior, thanks to smart API integrations that enable real-time performance, seamless communication, and scalable features.
What is an API?
An API (Application Programming Interface) is a set of protocols and tools that allow software applications to communicate with each other. In web development, APIs act as bridges that connect your website to external or internal systems.
Instead of building every function from scratch, APIs allow developers to integrate existing, trusted services—making websites faster, more reliable, and more scalable.
How APIs Power Modern Websites
1. Dynamic Content Delivery
APIs allow websites to fetch and display real-time content from a database or CMS without refreshing the page. This improves performance and user experience.
Example: A blog or news portal pulling updated articles from a headless CMS like Strapi or WordPress via REST API.
2. User Authentication and Access Control
APIs handle secure user logins and permission-based access. Authentication services like Google OAuth or Auth0 rely entirely on API interactions.
Example: "Sign in with Google" uses an external API to verify the user's identity securely without storing sensitive data on your own servers.
3. Third-Party Service Integrations
APIs enable seamless integration with third-party platforms for added functionality.
Function
API Providers
Payments
Stripe, Razorpay, PayPal
Email Marketing
Mailchimp, SendGrid
Analytics
Google Analytics, Matomo
Customer Support
Zendesk, Intercom
Maps & Location
Google Maps API, Mapbox
These integrations enhance user experience without compromising performance or security.
4. Real-Time Features and Updates
Websites that support live chat, order tracking, or instant notifications use APIs to communicate with real-time databases.
Example: Firebase and Pusher APIs power real-time chat interfaces or live delivery status updates.
5. E-Commerce Functionality
Modern eCommerce websites rely on APIs to handle inventory updates, pricing changes, order processing, and shipping logistics.
What We Implement:
Cart management via REST or GraphQL APIs
Real-time pricing and availability updates
Shipment tracking using courier APIs (e.g., Delhivery, Shiprocket)
6. Headless Architecture
In a headless setup, APIs serve as the communication layer between the front-end and the back-end. This decoupling improves performance and allows for more flexible design and delivery across platforms.
Example: Using Next.js (for the front-end) and Strapi or Sanity (as the headless CMS), data is fetched via API endpoints and rendered statically or server-side for speed and SEO.
Benefits of API-Driven Web Development
Benefit
Explanation
Faster Deployment
Plug in pre-built services instead of coding everything from scratch
Scalability
Easily add new features or services without overhauling your system
Enhanced Security
Offload sensitive functions like payments to trusted platforms
Maintainability
Isolated services reduce complexity and ease troubleshooting
Cross-Platform
Share the same API with mobile apps, web apps, and IoT devices
How Think To Share Implements API-Driven Architecture
Our development process incorporates API planning from the very beginning:
Architecture Planning: Identify necessary APIs based on business goals
Security: Implement OAuth2, JWT tokens, and rate limiting for secure access
Performance: Use caching mechanisms (Redis, CDN) to reduce API load
Monitoring: Set up logging, error tracking, and fallback handling for resilience
Documentation: Provide detailed API docs using tools like Swagger or Postman
Final Thoughts: APIs Are the Backbone of Modern Websites
APIs have evolved from technical add-ons to mission-critical infrastructure for digital platforms. Whether you're running a website, mobile app, or enterprise software, APIs allow you to build faster, scale smarter, and connect deeper with users.
At Think To Share IT Solutions, we design and develop high-performance web systems that are modular, connected, and built for long-term growth—powered by reliable, secure, and well-integrated APIs.
0 notes
Text
Simplify Data Integration: WPForms to Any API Made Easy
In today’s digital ecosystem, capturing and managing user data efficiently is more crucial than ever. Whether you're a marketer looking to automate lead management or a developer aiming to streamline workflows, integrating your contact forms with third-party applications is a must. WPForms, one of WordPress's most popular form builders, offers powerful features, and when paired with the right plugin, it can become a robust data automation tool. One such tool is the "Connect WPForm to Any API" plugin—a no-code solution that simplifies form-to-API integration.
This blog will walk you through why integrating WPForms with external APIs matters, how the plugin works, and how to set it up effectively.
Why WPForms to API Integration Matters
Modern businesses rely on a stack of tools—CRMs, email marketing platforms, payment gateways, helpdesk software, and more. Data captured via forms often needs to flow into these platforms instantly. Manual data entry is inefficient, error-prone, and counterproductive in an era of automation.
Here are a few real-world examples:
Marketing: Send lead data from a landing page to Mailchimp or HubSpot.
Sales: Route contact requests directly to Salesforce.
Support: Create helpdesk tickets from contact form submissions.
Custom Workflows: Trigger webhook-based workflows in tools like Zapier or Make.
Integrating WPForms with any REST API helps eliminate bottlenecks, ensuring data flows automatically and securely.
Introducing the "Connect WPForm to Any API" Plugin
The "Connect WPForm to Any API" plugin is a powerful and user-friendly solution for WordPress users who want to connect WPForms with virtually any third-party service. Whether you want to push form data to a CRM, an internal database, or a marketing tool, this plugin makes the process seamless.
Key Features:
No-Code Interface: Easily configure API connections without writing a single line of code.
Custom Headers: Add authentication or custom headers like Bearer tokens or API keys.
Flexible Payload: Customize the JSON structure and map form fields accordingly.
Support for REST APIs: Works with most RESTful services, including Zapier, Mailchimp, Salesforce, and more.
Multiple API Actions: Supports triggering multiple APIs from a single form submission.
Advanced Debugging: Helps identify and fix integration issues quickly.
How It Works: A Step-by-Step Guide
Step 1: Install and Activate the Plugin
Navigate to your WordPress dashboard, go to Plugins > Add New, and search for "Connect WPForm to Any API." Install and activate it.
Step 2: Create or Edit a WPForm
Using WPForms, either create a new form or edit an existing one. Make sure all the necessary fields (name, email, message, etc.) are included.
Step 3: Configure API Integration
Once your form is ready, go to the form settings tab and click on "Send to API". Here, you’ll configure the following:
API Endpoint URL: The destination where form data will be sent.
HTTP Method: Typically POST, but GET, PUT, and DELETE are also supported.
Headers: Include any required authentication (e.g., Authorization: Bearer token123).
Payload Structure: Map WPForm fields to JSON keys. Use smart tags to dynamically populate field values.
Example JSON Payload:
{
"name": "{field_id="1"}",
"email": "{field_id="2"}",
"message": "{field_id="3"}"
}
Step 4: Test Your Integration
Submit a test entry through the WPForm. Use the plugin’s debug console to verify if the API call was successful. If errors occur, the debug logs will provide helpful insights.
Common Use Cases
1. Connect to a CRM (e.g., Salesforce, HubSpot)
Automatically add leads to your CRM when someone submits a contact or signup form.
2. Trigger Webhooks (e.g., Zapier, Make)
Send WPForm data to automation platforms and connect with thousands of apps.
3. Create Support Tickets
Forward customer queries to helpdesk software like Freshdesk or Zendesk.
4. Store Data in External Databases
Push form submissions to custom back-end systems for advanced reporting or workflows.
Tips for Effective Integration
Use Smart Tags: WPForms offers dynamic tags (like {user_ip} or {date}) for greater flexibility.
Secure Your API: Always use HTTPS endpoints and secure tokens or keys.
Handle Errors Gracefully: Set up fallback actions or notifications if the API fails.
Test Thoroughly: Before going live, test with different inputs to ensure robustness.
SEO Benefits of Using API-Integrated Forms
From an SEO perspective, a better user experience translates to improved engagement metrics. Forms that work smoothly and provide instant feedback are more likely to be completed, thus reducing bounce rates and increasing conversions.
Additionally, API-integrated forms enable faster lead response times, which can improve your sales funnel performance and lead nurturing capabilities.
Conclusion
Integrating WPForms with external APIs doesn’t have to be a daunting task. With the "Connect WPForm to Any API" plugin, you can simplify your data workflows, eliminate manual processes, and connect your WordPress site to the broader digital ecosystem effortlessly.
Whether you're a solo entrepreneur, a marketer, or a developer, this plugin empowers you to automate, streamline, and scale your business processes. Say goodbye to copy-paste data entry and hello to a fully automated form pipeline.
Ready to simplify data integration on your WordPress site?Install the plugin now and start automating today!
0 notes
Text
Hybrid Website Plan: Experts Create the Core, You Keep It Dynamic

Building a website that looks professional and fits your budget is achievable with the right strategy. The hybrid approach is the perfect balance: hire a web designer to craft the essential pages that define your online presence, then manage simpler tasks like blogging and minor updates yourself. This method delivers a high-quality site while keeping costs down and giving you independence.
Let a pro design your homepage, service pages, and contact page—these are the backbone of your site. After that, you can handle content updates to keep your site fresh and engaging without paying for every change.
Why Core Pages Need a Professional
Your homepage and service pages are where visitors decide whether to stay or leave. If these pages are slow, disorganized, or don’t work well on mobile devices, you’ll lose potential customers fast. A talented web designer knows how to create pages that are engaging, intuitive, and optimized for all devices.
Even on a tight budget, cheap web design services can deliver a strong foundation. A good designer focuses on clean layouts, fast load times, and a professional look, avoiding flashy features that inflate costs. These pages are your site’s core and rarely need frequent updates, making them worth the investment.
Why You Can Manage Blogging
Once the main pages are built, you don’t need a designer for every new post or small edit. Platforms like Wix, WordPress, or Webflow are user-friendly, letting you add blog posts or update text with ease. Log in, write your content, add an image, and publish—no design skills required.
Blog posts don’t need to be visually complex. They just need to be clear, relevant, and posted consistently to keep your audience coming back. By handling these updates yourself, you save money and keep your site dynamic without constant professional help.
Errors to Avoid
When building a website, people often make one of two mistakes: trying to do it all themselves or outsourcing every single change. Going full DIY might seem cost-effective, but it often results in a site that looks amateurish, which can harm your brand’s reputation.
Conversely, paying a web designer for every small update—like adding a blog post or fixing a typo—can get costly and slow you down. You’re stuck waiting for someone else to make simple changes. The hybrid approach avoids both pitfalls: you get professional quality for the critical pages and the freedom to manage routine updates.
How to Execute the Hybrid Strategy
Start by defining your site’s core needs. Most small businesses need a homepage that reflects their brand, a service page that details their offerings, a contact page for easy communication, and a blog for regular updates. Hire a web designer to create these key pages, ensuring they’re polished and responsive.
Then, ask for a simple guide on managing content. Many designers, especially those offering cheap web design services, will provide a quick walkthrough or video showing how to add posts or edit text. You don’t need to learn advanced design—just enough to keep the site updated without breaking its structure.
Keep the design consistent. Avoid tweaking the layout every time you add new content. A steady design maintains professionalism and saves you from costly redesigns.
Budget Wisely
You don’t need an expensive designer to get a great website. Cheap web design services can create clean, functional sites if you focus on what matters: fast performance, clear navigation, and mobile compatibility. Skip extras like fancy effects that don’t add real value to your visitors.
By investing in the core pages and managing updates yourself, you cut costs and stay flexible. You can publish new content or make quick edits without extra fees or delays.
Closing Note
A great website doesn’t need to be complex or expensive. It should load fast, look professional, and clearly convey your value. Let a web designer build the critical foundation, then handle the ongoing content yourself. The hybrid approach gives you a high-quality site without the high price tag or constant reliance on others.
0 notes
Text
How To Fix the 500 Internal Server Error in WordPress (Full Guide)
Introduction
If you own or manage a WordPress website, you might have faced the dreaded 500 Internal Server Error at least once. This error is frustrating because it stops your website from loading, and it often does not tell you exactly what went wrong. You might just see a blank white page or a simple message like:
"500 Internal Server Error"
or
"The server encountered an unexpected condition that prevented it from fulfilling the request."
This error means something on your website’s server is broken, but it doesn’t say what. The good news is, this error is very common and usually easy to fix if you follow the right steps.
This guide will explain everything in simple language and help you fix this error step-by-step — whether you are new to WordPress or an experienced user. Let’s get started!
What Is the 500 Internal Server Error?
The 500 Internal Server Error is a generic server error message. It happens when your web server can’t complete your website’s request because something is wrong on the server or with your website files.
What does this error look like?
A blank white screen (sometimes called the “White Screen of Death”)
A message on the page that says "500 Internal Server Error"
A message that says “HTTP Error 500”
Your website homepage and dashboard are inaccessible
Because it is a general error, it can be caused by many different problems. This makes it hard to diagnose at first. But by checking common causes, you can find and fix the issue.
Common Causes of the 500 Internal Server Error in WordPress
Here are some of the most common reasons you might see the 500 error on your WordPress site:
Plugin or Theme Conflicts Sometimes, a WordPress plugin or theme is faulty, outdated, or incompatible with your WordPress version. This can cause server errors.
Corrupted .htaccess File The .htaccess file controls important settings for your website. If it’s broken or corrupted, it can cause the server to throw a 500 error.
Exceeding PHP Memory Limit Your website might need more server memory than allowed by default. If the PHP memory limit is too low, WordPress may crash with a 500 error.
Corrupt WordPress Core Files Sometimes, WordPress files become corrupted during updates or file transfers. This can cause errors.
Server Configuration Problems Hosting server issues or misconfigured server settings can trigger the error.
Caching Issues Problems with WordPress caching plugins or server caches may cause the site to fail loading correctly.
Incompatible Code or Customizations Custom code added to your theme or plugins might conflict and break the site.
How to Fix the 500 Internal Server Error in WordPress — Step by Step
Step 1: Backup Your Website First
Important: Before making any changes, back up your entire website. This includes your files and your database. If you have access to your WordPress dashboard, use a backup plugin like UpdraftPlus or BackupBuddy. If your dashboard is down, back up using an FTP client or your hosting file manager.
Backing up protects your data if something goes wrong during troubleshooting.
Step 2: Check for a Corrupt .htaccess File
The .htaccess file is a hidden file in your WordPress root folder. If it’s corrupted, you’ll get the 500 error.
How to fix it:
Connect to your website using an FTP client (like FileZilla) or your hosting file manager.
Locate the .htaccess file in your WordPress root folder (where wp-content and wp-admin are).
Rename it to .htaccess_backup (this disables it).
Now reload your website in your browser.
If your site loads normally, the .htaccess file was the problem.
Next:
Log into your WordPress dashboard.
Go to Settings > Permalinks.
Click Save Changes (you don’t have to change anything). This will create a fresh, new .htaccess file.
Step 3: Increase the PHP Memory Limit
If your website is running out of memory, it can crash and show a 500 error.
How to increase PHP memory:
Connect to your site with FTP.
Open the wp-config.php file in the root WordPress folder.
Add this line just before the comment that says “That’s all, stop editing!”:
phpCopy
Edit
define('WP_MEMORY_LIMIT', '256M');
Save the file and upload it back.
Reload your site. If it works now, you fixed the issue! Your site needed more memory.
Step 4: Deactivate All WordPress Plugins
Sometimes a plugin causes the error.
How to check:
Connect with FTP.
Go to /wp-content/.
Rename the plugins folder to plugins_backup. This disables all plugins at once.
Now try loading your website.
If it works, a plugin was the cause.
Rename the folder back to plugins.
Go to your WordPress admin and reactivate plugins one by one.
After activating each plugin, reload the site to find the one causing the problem.
Delete or replace the faulty plugin.
Step 5: Switch to a Default WordPress Theme
If your theme is broken or incompatible, the 500 error can appear.
How to test this:
Go to /wp-content/themes/ using FTP.
Rename your active theme’s folder (for example, add _old to the name).
WordPress will automatically use a default theme like Twenty Twenty-Four.
Reload your website.
If it works, the theme was causing the error.
Consider updating, fixing, or changing the theme.
Step 6: Re-upload Core WordPress Files
If your WordPress core files are corrupted, you can fix them by uploading fresh copies.
How to do this:
Download the latest WordPress version from wordpress.org.
Extract the zip on your computer.
Connect to your site via FTP.
Upload the /wp-admin/ and /wp-includes/ folders from the new WordPress download.
Overwrite the existing folders.
This will replace corrupted files without affecting your content or plugins.
Step 7: Check Your Server Error Logs
Server logs can help identify exactly what causes the 500 error.
Ask your hosting provider how to access error logs.
Or check logs in cPanel or your hosting control panel.
Look for lines mentioning “500 Internal Server Error” or plugin/theme errors.
If you find specific errors, it can point you to the cause.
Step 8: Contact Your Hosting Provider
If none of these steps work, the problem might be with the server.
Tell your hosting support about the issue and ask them to:
Check server error logs.
Review server settings and permissions.
Check PHP memory and limits.
Fix any server misconfigurations.
Good hosting providers will help resolve these issues quickly.
Final Tips to Prevent the 500 Internal Server Error
Keep your WordPress core, plugins, and themes updated regularly.
Avoid using poorly coded or outdated plugins/themes.
Regularly clear your WordPress cache (if using caching plugins).
Use a reliable web host with good server configuration and support.
Monitor your site’s error logs occasionally.
Backup your site regularly to avoid data loss.
Summary
The 500 Internal Server Error is one of the most common WordPress problems but also one of the easiest to fix once you know what to do.
To fix it:
Check and reset your .htaccess file.
Increase your PHP memory limit.
Disable all plugins and reactivate them one by one.
Switch to a default WordPress theme.
Re-upload fresh WordPress core files.
Review server error logs.
Contact your web host if needed.
Once fixed, stay updated and back up your site regularly to avoid future issues.
0 notes
Text
WordPress Update Problems? Here’s How to Fix Them (No Tech Skills Needed)

Keeping your WordPress website up to date is critical for security, speed, and access to new features. But let’s face it—when an update fails, it can feel like the whole site is crashing down, especially if you don’t have a technical background.
Don’t panic.
Most WordPress update errors are easy to fix with a bit of guidance. In this beginner-friendly guide, we’ll break down why updates fail and what you can do to resolve them—no developer required.
🛑 Why Do WordPress Updates Fail?
WordPress runs on a system of interconnected parts: the core platform, themes, and plugins. If one of these components doesn’t align properly during an update, things can break.
Here are some of the most common causes:
📡 Poor internet connection that interrupts the update
🔌 Conflicts between plugins
🎨 Theme incompatibility
💾 Insufficient server memory or time limits
🔐 Incorrect file and folder permissions
🧩 Corrupted or incomplete update files
The first step toward fixing any problem is understanding where it’s coming from.
🛠️ How to Fix WordPress Update Errors (Step by Step)
✅ 1. Back Up Your Site First
Before trying anything, create a full backup of your website using a plugin like UpdraftPlus or BackupBuddy. This gives you a safety net in case something goes wrong during the troubleshooting process.
✅ 2. Clear Your Cache (It Might Be That Simple)
Sometimes, your browser or caching plugin is the culprit—not the update itself.
Clear your browser cache (Ctrl+Shift+R or Command+Shift+R on most browsers)
If you use a caching plugin (like WP Super Cache or W3 Total Cache), clear your site cache too
Now try updating WordPress again.
✅ 3. Use Troubleshooting Mode to Find Plugin Conflicts
Conflicting plugins are a frequent reason for failed updates.
You can use the Health Check & Troubleshooting plugin to safely test your site:
Install and activate the plugin
Enable troubleshooting mode—this disables all plugins temporarily (just for you)
Try updating again
If it works, re-enable plugins one by one until the error returns
That last plugin activated is your likely culprit.
✅ 4. Check Your Hosting Settings
Shared hosting plans often limit memory and execution time, which can stop updates mid-process.
Ask your host:
What’s the PHP memory limit? (It should be at least 256MB)
What’s the maximum execution time? (Aim for 300 seconds)
Can they increase these limits for better stability?
Sometimes, simply switching to a better hosting plan solves everything.
✅ 5. Try a Manual WordPress Update
If automatic updates aren’t working, a manual update might do the trick.
Here’s a simple guide:
Download the latest WordPress version from WordPress.org
Unzip the files on your computer
Use FTP software like FileZilla to connect to your website
Replace the wp-admin and wp-includes folders with the new ones
Do not touch the wp-content folder (it holds your themes and plugins)
Open your site—if needed, it will ask to update the database. Just click the button
Done right, this is a safe and effective fix.
✅ 6. Adjust File Permissions (If You’re Getting Permission Errors)
WordPress needs the correct file permissions to update itself.
Use a plugin like WP File Manager or ask your hosting provider to set:
Folders to 755
Files to 644
These permissions allow WordPress to work smoothly without opening security risks.
✅ 7. Stuck in Maintenance Mode? Here’s How to Exit
Sometimes an update gets interrupted, leaving your site stuck in maintenance mode with this message:
“Briefly unavailable for scheduled maintenance. Check back in a minute.”
To fix this:
Log into your hosting account (e.g., cPanel or via FTP)
Go to the root folder of your WordPress site
Delete the file named .maintenance
Refresh your site—it should return to normal
This is one of the easiest fixes on the list.
💬 When You Should Call in the Experts
If you’ve tried everything and the update still won’t work—or if you're unsure about any step—it’s perfectly okay to ask for help.
Here’s who you can turn to:
Your web hosting support team
A WordPress specialist
Or a reliable web development company like Websenor
✅ Final Thoughts: Keep WordPress Simple with Websenor
WordPress update errors can seem intimidating, but most are fixable with a calm, step-by-step approach—even if you're not a tech expert. The key is to:
Back up first
Rule out the simple causes
Test safely before changing live settings
Know when to ask for help
If managing updates or troubleshooting problems ever feels like too much, Websenor is here to take the weight off your shoulders. Our team specializes in WordPress maintenance, bug fixing, and website performance tuning—so you can focus on growing your brand while we handle the backend.
Let Websenor be your WordPress safety net. With us, your website stays secure, updated, and stress-free.
0 notes
Text
Postcode/Address Validation nulled plugin 2.11.3
Postcode/Address Validation Nulled Plugin When it comes to streamlining the e-commerce experience, ensuring accurate postcode and address validation is crucial. The Postcode/Address Validation nulled plugin provides a simple yet effective solution to verify customer addresses at the point of checkout. This ensures smoother transactions, reduces errors, and enhances the overall user experience. Whether you're running an online store or a business that relies on accurate shipping information, this plugin is designed to help you improve efficiency and reduce costly delivery issues. Detailed Product Description The Postcode/Address Validation nulled plugin allows you to verify and correct customer addresses as they input them during the checkout process. By validating addresses in real-time, you can ensure that the data entered by users is accurate and complete. This plugin integrates seamlessly with WooCommerce and other major e-commerce platforms, offering a straightforward solution to address validation. Say goodbye to manual corrections and errors that can lead to delayed shipments and frustrated customers. With this Postcode/Address Validation nulled plugin, you can automate the address verification process. It ensures that the postcode, street name, and other essential details are correctly entered, saving both time and money. Additionally, this plugin helps prevent shipping to incorrect addresses, which could otherwise result in lost products and customer dissatisfaction. Technical Specifications Compatibility: Compatible with WooCommerce, WordPress, and most other e-commerce platforms. Supported Address Formats: Supports multiple address formats for international shipping. Real-Time Validation: Verifies addresses in real-time as users enter them. Customization: Allows you to customize the address validation rules based on your needs. Easy Installation: Quick and straightforward installation process. Cross-Platform Compatibility: Works seamlessly across different devices and browsers. Features and Benefits The Postcode/Address Validation nulled plugin offers several features that make it an indispensable tool for any online store or service. Here are some of the standout features: Accurate Address Validation: Automatically validates address fields during checkout, ensuring all information is accurate. Real-Time Feedback: Provides users with immediate feedback if their address is invalid or incomplete. Reduces Cart Abandonment: By preventing shipping issues, the plugin helps reduce the chances of cart abandonment. Enhances Customer Satisfaction: Correct addresses mean faster shipping, leading to improved customer satisfaction. Global Support: The plugin supports international address formats, making it suitable for businesses worldwide. Improves Efficiency: Automates the address validation process, saving your team time on manual corrections. Use Cases The Postcode/Address Validation nulled plugin is ideal for a wide range of businesses, especially e-commerce stores that handle regular deliveries. Below are some common use cases: Online Retailers: E-commerce stores that require accurate shipping information for fast and reliable delivery. Subscription Services: Businesses that offer subscription boxes or services and need to ensure correct addresses for timely deliveries. International Businesses: Companies shipping products internationally can benefit from the plugin’s support for multiple address formats. Logistics Companies: Service providers who need to verify addresses for optimal route planning and delivery efficiency. Installation or Usage Guide Installing the Postcode/Address Validation nulled plugin is a simple process. Here’s a step-by-step guide to get you started: Download the plugin from the website. Log in to your WordPress dashboard and go to the Plugins section. Click on Add New and select Upload Plugin. Choose the downloaded plugin file and click Install Now. Once installed, click Activate to enable the plugin.
Configure the plugin settings to suit your needs (e.g., enabling postcode validation or customizing address formats). After installation, the plugin will automatically start validating addresses during checkout, helping you provide a smooth and efficient shopping experience for your customers. Frequently Asked Questions (FAQs) 1. Can I use the Postcode/Address Validation nulled plugin with any e-commerce platform? While the plugin is primarily designed for WooCommerce and WordPress, it can be integrated with other platforms with minimal customization. Contact our support team for further assistance if needed. 2. Is this plugin suitable for international shipping? Yes, the plugin supports multiple international address formats, making it ideal for businesses that ship globally. 3. How does the plugin improve my store's efficiency? By automating address validation, the plugin helps prevent shipping errors, reduces the need for manual corrections, and minimizes the chances of delivery issues, ultimately saving time and increasing efficiency. 4. Can I customize the validation rules? Yes, the plugin allows for customization of the validation rules to match your business needs. You can configure it to validate specific address fields or to follow specific country rules. If you are looking for an all-in-one solution to manage your WordPress site, consider checking out WP-Optimize Premium nulled for enhanced performance and optimization features. For a complete and modern theme, check out the7 NULLED to give your website a professional and sleek design.
0 notes
Text
Out of Memory OOM Killer issue Investigation
Wednesday morning our monitoring solution suddenly alerted me to a critical issue with our main web server. Attempting to access our WordPress website via browser returned database connection errors, indicating a problem with our hosting environment. When I logged into the server via SSH, I discovered it’s a Linux Out of Memory (OOM) Killer terminating our MariaDB database service due to memory…
#Linux server#MariaDB optimisation#memory management#OOM Killer#Out of Memory#performance tuning#PHP-FPM configuration#server administration#swap space#system monitoring#WordPress hosting
0 notes