
Clarent is a premium Tumblr theme with a fixed sidebar, fixed footer bar, and sidebar slider. It supports all of Tumblr's post types as well as Tumblr's new Related Posts and Highlighted Posts feature. It's responsive and mobile-friendly with lots of customization features and options. Check out this blog for more info. Feel free to contact me here if you have any questions or need help. Buy the Clarent Tumblr Theme now. *Note: This blog is for demo purposes only.
Don't wanna be here? Send us removal request.
Statistics
We looked inside some of the posts by clarent-theme and here's what we found interesting.
Average Info
Notes Per Post
405
Likes Per Post
265
Reblog Per Post
140
Reply Per Post
0
Time Between Posts
2 days
Number of Posts By Type
Link
1
Text
6
Photo
9
Video
1
Last Seen Tumblr Blogs


Fun Fact
130K people were victims of a chain letter scam that affected Tumblr in May 2011.
Link
Buy the Clarent premium Tumblr theme now

Buy now
#tumblr themes#for sale#buy now#buy this#premium themes#uikit#ui kit#clarent#buy theme#tumblr blog#blog theme#theme options#tumblr#blogging theme#theme features#paid themes#tumblr theme#premium theme#customize theme
16 notes
·
View notes
Text
Clarent Tumblr Theme License Options
Buy Clarent now | Learn more about Clarent
Tumblr Themes Update: Extended License Option
As mentioned in the terms of use page for my Tumblr themes, I’ve added an Extended License option for all the premium themes. The Extended License is for those who want to remove the credits link on the themes. So, how does this work?
Regular License vs. Extended License
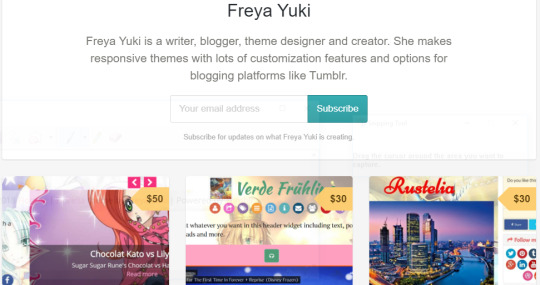
The Regular License is the default option. This one comes with credit links. These links show up in the footer section of the theme. Below, you can see an example of what it looks like using the Fiorella Tumblr theme:

Note that the first Fiorella in the pic above is actually the blog title, which means this will automatically change depending on the title of your blog. It will also link to the URL of your blog.
By getting the Extended License, you will be able to remove the credit links. Using the pic above as an example, this means the��“Fiorella theme by Freya Yuki” part will be removed.
Note that buying an Extended License will include a theme file that has no credit links, which means you don’t need to do anything else; the credit links have already been automatically removed for you.
How to get the Extended License?
Go to this link: https://gumroad.com/freyayuki
Pick a theme
Once you’re on the theme’s purchase page, you’ll see something like this:
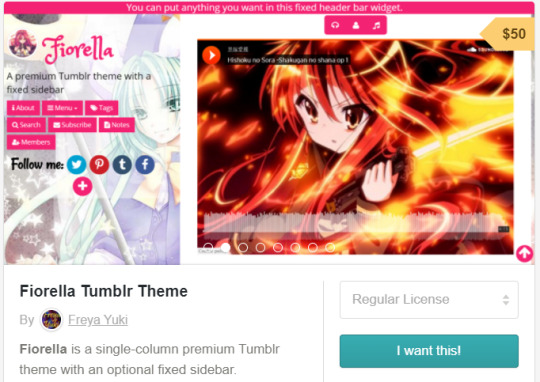
Click on the “Regular License” button
A dropdown menu will show up
One of the choices will be “Extended License”
Choose the “Extended License” option
The button above the “I want this!” button will now say “Extended License” instead of “Regular License”
Click on the “I want this!” button and you’ll be taken to the checkout page
If you have any questions, feel free to contact me here or by typing a message in the comments section below.
Pics are screenshots from the Fiorella Tumblr theme demo blog and my Gumroad account
#buy now#buy this#gumroad#for sale#tumblr themes#extended license#regular license#themes license#tumblr#themes terms of use#theme terms of use#clarent#tumblr theme#paid tumblr themes#blog themes#premium tumblr themes#terms of use#premium theme
13 notes
·
View notes
Photo
Clarent Premium Tumblr Theme For Sale
In this post, I talked about working on a new Tumblr theme. I even shared a few screenshots from said theme.
The theme I was talking about is actually Clarent. I just finished it, and it is now available for sale on Gumroad: https://gumroad.com/l/clarent.
Clarent is a premium Tumblr theme with a fixed sidebar, fixed footer bar, and sidebar slider.
Here are some of Clarent’s many features and theme customization options:
Sidebar Slider: showcase your arts and works; share links to your favorite posts and articles; use your mouse, or, if you’re on a touchscreen device, your fingers to navigate between slides

You can even add text and links to each of the slider or slideshow slides.
Supports Tumblr’s new Related Posts feature

Highlighted Posts: display the latest images from your photo, panorama, and photoset posts on the sidebar
Center photos: pics added to the body of a post will automatically be centered

All your pics will be high-res (high resolution) and high quality
Add titles to text posts: easily and quickly add titles to text posts and reblogged text posts with no titles just by using a tag

You can learn more about this here.
Exif data: display the exif data of pics from photo, panorama, and photoset posts including aperture and focal length

Track info: display the track info of audio posts including artist and album name

Caption titles: automatically turn the first line of your non-text posts into titles. You can learn more about this here
Supports all of Tumblr’s post types including panorama, answer, audio, and link posts

Customize your blog’s no search results page

Supports Tumblr’s built-in video player and audio player
Social media: share links to your accounts on various social media sites including Medium, Facebook, Pinterest, and Twitter; encourage your readers to follow you; let your blog visitors know where else they can find you on the web
The menu links (Ask, Submit, RSS, Archive, and Random) and pages links (pages you add to your blog; for example: tags page or about page) will open in their own dropdown box or container

Responsive and mobile-friendly: your blog will always look good no matter which screen size or device you view it from
Photo, Photoset, and Panorama posts come with a lightbox for images

Header, sidebar, post, and footer widgets: put anything you want on these widgets including ads, text, images, and javascript
Add links to photo post pics

Cookie consent notice banner: comes in 3 different styles and 2 different positions; let your readers know your blog uses cookies or let them know about a contest or any other news or announcements you may have
Customize your blog’s error 404 page not found

Tumblr fonts and Google fonts: choose from hundreds of different fonts; change the font size, font color, and font family of your blog title, your blog posts, your blog’s header, your blog’s footer, and more
Back to top button: easily and quickly go back to the top of your blog with the simple click of a button
GIF Attribution: GIFs you add using Tumblr’s GIF search will include attribution. The username of the person who originally posted the pic as well as a link to their blog will show up below the image. You can change the background color of the attribution box

Choose to use a background image or a background color to decorate your blog
JavaScript code prettifier: this theme also supports code syntax highlighting. This allows you to share codes or samples of code in a way that your readers can easily read

Lazyload images: images will be loaded only when they are needed and not all at once, which will help make your blog load faster
Author meta tag: will allow you to identify yourself as the author or owner of your blog
You can use this theme on a group blog. Display a list of all the members of your blog. Each post will include the author’s avatar


Showcase the stuff you like and the blogs you’re following
Social sharing buttons: easily and quickly share posts with the like, reblog, and social sharing buttons
Disqus comments feature: talk to your readers; let them share their opinions with you; discuss your posts with the visitors of your blog. You can even add some text before the comments section

Twitter cards feature: share your posts on Twitter and have them displayed in a layout (complete with thumbnail and excerpt) that encourages people to check out your blog and read your writing or look at your art and other works. You can learn more about this here.

Google Analytics: learn more about the visitors and readers of your blog; analyze your blog’s traffics and stats
Two Columns: one for your blog’s header, posts, and footer and another for the fixed sidebar
The search bar shows up in the navbar with the simple click of an icon


Want to make your blog more secure without messing up its appearance and layout? You can easily do this since Clarent is compatible with Tumblr’s HTTPS security feature. With this feature, your blog’s URL address will start with “https” instead of just “http”
And more
Check out the demo blog (https://clarent-theme.tumblr.com/) to see what the theme looks like. It also includes theme documentation and tutorials.
Buy the Clarent Tumblr theme now.
If you have any questions or need some help, please feel free to ask. You can contact me here or here, and I’ll reply as soon as possible.
Credits: pics are screenshots from the Clarent Tumblr theme demo blog


#uikit#tumblr themes#buy this#buy now#for sale#tumblr#premium themes#premium theme#theme options#clarent#tumblr theme#theme features#ui kit#paid themes#buy theme#tumblr blog#blog theme
4 notes
·
View notes
Text
The theme I’m talking about in this post is actually Clarent. I’ve just finished working on it, and it is now available for sale on Gumroad.

You can check out the demo blog here. Aside from sample posts and sample reblogged posts, it also has theme documentation and tutorials. You can learn more about Clarent in this post and this one.
Buy the Clarent premium Tumblr theme now for only $45

If you have any questions or if you need some help, please feel free to contact me, and I’ll get back to you as soon as possible.
Working On New Tumblr Theme After Arica
In this post, I talked about working on a new Tumblr theme. That theme is actually Arica, and I’ve just finished it as I discussed in this post. You can buy the Arica premium Tumblr theme on Gumroad using this link: https://gumroad.com/l/arica-theme.
Before Arica, I was working on Rei Asa. You can learn more about this theme on this post. It’s also available for sale on Gumroad. You can use this link to buy it: https://gumroad.com/l/reiasa.
You can also check out my themes blog as well as my themes page to see a complete list of all the themes I’ve made so far.
Anyway, now that I’ve finished Rei Asa and Arica, I have now started working on another Tumblr theme. This one is similar to the Rustelia Tumblr theme in that it also comes with a fixed sidebar. This new theme’s sidebar is located on the right side as you can see on the pic below.

Keep reading
#ui kit#uikit#for sale#buy now#tumblr themes#tumblr theme#new themes#buy theme#buy this#theme options#paid themes#tumblr#theme features#premium themes#blog theme#clarent#new theme#new tumblr theme
3 notes
·
View notes
Text
Clarent Tumblr Theme Documentation List
This is a complete list of all the theme documentation and tutorial articles for the Clarent premium Tumblr theme.
You can learn more about Clarent in this post and this one. You can also check out the demo blog here.
The Clarent Tumblr theme is available for sale on Gumroad: https://gumroad.com/l/clarent.
Theme Documentation and Tutorials List
How to customize the appearance options?
How to customize the color options?

How to customize the select options?

How to customize the toggle options?

How to customize the text options?

How to customize the error 404 page?
How to add Twitter Cards?
The following tutorials feature images from the Arica premium Tumble theme and they are located on Arica’s demo blog. But these posts apply to the Clarent theme as well.
You can learn more about Arica in this post and this one. The Arica Tumblr theme is available for sale on Gumroad: https://gumroad.com/l/arica-theme.
How to add tooltips to your blog?

How to make links look like buttons on your blog posts and pages?

How to style lists on your blog posts and pages?
If you have any questions about any of this or if you need some help, please feel free to contact me by leaving a message in the comments section below or by using my Tumblr Ask box.
Buy Clarent now for only $45
#buy this#for sale#tumblr themes#buy now#premium themes#theme tutorial#clarent#custom theme#theme options#theme documentation#customize blog#theme features#tumblr theme#tumblr tutorial
0 notes
Photo
How to Add the Twitter Cards Feature to the Clarent Tumblr Theme?
This post will show you how to add the Twitter Cards feature to your blog if you’re using the Clarent Tumblr theme.
What are Twitter Cards?
If you add a link to your tweet and if the site or blog you’re linking to has implemented the Twitter Cards feature, your posted tweet will include additional information right below your tweet.
This can include a beautiful and large image as well as text from the linked article.
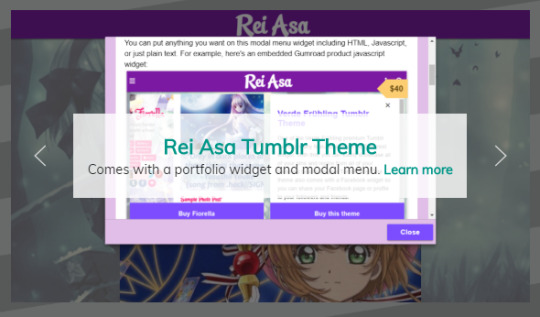
For example, see the pic above, which is from this post on the Clarent Tumblr theme demo blog. You can read more about Twitter Cards here.
So, if my blog is using the Clarent Tumblr theme, and I decide to share one of my posts using my Twitter account, what will happen?
Your post will be displayed on Twitter using the appropriate Twitter Card type (this depends on the Tumblr post type of your article).
It can look like the above pic or even something like this:

This pic is from the Fiorella premium Tumblr theme demo blog’s homepage. This theme also has the Twitter Cards feature.
You can learn more about Fiorella here, or you can buy Fiorella using this link to get a discount.
If my blog is using the Clarent Tumblr theme and other people decide to share one of my posts using their Twitter account, what will happen?
Your posts will still be displayed on Twitter using the appropriate Twitter Card type.
The only thing that will change is the text that makes up your main tweet and that shows up above the Twitter Card.
The tweet will also be listed under the account of whoever made the tweet.
I just installed the Clarent Tumblr theme on my blog. Is there anything I need to do to make the Twitter Cards feature work?
First, thank you for buying the theme :-). Hope you like it. Second, the Twitter Cards feature works right off the bat.
After installing the Clarent Tumblr theme on your blog, just log on to your Twitter account, and, if you tweet any of your posts or even the homepage of your blog, they’ll show up as Twitter Cards.
If you want to be identified as the author or creator of your blog post, there is one thing you need to do.
First, go to the theme options page of your blog. Scroll down until you see the following:

This one refers to the Twitter Cards feature. Just add your Twitter username (without the @ as that’s automatically added for you).
If you have any questions about any of this, please feel free to ask me by leaving a message in the comments section below or by contacting me here. You can also contact me via Twitter.
#twitter cards#tumblr tutorial#tumblr themes#twitter#premium themes#custom theme#theme options#premium tumblr theme#theme tutorial#theme features#theme documentation#tumblr theme#customize blog#clarent#premium theme
0 notes
Photo
How To Customize The Clarent Tumblr Theme 404 Page Not Found?
This post will show you how to customize the error 404 Page Not Found of your blog if you’re using the Clarent Tumblr theme. To get started, go to the theme options page of your blog.
You’ll get an error 404 Page Not Found if the page you were looking for could not be found on your blog.
This could be because the page might have been deleted, you might have been given the wrong URL, the URL link might have been typed incorrectly, or maybe the page never existed.
Tumblr’s default error 404 page looks like this:

Unfortunately, Tumblr does not make it possible to customize this page to your liking. So you can’t change or add anything on this page.
However, with the Clarent Tumblr theme, you can create your own error 404 page and customize this page to your liking.
If you or your blog readers and visitors end up going to a page on your blog that doesn’t exist or that can’t be found, you will all be taken to your customized error 404 page instead of Tumblr’s default one.
To create this, you’ll need to add a page to your blog. To add a page to your blog, scroll down to the bottom of the theme options page then click on the “Add a page” link.

For the Clarent Tumblr theme demo blog, I’ve chosen to use the Standard Layout. But you can also choose to use the Custom Layout. The default is the Standard Layout.
If you click on the downward arrow next to the Standard Layout, a dropdown box or container will show up. From there, you can select the Custom Layout option.
You can put anything you want in your custom error 404 page including images, links to your most popular posts and tags, etc.
You can also check out the Clarent Tumblr theme demo blog’s error 404 page for reference.
Once you’ve created your custom error 404 page, look for the following option:

Type the URL link of your custom error 404 page on the provided textbox.
In the case of the Clarent Tumblr theme demo blog, the URL link of the 404 page is https://clarent-theme.tumblr.com/404, so I typed 404 on the provided textbox.
If you have any questions about any of this, please feel free to ask me by leaving a message in the comments section below or by contacting me here.
#tumblr tutorial#premium themes#error 404#tumblr themes#customize blog#clarent#tumblr theme#premium theme#custom theme#premium tumblr theme#theme options#customize error 404 page#page not found#theme documentation#theme features#theme tutorial
2 notes
·
View notes
Photo
How to Customize the Clarent Tumblr Theme Text Options?
This post will show you how to customize the text options of your blog if you’re using the Clarent Tumblr theme. To get started, go to the theme options page of your blog.
Here are the meanings and explanations for each of these text options:
Just leave the textboxes blank if you don’t want to display these features.
Font Family
If you want to use Google Fonts instead of Tumblr’s built-in fonts, then refer to the following options:

Blog Title Font - the font family for the title of your blog

Post Title Font - the font family for the titles of your blog posts
This includes caption titles (if you turn on the caption titles feature) and text posts with no title (if you use the tag that will turn the first line of your text post with no title into a title). Check out this post for more info.
Body Font - the font family for the body part of your blog such as the contents of your posts
Quote Font - the font family for quotes in quote posts
This applies only to the quote itself as well as the first line in the body of the quote post (for the author or source of the quote).
The rest of the text in the quote post uses the Body Font.
Go to https://fonts.google.com/, copy the name of the font/s you want to use then paste them on the appropriate textboxes.
Font Size
To customize the font sizes of various text elements in your blog, refer to the following options:

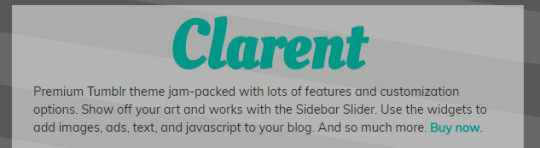
Header Content Font Size - refers to the font size for the contents of the header. This includes the tagline and the header widget.

The tagline shows up right below the blog title while the header widget shows up below the tagline.
You can put anything you want on the header widget including images, HTML, javascript, or just plain text.
Sidebar Content Font Size - refers to the font size for the contents of the sidebar.

This includes the font size for the description of your blog and the sidebar widget.
Sidebar Slider Heading Font Size and Sidebar Slider Content Font Size - font sizes for the sidebar slider.

Navbar Font Size - font size for the contents of the navbar including the icons.

Navbar Dropdown Font Size - font size for the contents of the navbar that open inside a box, container, or dropdown format.

Post Heading Font Size - refers to the font size for the headings in your blog posts.

Check out this post for more info.

Post Content Font Size - refers to the font size for the body part of your posts.
Post Blockquote Font Size - refers to the font size of the blockquotes of your posts.

Post Tags Font Size - font size of the tags you add to your posts.

Post Small Font Size - font size of small text in your posts.

Quote Font Size - font size of quotes in quote posts. This includes the first line of the body of quote posts (the author or quote source).
Notes and Comments Heading Font Size - font size for post notes and the comments heading.


Footer Bar Widget Font Size - font size for all the text content on the fixed footer bar widget. This widget shows up on smaller screens when you scroll down a bit on your blog.

Footer Heading Font Size and Footer Content Font Size - refers to the font sizes for the footer part of your blog.
Cookie Consent Font Size - font size for the cookie consent notice widget.

Back To Top Button Font Size - font size for the back to top button.

Buttons Font Size - font size for all the buttons on your blog.
All the font sizes are in rems except for the Post Small Font Size which is in percent.
Line Height and Spacing

Post Content Line Height and Post Title Line Height - refers to the spacing between lines of text.

Posts Paragraph Spacing and Posts List Spacing - refers to the spacing between paragraphs and lists.
Other Text Options
Blog Title On Hover - if you hover your mouse over the title of your blog, you will see a tooltip. You can customize the text on this tooltip.


The Blog Author Name will let you identify yourself as the author or owner of your blog.
This is the author meta tag that will let search engines know who the author or owner of a blog or website is.
To add this, all you need to do is look for the Blog Author Name option.

Then just type your name, username, or whichever name you want the author of your blog to be known as, and you’re all set.
Google Analytics will let you track your traffic and get more data and info about your blog. To use this, add your Tumblr blog to your Google Analytics account then get the given ID.
Back on the theme options page of your blog, scroll down until you find the Google Analytics ID option.

Then paste your ID on the provided textbox.
To customize the no search results page, look for the No Search Results Text option:


Change the Background Image Opacity depending on how transparent you want your blog’s background image to be.

Highlighted Posts Text - refers to the heading for the Highlighted Posts feature. Check out this post for more info.

Exif Data Text - refers to the tooltip text that shows up when you hover your mouse over the camera icon if you choose to display exif data and if it is available.

Check out this post for more info.

To add content to the header, look for the Header Tagline and Header Widget options.

To add content to the sidebar, look for the following option:

Look for the Post Widget option to add content to the widget that shows up after your posts. This widget will only show up on post permalink pages.


Menu Links Tooltip - text that shows up when you hover your mouse over the burger menu icon (the icon with three horizontal lines) in the navbar section of your blog.

Post Meta Tooltip - text that shows up when you hover your mouse over the meta part of your blog.

RSS Link - this is for those who don’t want to use Tumblr’s built-in RSS feed. Just type your RSS feed URL link on the textbox provided.

Ask URL - this is for those who don’t want to use the default ask page of their blog
Note: to display the ask and submit pages of your blog, you need to turn on these features on your blog settings:

Ask Page Text - way back in 2015, I wrote this post on how to add text to your Tumblr Ask page.
The method to do this is easy enough, but, using the Clarent Tumblr theme, it’s even easier, not to mention faster, because, now, all you need to do is fill in the Ask Page textbox, and your Ask page can look something like this:

Disqus Comments
The comments section will show up before the related posts section on permalink pages only if you fill up the Disqus Shortname textbox.

Leave the Comments Heading and Comments Content textboxes blank if you don’t want to display this info.

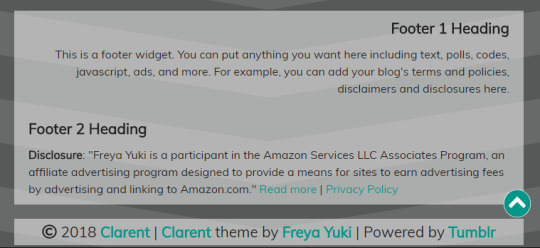
Footer Widget - contents of the fixed footer bar widget.

Footer 1 Heading, Footer 2 Heading, Footer 1 Content, and Footer 2 Content - contents of the footer.

Back To Top Button Position - position of the back to top button on your blog.
Change the contents of the following options to customize the text and links of the cookie consent notice banner:

Cookie Consent Position - position of the cookie consent notice widget on your blog.
Sidebar Slider
To add contents to the Sidebar Slider, refer to the following options:
Sidebar Slider 1 Title - Sidebar Slider 10 Title - refers to the title for each sidebar slider. For example:

Sidebar Slider 1 Content - Sidebar Slider 10 Content - refers to the contents for each sidebar slider. For example:

Sidebar Slider 1 URL Link - Sidebar Slider 10 URL link - refers to the URL link for each sidebar slider. For example:

Sidebar Slider 1 Image URL - Sidebar Slider 10 Image URL - refers to the image URL link for each sidebar slider. For example:

Social Media Follow Buttons
Scroll down near the bottom of the theme options page of your blog to find the textboxes that correspond to the social media icons that show up on the navbar.
Then just add the links to your accounts on these sites. For example:

Check out this post for more info.

If you have any questions about any of this, please feel free to ask me by leaving a message in the comments section below or by contacting me here.
#premium themes#tumblr themes#tumblr theme#theme documentation#premium theme#premium tumblr theme#customize blog#custom theme#theme options#theme features#clarent#text options
0 notes
Photo
How to Customize the Clarent Tumblr Theme Toggle Options?
This post will show you how to customize the toggle options of your blog if you’re using the Clarent Tumblr theme. To get started, go to the theme options page of your blog.
Here are the meanings and explanations for each of these toggle options:
To turn on these features, make sure the toggle switch is colored blue. To turn them off, make sure the toggle switch is colored grey.
Show Menu Links - refers to the entire dropdown box or container which contains the following links:
Ask
Submit
RSS feed - refer to the Show RSS link option to show or hide this link
Archive - refer to the Show Archive link option to show or hide this link
Random - refer to the Show Random link option to show or hide this link

The menu links are located in the navbar part of your blog. To open the dropdown box containing these links, just click on the burger menu icon (the icon with three horizontal lines).
If you hover your mouse over this icon, you will see a tooltip with the words “Menu links”. You can customize this text to your liking.
On bigger screens, the navbar will show up on the sidebar of your blog. On smaller screens, you can find this after the posts section of your blog.
To display the ask and submit pages of your blog, you need to turn on these features on your blog settings:
Show Tumblr Likes and Show Tumblr Follows - these features are only available on main Tumblr blogs, and only if you have the following settings turned on:

If you’re using the Clarent Tumblr theme, the likes and follows will show up on the navbar part of your blog.

Click on the hearts icon to open the box which contains a list of the stuff you like on Tumblr.
Click on the person with plus icon to open the box which contains a list of the blogs or people you’re following on Tumblr.
If you hover your mouse over the heart icon, you will see a tooltip with the words “Stuff I like”.

If you hover your mouse over the person with plus icon, you will see a tooltip with the words “People I follow”.

Show Blog Group Members - refer to this post for more info.

Show Social Icons - refers to the social media follow icons.

Click on the social follow icon to open the box which contains a list of all the available social media follow buttons you can choose to add or display on your blog.
If you hover your mouse over the follow icon, you will see a tooltip with the words “Follow me”.
You don’t have to display all of these social media buttons if you don’t want to. For example, if you only want to show the Facebook and Twitter icons, then you can easily hide all the other buttons.
If you hover your mouse over each of these social media icons, you will see a tooltip with the words “Follow me on [insert name of website here]”.
Show Caption Titles - this feature makes the first line of Audio, Video, Link, Photo, Panorama, and Photoset posts look like a title. Use this if you want all of your posts to have titles.
For example, if turned on, it can look like this:

If turned off, it will look like this:

Show Exif Data - refer to this post for more info.

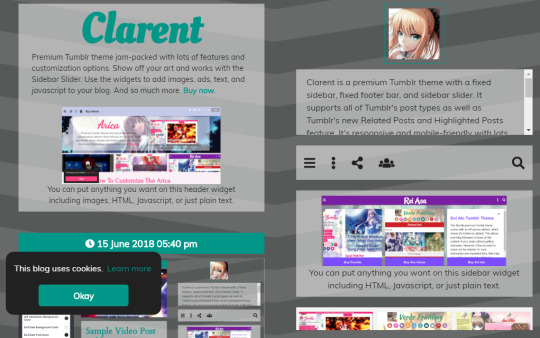
Show Cookie Consent Notice - refer to this post for more info.
Use Tumblr Fonts - turn this on if you want to use Tumblr’s built-in fonts. Turn this off if you want to use Google Fonts.
The Clarent Tumblr theme supports Tumblr’s new Related Posts feature. This will show up on post permalink pages after the comments section and before the footer. Tumblr will be the one to decide which of your posts will show up with this feature.
If turned on and if there are related posts available for your post, you will see a newspaper icon next to the post info on permalink pages.

If you hover your mouse over this newspaper icon, you will see a tooltip with the words “Related Posts”.
If you click on this icon, you will automatically be scrolled down to where the related posts are. Alternatively, you can manually scroll down to the related posts section on your own.
The layout of the related posts feature looks similar to the layout of posts on index pages. There are some differences though.

The related posts will be in its own box or container with its own scrollbar. At the very top, you will see the words “More you might like”.
If you hover your mouse over this text, you will see a tooltip with the words “Related Posts”.
At the end of the related posts section, you will see another button that says “Show more”. If you hover your mouse over this button, you will see a tooltip with the words “See more posts”.
Clicking this button will bring you to the homepage of your blog.

Photoset posts will be displayed in slideshow format.

You can decide whether the slideshow should autoplay or not by referring to the Autoplay Related Posts Photoset Slideshow toggle option.
The slideshow comes with navigation icons (left and right arrow carets).
While you can use these navigation icons to look through the slideshow, you can also use your mouse, or, if you’re on mobile or on a touchscreen device, your fingers, to navigate between the slides.
The exif data for Photo, Photoset, and Panorama posts will not be displayed on the related posts section.
Audio and Video posts on the related posts section will not display any text content.
You will need to go to the permalink page of the Audio or Video post in question to see the text that comes with said post.
Autoplay Sidebar Slider - with this toggled on, you can choose to have the slider move on its own.


If you have any questions about any of this, please feel free to ask me by leaving a message in the comments section below or by contacting me here.
#premium themes#tumblr themes#tumblr theme#theme documentation#premium theme#premium tumblr theme#customize blog#custom theme#theme options#theme features#clarent#toggle options
0 notes
Photo
How to Customize the Clarent Tumblr Theme Select Options?
This post will show you how to customize the select options of your blog if you’re using the Clarent Tumblr theme. To get started, go to the theme options page of your blog.
Here are the meanings and explanations for each of these select options:
If you want to use Tumblr’s built-in fonts for your blog, then refer to the following font options:
Body Font - the font family for the body part of your blog such as the contents of your posts.
Post Title Font - the font family for the titles of your blog posts.
This includes caption titles (if you turn on the caption titles feature) and text posts with no title (if you use the tag that will turn the first line of your text post with no title into a title).
Check out this post for more info.
Quote Font - the font family for quotes in quote posts.
This applies only to the quote itself as well as the first line in the body of the quote post (for the author or source of the quote).
The rest of the text in the quote post uses the Body Font.
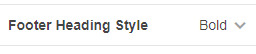
Buttons Style, Post Title Style, Footer Heading Style, and Quote Style - the choices are:
Bold
Normal - this is the default style, meaning the text is neither bold, italic, or underline
Italic
Underline
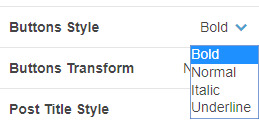
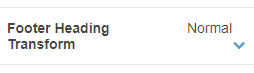
Buttons Transform and Footer Heading Transform- the choices are:
Uppercase - this means the text will show up in all caps like this: EXAMPLE TEXT
Lowercase - this means the text will show up in all small letters like this: example text
Normal - the text will show up exactly how you type it on the provided textbox. For example, if you type Example Text, then it will show up as Example Text
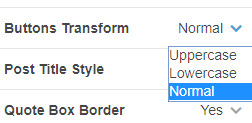
Quote Box Border - the choices are either Yes or No. Picking Yes will add a border box around the quote of quote posts. Choosing No will remove this border box.
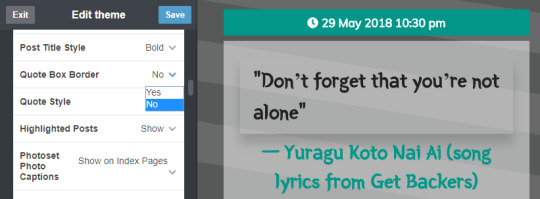
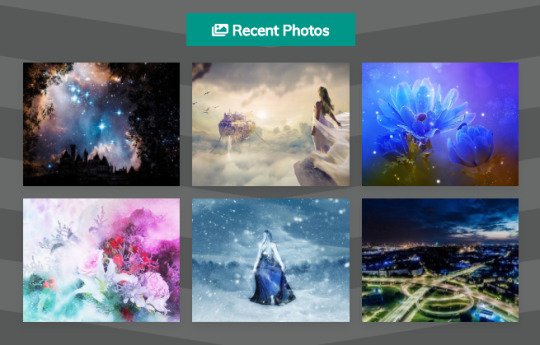
Highlighted Posts - the choices are either Show or Hide.
If you choose to show this, images from your latest Photo, Photoset, and Panorama posts will be displayed on the sidebar. These images will contain a link to the post where they came from.
On the demo blog, the heading for this feature is “Recent Photos”, but you can change this to any text you like.
On bigger screens, the highlighted posts will show up on the sidebar. On smaller screens, it will show up after the posts section of your blog.
Note that even if you choose to show this feature, it will not appear on your blog unless you have at least 6 Photo, Photoset, or Panorama posts.
This is decided by Tumblr; the feature will automatically show up (if you turn or toggle it on) as long as the requirement of 6 pics have been met.
Photoset Photo Captions - the choices are Show on Index Pages and Hide on Index Pages.
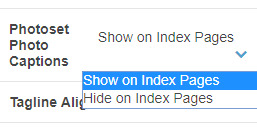
On the Clarent Tumblr theme, pics from Photoset posts are displayed in a single column, 1 image per row.
Captions for each photo will show up right below each photo.
You can choose to have these captions show up on index pages or you can have them only show up on post permalink pages.
Tagline Align - the choices are Left, Right, Center, and Justify.
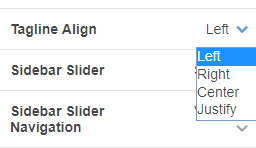
The tagline is located on the header part of your blog, right below your blog title. The Tagline Align will align your text either to the Left, Right, Center, or Justify.
On bigger screens, it will look like this:
On smaller screens, a small circular arrow icon will show up at the end of the tagline text.
If you click on this downward caret arrow, you’ll automatically be scrolled down to the sidebar section of your blog.
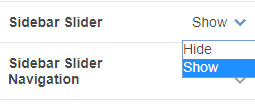
Sidebar Slider - the choices are Show or Hide.
Sidebar Slider Navigation refers to the left and right icons located on either side of the slider. You can use these icons to look through the slider.
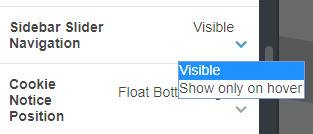
You can choose to make these icons Visible all the time or have them show up only when you hover your mouse over the slider (Show only on hover).
The Cookie Notice Position has the following options:
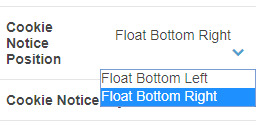
Float Bottom Left - the cookie consent notice will show up on the bottom left side of your blog
Float Bottom Right - the cookie consent notice will show up on the bottom right side of your blog
The Cookie Notice Style has the following options:
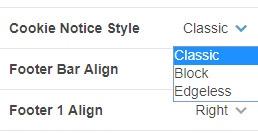
Classic

Block

Edgeless

Footer Bar Align - this refers to the alignment of the contents of the fixed footer bar widget. This widget shows up on smaller screens when you scroll down a bit on your blog.
The alignment choices are Left, Right, Center, and Justify.
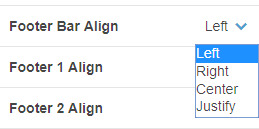
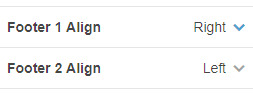
Footer 1 Align and Footer 2 Align - this refers to the alignment of the contents of the footer, which shows up at the bottom of your blog.
The choices are Left, Right, and Center.
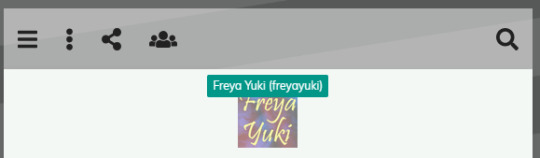
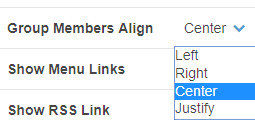
Group Members Align - this feature will show up on the navbar.
Click on the people icon (if you hover your mouse on it, you will see a tooltip which says “Group members”) to open a dropdown box or container.
The avatars of the members of your blog will be listed here. Their avatars will contain a link to their Tumblr blog.
If you hover your mouse over each of the avatars, you will see a tooltip with the blog member’s username as well as the title of their blog.
You can choose to align this group members avatar list to the Left, Right, Center, or Justify.
If you have any questions about any of this, please feel free to ask me by leaving a message in the comments section below or by contacting me here.
#premium themes#tumblr themes#tumblr theme#theme documentation#premium theme#premium tumblr theme#customize blog#custom theme#theme options#theme features#select options#clarent
0 notes
Photo
How to Customize the Clarent Tumblr Theme Color Options?
This post will show you how to customize the color options of your blog if you’re using the Clarent Tumblr theme. To get started, go to the theme options page of your blog.
Here are the meanings and explanations for each of these color options:
Buttons and Tooltip Font Color - the font color for all the buttons and tooltips on your blog.

Body Font Color - the font color of the body part of your blog such as your posts.
Post Heading Font Color - the font color of the headings of your posts.
Post Meta Background Color - refers to the background color of the post info box or container. The post author avatar, the post notes count, and the reblog info are located within this box or container.

Post Meta Font Color - font color of the contents of the post info.
GIF Attribution Background Color - when you add a GIF to your post, the username of the person who originally posted the pic as well as a link to their blog will also be included along with said GIF. This option will allow you to change the background color of the attribution box.

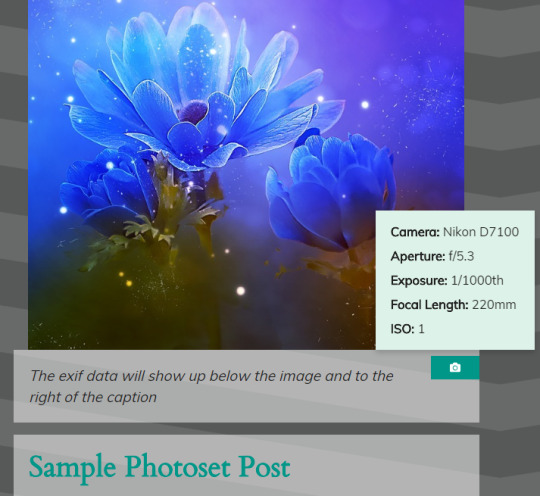
Exif Data Background Color and Exif Data Font Color - refers to the background and font color of the exif data feature. If available, you can choose to display the exif data of pics from Photo, Photoset, and Panorama posts.
You can turn off this feature if you don’t want to display exif data. If turned on and if available, the exif data will be displayed below the image and to the right of the photo caption.
Photoset post exif data:
Photo post exif data:
Panorama post exif data:
Search Box Font Color - refers to the font color for the search bar. On big screens, the search box shows up in the sidebar.
On smaller screens, it will show up after the posts section of your blog. To open the search bar, just click on the search icon (magnifying glass).


Navbar Background Color - refers to the background color of the navbar or navigation bar.
The contents of the navigation bar include the search bar, the menu links, the pages links, the group members info, the follow buttons, and the Tumblr likes and follows list.
The option to change the background color of the navbar is only available if you’re using a background color for your blog.

Navbar Dropdown Background Color - refers to the background color of the dropdown boxes or containers that house the contents of the navbar.
This includes the menu links, the pages links, the group members info, the follow buttons, and the Tumblr likes and follows list.


Navbar Font Color - font color of the contents of the navbar.

Cookie Consent Background Color and Cookie Consent Font Color - the background and font color for the cookie consent notice widget.

Footer Widget Font Color and Footer Widget Background Color - refers to the font and background color of the footer widget.
The fixed footer bar widget only shows up on smaller screens and devices. It will appear when you scroll down a bit on your blog.
Footer Heading Font Color and Footer Content Font Color - refers to the font color for the footer’s heading and content. The footer shows up at the end of your blog.
If you have any questions about any of this, please feel free to ask me by leaving a message in the comments section below or by contacting me here.
#premium themes#tumblr themes#tumblr theme#theme documentation#premium theme#premium tumblr theme#customize blog#custom theme#theme options#theme features#color options#clarent
0 notes
Photo
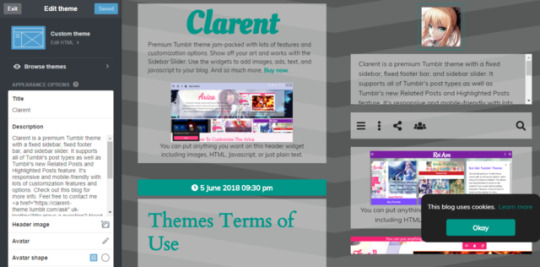
How to Customize the Clarent Tumblr Theme Appearance Options?
This post will show you how to customize the appearance options of your blog if you’re using the Clarent Tumblr theme. To get started, go to the theme options page of your blog.
Here are the meanings and explanations for each of these appearance options:
Title - the title of your blog. On big screens, this will show up on the left side of your blog. On smaller screens, it will show up on the header part of your blog.
To change the color of your blog title, refer to the Title color option.
If you’re using Tumblr Fonts, refer to the Title font option to set the font family of your blog title. The B to the side of the Title font refers to whether you want your blog title to be bolded or not.
Show Title - if you want to hide your blog title, make sure this is toggled to off.
Description - the description of your blog. On big screens, this will show up on the sidebar (on the right side of your blog). On smaller screens, this will show up after the posts section of your blog.
Show Description - toggle this option to off if you want to hide your blog description.
If you want your blog to have a background image, then toggle the Show header image feature on.
To add or upload a background pic to your blog, look for the Header image feature, click on the pencil icon then click on the “Choose a photo” option.
If you click the “Reset” option, the default background pic of your blog will show up. Just click on the camera icon if you want to change this pic.
To display the Avatar of your blog, toggle the Show Avatar feature to on. To upload an avatar to your blog, just click on the pencil icon to the right of the Avatar feature. The Avatar shape can either be square or circle.

On big screens, the Avatar will show up on your blog’s sidebar. On smaller screens, it will show up after the posts section of your blog.

Background Color - use this to change the background color of your blog. Ignore this option if you want to use an image for the background of your blog.
Accent color - the font color of all the links and the background color of all the buttons on your blog.
If you have any questions about any of this, please feel free to ask me by leaving a message in the comments section below or by contacting me here.
#premium themes#tumblr themes#theme features#custom theme#theme options#appearance options#clarent#premium theme#tumblr theme#theme documentation#customize blog#premium tumblr theme
1 note
·
View note
Text
Clarent premium Tumblr theme Terms of Use
Themes Terms of Use
Terms of Use for my themes. It’s also posted as a page here, and I just added a link to all my themes to this page.
Keep reading
#terms of use#tumblr themes#tumblr#blog themes#premium theme#free tumblr themes#premium blog theme#clarent#paid tumblr themes#themes terms of use#premium tumblr themes
11 notes
·
View notes
Video
Sample Video Post Reblog
On the Clarent Tumblr theme, reblogged video posts using Tumblr’s built-in video player looks like this.
lolawashere
Blue is the warmest color. Yes. Absolutely.
tumblr
#loki laufeyson#loki (marvel)#tumblr themes#tumblr videos#loki#clarent#jotun#reblogged posts#marvel#premium theme#frost giant#video player#video post#tumblr theme#premium tumblr theme
26 notes
·
View notes
Photo
Sample Photoset Post Reblog
On the Clarent Tumblr theme, reblogged photoset posts look like this.


#tumblr themes#special discounts#for sale#buy this#special deals#clarent#tumblr#tumblr theme#reblogged posts#premium tumblr theme#premium theme#special sale#blog theme#photoset post#blogging theme
8 notes
·
View notes
Text
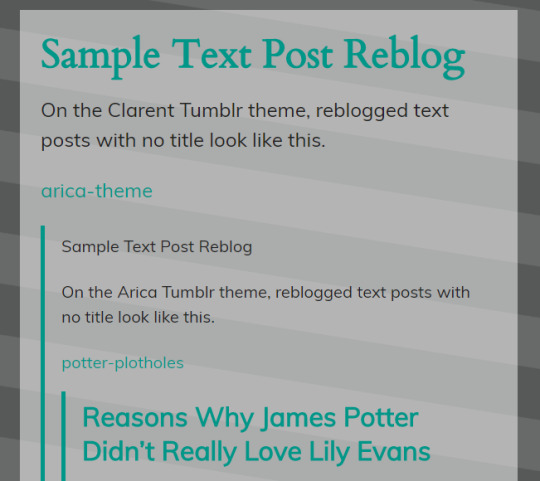
Sample Text Post Reblog
On the Clarent Tumblr theme, reblogged text posts with no title look like this.
arica-theme
Sample Text Post Reblog
On the Arica Tumblr theme, reblogged text posts with no title look like this.
potter-plotholes
Reasons Why James Potter Didn’t Really Love Lily Evans
Agree with both @deeplyhorriblefan and @snakebitcat. The Snape’s Worst Memory scene in Harry Potter and the Order of the Phoenix, book 5 of the HP series by J.K. Rowling, seems to show that James Potter didn’t really love Lily Evans. Why?

Blackmailing someone you love
If you love someone, would you resort to blackmailing them just to get them to go out with you? If James really loved Lily, why would he force her to go out with him when she already said no?
“I will if you go out with me, Evans,” said James quickly. “Go on… Go out with me, and I’ll never lay a wand on old Snivelly again.”*
(Side note: as mentioned in this post, it’s been a while since I’ve last logged on to Tumblr. Am now working on trying to finish all the posts in my drafts page and then publishing them on this blog. This post is one of them. The post date tells me it’s been sitting on my drafts page since Oct 4th, 2016 8:11:54pm.)
Threatening to hurt someone you love
Keep reading
#tumblr theme#harry potter meta#severus snape#james potter#lily evans#harry potter#snape's worst memory#premium tumblr theme#book review#book series#order of the phoenix#books#jk rowling#reblogged posts#ptitle#text post#premium theme#clarent#tumblr themes
315 notes
·
View notes
Text
Sample Text Post Reblog
On the Clarent Tumblr theme, reblogged text posts with titles look like this.
Why Severus Snape Listened To Sirius Black?
#sirius black#harry potter#tumblr themes#severus snape#harry potter meta#premium theme#clarent#premium tumblr theme#reblogged posts#text post#tumblr theme
6 notes
·
View notes