#theme tutorial
Explore tagged Tumblr posts
Visit Tumblr Blog
Explore Tumblr blogs with no restrictions, modern design and the best experience.
Last Seen Tumblr Blogs


Fun Fact
Users from the US are the majority of Tumblr visitors.
Text
Coding Tutorial - Permalinks, Tags and Notes
I found this helpful so I wanted to share
Source: https://themesbyeris.tumblr.com/tutorial07
I couldn't reblog so I'm reposting.
Permalink
We are going to start this part of the tutorial by adding in the permalink. If you don’t know what that is already, it is the thing you click to go to view a post on an individual page. Tumblr makes this really easy. All you need is the following piece of code:<a href="{Permalink}">Text</a>
You can replace the word “Text” from the example above with an image, a note count, the date, or anything else text-based. For example, if we wanted the permalink to be displayed in dd/mm/yyyy format, we would write:{block:Date}DayOfMonthWithZero}/{MonthNumberWithZero}/{Year}{/block:Date}
Tip: Always wrap the date in the “block:Date” tags otherwise the date will show up on ask/submit pages too.
Here are a few other formats:{MonthNumberWithZero}-{DayOfMonthWithZero}-{Year} = 04-10-2012 {DayOfWeek}, {DayOfMonth} {Month} {Year} = Tuesday, 10 April 2012 {ShortMonth} {DayOfMonth}{DayOfMonthSuffix}, '{ShortYear} = Apr 10th, '12 {12Hour}:{Minutes}{AmPm} = 3:00pm {12HourWithZero}.{Minutes}.{Seconds}{CapitalAmPm} = 03.00.00PM {24HourwithZero}{Minutes} = 1500 {TimeAgo} = 1 hour ago
[Click here for all the ways you can format the date]
I will be using the {TimeAgo} tag for this example. But I also want to include in the permalink the notecount. This one is easier because there’s only two options for it.{NoteCount} = 1,938 {NoteCountWithLabel} = 1,983 notes
Naturally, this is also wrapped in those pesky block tags. This time it’s “block:NoteCount”. So if we put both the date and notecount together with the word “with” between them, it will look like this:<a href="{Permalink}"> {block:Date}{lang:Posted TimeAgo}{/block:Date} {block:NoteCount} with {NoteCountWithLabel}{/block:NoteCount} </a>
What we’re going to do with this piece of code is wrap it in a div and call it “permalink”, then put that div right after our main content, inside the “block:Post” tags (this is important).{block:Posts} ... [All your post types here] ... <div id="permalink"> <a href="{Permalink}"> {block:Date}{lang:Posted TimeAgo}{/block:Date} {block:NoteCount} with {NoteCountWithLabel}{/block:NoteCount} </a> </div>
Now that it is wrapped up in a div, we can style it. We don’t need to do much for this theme, since we did a lot of the styling in the content tag. The only things we need to specify here is the size of the font, and use the margin property to make a space between the permalink and the post above it.#content #posts #permalink { font-size:9px; margin-top:10px; }
Tags
The basic code for tags is this:{block:Tags}<a href="{TagURL}">#{Tag}</a> {/block:Tags}
Tumblr also gives us an extra block tag called “block:HasTags” since not all posts have tags. If you add in a pretty box or image for tags, it is not a good idea to have it still display when there are no tags at all. In this case I will be adding a div with the label “tags”, and putting this inside the secondary block tags.{block:HasTags}<div id="tags"> {block:Tags} <a href="{TagURL}">#{Tag} </a> {/block:Tags} </div> {/block:HasTags}#content #posts #tags { font-size:9px; }
Now I am going to show you a little trick. At the moment we have formatted the tags so that they will show up like this:
#tag one #tag two #tag three
But what if I want them to show up like this?
tag one, tag two, tag three.
Do you see the problem there? The last tag ends with a fullstop instead of a comma. The following would not work:{block:Tags} <a href="{TagURL}">{Tag}</a>, {/block:Tags}.
(Take note of the full stop outside of the “block:Tags” tag.)
tag one, tag two, tag three,.
Here’s a little trick to get around that. Just copy this code:{block:Tags} <a href="{TagURL}">{Tag}</a><span class="comma">, </span> {/block:Tags}.#content #posts #tags .comma:last-child { display: none; }
It’s the “last-child” bit in the CSS that tells the browser not to display the comma if it’s the last one in the line. We also used “span” instead of “div” because if we’d used div, it would have made a line break, which we don’t want in this case.
tag one, tag two, tag three.
Note Container
The note container is the bit where it lists everyone that has liked or reblogged a post, along with their comments if they made any. Naturally it only shows up on the permalink pages.
This one is going to be done a little differently to the previous two, and be placed outside the “posts” div we created (but it still has to be inside the “block:Posts” tags).{block:Posts} <div id="posts"> ... [A lot of stuff in here.] ... [Permalink] [tags] </div> [<--closes the "posts" div] Note Container {/block:Posts}
Note that you don’t HAVE to put the note container outside the “posts” div, it can be inside if you want. This is just how we’re doing it for this theme. All this means is that it won’t be inside those white boxes we made for each post.
The HTML part for this is simple. Just some block tags, and {PostNotes}. I have wrapped this in a div so we can style it using CSS.{block:PostNotes} <div id="notecontainer">{PostNotes}</div> {/block:PostNotes}
Now since we took the note container outside of the “posts” div, we need to re-establish the width and margins. A font size also needs to be specified here since that isn’t specified in any parent tags.#content #notecontainer { margin: 20px auto; width: 500px; font-size: 11px; }
Now if you look at the theme, you will be able to click through to the permalink pages and see the notes as a list. If there are a lot of notes, they will be labelled 1-50, and number 51 will contain a “Show More Notes” link. Having it numbered is the tumblr default, but it doesn’t actually look nice. We are going to go ahead and access the list using a built in tag called “ol.notes” (ol = ordered list, numbered list), and apply a property called “list-style-type” to remove the number system. I am also going to get rid of the default margins and padding that comes with the list, but padding can be added if you prefer to have the lines more spaced out.#content #notecontainer ol.notes { list-style-type: none; margin: 0; padding: 0; }
Lastly I am going to edit the little avatar next to each note. At the moment there is no space between the avatar and the name of the blogger, so I’ll be adding in a 10px margin. Plus just to be on the safe size I will include the size of the images.#content #notecontainer img.avatar { margin-right: 10px; width: 16px; height: 16px; }
Click here to see the code so far, and here for the live-preview.
In the next tutorial we will be finishing up this basic theme with adding in pagination and infinite-scroll. Then I will move on to tricks to make things look pretty like transition-effects.
#themes#tutorial#theme code tutuorial#coding tutorial#tumblr theme tutorial#theme tutorial#tutorials#code tutorial
4 notes
·
View notes
Text
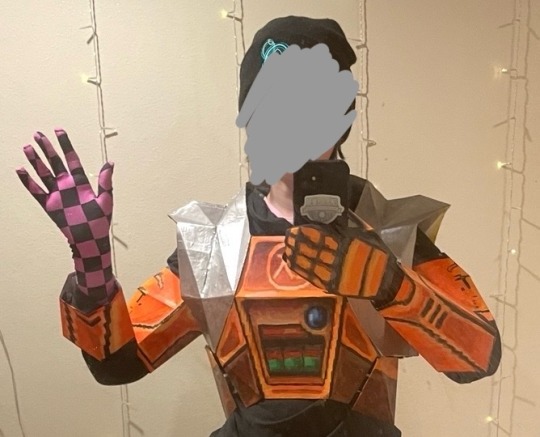
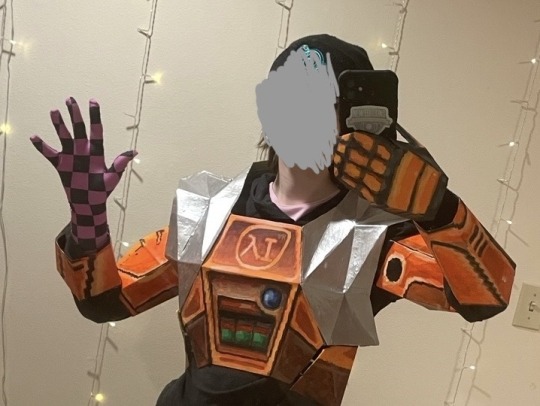
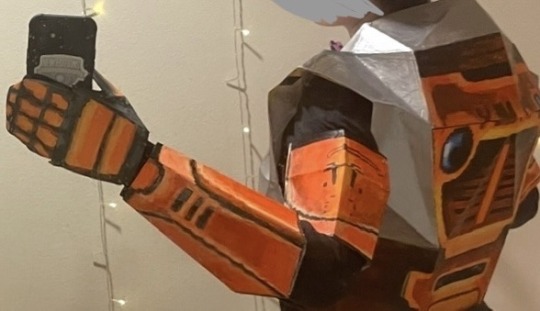
reveal of my gordon hlvrai costume project, now that about half of it is done! this is cardstock and glue and tape and more glue and paint and velcro. and 2 gloves (one hand-sewn)
i got started sometime in early-mid fall, but i committed to making it work with cardstock in january- it was originally meant to be a sizing test before construction with eva foam over the summer. then i realized how expensive thatd be, too much pressure for a form of craft ive never practiced. im pretty amazed with how its come together, even with the large seams! during that whole time when it was unpainted (started painting two weeks ago) there was no way to tell
#thank you sketchfab thank you blender thank you pepakura#school library printer… you were necessary but i dont appreciate that i had to pay per page despite my tuition#i started this because theres a tradition of wearing whatever you want to graduation at my college. ive thought abt how cool itd be to wear#an hev suit like gordon hlvrai.. hlvrai has been important throughout my whole time at college. that plus the stem degree im going for makes#hlvrai the most fitting thing to homage with my outfit#*so important to me#the support of my friends was the last push i needed before research#i havent seen anyone else go for the in-game low poly look for the hev suit! multiple tutorials out there (as expected)#but all i saw involve eva foam and molding. most of them were based on the half life 2 suit which. yeah. that one seems more desirable for#cosplay#lucky that this way was much more simple because its also the most in-theme!#hlvrai#half life vr but the ai is self aware
2K notes
·
View notes
Text
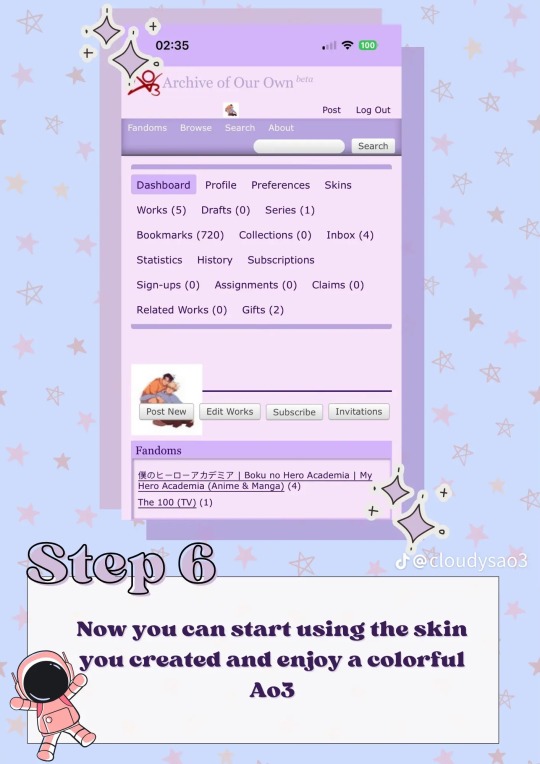
This is for the ao3 users who enjoy color or prefer non-white backgrounds
There is a TikTok user who made a tutorial of how to make your ao3 colorful, I’ll link her profile down below cuz she has MANY diff skin tutorials
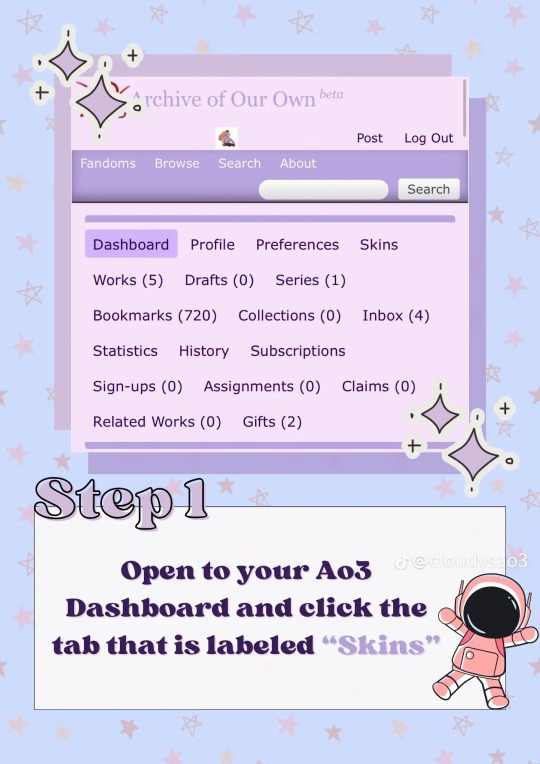

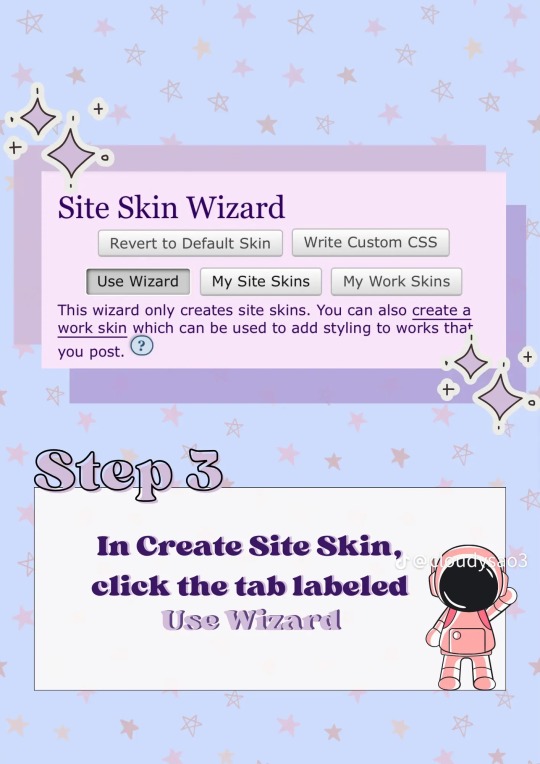
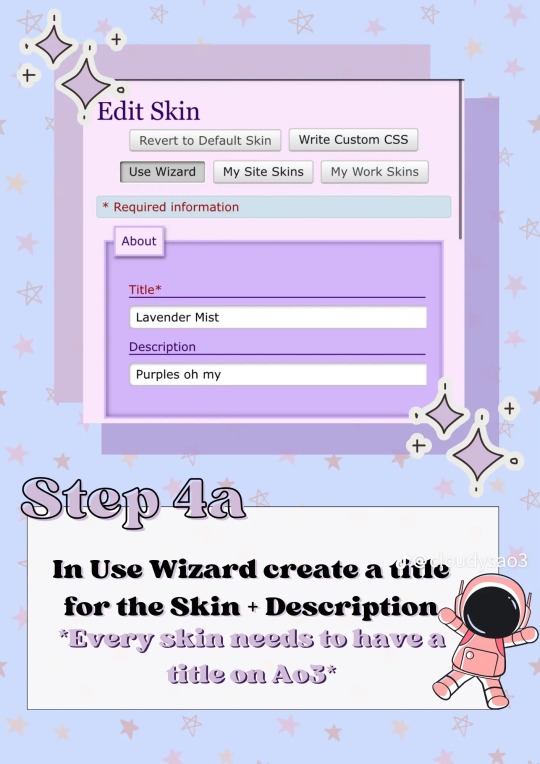
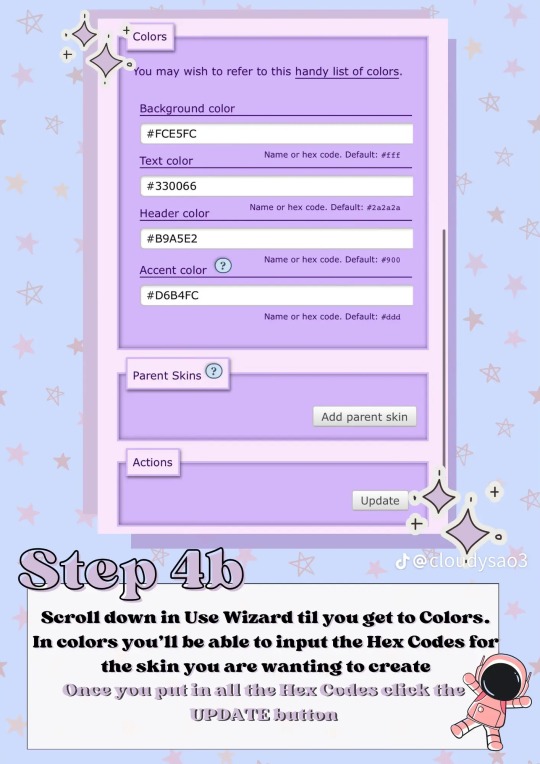
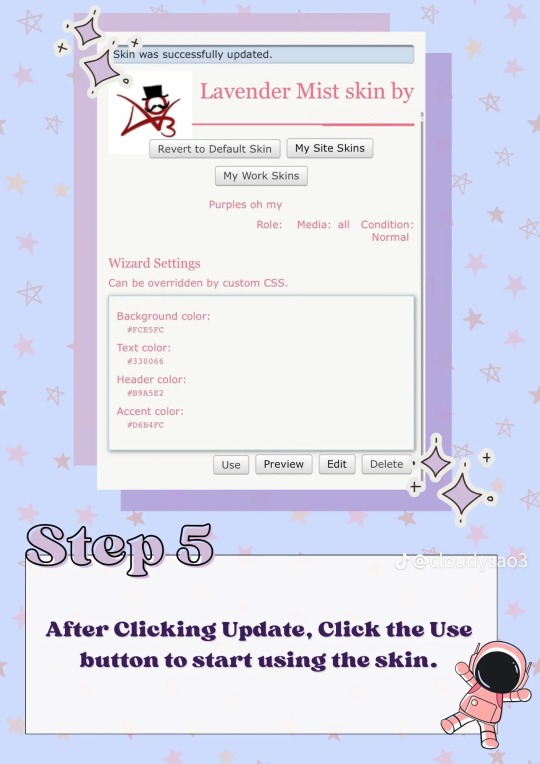
Here is her tutorial, here is her link to her page.
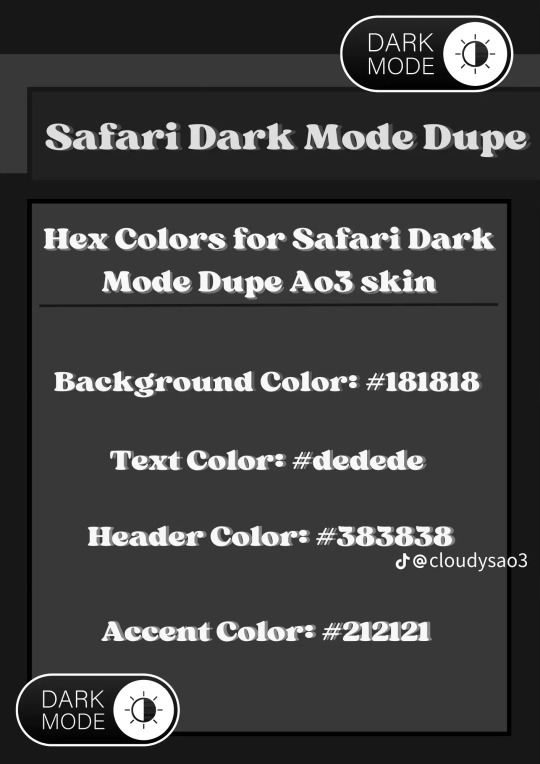
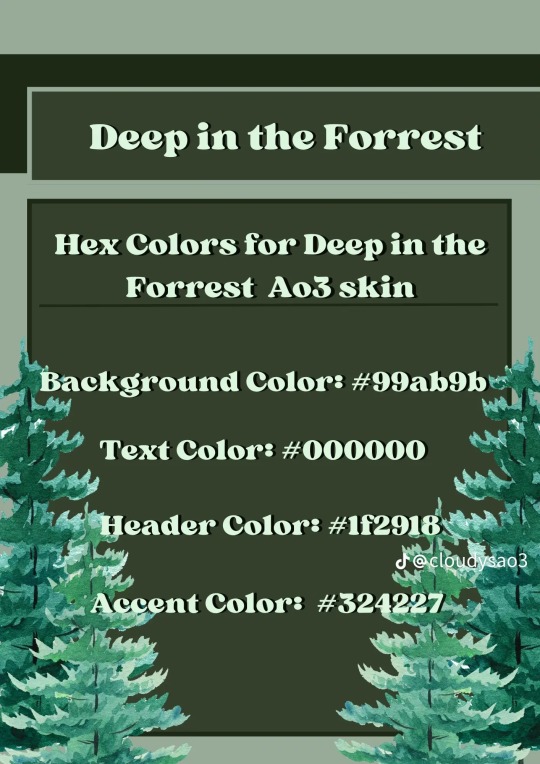
These are two that caught my attention, but that’s cuz I need darker colors, she has a lot of pretty and colorful themes for y’all to check out!
Enjoy!
And thank you @cloudysao3 (her TikTok and Instagram handle)
4K notes
·
View notes
Text
========================================================
[tutorial: build your own neocities/nekoweb page]
========================================================
a beginner's guide for making your very own home on the indie web—retro, personal, weird, and 100% yours.
this ain’t an average wix, squarespace, or tiktok aesthetic.
we’re talking full html/css with soul and attitude.
[ prerequisites ]
------------------
> an idea
> basic text editor (vscode, notepad++, or even notepad)
> account on https://neocities.org or https://nekoweb.org
> some gifs or tiles you love (dig deep or make your own)
> optional: image host or gif repo (or self-host everything)
[ feeling overwhelmed? read this. ]
-----------------------------------
you do *not* need to know everything.
html is not a mountain. it's a garden.
you plant one tag. then another. then a style. then a button.
you can build your site piece by piece.
and every piece is a portal to somewhere personal.
you are allowed to make broken pages.
you are allowed to use templates.
you are allowed to start over as many times as you want.
this is *your* world. you control the weird.
[ step 1: create an account ]
-----------------------------
> neocities: https://neocities.org
> nekoweb: https://nekoweb.org
register a name, log in, and enter your file manager.
this is where you upload your files and see your site live.
[ step 2: your first file - index.html ]
----------------------------------------
make a new file: `index.html`
basic starter:
<html>
<head>
<title>my weird little corner</title>
<link rel="stylesheet" href="style.css">
</head>
<body>
<h1>welcome to the void</h1>
<p>this is my page. it’s strange. like me.</p>
<img src="mygif.gif">
</body>
</html>
> upload to the dashboard
> boom. you’re live at
https://yoursite.neocities.org
or https://nekoweb.org/u/yoursite
[ step 3: add a style sheet - style.css ]
-----------------------------------------
create a file called `style.css` and upload it.
here’s some nostalgic magic:
body {
background: url('tile.gif');
color: lime;
font-family: "Courier New", monospace;
text-shadow: 1px 1px 0 black;
}
img {
image-rendering: pixelated;
}
marquee {
font-size: 20px;
color: magenta;
}
link it in your html and the vibes activate.
[ step 4: decorate it like a haunted usb ]
------------------------------------------
> use <marquee> for chaos scrolls
> embed gifs from https://gifcities.org/
> steal buttons from https://cyber.dabamos.de/88x31/
> set up a guestbook at https://www.smartgb.com/
> loop audio with <audio autoplay loop>
> add fake errors, 90s web lore, random link lists
[ step 5: resources, themes, and comfort ]
------------------------------------------
> templates & layouts: https://numbpilled-themes.tumblr.com
> glitchy gifs & buttons: https://glitchcat.neocities.org/resources
> layout builder: https://sadgrl.online/projects/layout-builder/
> free tiled backgrounds: https://backgrounds.neocities.org/
> beginner html intro: https://www.w3schools.com/html/
> pixel fonts & cyber assets: https://fontstruct.com/
remember:
you don't need to know js. you don't need to be a coder.
you just need a mood, a direction, a dream.
the html will follow.
[ bonus concept: shrine pages ]
-------------------------------
> a page just for one character you love
> a room to house digital fragments of your identity
> embed quotes, music, images like altars
> call it shrine.html and link it from your homepage
[ closing mantra ]
------------------
you are not here to be optimized.
you are not a brand.
you are a ghost inside the machine,
carving your initials into the silicon void.
welcome to Your website.
========================================================
#webcore#old web graphics#neocities#web graphics#carrd graphics#carrd resources#rentry decor#rentry graphics#carrd moodboard#carrd inspo#neopets#indie#indie web#early web#webdevelopment#web development#web resources#web design#old internet#old web#oldweb#nekoweb#transparent gif#tiny pixels#pixel gif#moodboard#tutorial#html page#html theme#htmlcoding
427 notes
·
View notes
Note
Heyy!! I love your carrds so so much they're so pretty!! Can you please make a f2u non pro discord nitro themed carrd please please please
HELLO HOPE THIS IS GOOD!
non pro freindly discord nitro themed carrd
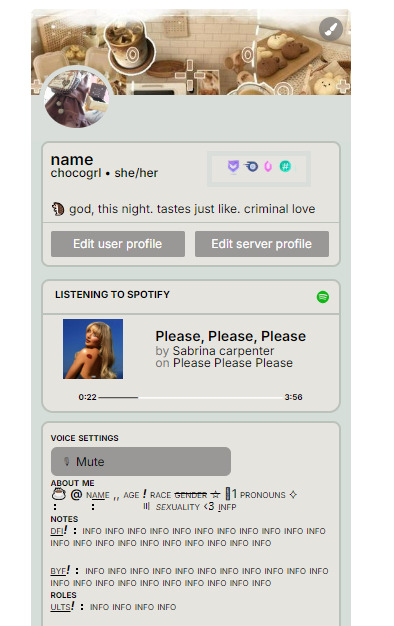
get the carrd here look at it here! here is also the image i used for the nitro badges!
REQS ARE OPEN FOR CARRDS!! only req i have is to be following me to ask for a carrd! and I DO CARRD COMMS!! so if you have a specific carrd you want made message abt my prices and what i take!! use my referral code also to help donate and get some money off on buying pro here / use the code manually HXYLIN !
#carrd commissions#carrd stuff#aesthetic#carrd templates#carrd icons#carrd inspo#carrd moodboard#carrd theme#carrd material#carrd packs#carrd req#discord chat#discord server#discord app#discord mobile#carrd template#request#carrd tutorial#free carrd template#carrd profile#strawberry#cutecore#commission#taking commisions#f2u
2K notes
·
View notes
Text
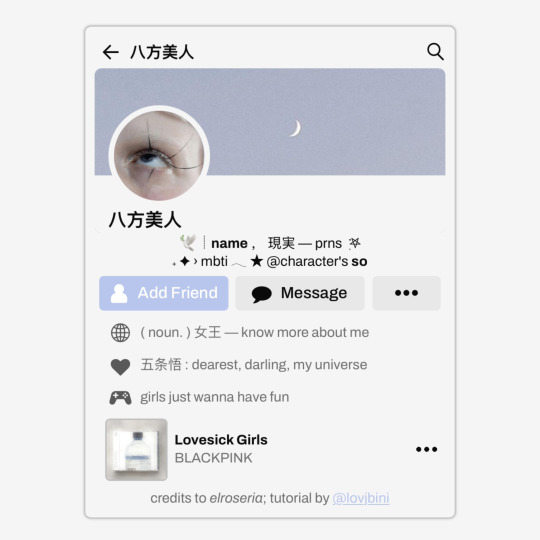
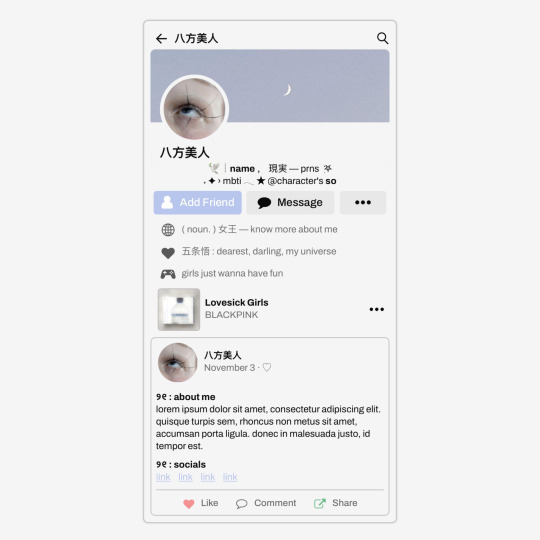
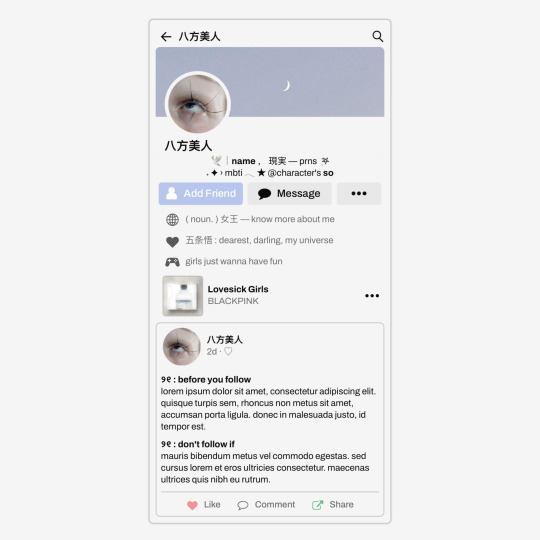
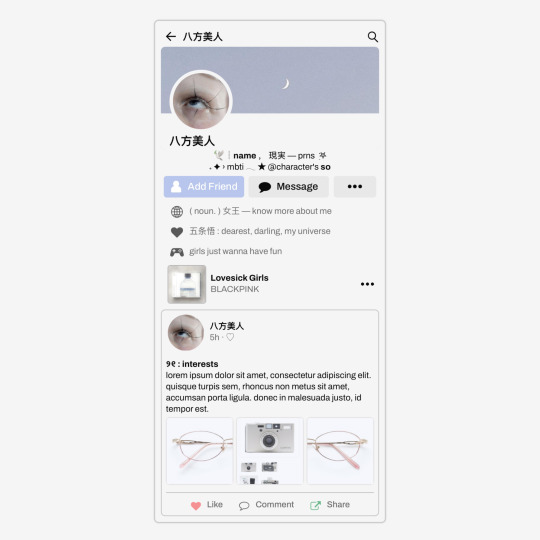
✩ CARRD INSPO by LOVJBINI // © elroseria
like or reblog if you useㅤෆㅤ2024.
✎﹏ please, put “ © elroseria – tutorial by @lovjbini ” in the description if you use our tutorial!
CLICK HERE FOR TUTORIAL
#lovjbini#carrd#carrd.co#carrd co#carrd inspo#carrd tutorial#carrd template#carrd layout#carrd tutorials#carrd templates#carrd layouts#carrd theme#carrd themes#carrd design#carrd designs#carrd stuff#aesthetic#simple#kpop#macbook#pastel colors#pastel aesthetic#kawaii#blue#pastel blue#light blue#facebook
608 notes
·
View notes
Text
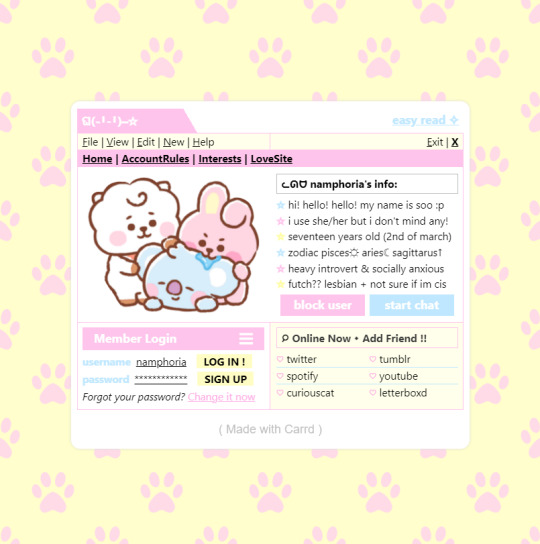

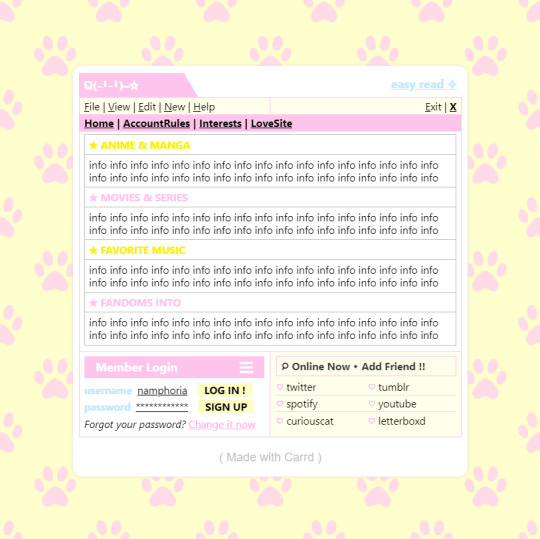

w w w . carrd . co // ⋆ 𐙚 ₊ ˚ 🐇 ⊹ ♡ ˚ .
✿ CARRD INSPO // © misamory
like or reblog if saveㅤ⿻ㅤᐢ..ᐢㅤ♡ㅤ2023.
#⋆ ˚ 。 just an rkive — ★. *#♡✮☁️✧˖°💿⋆。°✩#carrd.co#carrd inspo#carrd template#carrd templates#carrd icons#carrd stuff#carrd material#carrd resources#carrd moodboard#carrd inspiration#carrd#carrd layouts#carrd symbols#carrd help#carrd tutorial#carrd theme#carrd things
2K notes
·
View notes
Text
🥖 𝓨𝗈 𝗍𝖾𝗇í𝖺 𝗎𝗇𝖺 𝖾𝗌𝗉𝖾𝗋𝖺𝗇𝗓𝖺 ᭪ᬻ𓏸𓈒゚⃝
𝅄 ི۪۪۪ ֯ ּ ֗ ۫ 𝖤𝗇 𝖾𝗅 𝖿𝗈𝗇𝖽𝗈 𝖽𝖾 𝗆𝗂 𝖺𝗅𝗆𝖺 𝅘𝅥𝅮♪ ˟̫ː᜴ 🍰


#꒰ atsubie ꒱ ౨ৎ︵⠀⠀#gif by me#heres how the mb from my tutorial turned out ☆#ㅤㅤㅤㅤㅤㅤㅤㅤㅤㅤㅤㅤㅤㅤㅤㅤㅤㅤㅤㅤㅤㅤㅤㅤㅤㅤㅤㅤㅤㅤㅤㅤㅤㅤㅤㅤㅤㅤㅤㅤㅤㅤㅤㅤㅤㅤㅤㅤㅤㅤㅤㅤㅤㅤㅤㅤㅤㅤㅤㅤㅤㅤㅤㅤㅤㅤㅤㅤㅤㅤㅤㅤㅤㅤㅤㅤㅤㅤㅤㅤㅤㅤㅤ#stayc layouts#stayc moodboard#stayc j#kpop icons#kpop layouts#messy moodboard#kpop themes#kpop moodboard#kpop aesthetic#alternative moodboard#alt moodboard#colorful moodboard#yellow moodboard#pink moodboard#indie moodboard#y2k moodboard#fresh moodboard#nature moodboard#soft moodboard#simple moodboard#maximalist moodboard#retro moodboard#vintage moodboard#dark moodboard#edgy moodboard#divider by im4yeons
232 notes
·
View notes
Text

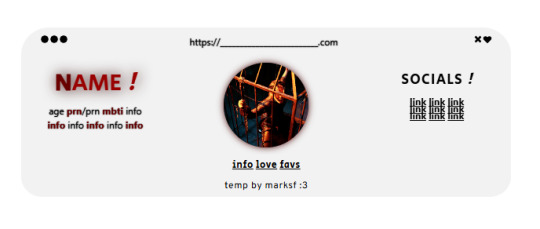
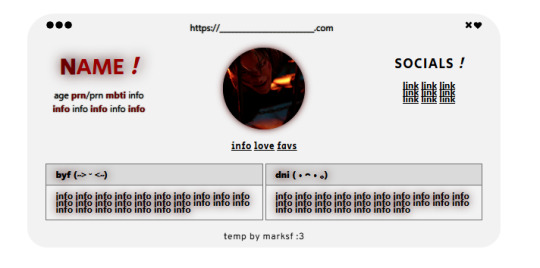
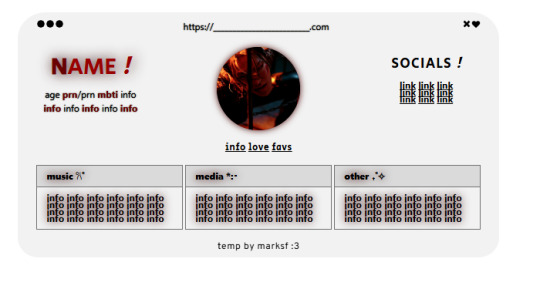
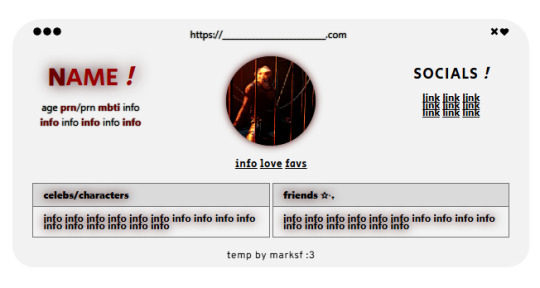
carrd.co template ! ($0+ pay what u want)
non-pro friendly ! preview . buy | refferal code - MARKLEE ♡ kofi
please, do not remove the credit or claim as your own ! you can move the credit but please keep it on the site <3
#marksf#marksf templates#carrd template#carrd#carrd stuff#carrd inspo#carrd resources#carrd commissions#carrd inspiration#carrd templates#template#carrd.co#free carrd template#carrd material#carrd moodboard#carrd layouts#carrd symbols#carrd help#carrd tutorial#carrd theme#carrd things
121 notes
·
View notes
Text

drew something good on my tablet for the first time in months
#btw does anyone have a good tutorial on how to draw mouths i just gave up today and did :333 face help#my art#evillious chronicles#btw sorry its all evillious now i might change this blogs theme to . show that#elluka clockworker#evillious fanart
80 notes
·
View notes
Text
IM TEACHING MYSELF HOW TO RECOLOR MANGA PANELS AND MAKE GRAPHICS IM SO EXCITEDDDD

#purple reo 😊#i’m sososososo excited for these upcoming series u guys omg#gonna try a new theme out for tbp since vgl is already done and i don’t wanna go back lol#actually i might recolor hiori IDK YET#i might post a tutorial if anyone wants to learn how recolor photos/make png dividers/change text color#blue lock#bllk#mikage reo
93 notes
·
View notes
Text
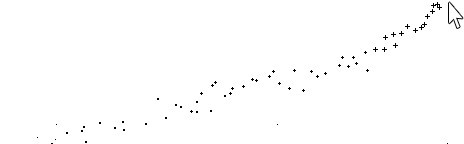
Sparkle cursor tutorial
Just paste the following code right before the part of your HTML under the customize section in Tumblr
https://www.snazzyspace.com/tumblr/mouse-sparkles.php
#tutorial#theme code tutuorial#coding tutorial#tumblr theme tutorial#theme tutorial#tutorials#code tutorial
3 notes
·
View notes
Note
how do you get your text that soft pink shade? tutorial?
BABY PINK TEXT TUTORIAL !
hi babe!! here's a short and hopefully easy to understand tutorial for the text i use in my posts ᥫ᭡
also, just a little disclaimer: the images on this post might not be visible because they exceed the limit of 10 images per post on mobile app. should be fine on a laptop or pc though!!

okay firstly, make sure you're using a laptop and open your post in one tab and in a seperate tab open jsfiddle.
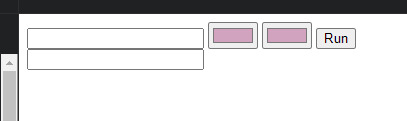
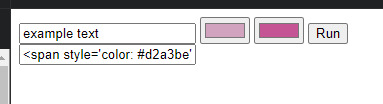
you should be able to see this coding somewhere on your screen:
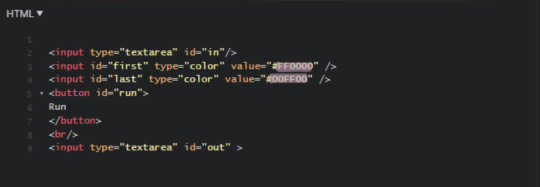
you're gonna replace the two hex-codes (highlighted text) with whichever colours you'd like. to do a gradient, like this, the two codes will be different, but i like to do a solid colour like this so my codes will be the same.
the hex code i use for the baby pink is D2A3BE, or you can use your own. if you don't have a hex code you like yet, you can use the colour picker on this site to find one!
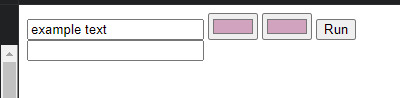
just copy and paste the hex codes into the code so it looks like this:
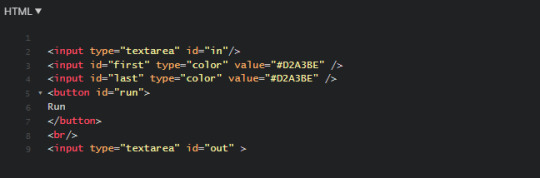
make sure it looks exactly like this. you still need all the spaces, quotations and other code. only change the hex codes.
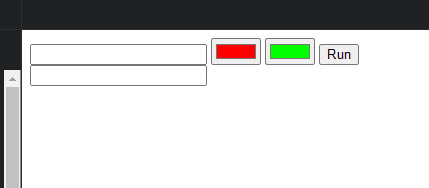
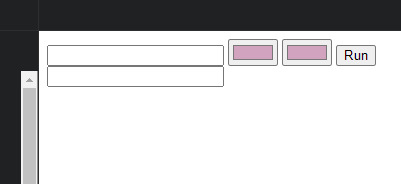
in the top left of your screen, there should be a "run" button, and when you press it, the colours in the bottom right should change from the default ones to the ones you chose.
next, you're going to open your tumblr post in your first tab.

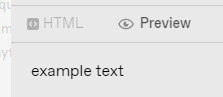
your post will start like this. you'll go to the settings button in the top right (circled) and change the post from rich text to HTML
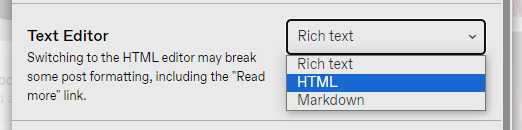
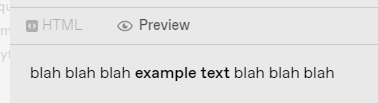
this will enable coding on the post. you'll still have 'preview' where it will look normal and you can still type and edit the post as you usually would.
once you've typed something it will show it in the HTML option just in a different way:
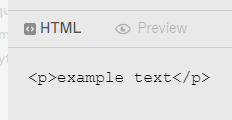
you want to go to the preview page and make sure you've got the text looking exactly as you want it (bold, italic, small, etc.). also note that colours look especially good and show up well when the text is bold. i set mine to bold as an example.
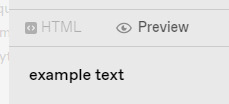
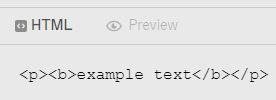
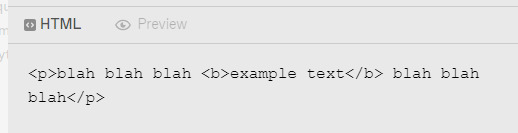
when you switch to HTML it will look something like it does above.
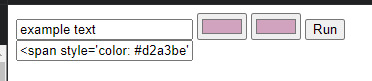
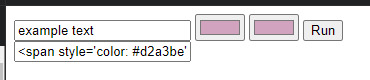
next, you'll copy the text between all the coding prompts (e.g. <p><b> and <b><p>). only copy the text you want to be pink or another colour!! don't highlight any of the coding. then paste it this top box on jsfiddle so it looks like this:
press "run" on the right, and it will spit out a line of code in the second box that will look something like this:
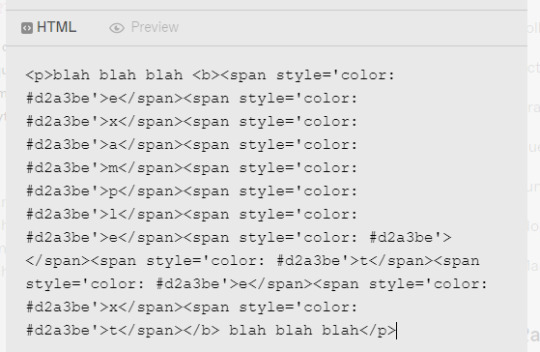
you're gonna copy that line of code and switch over to your tumblr tab. on your HTML version of your post, find the text you're changing and highlight it. then paste the code into that spot. make sure not to highlight any of the surrounding code - only the text you've written and want to change.
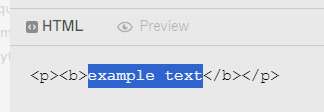
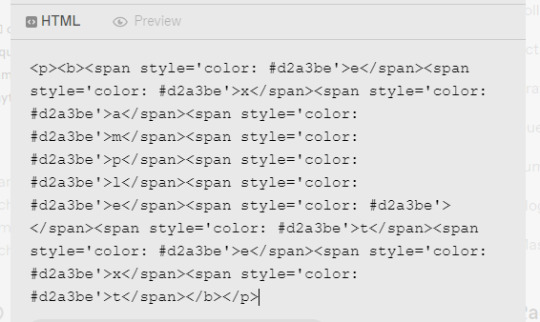
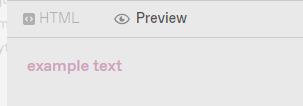
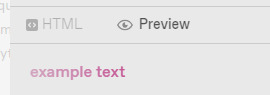
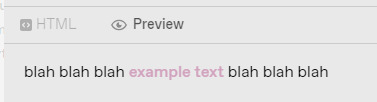
it will look super weird and long because it's colouring each symbol and letter, if you look closely, each letter of "example text" is separated and surrounded by code. when you switch to preview it will look like this:
for gradient, the process is the exact same, but on jsfiddle, when you're replacing the default hex codes with yours, the second hex code you plug in will be different to the one you start with. for example:
this second colour is C45494 btw!!
to do specific text in a paragraph as if bolding it (which i do in a lot of my posts), you just want to find that text in your HTML post, and copy and paste the specific word/s into your top box on jsfiddle, and then proceed as normal. example:

hopefully this helped!! let me know if you have any questions or need me to go over anything ( ˘³˘)
#coloured text tutorial#colored text tutorial#tumblr tutor#text tutorial#text tut#coloured text tut#colored text tut#colored text#coloured text#aesthetic#theme#aesthetic theme#pinterest#pink#hex codes#coding#jsfiddle#dodgesgirl helps#dodgesgirl answers#art donaldson#challengers#mike faist#challengers 2024#challengers movie#mike faist imagines#art donaldson fic#art donaldson smut#challengers smut#mike faist renaissance
230 notes
·
View notes
Text
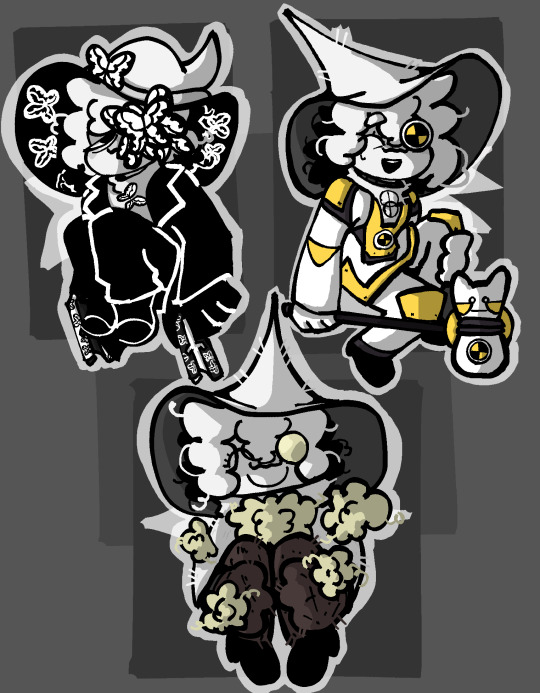
Some abnormality themed Siffrins <3
#keese draws#isat#sasasaap#isat siffrin#sasasaap siffrin#comic siffrin#new game+#isat spoilers#anyways can you tell I had very clear ideas for two of them and as such was forced to decide the third for the sake of this drawing#the main reason I wanted to do this tho was because I was struck by the standard training dummy rabbit saapfrin visions#it feels very mean so ofc I love it#I didnt want to use funeral of a dead butterfly for chou but they have butterfly theming plus the horrors so I didn't have much of a choice#isat sif was the real hard one tho since nothing rly stuck out to me as a particularly interesting choice#I decided to go with happy teddy bear since it works well enough plus I wanted to do the tear at the neck#but yeah I spent like the entire time drawing this thinking abt loop especially with the dummy rabbit being a tutorial exlusive abnormality#also smth smth the dummy rabbit thinking its an employee and trying to do its job smth smth saap#lobotomy corporation
44 notes
·
View notes
Text

some custom phone cases i designed for myself lol
#digital art#puppyaday#the goal is to have one to match whatever outfit i wear. next up is grayscale and its gonna be space themed lol#also thank u catmask for ur water tutorial i cant draw water for shit!!
47 notes
·
View notes
Text
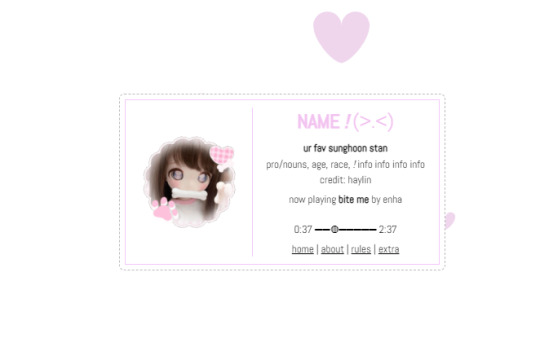
BASIC ACC FREINDLY LIGHT PINK MINIMAL CARRD
Hiii guys, to the comments and everyone i apologize for the inconvenience of the title and everything, the carrd was free at one point but many people kept stealing the carrd and removing creds and giving copies of the carrd and saying they made it. I had sent out posts on here and my discord server letting everyone know if it didn't stop i would start charging for the carrd or just take it away all together and it got progressively worse so i decided to change it to a paid carrd and realized after a couple comments about it on this post that i forgot to change the post and take away the parts where i said free, if you would like the carrd for free there is a tut up on my youtube channel (linked in my pinned post or comms carrd i believe) for it but i won't be giving out copies or temps of it anymore besides the paid one thank you!!
HIIII everyone here's a new carrd! obtain it here look at it here!
REQS ARE OPEN FOR CARRDS!! only req i have is to be following me to ask for a carrd! and I DO CARRD COMMS!! so if you have a specific carrd you want made message abt my prices and what i take!! Donate tips to me so im able to continue making free carrds here! use my referral code also to help donate and get some money off on buying pro here / use the code manually HXYLIN !
#carrd commissions#carrd stuff#aesthetic#carrd templates#carrd icons#carrd inspo#carrd moodboard#carrd theme#carrd material#carrd packs#carrd req#discord chat#discord server#discord app#discord mobile#carrd template#request#carrd tutorial#free carrd template#carrd profile#strawberry#cutecore#commission#taking commisions#f2u#f2ucarrd
1K notes
·
View notes