#Beginner excel tutorial
Explore tagged Tumblr posts
Visit Tumblr Blog
Explore Tumblr blogs with no restrictions, modern design and the best experience.
Last Seen Tumblr Blogs


Fun Fact
China blocked Tumblr because of pornography and censorship problems in 2013.
Text
Introduction to MS Excel: Essential Tips for Beginners

Are you a student or a professional looking to enhance your spreadsheet skills? Look no further than Microsoft Excel, a powerful tool that can simplify your data management and analysis tasks. In this Beginner's Excel Tutorial, we'll explore some basic Excel techniques that will set you on the path to becoming a proficient user.
Understanding the Excel Interface
Let's start with the basics. When you open Excel, you'll be greeted with a grid of cells arranged in rows and columns. Each intersection of a row and a column is called a cell, and it is where you can enter and manipulate your data. The ribbon at the top of the screen contains various tabs, each dedicated to a specific set of tools.
Entering Data
To input data into Excel, simply click on the desired cell and start typing. You can enter numbers, text, or a combination of both. Press Enter to move to the next cell below or use the arrow keys to navigate. If you make a mistake, don't worry! You can edit the content of a cell by double-clicking on it.
Basic Formulas
Excel's real power lies in its ability to perform calculations. Formulas are expressions that perform operations on the data in your spreadsheet. The most basic formula involves using arithmetic operators such as addition (+), subtraction (-), multiplication (*), and division (/). For instance, to add the contents of two cells, use the formula =A1+B1, assuming A1 and B1 are the cells you want to add.
Auto fill Feature
Save time and effort by utilizing Excel's Autofill feature. If you have a series of numbers or a pattern, enter the first few and then drag the small square at the bottom right corner of the selected cell to fill the rest automatically. This feature is handy for creating numbered lists, dates, or any sequential pattern.
Cell Formatting
Make your spreadsheet visually appealing and easy to read by formatting cells. You can change the font, font size, color, and even apply borders to cells. Excel also allows you to format numbers, dates, and currency to suit your preferences or the requirements of your data.
Sorting and Filtering
Efficiently organize your data by sorting and filtering. Highlight the range of cells you want to organize, go to the "Data" tab, and choose the desired sorting or filtering option. This is particularly useful when working with large datasets, allowing you to focus on specific information.
Charts and Graphs
Excel makes it simple to represent your data visually through charts and graphs. Highlight the data you want to visualize, go to the "Insert" tab, and choose the type of chart that best suits your data. Whether it's a pie chart, bar graph, or line chart, Excel has you covered.
Saving and Sharing
Once you've created your masterpiece, don't forget to save your work. Click on the floppy disk icon (or use the shortcut Ctrl + S) to save your spreadsheet. You can also share your Excel file with others by clicking on the "Share" option, allowing multiple users to collaborate on the same document.
Conclusion
This brief Beginner's Excel Tutorial covers the fundamental skills you need to get started with Microsoft Excel. As you become more comfortable with these basic techniques, you'll be ready to explore more advanced features and functionalities. Excel is a versatile tool that can be an asset in various fields, so embrace the learning process and watch your spreadsheet skills grow
0 notes
Text
Top 20 IF Formulas in Excel – A Complete Guide
Excel’s IF function is the backbone of decision-making formulas, allowing users to automate calculations and streamline data analysis. Whether you’re a beginner or advanced Excel user, knowing how to use the IF function in various combinations is essential. In this guide, we’ll explore the Top 20 IF Formulas that can significantly improve your Excel workflow. From basic comparisons to complex…
#Excel AVERAGE#Excel conditional formulas#Excel formulas#Excel formulas for beginners#Excel IF function#Excel IF with VLOOKUP#Excel logic functions#Excel SUM#Excel tips#Excel tutorial#IF formula examples#nested IF Excel#Radiant Resume#RadiantResume
0 notes
Text
Advanced Excel | What If Analysis |Microsoft Excel Free | Excel Training |Excel Tutorial
Advanced Excel is complete Excel tutorial that helps aspiring data analysts with excel data analytics fundamentals. This Free Excel Tutorial is for Beginners and will cover basics of excel like data validation, conditional formatting, spreadsheet fundamentals to advanced excel tips like time series analysis, filters, slicers, excel dashboarding, data visualization, and much more.
#advance excel, #advance Excel Tutorial, # advance Excel topics, #Excel Advance formulas , #MS Excel #Excel beginner to advance , #ExcelTraining, #Learn MS Excel, #Excel Basics, #Excel Tutorial For Beginners, #simpli learn
youtube
#advance excel#advance Excel Tutorial#advance Excel topics#Excel Advance formulas#MS Excel#Excel beginner to advance#ExcelTraining#Learn MS Excel#Excel Basics#Excel Tutorial For Beginners#simpli learn#Youtube
0 notes
Text
complete beginner's guide to [kpop] giffing, as explained by me!
keep in mind everyone has a different style and process, so there are some things in mine that may not feel intuitive or helpful - if so, don't include it! if you can make the gif, and have fun doing it, that's good enough. this post also assumes interest in specifically kpop giffing, but can for the most part apply to other content as well. i would just recommend different sharpening and coloring for those.
separated by headings (not images, since i need those... for examples) - if you are skipping to a specific section, look for the orange text of what you are looking for!
table of contents: - picking your programs - additional tools and programs (optional) - finding files - importing to photoshop (vapoursynth, screencaps, etc) - photoshop shortcuts and actions - sharpening - coloring - export settings - posting on tumblr
programs:
if you already have photoshop / your giffing program installed and set up, go ahead. if you don't, i would recommend looking here to get photoshop. please make sure you follow instructions carefully and safely! i do know photopea is an alternative people use, and i'm sure there are others. i unfortunately don't know any tutorials to link and probably won't be much help in regards to those programs, but i'm sure there are some floating around on tumblr!
my gif process uses photoshop, so this tutorial assumes that as well. if you use a different one, you might be able to transfer this to what you use, i'm not really sure :(
additional tools and programs: - handbrake: upscaler, found here. i make my own settings and generally only use this on lower quality sources to give vapoursynth a better chance with encoding in higher quality. - davinci resolve: a program i use to make clips appear 60fps when they are choppy or too few frames for the gif to look nice, and occasionally to do pre-photoshop coloring! i use the free version. i do not use this all the time and it is a big program, so definitely don't get it if you think you'd forget to / not want to use it. - yt-dlp: open source, downloads pretty much any file i could want quite well. i use this for most of my downloads and for subtitles as well. does require some knowledge of code, or, at the very least, willingness to troubleshoot set-up. find it here! i can share the command lines i run for: video, audio, vid + sub. - 4k+ downloader: what most people use for youtube-source sets, i believe. you have a limited number of downloads per day on the free version, thus the other downloading programs. - jdownloader2: no limit but sometimes a little slow or will refuse to download because of not being logged into an account, etc. a good download alternative if you plan on downloading a lot and yt-dlp is too much. - vlc: free program, standard on some devices, good for viewing files. - mpv: excellent file viewing, can also deinterlace and screencap (if you do not have / use vapoursynth) - vapoursynth: mac users beware, it's not optimized or set up and is a huge headache. windows users, once you get it set up, it's golden.
finding files, what to look for, and how to use them: how to use is explained here, with a focus on smooth and nice speeds! but finding the file is the first step, so let's head there.
stages: k24hrs (invite only, feel free to private dm or send an ask off anon for a file - i will do my best to get it to you); kpopbuzzhub; sharing korea torrent (requires a torrent app); twitter (shrghkqud (only has recent files) and a few other uploaders, requires much more active searching). there are a few other places you can look, but it is often more trouble than it is worth (or costs $). i am also always willing to help people find materials, so you can ask me to help you look for something or to link a source i used for whatever set.
music videos: also sometimes on k24hrs. i use vimeo a lot (color graders, directors, etc., will upload clearer versions). sharemania.us has some kpop mvs, typically bigger groups (i.e. blackpink). this is a place i check for ggs. and if none of these places or searching for torrents on btdigg, or on google in korean works, i just download the highest quality setting from youtube.
other types: like vlogs and fancams, normally directly downloaded from youtube, instagram, or twitter using yt-dlp or sites specifically for the app (i.e. twittervideodownloader).
what do i look for? 1080i for stages (or 1080p) are often super nice as they're a .ts. 2160p/4k is often ideal, but it also depends on your computer and what you are comfortable working with! generally - not always due to ai upscale - a bigger file size (in the gbs, high mbs like 800) is better and has more detail that will look clear when you work on it. older stages (2nd gen and before, some 3rd gen) and music videos often always are lower quality due to camera quality, and much harder to find. if you have to use the youtube upload for a stage, it is definitely doable, but it may be slightly disappointing in the quality you want to achieve. it depends on what you're comfortable posting and making!
how do i use them? if you use vapoursynth, scenedetect (encode/process whole video) or timestamp (just a small clip) your file - if upscaling, using davinci resolve, or any other pre-processing, do that first. it will pull up a resizer and a program and once you encode, it will give you an output file using the size and settings you put. this will import to photoshop. if using mpv or another screencapping method, take your screencaps (again, all pre-processing first) and prepare to import. there are two ways to do that for screencaps. you can also just watch whatever you downloaded, i'm guilty of downloading concert files just for fun 😅
in the next sections, i will be using four different files of varying quality and sources to explain my steps. hopefully that is helpful!
example file 1 (4k and 60fps, obtained using yt-dlp) example file 2 (1080i, obtained from k24hrs) example file 3 (1080p HD, obtained using yt-dlp) example file 4 (pulled from the gg archive i use, master)
importing to photoshop (vapoursynth and mpv explained): using example file 1, i am processing in vapoursynth - i always do one extra second before and after the clip i actually want so it doesn't cut off any frames i'd like. i adjust my sizes based on what works best for tumblr (540px for wide, 268px for 2 column, and 178 for 3 column). i always use finesharp 1.5 (this setting is up to you! i used to use .7, so totally ok if it changes over time, too!) when you export in vapoursynth, you need the y4m header. i use export to mov preset.
when importing to photoshop using a video (so vapoursynth, video files, not screencaps):


i recommend making your selected range a little bigger than the frames you want so they don't accidentally not get included. delete any extra frames while in the frame animation and then turn it into video timeline. i turn all my layers into a smart object (select them all by clicking the bottom layer and then shift-clicking the top one, or use (on windows) ctrl + alt + a to have it select faster). set timeline framerate (if you want to, i always use 60).


now your smart object is ready to sharpen and color!
using example file 2, i am processing mpv - i hit 'd' until deinterlace is on 'auto'. find the clip you'd like and hit your screencap shortcut (alt+s) for me - your screencaps should be super clear, it depends on how you set up your software (if mpv, what compression you told it). screencaps can take up a ton of storage so i recommend only screencapping what you need and deleting them after. when you hit your shortcut, play the file to the end of the clip you went and hit the screencap shortcut again to stop. your frames should be in the folder you designated as pngs now. delete extra frames now!
you now have two options: import as is, which can be a little slow, or turn them into dicom files. importing as is is done through stack. it will prompt you to select what is being loaded - change Use: to folder, and let it process. it will be slow. hit ok when the file list updates.

when it is done loading: create frame animation -> make frames from layers -> reverse frames. i would crop now using the crop tool for processing speed, and then proceed to do video timeline, smart object, and frame rate. when cropping: on the top, above your document names, the second image should show up on the crop tool - this can set your dimensions. i zoom and crop screencaps using this.


the other option is DICOM files, and what i use. when you have your pngs, do alt + d in the folder (windows), type cmd, and run this command: ren *.* *.dcm. press enter. it will update the files. on macOs, just rename the file type to .dcm.

then, import as so (it will prompt you to select the folder your .dcm are in, and will not work if the files are not actually DICOM). i find it much faster than the stack import. crop when it is done importing for processing time, like the other screencap import style.

create frame animation -> make frames from layers -> video timeline -> smart object from layers -> 60 fps.
photoshop shortcuts and actions: (windows) - ctrl + alt + a: select all layers - ctrl + shift + alt + w: export as image - ctrl + alt + shift + s: save for web (legacy) - this is the gif one!
actions are imported or created, i've shared my sharpening ones before. there are plenty you can find (or make) for a variety of things, such as aligning objects to a fixed position on all docs, doing the screencap reverse and import for you, etc. they are imported using load actions - select the [downloaded] .atn file and it'll pop up.

sharpening: explained here, and has my actions (feel free to use). very important to the quality and clarity of the gif. the better the file, the clearer a gif looks, sharpening can only do so much. play around during this step!
coloring: very much the most personal taste stage of giffing. i explain my process here. in kpop giffing, we tend to focus on unwhitewashing. other giffing tends to be more aesthetic tastes and fun since the source has better colors to work with.
export settings: these are what i use! you need the 256 colors. i do not recommend lossy or interlaced. i think bicubic sharper is the clearest i have tried.

posting on tumblr: use these dimensions FOR GIFS. edits can be different. height is up to you - i would not go over 800, but i think my quality looks weird past 600 range anyways.

example gifs: yeji, from example file #1, imported using vs. uses no. 1 sharpening (altered) from my pack. colored. zhanghao, from example file #2, imported using mpv and the load via stack. uses no. 4 sharpening (altered) from my pack. colored. taeyeon, from example file #3, imported using mpv and the load via dicom. uses no. 1 sharpening from my pack. colored. eunbi, from example file #4, imported using vs. uses no. 2 sharpening from my pack. colored.


if your gifs don't look how you want right away, that's okay! it takes time. my first ones were not great either. i am always improving on and working on my gifs. good luck and have fun hehe ♡
#i do not feel that qualified to answer this so caveat im not the best. and please also take ideas from my lovely moots and their resource#tags and tutorials / shared things. they are all so good#m:tutorial#resources#long post#flashing tw#userdoyeons#awekslook#ninitual#useroro tuserflora#useranusia#userchoi
85 notes
·
View notes
Note
What is the easiest website / app for interactive fictions for starters??
Hello, Nonnie!
Unfortunately, I'm not sure which the easiest option would be--sorry about that!
For me, I've found Choicescript to be very intuitive to learn. I use an IDE--CSIDE-- to do my writing, personally. It has built-in testing features and the tutorial that comes pre-installed is excellent. I also always direct folks to the forums if they're just starting out, and recommend reading other games' code when possible! Reading code tbh is the thing that helped me learn most.
Twine is the other extremely popular option for IF, and from what I know it's also beginner friendly! When I was trying out different systems I played around with it, and being able to see the branching laid out was very nice. It's also a great option if you want more freedom with your game's visuals--though, the coding aspect of those visuals is one of the reasons I ultimately didn't use it. That being said, there are tons of lovely templates you can use for visuals!! I know there are a lot of great resources for learning Twine at the interact-if blog--which is a great resource if you're just starting out overall!!
If you're wanting to write specifically a visual novel, Ren'py is also pretty beginner friendly, afaik!!
I know this isn't all probably the most helpful, but I think all three are pretty beginner friendly and have a lot of documentation out there to make learning easier! Good luck in your writing pursuits <3
72 notes
·
View notes
Note
Heyyyy, I just wanted to ask what app do you recommend? I love art! but I feel like my art isn’t arting like I want it to. Any tips?
What app do I recommend? I'd say… Paint Tool SAI! If you're a beginner in art then it's an excellent option! You can watch tutorials on YouTube and even speedpaints to learn how to use each tool and some very helpful tricks.
I also recommend using references, practicing (yknow, drawing a lot even if it's just sketches/doodles) and consuming media of any kind to inspire yourself.
Something I personally like to do to improve my drawing, also, is to see the work of an artist that I admire and analyze it, check the details that I like ("I like how this person draws clouds", "I like how this person colors") and try them - Sometimes I even redraw (not trace, just redraw) entire other people's works myself, always paying attention to each little thing to learn in a more practical way. Helps a lot!
I'm not very good at explaining things and my English isn't the best, but I hope you find this useful!
Take this lil' Wally as an apology for any confusion!
186 notes
·
View notes
Text
Some language learning apps:
Notifyword - free, closest I cpuld find to a free alternative to Glossika with the feature to upload your own sentences/decks/spreadsheets, and it makes audio using TTS and plays them. However I did not test it enough to see if it schedules new/reviews so you don't need to manage figuring all that out yourself. It has potential, I will check into the app again in a year.
Smart Book by KursX - free, used to be my favorite app to read novels as it could do parallel sentence translation, then something broke on my version and it crashed whenever I opened a novel. Now any chinese book I add epub or txt shows me a black screen, no text, making the app unusable. Its easier to read in the web browser now. Which makes me sad because this app was so good back when I got it. Then something broke and I haven't been able to fix it. I paid for premium for this app I liked it so much, I'm really sad I can't see text in books in it anymore. If anyone knows how to fix this problem please let me know? Maybe it's a txt file setting? But then why do the epubs also not load text? Anyway great app... if it works for you. Sadly its broken for me.
Live Transcribe - I don't use this enough. It transcribes what people say (or audio), then you can click to translate the text.
LingoTube - only free app I know where I can put in a youtube video link, and it will make dual subtitles/let me replay the video line by line (including repeating a loop on one line), click translate individual words. Excellent for intensive listening. I'm usually lazy so I just watch youtube and look up an occasional word in Google Translate or Pleco. But this tool is excellent for intensively looking a lot up in a video/relistening to particular lines.
Duoreader - basic collection of parallel texts. No options to upload files, but super nice for what it is. Totally free.
Chinese:
Hanly - a new free app for learning hanzi. Looks great, has great mnemonics and sound information and you can tell it was made with love/a goal in mind. It's still new though so only the first 1000 hanzi have full information filled out, making it more useful for beginners. As the app is worked on more, I'm hoping it will become more useful for intermediate learners.
Readibu - free, great for reading webnovels just get it if you want to read chinese webnovels. You can import almost ANY webpage into Readibu to read, just paste the url into the search. So if you have a particular novel in mind you may want to do that instead of searching the app's built in genres.
Pleco - free, great for everything just get it if you're learning chinese. Great dictionary, great (one time purchase) paid features like handwriting, additional dictionaries, graded readers. Great SRS flashcard system, great Reader tool (and free Clipboard Reader which is 80% of what I use the app for - especially Dictate Audio feature which Readibu can't do).
Bilibili.com app - look up a tutorial, it is fairly easy to make an account in the US (and I imagine other countries) using your email. The algorithm is quite good at suggesting things similar to what you search. So once I searched a couple danmei, I got way more recommended. Once I searched one manhua video, more popped up. Once I searched one dubbed cartoon, more popped up. You can easily spend as much time on this as you'd like.
Weibo - you can browse tags/search without an account. I could not make an account with a US phone and no wechat account. Nice for browsing tags/looking up particular topics.
Japanese:
Tae Kims Grammar Guide - has an app version that's formatted to read easier on phones.
Yomiwa - this is the dictionary app I use for japanese on android.
Satori Reader - amazing graded reader app for japanese with full audiobooks for each reader (which you can listen to individual sentences of on repeat if desired), individual grammar explanations for each part, human translations for each word and sentence. When I start reading more this is what I want to use. Too expensive right now unless I'm reading a bunch, as only the first chapter (or first few) of each graded reader is free. I would suggest checking out the free Tadoku Graded Readers first online, then coming to this app later.
52 notes
·
View notes
Text
[Megapost] Online Resources For Fiber Arts
Hi y'all! Local crazy lady librarian n' crafter here! I am one of those people who loves collecting resources and to that end I created my Weird Wonderful Web spreadsheet many moons back (which is an ever updating project btw) which is a spreadsheet of useful, interesting, wacky, old school, unique, or just plain delightful gems on the internet. For the purposes of this post I decided to pull out all of the fiber arts related resources (+ I added some new stuff just for this post that will make it on the sheet eventually)
Today, I am here to share with you collection of useful resources online for embroidery, cross stitch, sewing, knitting, and crochet. If you have any useful sites that you know of that I didn't share here I'd love to know! Reblog or comment and share!
Without further ado:
Sewing
@fatmasc’s google drive of sewing resources –– lots of sewing resources in one gDrive folder
Dagraeve’s Jedi Robe Pattern –– sew a simple jedi robe for a costume!
Vincent Briggs’ tutorials on making fabric covered buttons (18th century style!) –– what it says on the tin. These are very thorough video tutorials on this topic from a dude is extremely knowledgeable about sewing 18th century men’s clothing. Check out his whole YT channel for more 18th sewing content and his blog @ vincentbriggs.tumblr.com for more excellent content!
@wastelesscrafts basic circle skirt tutorial –– learn how to design and sew a basic circle skirt
Google WeWearCulture Project –– browse a huge collection of images and information about fashion around the world and throughout history.
Embroidery/Needlepoint/Cross Stitch
Sarah’s Hand Embroidery Tutorials –– a complete visual dictionary of embroidery stitches with tutorial videos for each stitch. Super thorough and informative!
Lord Libidian’s Cross Stitch Blog –– lots and lots of useful resources for cross stitch and embroidery, including the extremely handy downloadable DMC thread color chart spreadsheet for helping you organize your thread hoard. Lots of reviews of products and free patterns as well.
ThreadColors –– DMC thread colors to html hex codes. Excellent resource for selecting matching colors from your reference image to color block your next project. Note that some of the color names on this site are older names that DMC no longer uses, but the number codes and the colors themselves remain unchanged.
Faimyxstitch’s embroidery blog posts –– embroiderer Kseniia Guseva, who is well known for her stunning embroideries of scenes of various cities around the world has a variety of freely available posts with information about getting started with embroidery, including a very thorough post on the supplies you might need. She also sells patterns on her etsy and teaches a class (paid).
Free Patterns on the Official DMC site –– DMC has a lot of free to download patterns for cross stitch and embroidery.
DMC thread conversion charts –– convert DMC colors to other brands and vice versa using these handy charts.
reddit’s embroidery community r/embroidery –– lots of great, talented people, many of whom very kindly offer tips when asked!
Needle n’ Thread embroidery tutorials –– lots of posts and videos for beginners!
Knitting/Crochet
Ravelry –– if you’re not new to crochet or knitting you probably have already heard of Ravelry, but I figured I’d stick it here because if you’re brand spanking new you might not have heard of it. You need to create an account but you can download free patterns or purchase patterns on Ravelry. The other main thing you can do with your Ravelry account is to use it to keep track of your projects in your “journal” where you can put notes, a list of the yarns used, the hooks/needles you used, etc. and continue to update the project as you go along. Because I am a person who starts a project and completely forgets about it for like 2 months, I love my Ravelry journal because I put down the yarn I used, the hook I used and the stitch counts for the last row that I crocheted. Nifty!
Left handed Knitting from LeftyKnits –– short, sweet videos on knitting for lefties posted 16 years ago. All are less than 2 minutes long and cover a single micro topic!
Rowbot’s Knitting Videos –– similarly old knitting videos that are short, sweet and to the point from 10+ years ago.
thecrochetside crocheting videos –– short, sweet and to the point crochet videos from 15+ years ago. Right handed mostly.
Internet Archive’s Collection of Knitting Magazines –– collection of knitting magazines that can be viewed online via IA from a variety of time periods. Some magazines also contain crochet and a few crochet magazines are buried in the mix. Magazines contain patterns and project ideas.
Bella Dia’s “vintage” style vertical stripe crochet blanket pattern –– photo tutorial for crocheting a vertical striped multi-color blanket.
General:
findoldvideo.com –– for those who weren’t on YouTube 12+ years ago, you might not know this but there were a TON of super useful fiber arts tutorial videos that were short, sweet and to the point that were all over YouTube, but since the YT search algorithm heavily weights new content you’d never be able to find them now …. unless you use this site! findoldvideo allows you to search YouTube videos from a particular year and sort your results chronologically. A good example search would be “crochet” year: 2008 Boom! Now you have tutorial videos that are less than 2 minutes long and have no promos, random extra talking, title cards, or other fancy shit because they were posted 17 years ago before YouTube was awash in “content”. You’re welcome.
Degraeve Color Palette Generator –– generate a color palette from any image on the web and get hex codes. Good for graphic design, but could also be useful for coming up with “inspired by” color palettes for your projects.
Kleki –– digital painting in your browser for free. Includes a wide range of brushes and the ability to use layers. If you need to do some drawings for your project, Kleki is a good free alternative if you don’t have paid software on your computer or tablet.
Library of Congress Digital Collections –– Free to use reference images of a wide range of items, including images of historical fashions!
ManualsLib –– did you just buy a second hand sewing machine, digital embroidery machine, or knitting machine that doesn’t have a manual? You might be able to download a free copy here on the internet’s most comprehensive catalog of product manuals.
Stitch Fiddle –– A site/tool for designing patterns for knitting, crochet, cross stitch, needle punch and more.
The Smithsonian Image Archive –– Free to use images of a massive amount of things! If you like designing embroidery or cross stitch images of botanicals, insects, animals, etc. you can find high quality images of these here and download them for free and use them for anything.
Encyclopedia of Needlework by Thérèse de Dillmont (1890) –– Dillmont’s Encyclopedia of Needlework contains tutorials for sewing, embroidery, cross stitch, lace making, knitting, macrame and more. Originally published in 1890, it was an extremely popular work on the topic and is still being reprinted today. The link takes you to a free online copy on Project Gutenberg. It unfortunately doesn’t seem to have included the Table of Contents so you’ll need to pop a ctrl + f (cmd + if you’re on mac) and search your desired terminology. If you get it in print it is HUGE!
The Dictionary of Needlework by Sophia Frances Ann Caulfeild (1885) –– Read another popular book stitching, with the delightful subtitle: “an encyclopaedia of artistic, plain, and fancy needlework. Dealing fully with the details of all the stitches employed, the method of working, the materials used, the meaning of technical terms, and, where necessary, tracing the origin and history of the various works described. Illustrated with upwards of 800 wood engravings, and coloured plates. Plain sewing, textiles, dressmaking, appliances, and terms”
Volunteering Opportunities:
Project Linus –– Project Linus seeks to “Provide love, a sense of security, warmth and comfort to children who are seriously ill, traumatized, or otherwise in need through the gifts of new handmade blankets and afghans, lovingly created by volunteer blanketeers.” Knit, crochet, or quilt blankets that will be donated to NICU babies, Peds Oncology kids, and more. My grandma quilted for Linus for many years. I think that this post is a great encapsulation of the impact of Linus and similar orgs that donate blankets to kids in need.
Loose Ends Project –– “Loose Ends is an everyone-is-welcome movement that aims to ease grief, create community, and inspire generosity by matching volunteer handwork finishers with textile projects people have left undone due to death or disability.”
#fiber arts#crochet#knitting#embroidery#sewing#resources#masterlist#megapost#reference#mine#help#please please tell me what resources YOU know about! I'd love to hear about them!!!
49 notes
·
View notes
Text
A disgruntled Tumblrina (gender-neutral) made a website and why you should too.
Or "reject social media, return to personal websites".
PART 1: THE PART WHERE I CONVINCE YOU TO MOVE TO PERSONAL WEBSITES
So, the Web 2.0 social media infested landscape seems to be crumbling before our very eyes. Reddit's leadership is increasingly greedy, Twitter is sinking under the weight of Elon's massive, yet increasingly fragile ego, Tumblr is slowly turning into another lifeless corpo-fest, complete with the layout, Instagram continues to be vapid and soulless and Facebook seems to be going the way of MySpace.

(feel free to check the alt text on these, btw)
In these troubling times, where everything looks the same and you're expected to be milked for every dollar you're worth, what is a disgruntled Internet surfer such as yourself to do? Move to an untested alternative that's bound to get overrun by fascists thanks to poor moderation? Stay the course on the sinking ships you're used to?
Well, what if I told you that we've solved this problem way back in the 90's and early 2000's and were merely duped by the Big Zuck into forgetting our legacy? What if there was a cure for the sanitized, dull social media hellscape?

It takes a bit of work, when compared to just using a social media site, but even if your particular use case makes switching difficult (ex. an artist looking to promote their work), it's still a good secondary option to consider.
The core appeal is the ability to customize and individualize, make a corner of cyberspace unabashedly yours,
It can also be an exciting avenue of creative expression, giving whatever you want to say a unique coat of paint,
Most website hosting services are a bit more lax about what you can do on them, due to changes in the profit structure (rather than depending on advertisers and investors, they either have a premium option to give supporters perks, have another product, or, in the case of paid services, you renting that space IS the product),
If you want your website to be more accomodating and accessible, you don't have to file tons of feedback - do it yourself,
If you'd like to connect with other webmasters and promote each other's websites, we have webrings - sets of circular links that connect websites with something in common, be it a topic, aesthetic or friend group,
You're less likely to have your stuff purged by an ill-advised change in policy (especially if you have a backup of your files somewhere),
The more people do it, the less power those massive social media corpos have over the internet,
It can be a load of fun!
If I have you convinced, keep reading into part 2. If you just wanna see what I did, skip to part 3. If neither, feel free to continue scrolling. I won't hold it against you. You'll be missing out, that's all.
PART 2: SO, YOU WANNA MAKE A WEBSITE!
Good choice, here's some resources!
sadgrl's absolute beginner's guide to Neocities - what it says on the tin!
W3Schools - a more in-depth tutorial site, a learning resource so excellent it substituted for what I was supposed to learn in technical highschool (because our teacher just told us to go on W3Schools instead of teaching us shit)
A list of free layouts for your website - whether to use as a base to learn from or to simply take for yourself,
Neocities - the posterchild for free website hosting for personal websites. Doesn't allow video or audio, but you can get around that by linking those files from elsewhere. Beginner-friendly to a fault - once you have an account just drag and drop your files in,
Gitlab (& Gitlab Pages) - a more advanced option, but it has a few advantages of its own. Gitlab is a website hoster second and a version control service first - which is programmer speak for "keeps track of changes in your code and stores a backup of it online". it helps a lot when working on multiple devices or co-writing with a friend. And secondly, you can use Gitlab Actions to automate putting your website up (even on Neocities, like I do!)
My askbox - I am not joking, if you have any questions about any of this, I'd love nothing more than to help you out!
But with most of my indie web propaganda out of the way, it's time.
PART 3: Welcome to Timewatcher OS.
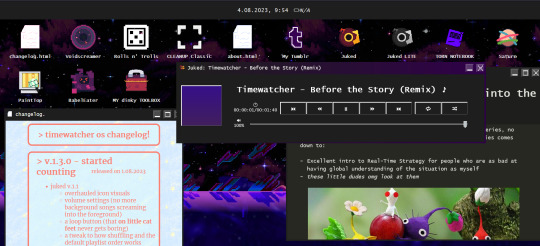
Of course, because I couldn't be normal when it comes to making a website, I had to turn it into a fake operating system. Each subpage is an "app", opened in a separate embed window. It has unlockable wallpapers (no pay2win, prommy). There's bideo games on it! I even made a music player for it so I can share my incongruent music tastes!
Like I said in my Tumblr bio, if I ever go radio silent for more than a month, it means I've gotten fed up with this hellsite and moved to my own homepage permamently. And I highly advise you make an option like this for yourself too! Lastly, if any of y'all would like to start a webring, do let me know in the askbox - I'm down to manage it if I'm not alone in there.
Anyways, I hope I convinced you to make a website, or at least check out some of the cool sites you've been missing out on! Hope to see you on the Old Web!
432 notes
·
View notes
Note
how do you decide the colors of your art? color theory is so hard and your art is always so vibrant and cute! 🥲
Non are you on the right page? 😅 jkjk
uh I've put off answering this ask (this was from March 2nd aksjdhk) because Idk what I'm doing most of the time and go with the vibe BUT I tried my best with this, sorry if it's messy af akjshdkjasd
again like the previous tutorial-ish ask I answered, I am not a professional artist by any means so all of these are just stuff I learned on my own and heavily simplified for me to digest and implement it easily, you'll have to take these with a grain of salt. With that said-
Okay first off, yeah color theory is hard and I don't know everything about it xD I think the most I've used are these ones:

There's a lot of tutorial, advice and like, art out there that explains the entire color theory thing, some are complicated and some are easy. My advice is pick only 1 thing to focus on, try to understand it and then use that one advice, then only moving on to other concepts, because there's so much going on with color theory it's very easy to get overwhelmed and to give up on it!
here are some recommendations if you want to learn color theory:
bluebiscuits
nouconcept has a lot of post of all kind explaining her process and colors in a cutesy, bright and colorful manner, so feel free to scroll through her page! I recommend [basic knowledge with colors, color theory, color palettes (more on this later)]
Btw if you're on Procreate, I like to use the square more than the triangle. Also, if you click on "Harmony", there are modes of color theories (the complementary, tetradic color thingy) that you can pick to create colors easily.


Like when I set it to "Split Complementary" and when I pick this bright pink as my main colors, there are 2 more circle to indicate the complementary colors (green and blue)

Okay in terms of picking my colors like the how and why, the easiest way is to find color palettes to work with, you can find them in abundance in pinterest for starters, but if you want more specific or control you can try colorhunt, sometimes you'll see me reblogging palettes from @/color-palettes too (here's an example on the result of using a set of colors, pretty cool!)
If you're using Procreate, you can also convert images to palette easily. You know how sometimes when you see really aesthetically pleasing screenshots whether it's from games or anything and you go, "huh, I wanna color something like that but I don't know how and I don't feel like color picking every pixel"? yeah just plop it into procreate and you'll get an array of colors to work with. Here's how to do it.


Uhhh next is about shading I guess? xD here's my simplified way to do it. If you want me to go in depth or more about "Layers" you can send me another ask, but I'm not the greatest at it I just like to use a few of it.
On the alpha lock lineart thing, red is usually nice to work with on skins, orange is good for like a glowy/warm/AYO LIGHT IS RIGHT HERE ON HIS HAIR situation, blue is for reflective lights or like in the darker zone (don't take my words for it cuz I rarely use blue correctly)

I think when it comes with shading there's a lot that can go wrong, and very quickly too, so what I would suggest is try out the cel shading technique first, in my opinion it's cleaner and much easier to handle. Marc Brunet does an excellent tutorial on this. If you want to know the differences between cel shading and the usual soft shading you can watch this video by Winged Canvas.
Why I think cel shading is easier? because there's not a lot of blending that needs to be done. From my experience, I feel like blending can sometimes lead to badly smudged, blurry, undefined look on a painting, it comes with experience from understanding different aspects like lighting, face planes, color coherency etc. If you want to learn more about the details, I can suggest:
How to learn digital painting (beginners) by Sinix Design (highly recommend them for the basics and foundations)
Better Shadows by Sinix Design again, this is still something I'm learning and struggling with but this video talks in detail about hard lines and soft lines, planes and etc, essentially the things that make up a good color piece
While we're at it, actually I think before you even tackle color you probably wanna take a look at greyscale first xD but okay then that's a whole new thing to learn so, this post is more like a simplified way of how I color stuff. I will rec Ariabba and Lucas Peinador's videos if you're interested tho.
RIGHT okay so the next few are just more like things I do. When it comes to colored doodle, once I've picked a palette I want to work with, I stick to it. Idk what to call this except color group consistency. You can look at this example below.

You can see how all the colors are primarily from the ones on the side, the only difference I would make are saturation and hue but only very minimal for shadows. (This is also why I recommended finding a color palette in the beginning) I feel like whenever we do colors we're quick to jump into the big fiasco of "oh I want to make everything really bright and really colorful!" and there is nothing wrong with that thinking, it's good! But if you're new to coloring in general, that kind of approach can make a painting feel...uh...disconnected? I think? it's like the colors aren't matching well together if you don't know how to blend and make all the colors work xD If we stick to a set of colors, it's much easier to maintain the tone of the art.
Okay, another tip when it comes to shading is this.

Let me preface this by saying, there is nothing wrong with the "Dull" method, it all depends on the mood/setting of the piece you're working with. Say if you're drawing something that is moody, in the shadow, in the rain, just basically in a darker surrounding, then it works well. But in other cases, if you feel like your colors looked dull then maybe you can try the 2nd method. Basically you shift your hue (the outer circle, the ones with different colors like green blue purple and all) a tiny bit then increase the saturation to the level you want. This would make the shadows/shades much brighter and nicer to look at.
Another tip is understones! they help tremendously in terms of adding just that extra oomph to your art. Take a look at this example.

Adjust your brush opacity (make it lower) to color a base (in this case, orange), then only shade in the color you wanted (red), you can see how it's a little bit more interesting to look at. Again, this is just a preference thing, if you prefer to make it red then go red.
Here's another example, I think this is more so of combining undertones and color stacking. If I just color Laswell's shirt with pure dark purple, it wouldn't be as interesting and eye-catching, ya know? So I actually used a mix of blue and pink as undertone, then I shade dark purple over it, then adjust in some places with a lighter purple as accents.

This is another thing that I do sometimes, not often because idk what I'm doing with this LMFAO but I'm basically trying to add more variation and some pop to a painting by dotting in really bright, almost neon like colors to well, make it interesting looking. I think I always use the blue, purple, orange, yellow category.

Lastly (and I like to say this a lot), when all else fail, just use a gradient. It doesn't matter if you don't know how just know to use a (light color) (base color) (darker base color) combo and instantly your art already looks more interesting. Hell, why not take it a step further and add some texture to the piece? It doesn't have to be complicated, you could put random lines, dots, hearts, whichever works as long as it creates a subtle contrast to the whole piece. Very small detail but it can make a big change! Let's take Alexander the IV as example:

Once we added a green to it, it looks good on itself already, like hey now we know the lil buddy is green. But it's boring, okay then smack on some gradient, make the top lighter and the bottom darker. Hm but it's missing something, okay random bullshit go! Add lines, hearts or use a noise brush over the green and boom, now Alexander the IV looks cuter.
Hope these help!
#gomz scuff advice#man idk if i even make sense aksjhdkjghsk#like i do monochrome doodles like 80% of the time....so...idk shi about colors...DKSJZHLSKGJ#and most of my color doodles usually have shittier engagement/numbers/reach so that says a lot LMAO#i almost didnt want to answer this....but fuck it lmao i didnt feel like removing your ask either so here#maybe it can help a tiny bit#hopefully#waiting for another artist who knows what they're doing - sees this and go wtf is this panda on about kajhsfdkjh#sorry HASKD uhm anyways#ask response#idk how to tag this#color#art#i guess???? yeah sure why not
20 notes
·
View notes
Text
ForexJudge.com is a comprehensive platform that provides reviews and comparisons of forex brokers. Here’s a detailed point-by-point review:
1. Website Design and Usability
User Interface: ForexJudge.com boasts a user-friendly interface, making navigation easy even for beginners. The site layout is intuitive, with well-organized sections and quick access to key information.
Mobile Compatibility: The website is fully responsive, offering a seamless experience on both desktop and mobile devices.
2. Content Quality
In-Depth Reviews: ForexJudge.com offers detailed reviews of various forex brokers, covering aspects like fees, platforms, customer service, and regulatory compliance. The reviews are thorough, well-researched, and provide valuable insights.
Comparison Tools: The site features robust comparison tools that allow users to evaluate brokers side by side based on multiple criteria, helping traders make informed decisions.
Educational Resources: There is a rich library of educational materials, including articles, tutorials, and glossaries, which are beneficial for both novice and experienced traders
3. Expert Analysis
Professional Reviews: The reviews are crafted by seasoned forex professionals, ensuring knowledgeable and insightful evaluations. This expert input adds credibility and reliability to the content.
Regular Updates: ForexJudge.com frequently updates its content to reflect the latest trends and changes in the forex market, keeping users informed with the most current information.
4. Broker Coverage
Comprehensive Listings: The platform covers a wide range of brokers globally, offering a broad perspective on the forex market. This extensive coverage includes well-known brokers as well as emerging ones, providing options for different trading needs.
Unbiased Reviews: The reviews are presented in an unbiased manner, focusing on both the strengths and weaknesses of each broker. This balanced approach helps traders choose brokers that best match their requirements【12†source】.
5. Community and Support
Engagement: ForexJudge.com fosters a community of traders who rely on its reviews and insights. The platform encourages user feedback and interaction, enhancing the overall user experience.
Customer Support: The website offers excellent customer support, ensuring users can get assistance when needed. This includes answering queries and providing additional information upon request.
6. Trust and Reliability
Transparency: ForexJudge.com maintains high transparency in its operations, including how reviews are conducted and how they make money. This builds trust among users.
Industry Recognition: The platform is recognized in the forex trading community for its comprehensive and reliable reviews. Its reputation is built on years of consistent and accurate information delivery【14†source】.
7. Additional Features
Market Insights: The website provides market insights and analysis, helping traders stay updated with market movements and trends.
Broker Awards: ForexJudge.com hosts annual awards, recognizing top-performing brokers in various categories. These awards are based on rigorous criteria and extensive research.
Overall, ForexJudge.com is a valuable resource for anyone involved in forex trading, offering detailed broker reviews, educational content, and tools to aid in making informed trading decisions.

#HeroFX Review 2024#is herofx a regulated broke#herofx#herofx review#herofx login#hero fx#herofx broker#is herofx regulated#herofx reviews#herofx minimum deposit#herofx mt5#herofx broker review#forextradingreviews#forextradingreview
60 notes
·
View notes
Note
in the spirit of interaction: what are your thoughts on chinese calligraphy? have you ever taken classes? (i ask because it's something of a closet hobby of mine and your header is calligraphy as well ^.^) also, what would you say the most challenging part of studying is for you?
in the spirit of interaction: thank you, and apologies it inevitably took me this long to answer!!
my actual experience with calligraphy goes hand-in-hand with my ability to handwrite: as in, not much! whenever I do end up restarting my handwriting journey (and I'm going to have another crack at it soon), however, I find the calligraphic component of it the most satisfying by far. I'm going to focus on the practical element of calligraphy as beautiful handwriting that you can actively study, rather than as an art form or studying its history.
one of the things I focused on right from the get-go with learning to handwrite chinese was to copy chinese handwriting and not typed fonts. the balance was always important: chinese is such an elegantly written language and my ugly beginner's handwriting physically hurt me. I also love handwriting in english and deliberately crafted my own cursive style when I was around 14, so I knew I wanted to pay similar attention to it in chinese. that meant I spent a lot of time 'handwriting' without knowing the characters I was writing in the beginning, purely to get a feel for the balance and shape of characters.
I think calligraphy is especially interesting to deliberately study from a practical perspective when learning to write because it provides an answer to the 'how to fit X character in a box' conundrum that always plagues me: fat characters, complex character, lopsided characters, thin and narrow characters. looking at calligraphic representations of whatever character you're trying to learn to write can show you that often this desire to fit into the box is a little misplaced: most natural chinese handwriting does have characters that are taller, broader, longer etc, and you can learn in what circumstances such a re-balance is considered beautiful and acceptable, and in what circumstances the size difference or relationship between different characters on the same line is too extreme and veers towards awkward or ugly.
I find making an effort to separate your handwriting practice (for learning the strokes) and handwriting practice (for practicing balance and style) can lead to really excellent results!! I would add a separate half an hour of practice at the end of my general handwriting daily ritual to specifically focus on one aspect of handwriting: a type of stroke, the way I held the pen or pencil (I don't regularly use brush and ink), the composition and balance of similarly composed characters.
for this, I would go to a chinese calligraphy app on my phone and search for, say, a common character like 也 that I already knew how to write. this would show me examples from different styles of calligraphy, and where the line might be between 'readable and beautiful' and 'artistic but illegible for daily life'. from there I would go on a little bit of a youtube rabbit hole watching other tutorials for that particular character - I found searching for the kanji in japanese if it's the same as the chinese character to be very helpful, as there are lots of videos for a japanese audience! - and pay attention to the key things that go wrong, its balance, where its 'centre' is and so on.
I would then go and practice writing the character, but not only that: I would try and deliberately make certain parts of it exaggerated, as much as I could, to see which parts of the writing process are 'loadbearing'. for example with 也 - the middle line often in calligraphic styles begins way above the left-most line and the hook. so from that it would become clear how the character might look sped up - I would also try and find cursive examples of each on youtube to understand which strokes are commonly joined.
all of the characters that I can write - still, after a long time away - in a way that I find pleasing or well-balanced for a non-native and unpracticed writer, are ones that I spent the time and effort into studying in this amount of detail, or ones that are analogous to other characters whose compositions I studied. the best thing about this sort of method is that, even though you might only be 'learning' one character a day, the rules and general guidelines for form, weight of the pencil, balance of composition etc are very similar across many different characters. and you learn to spend time before you write a new character examining it and figuring out where the weight of it is, what it would look like in a square, what it would look like calligraphically on its own, where it would sit on a line with other characters etc. so it all carries over to other characters you later learn, and your handwriting in general begins to improve.
in terms of calligraphy as an art form: I think part of what draws me to chinese and specifically traditional chinese culture is the emphasis on morality within craft - excellence in learning is a moral virtue. the harmony of technical excellence and virtue is something which makes me kind of go insane. and it makes sense: there is not the same separation of duty and social life and other confucian values to family, state etc with art as there is in western culture: who wrote the poems? even the poets with the most overtly daoist and/or rebellious themes had often been officials at court, even if they were hermit-ing out in the mountains or had fled their official positions. a gentleman of good standing was expected to master calligraphy, but also painting, poetry composition and so on.
with the same brush and the same paper, the three arts are inseperable: a painting is a poem and a poem is a painting, and both are enriched by the fervour or restraint or elegance or curtness or wildness of the writer or painter's brushstrokes. of course there are individual artists who are remembered more as calligraphers or painters or poets, but most 'gentlemen' and respected educated rich women (though about this I know less, being honest) would have been expected to excel at all three.
and the 'literati' was a social class, tied up of course with land and money and huge privilege, but in theory a class which anybody with the luck to receive a good education, pass the imperial exams and join the ranks of government, could enter. (of course you had to have money to be tutored in the first place since there were not schools and private tuition was the norm, but anyway...). even if you failed the exam, or failed at one of the increasingly challenging levels, your life could be transformed: you could find a job as a tutor or teacher and escape the crushing weight of a peasant's life, with room to pursue leisure.
so my appreciation for calligraphy I think ties in to my appreciation of this way of thinking and the emphasis on a well-rounded gentleman of letters, and the idea that learning and painting and writing are all forms of self-betterment and cultivation. that too ties in with the martial arts aspect of it - like you can see in films like zhang yimou's hero, where calligraphy is held up as proof of a swordsman's mastery of the sword - in a way which is kind of mocked in the west, or seen in anime with the old master at the top of the mountain, but something that does have its basis in reality. the idea that creativity itself must be based first on a solid mastery and understanding of the classics, of the works of antiquity; the idea that learning and exercising that - like you exercise your body - is a morally good thing to do. the idea that because it is moral, your own moral virtues or lack thereof, your own character, can be revealed in your calligraphy or your swordsmanship or your poetry or your art.
I don't have any especial knowledge of calligraphy itself, but the underpinning idea is very compelling to me. I suppose it's similar in some ways to the greek strenuous education of body and mind in antiquity, though I really don't know much about that. I know that the heavy and weighted respect for the classics can be stifling in a lot of education, and has worked to repress and suppress the rights of women and the lower classes. so of course there's nuance, and having taught in east asia three times I'm well aware of the frustrations and cruelties, sometimes, of a confucian-based classroom. but I still think it's something we can learn from in the west, with discernment and respect.
(I COMPLETELY FORGOT THE SECOND PART OF YOUR QUESTION!! will do another post on that, sorryyy)
#meichenxi answers#this got long and rambling sorry!!!!!#also I am writing this with no sources and acknowledge this and its likely vagueries or mistakes#please don't eat me
12 notes
·
View notes
Text
HELLO @okartichoke I AM HERE WITH MOSSY'S GUIDE ON HOW TO START SEWING: A VERY MESSY TUTORIAL
I am extremely self taught, so this is gonna be a lot of links and infodumping!!!! Hopefully this helps a even just a little bit :>
SO! I honestly got into sewing through youtube during covid, largely bc i wanted silly fun clothes! There are a loooot I could recommend to you out there, but I personally find that the more chaotic and learn-as-they-go people help me the best! Rachel Maksy and The Stitchery are, to me, some of the best to learn from! Which is honestly pretty funny since they tend to just fully wing it most of the time lol. While i could recommend excellent sewists like the amazing Bernadette Banner (who is actually the first sewing channel I watched!), I find that the more loosey goosey the process, the more i can learn, if that makes sense? I find it helpful to watch people trial-and-error their way through projects and show where they succeeded and failed since I get a better grasp on their process that way.
The best way to start sewing, in my humble opinion, is to grab whatever sewing machine you can get your hands on and play around with it! Read the manual, find a tutorial video on how to thread the machine, grab some scrap fabric and play around! You don't really need any special needles or feet (the little thing that holds the fabric down), unless you wanna get started sewing denim or velvet or something Speaking of which, learn about fabrics!!!!! I learned mostly by going to joanns, touching the fabrics, and looking at the content labels. Everything has different uses, and while two things might both be cotton, one could be knit while the other jersey (tshirt fabric). I like this video for learning the basics! Tbh this one took me a while. Usually patterns have recommendations for what fabrics to use, so that's always a good place to start!
Patterns. Ah my arch nemesis. Unless you decide to start drafting your own patterns (or get a mannequin and learn how to drape fabric), you're probably gonna need to use one. There's two major things i recommend for this: 1) Make sure there's a video tutorial online before buying, and 2) start with something you might actually use/wear. Pattern instructions are notoriously vague, but thankfully many wonderful people make video tutorials for them! And while you might be tempted to grab one of those beginner friendly patterns, they can sometimes be. real ugly and not well fitting. Also boring! Finding something you like will hold your attention better and make you actually wanna finish it!
Ok SO. getting into more of the cosplay sewing stuff. First things first my knowledge here is a bit more limited, unfortunately. Fortunately there are many wonderful people out there with tutorials!! So if you wanna learn more definitely look there!!! General tip for cosplays + more complex sewing: MAKE MOCK UPS PLEASE IT SUCKS BUT IT HELPS SO MUCH. Go find the ugliest fabric in the sale bin and buy a few yards, then use it whenever you wanna test patterns. It might be tempting to immediately start cutting and sewing the finished garment, but the truth is that patterns rarely fit perfectly well (especially if they're fitted/tighter on your body). Make an ugly, barebones version first with your bad fabric, take notes, and then start making the finished piece. It'll save you money and sanity.
As for cosplay youtubers, I heartily recommend Sarah Spaceman, since not only do her videos show her process, she also does segments teaching you more about sewing!! She tends to tackle more complex projects, and watching her take those on has helped me a lot :} For cosplay patterns etsy usually has quite a few! I like Indigo Patterns (they have a good array of loz patterns I need to buy) as well as Alice in Cosplay Land. Please note that I haven't bought from either, but both their etsy shops have wonderful reviews and I plan to buy from them in the future!
not gonna lie I am getting very sleepy so I'm gonna cut it off there for now! Hopefully my rambling helped lol. Feel free to ask me any questions or for any clarification!
#wowie this is longer than I thought#and i didnt even get into any specifics#tbh my whole method for learning things is mess around and find out#you'll only get better once you start!!!#it looks really daunting at first#but you gotta start sometime!#the time will pass anyways#anyways you're more than welcome to dm me with any questions!!!#i will do my best to answer them :]#I was gonna include pictures of my projects and mockups#but *apparently* i deleted them all for some stupid reason#and i'm currently trying to finish all my half done projects before I start any more#so no pictures for now 😔#mossy’s sewing adventures#sewing#mossy talks
29 notes
·
View notes
Text
Yvette Heiser - From Amateur to Pro: Essential Tips for Taking the Perfect Picture
Photography is an art form that captures moments, emotions, and stories in a single frame. For many aspiring photographers, the journey from amateur to pro can be daunting. However, with the right guidance and practice, anyone can elevate their photography skills. Renowned photographer and Yvette Heiser – tips for taking perfect pictures, known for her stunning visuals and expert techniques, shares her essential tips for taking the perfect picture. Whether you're a beginner or looking to refine your skills, Heiser's advice will help you achieve picture-perfect shots.

Understanding Your Equipment
One of the first steps to becoming a proficient photographer is to understand your equipment. Heiser emphasizes the importance of getting to know your camera inside and out. This includes understanding the functions of different settings, such as aperture, shutter speed, and ISO. Experiment with these settings to see how they affect your images. Heiser suggests spending time reading the camera manual and watching tutorials to fully grasp the capabilities of your gear.
Mastering Composition
Composition is the backbone of a great photograph. Heiser believes that understanding the principles of composition can transform an ordinary snapshot into a work of art. The rule of thirds, leading lines, and framing are some of the fundamental techniques every photographer should master. Heiser encourages photographers to practice these techniques and develop an eye for creating balanced and visually appealing images.
Lighting is Key
Lighting plays a crucial role in photography. Heiser advises paying close attention to natural light and learning how to manipulate it to enhance your photos. Golden hour, the time shortly after sunrise or before sunset, is ideal for capturing soft, warm light that adds depth and dimension to your images. Heiser also recommends experimenting with artificial lighting, such as using reflectors or off-camera flash, to achieve the desired effect.
Focus on the Subject
A compelling photograph often has a clear and well-defined subject. Heiser stresses the importance of identifying your subject and making it the focal point of your composition. Use techniques such as depth of field to isolate your subject from the background, creating a sense of importance and drawing the viewer's attention. Heiser suggests practicing portrait photography to hone your skills in capturing the essence of your subject.
Embarking on the journey of photography can be both exciting and overwhelming, especially for beginners. With so many styles and techniques to explore, it's essential to find the ones that resonate with your passion and creativity and Yvette Heiser Texas – 5 Interesting Photography Types for Beginners, a Texas-based photography enthusiast, shares her insights on five interesting photography types that are perfect for beginners. These styles not only help you hone your skills but also allow you to discover your unique artistic voice.
Landscape Photography
Capturing the beauty of nature is a timeless pursuit that appeals to many beginner photographers. Landscape photography involves taking pictures of natural scenes such as mountains, forests, rivers, and beaches. Yvette Heiser suggests starting with landscape photography as it allows you to experiment with composition, lighting, and perspective.
Portrait Photography
Portrait photography focuses on capturing the essence of a person, often highlighting their emotions, expressions, and personality. Heiser believes that portrait photography is an excellent way for beginners to practice working with different lighting setups and learn how to connect with their subjects. Start by taking pictures of family and friends to build your confidence.
Macro Photography
Macro photography involves taking close-up shots of small subjects, such as flowers, insects, and everyday objects, revealing intricate details that are often overlooked. This type of photography allows beginners to explore the world from a different perspective and develop an eye for detail. Yvette Heiser encourages beginners to use a macro lens or extension tubes to achieve the desired magnification.
Street Photography
Street photography is all about capturing candid moments and scenes from everyday life in public places. It offers a unique opportunity for beginners to develop their observational skills and learn how to anticipate and capture fleeting moments. Heiser suggests starting with a simple camera setup, such as a compact or mirrorless camera, to remain inconspicuous.
Still Life Photography
Still life photography involves arranging and photographing inanimate objects, often with a focus on composition, lighting, and texture. This type of photography is ideal for beginners as it allows you to experiment with different setups and practice your technical skills in a controlled environment. Yvette Heiser recommends starting with everyday objects like fruits, flowers, or household items. Pay attention to the lighting, and use natural light or artificial sources to create shadows and highlights that enhance the visual appeal of your subjects.
Conclusion
Transitioning from an amateur to a professional photographer is a journey that requires dedication, practice, and a passion for the craft. By following Yvette Heiser's essential tips, you can hone your skills and capture perfect pictures that tell captivating stories. Remember, the key to success lies in continuous learning, experimentation, and staying true to your unique vision as a photographer.
#wedding#photographer#camera#moments#photography#childphotography#pictures#yvette heiser#photographytips#events
13 notes
·
View notes
Text
Want to learn something new
Want to learn something new in 2022??
Absolute beginner adult ballet series (fabulous beginning teacher)
40 piano lessons for beginners (some of the best explanations for piano I’ve ever seen)
Excellent basic crochet video series
Basic knitting (probably the best how to knit video out there)
Pre-Free Figure Skate Levels A-D guides and practice activities (each video builds up with exercises to the actual moves!)
How to draw character faces video (very funny, surprisingly instructive?)
Another drawing character faces video
Literally my favorite art pose hack
Tutorial of how to make a whole ass Stardew Valley esque farming game in Gamemaker Studios 2??
Introduction to flying small aircrafts
French/Dutch/Fishtail braiding
Playing the guitar for beginners (well paced and excellent instructor)
Playing the violin for beginners (really good practical tips mixed in)
Color theory in digital art (not of the children’s hospital variety)
Retake classes you hated but now there’s zero stakes:
Calculus 1 (full semester class)
Learn basic statistics (free textbook)
Introduction to college physics (free textbook)
Introduction to accounting (free textbook)
Learn a language:
Ancient Greek
Latin
Spanish
German
Japanese (grammar guide) (for dummies)
French
Russian (pretty good cyrillic guide!)

Jan 2, 2023
Want to learn something new in 2023??
Cooking with flavor bootcamp (used what I learned in this a LOT this year)
Beekeeping 101
Learn Interior Design from the British Academy of Interior Design (free to audit course - just choose the free option when you register)
Video on learning to read music that actually helped me??
How to use and sew with a sewing machine
How to ride a bike (listen. some of us never learned, and that's okay.)
How to cornrow-braid hair (I have it on good authority that this video is a godsend for doing your baby niece's black hair)
Making mead at home (I actually did this last summer and it was SO good)
How to garden
Basics of snowboarding (proceed with caution)
How to draw for people who (think they) suck at art (I know this website looks like a 2003 monstrosity, but the tutorials are excellent)
Pixel art for beginners so you can make the next great indie game
Go (back) to school
Introduction to Astronomy (high school course - free textbook w/ practice problems)
Principals of Economics (high school course - free textbook w/ practice problems)
Introduction to philosophy (free college course)
Computer science basics (full-semester Harvard course free online)
Learn a language
Japanese for Dummies (link fix from 2022)
Ukrainian
Portuguese (Brazil)
American Sign Language (as somebody who works with Deaf people professionally, I also strongly advise you to read up on Deaf/HoH culture and history!)
Chinese (Mandarin, Simplified)
Quenya (LOTR fantasy elf language)
Dec 26, 2023
Want to learn something new in 2024??
Beginner-oriented video on how to sail
This guy has so many videos on baking different types of bread. SO very many.
Coding in Python - one of the most flexible and adaptable high-level programming languages out there - explained through projects making video games
Learn to swim! (for adult learners. I don’t care if you live in Kansas or Mali or wherever. LEARN TO SWIM.)
Learn how quantum mechanics works. Then read some more about it
[Learn about quantum mechanics again, but in a more advanced engineering/mathematics class. Then read more about the math and physics of it]
Poetry Handbook, by Mary Oliver
Something I learned this year: how to sew a quilt (Here’s a very easy beginning pattern that looks amazing and can be done with pre-cut fabric!)
How to hit the ball in softball
Tutorial video on what is under the hood of most (gas) cars + weird engine sounds and what they mean
Full beginner mechanics technical training, if you want to go more in depth
Playlist on how car engine physics work if you want to go ultra in depth
Lecture series on architecture design through study of buildings
How (American income) taxes & tax law work (choose “audit course” at checkout for free class)
Pickleball for beginners (so you can finally join your neighbor/friend/distant cousin who is always insisting you join their team)
+ Para-Pickleball for beginners (for mobility aid users!)
School is so much more fun when there’s no tests:
American Law - Contracts
Shakespeare’s Life and Plays
Fairy Tales: Meanings, Messages, and Morals
Modern Poetry
World History [Part 1, Part 2]
Learn a language:
Arabic + Resource Guide compiled from Reddit (includes info on different dialects)
Chinese (Cantonese) (audio)
Urdu (frequently recommended course on Reddit) + Resource Guide
Yucatec Maya
36 notes
·
View notes
Text
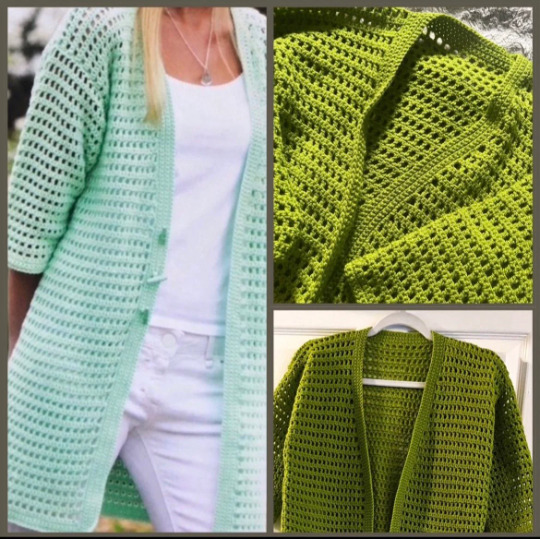
Crochet Longline Cardigan 💚
This lovely long design is perfect for beginners. It’s an excellent handmade project to keep you cosy adding a unique touch to any outfit, ideal and so handy for summer🧶
#crochet pattern#easy crochet#long cardigan#fibre crafts#crochet#crochet tutorial#summer fashion#summer crochet#popular design#yarn#green
4 notes
·
View notes