#Boss Fight Guide
Explore tagged Tumblr posts
Visit Tumblr Blog
Explore Tumblr blogs with no restrictions, modern design and the best experience.
Last Seen Tumblr Blogs


Fun Fact
Kazakhstan’s Minister of Communications and Informatics has blocked the Tumblr site because it contained 60 sites of terrorism, extremism, and pornography in 2015.
Text
🌒🎮 Defeat the Benevodon of Darkness! ✨
Dive into our latest post for an in-depth guide on Chapter 5 of Visions of Mana! Discover how to navigate the perilous journey, utilize key abilities like Shade Sight and Gravity Grapple, and conquer Zable Fahr in the epic boss fight. Don’t let Daelophos bring ruin! 💥⚔️
#Visions Of Mana#Benevodon Of Darkness#Zable Fahr#Boss Fight Guide#Chapter 5 Guide#We're Alm In This Together#Gaming Tips#RPG Guide#Game Strategy#Teamwork In Games#Flowing Through Mana#Mana Goddess#Defeat The Boss#Ancient Hero#Epic Battles#Game Foes#Video Game Tips#Gaming Community#RPG Boss#Combat Strategies#Character Development#Spell Usage#Healing Spells#Elemental Weaknesses#Adventure Gaming#Fantasy RPG#Storyline Progression#Game Walkthrough#Gamer Lifestyle#Quest For Victory
2 notes
·
View notes
Text
How to Defeat Tricephalus (Gladius) in Elden Ring: Nightreign Boss Guide
youtube
Introduction
Taking on your first major boss in Elden Ring: Nightreign can feel overwhelming—especially when it's the ferocious Tricephalus, also known as Gladius. Whether you’re venturing in solo or teaming up with other hunters, this guide will help you prepare, survive, and ultimately defeat this three-headed beast. We’ll break down the fight step-by-step, with a focus on Iron Eye strategies, holy damage usage, and how to manage each phase without getting wiped out.
If you’re struggling with positioning, dodging, or keeping up with the chaos when Gladius splits into three separate enemies, don’t worry—we’ve got you covered. Here’s everything you need to know to come out on top in this tough but manageable boss battle.
Prepare for the Fight: Gear Up with Holy Damage
Before entering the battle with Tricephalus, the most critical thing to do is equip yourself with holy damage weapons or spells. The boss has a noticeable weakness to holy-based attacks, which makes them your best bet for maximizing damage. If you're playing as Iron Eye, use ranged options like holy arrows or spells that scale with your build. Check nearby merchants, chests, or item drops in the area for anything tagged with holy bonuses. This choice can significantly shorten the length of the fight if used properly from the start.
Before the arena loads, observe the boss preview—it’s a helpful hint that shows what kind of damage works best. Make sure your team members also understand the importance of holy damage. Even if you're matched with random players online, having one person focused on healing and another on holy DPS helps keep things balanced. If possible, go in with a full group to spread out aggro, since this boss tends to switch targets quickly and unpredictably.
Watch the Attack Patterns: Dodging Matters
Tricephalus uses sweeping sword strikes and fast lunges that can easily overwhelm an unprepared team. One of the most dangerous moves comes from the leftmost head, which swings a large sword in a wide arc. The best way to handle this is to dodge roll into the attack, not away from it. Doing so reduces the window of impact and helps you get back into position quickly. For frontal lunges, side rolls are more effective at dodging cleanly.
Positioning is everything. Even when you're behind the boss, some of its moves—especially stomps and tail whips—can still land. Try to always keep an eye on the movement of the heads. As soon as you see one wind up, anticipate a strong area-of-effect move. If you’re playing as a ranged character, stay at mid-range—not too far to miss out on team synergy, and not too close to eat heavy damage. Mastering these dodge timings will make or break your run.
Use Your Abilities Often and Rotate Aggro
In this fight, your ultimate abilities aren't just flashy—they're essential. Don’t hold back waiting for a perfect moment. Tricephalus can soak up a lot of damage, and using ultimates early and often helps push it toward its next phase faster. Iron Eye’s ranged ult can keep you safely distanced while still contributing serious DPS, and it pairs well with marking skills to amplify team damage. Tag the boss to draw attention and give your allies room to breathe.
Team coordination is key. Since Tricephalus tends to rotate targets between players, try to manually switch aggro to avoid overwhelming one player. Use ranged attacks to pull its focus when a teammate is low on health. Spreading out aggro also creates natural windows for healing or revives, especially when someone goes down. Iron Eye’s healing arrows are clutch here—you can bring allies back without ever stepping into danger, making him an ideal support during hectic moments.
Phase Shift: Prepare for the Three-Dog Split
After you deal enough posture or health damage, Tricephalus will begin a howling phase, signaling a transition. This is the danger zone—run away immediately. Do not use any abilities or try to rush in, as the boss will explode and split into three smaller wolves, one of which still carries the sword. This sword-bearing dog is much more aggressive and hits harder than the others, so keep your distance from it if you’re not at full health.
Each of the three dogs behaves differently. The two without weapons are slower and easier to manage. Assign teammates to kite or distract them while someone focuses on pulling the sword dog away from the group. Use this chance to build up posture damage again—once one dog drops, the rest will follow more easily. Be mindful of your positioning though. If you’re too far from your teammates, and someone gets downed, they might not be reachable in time for a revive.
Stay Alive: Defense Over Offense
During the three-dog phase, playing defensively is more important than doing high DPS. If the sword-wielding dog locks on to you, it's better to run and dodge than to risk trading blows. Look for cover spots or wide open areas where you can safely lead it away from your team. If you're playing solo, keep all three dogs in your view as much as possible. Losing track of one can mean getting ambushed from an off-screen lunge.
Watch for the red circle indicator that appears on your character—it shows when you have aggro. This is your signal to go defensive, bait attacks, and let your teammates take over the offensive pressure. If everyone understands this mechanic, you can naturally rotate roles mid-fight without needing voice communication. A great tactic is to lure one dog away while maintaining just enough distance to stay within healing or revive range of the others.
Use Environment and Items to Your Advantage
Throughout the arena, you’ll find worn gravestones and terrain dips you can use for quick cover or strategic repositioning. These aren't foolproof, but they help break line of sight or interrupt attack chains. Don’t ignore item use—if you have a Spear Calling Bell, it’s a great tool to spend FP instead of arrows, especially if you’re using a ranged build. Summoned spirits can distract one of the dogs and create a crucial opening.
Warming Stones are also incredibly useful here. Place one near a safe zone when your team is grouped up, especially after the phase transition. This allows passive healing while freeing your main healer to focus on support attacks. If you're Iron Eye, remember your revival ability from range is one of your biggest strengths. You don’t have to risk a melee revive—stay safe and contribute with ranged support until the dogs are manageable again.
Managing the Final Phase: Return to Tricephalus
After taking out the three split forms, Tricephalus reforms into its original three-headed body. This is your chance to close out the fight if your team is coordinated. However, the final form is still dangerous, especially because all three heads can now alternate attacks rapidly. The sword head remains the biggest threat, so keep your dodges sharp and don’t linger near its flank. Resume aggro rotation and keep an eye out for big telegraphs.
At this point, it’s a battle of endurance. If your team’s FP or health items are running low, prioritize survival over risky attacks. Let the boss overextend and create its own punish windows. Keep marking the target to help your team land higher burst damage. Healing items and ranged revival support are your lifeline here—especially if one or more players go down during the chaos. Stick together, share aggro, and keep dodging smartly.
General Tips to Keep in Mind
Use holy damage for max effectiveness
Dodge into arcing sword swings, not away
Manage aggro rotation to avoid overwhelming any one player
Run during the howl to avoid the explosive transformation
Use terrain and Warming Stones for defense and recovery
Play defensively during the three-dog phase
Use Iron Eye’s ranged revive to keep allies in the fight
Save ultimates for crucial moments, especially near the end
Conclusion
Defeating Tricephalus (Gladius) in Elden Ring: Nightreign may feel intimidating at first, but it’s very manageable once you know the patterns and go in prepared. Focus on bringing holy damage, mastering your dodge timing, and staying defensive during the three-dog split phase. Whether you're using Iron Eye or another class, proper aggro rotation and team communication—even if silent—go a long way.
Make use of terrain, healing items, and range-based support skills like Iron Eye’s revival arrows to survive longer and keep your group in the fight. Remember, this battle isn’t just about dealing high damage—survival and positioning are the keys to victory. Follow this guide, and you'll have no trouble clearing one of Nightreign's toughest early bosses.
FAQ – Beating Tricephalus (Gladius) in Elden Ring Nightreign
Q: What is Tricephalus weak to? A: Holy damage is Tricephalus's main weakness. Use holy weapons, spells, or arrows to deal maximum damage.
Q: What class is best for this fight? A: Iron Eye is especially useful due to his ranged revival ability and support skills. However, any class can win with the right preparation.
Q: How do I avoid the explosion during phase shift? A: When the boss starts howling, run away immediately. This triggers a blast and a transformation into three dogs.
Q: Which dog is the most dangerous after the split? A: The one with the sword. It's more aggressive and does the most damage, so prioritize avoiding or isolating it.
Q: How can I revive teammates without dying? A: If you're using Iron Eye, use his arrows to revive downed allies from a safe distance.
Q: What items help the most? A: Warming Stones (for healing) and Spear Calling Bells (for FP-based summons) are both very effective in this battle.
Q: How do I know when I have aggro? A: Look for the red circle indicator on your character—this means the boss is targeting you.
🎮 Meet Haplo Gaming Chef 🍳
Level 99 Kitchen Warrior here! I'm on a quest to transform your gaming sessions into epic culinary adventures. When I'm not farming rare ingredients in MMOs, I'm crafting real-world recipes inspired by your favorite video games.
Specializing in: • Game-inspired recipe creation • Cooking quest guides • Power-up snacks for gaming sessions • Achievement-worthy meal prep
Join my party as we explore the delicious intersection of pixels and plates. Whether you're a casual foodie or a hardcore gamer, there's always room at my crafting table! #Gaming #GamingGuides #GamingChef #HaploGamingChef For More Visit: https://haplogamingchef.blogspot.com/
Follow Me!
https://bsky.app/profile/haplogamingchef.bsky.social https://www.threads.com/@haplogamingchef https://www.twitch.tv/haplogamingchef https://www.pinterest.com/haplogamingchef https://www.youtube.com/@HaploGamingChef https://www.tiktok.com/@haplogamingchef https://flipboard.com/@HaploGamingChef https://x.com/HaploGamingChef https://www.instagram.com/haplogamingchef https://www.facebook.com/HaploGamingChef https://www.linkedin.com/in/haplogamingchef https://haplogamingchef.blogspot.com https://www.tumblr.com/haplogamingchef https://medium.com/@haplogamingchef Google Business Profile: https://g.co/kgs/6nqgw9H
#Elden Ring Nightreign#Tricephalus boss guide#Gladius boss fight#Elden Ring Nightreign bosses#how to beat Tricephalus#Tricephalus strategy#Elden Ring Nightreign tips#boss fight guide#Nightreign gameplay#Elden Ring DLC bosses#Tricephalus weaknesses#Gladius arena fight#Elden Ring boss tactics#Nightreign combat guide#three-headed boss fight#Elden Ring Nightreign walkthrough#boss battle strategy#Tricephalus attacks#Elden Ring multiplayer bosses#Nightreign co-op guide#Youtube
1 note
·
View note
Note
so... opinions on three and four?
Three was oodles of fun!!! I talked about this with a few friends but a part of me wishes they leaned more into the tv show side of things rather than video games, but i do understand that video games are significant specificlly to kris’ upbringing. I have nooooooo complainnntsss about getting the shadow mantle, it was tough but fun and made me so so sad for kris😀😀😀😀😀i beat the knight and had a lot of fun with that fight, im keeping a save file around to fight them more later.
If chapter 3 blew my mind then i dont even know how to describe chapter 4. Tbh i havent really done the secret boss (i had to rush through it on my first playthrough and spoiled myself on it anyhow so its fine,,,) and i havent finished the weird route file either, i barely entered the dark world and am. incredibly. sad. and distressed. about. what just happened. my mind is buzzzzinggggggggg thinking about everything in chapter 4. Theres soooooooooooooo many good character moments. mentally my brain is still stuck on kris playing the piano at noelle’s house. You have something like 30 minutes to just be yourself, alone, before its back to whatever grueling thing theyre apart of. how are you supposed to spend that kind of time?? They drink chocolate milk, collapse on the counter, and play the piano. Im reallysad.
series of doodles i made while taking a break between sessions. you can tell exactly where i was for most of these depending on what was drawn


#thank you to sock for guiding me through noelles house and showing me everything#thank you to my friends for being so so patient with me taking forever to touch chapter 4#dumbass wanted to beat the knight befprr moving on to chaoter 4. i had to give up#dumbass forgot rude buster existed for the first 10 hours of fighting the knight actually. im so not sure how#no i havent done the secret mike boss yes i know it exists#asks#pedias art#deltarune#deltarune spoilers#utdr
193 notes
·
View notes
Text
Me after finally beating the Mines


#someone tell me how i beat the seek dam boss fight in ONE try#but it takes me like 10+ for the nest-#i think guiding light saw my desperation this run bc i got two crucifixes in different places#and the path they gave me for the 2nd seek chase was straightforward#anyways im happi#clanspeaks#roblox doors#doors the mines#doors spoilers#roblox
25 notes
·
View notes
Text
Quick guide to Aventurine Boss Fight
I finally won the fight on my 8th try, and it took 40 minutes. Holy fuck. Here's how I did it and how you can replicate it.
I ran Dan Heng: Imbibitor Lunae, Gepard, Natasha, and March 7th. DHIL can probably be replaced with any character that can deal decent damage and (most importantly) has some form of an AoE attack, such as Burst DMG or AoE DMG.
The best strategy I can suggest is having 3 abundance/preservation characters, and one general damage dealer. Outlasting Aventurine's damage output and imprisonment is a viable strategy.
Skill point and energy management is huge here. I would not use any ultimate outside of the gamble state unless it either defeats Aventurine or allows another character to regain energy. Keeping your skill points up to allow characters to do AoE attacks is critical.
I personally found shielding more helpful than healing. It was much easier to utilize March 7th's and Gepard's endless shielding output than to pray that DHIL survived long enough for a Natasha heal.
March 7th is really, really good for this fight. Her shield has a chance to clear debuffs from your own characters, including the imprisonment status, her follow-ups just slowly keep chipping away at Aventurine's HP and regenerates energy for her ult to be ready, her ult hits all of the dice, and throughout the whole 40 minutes she only lost one gamble due to bad RNG. If you have a built March (mine was half-built, I used spare relics I had while farming for Gepard,) BRING HER.
The main strategy was this: I rigged my party to have characters consistently win the gamble every time. By holding's March's ult until she needed to gamble and saving skill points for DHIL to gamble, I was able to ensure that those two would win every gamble and would probably stay alive, and than it turned into keeping Natasha alive as best I could and slowly defeating Aventurine.
This is absolutely an RNG fight. Good luck. Once again, this strategy is tiring, but it will get a win...eventually.
24 notes
·
View notes
Text

holy shit. probably one of the most nerve-wracking stages i’ve ever played. took me several tries trying to perfect trying to stall frostnova, and several more from basically trying to get good rng and not get murdered with her ice spawns. as you can see at the bottom left, i was banking on texas being the only one who could deal damage and actually defeat her. was throwing down just about everyone trying to stall her while trying to wait out texas’ deployment cooldown until frostnova iced the entire middle damn lane and made it impossible to put down anyone there
#playing arknights#am i attempting to do it on challenge mode? FUCK NO!#followed a guide but not exactly. just took in what each operator’s role is in the fight and substituted them with who i had#texas was the mvp but special thanks to gravel cuora and melantha for taking turns stalling her when the former was still in cooldown#the last time ive clenched my entire body this hard was like. kromer boss fight from limbus lmfao#had to dedicate some actual strategic thinking instead of. mindlessly following a guide lmao. fishareglorious finally using their brain#in arknights what a wonder
11 notes
·
View notes
Text
Persona 3 Reload: Elizabeth Boss Battle

While I could probably be called a layman to Persona - a newb, a greenhorn... I do empathize with anyone trying to clear this final, "secret" boss battle that is pretty grueling, if I do say so myself. (人◕ω◕);;; I drew up this "strategy guide" for my own remembrance, but if anyone wants tips or ideas, you can feel free to consult this. I'll just leave it up here. It's, generally, easy to follow and borrows from guides on the internet I've read. I didn't follow them to the letter exactly, and yet I managed to come out of this fight alive twice thus far... Make adjustments of your own if you need to; this is just what I cobbled together, and it works for me. Proud owner of 2 Omnipotent Orbs over here, and hope to get more in the future. ... Even if Elizabeth kicks my ass several times along the way. (人◕ω◕)
... But I digress. Here's my notes. I heavily advise using a calculator or scratch paper to keep a record of how much damage you deal to Elizabeth... You're gonna need to know when you hit certain thresholds. Also - I managed to beat her without maxing the stats of my Personas. Made things a bit harder for myself because of that, but I still mustered victory twice with stats and levels across the board. It's easier with higher leveled Persona's, so I advise grinding as much as possible. You don't need max stats... Just get them to where you're comfortable. You're in for one tough fight regardless if you're maxed out or not.
Also... Before going into Tartarus, I advise going to the fortuneteller at Club Escapade to get a Soul Fortune. You'll build up Theurgy much quicker, and the fight can be much easier for it. Do as you like~
~*~
The Rules
For this fight, you'll be battling alone... Once you leave your party members at the entrance, journey up to Floor 255 and down into the deepest parts of the Monad Door there. And you'll need to keep in mind to not equip anything that nullifies/absorbs/reflects Elizabeth's elemental attacks. You can use Personas that have such resistances, but be careful. If she launches an attack and you break her rules, she'll nuke you with Megidolaon and you'll have to start the fight over. Be mindful of your team and what stage of the fight she's in. You'll have 50 turns to bring her down to 0, but as you'll soon see... They get used up pretty quickly. Come prepared to hit her strong and hard - and definitely stock up on materials, you'll need the healing and status buffs/debuffs.
~*~
My best Personas for the fight (feel free to modify these to your own liking; this is just what I used):
Orpheus Telos
Salvation, Single-Target Boost, Spell Master, Firm Stance, Ice Boost, Ice Amp, Concentrate, Diamond Dust
Helel
Almighty Boost, Almighty Amp, Heat Riser, Spell Master, Firm Stance, Endure, Morning Star, Resist Ice
Messiah
Enduring Soul, Morning Star, Spell Master, rest of moves up to your discretion
Chi You
Arms Master, Brave Blade, Charge, Firm Stance, Single-Target Boost, Resist Elec, Slash Boost, Slash Amp
Lucifer (only good for Phase 1; I have Debilitate on him, saves me Debilitator Sutras for Phase 3)
~*~
Items to stock up on (feel free to add or subtract from this list; these are what I most commonly used):
Empowering Sutras/Heat Riser Potatos
Somas
Debilitator Sutras
~*~
Items equipped:
Lucifer's Blade
Armor of Light
Shoes of Light
Amritite Necklace (shields you from ailments, highly recommend)
~*~
Necessary Theurgy:
Armageddon
Recommended Theurgy:
Trickster
~*~
Phase 1:
Elizabeth can be a vexing opponent, but she does have patterns if you prolong the battle enough and observe her. For this first phase, she'll only attack twice each turn with a different Persona each round. Usually status buffs/debuffs, elemental moves, and physical moves. The order of elements she goes in are: Fire, Ice, Electric, Wind, Light, Dark, Status Ailments, and Almighty.
To break it down a little for you - Helel can be used for those first four types; he absorbs Light and Dark, so when those turns come around swap him out. Helel is mainly used for Heat Riser and Morning Star. Orpheus Telos can be used any turn, and I use him for the Concentrate move, mostly - it doubles the damage of your next magic attack. Don't worry if you use Heat Riser on the next turn, Concentrate will still be active. During this phase, I will occasionally throw Lucifer out to Debilitate Elizabeth, debuffing her stats; this first phase is rather open-ended, just be mindful of what type of moves she's going to use next and how much damage you've dealt to her.
Cycle through Concentrate, Heat Riser, Morning Stars, and Theurgies to whittle her down from 20,000 to at least 13,000. There are elemental attack strategies, too, but I was alright using Morning Star Almighty damage, chiefly. And Theurgies like Trickster (save Armageddon for later, you will NEED it). Occasionally throw in Debilitate to hit harder; Lucifer is best used on turns after she uses Surt (fire), Thor (electric), and Alice (dark) (if Lucifer is equipped ON those turns, you break her rules because of his resistances. Be careful.).
Depending if you get her lower than 10,000, she skips Phase 2. Otherwise, get ready for Phase 2 after getting her below 13,000.
Phase 2:
Elizabeth will praise you for your efforts, and buff herself with Concentrate. This is your cue.
Switch to Messiah to endure and restore your health from her Megidolaon (or whatever Persona of yours has Enduring Soul; I highly recommend carrying one with Enduring Soul because it saves you a turn of healing up). Then, hit her hard with Morning Stars or Theurgy attacks to get her down from 13,000 to the 9999 threshold, you'll have three turns to pull this off; if you fail, she'll hit you with another Megidolaon and you'll have to start the fight over. Be mindful of how much SP you have, I certainly recommend leveling up as much as possible for this fight. Once she hits this new threshold, she jumps into Phase 3.
Phase 3:
Elizabeth praises you again and recovers her health back to 20,000. Frustrating, I know, but this is the home stretch believe it or not. If you skipped Phase 2, you might want to take a turn to use a Soma. ... Heck, you might want to use an SP recovery item anyway, if you're pretty low.
Otherwise, jump into Chi You. Do not forget this. Elizabeth will now be using two Persona each turn, but still get two attacks only; after she cycles through Fire/Ice, Electric/Wind, Light/Dark, she'll start varying it up (in my experience, she does ailment/electric next, but after that she has a new cycle to pay attention to). Chi You has no resistances to worry about, and as long as you watch for physical resistances on her end, you should be able to whittle her back down to the 9999 threshold. Just keep using Charge + Brave Blade, and heal yourself when necessary. Pop one or two Theurgies if you want (again, save Armageddon for later), toss Debilitator Sutras at her if you'd like to weaken her, and Empowering Sutras on yourself. Elizabeth's a glutton for punishment... so go ham.
Important!
Be very careful to not get her below 10,000 without switching to Helel. You need his Endure ability to survive her last Megidolaon. Or, again, if you have a different Persona with Endure just use what you're comfortable with.
Also: SAVE YOUR THIRD THEURGY FOR ARMAGEDDON. Feel free to use Theurgy moves, at most, twice before getting her close to 10,000 hp. Remember to keep in mind where you are on her health bar, the game won't tell you. Around the 11-12,000 mark, hold back on using Theurgy. Save up for the next one. Chi You should be able to whittle down the remainder, and once she's as close to 10,000 as possible, switch to Helel. Use Morning Star to get her below 10,000. Endure kicks in automatically for her last attack (her grand finale, as she calls it). At last, hit her with the Armageddon Theurgy. This always deals 9999 damage, and you need to save this for last because it can only be used once. If you use it up prior to this, you've lost the fight. Trying to attack Elizabeth normally after she's below 10,000 is a futile effort - she'll just heal back up, and cast Megidolaon on you eventually. You've got one shot, but if you've roughly been following what I did here... Pat yourself on the back and enjoy the post-battle chat with Lizzy~ You'll get no EXP from this fight, no materials.... Just a Platinum Bookmark for bragging rights.
If you talk to her at the entrance of Tartaros, she'll give you an Omnipotent Orb. That's your main reward for the Hell she put you through. ^_^ Unfortunately, you can't use it against her in any subsequent NG+ playthrough, but the orb does carry over to NG+. As stated above, Lizzy does not appreciate her elemental attacks not connecting... She will nuke you if you break her rules. Lizzy wants to play, so play nice~
If you stuck it out this long, I salute you. Most other guides are more professional and more in-depth, I suppose. But I figure not everyone has the patience to prepare perfectly for a fight with Elizabeth, not with max levels and stats for Personas... Those can take a while to grind. This is just how I managed it, and I'm throwing my ideas out there for anyone else struggling. (人◕ω◕)

14 notes
·
View notes
Text
Armored Core 6 continues to be great.
I just got to the boss fight with the Ibis Series and to my amazement it seemed like I managed to take it down on my first try.
And then it stood back up at full health and started pulling moves on me perceptible only to certain species of shrimp.
Great stuff.

#armored core 6#fromsoftware#gif is not me but communicates the energy of the boss fight#All the help guides are like “Here use this loadout and PRAY”#fires of rubicon
34 notes
·
View notes
Text
🌄✨ Adventure seekers! Are you prepared to take on the Hillside Cavern Dungeon in Palworld? Our newest blog post breaks down how to defeat the tough Gumoss boss and catch it! Don't miss out on these essential tips for your journey! 🏆
#Palworld#Hillside Cavern#Gumoss Boss#Gaming Guide#Boss Battle#Dungeon Adventure#Video Game Tips#Capture The Pal#Palworld Tips#Gumoss#Game Strategy#Action Adventure#Level Up#Gaming Community#Boss Fight Guide#Dungeon Exploration#Palworld Dungeons#Video Game Bosses#Adventure Gaming#Gaming Tips#Game Walkthrough#Gamer Life#Online Gaming#RPG#Video Game Challenges#Teamwork In Games#Boss Strategy#Game Guide#Pal Collection#Epic Gaming
1 note
·
View note
Text
Nioh 3: Best Strategy and Build to Defeat Jakotsu-baba
youtube
Introduction
Facing Jakotsu-baba, the final boss in the Nioh 3 demo, can be overwhelming if you're not prepared. Her unique mechanics and the realm-based combat make this fight different from anything you've faced before. Whether you're playing solo or avoiding co-op to challenge yourself, this guide walks you through a solid, tested strategy and a reliable ninja-focused build using the kusarigama.
In this guide, you'll learn how to effectively dodge, counter, and deal consistent damage while minimizing your risk. If you're wondering how to beat Jakotsu-baba, this guide covers everything—from skill choices to smart positioning.
Understanding the Jakotsu-baba Boss Fight Mechanics
Before jumping into combat, it's crucial to grasp how Jakotsu-baba works in the Nioh 3 demo. Unlike many bosses, she applies a special debuff that lowers your maximum HP every time you take a hit. This isn't permanent—you can recover the lost max HP by landing attacks back on her. Timing your offensive moves becomes essential not just to deal damage but to maintain your health.
Jakotsu-baba also summons a black circle on the ground, creating a hazardous zone. If you fight inside this area, your Ki rapidly drains, leaving you vulnerable. Avoid standing in these zones and instead bait her into attacking outside them. You’ll have more breathing room to react and counter.
Best Weapon and Build Choice: Kusarigama with Ninjutsu
For this fight, the kusarigama is one of the strongest weapon choices. It offers quick strikes, ranged pressure, and excellent synergy with ninjutsu. The high mobility of the kusarigama lets you weave in and out of combat, perfect for staying safe from Jakotsu-baba’s long-reach attacks.
Your build should focus on:
Stamina and HP: Boost survivability so you can take a few hits while learning patterns.
Dexterity: Amplifies ninjutsu effectiveness.
Strength or Skill (depending on gear scaling): Improves damage output with kusarigama.
Key perks to equip:
Elixir Boost: Increases damage and reduces damage taken (by ~5%) right after using an elixir.
Dodging Buff: Grants Ki regeneration when you dodge with perfect timing.
Dash Ki Cost Reduction: Helps maintain mobility during extended fights.
Essential Ninjutsu Skills to Use in the Fight
If you're running a Nioh 3 ninja build, make sure to unlock and equip specific ninjutsu skills that boost both your damage and utility during the boss battle. One of the standout techniques for this fight is a skill that lets you jump in the air, form a projectile, and then dive down with a strong hit by holding Triangle after pressing Circle. This stagger attack not only interrupts Jakotsu-baba’s combos but also deals significant damage.
Timing is everything—if you initiate this jump attack just before her attack animation starts, she gets stunned and won't retaliate. But if you're late and she begins attacking, she’ll power through and punish you. Practice this sequence to get it right consistently. It's one of the best ways to control the tempo of the fight.
Combat Tactics: How to Control the Battlefield
Positioning plays a big role in this fight. Whenever the boss activates her black circle zone, avoid standing on it. These zones drain your Ki rapidly, and without Ki, you can’t block, dodge, or attack effectively. Instead, stay just outside the perimeter and bait her to move out of it.
You’ll notice that Jakotsu-baba can be baited into attacking predictably. Once she starts an attack pattern, circle around her to get behind. Her back is less defended, and you can safely land combos or quick kusarigama hits. Keep moving to the side rather than dodging backward, which keeps you closer and ready to strike again.
Using Realm Awareness to Your Advantage
When Jakotsu-baba pulls you into her realm, her range and aggression increase. Her attacks reach farther and come out faster, so it’s critical to stay on your toes. This is when your mobility-focused build really shines. Use your dash, powered by Ki-efficient perks, to keep dodging and repositioning. If you avoid standing directly in front of her, you’ll have better chances to avoid her long-reach grabs and wide sweeps.
One key to surviving in the realm is monitoring the ground. Avoid the glowing puzzle-like patterns—these are areas that suppress your Ki regeneration. Being stuck without Ki means no dodging, and that’s usually fatal. Stay alert, keep moving, and use ranged kusarigama hits if needed to create space.
Ultimate Skill Timing: Finish the Fight Strong
Your ultimate Yokai ability can be tempting to use early in the battle, especially when you land a few combos. But it’s best saved for the final phase of the fight when Jakotsu-baba is at low health. Her stagger meter builds slowly, so relying on it too early may waste your chance to close out the fight efficiently.
Instead, keep using your regular ninjutsu jump-stagger combo and kusarigama for consistent pressure. Once she’s down to 20–30% HP, pop your ultimate and go all in. This burst phase can end the fight if timed correctly, especially when you’ve recovered all your max HP and have full Ki reserves.
Mistakes to Avoid When Fighting Jakotsu-baba
One common mistake players make during the Nioh 3 demo boss fight is staying too aggressive inside the cursed zones. These black-circle traps punish you by draining Ki quickly, making it almost impossible to dodge or block. Avoid fighting in them unless you're confident in your timing and mobility.
Another mistake is using your ultimate ability too early. Since it has a long cooldown, it's not worth activating unless you’re sure you can end the fight with it. Save it for the final phase when the boss is weakest. Finally, don’t stand still—Jakotsu-baba thrives on catching you off guard with fast, multi-hit attacks. Keep circling, repositioning, and baiting her into predictable movements.
Why This Build Works Well Without Co-op
Many players opt for co-op to make tough boss fights easier, but this build proves that you can handle Jakotsu-baba solo. The combination of high mobility, quick recovery, and damage-boosting perks lets you recover from mistakes and stay in control. Learning the boss mechanics on your own not only helps you get better but also makes the victory more satisfying.
This strategy focuses on adaptability and timing over brute strength. If you prefer refining your skills and going in solo, the kusarigama + ninjutsu combo offers the tools to make that happen. It rewards patience, movement, and precision—core elements of Nioh’s combat design.
Conclusion
Beating Jakotsu-baba in the Nioh 3 demo requires more than brute force. With the right ninja build, good timing, and awareness of her patterns, you can handle the fight solo without relying on co-op. Equip your kusarigama, make smart use of your ninjutsu, and avoid the cursed zones. This guide gave you a complete strategy—from build setup to attack tactics—designed to help you learn, adapt, and win. Stick with the plan, stay mobile, and you’ll defeat Nioh 3’s final demo boss with confidence.
Frequently Asked Questions (FAQ)
Q1: What’s the best weapon to use against Jakotsu-baba in Nioh 3? A: The kusarigama is highly effective due to its speed, range, and compatibility with ninja-focused builds.
Q2: How do I recover lost max HP in this boss fight? A: You regain lost max HP by hitting the boss back after taking damage. Offensive timing is critical.
Q3: Is co-op necessary to beat Jakotsu-baba? A: No. With a solid solo build, proper ninjutsu, and positioning, you can beat the boss without help.
Q4: When should I use my Yokai ultimate ability? A: Save it for the final phase of the fight, when Jakotsu-baba’s HP is low and you can finish her off efficiently.
Q5: What skill helps with staggering Jakotsu-baba? A: A jumping ninjutsu skill lets you stagger her by holding Triangle after Circle, if timed before her attack animation starts.
🎮 Meet Haplo Gaming Chef 🍳
Level 99 Kitchen Warrior here! I'm on a quest to transform your gaming sessions into epic culinary adventures. When I'm not farming rare ingredients in MMOs, I'm crafting real-world recipes inspired by your favorite video games.
Specializing in: • Game-inspired recipe creation • Cooking quest guides • Power-up snacks for gaming sessions • Achievement-worthy meal prep
Join my party as we explore the delicious intersection of pixels and plates. Whether you're a casual foodie or a hardcore gamer, there's always room at my crafting table! #Gaming #GamingGuides #GamingChef #HaploGamingChef For More Visit: https://haplogamingchef.blogspot.com/
#nioh 3 jakotsu-baba#nioh 3 boss guide#jakotsu-baba strategy#nioh 3 jakotsu-baba build#best build jakotsu-baba nioh 3#nioh 3 boss fights#jakotsu-baba defeat guide#nioh 3 yokai boss#jakotsu-baba tactics#nioh 3 strategy guide#best weapons jakotsu-baba#nioh 3 boss tips#jakotsu-baba weaknesses#nioh 3 combat guide#jakotsu-baba counter attacks#nioh 3 build optimization#jakotsu-baba patterns#nioh 3 boss mechanics#best armor jakotsu-baba#nioh 3 difficulty guide#jakotsu-baba positioning#nioh 3 advanced tactics#jakotsu-baba cheese strategy#nioh 3 boss preparation#jakotsu-baba recommended level#Youtube
2 notes
·
View notes
Text
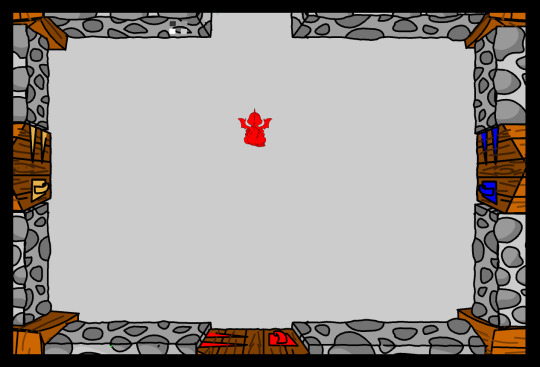
Here is how far I've gotten so far in Scorchio Quest
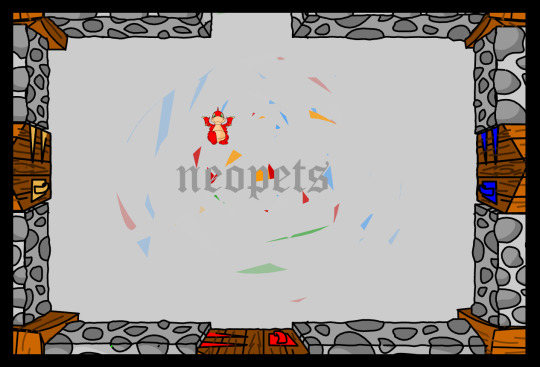
Starting room
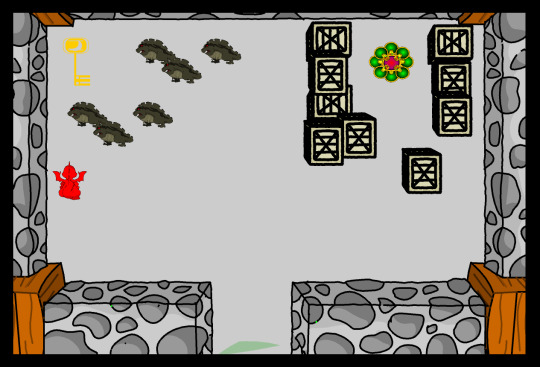
North room
West room behind the yellow door (green ghosts chases you)
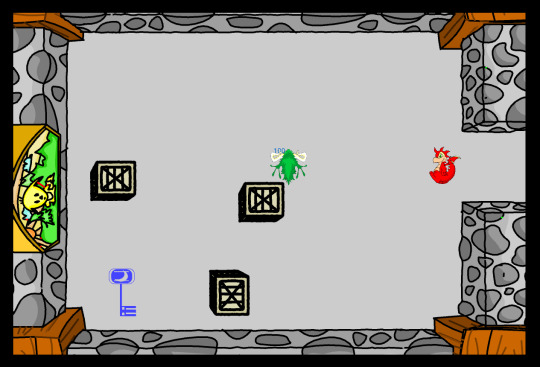
East room behind the blue door
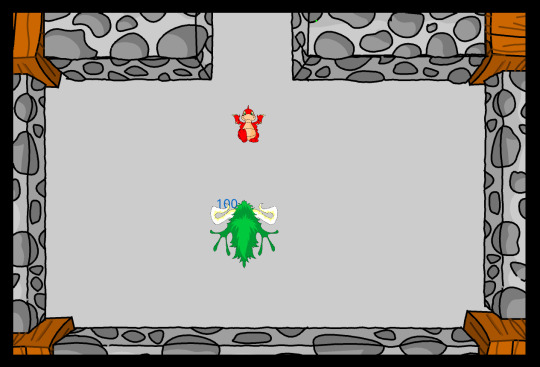
South room behind the red door aka a boss room, beating him gives you the power of push box (also boss kills you in 2 touches at full health)

Back to northern room after beating the boss, pushing the box blocking the gem that teleports you to the second floor
second floor starting room (note the hint for the next room by the north door)


The solution to second floor north room, step on tiles to make them match
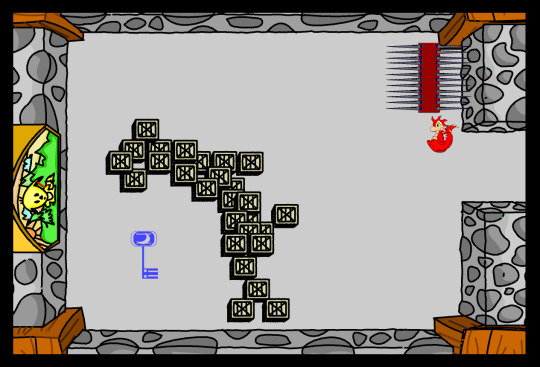
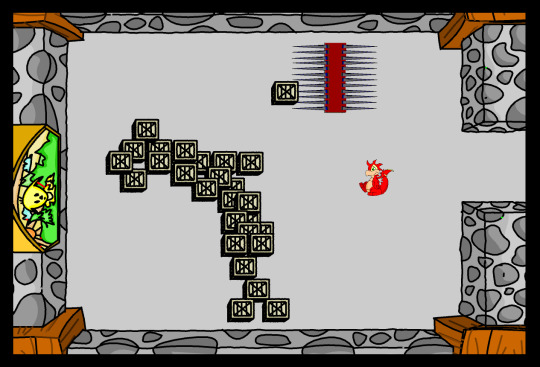
second floor west room behind yellow door has a spike trap that needs to be blocked using push box power

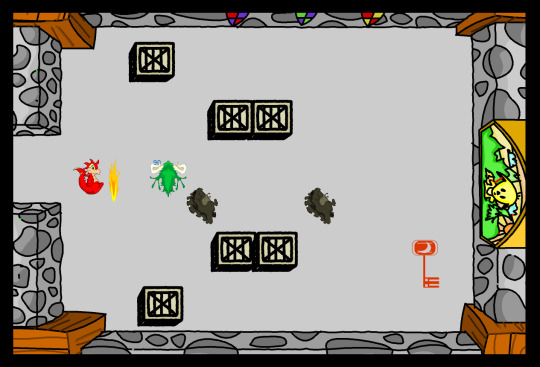
Second floor east room behind blue door (I have not gotten past this room yet)
#neopets#scorchio quest#scorchio quest 1#flash game#long post#I couldn't find anything about this game beyond the first room online so if there is a long lost game guide for it you know about or#a video of someone beating the game I want to see it desperately other wise I'll have to make it my self#any way here is a cheat for fighting the boss#as soon as u touch the red door with the red key stop don't go in the room unlocking the door is what activates the boss#you can then shoot the boss from outside the room even tho you cant see him it takes 10 shots you will hear a sound effect when he dies
2 notes
·
View notes
Text
Watched a video where someone played Splatoon 3 side order and bought side order yesterday and I can feel the Splatoon enjoyment seeping in
#relic answers#can you brainrot over your own protagonist playable character who doesn’t even have a name but he’s just a cutie whom you adore#also playing Splatoon because I’m. stuck in dq11 again#I triggered a stupidly hard boss fight without getting more useful party members first#(the fucking thing told me ‘go to arboria’ ok where is arboria on the map I don’t fucking know. I found jade first but not erik or Serena??)#and every walkthrough I see for the boss fight I’m stuck on says ‘just use Erik and Serena :)’#ok. I was following the storyline as it laid out in front of me and I did not get Erik or Serena yet. what was I supposed to do#there was an NPC after I finished getting Jade in octagonia who was like ‘oh there’s shit going on in sniflheim go there’#I was like ‘ok. where is that. let me check a walkthrough to be able to find it cause I can’t read this map’#walk through says ‘ummm go to hotto :)’#and assumes I have Erik and Serena already??? what??#anyway. this is why I don’t like open world games#skill issue user error ik whatever it just doesn’t click in my head#i THOUGHT dq11 was pretty well guided but it appears I was a tad mistaken#whatever though I do still love the game#i just can’t be bothered to grind to beat that boss rn#LMAO#so. Splatoon time
3 notes
·
View notes
Text
i will NOT start another oneshot i am NOT starting another oneshot but i am thinking veryveryvery much about miranda giving aaravi oral while she's playing a game in order to distract her
#all the care guide says is 'biomass'#miravi.txt#they really like doing their silly little challenges with each other#they really never stopped the ''i can do this better than you can'' they just realized they both liked it#miri and the tactful application of her mouth to ruin this boss fight for ravi#you see. you see why they are so awful.
4 notes
·
View notes
Text
Mario RPG Post Game Bosses Quick and Dirty Guide
Okay, so I can't promise the tactics I'm going to suggest here are the best effective tactics in the game for defeating each of the bosses in the post game. But I will say they let me roll through all of them pretty fast. Also bosses are pretty much in the order I encountered them. If at any point you're unsure if what boss you should be fighting you can go talk to Frog Sage at tadpole pond to be hinted at where to go.
Before Any Fights
Make sure you've fought and defeated Jinx three times and beaten Culex in Montro town and got the Jinx Belt and Quartz Charm accessories.
Level up as much as possible. You can buy the EXP Booster from the frog coin merchant in Seaside Town which doubles the XP of the person who has it equipped even if they're not in battle. The Lucky Egg bought from the Treasure Hunter in the Moeville Item Shop can be used to double your XP earned a lot for the party if you're good at the shuffle game.
Buy the Earlier Times item from the Frog Coin Merchant in Seaside Time. When RNG just goes bad or you mess up this will let you restart the fight right away rather than having to slowly die and resume from the last save point.
Make sure you have a Feather. If you didn't get won from beating Dodo in the statue mini game you can buy one, or if you want a second buy a second one from the Treasure Hunter in the Moeville Item Shop.
Make sure yo have the Lazy Shell (Weapon and armor) and Safety Ring.
Get as many Kercolas, Red Essences and Rock Candies that you can.
Practice timed hits and perfect blocks because both are required for multiple boss fights and will be the difference between life and death.
Consider getting the Star Egg from Grate Guy's Casino if you can stand the torture that is winning 100 Games of Look the Other Way. It deals a flat 100 damage to all enemies so isn't the best damage but it's reliable and reusable so comes in handy when you need something to damage everyone.
Now to the bosses.
Belome
Fought in Belome temple. Don't be an idiot like me and immediately run through all of Kero Sewer and then have to do Midas River because he's not there. Frog Sage told me he was up to his old tricks. So old tricks made me think the sewers. It was the temple. Travel to Monstro Town and enter the temple from there to get to him instantly.
Belome is frustrating but easy. But you can get rid of most of the frustrating part. Take any party members you want but I recommend including Peach for healing like I will for every fight. You don't need any special preparations to beat him but immunizing your entire party to sleep will save you a lot of grief. I did not, I only had Peach immune to sleep. She had the Safety Ring. Belome spams Sleep attacks so Mario and Geno went to sleep A LOT.
Belome's main gimmick this time is that he can't be injured by any attack as long as he has a clone out. He'll basically bounce back and forth between creating a clone, attacking and attempting to put the party to sleep. If you're prepared (unlike me) and immune to sleep 90% of this fight is solved. Just need two characters who hit hard to rip through the clone as soon as it comes out and beat down Belome. He doesn't really have anything dangerous and aside from not taking damage and so much sleep spam is really not that different from previous fights.
Jinx
Since I was already in Monstro Town decided to go visit Jinx yet since based on the wishes I read on the Pink Stars (You'll see them when you start the post game and follow the story leading to the boss rematches) that he was one of them.
Preparation
Jinx is going to spam mortal blows on your party. Accessories like the Safety Ring and the Quartz Charm are absolutely mandatory unless you have flawless mastery of timed hits to the point you never miss, even so good to have them for safety on the occasion you mess up and they're both really good accessories. Party members, someone, anyone that you're really good with their timed hits and Peach for healing.
Jinx is a bit different in that you're not looking to deplete his HP. All you have to do is use a Team Attack and you instantly win. But before you try to be a smarty pants and go in with a 100% gauge prepped he will set your gauge to 0 when the fight starts. It doesn't matter if the team attack actually deals damage, Jinx wants to duel you to see how to get in synergy with your partners to do a team attack and so you will instantly win as soon as you use any attack. Recommend Lazy Shell and Safety Pin go specifically on Peach.
Jinx hits fast and hard as usual. Anytime you miss a timed hit rather it be attacking or healing Jinx will counter with an instant death attack. This is why you want protection from Mortal Blows. Basically, this entire fight is just a practice of your timed hits and defenses. His attacks can deal massive damage and sometimes one shot characters but all of them can be negated to 0 damage with a properly timed block. There's really no trick to it beyond that. Just used timed hits and blocks to build up your gauge and fire it of as soon as its full. Make sure all party members are up and able to perform the attack. Summoning Toad is not what he needs, you need all three party members. Peach with the Lazy Shell and Safety pin will survive anything he throws at her, so just use her to heal up and revive anyone that goes down while you build up that gauge. Don't lose your cool and keep that timing up and victory will be yours.
Punchinello
Preparation: Not a whole lot you can prepare to do on this fight. Like Jinx this fight is going to revolve entirely around getting your Timed Hits right. And you'll mostly be dealing with attacks that can kill you instantly if you fail to block. But they're not guaranteed 9999 damage like some later bosses they're just really strong attacks, might be survivable with something like Lazy Shell + Ghost Medal. Speed is probably the most important factor here though so the Lazy Shell armor can be a liability. Since Speed is important Geno is naturally one of the best fits for the party. And again I make Peach the third for reviving and healing others.
The Fight Itself
So like I said this game revolves around timed hits. You can't damage Punchinello directly. You can only attack the bombs he throws out. If you do a perfectly timed hit, the bomb will change the direction its facing and face him. Then when the bomb goes off it will explode on Punchinello and damage him instead of you. Be careful to watch the bombs before you attack them some of them will already be pointing at him leave those untouched. This is why speed is important. You only have four party members and he'll drop four bombs. And of course only perfectly timed time attacks will turn them around so if you screw it well hope you can go again before that bomb goes off. The bombs can be killed if enough damage is done but this is kind of a last resort sort of thing and you're more likely to kill one on accident from it taking damage when you damage all enemies with your perfect hits. Mastering the timing for a perfect block against the bombs is mandatory to survival. If you have a hard time feel free to use Earlier Times if you have it to restart the fight until you get it down. Basically hit A right before the bomb hits you. But if a bomb hits you and takes you down you either have to swap that party member out or waste a turn reviving them and lose up to two attacks possibly resulting in more bombs going off on you. Because your timing has to be perfect you they won't spin around loses happen sometimes. Just, best of luck with the perfect blocks and perfect timed hits.
Boster
Preparation
I hate this fight, with all of my hate. This is the first fight to kill me in the entire game. You must bring Geno for this fight, and equip him with a Feather to boost his speed. This fight is just... not a good fight, and is absolutely terrible design in an otherwise wonderful game because there is a very specific solution to the fight and it's just, screw you if you don't know it. Super fast Geno is that solution. Bring Peach for healing, and give Mario the Quartz Charm for damage.
The Fight
So at the start of every round Booster will start building his train. If it gets to his turn he will finish building the train and crash it into your party for 9999 damage. Coincidentally, every turn one of his Sniffets will cast Morale Boost that increases his speed every single turn. See why I hate this fight? The trick is Booster must be attacked before his turn each round to interrupt his building. Which is why you need Geno because the fight will quickly get to the point where no one can out speed him but a speed boosted Geno. Make sure he gets interrupted each round. Then I murdered the Sniffets next, in hind sight it might have been easier to go straight for Booster. Either way just deal as much damage as fast as you can. Rock Candies are useful to deal significant damage to everyone, Geno Flash, Psych Bomb (but only if Peach doesn't have the lazy shell) and of course if you're good at it Super Jump is always amazing. If you're not, kick a lazy shell into them. Just kill the Sniffets or Booster as fast as possible and be aware you might have to restart. If your backline party tags in I recommend immediately restarting the battle with an Earlier Times (You can buy it with Frog Coins in Seaside Town) because Mallow and Bowser will not be fast enough to really do anything unless Booster is low on health and they can finish him off right there. I don't know his HP but you can always have Mallow use Thought Peak once to see his HP if you go for killing Booster first to track the damage on him and know how close you are to killing him. Also, can charge a team attack before coming to the fight and swap Peach out for a turn to Mallow or Bowser to do a damage dealing team attack. I do not reccomend swapping out Geno because you want him there to interrupt Booster from building when the next attack starts. Roselina freaking Luma this fight is easily the hardest in the game for me and just so obnoxious. Best of luck.
Now then whose next... I honestly forget so I had to go google the post game fights. And it turns out it's the freaking cake again in Marrymore. Make your Portal references now.
Bundt Cake
Preparations: Not a ton of prep work here, Quartz Charm and Black Belt are recommended. Peach will put this fight into easy mode so should be included for something other than her healing. Other than her big your favorite damage dealer. Probably put Safety Ring on Peach as usual. She won't be focusing on damage.
The Fight
So the goal is to put out the candles just like last time. The catch this time, the chefs are there and will keep lighting the candles and if they light all the candles bad things happen. Which I never found out what would happen because I never let them get that far. So, you need Peach or as many sleep bombs as you can carry. Peach is better, because you're going to cast Sleepy Time to put both chefs to sleep. I believe if you spin the stick enough to max it out it's 100% chance of putting both of them to sleep but I'm not 100% sure. All I know is I never saw it fail when maxed out in the fight. I also never failed to max it out.
After you put the chefs to sleep, it's just a matter of dealing damage to the cake and healing up as needed. Chefs will wake up every now and then and need to be put back to sleep but as long as you keep them under control this fight is easier than the original fight with the cake. No wonder I forgot this one. I don't know when I actually did it. Just make sure to play it safe and keep yourself healed up and those chefs asleep and you'll be good.
Johnny Jonathan Jones
Preparation
This is going to be a one on one fight between Mario and Jones. Prepare accordingly and equip Mario with your best accessory. Quartz Charm is my preference. Can also do Lazy Shell Armor and Safety Ring if you want to try to turtle your way through the fight. Just a quick warning, there's no way to heal in the fight at all. You can't use items, and only Mario can fight. I guess Jones is a Melee player. Anyway before the fight you'll be asked to choose which party members you want cheering you on. You won't get anyone to fight but you will get buffs from the party. Best way to beat Jones is to take him down as fast as possible so I took Geno and Bowser for damage up and I guess defense up but mostly damage go up.
The Fight
This fight was the second one to kill me. It can be rough. It's going to test your ability to do perfect blocks. Jones will attack with both spells and physical attacks so you need to be ready to block them... And that's really all there is to this fight. Be able to block his attacks and strike back till he's dead. He doesn't have a lot of HP thankfully since the fight is 1 v 1. If you're a master of Super Jump you can probably kill him in one turn. I don't know I'm not good at Super Jump. Though I finally found out it was because unlike what Toad told me it's not hit the button right before the attack lands but actually when it lands. So with that new knowledge I will have to go back and try super jumping things again and get to 100. Right back to Johnny. So, again it might take you a few tries but you just keep practicing his fight until you can block all his attacks with the correct timing and then take him out. There's not really any shortcut or trick to this fight (Besides Super Jump) just gotta learn the timing.
Culex
Preparation: Here's the one we've all been waiting for. Let's get down to it. Culex is the main course and all the other bosses were just an appetizer before him. So first off, Lazy Shell and Safety Ring on Peach. Second, Geno with Quartz Charm and Mario with Black Belt or Safety Badge. Might want to also consider Zoom Shoes or Feather on Geno and give the Quartz Charm to Mario instead depending on how you want to play it. Finally, go into the fight with your Team Gauge already charged to 100%. We're going to be using Mario, Geno and Peach's Team Attack A LOT this fight. Savs-Us-All blocks the next attack each party member takes and will work on anything.
The Fight
Culex is as expected a beast. And the third and final character I have met my end by. Oh wait, no I didn't because every time I was in danger of dying I used Earlier Times. HA! Take that Culex! You technically never sent me to the game over screen, and I technically beat you on my first try. Anyway, his newest jerk move is to use an HP that deals your max HP -1 in damage. This is important. His new spell Meteor is not HP to 1, it is your max HP -1. If you have even a single point of damage on you the spell will kill you. Now, after he opens the fight with that he'll use it every five turns and give you a counter, and responding to that is going to be a large part of our strategy for how to beat him. Finally, make sure you are maxed out in your inventory on Red Essences, Rock Candies, Kercolas, and Pick-Me-Ups.
First off, surviving the first round is the most important and hardest part of the fight. Once you make it past the first round the fight becomes a lot easier. The largest problem is that depending on your set up there is a high chance that Culex will open the fight dropping your party's HP to 1 and then the Wind Crystal will go off and use an AoE killing your entire party. It's that kind of fight. So, you have two choices here, can keep using the Earlier Times item to restart the battle till you have at least two characters alive or can give Geno the Feather pre-fight so he can move faster and have him use a Kercola. Regardless of which method you use Geno will go first and use a Kercola to get the two or if if you're really lucky your entire party up to max health. Peach on her turn if anyone is dead use Come Back unless the living characters are in need of healing because they will get KOed if you don't keep yourself healed up. Basically priority is as follows
Negate or Survive Culex's Meteor Attack > Heal HP > Revive Down Allies > Deal Damage.
Now, on negating Culex's attack. There are a couple ways to do it. Peach should be going last each round while Culex goes first meaning she'll always go off before him. When the first Cooldown hits 1, have Peach use the Team Attack Save-Us-All on her turn and you'll just straight up negate Meteor when Culex uses it on 0. Other options is once you have someone guaranteed to go after Culex is to use Kercolas, but remember you only have three. Another is to throw a Red Essence on Peach and then have her heal everyone and the two others use Max Mushrooms as needed. Try to save Pick Me Ups for reviving Peach if she dies and use Comeback to revive your other allies, but if you need to get everyone up fast use it. Anytime you have your team gauge fully charged use Save-Us-All with Peach right before Culex casts Meteor. Obviously it won't be charged every turn and that's why you'll need to make do with Kercolas and Red Essences. Save the Red Essences for Peach you don't have enough of them to use on your entire party and last till the end of the fight.
Now... As for actually defeating the enemies. I recommend starting with the Wind Crystal it's weak to special attacks, all special attacks so Geno Flash or even just Geno Beam will make quick work of it. If you're good at Super Jump you can probably take out the Wind Crystal right away.
From there I took out the Water Crystal but I think it may have been a better choice to go after the Earth Crystal. One of them can summon Bowyer's button locks and seal one of your commands. I think it's the Earth Crystal that does it but not 100% sure. Fire Crystal felt like the least threatening of them so saved it for last.
While this is going on always be aware of when Meteor is coming and prepare accordingly. Remember that if Meteor goes off any character with damage on them will die unless Save-Us-All is active. Mario and Geno should focus on damage and killing as much as possible. In the rare event the party doesn't need healing on Peach's turn she should use a Rock Candy to damage everyone, or if you run out of those the Star Egg. You can also use the Fire and Ice bombs just be aware the naturally a the fire crystal resists fire and the water crystal resists water.
Once all the Crystals are down the fight becomes much easier to deal with. Culex will replace Meteor with Final Claw, an attack that deals 9999 damage, but it only targets one person, and it can be blocked with a perfect block. Timing is a bit tricky but it can be done. But either way losing one person is a lot better than the entire team and you have a countdown till he uses it just like Meteor so whenever Team Attack is charged can just use Save-Us-All and bam no Final Claw. So like the previous fight when Team Attack is charged always pop it with Peach when Culex's counter is on 1 to just negate his ultimate instant kill attack. At this point it's just a matter of keeping yourself healed and beating Culex down. Keep persisting and use that Team Attack anytime its charged to negate Final Claw and victory is finally yours.
And with that, you get a completely useless key item per Final Fantasy Superboss tradition that just says you beat the hardest boss. Huzzah! Hope that helps. Not a perfect guide by any means but this is what worked for me.
#Mario RPG#Super Mario RPG#SMRPG#MarioRPG#Boss Fights#Game Guide#Mario#Geno#Peach#Belome#Jinx#Booster#Punchinello#Bundt#Johnny Jonathan Jones#Culex#super mario rpg remake
24 notes
·
View notes
Text
//also hang on why is octo expansion literally just portal for fish
#ooc#i wanna say beat for beat but not exactly i think.#but like.#mysterious AI guides silent protagonist test subject through a series of tests and promises freedom/cake at the end#but the real cake is just death#tie in an escape sequence... boss fight against said AI or someone being controlled by said AI in tartar's case#OH it's also an underground test facility too#like i said it's not beat for beat OE is definitely LONGER and has a larger scope than the original portal#and people also wanting to fuck said AI. that's another one.#i remember thinking at one point 'why isn't there a tartar for lesbians' and then i realized that was just glados#anyway nothing profound here i've had this thought before and i'm definitely not the only one to realize it#but i was just reminded of it suddenly jlfkjfkad#but like. hey nintendo are you guys portal fans or something fjlkafjkda
4 notes
·
View notes
Text
wait actually connecting the dots was the guy telling us the fight would go well when we were half a party of first timers also the one who forgot to lb3 us like bro was a tank one of em. jffjjssn he forgor.
#the one guy who does know the fight gjdjsjsbsbsbd#no one doing trial roulette at midnight we were all here to discover it#actually the coach review im doing in my head is critical again i realised i once more forgot to hit SSS like i have to figure out a spot on#the hotbar for me to remember#ok authors notes and definitions ¹LB for Limit Break: staple of FF big ability that you get to use after certain conditions#in this case for the time spent in the fight (+other little things but mostly its about the time spent). in the context of this tale#a protective one was needed to supershield us from death. hence 'tank lb' speaking of ²Tank: one of the three key roles in a fight#alongside Healer (self explanatory) and dps (damage-per-second– hence damage dealers) the tank is solid and takes hits#so that the others dont have to. its sturdy and healthy and looks particularly yummy tovthe enemies to make tjem want to hit Just this guy#in this specific story there were Two tanks#one of them seemingly having knowledge of the specific fight we embarked on#the other likely not. neither of them activated the special limited use bug spell we needed to survive though (only they can)#and for ur curiousity dear scientual i play as damage dealer. so that i cant be the bearer of thus sort of mistake ever 👍#though granted dps also could do LB fumbles in this specific fight apparently. twas the fight disclaimers on the guides jdjfjfd#'do NOT cast dps LB UNLESS the boss himself os casting something or else he'll activate invulnerability and make it all useless'#+8second of invulnerability??? bro i just elected to not even try it even before the fight went. awry.#even tho technically my position is good for damage lb its ok given how it went i doubt anyone would mind that no one hit the lb gjdjsjsjsks#to be fair its one of these situations where its better left to the healer in case all goes wrong again#(author note damage lb does big damage. healer lb does big heal and if maxed out on its capacity can even ressurect anyone dead)#(hence. given the struggle. it was better off being theirs even outside of the odd conditions of the boss turning invulnerable)#dont think anyone used it tho#its ok.
7 notes
·
View notes