#Figma Export to HTML
Explore tagged Tumblr posts
Visit Tumblr Blog
Explore Tumblr blogs with no restrictions, modern design and the best experience.
Last Seen Tumblr Blogs


Fun Fact
Tumblr was the first site to host the blog for President Barack Obama in 2011.
Text

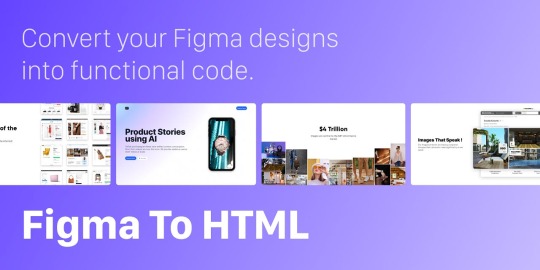
Figma to HTML, Figma to HTML Conversion — PSDtoHTMLNinja
Experience the Figma to HTML Conversion expertise of PSD to HTML Ninja. Seamlessly convert Figma designs to HTML with precision. Save time and ensure visual integrity in your web project by choosing us for your Convert Figma to HTML and Export Figma to HTML needs.
#Figma to HTML Conversion#Figma to HTML#Figma to HTML Service#Figma to HTML Conversion Service#Convert Figma to HTML#Export Figma to HTML#Figma Export to HTML#Figma to Code
0 notes
Text
0 notes
Note
hii!! uh starting writer here, can you pls make a tutorial of how to make the dividers? yours is so pretty!! and i kinda want to do something like that too 🫶
my dividers i use figma! i’m a ux designer so it was easy for me to use 😭
figma is free if you want to try it out but i did download a plugin to export gifs as normally figma doesn’t export .gif
you can use anything that lets you use masks!
for the gradient text dividers i use a html code creator (https://jsfiddle.net/j7vLfbw1/22/)
good luck <3
11 notes
·
View notes
Text
What is Canva Code? Canva Create 2025 Reveals a Game-Changing Innovation

At the Canva Create 2025 event, Canva broadened its platform significantly, moving beyond just graphic design into AI tools, enterprise-grade features, and — for the first time — developer-friendly functionality. One of the most talked-about additions was Canva Code, a built-in coding environment within the platform.
It allows users to not only visually design elements but also modify the code behind them using HTML, CSS, and JavaScript. This feature empowers collaboration between designers and developers, signaling a larger industry trend towards low-code and no-code accessibility.
What is Canva Code?
Canva Code is an integrated code editor that lives directly within Canva’s interface. Unlike traditional design-to-code tools, it gives users the ability to directly customize the logic, behavior, and appearance of their projects using front-end languages.
Whether you're tweaking layout styles, injecting interactive JavaScript, or connecting to third-party APIs, Canva Code offers a developer-like experience within a visual design platform. It brings together elements of Figma’s Dev Mode, Webflow’s visual-coding fusion, and a lightweight version of VS Code — all streamlined into one tool.
Building Interactive Designs Made Easy: The Power of Canva Code’s AI and No-Code Features

No-code coding: Users can build interactive experiences with Canva Code without having to start from scratch with code. Canva Code will create the required code if you only specify the needed functionality.
Interactivity: Users may incorporate interactive components into any Canva design, such as price calculators and mini-games.
Code editor: Although Canva Code streamlines the coding process, it also provides an integrated code editor that allows users to manually update the code and link it to APIs for more intricate features.
AI-powered: Canva Code makes it simpler for anybody to create interactive designs by using AI to produce code in response to user input.
Use versatility: Canva Code may be applied to a wide range of Canva forms, such as papers, presentations, social media posts, and even webpages.
What's Different About Canva Code?
Traditional platforms often allow design export as HTML/CSS, but Canva Code goes far beyond that. It offers:
Canva's live editing feature– No need to switch between platforms.
Real-time code updates – Changes to your code reflect instantly on the design canvas.
Integration with Canva AI tools – Seamless use of design intelligence across projects.
Coming soon: One-click deployment – Direct publishing of coded widgets or microsites.
This makes Canva not just a design solution, but a complete creation and development platform, bridging gaps between idea, design, and execution.
Canva Code's key attributes
With Canva Code, users can:
Access and edit auto-generated HTML/CSS directly from their design.
Write JavaScript functions to add interactivity or custom logic.
Integrate third-party APIs and backend services.
Make component-level edits with class/state logic.
All code updates are live — you can preview, test, and even embed or export your design without leaving the Canva interface.
Canva Code: Who Should Use It?
Canva Code is perfect for a wide range of hybrid users:
Designers who want control over responsiveness and interactivity.
Developers seeking a fast way to prototype ideas without spinning up separate environments.
Small teams or startups aiming to bridge design and code without complex workflows.
Educators or solopreneurs creating web-based learning tools, calculators, or games.
This platform is especially valuable to creators who want to move from concept to launch — fast and without barriers.
How AI Is Used in Canva Code

AI plays a central role in Canva Code. Here’s how:
Auto-generation of responsive layouts based on your design intent.
Intelligent code recommendations to optimize your project.
Convert designs to clean, semantic HTML for accessibility and SEO.
Natural language debugging and coding help, similar to ChatGPT's assistance.
This makes the coding experience feel intuitive, even for those who are not deeply technical, and provides real-time support for problem-solving.
How Canva Code Is Used
To get started with Canva Code:
Open Canva:Access Canva via your web browser or app and log in.
Navigate to Canva Code:Use the sidebar or search to find “Code for me” under Canva AI. This initiates the smart coding prompt interface.
Describe What You Want:Type a prompt like: “Build a quiz app for 5th graders” or “Create a price calculator with three input fields.” Add visual preferences or functionality.
Refine Through Chat:Didn’t get it right the first time? Continue prompting the AI to adjust layout, structure, or behavior.
Use or Share Your Code:Embed your new widget into existing Canva designs, export the code, or soon — publish it live with Canva’s upcoming deployment feature.
Canva Code in Action: Real-World Examples

Below are three real-life use cases demonstrating the power and flexibility of Canva Code:
Flash Card Game for 2nd Grade
Prompt: “Create a flashcard game for addition/subtraction for 2nd graders.”
Result: A colorful, responsive quiz interface powered by basic math logic.
To-Do List App
Prompt: “Design a fun UI for a daily to-do list app.”
Result: An interactive checklist with playful styling and functional state management.
Custom Price Calculator
Prompt: “Build a calculator that estimates service costs based on input values.”
Result: A live form with logic tied to service categories and pricing tiers.
These use cases showcase Canva Code's versatility — ideal for educators, freelancers, and product teams building lightweight tools without deep backend integration.
Additional Highlights of Canva Create 2025
In addition to Canva Code, the event introduced several major upgrades:
Real-Time Collaboration – Teams can now work together on the same design live, increasing workflow speed.
3D and Animation Tools – Create animated, interactive visuals with new 3D assets and motion features.
Expanded Brand Hub – Centralized asset management including fonts, logos, and templates for brand consistency.
Template Library Boost – A wider range of professional templates for presentations, social posts, and more.
Revamped Canva Video Suite – Advanced editing tools make Canva a serious contender in the video creation space.
Canva Assistant (AI) – A smart assistant offering live design advice, layout suggestions, and troubleshooting help.
Final Thoughts
Canva Code marks a transformative step in the world of collaborative creation. By blending design, development, and AI-powered assistance into a unified workflow, it democratizes the building of functional digital products. For creators who want both control and speed, whether designers dabbling in code or developers seeking visual structure, Canva Code offers a frictionless, future-ready solution.
As AI continues to reshape creative tools, Canva is leading the charge with a platform that makes building, prototyping, and launching as simple as designing a slide.
At CQLSYS Technologies, we build innovative, user-friendly mobile and web apps for startups and enterprises worldwide. Specializing in AI, Flutter, PWA, and cross-platform development, we deliver scalable, future-ready solutions across industries like transport, e-commerce, healthcare, and more. As tools like Canva Code reshape the tech landscape, we stay ahead with modern stacks and low-code options. Partner with CQLSYS for fast, creative, end-to-end digital innovation. Visit www.cqlsys.com to get started.
#mobile apps development companies#custom mobile app development company#android apps development#ai generated#canva#graphic design#no code platforms#low code app development#ai app development
0 notes
Text
Effortless Figma to Elementor Conversion for Your WordPress Needs
When it comes to building dynamic, aesthetically appealing websites for WordPress, the integration of design tools with page builders is crucial. Figma and Elementor are two powerful platforms that, when combined, can take your web design to the next level. The process of converting Figma designs into Elementor layouts might seem daunting at first, but with the right strategies and tools, the transition from Figma to Elementor can be incredibly seamless. This guide will help you understand how to effortlessly perform a figma to elementor conversion, ensuring your website looks exactly as envisioned and functions perfectly.
Understanding Figma to Elementor Conversion
Figma is a popular design tool widely used by UX/UI designers to create wireframes, prototypes, and high-fidelity mockups. Elementor, on the other hand, is a drag-and-drop page builder for WordPress that allows users to build stunning websites without needing to write a single line of code. The combination of these two tools makes designing and building a website faster and more efficient.
The key to a successful Figma to Elementor conversion lies in understanding the relationship between a static design and the dynamic elements that Elementor offers. While Figma provides an accurate visual representation of how a page should look, Elementor helps translate that design into a fully functional website. With the right workflow, converting your Figma designs into Elementor pages becomes a straightforward task.
Preparing Your Figma Design for Elementor
Before diving into the actual Figma to Elementor conversion, it’s important to ensure that your Figma design is structured in a way that is compatible with Elementor. Start by ensuring that your design is clean, organized, and broken down into sections that make sense for a web page layout. Proper use of grids, alignments, and spacing in Figma will make the conversion process smoother.
Additionally, ensure that all the images, typography, and colors used in your Figma design are clearly defined. By keeping a consistent design language, you’ll save time when transferring assets into Elementor. It’s also helpful to export Figma elements like icons, logos, and images in high-quality formats that are optimized for the web. This will ensure that the design’s integrity remains intact when using Elementor.
Tools for Effortless Figma to Elementor Conversion
There are several tools available that can significantly speed up the Figma to Elementor conversion process. For instance, there are plugins that allow you to import your Figma design directly into Elementor, reducing the manual effort of recreating each element. These tools automatically map the visual elements from Figma to their Elementor counterparts, preserving the design’s layout, typography, and other key components.
Additionally, using a Figma-to-HTML converter can also streamline the conversion. This tool generates an HTML version of your Figma design, which can then be imported into Elementor as custom HTML. Once you have the design in Elementor, you can further refine it using Elementor’s advanced styling options to ensure that it matches the original Figma design.
Steps for Converting Figma to Elementor
The process of converting Figma to Elementor involves several key steps that can be broken down into manageable tasks. First, begin by preparing your design files in Figma for export. This involves ensuring that all elements are grouped and organized in layers, so they can be easily manipulated once in Elementor.
Next, export the Figma files you need, such as images, icons, and any other assets you want to keep. These files should be saved in a web-friendly format, such as PNG or SVG, ensuring that they retain their clarity and resolution when used on your WordPress website. Now, create a new page or post in WordPress and open it with Elementor. Begin the process of building your page by replicating the design structure from Figma, using Elementor’s widgets to add elements like text, images, and buttons.
For more advanced users, Elementor allows custom CSS and HTML integration, which can be used to fine-tune the design to match Figma precisely. During this stage of the Figma to Elementor conversion, be mindful of responsiveness. Make sure your design looks great on both desktop and mobile devices by utilizing Elementor’s responsive editing features.
Customizing Your Elementor Design
Once the basic structure of your page is built, it’s time to dive into the customization options that Elementor offers. Elementor’s theme builder allows you to fine-tune the design by customizing headers, footers, and even global design settings like fonts, colors, and spacing. This gives you full control over the look and feel of your website while keeping it in line with the original Figma design.
You can also take advantage of Elementor’s advanced features, such as animations, hover effects, and dynamic content. These features enable you to add interactivity and visual appeal to your website, which might not be possible with static Figma designs alone.
Testing and Refining Your Figma to Elementor Conversion
After the Figma to Elementor conversion is complete, it’s important to thoroughly test your website for functionality and visual consistency. This includes checking how it looks on different devices and browsers to ensure that your design remains responsive and fully functional across various platforms. You may need to adjust certain elements for optimal display, especially for mobile users.
Additionally, check for any broken links, missing images, or alignment issues that might have occurred during the conversion process. Elementor’s preview mode allows you to see how your design will look once published, which is an essential step before going live with the new page.
Conclusion
The process of Figma to Elementor conversion doesn’t have to be time-consuming or complicated. With careful planning, the right tools, and an understanding of how to leverage both platforms effectively, you can easily turn your Figma designs into fully functional WordPress pages. Whether you’re a designer or developer, mastering this workflow will help streamline your web design process and ensure that your website looks exactly as envisioned.
1 note
·
View note
Text
Transforming Designs: How to Convert Figma to WordPress Effectively
In the dynamic world of web development, transforming a meticulously crafted design into a functional website is both an art and a science. Figma, a robust design tool, is increasingly becoming the go-to for web designers due to its collaborative features and versatility. However, converting Figma designs into a WordPress site can be a daunting task if you're not well-versed in the process. This blog aims to demystify the conversion process and provide a clear roadmap for developers and designers alike.

Why Choose WordPress for Your Website?
Before diving into the conversion process, it’s essential to understand why WordPress is the platform of choice for many developers. WordPress powers over 40% of all websites on the internet, thanks to its flexibility, scalability, and user-friendly interface. Custom WordPress development allows for the creation of unique, feature-rich websites that cater to specific business needs.
Benefits of Converting Figma Designs to WordPress
Visual Precision: Figma’s vector-based design system ensures that your website looks exactly as you envisioned it.
Collaboration: Figma’s collaborative tools allow designers and developers to work together seamlessly, ensuring that the final product aligns with the initial design.
Efficiency: Converting designs from Figma to WordPress can streamline the development process, saving time and reducing errors.
Step-by-Step Guide to Convert Figma to WordPress
Step 1: Prepare Your Figma Design
Organize Layers: Ensure that your Figma design is well-organized with named layers and groups. This will make the development process smoother.
Responsive Design: Check that your design is responsive, meaning it will look good on various devices and screen sizes.
Step 2: Export Assets from Figma
Images and Icons: Export all images, icons, and other graphical elements from Figma. Ensure they are in the correct formats (e.g., PNG, SVG) and resolutions.
CSS and Styles: Use Figma’s built-in tools to extract CSS styles for text, buttons, and other elements.
Step 3: Set Up Your WordPress Environment
Local Development Environment: Set up a local development environment using tools like XAMPP, WAMP, or Local by Flywheel.
Install WordPress: Download and install the latest version of WordPress on your local environment.
Step 4: Develop the WordPress Theme
HTML and CSS: Create HTML and CSS files based on your Figma design. Start with a basic HTML structure and gradually add styles.
Theme Structure: Follow the WordPress theme hierarchy to create essential files like header.php, footer.php, index.php, style.css, and functions.php.
Template Files: Use WordPress template files to define different parts of your site, such as the homepage, single posts, and pages.
Step 5: Implement Functionality
Custom Post Types: Define custom post types in functions.php if your site requires specific content types.
Advanced Custom Fields (ACF): Use the ACF plugin to create custom fields and add more flexibility to your content management.
Plugins: Install necessary plugins to add functionality like SEO, security, and performance optimization.
Step 6: Test and Optimize
Cross-Browser Testing: Ensure your site works well across different browsers and devices.
Performance Optimization: Optimize images, minify CSS and JavaScript files, and leverage caching to improve site performance.
SEO: Implement SEO best practices, including meta tags, alt texts for images, and a clean URL structure.
Common Challenges and Solutions
Responsive Design Issues: Use media queries in CSS to ensure that your site looks good on all devices.
Alignment and Spacing: Pay close attention to the spacing and alignment of elements to ensure they match your Figma design.
Complex Animations: Use CSS and JavaScript libraries like Animate.css or GSAP to recreate complex animations.
Tools and Plugins to Facilitate the Conversion
Figma to HTML Tools: Tools like Anima or Figma2HTML can automate parts of the conversion process.
WordPress Page Builders: Elementor or Beaver Builder can help you build complex layouts without extensive coding.
Theme Frameworks: Use frameworks like Genesis or Underscores to speed up theme development.
Conclusion
Converting Figma designs to WordPress involves a combination of design precision and coding expertise. By following the steps outlined above, you can ensure a smooth and efficient conversion process, resulting in a stunning, fully functional WordPress website. Whether you’re a designer looking to bring your vision to life or a developer aiming to streamline your workflow, mastering the Figma to WordPress conversion process is an invaluable skill in the realm of custom WordPress development.
0 notes
Text
How to Convert Your Figma Design into Pixel-Perfect HTML Code – The Ultimate Guide
Evidently, your website should be responsive, quick, and user-friendly to attract more customers and potential audiences. Reaching a wider audience is not a cakewalk, and you can easily lose them with a poorly developed website with an unattractive user interface. The human mind is creative and some people like to design their own website. But how do you convert it into a fully-functional website? That job is done with a Figma to HTML conversion service.
People often have their website designs in Figma format. You can get a website of your choice by converting Figma to HTML using pixel-perfect HTML code. Trained developers and coders can convert even the most complex Figma designs to feature-loaded websites
Why choose Figma?
Figma is the most popular graphic editing tool that works for the web. It develops the best and most creative user interface designs for websites. It is a web-based tool that helps in designing and prototyping. It also offers several features like a collaborative workspace that allows multiple designers to work simultaneously.
Another essential aspect of Figma is it is cloud-based, which makes it accessible to designers wherever they are. You can also integrate it with other tools and systems for added convenience.
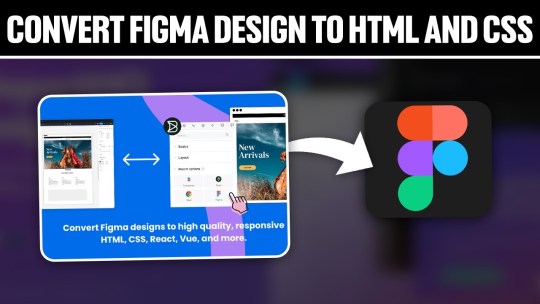
What is Figma to HTML conversion?
Figma to HTML conversion process enables converting Figma designs to functioning CSS and HTML codes. The service ensures that a design of your choice is successfully transformed into a world-class website.
During the Figma to HTML conversion process, designers or developers analyze the Figma design file and manually write HTML markup that accurately represents the design. This involves identifying the different components of the design, such as headers, paragraphs, buttons, images, and more, and translating them into their corresponding HTML tags and attributes.
Steps to convert a Figma design to HTML
The cost associated with Figma to HTML conversion
Conclusion
Frequently Asked Questions
Read More Details please check out full blog:- How to Convert Your Figma Design into Pixel-Perfect HTML Code – The Ultimate Guide
#Figma to HTML conversion#Figma to HTML conversion service#Figma Export to HTML#Figma to HTML#Convert Figma to HTML#HTML to Figma
0 notes
Text
Can you convert Adobe XD to HTML?
Yes, you can convert Adobe XD to HTML, but the process involves multiple steps. Adobe XD is a design tool used to create user interfaces and prototypes, while HTML is the coding language used to build websites. To convert XD designs into a functional HTML website, you generally need to:
Export Assets: Extract images, icons, and other elements from the Adobe XD file. Adobe XD allows you to export these as PNG, SVG, or JPG formats.
Write HTML & CSS: You'll need to manually code the structure of the website in HTML and style it using CSS to match the design created in Adobe XD. This also involves making the site responsive for different devices and screen sizes.
Add JavaScript (Optional): If your design includes dynamic elements like sliders or forms, you’ll need to use JavaScript to bring these functionalities to life.
However, manually converting XD designs to HTML can be time-consuming and requires a good understanding of coding. That's where services like Figma2HTML come in. Although named for Figma, Figma2HTML also specializes in converting Adobe XD designs into clean, responsive HTML/CSS code.
With Figma2HTML, you can hand off your XD design to a team of experts, who will transform it into pixel-perfect HTML, CSS, and JavaScript. This service can save you both time and effort, ensuring your website is fully functional and professionally coded without you needing to dive into the technical details.
If you're looking for an efficient and high-quality solution, check out Figma2HTML to streamline your design-to-development process!

0 notes
Text
Converting Figma Designs to HTML and CSS: A Complete Tutorial
Introduction
Welcome to our comprehensive tutorial on converting Figma designs to HTML and CSS. In today's web development landscape, the seamless integration between design tools and the coding process is crucial for creating visually stunning and functional websites. This tutorial aims to guide you through the process of translating your Figma designs into clean, responsive, and optimized HTML and CSS code.
Understanding Figma Designs
Figma stands as a powerful collaborative interface design tool, empowering designers to create visually compelling and interactive user interfaces. Before diving into the conversion process, it's essential to grasp the intricacies of Figma designs and their significance in the web development workflow. Figma Features: - Vector Editing: Figma allows designers to create and edit vector graphics, ensuring scalable and high-quality designs. - Collaboration: With real-time collaboration features, multiple team members can work on the same project simultaneously, fostering efficient teamwork. - Prototyping: Designers can create interactive prototypes, offering a holistic view of user flows and interactions within the application. - Component-Based Design: The use of components ensures consistency across designs, making it easier to translate into code. Understanding the structure of a Figma design is crucial for an accurate conversion to HTML and CSS. Design elements such as layers, groups, and artboards play a pivotal role in maintaining the hierarchy and visual integrity of the design when translated into code. Figma-to-Code Workflow: - Design Exploration: Designers create and iterate on the user interface, defining styles, layouts, and interactions within Figma. - Export Assets: Export design assets such as images, icons, and SVGs for use in the HTML and CSS files. - HTML Structure: Translate the visual layout into a well-structured HTML document, ensuring a logical and semantic flow of content. - CSS Styling: Apply styles to HTML elements based on the design specifications, including typography, colors, and spacing. - Responsive Design: Ensure that the design adapts seamlessly to different screen sizes, considering mobile and desktop layouts. Developers must pay attention to the details within Figma designs, from font choices to spacing and color schemes, to faithfully recreate the designer's vision in the final web product. Stay tuned as we guide you through the step-by-step process of setting up your development environment and translating these designs into code in the upcoming sections of this tutorial.
Setting Up the Development Environment
Before embarking on the journey of converting Figma designs to HTML and CSS, it's crucial to establish a well-configured development environment. This ensures a smooth and efficient workflow throughout the coding process. Here's a detailed guide on setting up your environment: 1. Choose a Code Editor: Select a code editor that suits your preferences and needs. Popular choices include Visual Studio Code, Sublime Text, and Atom. A code editor with robust features and extensions can significantly enhance your productivity. 2. Version Control: Implement version control using Git to track changes and collaborate seamlessly. Platforms like GitHub or GitLab provide hosting solutions for your code repositories, facilitating teamwork and code management. 3. Project Structure: Organize your project structure thoughtfully. Create folders for assets, stylesheets, scripts, and HTML files. This ensures a clean and maintainable codebase, making it easier to locate and update specific elements. 4. Install Node.js: Node.js is essential for running various build tools and package managers. Install Node.js and npm (Node Package Manager) to manage project dependencies efficiently. This step is crucial for automating tasks and optimizing your workflow. 5. CSS Preprocessors: Consider using CSS preprocessors like Sass or Less to enhance your stylesheets with features like variables, mixins, and nesting. These preprocessors contribute to cleaner and more maintainable code. 6. Browser Developer Tools: Familiarize yourself with the developer tools available in web browsers. These tools aid in debugging, inspecting elements, and testing your website across different devices and screen sizes. 7. Responsive Design Testing: Explore tools for testing responsive designs. Platforms like BrowserStack or built-in browser tools allow you to simulate your website on various devices, ensuring a consistent and user-friendly experience. Tool Purpose Visual Studio Code Code editing and debugging Git & GitHub Version control and collaboration Node.js & npm Package management and task automation By meticulously configuring your development environment, you lay the foundation for a successful Figma-to-HTML/CSS conversion. In the next sections, we'll delve into the specifics of structuring HTML from Figma and styling with CSS, bringing your designs to life on the web.
Structuring HTML from Figma
Once your development environment is set up, the next crucial step in converting Figma designs to HTML and CSS is to create a well-structured HTML document. Proper HTML structuring not only ensures a logical flow of content but also lays the groundwork for seamless styling and responsiveness. Let's dive into the details: 1. Analyzing the Design: Thoroughly examine your Figma design to identify key sections and components. Create a mental map of the layout, including header, main content, sidebar, and footer. This analysis guides the HTML structure you'll implement. 2. Semantic HTML Elements: Embrace semantic HTML elements to convey the meaning of your content. Use , , , , , , and to represent different parts of your webpage. 3. Dividing Into Components: Identify design components that can be treated as separate entities. Convert these into reusable HTML components, making your code modular and easy to maintain. Utilize classes and IDs for styling and JavaScript interactions. 4. Navigation and Links: Implement navigation elements using the appropriate HTML tags. Use for the navigation bar and for links. Ensure proper linking between pages and sections of your website. 5. Form Elements: If your design includes forms, structure them using HTML form elements. Utilize , , , and other form-related tags to create a user-friendly and accessible form structure. HTML Structure Example: HTML Element Purpose Top section containing the site's logo and navigation. Main content area, housing articles, sections, and other content. Side section, often used for related content or advertisements. Bottom section with copyright information and additional links. Optimizing for Accessibility: Consider accessibility by incorporating proper heading structures (
,
, etc.), alt attributes for images, and other accessibility best practices to ensure your website is inclusive and user-friendly. By carefully structuring your HTML based on the Figma design, you set the stage for a seamless transition to CSS styling. In the upcoming sections, we'll explore the intricacies of styling with CSS, ensuring your web pages look as visually appealing as the original design.
Styling with CSS
With the HTML structure in place, the next pivotal step in converting Figma designs to a functional website is styling with CSS. CSS brings your design to life by defining the visual presentation and layout. Let's delve into the details of effectively styling your HTML elements: 1. External Stylesheets: Organize your styles by using external stylesheets. Create a separate CSS file and link it to your HTML document. This separation enhances maintainability and allows for a cleaner project structure. 2. Selectors and Properties: Utilize CSS selectors to target specific HTML elements and apply styles. Common properties include color, font-size, margin, padding, and more. Use meaningful class and ID names for clarity. 3. Typography: Define font styles for headings, paragraphs, and other text elements. Specify font families, sizes, and weights to achieve a consistent and visually appealing typography throughout your website. 4. Colors and Backgrounds: Implement the color scheme from your Figma design using CSS. Use hexadecimal or RGB values to set colors for text, backgrounds, borders, and other elements. Consider gradients and images for background styles. 5. Box Model: Understand and apply the box model to control the spacing and layout of elements. Adjust margins, padding, and borders to achieve the desired visual hierarchy and spacing between elements. 6. Flexbox and Grid: Embrace Flexbox and Grid layout models for efficient and responsive designs. These CSS features simplify the positioning and alignment of elements, ensuring a flexible and dynamic layout on different screen sizes. 7. Media Queries: Implement media queries to create responsive designs. Define breakpoints where the layout or styling should adapt to different screen sizes. This ensures a seamless user experience on both desktop and mobile devices. CSS Property Purpose color Defines the text color. font-size Sets the size of the font. margin Specifies the outside spacing of an element. padding Determines the inside spacing of an element. Testing and Debugging: Regularly test your styles across different browsers to ensure consistency. Use browser developer tools to inspect and debug your CSS code, addressing any layout or styling issues that may arise. By mastering the art of styling with CSS, you bring your Figma design to life on the web. The next section will guide you through handling interactivity and dynamic elements, enhancing the user experience of your website.
Handling Interactivity and Dynamic Elements
As we progress in converting Figma designs to HTML and CSS, it's essential to introduce interactivity and dynamic elements to create a more engaging user experience. This section focuses on incorporating JavaScript and other techniques to breathe life into your web pages: 1. JavaScript Integration: Integrate JavaScript into your project to add interactivity. Utilize event listeners to respond to user actions such as clicks, mouseovers, and form submissions. JavaScript enables you to manipulate the DOM (Document Object Model) dynamically. 2. Animation Effects: Enhance user engagement by incorporating animation effects. CSS animations and transitions can be used for subtle enhancements, while JavaScript libraries like GreenSock Animation Platform (GSAP) provide advanced animation capabilities for more complex scenarios. 3. Form Validation: Implement client-side form validation using JavaScript to enhance user experience and reduce server load. Validate user inputs for correctness before submitting the form, providing real-time feedback to users. 4. Dynamic Content Loading: Load content dynamically to improve page load times. Use JavaScript to fetch data from external sources and update specific sections of your page without requiring a full page reload. This technique enhances the perceived performance of your website. 5. Interactive Components: Create interactive components based on Figma designs. Convert buttons, sliders, modals, and other elements into interactive components using a combination of HTML, CSS, and JavaScript. Ensure a seamless transition between states for a polished user experience. Technique Purpose Event Listeners Respond to user actions like clicks and key presses. CSS Animations Create visually appealing animation effects. Form Validation Ensure accurate and validated user input. Dynamic Content Loading Improve page load times by loading content on demand. Accessibility Considerations: When adding interactivity, ensure your website remains accessible. Provide alternative text for dynamic content, focus states for interactive elements, and consider keyboard navigation for users who rely on assistive technologies. Testing Across Browsers: Thoroughly test the interactivity and dynamic elements across different browsers to ensure a consistent experience for all users. Address any compatibility issues that may arise during testing. By mastering the handling of interactivity and dynamic elements, your website moves beyond static design, offering users a dynamic and engaging online experience. The final section will cover optimizing your Figma-to-HTML/CSS project for performance, ensuring a fast and responsive web presence.
Optimizing for Performance
As we near the completion of our Figma-to-HTML/CSS journey, optimizing your project for performance is crucial to ensure a fast and responsive web presence. Efficient optimization practices not only enhance user experience but also contribute to better search engine rankings. Let's explore key strategies for optimizing performance: 1. Minification: Minify your HTML, CSS, and JavaScript files to reduce their size. Minification involves removing unnecessary whitespace, comments, and unused code, resulting in smaller file sizes and faster loading times for your web pages. 2. Image Optimization: Optimize images to strike a balance between quality and file size. Use image compression tools to reduce the size of images without compromising visual integrity. Consider using responsive images to deliver different sizes based on the user's device and screen resolution. 3. Lazy Loading: Implement lazy loading for images and other non-essential resources. Lazy loading defers the loading of certain elements until they are about to come into the user's viewport. This technique improves initial page load times, especially for content-heavy websites. 4. Content Delivery Network (CDN): Utilize a Content Delivery Network to distribute your static assets across servers worldwide. CDN ensures that users can access resources from servers geographically closer to them, reducing latency and accelerating content delivery. 5. Browser Caching: Leverage browser caching to store static files on the user's device. Cached files can be reused for subsequent visits, reducing the need to download them again. Set appropriate expiration dates for cacheable resources. Optimization Technique Purpose Minification Reduce file sizes by removing unnecessary characters and whitespace. Image Optimization Balance image quality and file size for faster loading times. Lazy Loading Defer the loading of non-essential resources until they are needed. CDN Accelerate content delivery by distributing assets across global servers. Performance Monitoring: Regularly monitor your website's performance using tools like Google PageSpeed Insights or Lighthouse. These tools provide insights into areas that need improvement, helping you fine-tune your optimization strategies. Mobile Optimization: Optimize your website for mobile devices by implementing responsive design practices. Test your website on various mobile devices to ensure a seamless and fast user experience for mobile users. By implementing these optimization strategies, you'll not only enhance the performance of your Figma-to-HTML/CSS project but also provide users with a faster and more enjoyable browsing experience. In conclusion, let's summarize the key takeaways from our tutorial.
Common Challenges and Solutions
While converting Figma designs to HTML and CSS is a rewarding process, developers often encounter common challenges. Addressing these challenges proactively ensures a smoother workflow and a successful translation of design to code. Let's explore these challenges and their solutions: 1. Design-to-Code Consistency: Challenge: Maintaining consistency between the Figma design and the coded website can be challenging, leading to discrepancies in layout, spacing, and styling. Solution: Create a style guide based on the Figma design to establish a reference for fonts, colors, and spacing. Regularly compare the coded elements with the Figma design to ensure consistency. 2. Responsive Design Complexity: Challenge: Adapting the design to different screen sizes and resolutions can be complex, especially when dealing with intricate layouts. Solution: Implement a mobile-first approach and use CSS media queries to progressively enhance the design for larger screens. Test thoroughly across various devices to identify and address responsiveness issues. 3. Browser Compatibility: Challenge: Different browsers may interpret CSS and JavaScript differently, leading to compatibility issues. Solution: Test your website on multiple browsers and versions, addressing any inconsistencies. Utilize browser prefixes for CSS properties and consider using feature detection libraries to handle browser-specific quirks. 4. Performance Bottlenecks: Challenge: Performance issues, such as slow loading times and unoptimized assets, can impact the user experience negatively. Solution: Employ optimization techniques discussed earlier, including minification, image optimization, lazy loading, and content delivery networks (CDN). Regularly monitor and analyze your website's performance to identify and resolve bottlenecks. Challenge Solution Design-to-Code Consistency Create a style guide and regularly compare coded elements with the Figma design. Read the full article
0 notes
Text
How to Export Figma to HTML Code: Step-by-Step Guide
In the world of web design and development, efficiency is key. One tool that has revolutionized the design process is Figma, a cloud-based design platform that allows teams to collaborate in real-time. However, once the design phase is complete, the next step is to convert those stunning visuals into functional code. This is where knowing how to export Figma to HTML comes into play.
Understanding the Figma to HTML Process
Figma to HTML is the bridge that transforms your design files into a web-ready format. This process involves translating the visual elements, such as images, text, and layouts, into HTML code that browsers can understand and render as a website.
Step 1: Organize Your Figma Design
Before exporting to HTML, it's essential to have a well-organized Figma design. Ensure that all layers are named appropriately, and elements are grouped logically. This will make the conversion process much smoother.
Step 2: Export Assets
Start by exporting any images, icons, or other assets used in your design. Figma provides an easy-to-use export feature that allows you to select and save individual elements as PNGs, SVGs, or other common image formats. Remember to keep track of where you save these files, as you'll need to reference them later.
Step 3: Use a Figma to HTML Converter
There are several tools available online that specialize in converting Figma designs to HTML code. These converters streamline the process, saving time and ensuring accuracy. Simply upload your Figma file, and the converter will generate the corresponding HTML code.
Figma to HTML converters are equipped to handle various design elements, from basic shapes and text to more complex features like gradients and shadows. This ensures that your design is faithfully translated into code.
Step 4: Review and Adjust
Once you have the initial HTML code, it's crucial to review the output. Check for any discrepancies between the design and the generated code. This could include spacing issues, font styles, or any other visual elements that may need adjustment.
Step 5: Add Interactivity with CSS and JavaScript
While the Figma to HTML converter does an excellent job of translating the visual elements, you may need to add interactivity using CSS and JavaScript. This includes animations, transitions, and responsive design elements that enhance the user experience.
Step 6: Test Across Browsers and Devices
Before finalizing your HTML code, it's essential to test it across different browsers and devices to ensure compatibility. This step helps identify any potential issues that may arise when the website is live.
Step 7: Optimize for Performance
Optimizing your HTML code is crucial for ensuring fast load times and a seamless user experience. This involves minimizing unnecessary code, compressing images, and utilizing techniques like lazy loading to prioritize content.
Step 8: Deploy Your Website
With your HTML code ready and optimized, it's time to deploy your website to a hosting platform. Choose a reliable hosting provider that offers the resources and support you need to keep your site running smoothly.
Conclusion
Knowing how to export Figma to HTML opens up a world of possibilities for designers and developers alike. It streamlines the transition from design to code, saving time and ensuring a seamless user experience. By following these steps, you can confidently convert your Figma designs into functional, web-ready HTML code. Embrace the power of Figma to HTML conversion and elevate your web design projects to new heights.
0 notes
Text
I Went Above And Beyond To Get The Frontend Job I Wanted But It Didn't Work.
I was very interested in a job position in Europe that came with visa sponsorship. While browsing the company's website, I noticed their sleek CSS animations. However, one diagram stood out because it was static:

Seeing this, an idea struck me. They were on the hunt for a Frontend developer. Why not showcase my skills by transforming this static image into HTML elements with polished CSS3 animations? I saw it as a great opportunity to experiment with Figma, which I believed could assist in generating some of the required HTML and CSS. My strategy was to initially craft it in a 2D format (from top to bottom). After exporting, I planned to manually infuse a 3D touch, incorporating aspects like rotation and bevels. Creating the three lines that interconnected each square was undoubtedly the most challenging. Positioning becomes a tad complex with intricate designs in Figma, especially when layering one element over another. Yet, I must admit, Figma proved to be quite a robust tool. Here’s what it looked like at that stage:

I then attempted to export the CSS/HTML using a Figma plugin named "Anima". Unfortunately, it didn't quite hit the mark. Rather than creating individual HTML components for each square and connecting line, it compacted everything into a singular static image. This was a far cry from what I was aiming for. To provide a clearer picture: in Figma, I had primarily used two layers, one for elements with absolute positioning and another for those with relative positioning. The plugin merged the latter into one bitmap image. My persistence paid off when I realized that exporting the relative layer by itself worked perfectly. My subsequent task was to individually export the components and manually integrate them using my local code editor.
However, there was a minor hiccup with the borders. Since CSS doesn't natively support gradient colors for borders and the plugin didn't offer a workaround, the borders ended up looking quite blocky. This was especially evident with the circular elements at the bottom, as can be observed here:

After exporting the HTML I started by rotating the full container, but the big beveled cyan square needed to look 3D and not like a flat surface so I had to add create some additional HTML elements:

Then I animated it (on mouse hover) using it "scaleX" on the ::before and ::after selectors (the "bevels") and then "translate" on the big square itself (otherwise it wouldn't look like going down but stuck mid-air):

While I might have glossed over a few steps, if you're curious about the technicalities or you want to see it live here it is: https://replit.com/@IvanCastellanos/demo-css-animation?v=1
I even went the extra mile by creating a video on YouTube to showcase my entire process. However, despite my efforts, I didn't secure the position. The feedback I received was rather generic, stating, "[...]we don’t think there’s a good fit for the position you applied for". It makes me wonder: perhaps going the extra mile isn't always appreciated, or maybe it boils down to the individual reviewing the application. Nevertheless, it was a good learning experience.
If, by chance, you or your organization are scouting for talent, feel free to drop me a message at ivanca at gmail. My expertise spans JavaScript, TypeScript, CSS, PHP, and Python. And at the moment I'm open to opportunities for remote work or one that offers visa sponsorship.
0 notes
Text
Web Designer Course: A Complete Guide to Kickstart Your Career in Web Design
In today's digital world, a strong online presence is essential for every business, organization, and individual brand. As a result, the demand for skilled web designers has skyrocketed. A well-designed website not only attracts visitors but also enhances user experience, boosts credibility, and drives business growth. If you have a creative eye and a passion for technology, a Web Designer Course might be the perfect start to your professional journey.
What is Web Design?
Web design is the process of creating visually appealing, user-friendly websites. It involves several components such as layout design, color theory, typography, content structuring, responsive design, and user interface (UI) design. A web designer ensures that a website is both aesthetically pleasing and functional.
Why Choose a Web Designer Course?
A formal course in web design equips students with the technical and creative skills required to build modern websites. Whether you’re a beginner or a professional looking to upskill, a web designer course offers structured learning, expert guidance, hands-on projects, and the foundation needed to enter the competitive digital industry.
Key Benefits:
High Demand: With businesses moving online, web design professionals are more in demand than ever.
Creative Outlet: Web design combines creativity with technology, offering a dynamic and fulfilling career.
Freelance Opportunities: Work independently or with clients across the globe.
Diverse Career Options: From UX/UI design to front-end development and digital branding, the possibilities are vast.
Who Can Enroll?
Anyone with basic computer skills and an interest in design and technology can join a web designer course. It is ideal for:
Students (10+2 and above)
Graduates from any stream
Working professionals looking to switch careers
Freelancers aiming to expand their service offerings
Course Duration and Modes
Web designer courses vary in length based on the depth and specialization:
Short-term Courses: 3 to 6 months (suitable for beginners)
Diploma Programs: 6 months to 1 year (in-depth training)
Advanced Programs: 1 year+ (often includes internship or live project)
Courses are available in online, offline, and hybrid formats. Online classes offer flexibility, while classroom learning provides hands-on mentoring and peer interaction.
Core Modules in a Web Designer Course
A comprehensive course will typically cover the following modules:
1. Introduction to Web Design
Overview of web design and development
Role of a web designer
Understanding the web ecosystem
2. HTML & HTML5
Structure of web pages
Tags, attributes, and elements
Semantic HTML and best practices
3. CSS & CSS3
Styling techniques
Layouts using Flexbox and Grid
Responsive design with media queries
4. JavaScript Basics
Introduction to programming logic
DOM manipulation
Interactive elements
5. UI/UX Design Fundamentals
Wireframing and prototyping
User flow and navigation
Visual hierarchy and usability
6. Adobe Photoshop & Illustrator (or Figma)
Designing web layouts
Exporting assets for the web
UI mockups and icons
7. Bootstrap Framework
Building responsive layouts
Using pre-designed components
Customizing themes
8. Content Management System (CMS) – WordPress
Installing and configuring WordPress
Custom themes and plugins
Managing dynamic content
9. SEO Basics
On-page optimization
Mobile-friendly design
Page load speed and usability
10. Portfolio Development
Building a personal web design portfolio
Live project work
Presentation and feedback
Optional Advanced Topics
JavaScript libraries (like jQuery)
Introduction to React or Vue.js
E-commerce website design
Animation using CSS and JS
Web accessibility and standards
Tools Covered in a Web Designer Course
A good course exposes learners to the most widely-used industry tools such as:
Figma / Adobe XD – UI/UX and wireframing
Visual Studio Code – Code editor
Chrome DevTools – Debugging and optimization
Photoshop / Illustrator – Graphic design
Git & GitHub – Version control
Career Opportunities After Completing a Web Designer Course
Upon successful completion of the course, learners can explore roles such as:
Web Designer
UI/UX Designer
Front-End Developer
WordPress Developer
Graphic & Web Design Specialist
Freelance Web Consultant
Depending on your skills and interests, you could also branch into digital marketing, mobile app design, or motion graphics.
Expected Salary
Web design salaries vary depending on experience, location, and employer. Here’s a general idea:
Entry-Level Web Designer: ₹2.5 – ₹4.5 LPA
Mid-Level (2–5 years): ₹4.5 – ₹8 LPA
Senior Designer or UI/UX Lead: ₹8 – ₹15+ LPA
Freelancers: ₹25,000 to ₹1,00,000+ per project (depending on complexity)
International opportunities can offer even higher packages.
How to Choose the Right Web Designer Course?
With so many courses available, consider these factors before enrolling:
Curriculum Depth: Ensure the course covers both design and development basics.
Faculty Expertise: Learn from experienced industry professionals.
Hands-On Projects: Practical learning is critical for skill-building.
Portfolio Support: Does the course help you build a professional portfolio?
Internships & Placement: Job assistance or internships are a big plus.
Reviews and Ratings: Check feedback from past students.
Certifications
Many reputed institutes offer certification upon completion. Some globally recognized certifications include:
Adobe Certified Expert (ACE)
Google UX Design Certificate
Coursera/edX verified certificates
HubSpot CMS Design Certification
These add value to your resume and enhance credibility.
Final Thoughts
The internet continues to grow rapidly, and so does the need for skilled web designers. A Web Designer Course is a smart investment for those looking to build a creative, flexible, and high-demand career in the digital space. Whether you want to work for a tech company, join an agency, or freelance from home, the skills you gain from a quality course will open doors to endless possibilities.
Are You Ready to Design the Future?
If you're passionate about design, technology, and problem-solving, a career in web design awaits you. Enroll in a web designer course today and start building the digital experiences of tomorrow.
0 notes
Text

Pros and Cons of Using a Figma Export to HTML Plugin
When it comes to creating websites, one of the most important aspects is the design. And when it comes to web design, Figma is a popular tool that many designers use.
However, while Figma is a great tool for designing websites, it doesn't exactly offer an easy way to convert those designs into HTML code. That's where Figma to HTML plugins come in.
There are a few different Figma to HTML plugins available, but not all of them are created equal. In this article, we'll take a look at the pros and cons of using a Figma to HTML plugin so you can decide if it's the right tool for your needs.
Pros:
- Can save time: If you're familiar with both Figma and HTML, then using a plugin can save you a lot of time when compared to coding everything from scratch.
- Design changes are easy to make: With most plugins, you can simply make changes to your design in Figma and then export the updated code. This means that making changes is much easier than if you were coding everything by hand.
Cons:
- Limited options and customization: While using a plugin can save you time, it also
Conclusion
If you're looking for a Figma to HTML plugin, we highly recommend using the ones listed here. This is a great option that will make your life much easier when it comes to converting your Figma Export to HTML code. We hope this article has helped you find the best plugin for your needs and that you have found success in using it.
0 notes
Text
...
So, working on a project and one aspect of it is making a really simple scientific poster. I'm the design guy, I do the front nd design since I'm the only person who knows basic html and css, the only person who has taken art and design classes, and I do this stuff for fun so I go ahead and take charge of the poster. Plus they really just don't have the intuition for design at all, even when I or the professors give clear instructions on How To Do Things Right. We have to make tons of drafts and get feedback on them, and its kind of a dripfeed because staff would make comments on some things, neglect to comment on the other things, and make us turn in another draft based on those missed comments.
Every single fucking time my teammates would work on it, I would have to go back and fix allllllll of the margins and padding they neglected, and I would have to remake every image of a diagram into a simplified, vectorized. Every time we had to change text or images based on the feedback, I would have to go back and change those as well. Today, while I was working on this, one of my teammates was literally trying to edit the same thing at the same time (using figma and diagrams.net). I was going to lose my mind because I was just trying to fix all of the issues, like I had to do multiple times, that my teammates would neglect from the feedback, and so this was actively happening while I was trying to fix them.
I had everything in their own groups, so that it would be easy to change things out. My teammates didn't know how to work with that. Earlier teammate literally did not understand that a file cannot have two different file extensions, and sent me a rasterized image of a diagram instead of the actual editable file, because diagrams.net just lets you have an "editable (so like, able to move around the individual elements) png" saved to your google docs, exported it as a plain png and posted it in the project chat. When I couldn't open it they then tried to tell me like, well it worked for me and well it has the other extension too so it should work. It was only the filename that had the 'extension' of the proper file format. (this is the big csc senior class btw)
The fact that we went back and forth so much on that diagram to begin with was frustrating because they could've given me access to the editable file at any time, and would constantly ignore or forget feedback which meant having to fix it many, many more times, and most of those fixes were still missing the core design feedback like 'make the text size bigger' and 'eliminate unnecessary whitespace'. If anything, it would've been much better if I went through with porting it to figma instead of relying on them, but I'm over here not wanting to be a total control freak so I'm like... whatever.
So when I get access to that diagram I fix issues from all of the feedback, but at the end of our final feedback they go and try to edit at the same fucking time as I am editing, and I had been fixing the diagram all day up to that point. Then the same thing happened on the figma document, and of course they deleted my group for the section the diagram was supposed to go in, so I had to make it again, fix the margins, fix the padding, fix the sizing.
They also completely trashed my design for a page I worked on for the project itself like waay earlier in the semester, so I was like. Okay. You guys do your thing, I can put in all my junk later. I would like to avoid wasting my time as much as possible, considering how mentally ill and exhausted I already am.
oh yeah and also the examples the professors put in the powerpoint for posters had the same (margins and spacing or text inconsistencies, bad looking screenshots, that kind of thing) or worse issues (think black impact font on a busy patterned background, for fucks sake) that they kept nitpicking us for, so its kinda like. please actually showcase something that's relevant thanks.
At least it's finally(?) over.
1 note
·
View note
Text
How to Convert Your Figma Design into a Fully Functional WordPress Site
Transforming your Figma design into a fully functional WordPress site can seem daunting, but with the right approach, it's perfectly achievable. This blog post will guide you through the process of converting Figma designs into a WordPress site, highlighting essential practices in custom WordPress development and WordPress website development. Here’s how you can make your Figma to WordPress project a success.

Finalize Your Figma Design
Before you begin the conversion process, ensure that your Figma design is completely finalized. This includes refining the UI/UX details, ensuring that the layout is responsive, and organizing your assets for easier transition. Properly naming your layers, grouping related elements, and creating a style guide within Figma can greatly streamline the later stages of development.
Export Assets from Figma
Figma allows you to export your assets in various formats which are web-ready. Export all visual elements such as images, icons, and fonts. Ensure that these assets are optimized for the web to enhance your site’s performance. This includes compressing images and using web-friendly font formats.
Choose the Right WordPress Theme
Selecting an appropriate WordPress theme that matches your design is crucial. You can choose from thousands of themes or opt for a blank starter theme like Underscores or Hello Elementor. For custom WordPress development, these themes offer a clean slate to implement your design with minimal interference from pre-existing styles.
Convert Figma Designs to HTML/CSS
The next step involves turning your Figma designs into HTML and CSS. This can be done manually by a developer or through automated tools that convert designs directly into code. However, manual coding often results in cleaner and more optimized code. This stage forms the skeleton of your WordPress website development process.
Integrate with WordPress
After you have your HTML and CSS ready, integrate them with WordPress. This involves breaking down your HTML into WordPress themes' template files like header.php, footer.php, and index.php. Also, create custom page templates for unique layouts in your design. Utilize WordPress’s functions and hooks to add functionalities like navigation, widgets, and post formats.
Add WordPress Plugins
To enhance functionality, install necessary WordPress plugins. Plugins can handle forms, SEO, security, and more. Choose plugins that are well-supported and keep the number of plugins to a minimum to avoid slowing down your site.
Test Your Site
Testing is an essential step in ensuring that your WordPress site matches your Figma design in functionality and appearance. Check responsiveness across all devices, test all functionalities like form submissions and page loading, and ensure compatibility with all major browsers.
Launch and Maintain
Once testing is completed and you’re satisfied with the results, launch your website. However, launching your site is not the end. Regular maintenance is necessary to keep the site secure, functional, and up-to-date with the latest web standards and SEO practices.
Conclusion
Converting a Figma design to a WordPress site involves a detailed process that bridges creative design and technical development. By following these steps and focusing on custom WordPress development, you can ensure that your WordPress website not only looks exactly as planned in Figma but also performs excellently in the digital space.
Remember, while tools and plugins can automate many aspects of this process, the expertise and insights from experienced WordPress developers can add significant value, ensuring that your website is optimized, secure, and tailored to meet your specific needs.
0 notes
Text
Figma to HTML: A Simple Guide To Converting Figma To HTML
PSD to HTML Ninja is a renowned name for helping convert Figma to HTML with efficiency. We have years of experience in the field, and our experts are highly qualified professionals. If you are looking for a reliable and top-quality Figma to HTML conversion service, then we can be your ultimate savior.
#Figma to HTML Conversion#Figma Export to HTML#Convert Figma to HTML#Figma to HTML conversion service
0 notes