#Figma to HTML conversion
Text
Learn how to transform your Figma designs into beautiful and functional websites using this step-by-step guide.
#Figma to HTML Code#Figma to HTML#Figma to HTML Conversion#Convert Figma to HTML#Figma to Code#Figma to HTML Conversion Services#Figma Designs to Websites#Figma to Websites#PSDtoHTMLNinja
0 notes
Text
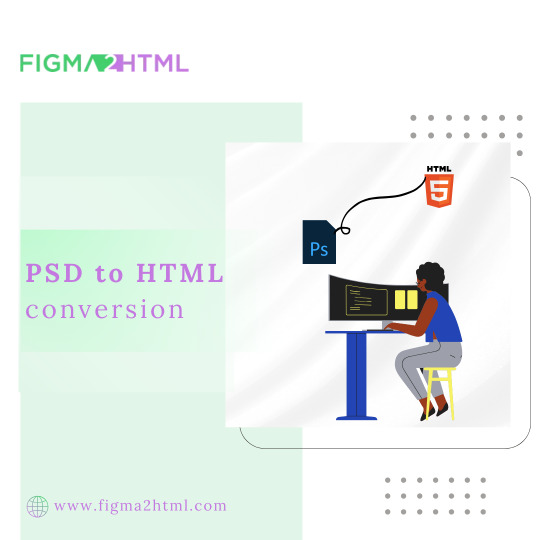
Figma to HTML conversion Service
We can help you convert Figma design to HTML CSS. Build a fully responsive, clean, high-quality website with our Figma to HTML conversion services.

#figma#html#figma to html#figma to html conversion#create a figma to html#figma to html conversion servicers
0 notes

Text
Building Cutting-Edge Websites: A Guide to Web Development in Coimbatore
In today’s competitive digital landscape, a robust website is the cornerstone of any successful business. For companies looking for tailored, efficient, and scalable solutions, Technox Technologies, a leading website development company in Coimbatore, offers a comprehensive range of web development services.
Why Choose a Website Development Company?
Choosing the right website development company ensures that your online presence is optimized for performance, functionality, and growth. From small businesses to large enterprises, companies can benefit from custom-built websites that not only look professional but also function smoothly across devices and platforms.
Why Coimbatore?
Coimbatore has become a hub for technological innovation, boasting a rich talent pool of web developers and a rapidly growing IT industry. Technox Technologies stands out as one of the top choices for businesses that want to scale their digital presence.

Services Offered by Technox Technologies
1. Custom Website Development
Whether you need a dynamic e-commerce platform or a simple static site, Technox crafts custom websites that align with your business goals. They use HTML, CSS, JavaScript, and various back-end technologies like PHP and Python to develop responsive, scalable websites.
2. E-commerce Website Development
Technox specializes in building e-commerce websites that enhance user experiences and drive conversions. Using platforms such as WooCommerce, Shopify, and Magento, they create custom online stores with user-friendly navigation, secure payment gateways, and seamless product management features.
3. CMS-Based Development
Using WordPress or Drupal, Technox builds content management systems (CMS) that allow you to manage your website's content efficiently. This feature empowers you to easily update product listings, publish blog posts, and edit pages.
4. Third-Party API Integration
Technox integrates third-party APIs to enhance functionality—whether it's connecting to payment gateways, social media platforms, or external databases, ensuring that your site is as functional as it is beautiful.
Advanced Tools and Technologies Used by Technox
Technox leverages cutting-edge technologies and tools to ensure high-performance websites:
Front-End Technologies
HTML5 & CSS3: For structuring and styling.
JavaScript Frameworks: Libraries like React.js and Vue.js for smooth user interactions.
Responsive Design: With frameworks like Bootstrap, sites adapt seamlessly to all device sizes.
Back-End Technologies
Node.js and PHP: For building scalable and fast back-ends.
Python (Django/Flask): For high-performance web applications.
MySQL and MongoDB: Reliable databases for handling complex data operations.
Security and Performance Optimization
Security and performance are integral to any website's success. Technox Technologies employs SSL certificates, firewall protection, and regular security audits to prevent vulnerabilities. Additionally, they optimize websites for faster load times using CDNs and lazy loading techniques, which enhance user engagement.
Website Development Process at Technox
At Technox, the web development process is broken down into several key stages:
1. Strategic Planning
A project begins with identifying business goals, understanding the target audience, and performing a competitive analysis. A roadmap is then created to align design and functionality with business objectives.
2. Design and User Experience (UX)
The team focuses on creating visually appealing designs while ensuring ease of use. Tools like Figma and Adobe XD are utilized for wireframing and prototyping to create intuitive and engaging user experiences.
3. Development
Once the design is approved, development begins. The front-end team works on translating the design into code, while the back-end team sets up databases, server configurations, and APIs.
4. Testing and Quality Assurance
Before the launch, Technox rigorously tests websites across multiple devices and browsers. They employ automation tools like Selenium to perform load testing, cross-browser testing, and performance evaluations.
5. Deployment and Maintenance
Once the site is ready for the live environment, Technox deploys it to the client’s server and monitors for any issues. They offer continuous support and updates, ensuring that the website runs smoothly even after launch.

Latest Trends in Web Development
Technox Technologies stays at the forefront of the industry by incorporating the latest trends:
1. Progressive Web Apps (PWAs)
PWAs offer a mobile app-like experience directly from a browser, improving engagement and performance. With features like offline accessibility and fast loading times, PWAs are becoming increasingly popular.
2. AI and Chatbots
Integrating AI-powered chatbots into websites can enhance customer service by offering real-time, automated assistance. This is particularly useful for e-commerce websites where users may have frequent inquiries.
3. Voice Search Optimization
Voice search is on the rise. Technox ensures that your website is optimized for voice searches, which can help improve SEO rankings and user experience.
4. Motion UI
Motion UI adds dynamic transitions and animations, making the website more engaging. This improves the user experience by providing visual feedback and improving overall usability.
Frequently Asked Questions (FAQs)
1. Why should I hire a website development company?
A website development company offers expertise in creating professional, high-performing websites that align with your business goals. They bring technical expertise and modern design principles, ensuring your site is both functional and visually appealing.
2. How long does it take to develop a website?
The development time can vary depending on the complexity of the project. On average, a basic website can take 4-6 weeks, while a more complex e-commerce site may take 8-12 weeks.
3. Can I update my website on my own after development?
Yes, if you opt for a CMS-based solution like WordPress, you will have the flexibility to update content, images, and other elements of the website without technical expertise.
4. What security measures are taken to protect the website?
Technox prioritizes security by implementing SSL certificates, firewalls, regular software updates, and performing security audits to prevent hacking and other vulnerabilities.
Conclusion
Technox Technologies, a premier website development company in Coimbatore, offers a comprehensive range of services that help businesses establish a strong online presence. By leveraging the latest tools and technologies, they create custom, scalable, and secure websites that drive engagement and conversions. Whether you need a simple landing page or a full-fledged e-commerce platform, Technox has the expertise to turn your vision into reality.
1 note
·
View note
Text
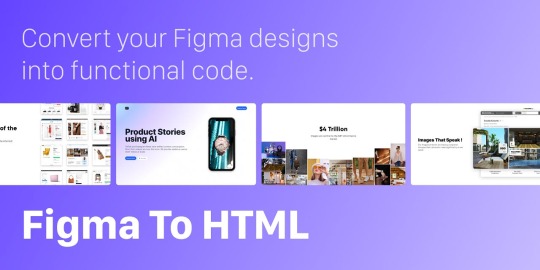
Convert Figma to HTML | Professional Figma to HTML Services
Transform your Figma designs into responsive and pixel-perfect HTML code. Our expert developers ensure your Figma to HTML conversion is seamless and efficient. Get started today!
1 note
·
View note
Text
Web Development and Web Designing:
Which One is more important for Your
Business

What Is Web Development?
Web development is the process of making and maintaining websites for the browser. It includes frontend development, back-end development and database management. Front end development refers to the development of the user side of the website.
The side that users see and interact with. It is developed with the help of programming languages like HTML, CSS and JavaScript, where HTML gives the skeletal structure to the website, CSS is used for giving styles, fonts and colors etc. to the website. And JavaScript is used for making a website interactive and usable with its features.
Backend development is the development of the server side of a website. Users do not interact with this part of the website. It is developed using frameworks like Express J.s. Database management is the management and maintenance of data of the website. It is done with the help of database management programs such as MongoDB.
What Is Web Designing?
Web Designing is the process of making the design and overall look of a website smoother and better for the user. Web Designing includes overall feel and design of a website. A web designer takes care of the customer side of the website. He or she make sure that the website is providing a good experience for the users.
Web designers can be of many types, but the main ones include UI and UX designers where UI refers to user interface and UX as user experience. They use design tools like Figma to create beautiful, intuitive and interactive web designs.
Web Development vs. Web Designing: How Are They Different?
1. When web developers are more concerned with the building and functioning of the website, web designers are more concerned with the customers and users of the website.
2. A web developer takes care of the smooth functioning of the website while a web designer takes care of how a user, or a customer feels when he visits that website.
3. Web Developer’s goal is the final deployment and smooth functioning of a website whereas a web designer’s goal is to increase the conversion rate and sales of a business.
4. A web developer is required to have a great knowledge and expertise of programming languages and technologies. While a web designer is required to have in-depth knowledge and expertise of user behaviour, analytics, design and creativity, sales, conversion rate etc.
Similarities Between Web Design and Web Development
Every business that wants to go online by having a website has one goal in their mind: “to grow their business and make profits”. For that, both the web designers and developers are equally essential.
They work together to bring out a perfect website for your business. Both the web developers and designers need to know the goals and vision of the business with things like, what the client wants to have in their website and how they want their customers to feel when they use this website etc to deploy a good product.
“A web developer will take on the responsibility of building the skeleton and body of a website and a web developer takes on the responsibility of creating the personality of the website.”
This way both will work together to skyrocket the growth of your business.
Which One You Need for Your Business?
In most cases you need both for achieving your goals and targets of the business. The answer to this question might also depend on the type of project to be made. But in most cases, having both web development and designers can greatly enhance the overall functioning and look of your website.
Conclusion
Our team of excellent web developers and designers at Greps AI, are dedicated in building highly capable and interactive websites. From planning and building to designing and deployment, we are dedicated in providing all round solutions for all your needs while establishing online.
0 notes
Text
Transforming Designs: How to Convert Figma to WordPress Effectively
In the dynamic world of web development, transforming a meticulously crafted design into a functional website is both an art and a science. Figma, a robust design tool, is increasingly becoming the go-to for web designers due to its collaborative features and versatility. However, converting Figma designs into a WordPress site can be a daunting task if you're not well-versed in the process. This blog aims to demystify the conversion process and provide a clear roadmap for developers and designers alike.

Why Choose WordPress for Your Website?
Before diving into the conversion process, it’s essential to understand why WordPress is the platform of choice for many developers. WordPress powers over 40% of all websites on the internet, thanks to its flexibility, scalability, and user-friendly interface. Custom WordPress development allows for the creation of unique, feature-rich websites that cater to specific business needs.
Benefits of Converting Figma Designs to WordPress
Visual Precision: Figma’s vector-based design system ensures that your website looks exactly as you envisioned it.
Collaboration: Figma’s collaborative tools allow designers and developers to work together seamlessly, ensuring that the final product aligns with the initial design.
Efficiency: Converting designs from Figma to WordPress can streamline the development process, saving time and reducing errors.
Step-by-Step Guide to Convert Figma to WordPress
Step 1: Prepare Your Figma Design
Organize Layers: Ensure that your Figma design is well-organized with named layers and groups. This will make the development process smoother.
Responsive Design: Check that your design is responsive, meaning it will look good on various devices and screen sizes.
Step 2: Export Assets from Figma
Images and Icons: Export all images, icons, and other graphical elements from Figma. Ensure they are in the correct formats (e.g., PNG, SVG) and resolutions.
CSS and Styles: Use Figma’s built-in tools to extract CSS styles for text, buttons, and other elements.
Step 3: Set Up Your WordPress Environment
Local Development Environment: Set up a local development environment using tools like XAMPP, WAMP, or Local by Flywheel.
Install WordPress: Download and install the latest version of WordPress on your local environment.
Step 4: Develop the WordPress Theme
HTML and CSS: Create HTML and CSS files based on your Figma design. Start with a basic HTML structure and gradually add styles.
Theme Structure: Follow the WordPress theme hierarchy to create essential files like header.php, footer.php, index.php, style.css, and functions.php.
Template Files: Use WordPress template files to define different parts of your site, such as the homepage, single posts, and pages.
Step 5: Implement Functionality
Custom Post Types: Define custom post types in functions.php if your site requires specific content types.
Advanced Custom Fields (ACF): Use the ACF plugin to create custom fields and add more flexibility to your content management.
Plugins: Install necessary plugins to add functionality like SEO, security, and performance optimization.
Step 6: Test and Optimize
Cross-Browser Testing: Ensure your site works well across different browsers and devices.
Performance Optimization: Optimize images, minify CSS and JavaScript files, and leverage caching to improve site performance.
SEO: Implement SEO best practices, including meta tags, alt texts for images, and a clean URL structure.
Common Challenges and Solutions
Responsive Design Issues: Use media queries in CSS to ensure that your site looks good on all devices.
Alignment and Spacing: Pay close attention to the spacing and alignment of elements to ensure they match your Figma design.
Complex Animations: Use CSS and JavaScript libraries like Animate.css or GSAP to recreate complex animations.
Tools and Plugins to Facilitate the Conversion
Figma to HTML Tools: Tools like Anima or Figma2HTML can automate parts of the conversion process.
WordPress Page Builders: Elementor or Beaver Builder can help you build complex layouts without extensive coding.
Theme Frameworks: Use frameworks like Genesis or Underscores to speed up theme development.
Conclusion
Converting Figma designs to WordPress involves a combination of design precision and coding expertise. By following the steps outlined above, you can ensure a smooth and efficient conversion process, resulting in a stunning, fully functional WordPress website. Whether you’re a designer looking to bring your vision to life or a developer aiming to streamline your workflow, mastering the Figma to WordPress conversion process is an invaluable skill in the realm of custom WordPress development.
0 notes
Text
UX developer:
About:
A UX developer is a professional who focuses on optimizing the user experience of a digital product, such as websites, mobile apps, or software applications. They blend their expertise in design and front-end development to ensure that products are not only visually appealing but also highly functional and user-friendly.
Outcomes:
Increased Conversion Rates
Data-Driven Improvements
Alignment with Business Goals
Stronger Brand Loyalty
Reduced support cost
Skills and & tools:
Design Skills: Knowledge of design principles, typography, color theory, and layout.
Coding Skills: Proficiency in front-end technologies like HTML, CSS, JavaScript, and frameworks such as React or Angular.
Prototyping Tools: Familiarity with tools like Sketch, Figma, Adobe XD, or InVision for creating wireframes and prototypes.
User Research Tools: Experience with tools for conducting and analyzing user research, such as UserTesting, SurveyMonkey, or Hotjar.
Soft Skills: Strong communication, empathy, and problem-solving skills to understand user needs and collaborate effectively with team members.
Benefits:
Enhanced User Satisfaction
Increased usability
Improved Accessibility
Higher User Retention
Reduced Development Costs
0 notes
Text
0 notes
Text
XHTMLCHOP is a prominent WordPress conversion service
Are you seeking a dependable and cost-effective WordPress conversion service? Do you wish to convert your current website into a WordPress-powered platform that's easy to manage, update, and customize? If so, consider XHTMLCHOP!
XHTMLCHOP is a prominent WordPress conversion service provider with over 10 years of industry experience. Our team comprises skilled and seasoned WordPress developers capable of converting any website design into a fully operational WordPress theme. Whether you have a PSD, HTML, Sketch, Figma, or any other format, we can transform it into a WordPress-ready solution.
Why opt for XHTMLCHOP's WordPress conversion service?
We deliver top-notch WordPress themes that are pixel-perfect, responsive, cross-browser compatible, and SEO-friendly.
Adhering to the latest WordPress coding standards and best practices, we ensure your website's optimal performance and security.
We back our work with a 100% satisfaction guarantee and a 60-day free support period for all our WordPress conversion projects.
With a quick turnaround time and competitive pricing, our services cater to your budget and deadlines.
We offer complimentary installation and setup of your WordPress theme on your server.
How to initiate XHTMLCHOP's WordPress conversion service?
Simply complete our online order form and upload your website design files.
Select the features and options you desire for your WordPress theme, such as plugins, widgets, custom post types, etc.
Make a secure payment via PayPal or credit card.
Sit back and relax while we transform your website design into a WordPress theme.
Receive your WordPress theme files via email or download them from our client area.
Ready to convert your website design into a WordPress theme? Contact us today and obtain a free quote for your WordPress conversion project. XHTMLCHOP - the ultimate WordPress conversion service!
#web#webdesign#figma to html#figma to wordpress#webdevelopment#psd to wordpress#wordpresswebsite#figmatowordpress#htmlcoding#website#shopify#wordpress#bootstrap#html css#psd to html#html#html5 css3#frontend#code#html5#css#web-graphics#squerespace#woocommerce#websitedevelopment
0 notes
Text
AI-Powered Development: Locofy.ai’s Answer to the Global Tech Challenge
New Post has been published on https://thedigitalinsider.com/ai-powered-development-locofy-ais-answer-to-the-global-tech-challenge/
AI-Powered Development: Locofy.ai’s Answer to the Global Tech Challenge

In 2024, as the tech industry grapples with a critical shortage of software developers, Locofy.ai, a visionary company based in Singapore, emerges as a game-changer in the realm of frontend development. Founded in 2021 by Honey Mittal and Sohaib Muhammad, Locofy.ai has quickly risen to prominence, offering innovative solutions that transform design into code with groundbreaking efficiency.
With predictions of a global shortfall of 4 million developers by 2025 by the International Data Corporation (IDC), and the US Labor Department estimating a potential loss of $8.5 trillion in unrealized annual revenues by 2030 due to this shortage, the tech world is in dire need of innovative solutions. Locofy.ai addresses this need head-on with its Large Design Models (LDMs) and a new product, Locofy Lightning, designed to significantly reduce development time and cost.
The company’s flagship product, Locofy Lightning, is a testament to their commitment to revolutionizing the design-to-code process. Using their in-house developed LDMs, this 1-click technology effortlessly converts Figma designs into web frontend code, saving up to 80% of the time typically required for coding user interfaces from scratch. This leap forward in efficiency is particularly crucial in a landscape where approximately 83% of software developers suffer from burnout, largely due to high workloads.
Industry leaders have recognized Locofy.ai’s impact. Cameron Pak, Founder of Melos in the USA, compares Locofy to the ChatGPT for front-end interfaces in terms of ease and effectiveness. Mark Zielinski, CTO of Where is My Package in Canada, credits Locofy with significantly streamlining their design-to-code workflow.
The founders, Honey Mittal, former Chief Product Officer at three Singapore startups, and Sohaib Muhammad, with a robust engineering background, have steered Locofy.ai to a remarkable journey since its inception. The company quickly garnered attention after sweeping all 7 awards on offer at its Product Hunt debut and has since secured $7.5M from notable investors, including the CTO and co-founders of Dropbox and Ola, as well as esteemed funds like Accel and Northstar Ventures.
Locofy.ai’s free beta program, focusing on Figma to React, React Native, Vuejs, HTML-CSS conversion, has been shaped by extensive developer feedback, emphasizing code quality and ease of use. The upcoming beta release for Figma to web frontend marks another step in Locofy.ai’s mission to streamline and enhance frontend development processes, with future plans including a 1-click solution for mobile apps.
By integrating Locofy Lightning into existing workflows, the company empowers development teams to focus on complex business logic and innovation, rather than the time-consuming aspects of frontend development. This approach is set to redefine the industry standards, offering a ray of hope in addressing the global developer shortage and burnout crisis.
#2024#ai#AI-powered#approach#apps#Artificial Intelligence#attention#background#beta release#burnout#Business#Canada#challenge#chatGPT#code#coding#CSS#CTO#data#Design#Developer#developers#development#dropbox#efficiency#engineering#figma#frontend development#Future#game
0 notes
Text
Figma to HTML Conversion: Simple Guide To Convert Figma To HTML
Introduction:
In the modern web development landscape, designers and developers often collaborate using tools that bridge the gap between design and code. Figma, a popular design tool, is widely used for creating stunning web interfaces. However, turning those designs into functional websites requires converting Figma to HTML. This process might seem complex, but with the right approach, you can efficiently convert Figma to HTML, ensuring that your designs come to life on the web.
Why Convert Figma to HTML?
Figma is an excellent tool for crafting visual designs, but to bring those designs to the web, you need HTML, CSS, and JavaScript. Converting Figma to HTML allows you to take a static design and transform it into a responsive, interactive website. This conversion is essential whether you're creating a standalone website or integrating your design into a content management system like WordPress.
Step-by-Step Guide to Convert Figma to HTML:
Prepare Your Figma Design
Before diving into the conversion, ensure your Figma design is well-organized. Use consistent naming conventions for layers, group similar elements, and double-check that your design is pixel-perfect. This preparation will make the conversion process smoother and more efficient.
Export Figma Assets
The first step in Figma to HTML conversion is exporting the necessary assets. Figma allows you to export images, icons, and other elements in various formats such as PNG, SVG, or JPG. Select the elements you want to export, right-click, and choose the export option. These assets will be used in your HTML and CSS files.
Convert Figma to HTML/CSS
Manual Coding: Start by setting up a basic HTML structure using semantic elements like <header>, <section>, and <footer>. Write CSS to style these elements according to the design specifications in Figma. Pay attention to typography, color schemes, and spacing.
Using Figma Plugins: There are Figma plugins like "Figma to Code" that can help automate parts of the conversion. These plugins generate HTML and CSS code based on your design. While not perfect, they can significantly speed up the process and provide a good starting point for further customization.
Responsive Design
Ensure your converted design is responsive. Use media queries in your CSS to adjust the layout for different screen sizes. Figma allows you to design for multiple screen resolutions, and your HTML/CSS should reflect this adaptability.
Integrate with WordPress (Optional)
If you're working on a WordPress project, you can convert Figma to WordPress by creating custom templates. Export your Figma design elements, then integrate them into a WordPress theme using PHP. This step requires a bit more technical knowledge, but it allows for seamless content management and dynamic features.
Test and Optimize
After converting Figma to HTML, thoroughly test your website across different browsers and devices. Optimize images and code to ensure fast loading times. Validation tools can help you check for any HTML or CSS errors that might affect the user experience.
Conclusion
Converting Figma to HTML is a crucial step in turning your design ideas into a functional website. Whether you choose to manually code or leverage tools and plugins, following a structured approach will help you achieve a pixel-perfect result. As web design continues to evolve, mastering the Figma to HTML conversion process will enhance your ability to create responsive, interactive, and visually appealing websites.
#Figma to HTML#Convert Figma to HTML#Export Figma to HTML#Figma to HTML Conversion#Figma to Code#Figma to Wordpress#Figma to HTML Conversion Services
0 notes
Text
Figma to HTML Conversion Service
Transform your Figma designs into fully functional HTML sites with ease.
Ready to take the next step?
Start your conversion today:- https://bit.ly/3tRt1pM.

0 notes
Text
Which one is the best Responsive PSD to HTML Service provider?
When it comes to finding the best responsive PSD to HTML service provider, there are several factors to consider, such as code quality, responsiveness, turnaround time, and attention to detail. One service that stands out is Figma2HTML. Although primarily focused on Figma designs, their team offers excellent PSD to HTML conversion services as well.
Read More: Which one is the best Responsive PSD to HTML Service provider?
0 notes
Text
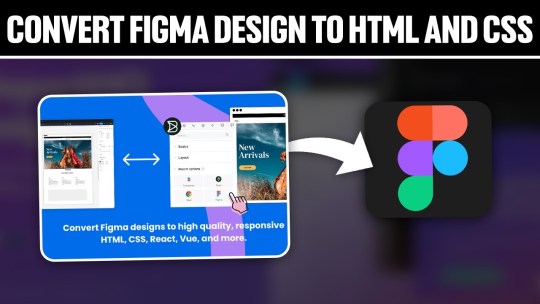
Converting Figma Designs to HTML and CSS: A Complete Tutorial
Introduction
Welcome to our comprehensive tutorial on converting Figma designs to HTML and CSS. In today's web development landscape, the seamless integration between design tools and the coding process is crucial for creating visually stunning and functional websites. This tutorial aims to guide you through the process of translating your Figma designs into clean, responsive, and optimized HTML and CSS code.
Understanding Figma Designs
Figma stands as a powerful collaborative interface design tool, empowering designers to create visually compelling and interactive user interfaces. Before diving into the conversion process, it's essential to grasp the intricacies of Figma designs and their significance in the web development workflow.
Figma Features:
- Vector Editing: Figma allows designers to create and edit vector graphics, ensuring scalable and high-quality designs.
- Collaboration: With real-time collaboration features, multiple team members can work on the same project simultaneously, fostering efficient teamwork.
- Prototyping: Designers can create interactive prototypes, offering a holistic view of user flows and interactions within the application.
- Component-Based Design: The use of components ensures consistency across designs, making it easier to translate into code.
Understanding the structure of a Figma design is crucial for an accurate conversion to HTML and CSS. Design elements such as layers, groups, and artboards play a pivotal role in maintaining the hierarchy and visual integrity of the design when translated into code.
Figma-to-Code Workflow:
- Design Exploration: Designers create and iterate on the user interface, defining styles, layouts, and interactions within Figma.
- Export Assets: Export design assets such as images, icons, and SVGs for use in the HTML and CSS files.
- HTML Structure: Translate the visual layout into a well-structured HTML document, ensuring a logical and semantic flow of content.
- CSS Styling: Apply styles to HTML elements based on the design specifications, including typography, colors, and spacing.
- Responsive Design: Ensure that the design adapts seamlessly to different screen sizes, considering mobile and desktop layouts.
Developers must pay attention to the details within Figma designs, from font choices to spacing and color schemes, to faithfully recreate the designer's vision in the final web product. Stay tuned as we guide you through the step-by-step process of setting up your development environment and translating these designs into code in the upcoming sections of this tutorial.
Setting Up the Development Environment
Before embarking on the journey of converting Figma designs to HTML and CSS, it's crucial to establish a well-configured development environment. This ensures a smooth and efficient workflow throughout the coding process. Here's a detailed guide on setting up your environment:
1. Choose a Code Editor:
Select a code editor that suits your preferences and needs. Popular choices include Visual Studio Code, Sublime Text, and Atom. A code editor with robust features and extensions can significantly enhance your productivity.
2. Version Control:
Implement version control using Git to track changes and collaborate seamlessly. Platforms like GitHub or GitLab provide hosting solutions for your code repositories, facilitating teamwork and code management.
3. Project Structure:
Organize your project structure thoughtfully. Create folders for assets, stylesheets, scripts, and HTML files. This ensures a clean and maintainable codebase, making it easier to locate and update specific elements.
4. Install Node.js:
Node.js is essential for running various build tools and package managers. Install Node.js and npm (Node Package Manager) to manage project dependencies efficiently. This step is crucial for automating tasks and optimizing your workflow.
5. CSS Preprocessors:
Consider using CSS preprocessors like Sass or Less to enhance your stylesheets with features like variables, mixins, and nesting. These preprocessors contribute to cleaner and more maintainable code.
6. Browser Developer Tools:
Familiarize yourself with the developer tools available in web browsers. These tools aid in debugging, inspecting elements, and testing your website across different devices and screen sizes.
7. Responsive Design Testing:
Explore tools for testing responsive designs. Platforms like BrowserStack or built-in browser tools allow you to simulate your website on various devices, ensuring a consistent and user-friendly experience.
Tool
Purpose
Visual Studio Code
Code editing and debugging
Git & GitHub
Version control and collaboration
Node.js & npm
Package management and task automation
By meticulously configuring your development environment, you lay the foundation for a successful Figma-to-HTML/CSS conversion. In the next sections, we'll delve into the specifics of structuring HTML from Figma and styling with CSS, bringing your designs to life on the web.
Structuring HTML from Figma
Once your development environment is set up, the next crucial step in converting Figma designs to HTML and CSS is to create a well-structured HTML document. Proper HTML structuring not only ensures a logical flow of content but also lays the groundwork for seamless styling and responsiveness. Let's dive into the details:
1. Analyzing the Design:
Thoroughly examine your Figma design to identify key sections and components. Create a mental map of the layout, including header, main content, sidebar, and footer. This analysis guides the HTML structure you'll implement.
2. Semantic HTML Elements:
Embrace semantic HTML elements to convey the meaning of your content. Use , , , , , , and to represent different parts of your webpage.
3. Dividing Into Components:
Identify design components that can be treated as separate entities. Convert these into reusable HTML components, making your code modular and easy to maintain. Utilize classes and IDs for styling and JavaScript interactions.
4. Navigation and Links:
Implement navigation elements using the appropriate HTML tags. Use for the navigation bar and for links. Ensure proper linking between pages and sections of your website.
5. Form Elements:
If your design includes forms, structure them using HTML form elements. Utilize , , , and other form-related tags to create a user-friendly and accessible form structure.
HTML Structure Example:
HTML Element
Purpose
Top section containing the site's logo and navigation.
Main content area, housing articles, sections, and other content.
Side section, often used for related content or advertisements.
Bottom section with copyright information and additional links.
Optimizing for Accessibility:
Consider accessibility by incorporating proper heading structures (
,
, etc.), alt attributes for images, and other accessibility best practices to ensure your website is inclusive and user-friendly.
By carefully structuring your HTML based on the Figma design, you set the stage for a seamless transition to CSS styling. In the upcoming sections, we'll explore the intricacies of styling with CSS, ensuring your web pages look as visually appealing as the original design.
Styling with CSS
With the HTML structure in place, the next pivotal step in converting Figma designs to a functional website is styling with CSS. CSS brings your design to life by defining the visual presentation and layout. Let's delve into the details of effectively styling your HTML elements:
1. External Stylesheets:
Organize your styles by using external stylesheets. Create a separate CSS file and link it to your HTML document. This separation enhances maintainability and allows for a cleaner project structure.
2. Selectors and Properties:
Utilize CSS selectors to target specific HTML elements and apply styles. Common properties include color, font-size, margin, padding, and more. Use meaningful class and ID names for clarity.
3. Typography:
Define font styles for headings, paragraphs, and other text elements. Specify font families, sizes, and weights to achieve a consistent and visually appealing typography throughout your website.
4. Colors and Backgrounds:
Implement the color scheme from your Figma design using CSS. Use hexadecimal or RGB values to set colors for text, backgrounds, borders, and other elements. Consider gradients and images for background styles.
5. Box Model:
Understand and apply the box model to control the spacing and layout of elements. Adjust margins, padding, and borders to achieve the desired visual hierarchy and spacing between elements.
6. Flexbox and Grid:
Embrace Flexbox and Grid layout models for efficient and responsive designs. These CSS features simplify the positioning and alignment of elements, ensuring a flexible and dynamic layout on different screen sizes.
7. Media Queries:
Implement media queries to create responsive designs. Define breakpoints where the layout or styling should adapt to different screen sizes. This ensures a seamless user experience on both desktop and mobile devices.
CSS Property
Purpose
color
Defines the text color.
font-size
Sets the size of the font.
margin
Specifies the outside spacing of an element.
padding
Determines the inside spacing of an element.
Testing and Debugging:
Regularly test your styles across different browsers to ensure consistency. Use browser developer tools to inspect and debug your CSS code, addressing any layout or styling issues that may arise.
By mastering the art of styling with CSS, you bring your Figma design to life on the web. The next section will guide you through handling interactivity and dynamic elements, enhancing the user experience of your website.
Handling Interactivity and Dynamic Elements
As we progress in converting Figma designs to HTML and CSS, it's essential to introduce interactivity and dynamic elements to create a more engaging user experience. This section focuses on incorporating JavaScript and other techniques to breathe life into your web pages:
1. JavaScript Integration:
Integrate JavaScript into your project to add interactivity. Utilize event listeners to respond to user actions such as clicks, mouseovers, and form submissions. JavaScript enables you to manipulate the DOM (Document Object Model) dynamically.
2. Animation Effects:
Enhance user engagement by incorporating animation effects. CSS animations and transitions can be used for subtle enhancements, while JavaScript libraries like GreenSock Animation Platform (GSAP) provide advanced animation capabilities for more complex scenarios.
3. Form Validation:
Implement client-side form validation using JavaScript to enhance user experience and reduce server load. Validate user inputs for correctness before submitting the form, providing real-time feedback to users.
4. Dynamic Content Loading:
Load content dynamically to improve page load times. Use JavaScript to fetch data from external sources and update specific sections of your page without requiring a full page reload. This technique enhances the perceived performance of your website.
5. Interactive Components:
Create interactive components based on Figma designs. Convert buttons, sliders, modals, and other elements into interactive components using a combination of HTML, CSS, and JavaScript. Ensure a seamless transition between states for a polished user experience.
Technique
Purpose
Event Listeners
Respond to user actions like clicks and key presses.
CSS Animations
Create visually appealing animation effects.
Form Validation
Ensure accurate and validated user input.
Dynamic Content Loading
Improve page load times by loading content on demand.
Accessibility Considerations:
When adding interactivity, ensure your website remains accessible. Provide alternative text for dynamic content, focus states for interactive elements, and consider keyboard navigation for users who rely on assistive technologies.
Testing Across Browsers:
Thoroughly test the interactivity and dynamic elements across different browsers to ensure a consistent experience for all users. Address any compatibility issues that may arise during testing.
By mastering the handling of interactivity and dynamic elements, your website moves beyond static design, offering users a dynamic and engaging online experience. The final section will cover optimizing your Figma-to-HTML/CSS project for performance, ensuring a fast and responsive web presence.
Optimizing for Performance
As we near the completion of our Figma-to-HTML/CSS journey, optimizing your project for performance is crucial to ensure a fast and responsive web presence. Efficient optimization practices not only enhance user experience but also contribute to better search engine rankings. Let's explore key strategies for optimizing performance:
1. Minification:
Minify your HTML, CSS, and JavaScript files to reduce their size. Minification involves removing unnecessary whitespace, comments, and unused code, resulting in smaller file sizes and faster loading times for your web pages.
2. Image Optimization:
Optimize images to strike a balance between quality and file size. Use image compression tools to reduce the size of images without compromising visual integrity. Consider using responsive images to deliver different sizes based on the user's device and screen resolution.
3. Lazy Loading:
Implement lazy loading for images and other non-essential resources. Lazy loading defers the loading of certain elements until they are about to come into the user's viewport. This technique improves initial page load times, especially for content-heavy websites.
4. Content Delivery Network (CDN):
Utilize a Content Delivery Network to distribute your static assets across servers worldwide. CDN ensures that users can access resources from servers geographically closer to them, reducing latency and accelerating content delivery.
5. Browser Caching:
Leverage browser caching to store static files on the user's device. Cached files can be reused for subsequent visits, reducing the need to download them again. Set appropriate expiration dates for cacheable resources.
Optimization Technique
Purpose
Minification
Reduce file sizes by removing unnecessary characters and whitespace.
Image Optimization
Balance image quality and file size for faster loading times.
Lazy Loading
Defer the loading of non-essential resources until they are needed.
CDN
Accelerate content delivery by distributing assets across global servers.
Performance Monitoring:
Regularly monitor your website's performance using tools like Google PageSpeed Insights or Lighthouse. These tools provide insights into areas that need improvement, helping you fine-tune your optimization strategies.
Mobile Optimization:
Optimize your website for mobile devices by implementing responsive design practices. Test your website on various mobile devices to ensure a seamless and fast user experience for mobile users.
By implementing these optimization strategies, you'll not only enhance the performance of your Figma-to-HTML/CSS project but also provide users with a faster and more enjoyable browsing experience. In conclusion, let's summarize the key takeaways from our tutorial.
Common Challenges and Solutions
While converting Figma designs to HTML and CSS is a rewarding process, developers often encounter common challenges. Addressing these challenges proactively ensures a smoother workflow and a successful translation of design to code. Let's explore these challenges and their solutions:
1. Design-to-Code Consistency:
Challenge: Maintaining consistency between the Figma design and the coded website can be challenging, leading to discrepancies in layout, spacing, and styling.
Solution: Create a style guide based on the Figma design to establish a reference for fonts, colors, and spacing. Regularly compare the coded elements with the Figma design to ensure consistency.
2. Responsive Design Complexity:
Challenge: Adapting the design to different screen sizes and resolutions can be complex, especially when dealing with intricate layouts.
Solution: Implement a mobile-first approach and use CSS media queries to progressively enhance the design for larger screens. Test thoroughly across various devices to identify and address responsiveness issues.
3. Browser Compatibility:
Challenge: Different browsers may interpret CSS and JavaScript differently, leading to compatibility issues.
Solution: Test your website on multiple browsers and versions, addressing any inconsistencies. Utilize browser prefixes for CSS properties and consider using feature detection libraries to handle browser-specific quirks.
4. Performance Bottlenecks:
Challenge: Performance issues, such as slow loading times and unoptimized assets, can impact the user experience negatively.
Solution: Employ optimization techniques discussed earlier, including minification, image optimization, lazy loading, and content delivery networks (CDN). Regularly monitor and analyze your website's performance to identify and resolve bottlenecks.
Challenge
Solution
Design-to-Code Consistency
Create a style guide and regularly compare coded elements with the Figma design.
Read the full article
0 notes
Video
youtube
Chatbot Design, Chatbot Avatar, AI Chatbot Design, Chatbot Website Design
https://youtu.be/Rre9QrTM0Pc
Chatbot Design, Chatbot Avatar, AI Chatbot Design, Chatbot Website Design
👋 Welcome to our exciting world of Chatbot Design! 🤖 In this insightful YouTube video, we delve deep into the art and science of crafting cutting-edge AI Chatbots and their dynamic avatars. Join us on a journey where we demystify the intricacies of Chatbot Website Design, exploring the fusion of technology and user experience. Whether you're a seasoned developer or just curious about the world of artificial intelligence, this video is tailored for you. Discover the secrets behind creating engaging chatbot interfaces, optimizing user interactions, and giving your chatbot a personality with a unique avatar. 🎨 Our expert insights and practical tips are sure to elevate your understanding of Chatbot Design to new heights. Don't forget to hit the like button if you find this content valuable and share it with your peers to spread the knowledge. Subscribe to our channel for more exciting updates on the latest trends in AI and chatbot development. Let's build a community of tech enthusiasts together! So 💖 with a commitment to excellence and a passion for creativity, our team of professionals is ready to collaborate with you to achieve your goals and we invite 🤝 you, to our world where innovation, precision, and imagination converge. We, Welcome to our services hub, where your vision becomes reality.
🎯For Your Inquiries Reach Us At:
🌟SOLUTION LAB,
🚀Email ID’s:- [email protected], [email protected],
🔍Web: - www.solutionlab.online,
🚀Blog ID: - https://solutionlabonline.blogspot.com/
👋chatbot avatar, chatbot system design interview, chatbot figma, ai bot design, best chatbot design, website chatbot design, chatbot design html css, figma chatbot, design chatbot system design, ai avatar chat, conversation design chatbot, chatbot conversation designer, chatbot user experience, chatbot app design, conversational ux examples, chatbot flow design, adobe xd chatbot, amazon lex automated chatbot designer, amazon lex automated chatbot designer benefits, amazon lex chatbot designer, avatar for chatbot, best chatbot ui design, bot conversation design, bot conversation flow design, bot ui design, chatbot avatar design, chatbot avatar examples, chatbot character design, chatbot conversation flow design, chatbot database design, chatbot design canvas, chatbot design flow, chatbot design in html, chatbot design process, chatbot design ui, chatbot dialog design, chatbot dribbble, chatbot front end design, chatbot interface design, chatbot ui github, chatbot ui html, chatbot ui ux, chatbot ux design process, conversation flow design, conversational bot design, conversational interface design, conversational user experience design, conversational user interface examples, conversational ux designer, design a chatbot in python, design of chatbot, designing a chatbot conversation, designing bots, desktop chatbot ui design, dialogflow conversation design, dribbble chatbot, lex automated chatbot designer, lex chatbot designer, line chatbot designer, system design chatbot, system design for chatbot, ui design for chatbot, ux conversational design, ux design chatbot, ux writer chatbot, 🚀 #chatbotdesign #aichatbots #uxdesign #uxdesigner #uxdesigners #uxdesigntips #TechInnovationanimated #ConversationalUI #ChatbotAvatar #userexperience #userexperiencedesign #botdevelopment #artificialintelligence #interactivedesign #techinnovation #techinnovations #digitaltransformation #humancomputerinteraction #userinterfacedesign #conversationaldesign #innovationintech #virtualassistants #BotInterfaces #aiuserexperience #techtrends #websitedesign #futuretech #chatbotdevelopment #humancentereddesign #techcommunity #emergingtech #likeandshare #likeandshareandcomment #likeandsharemarketing #likeandshareplz #likeandsubscribe #likeandsubscribemychannel #likeandsubscribes #likeandsubscribeplease #likeandsubscribebutton #likeandsubscriber #likeandsubscribepls #likeandsubscribeplz #likesharesubscribecommentnow #likeshare #likesharesubscribe #likeshareandsubscribe #likesharecomment #likesharesubscribecommentnow #likeshareandsubscribemychannel #likesharefollow #subcribe #subcribeme #subcriber #subcribers #subscribeandshare #subscribenow #subcribemyyoutube #subcribemychannel #subcribetothechanell #subscribenowmychannal #subcribe_to_our_channel #subscribenowmorevideos #subscribenowmoreinterestingvideos #subscribeandlearn #subscribeforsupport #usa #usacollege #unitedstates #unitedstatesofamerica #unitedstatesofamerican #unitedstatesofamericaplease #usanews #usanewsonline #usacollege #usatoday #usatodaynews #usatodaysports #unitedarabemirates #uaekhabartoday #uaenews #uaenewsofficial #uaelife #uaelifestyle #uaejobs #uae #dubai #dubailife #dubaijobs #dubainews #dubainewstoday #dubailifestyle #dubailifestylevlog #dubailifestyleblogger #canada #canadalife #canadalifestyle #canadian #canadianuniversity #canadanews #canadanewstoday #australian #saudiarabia #saudiarabialatestnews #saudiarabianews #saudiarabianewslive #saudiarabiajobs #saudinews #saudi #saudi_news #saudi_news_update #saudinewsofficial #oman #omannews #omannewsdaily #omanchannel #omannewslive #omanjobs #omanjob #omanjobnewstoday #qatar #qatarlife #qatarlifestyle #qatarnews #qatarjobs #qatarevents #qatarliving #kuwait #kuwaitnews #kuwait_kuwait #kuwaitlivenews #kuwaitcity #kuwaitlatestupdate #kuwaitlatestupdates #kuwaitnewshighlights #kuwaitnewsheadlines #newzealand #newzealandbusiness #newzealandlife #uk #unitedkingdom #unitedkingdomlife #britain #britainnews #greatbritain #british #britishenglish #britishenglishpronunciation #britishenglishclass #bahrain #bahrainbloggers #bahrainevents #bahrainnews #bahraintv #poland #portugal #português #finland #singapore #singaporevlog #singaporevideos #mexico #mexicocity #brazil #argentina #chile #southafrica #southkorea #norway #peru #germany #germanynews #germanywale #german #france #francese #italy #italya #italian #italia #italianteacher #italiancourse #italianclass #turkey #switzerland #swiss #swissview #swissviews #austria #austriatravel #hungary #hungarylife #bulgaria #bulgariantechchannel #russia #russian #russianews #russianlanguage #russianlanguageteacher #russianlanguagelessons #japan #japanese #japaneselanguage #japaneselanguageschool #japanlife #japanlifestyle #japanvlog #japanvlogger #qatarjobinformation #saudiarabiainternational #canadalifevlog #australiainternationalstudents #canadavlogs #spain #spaintravel #spainish
0 notes
Last Seen Blogs

auto360p
Automotive 360 & Performance

shankargallery
shankargallery.tumblr.com

stacyj514
Glimpses of Montreal

murielhursxvkv036
Dollar Tree Diy Home Decor

nintendoritoniumaker
Don't Worry In Worldend