#Free Convert PDF Files
Explore tagged Tumblr posts
Visit Tumblr Blog
Explore Tumblr blogs with no restrictions, modern design and the best experience.
Last Seen Tumblr Blogs


Fun Fact
69% of Tumblr users are millennials.
Text
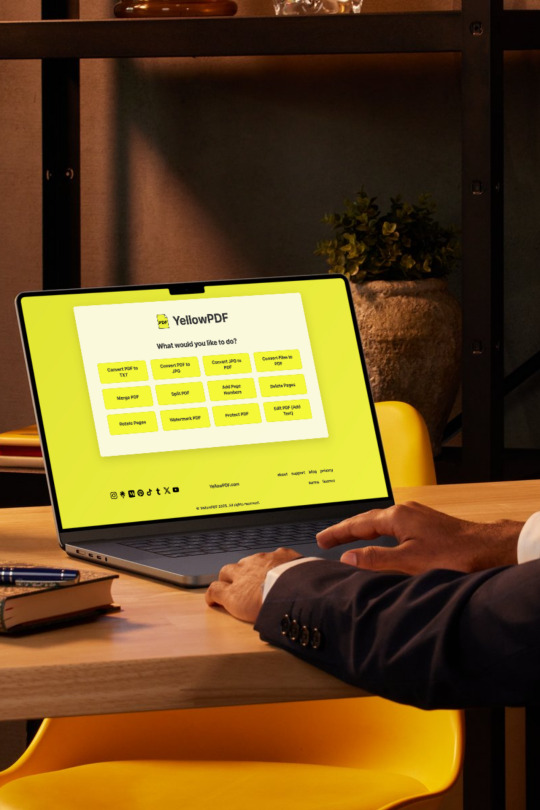
https://www.yellowpdf.com/
Free and Unlimited PDF converter and editor. Merge, split, convert TXT/PNG/JPG to PDF, convert PDF to TXT/JPG, watermark, protect, and edit PDFs easily. Try now!
#free pdf#pdf converter#pdf#jpg#pdf download#pdf editor#pdf file#txt#converter#rotate#merge pdf#split pdf#tool
1 note
·
View note
Text
PDF to DOCX converter

A PDF to DOCX converter transforms fixed-format PDF documents into editable Word files while preserving the original formatting, layouts, and tables. The DOCX format, which is XML-based and was introduced with Microsoft Office 2007, offers improved accessibility and usability compared to older DOC files. Unlike single binary DOC files, DOCX stores data in separate compressed files and folders, creating a more versatile document format.
ACCESS HERE: https://agrtech.com.au/pdf-to-docx-converter/
0 notes
Text
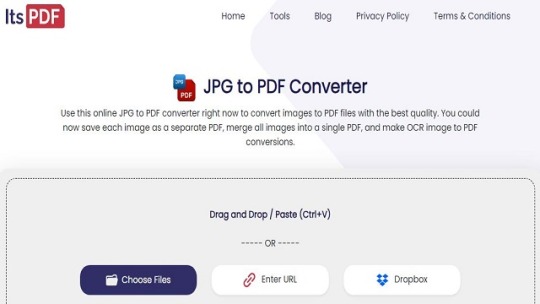
new latest jpg to pdf converter
JPG को तुरंत पीडीएफ में बदलने के लिए इन उपकरणों का उपयोग करें use these tools to convert jpg जेपीजी को पीडीएफ प्रारूप में बदलने के पीछे अलग-अलग कारण हैं, खासकर जब आपको गुणवत्ता हानि के बिना एक साथ कई छवियां साझा करने की आवश्यकता होती है। इसके अलावा, यदि आप अपनी फाइलों को पीडीएफ जैसे कुछ गोपनीय प्रारूपों के साथ सुरक्षित रखना चाहते हैं। इससे कोई फर्क नहीं पड़ता कि छवियों को पीडीएफ में बदलने का…
View On WordPress
#Batch Conversion#Convert Image Files#Digital Document Creator#Document Conversion#File Conversion#Free PDF Converter#Image Merge#Online JPG to PDF#PDF Conversion Tool#PDF Generator#PDF Maker#Portable Document Format
0 notes
Text
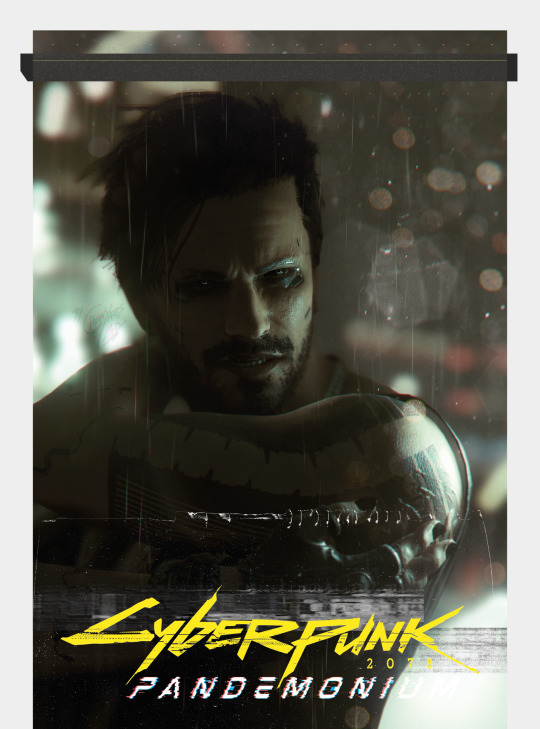

/// gaining access_ scanning file_ … /// CH04_SILENCE_IS_OPPRESSION.file breaching_ ⇢ data is safe_ ⇢ LOW-RES file extracted_ ⇢ no malware detected_ ⇢ savely accessible via shared cloud 'G-Drive'_ ⇢ no account needed_ /// —
If you are not content with Cyberpunk's canon specific violence, horror-like scenes, mention of blood, death, drugs and some explicit sexual mlm content throughout the story, it might not be of your interests. I orientated a bit on ao3's content ratings and warnings and will update it for every new chapter so you will know when e.g. there's gonna be smut. Feel free to reach out to me if I should add something to it.
We are happy about comments/feedback. Feel free to post them in this post, reblog with a tag-comment or send a private message. I won’t post/upload it anywhere else than here. I would be very happy not to find it anywhere else either other than saved onto your devices — so please no re-uploading, thank you.
Best viewed on a computer as the pdf is exporterd as print sheet to give the feel of a book. If a bunch wish to have single pages I will see I can add those as well but it will take me a bit of refining the pages again as they are fit for double paged layouts.
Make sure to follow the tag #Cyberpunk 2078 – Pandemonium if we got you hooked so you won't miss out for the next chapter. We/I are not fast in converting our rp chapters so future chapter posts won't happen on a regular basis.
—
Cyberpunk®/Cyberpunk 2077® belongs to CD Projekt©/CD Projekt Red®. Original characters belong to @nervouswizardcycle and @chevvy-ryder.
Content & VP by @chevvy-ryder. Artwork & Graphic Design by @chevvy-ryder. Used fonts/textures are bought/open-source-material/free for commercial use.
#cyberpunk 2077#Cyberpunk 2078 – Pandemonium#original characters#original story#fanfiction#oc: Ryder von Scharfenberg#about: Ryder von Scharfenberg#chev.graphics#cyberpunk universe#writing#writers on tumblr#writeblr#for tags please see above as I won't tag much here other when it gets more for adults#this chapter means EVERYTHING to me (so far)#if it won't let u have at least a crocodile tear in your eye then I am at a loss#This is the ultimate chapter that explains how Beast is for Ryder#how he feels with it#what it does to him#how it behaves#what he's got to endure all day
30 notes
·
View notes
Text
PSA for people who also want to read the Chinese danmei, Mou Mou (A Certain Someone) by Mu Su Li:
Sidenote: There's no such thing as free lunch when it comes to Chinese danmeis - particulary those that are fortunate to be adapted to live-action. You need to pay for them. Most danmeis have 4 to 6 volumes with 10 or more chapters each. 😄
A. If you can read Traditional Chinese (Han) with ease, congratulations! You just need to download and install the JJWXC app. The app itself is not available on Google Play (not sure about the other app stores) and must be downloaded directly from the website. Just follow the instructions and you're all set.
B. If you are an international reader (or have a very shaky foundational understanding of the Chinese alphabet like me 😅) and would want an English translation, it will be slightly complicated. Better use your desktop for the following procedure:
1. Read and use this site as a guide: https://bookswithqianya.com/support-authors/#google_vignette
2. Whatever you do, please make sure your browser's auto-translate is ON. Also during registration, keep in mind that the website DOES NOT accept the usual English alphabet (They do accept arabic numerals though).
To solve this, you can open another browser to auto-translate whatever it is you are typing into Han characters, copy then paste.
3. Once registered, the JJWXC website uses points to purchase novel so you need to top up your account. The only international payment method they accept to buy points is PayPal. The cheapest you can buy is 10,000 points for USD 15. This is more than enough as the novel is only worth around 2,000 points. Again, follow the guide in procedure 1 when you buy the novel.
4. Once you bought the novel, take a screenshot of your invoice (turn off your auto-translate atp since the translator only accepts proof of purchase in Chinese), fill up this form with the attached screenshot then submit. You might need to wait a couple of hours before the translator can send you a link to the translation in google drive (or whichever cloud storage device you use).
The translator also has certain stipulations (like not sharing the link to anyone who did not buy the novel, downloading and converting the files to epub or pdf, etc), so please be respectful.
Note: THE TRANSLATION ITSELF IS FREE. The only "payment" the translator requires is that you support the original author by buying a copy of the novel. 😄
Edit: I almost forgot — if you don't like digital copies AND you can read Chinese, you can purchase the physical novel (i think AliExpress and Taobao sells them). The novel has five volumes and 1 extra. Not sure about the price though 😊
55 notes
·
View notes
Text
Updating... The Tattooer (ver. 3.4)!

Finally! Took me a while, huh. This is the updated version of the Tattooer project. It skips some steps, making the workflow much, much faster! Huge thanks to @applewatersugar for his suggestion on how to bake textures while preserving the transparency. This is kind of a repost of the original Tattooer post, but it actually has some new stuff and a few changes here and there, so please take a look if you want to learn how to use this new version.
This is a series of Blender template files already set up to quickly bake textures from The Sims 4 to The Sims 2. The different Blender files will allow you to: -Bake body textures from TS4 to TS2 (Female) -Bake body textures from TS4 to TS2 (Male) -Bake body textures from TS4 (Female) to TS2 (Male) -Bake body textures from TS2 (Female) to TS2 (Male) [Bonus!] -New! Bake face textures from TS4 to TS2 (Unisex) [Bonus!] -Bake head textures from TS4 to TS2 (Face + Scalp) (Unisex) [Still experimental] Check the file names to see which one is which, and the resolution of the baked texture it will give. Everything you see in the render above was 100% converted using those Blender files.
Download here! SFS / GD
Update: Version 3.4.1 (27/08/2023) Fixed some issues on the shoulders for the AF-body-4t2-1024 and AF-body-4t2-2048 templates. Now the top straps on most converted underwear/swimwear should look right.
Update: Same version (13/12/2023) As requested, added a new spanish version of the included pdf guide!
These templates were made mainly to bake and convert tattoos, but there’s more you can do with them if you get creative. I have to say, these are NOT perfect. Results may vary depending on what you are trying to convert, so! With that in mind, this is all the stuff you will be able to convert almost seamlessly from TS4 to TS2: -Tattoos. -Other body details such as body hair, scars, freckles, supernatural/occult details… -Body painted underwear and swimwear, as well as some other clothing that’s mostly painted on the body. -Socks, stockings and maybe leggings. -Even skintones! In some areas they will look weird, so I recommend editing and blending them with other existing TS2 skins. -Makeup, eyebrows and beards. In the old version this was just a proof of concept, but now I’ve added a new Face file template which gives some pretty decent results! -Hair scalps. Very useful when converting some hairs! Although keep in mind part of that texture might also need to be baked on the face mesh, you know, that hairline makeup stuff.
Got your attention? Nice! Editing some of the textures from TS4 to match the UV mapping in TS2 using a 2D editing program can be incredibly hard. That’s where texture baking in Blender comes to the rescue!
You will need to download Blender, at least version 3.4, but you could always use a newer version. It is only incompatible with versions older than 3.4. -You can download Blender for free here. -You will also need Sims 4 Studio to extract the original Sims 4 CC textures you want. In the first version of these Blender files, there was a necessary step using Photoshop, but that’s no longer needed. However, there’s still a tiny extra step which requires resizing the newly baked texture on some of the high resolution templates, so you might need a 2D editing program like Photoshop. More on that later.
So, before we begin, let’s clear out some questions you might have. What the heck is this texture baking thing and what does it do? Well, let’s imagine you have a video projector and point an image into a blank wall. Then you pick up some brushes and start painting and copying that projected image in that wall. Texture baking is kinda like that when it comes to 3D models. You align two models and match them as closely as you can in shape and form, and once you adjust some parameters and values, Blender does the rest for you: it will give you a new texture for a new model with a different UV map. These files I’m sharing have everything already set up, so it’s a matter of plopping in that Sims 4 texture and you will get that new texture for TS2 in just a few clicks.
This tutorial assumes you know literally nothing about how to use Blender, so if you feel uncomfortable with it, worry no more! This will guide you with pictures showing where you need to click and explaining what is happening. For Sims 4 Studio and Photoshop the process might be a bit less detailed, but still this should be pretty beginner friendly. For this tutorial, I will use some tattoos as an example (properly credited at the end of the post). Alright, enough with the rambling. Let’s get started!
·EXTRACTING TEXTURES IN SIMS 4 STUDIO: First things first, you will need to extract as pngs all the textures you want to convert from TS4 using Sims 4 Studio. It should be pretty straightforward. Just open the packages and export the Diffuse textures. Keep them organized in a folder for easy access.
·BAKING THE TEXTURES IN BLENDER: PRELIMINARY STEP 1: CONFIGURING BLENDER’S GRAPHICS SETTINGS: Open your preferred Blender file depending on what you’re going to bake and the desired resolution (in this example I’m going to use the AF-body-4t2-1024 file). Before we start messing around in Blender, there’s one thing you should set up. It is a onetime step, and once it’s done, you won’t need to do it again. So, does your computer have a dedicated graphics card? If you don’t know or you’re not sure, just skip to the next step. Configuring Blender so it uses your graphics card instead of your CPU will make the baking render much faster, so it is recommended you set it up correctly. If your computer has a dedicated graphics card, click File (1) > Preferences (2) > and on the window that pops up click System (3) > and select CUDA and make sure your graphics card is there and tick it (4). I have an Nvidia Graphics card but your case may vary. Once you’re done, click on the tiny button on the bottom left corner and Save Preferences (5).

PRELIMINARY STEP 2: CHOOSING THE RENDERING DEVICE: Click on the tiny camera button on the right, called Render Properties (1), and on Device (2) select GPU Compute if it’s not already selected. If you’re not sure if you have a graphics card or not, just select CPU. Then select the Material Properties tab (3) and Save your changes, either by pressing Ctrl + S, or clicking File (4) > Save (5). You might need to do this second step with the other Blender files, but once you have it done and saved, you won’t need to do this again. Okay, time to get into the good stuff!

·STEP 1: LOADING YOUR TS4 BASE TEXTURE: In the Material Properties tab, click the folder icon that says Open (1) and on the window that pops up, navigate through your folders and select your first texture. To navigate easily, the 3 buttons on the top right (2) are for the display mode. They will show your files in list mode, vertical and horizontal, and the one on the right will display the file thumbnails, pretty useful if you want to easily preview your textures here. The icons on the left side (3) will let you go one folder back and forward, go to the parent directory, and refresh the folder in case you just dropped something new in there. Double click on the image you need and that will load the texture into the Sims 4 body model, named “ts4 body”.

·STEP 2: SETTING UP YOUR SELECTION AND BAKING THE TEXTURE: On the top right of the screen, you will see the names of the 2 models in the scene. Hold the Ctrl key in your keyboard and left click on the “ts2 body” model (1). If you did it correctly, you should see “ts2 body” in a yellowish orange color, and right down below, “ts4 body” should look more like a red orange. If not, try again by clicking first on ts4 body, and then while holding Ctrl click again on ts2 body. Then switch to the Render Properties tab by clicking the tiny camera icon (2) and click Bake (3). Depending on your screen resolution, you might need to scroll down a bit with your mouse to see the Bake button. Wait a few seconds for it to finish. You will see the progress percentage down on the bottom of your screen. Don’t panic if you notice your computer fans start ramping up, that’s completely normal! As I said in the beginning, using your GPU will bake the textures much faster than the CPU.

·STEP 3: SAVING YOUR NEW TS2 TEXTURE: Once it’s finished, switch to the UV Editing Mode by clicking “UV Editing” on the top of your screen. And there it is: your new texture! You might have to scroll up your mouse wheel a bit to zoom in and see it in all its glory on the left side of the screen. We’re still not done yet though. You need to save it to yet another new folder (always try to keep your stuff organized!).

You can save it by pressing Shift + Alt + S, or clicking on Image* (1) and then Save As… (2). That will pop a window where you’ll need to navigate again and save it somewhere. Give it a proper name (3) and hit Enter to save it… well, Enter doesn’t always work for me for some reason, so if that happens just click Save As Image (4). And that’s it! You’ve successfully converted your baked texture. Congrats!

·STEP 4: GOING BACK TO STEP 1: Alright! If you’re done with your textures, you can close Blender without saving and call it a day. But let’s say you want to keep baking other swatches. In order to go back to step 1 and start the process once again, click Layout (1), go back to the Material Properties tab (2), select “ts4 body” (3) and click on the folder icon (4) to open and load your next swatch.

Then it’s just a matter of repeating the process from step 2. When you’re ready to move on, close Blender without saving. If you see a small check telling you it will save some images, make sure you uncheck it, so you will be able to use it again in the future from the starting point with no issues. I don’t think it really matters if you accidentally save your progress in these files, but I like to keep it clean and fresh so I can do the process where I left it from the beginning next time I open it. And in case you mess up and save somewhere, you can always just delete the .blend file and download the template files again.
In case you’d like a video tutorial on how to use these files, the amazing @platinumaspiration recorded this fantastic video showcasing the process! You can watch it here.
One final note: some of the baking .blend files save the textures with a resolution of 2048x2048 pixels, as clearly stated at the end of their file name. That’s way too overkill, because TS2 only properly supports up to 1024x1024 for most of its textures and you should always resize your final product to that max resolution (or lower if needed). I just made those 2048 versions because there might be some really tiny and slim details on some tattoos that might look a little too blurry when baked into a 1024 resolution texture, so for those cases use that if you want and then resize them using your 2D editing software of choice. In Photoshop, in the Resample mode of the Image Size menu, there are a few options to choose. For the fine details, I like the Nearest Neighbor (hard edges) option, which, even if it looks a bit pixelated, it still preserves most of the texture and quality.

For anything else, I would just directly bake them using the 1024 versions in Blender (512 for the face and scalp).
And for the folks who feel comfortable playing around in Blender, this is just the beginning! Texture baking opens a LOT of possibilities, so feel free to move stuff around and edit the models to your liking! If you notice the baked textures look warped or stretched somewhere, or don’t like where some textures are placed in the S2 body, poke around that area moving stuff and then give it another try. The main objective of the baking process is keeping both overlapping models as close in shape as possible. You may also edit and save new copies of the templates, or make new ones from scratch using mine as a reference (keep a close look on those Baking settings and values, I think they work pretty well) and share them if you want to. Go ham, do whatever you want with them! I still have plans on making templates to convert body textures from Sims 3 to Sims 2, but for now it’s not on my priorities, so we’ll see when that happens.
Whew! Hope none of this was too confusing. Need help or have any issues with these? Please ask/message me here and I’ll be glad to help when I’m able to!
Credits for the CC used in the render demonstration: -Skin by Sims3Melancholic. -Eyes by Northern Siberia Winds. -Eyebrows by PeachyFaerie. -Tattoos by xtc. -Top by SerenityCC. And the Tattoo I used for the tutorial can be found here, by ValhallanSim.
Last but not least, a huge thanks to all the people who somehow contributed to make this project and update possible, either by doing initial testing, finding issues to fix, or teaching me new Blender tricks to make the workflow way faster and easier. So thanks again to @elvisgrace @moyokeansimblr and @applewatersugar on Tumblr! <3
And thank you for reading! Hope you have fun playing with this (not so) new toy hehe.
#tattooer project#tattooer update#ts2 tutorial#ts2 resources#ts2 blender#ts2 overlays#ts2 texture baking#4t2 conversion tutorial#this took me so LONG to update#im really sorry for the delay :(
408 notes
·
View notes
Text
For my oomfs and non-oomfs who want to read Secrets of Blackthorn Hall and either
1) hate trying to read it on Tumblr
2) couldn't back the Kickstarter... this one is for you! Here is a link to SOBH on my google docs!
It should let you convert to PDF/EPUB if that's what you prefer or just read it straight on the google drive application. I have it set up so you should be able to scroll it on mobile with ease as well. If you have a Kindle: you can download the document as an EPUB file then visit https://amazon.com/sendtokindle to put it on your kindle! I just checked it with mine and it works
Additionally, feel free to share it with whoever. I want SOBH to be easier for ppl! I know there are plenty of people who have struggled to read it through Tumblr or through the Shadowhunter fandom wiki. I hope this makes it easier.
71 notes
·
View notes
Text
Please Start Archiving in the US
With current events, I think it is prudent that everyone, that is able to, needs start archiving shit. I am a former library worker but I do not know much about cybersecurity. If you do want to go down that route please research and keep you and your archive safe :). The more copies that are preserved, then the more likely it is that the media will survive. Even if you save only 2 files that is still important!
First, I will list how to create an computer archive and best practices, then I will provide a list of known targets and suggested materials to add.
You need somewhere to store your data most people will use their computer's storage drive but you need to have backups! Do not rely on cloud storage solutions, they require internet connection are vulnerable to data breaches, and the companies that store that data must follow any laws that the government may decide to pass. USBs or external hardrives are best options. CDs can be used in a pinch, but are more likely to degrade as well as having lower storage capacity then the previous options. Use whatever you have lying around, you do not need to spend money if you don't want to.
When saving data use file formats that are common and able to be read without use of a special software. (that means no .docx) PDF/A is the gold standard for archiving. It is a subtype of pdf that contains metadata, such as typefaces and graphical info, that ensure the files are read properly in the future. Adobe Acrobat is able to save and convert documents into PDF/A. PDFTron, DocuPub, and Ghostscript are all free or have free versions that create pdf/a files. PNG, JPEG2000, .txt, MP3, wav, are other common file types that the Smithsonian recommends for data storage. For a full list of types to use and avoid, see the sources cited at the bottom.
What are we archiving?
Please gather both fiction and nonfiction resources. Nonfiction collection ideas: Current news clips, local history of marginalized communities, interviews, biographies, memoirs, zines, and art pieces. Saving scientific research is incredibly important! In 1933, one of the first places they targeted was the Institute of Sexual Science. Lots of what was stored there was never recovered. Environmental science, trans and intersex health, and minority history will likely be targeted first. For fiction, the most commonly challenged books last year were: 1) GenderQueer by Maia Kobabe 2) All Boys Aren't Blue by George Johnson 3) This Book is Gay by Juno Dawson 4) The of Being a Wallflower by Stephen Chbosky 5) Flamer by Mike Curato 6) The Bluest Eyes by Toni Morrison 7) Me and Earl and the Dying Girl by Jesse Andrews 8) Tricks by Ellen Hopkins 9) Let's Talk about it (Teen guide to sex, relationships, and being a human) by Erika Moen and Matthew Nolan 10) Sold by Patricia McCormick I present this list so you have an idea of what is normally targeted. Books that describe racism and queer identities are most common, but other targets include any depictions of violence, drugs, sex. Use your personal archive to accumulate data that you personally are passionate about. The more niche a topic the more likely it is that other people will not have it in their storage.
Lastly, please remember as an archivist you are not there to determine if a piece is worthy of being saved. Just because you do not like or agree with the message does not mean it will be saved from being banned. All artworks amateur or professional are worthy of being archived.
Sources: ALA 2023 Banned Books https://www.ala.org/bbooks/frequentlychallengedbooks/top10
How to create a PDF/A file https://www.research.gov/common/attachment/Desktop/How_do_I_create_a_PDF-A_file.pdf
Smithsonian Data Management Best Practices and File Formats https://siarchives.si.edu/what-we-do/digital-curation/recommended-preservation-formats-electronic-records https://library.si.edu/research/best-practices-storing-archiving-and-preserving-data
20 notes
·
View notes
Note
Hello, Gina! Hope you're having a wonderful day. I was wondering if you or a follower possibly know how to convert a PDF fic into an epub? I use an eReader for fics, and it can open a PDF but it doesn't work super well. I've been trying to read "Where Your Heart Is" but had to download it from Dropbox. And for some reason the file drains my readers battery! Haha, so I was just wondering if you may know how to convert it so it's easier to read! Thank you for your time ♥️
Hi, sugar. I used to use Zamzar and it was free at the time (for a limited number of files).
Does anyone have other suggestions for converting files?
13 notes
·
View notes
Text
Tiny Tip #2
So, you've decided to take up creative writing! You open up your preferred writing program and go to open up your last file, which is your 20,000 word first draft of a novel-- until, uh oh! An error message pops up, saying the file is corrupted, can't be retrieved, etc!
Or, say lightning strikes your house, and fries your computer--!
Or, a cat comes scampering across your computer desk, sending your computer crashing to the floor where it promptly explodes in a million prices --!
How to you avoid losing all your hard work in these scenarios?
✨By Backing up your work regularly✨
You should take steps right now with any important documents you have on your computer!
Here's some very simple ways you can back your work up, from completely free to paid services:
Each day that you make changes to your main writing document(s), make a brand new copy with the "Save-as" function, and label each one with that day's date, so you have a complete timeline of documents from day one to current day, instead of all being one single document.
Email the Docx / ODF file to yourself once a day, and if you have more than one email, or a trusted friend/family member, email it to them as well in case you somehow lose access to your account.
use Google Docs to back up your documents or for cross-platform writing, or if you use Google Docs as your main writing program, back up your writing locally to Libreoffice and all other methods mentioned above. It only takes 1 issue with logging into your account or a service outage to lose access to your work on google docs!
Use 4thewords as another online cloud service to back up your writing and write cross platform
Use A cloud drive service to back up your works once a day, such as Google Drive, Mega, One Drive, IDrive, Sync Drive, etc to back up your works once a day
Use Calibre to convert your document into an ebook format or PDF, and send it to your phone as an extra backup, and a handy way to reference your writing on the go.
use Google Docs to back up your documents or for cross-platform writing, or if you use Google Docs as your main writing program, back up your writing locally to Libreoffice and all other methods mentioned above. It only takes 1 issue with logging into your account or a service outage to lose access to your work on google docs!
#writing#tiny tips#BACK YOUR WRITING UP YOU NEVER KNOW WHAT WILL HAPPEN#BACK IT UP AT MINIMUM ONCE A DAY OR ANY TIME YOU MAKE MAJOR CHANGES#bold text#large text
20 notes
·
View notes
Text
youtube
Four Keys Book Arts - From E-Book to Real Book: Part 1 - Typesetting and Imposing a 120+ Year Old Bookbinding Manual
Hi everybody, welcome to the bindery!
Over the years I've received countless requests for help on converting e-books or pdfs into a format suitable for hand binding, so I finally decided to figure it out for myself. In this video I'll show you not only where I found a free digital copy of Douglas Cockerell's essential work: 'Bookbinding and the Care of Books', but also how I converted the .epub file and formatted the book for printing and binding.
Project Gutenberg: https://gutenberg.org/
PDFGear: https://www.pdfgear.com/
Bookbinder JS: https://momijizukamori.github.io/bookbinder-js/
In the next installments I will continue with sewing and casing in this book, so stay tuned!
I will be giving away this book when this series is complete! To find out more, check out my Patreon post about it here: https://www.patreon.com/posts/patreon...
Cheers,
Dennis
From the comments:
For future reference, on project Gutenberg you can also download the HTML version which you should be able to open directly in word or however else to process directly and should give you a lot more control over things like margins and font and page splits and junk
There's a really cool functionality in MS Word in the page setup to help with the signature printing. In the 'Layout' tab of the top banner, expand 'Page Setup'. In 'Margins' change from 'Normal' to 'Book fold.' From there, you can specify the number of sheets in your booklet
Word can definitely do basic imposition, but Bookbinder JS offers far more flexibility in a much more streamlined, purpose-driven format.
9 notes
·
View notes
Note
Hiii, I hope ur having a good day!, do u mid if I convert one of your fics into a pdf file so I can read it offline on my kindle?
:D sure, go for it. A03 has a download feature that may make your life a bit easier (link) as it has a download feature that can directly convert it.
Just as a general note to readers, feel free to download for personal use, but please don’t feed the AI, or reupload it. Pretty common sense stuff ☺️ This is one of the few places where we have free communal interaction because we love something.
6 notes
·
View notes
Text
CLASH! Devlog, April 16, 2025 - Major System Change
I changed the core engine of CLASH!. Let's talk about it.
From the very inception of CLASH!, back when it was a free pdf with ripped Shonen Jump assets, A character's Stances have been composed of two parts: A Score and a pool of Tokens. The Score was mostly static, and really existed to tell you how many Tokens you got when you Focused that Stance. The Tokens themselves existed for two purposes: mind games and CLASH!es. When you made a Bid, you declared a number, the goal being to imply which Stance you planned to declare. The number you declared corresponded to some number of Tokens, which would be converted to dice in a pool when it came time to break the tie of a contest.
Reading that, you might think, "Hey, Sabrina? That's really fucking obtuse. I have to imagine that would be really unintuitive for new players, and would bog down a game being built for the express purpose of hype and excitement." And... yeah, exactly.
I recently played a oneshot on-mic for a podcast, and I'm embarassed to say it took until I played the game for the public - a year and a half into development - to spot the issue. And once I spotted it, it took a multi-hour conversation with my partner to accept that a change needed to be made. So here's what that looks like.
First things first - I've dropped Stance Tokens. They simply didn't do anything exciting. I'm loathe to remove such a wonderful doohickey (sorry Jeff), but the fact is that they only existed for CLASH!es, and not in a way that can't also be accomplished with the static Stance Score. As central as they felt to me, Tokens were just an extra number to juggle for no discernable reason. Don't worry, though! I'm keeping Potential Tokens - we aren't doohickey-hating animals.
Second - Contests are now a literal, actual game of rock-paper-scissors. G-ddamn no-brainer. It used to be that the declaration of Stances took place in turns, with some subsystems slapped on to give both participants some kind of advantage, so that the second player couldn't always just call a winning Stance. But folks - that wasn't friggin' exciting. The reason I'm so proud of the CLASH! is because it's a real-time tiebreaker that heightens the real tension in the room - I've played games where the outcome of a CLASH! cause actual cheering from the table. It rules! But the body of a Contest has never done that. They've been slow, clunky, and awkward, in no small part because players just... couldn't get their heads around the Token-centric system in place before hand. Because it was a bad system!
So now, Contests exist in three phases - the building of a hand of Techniques (which are their own topic for a later devlog), the turn-based playing of those Techs, and a game of RPS to see who kicks who's ass. I'm excited to see how it plays in future tests.
As of the writing of this post, I haven't yet released the 4th playtest booklet, where these changes will take place; I'm still implementing the change. But keep your eyes out! I hope to have it done soon (in the next week or two, fingers crossed), and I'll make that its own post when I upload the file.
Thanks for making it to the end of this... screed. If you want to know what the hell I'm talking about, I recommend you check out some earlier playtest booklets (version 3 or lower). And while you're on my itch, maybe support my surgery fundraiser!
5 notes
·
View notes
Text


This is my first attempt at printing and binding a book and it worked out so well! (Prior to this I made two blank notebooks from a kit to learn how)
The text is The Marlows and the Traitor, by Antonia Forest - a book that's out of print and apparently impossible to buy second hand. I found a PDF of a scan of the book online, converted this to a txt file, copied and pasted it into Word and then retyped most of it to correct the mis-translated words and punctuation from the scan. I cleaned up the illustrations and added them back in, and then formatted it for printing. I used Bookbinder JS online to create the signatures.
I made a mistake with the spine board and didn't realise it wasn't right until it was first glued together, so I had to rip off the endpaper to set it free, then trimmed the spine board down and glued it back together - I didn't know if this would make the hinges too big but it turned out fine. It does mean it has different endpapers at the start and end, because I didn't have a second sheet to replace the one I ripped up.
I'd like a Cricut or similar for a more professional looking cover, but that's on the wishlist for now. My handwriting is legible, so I bought a metallic paint pen that would write on bookcloth and just wrote the title on the spine and cover. (Next time i'll do this before I put the text block into it - I didn't have the pens until after it was all together.)
Anyway, I definitely have a list of things to improve but I'm pretty happy with the end result. And since it's been so long since I edited the text (this has been on the backburner for a long time) I was able to actually read this physical copy, and despite the imperfections it's a perfectly functional book which is what ultimately matters!
3 notes
·
View notes
Text
UPDATES: 📖books📖 on googledrive, panelist collection additions, misc. uploads
hello again everyone :) apologies for the long post incoming, but there is some fun new content on the googledrive i'd like to share!
—
with quite a few books coming out and quite a few requests in my inbox for some comedians' writing, i've put most of my personal ebook & audiobook collection on google drive!
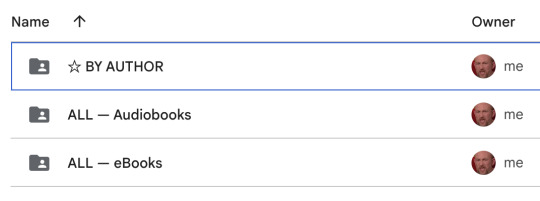
you can find the link on the secondary masterpost here under books :)
on drive, you'll be able to browse by author or by book type:
some books are available in both formats while others are ebook or audiobook only. i renamed all of the files so they should show up chronologically per author + audiobook files names will also show who is narrating:

(bob & sally💙)
note: nearly all of the ebooks are in epub format and nearly all of the audiobooks are in m4b format, both of which will automatically open in apple books, google play books, adobe digital, calibre, etc. — whatever is default on your device. you shouldn't have any issues with these files, but in case you do you can use the following website to convert the epub to pdf or m4b to mp3 (totally free and very fast!)
it's not a very big collection — about 50 books — but hopefully this will help anyone who wants to take a further plunge into their fave comedians :) enjoy!
—
as i mentioned earlier this month, i started rolling out panelist "collection" folders, which include not only the panel show episodes someone has appeared on but also deeper cuts and content like radio sitcoms/dramas, non-panel show light entertainment, late night appearances, podcasts, audiobooks, and more!
while i don't plan to upload every last piece of content in the world to a panelist's collection, i know how convenient it would be if nearly everything was in one place, so along with the files you'll find in a folder there is also a docx file with additional working links:


even though these collections still aren't "complete", at least they're closer to complete lol i have added these docs for alex horne, joe wilkinson, john kearns, and vcm! i'll continue adding to these docs when i can
i got requests for collections for david & victoria, mike wozniak, and nish, so i'll keep working on those!
—
new content on the masterposts:
new buzzcocks
new rhod gilbert's growing pains
no more jockeys — complete series
standup from frankie boyle & hal cruttenden
audiobook 'egg and soldiers' by damien trench (main character of in and out of the kitchen) (read by miles jupp)
—
WATCH LINKS MASTERPOST / FAQ / TAGS / ASK
52 notes
·
View notes
Note
out of interest how do u go abt converting pdfs to mobi files (i also recently started sending files to my kindle but just as pdfs and i miss being able to zoom in)
Thank you so much for asking this bc i'm dying to talk about it, and it's super simple! (but i will go into more detail here if that's ok)
The short answer is: I'm using calibre on my laptop to convert the files to .mobi and then adding them to my kindle via cable (i assume that's how you're doing it?).
The long answer: Calibre is super easy to use, and there's even a wikihow explaining it. You can select the manufacturer and product version while installing, so the program will know what to convert the file to. I hear there are some minor details that work best on specific kindles, but i just picked the general option bc i don't know what kindle i have, and that works perfectly fine. You also have the option to add your amazon account if you want to send it to your kindle through email, but that's optional so i don't know how well it works.
I transfer the books to my kindle using a cable. If someone reading doesn't know how to: connect your kindle to your laptop with a cable, and put the .mobi file into the folder on your kindle called "documents" (i assume it's called that on all kindles). Just remember to eject it from your computer like you would a USB stick before removing. That's it!
Also if you're like me and super cautious about downloading stuff on your computer, but not sure how to make sure it's safe: i ran the website and the installation file through scamadviser and virustotal respectively, and there was nothing malicious in either (i use virustotal a lot bc i'm always pirating books and it's nice to make sure they're safe).
Anyway, hope that wasn't too long, and that it can help you and whoever else needs this!! Feel free to ask if there's something else, and happy reading!! :D <3
#ask#thanks for the ask!#kindle#books#lifeblogging#hope this helps and isn't too long but i downloaded like 10 new books to my kindle since yesterday and i'm just so happy about it
4 notes
·
View notes