#Git in VS Code
Explore tagged Tumblr posts
Visit Tumblr Blog
Explore Tumblr blogs with no restrictions, modern design and the best experience.
Last Seen Tumblr Blogs


Fun Fact
If you dial 1-866-584-6757, you can leave an audio post for your followers.
Text
0 notes
Text

Welcome back, coding enthusiasts! Today we'll talk about Git & Github , the must-know duo for any modern developer. Whether you're just starting out or need a refresher, this guide will walk you through everything from setup to intermediate-level use. Let’s jump in!
What is Git?
Git is a version control system. It helps you as a developer:
Track changes in your codebase, so if anything breaks, you can go back to a previous version. (Trust me, this happens more often than you’d think!)
Collaborate with others : whether you're working on a team project or contributing to an open-source repo, Git helps manage multiple versions of a project.
In short, Git allows you to work smarter, not harder. Developers who aren't familiar with the basics of Git? Let’s just say they’re missing a key tool in their toolkit.
What is Github ?
GitHub is a web-based platform that uses Git for version control and collaboration. It provides an interface to manage your repositories, track bugs, request new features, and much more. Think of it as a place where your Git repositories live, and where real teamwork happens. You can collaborate, share your code, and contribute to other projects, all while keeping everything well-organized.
Git & Github : not the same thing !
Git is the tool you use to create repositories and manage code on your local machine while GitHub is the platform where you host those repositories and collaborate with others. You can also host Git repositories on other platforms like GitLab and BitBucket, but GitHub is the most popular.
Installing Git (Windows, Linux, and macOS Users)
You can go ahead and download Git for your platform from (git-scm.com)
Using Git
You can use Git either through the command line (Terminal) or through a GUI. However, as a developer, it’s highly recommended to learn the terminal approach. Why? Because it’s more efficient, and understanding the commands will give you a better grasp of how Git works under the hood.
GitWorkflow
Git operates in several key areas:
Working directory (on your local machine)
Staging area (where changes are prepared to be committed)
Local repository (stored in the hidden .git directory in your project)
Remote repository (the version of the project stored on GitHub or other hosting platforms)
Let’s look at the basic commands that move code between these areas:
git init: Initializes a Git repository in your project directory, creating the .git folder.
git add: Adds your files to the staging area, where they’re prepared for committing.
git commit: Commits your staged files to your local repository.
git log: Shows the history of commits.
git push: Pushes your changes to the remote repository (like GitHub).
git pull: Pulls changes from the remote repository into your working directory.
git clone: Clones a remote repository to your local machine, maintaining the connection to the remote repo.
Branching and merging
When working in a team, it’s important to never mess up the main branch (often called master or main). This is the core of your project, and it's essential to keep it stable.
To do this, we branch out for new features or bug fixes. This way, you can make changes without affecting the main project until you’re ready to merge. Only merge your work back into the main branch once you're confident that it’s ready to go.
Getting Started: From Installation to Intermediate
Now, let’s go step-by-step through the process of using Git and GitHub from installation to pushing your first project.
Configuring Git
After installing Git, you’ll need to tell Git your name and email. This helps Git keep track of who made each change. To do this, run:

Master vs. Main Branch
By default, Git used to name the default branch master, but GitHub switched it to main for inclusivity reasons. To avoid confusion, check your default branch:

Pushing Changes to GitHub
Let’s go through an example of pushing your changes to GitHub.
First, initialize Git in your project directory:

Then to get the ‘untracked files’ , the files that we haven’t added yet to our staging area , we run the command

Now that you’ve guessed it we’re gonna run the git add command , you can add your files individually by running git add name or all at once like I did here

And finally it's time to commit our file to the local repository

Now, create a new repository on GitHub (it’s easy , just follow these instructions along with me)
Assuming you already created your github account you’ll go to this link and change username by your actual username : https://github.com/username?tab=repositories , then follow these instructions :


You can add a name and choose wether you repo can be public or private for now and forget about everything else for now.

Once your repository created on github , you’ll get this :

As you might’ve noticed, we’ve already run all these commands , all what’s left for us to do is to push our files from our local repository to our remote repository , so let’s go ahead and do that

And just like this we have successfully pushed our files to the remote repository
Here, you can see the default branch main, the total number of branches, your latest commit message along with how long ago it was made, and the number of commits you've made on that branch.

Now what is a Readme file ?
A README file is a markdown file where you can add any relevant information about your code or the specific functionality in a particular branch—since each branch can have its own README.
It also serves as a guide for anyone who clones your repository, showing them exactly how to use it.
You can add a README from this button:

Or, you can create it using a command and push it manually:

But for the sake of demonstrating how to pull content from a remote repository, we’re going with the first option:

Once that’s done, it gets added to the repository just like any other file—with a commit message and timestamp.
However, the README file isn’t on my local machine yet, so I’ll run the git pull command:

Now everything is up to date. And this is just the tiniest example of how you can pull content from your remote repository.
What is .gitignore file ?
Sometimes, you don’t want to push everything to GitHub—especially sensitive files like environment variables or API keys. These shouldn’t be shared publicly. In fact, GitHub might even send you a warning email if you do:

To avoid this, you should create a .gitignore file, like this:

Any file listed in .gitignore will not be pushed to GitHub. So you’re all set!
Cloning
When you want to copy a GitHub repository to your local machine (aka "clone" it), you have two main options:
Clone using HTTPS: This is the most straightforward method. You just copy the HTTPS link from GitHub and run:

It's simple, doesn’t require extra setup, and works well for most users. But each time you push or pull, GitHub may ask for your username and password (or personal access token if you've enabled 2FA).
But if you wanna clone using ssh , you’ll need to know a bit more about ssh keys , so let’s talk about that.
Clone using SSH (Secure Shell): This method uses SSH keys for authentication. Once set up, it’s more secure and doesn't prompt you for credentials every time. Here's how it works:
So what is an SSH key, actually?
Think of SSH keys as a digital handshake between your computer and GitHub.
Your computer generates a key pair:
A private key (stored safely on your machine)
A public key (shared with GitHub)
When you try to access GitHub via SSH, GitHub checks if the public key you've registered matches the private key on your machine.
If they match, you're in — no password prompts needed.
Steps to set up SSH with GitHub:
Generate your SSH key:

2. Start the SSH agent and add your key:

3. Copy your public key:

Then copy the output to your clipboard.
Add it to your GitHub account:
Go to GitHub → Settings → SSH and GPG keys
Click New SSH key
Paste your public key and save.
5. Now you'll be able to clone using SSH like this:

From now on, any interaction with GitHub over SSH will just work — no password typing, just smooth encrypted magic.
And there you have it ! Until next time — happy coding, and may your merges always be conflict-free! ✨👩💻👨💻
#code#codeblr#css#html#javascript#java development company#python#studyblr#progblr#programming#comp sci#web design#web developers#web development#website design#webdev#website#tech#html css#learn to code#github
93 notes
·
View notes
Text
A free image hosting solution for AO3 and elsewhere - A Tutorial (mobile-friendly!)
See the demo site made from this template IN ACTION: https://hotlink-archive-template.pages.dev/
This guide is for an easy, mobile-friendly way to host files for hotlinking on AO3 or elsewhere, using github and cloudflare pages.
I've encountered far too many dead links in fanfics and forums simply because a hosting service decided to dump older files, or they decided to change their TOS to no longer allow hotlinking or certain kinds of content (nsfw, fictional graphic content). See Optional Steps for even more options.
This is an easy, barebones way to permanently host images that you don't want deleted unexpectedly or that you can't host elsewhere. (Emphasis on barebones. This will not be a nice portfolio style site. Unless you decide to code that yourself!) You can follow the link above for an example of this type of site.
It is also EASY to upload and use on mobile devices after initial setup!
Tools you will need:
Cloudflare Pages/Workers is a free to use static site hosting service. This will publish your files and make them available online. This will publish your files and make them available online. There is a limit to the amount of data you can upload for free, but you can pay for proper hosting if you want to exceed it.
Github is a code sharing/storage platform. Your files will go here first before being published on Pages. You can edit and upload files through your browser at github.com, or through Github Desktop, a program you install on your computer. There are limits to Github repositories, but they are also generous (suggested 1GB to 5GB per repo).
Basic Setup
1. Create a github account
2. Copy this template repository hotlink-archive-template
Your website will be contained in a repository, a place where all the files and the revision history for your project are stored.
This template repository uses an "Action" (using python) to automatically create a "home" page with an Index of all the files in your repository every time it is updated.
NOTE: I recommend you set your repository to Private. Github's history feature is extensive, so if you have sensitive content or think you might want to delete something later, it will be hard to get rid of it completely once it's been committed and publicly available.
3. Enable Action permissions
In order for the Action script to work, you need to give Actions permission to read and write in your repository.
Within your repository, go to the tab Settings > Actions > General > Workflow Permissions

4. Create a Cloudflare account
5. Create a Pages (or Workers) project and link it to your Github repository
Your Pages project will create the front end of the site where the images will be displayed. You will be able to link those images to other platforms like AO3.
You can create either a Workers or Pages project by going to Add > Pages (or Workers). Name your project WISELY! This name will be your site's URL.
Workers vs. Pages
Workers is subsuming Pages on Cloudflare and now has all the same static hosting capabilities, in addition to its original server-side processing services. If you'd like to, read more about this.
While Workers has similar capabilities, I recommend Pages for this project. Pages has the added bonus of a cleaner URL if you do not have your own domain: “MySite.pages.dev” in Pages vs Workers' “MySite.username.workers.dev”
You will be prompted to import an existing Git repository. You will need to give it access to your Github to do this.

Select the repository on your Github you made for your project, then hit "Begin Setup".
Name your project WISELY! This name will be your site's URL.
You do not need to change any settings on the next page, so hit "Save and Deploy". Your image hosting site will now be live!
The URL will be "https://ProjectName.pages.dev". It may take a few minutes to become accessible.
Now you're done with the basic setup!
How to Add files
You can add any files you want to link to on AO3/elsewhere through mobile, desktop browser, or the Github desktop program!
Here is how to do it on Github.com:
Open up the repository that you made (it can be found at github.com/username/repositoryname). You will see a list of folders and files that are in that repository.
Click into the folder "fan-stuff".
In the top right, go Add file > Upload files and drag in the images you want added. You will need to name the images BEFORE you upload them, as there is not an easy renaming feature within Github's browser interface.
In the Commit changes box, choose a title for what action you are doing. This will help you backtrack uploads if needed.
For example, it could be "Uploaded Batman Art". Make sure it's set to "commit directly to the main branch", then commit those changes. This will upload the files.
Now, if you visit your site, you will see your uploaded image under the "fan-stuff" folder!
To embed/link your image, navigate to your file on your Pages site and copy the URL in the address bar. This URL is what you will use to embed your photo (using HTML or "add image as URL" tools some sites have).
Continue onto More Setup to customize your site and implement more advanced settings. See Tips/Troubleshooting if you're running into problems.
More Setup
Perform site customization/advanced setup with Github Desktop on your PC
Github’s web UI is great, but it has major limitations. I highly recommend that you use Github Desktop during the initial setup, as well as when you want to make major organizational changes to your files/site. Once you have everything set, though, you can use Github in your browser to upload whatever files you want to hotlink at the moment.
Download Github Desktop and “clone” (download a copy of) the repository you made.
This is the best time to rename/rearrange folders + files, etc.
There are other methods in the Troubleshooting section if you need, but Github Desktop is by far the easiest way
see Adding/Renaming Folders for important info on how to properly rename/add folders
see About the Index Page for how to customize your Index pages
Once you’re done editing, “push” (upload) all the changes you made to your online Github repository.
Having some sort of text editor like Notepad++ is useful for editing any code, the automatic color-coding is very helpful. You can edit in plain old Notepad as well, it just won’t look as nice.
About the Index Page
The template repository uses a python Action to automatically create an HTML "home" page with an Index of ALL the files in the folder every time it is updated.
This is particularly convenient for mobile use, as you can upload a file, and the python action automatically updates the Index page.
If you don’t want this, just disable the “create-index” Action and delete the .py files. You can just type in the file locations to get to each file, or you can manually maintain an home/Index page yourself, which isn't hard if you know some basic HTML and can remember to do it consistently.
Also note that if you wish to change any of the content on your Index pages, you must edit the "index.py" file, not the "index.html" file. The "index.html" file gets re-written every time the "create-index" Action is run in order to keep the file index up to date.
Adding/Renaming/Deleting Folders
Disclaimer: This is a bit convoluted because I am extremely unqualified to be working with python OR HTML. There’s probably an easy way to do this, but I don’t have the skill to do it, and most of the stuff here is copied from stuff I found around. If you know a better way to do things, please let me know, it’d make my life easier too!
Adding or renaming folders involves some extra steps.
1. The "index.py" file inside the folder needs to be edited to match the parent folder name.
The place you need to do this is found near the top of the file (highlighted below)

2. Then the outer-most "create-index.py" file needs to be updated to match the new name as well. If you’ve added a new folder, duplicate and adjust the code to match.
The place you need to do this is found at the bottom (highlighted below)

If you don’t need any folders at all, great! Just delete them and their contents! No need to edit any files. (Don’t delete “index.html” or “create-index.py” or “.github/workflows”!)
If you would like to have these folders for later use, leave them as-is and simply edit the index files.
The relevant lines of code at the bottom of "create-index.py" like in the previous step for renaming folders. You may delete this code, or comment it out (using # at the beginning of a line will make it “invisible” to the computer)
Then, add the folder’s name to the “exclusions” list at the top of the "create-index.py" file so that it doesn’t show up on your Index page (highlighted below)

You can also use this same concept to create "invisible" files/folders. Any files/folders included in the "exclusions" list in "(create-)index.py" will not be listed on the Index page, however they can still be found through the direct URL to the file.
On the flipside, this means simply hiding the file/folder from the Index page does not get rid of the file from your site. Anyone who has the URL will be able to find that file unless you remove it, or move its location to change the URL
Tips/Troubleshooting
(Re)name your files before uploading
It’s not possible to rename image/media files on Github’s web UI (it is possible with the local Git program). The "create-index" Action lists out the names of your files exactly, so you will end up with ugly strings of numbers and letters on your Index page if you don't rename them, which is terrible to look at and also plain old CONFUSING to navigate.
So if you're uploading on mobile or through Github on browser, name your files with easy to remember and distinctive filenames before you go ahead and upload them. This makes everything much easier, and it makes your Index page look nice :)
My website isn’t updating when I edit my Github repository!
Check to see if your Pages is retrieving from the correct branch, and if it has automatic deployments enabled.

Can’t see your Github repository when trying to link it on Cloudflare?
Check your Github applications Repository Access settings. Go to your ACCOUNT Settings > Integrations - Applications > Cloudflare > Repository Access

Index action is failing!
Go back to step 3 in Basic Setup and check if you’ve given Actions permission to read and write. If that’s not the issue, check to see if you’ve set up your "index.py" files correctly. The folder names should correspond to the parent folders, and the "create-index.py" file in the outer-most folder should have the correct folder names at the VERY BOTTOM.
How do I rename a folder (or move a file) in Github’s web UI?
It isn’t possible to directly rename a folder in Github’s web UI, doing it using Git on your computer is the most foolproof way to do it. But there is a way (except for media files).
Go into the folder you want to rename and select a file such as “index.html” and enter the “edit” mode.
Go to the file name and backspace until you can edit the parent folder name as well. This will create a new folder with the new name.
You’ll have to do this to every file in the folder until they’re all in the new folder.
Unfortunately, you can’t do this with media files like png/jpg/etc, because entering the “edit” mode on a photo “breaks” it somehow, and bye-bye image :’) (Don’t worry if this happens, just don’t commit the change or roll it back in your history).
Optional Steps
Make deployment (semi-)Manual
You can play with cloudflare and github to make deployment of your site a manual step you have to trigger, instead of automatic with each commit (default setting). This is a safeguard in case you accidentally make a change or delete something from your github, it won't affect your website.
Deploy w/ Branches
You could do a semi-automatic deployment with a "Production" branch on your github that is separate from the branch you edit. This creates an extra step before anything is published on Cloudflare. A safeguard against accidental changes/deletion of sorts :)

Go to Settings > Build tab > Branch Control
Choose your Production Branch (MAIN or CLOUDFLARE) and enable (or disable) automatic deployments
If you choose MAIN, every change you commit to MAIN will be published to Pages
If you choose CLOUDFLARE, any changes you make to MAIN will not show up on your Pages site until you Pull from MAIN to CLOUDFLARE
To Pull changes from MAIN to CLOUDFLARE, go to your github repository
Above your files on the Left, you will see a toggle to choose which branch you are on.
Choose Cloudflare. There will be a message like "This branch is 7 commits ahead of, 2 commits behind main." Click "2 commits behind"
Click "Create a Pull Request". Then click "Merge Pull Request". If everything is correct, this should trigger a build on your Cloudflare
Deploy w/ Github Actions
Or you can create a manual command that you have to enter on github to trigger a deployment on cloudflare. If you're paranoid about anything happening to your site due to a mishap on the Github side, this is a safe choice. Unless you manually trigger the command, your Pages site will be completely untouched no matter if something happens to your repo.
This can be done in many ways, I think the most straightforward is with Deploy Hooks (maybe in conjunction with Actions if you want to make it mobile-friendly), and might be a bit complicated, but not too hard to figure out with some Google-fu.
Here’s some links I think will be useful (note: I don’t use this method, so these haven’t been tested)
Manual trigger action tutorial
How to configure Github webooks
Storing Locally instead of on Github
Although this guide is written with Cloudflare's Github integration in mind, particularly for easy online/mobile access, you can also keep your files locally on your PC and directly upload your assets onto your Pages project. This gives you full control over what happens to your files. (Keeping backups is a good idea. You can still use Github Desktop to do this, just keep your repository on your PC.)
Simply clone/download the repository as it is, customize it as you like, and create a NEW Pages project on Cloudflare, using "Direct Upload" to upload your files
Once you have connected a Pages project with Github, there is no way to change the deployment method to Direct Upload or vice versa. Direct Upload is also not available for Workers.
One thing that will NOT work the same is the "create-index" Action that only works on Github.
I have made a "create-index.exe" that will execute the "create-index.py" files in the exact same way as they would work with the Action. You do not have to install python for this to work (if I did everything right). Simply run "create-index.exe" whenever you make a change and want to update the "index.html" files
Remember, this is EXACTLY THE SAME as the "create-index" Action, meaning you have to edit each "index.py" file when you rename folders, add a folder, want to exclude a file from the Index page, etc. (See Adding/Renaming Folders for how to do this)
Find me on Bluesky. Or if you have a problem, open an Issue on this project :)
I'll try to answer your questions as best I can! But really, I am the most amateur of amateurs and figured this all out using Google, so I might not be of much help ^^;
I also recommend Squidge Images (an offshoot of Squidge.org) as a fairly trustworthy alternative. However, Squidge Images does have some additional rules that Squidge does not, and what crosses the line is at their discretion.
I also posted this over on AO3!
5 notes
·
View notes
Text
the ellipsus 'export to ao3 code' worked very well but i am back using google docs for a few reasons:
the ellipsus support website is a discord server. fuck that shit, pay for a forum so i can just look things uo without bothering anyone on a program you don't even own and that i find anxiety-inducing, you cheap gits.
no colours of text, which might change but until then my system of notes vs text doesn't work.
it seemed to disconnect a lot and the advice on the site was don't worry just keep typing, WTF you expect me to risk losing MORE of my work? where even is it if it's not online! is that why i had to unintuitively download a dictionary for an online thing? (oh look there's no forum i could go and check that on...)
it looks pretty though. i'd prefer to use it and google is bad but i am used to the badness now and it was less full of anxiety triggers. :'(
9 notes
·
View notes
Text
What Is The Difference Between Web Development & Web Design?
In today’s world, we experience the growing popularity of eCommerce businesses. Web designing and web development are two major sectors for making a difference in eCommerce businesses. But they work together for publishing a website successfully. But what’s the difference between a web designers in Dubai and a web developer?
Directly speaking, web designers design and developers code. But this is a simplified answer. Knowing these two things superficially will not clear your doubt but increase them. Let us delve deep into the concepts, roles and differentiation between web development and website design Abu Dhabi.

What Is Meant By Web Design?
A web design encompasses everything within the oeuvre of a website’s visual aesthetics and utility. This might include colour, theme, layout, scheme, the flow of information and anything related to the visual features that can impact the website user experience.
With the word web design, you can expect all the exterior decorations, including images and layout that one can view on their mobile or laptop screen. This doesn’t concern anything with the hidden mechanism beneath the attractive surface of a website. Some web design tools used by web designers in Dubai which differentiate themselves from web development are as follows:
● Graphic design
● UI designs
● Logo design
● Layout
● Topography
● UX design
● Wireframes and storyboards
● Colour palettes
And anything that can potentially escalate the website’s visual aesthetics. Creating an unparalleled yet straightforward website design Abu Dhabi can fetch you more conversion rates. It can also gift you brand loyalty which is the key to a successful eCommerce business.
What Is Meant By Web Development?
While web design concerns itself with all a website’s visual and exterior factors, web development focuses on the interior and the code. Web developers’ task is to govern all the codes that make a website work. The entire web development programme can be divided into two categories: front and back.
The front end deals with the code determining how the website will show the designs mocked by a designer. While the back end deals entirely with managing the data within the database. Along with it forwarding the data to the front end for display. Some web development tools used by a website design company in Dubai are:
● Javascript/HTML/CSS Preprocessors
● Template design for web
● GitHub and Git
● On-site search engine optimisation
● Frameworks as in Ember, ReactJS or Angular JS
● Programming languages on the server side, including PHP, Python, Java, C#
● Web development frameworks on the server side, including Ruby on Rails, Symfony, .NET
● Database management systems including MySQL, MongoDB, PostgreSQL
Web Designers vs. Web Developers- Differences
You must have become acquainted with the idea of how id web design is different from web development. Some significant points will highlight the job differentiation between web developers and designers.
Generally, Coding Is Not A Cup Of Tea For Web Designers:
Don’t ever ask any web designers in Dubai about their coding knowledge. They merely know anything about coding. All they are concerned about is escalating a website’s visual aspects, making them more eyes catchy.
For this, they might use a visual editor like photoshop to develop images or animation tools and an app prototyping tool such as InVision Studio for designing layouts for the website. And all of these don’t require any coding knowledge.
Web Developers Do Not Work On Visual Assets:
Web developers add functionality to a website with their coding skills. This includes the translation of the designer’s mockups and wireframes into code using Javascript, HTML or CSS. While visual assets are entirely created by designers, developer use codes to implement those colour schemes, fonts and layouts into the web page.
Hiring A Web Developer Is Expensive:
Web developers are more expensive to hire simply because of the demand and supply ratio. Web designers are readily available as their job is much simpler. Their job doesn’t require the learning of coding. Coding is undoubtedly a highly sought-after skill that everyone can’t entertain.
Final Thoughts:
So if you look forward to creating a website, you might become confused. This is because you don’t know whether to opt for a web designer or a developer. Well, to create a website, technically, both are required. So you need to search for a website design company that will offer both services and ensure healthy growth for your business.
2 notes
·
View notes
Text
Primeros Pasos en Programación: Guía Completa
Introducción
Bienvenido al mundo de la programación. Si estás aquí, probablemente estás dando tus primeros pasos en el vasto campo del desarrollo de software. Puede parecer abrumador al principio, con tantos lenguajes, herramientas y conceptos desconocidos, pero no te preocupes. Este blog está diseñado para guiarte en este viaje, ofreciéndote una introducción clara y consejos prácticos para que puedas empezar con buen pie.
1. ¿Qué es la Programación?
La programación es el proceso de crear instrucciones que una computadora puede seguir para realizar tareas específicas. Estas instrucciones se escriben en un lenguaje de programación, que es un conjunto de reglas y sintaxis que los humanos pueden usar para comunicarse con las computadoras.
Lenguajes de Programación Populares:
Python: Fácil de aprender y ampliamente utilizado en ciencia de datos, desarrollo web, automatización y más.
JavaScript: El lenguaje del web, esencial para desarrollar aplicaciones y sitios interactivos.
Java: Famoso por su uso en aplicaciones empresariales y móviles (especialmente en Android).
C++: Utilizado en desarrollo de software de sistemas, juegos, y aplicaciones de alto rendimiento.
2. Conceptos Básicos de Programación
a) Variables y Tipos de Datos
Variables: Son contenedores que almacenan valores que pueden cambiar durante la ejecución del programa.
Ejemplo en Python: x = 5 asigna el valor 5 a la variable x.
Tipos de Datos: Representan la naturaleza de los valores almacenados en las variables.
Enteros: int (números sin decimales)
Flotantes: float (números con decimales)
Cadenas: str (secuencias de caracteres)
Booleanos: bool (True o False)
b) Estructuras de Control
Condicionales: Permiten que un programa tome decisiones.
Ejemplo: if x > 0: print("x es positivo")
Bucles: Ejecutan un bloque de código repetidamente.
Ejemplo: for i in range(5): print(i) imprimirá los números del 0 al 4.
c) Funciones
Las funciones son bloques de código reutilizables que realizan una tarea específica.
Ejemplo en Python: def suma(a, b): return a + b print(suma(2, 3)) # Salida: 5
3. Elige tu Primer Lenguaje de Programación
Si eres nuevo en la programación, te recomiendo empezar con Python por las siguientes razones:
Sintaxis Simple: La sintaxis de Python es clara y fácil de entender, lo que permite concentrarte en aprender conceptos básicos de programación sin enredarte en detalles complejos.
Comunidad Amplia: Hay muchos recursos de aprendizaje disponibles, incluyendo tutoriales, foros y documentación oficial.
Versatilidad: Python se utiliza en una amplia gama de aplicaciones, desde desarrollo web hasta inteligencia artificial.
4. Herramientas Esenciales
a) Entornos de Desarrollo Integrados (IDEs)
VS Code (Recomendado): Un editor de código ligero y personalizable que soporta múltiples lenguajes.
PyCharm: Un IDE robusto para Python que ofrece herramientas avanzadas para el desarrollo y depuración.
b) Control de Versiones
Git: Una herramienta esencial para el control de versiones, que te permite rastrear cambios en tu código y colaborar con otros desarrolladores.
GitHub: Un servicio basado en la nube que facilita la colaboración y el alojamiento de proyectos.
5. Primeros Proyectos para Principiantes
Comenzar con pequeños proyectos es una excelente manera de aplicar lo que has aprendido y adquirir confianza. Aquí tienes algunas ideas de proyectos:
Calculadora Básica:
Crea una calculadora que pueda realizar operaciones básicas como suma, resta, multiplicación y división.
Juego de Adivinanza de Números:
Un programa que elige un número al azar y pide al usuario que lo adivine. Puedes agregar funciones como limitar el número de intentos y dar pistas si el número es mayor o menor.
Lista de Tareas (To-Do List):
Una aplicación simple que permite a los usuarios agregar, eliminar y marcar tareas como completadas.
6. Consejos Útiles para Principiantes
a) Practica Regularmente
La programación es una habilidad práctica. Cuanto más código escribas, mejor entenderás los conceptos.
Utiliza plataformas como LeetCode o HackerRank para resolver problemas de programación.
b) No Tengas Miedo de Cometer Errores
Cometer errores es parte del proceso de aprendizaje. Cada error que cometes es una oportunidad para aprender algo nuevo.
c) Aprende a Buscar Información
Saber cómo buscar respuestas a tus preguntas es una habilidad vital. Stack Overflow es un recurso invaluable donde puedes encontrar soluciones a problemas comunes.
d) Colabora y Comparte tu Trabajo
Participa en comunidades de desarrolladores, como GitHub o Reddit. Compartir tu trabajo y colaborar con otros te expondrá a nuevas ideas y te ayudará a mejorar.
e) Mantente Curioso
La tecnología está en constante evolución. Mantente al día con las últimas tendencias y tecnologías para seguir creciendo como desarrollador.
7. Recursos Adicionales
a) Cursos y Tutoriales
CódigoFacilito (Página web): Ofrece una amplia variedad de cursos gratuitos en español sobre programación, desarrollo web, bases de datos y más. Además, cuenta con tutoriales y una comunidad activa que apoya el aprendizaje colaborativo.
freeCodeCamp (Página web): Un excelente recurso gratuito que cubre desde conceptos básicos hasta proyectos avanzados.
Desarrolloweb.com: Un portal completo que ofrece artículos, tutoriales y guías sobre programación y desarrollo web. Es una excelente fuente para aprender HTML, CSS, JavaScript, PHP, y otros lenguajes de programación.
Píldoras Informáticas (Canal de YouTube): Explica conceptos de programación y desarrollo de software en videos cortos y fáciles de entender.
HolaMundo (Canal de YouTube): Un canal dedicado a enseñar programación en español, con cursos completos de Java, Python, C++, y más.
Fazt Code (Canal de YouTube): Ofrece tutoriales y guías sobre desarrollo web, especialmente en JavaScript, Node.js, y frameworks modernos.
b) Libros Recomendados
“Python para todos” de Raúl González Duque: Este libro es una excelente introducción a Python, diseñado para principiantes. Está escrito de manera sencilla y práctica, ideal para quienes quieren aprender a programar desde cero.
“Aprende JavaScript desde cero” de Victor Moreno: Un libro que te guía paso a paso en el aprendizaje de JavaScript. Es perfecto para principiantes que desean entender el lenguaje desde sus fundamentos y aplicar lo aprendido en proyectos reales.
“Programación en C” de Luis Joyanes Aguilar: Este es un clásico en la literatura técnica en español, ideal para quienes desean aprender el lenguaje C, uno de los más fundamentales y poderosos en la programación.
“Introducción a la programación con Python” de Jesús Conejo: Otro excelente recurso para aprender Python, este libro está enfocado en estudiantes y autodidactas que desean adquirir una base sólida en programación utilizando Python.
“El gran libro de HTML5, CSS3 y JavaScript” de Juan Diego Gauchat: Este libro cubre los fundamentos del desarrollo web moderno, incluyendo HTML5, CSS3 y JavaScript. Es una guía completa para aquellos que quieren empezar a construir sitios y aplicaciones web.
Conclusión
Adentrarse en la programación es una experiencia emocionante y gratificante. Con paciencia, práctica y los recursos adecuados, estarás bien encaminado hacia convertirte en un desarrollador competente. Recuerda que cada experto fue una vez un principiante, y lo más importante es disfrutar del proceso de aprendizaje.
#programación#aprendiendoaprogramar#principiantesenprogramación#tutorialesdeprogramación#conceptosbásicosdeprogramación#python#javascript#coding#desarrollodesoftware#programadoresprincipiantes#programacion#codinglife#desarrolladores#aprendeaprogramar#empezandoaprogramar#comienzaaprogramar#programacionprincipiantes#codingforbeginners#programadoresnovatos#tutorialesdecoding#codetutorials#aprendecoding#basicosdeprogramacion#fundamentosdeprogramacion#codingsimplificado#pythoncode#pythonprogramming#pythondev#js#javascriptcode
8 notes
·
View notes
Text
back in college they taught us all these old ways of programming, which is why I had to code all of my class projects by connecting remotely to the school's server via ssh and writing c++ in emacs. and I just. why??? sure development on linux is better, but you can also just use vs code's remote tunnel feature to do your programming on a linux server remotely while still being able to do it in a modern ide. did this feature not exist back then?
the thing that still puzzles me the most is that they made us use subversion instead of git. why????
13 notes
·
View notes
Text
7 extensions of VS-Code to boost productivity.
Boosting your productivity as a beginner programmer is essential. Visual Studio Code (VS Code) offers many extensions to streamline your workflow. Here are some of the best VS Code extensions to help you write cleaner code, debug efficiently, and manage projects effectively.
1. Prettier - Code Formatter
Function: Automatically formats your code to make it clean and consistent.
Usage: Saves time on manual formatting and ensures your code adheres to style guides.
Install: Search for "Prettier - Code formatter" in the extensions marketplace and install it
2. ESLint
Function: Identifies and fixes linting errors in your JavaScript and TypeScript code.
Usage: Helps catch common errors and enforce coding standards.
Install: Search for "ESLint" in the extensions marketplace and install it.
3. GitLens — Git supercharged
Function: Enhances the Git capabilities in VS Code by providing insights into code authorship and history.
Usage: This makes it easier to understand the history and evolution of your codebase.
Install: Search for "GitLens" in the extensions marketplace and install it.

4. Code Spell Checker
Function: Checks your code for spelling errors.
Usage: Helps catch typos and improve code readability.
Install: Search for "Code Spell Checker" in the extensions marketplace and install it.
5. Path Intellisense
Function: Autocompletes file paths in your code.
Usage: Saves time and reduces errors when working with file paths.
Install: Search for "Path Intellisense" in the extensions marketplace and install it.
6. Bracket Pair Colorizer 2
Function: Colorizes matching brackets to make it easier to identify block structures.
Usage: Improves readability of your code, especially for nested blocks.
Install: Search for "Bracket Pair Colorizer 2" in the extensions marketplace and install it.
7. Pets
Function: Adds a fun, interactive pet to your VS Code workspace.
Usage: Provides a cute, engaging way to take short breaks and reduce stress.
Install: Search for "Pets" in the extensions marketplace and install it.
7 notes
·
View notes
Text
HTML and git
what is going on
Ah yes, HTML a way to make websites. and git, a way to keep track of code what could possible go wron-
Error something went wrong
You have to be kidding me??
ok git is a very helpful tool but for some reason, idk if it is just me or if it is anyone else but git does not like html. like why does it hate it and not keep track of half of my code. only way i can edit my code with git keep track is using github on a web brower and it works just fine. but if i use VS code and use git, it hates it a lot for some reason and it is annoy.
2 notes
·
View notes
Text
Full Stack Testing vs. Full Stack Development: What’s the Difference?

In today’s fast-evolving tech world, buzzwords like Full Stack Development and Full Stack Testing have gained immense popularity. Both roles are vital in the software lifecycle, but they serve very different purposes. Whether you’re a beginner exploring your career options or a professional looking to expand your skills, understanding the differences between Full Stack Testing and Full Stack Development is crucial. Let’s dive into what makes these two roles unique!
What Is Full Stack Development?
Full Stack Development refers to the ability to build an entire software application – from the user interface to the backend logic – using a wide range of tools and technologies. A Full Stack Developer is proficient in both front-end (user-facing) and back-end (server-side) development.
Key Responsibilities of a Full Stack Developer:
Front-End Development: Building the user interface using tools like HTML, CSS, JavaScript, React, or Angular.
Back-End Development: Creating server-side logic using languages like Node.js, Python, Java, or PHP.
Database Management: Handling databases such as MySQL, MongoDB, or PostgreSQL.
API Integration: Connecting applications through RESTful or GraphQL APIs.
Version Control: Using tools like Git for collaborative development.
Skills Required for Full Stack Development:
Proficiency in programming languages (JavaScript, Python, Java, etc.)
Knowledge of web frameworks (React, Django, etc.)
Experience with databases and cloud platforms
Understanding of DevOps tools
In short, a Full Stack Developer handles everything from designing the UI to writing server-side code, ensuring the software runs smoothly.
What Is Full Stack Testing?
Full Stack Testing is all about ensuring quality at every stage of the software development lifecycle. A Full Stack Tester is responsible for testing applications across multiple layers – from front-end UI testing to back-end database validation – ensuring a seamless user experience. They blend manual and automation testing skills to detect issues early and prevent software failures.
Key Responsibilities of a Full Stack Tester:
UI Testing: Ensuring the application looks and behaves correctly on the front end.
API Testing: Validating data flow and communication between services.
Database Testing: Verifying data integrity and backend operations.
Performance Testing: Ensuring the application performs well under load using tools like JMeter.
Automation Testing: Automating repetitive tests with tools like Selenium or Cypress.
Security Testing: Identifying vulnerabilities to prevent cyber-attacks.
Skills Required for Full Stack Testing:
Knowledge of testing tools like Selenium, Postman, JMeter, or TOSCA
Proficiency in both manual and automation testing
Understanding of test frameworks like TestNG or Cucumber
Familiarity with Agile and DevOps practices
Basic knowledge of programming for writing test scripts
A Full Stack Tester plays a critical role in identifying bugs early in the development process and ensuring the software functions flawlessly.
Which Career Path Should You Choose?
The choice between Full Stack Development and Full Stack Testing depends on your interests and strengths:
Choose Full Stack Development if you love coding, creating interfaces, and building software solutions from scratch. This role is ideal for those who enjoy developing creative products and working with both front-end and back-end technologies.
Choose Full Stack Testing if you have a keen eye for detail and enjoy problem-solving by finding bugs and ensuring software quality. If you love automation, performance testing, and working with multiple testing tools, Full Stack Testing is the right path.
Why Both Roles Are Essential :
Both Full Stack Developers and Full Stack Testers are integral to software development. While developers focus on creating functional features, testers ensure that everything runs smoothly and meets user expectations. In an Agile or DevOps environment, these roles often overlap, with testers and developers working closely to deliver high-quality software in shorter cycles.
Final Thoughts :
Whether you opt for Full Stack Testing or Full Stack Development, both fields offer exciting opportunities with tremendous growth potential. With software becoming increasingly complex, the demand for skilled developers and testers is higher than ever.
At TestoMeter Pvt. Ltd., we provide comprehensive training in both Full Stack Development and Full Stack Testing to help you build a future-proof career. Whether you want to build software or ensure its quality, we’ve got the perfect course for you.
Ready to take the next step? Explore our Full Stack courses today and start your journey toward a successful IT career!
This blog not only provides a crisp comparison but also encourages potential students to explore both career paths with TestoMeter.
For more Details :
Interested in kick-starting your Software Developer/Software Tester career? Contact us today or Visit our website for course details, success stories, and more!
🌐visit - https://www.testometer.co.in/
2 notes
·
View notes
Text
C++ Tools Every Programmer Should Know in 2023

As technology continues to evolve rapidly, it is essential for programmers to stay updated with the latest tools to enhance their productivity and efficiency. In this article, we will explore some of the top C++ tools that every programmer should know in 2023. From integrated development environments (IDEs) to debuggers, code editors, libraries and frameworks, documentation tools, and build systems, we'll cover a comprehensive range of tools that will help programmers streamline their C++ development process. 1. Integrated Development Environments (IDEs) Visual Studio Code Visual Studio Code (VS Code) is a highly popular and powerful IDE that offers excellent support for C++ development. It provides a wide range of features, including code completion, syntax highlighting, debugging capabilities, and easy integration with version control systems like Git. Eclipse Eclipse is another widely used IDE for C++ development. It offers a comprehensive set of tools, such as code refactoring, code navigation, and a customizable user interface. Eclipse also supports various plugins and extensions to enhance its functionality further. Qt Creator Qt Creator is a specialized IDE for C++ and Qt development. It provides an intuitive and user-friendly interface, along with powerful tools for designing graphical user interfaces (GUIs) using the Qt framework. Qt Creator also supports cross-platform development, making it an excellent choice for C++ programmers. 2. Debuggers 2.1 GDB The GNU Debugger (GDB) is a command-line debugger that helps programmers analyze and debug their C++ code efficiently. It allows breakpoints, stepping through code, inspecting variables, and examining call stacks, among other debugging features. GDB is highly customizable and supports various platforms. 2.2 Visual Studio Debugger The Visual Studio Debugger is a robust and user-friendly debugger provided by Microsoft Visual Studio. It offers advanced debugging capabilities for C++ programs, including real-time expression evaluation, memory tracking, and parallel debugging. The Visual Studio Debugger integrates seamlessly with Visual Studio IDE. 2.3 LLDB LLDB is a powerful, modern debugger primarily developed for LLVM-based programming languages such as C++. It provides capabilities like multithreaded debugging, just-in-time compilation, and efficient memory management. LLDB offers a command-line interface and can be used on multiple platforms. 3. Code Editors 3.1 Sublime Text Sublime Text is a lightweight yet feature-rich code editor known for its speed and extensibility. It offers a minimalistic user interface, multiple selections, powerful search and replace functionality, and a vast collection of plugins to customize the editor according to programmers' needs. 3.2 Atom Atom is a highly customizable and open-source code editor that gained popularity among developers. It supports various programming languages, including C++, and provides features like smart autocompletion, file system browser, and Git integration. Atom also allows third-party package installations to extend its functionality. 3.3 Vim Vim is a highly efficient and text-based code editor preferred by many experienced programmers. It offers a wide range of features designed to enhance developers' productivity, such as extensive key bindings, split editing, powerful search and replace, and support for plugins and scripts. 4. Libraries and Frameworks 4.1 Boost Boost is a widely used C++ libraries collection known for its high-quality and portable code. It provides a range of libraries that cover various aspects of C++ programming, including smart pointers, multithreading, regular expressions, and container classes. Boost libraries offer excellent support and compatibility with different platforms. 4.2 Qt Qt is a comprehensive cross-platform framework that includes a powerful set of C++ libraries and tools. It enables developers to create high-performance applications with an intuitive UI and supports features like network programming, XML processing, database connectivity, and 3D rendering. Qt is widely adopted for GUI application development. 4.3 STL The Standard Template Library (STL) is an essential component of C++ programming. It offers a collection of generic algorithms, containers, and iterators, making it easier to write efficient and maintainable code. STL provides various data structures and algorithms, such as vectors, lists, sorting, and searching functions. 5. Documentation Tools 5.1 Doxygen Doxygen is a popular documentation tool for C++ projects. It automatically generates documentation from properly formatted comments in the source code. Doxygen supports various output formats like HTML, LaTeX, and PDF, allowing programmers to create professional-looking documentation for their projects easily. 5.2 Docutils Docutils is a Python-based documentation tool that provides support for multiple markup languages, including reStructuredText. It enables programmers to write documentation in a human-readable format and convert it into different output formats. Docutils is widely used in the C++ community for documenting projects. 5.3 Sphinx Sphinx is another widely adopted documentation tool that integrates well with the C++ ecosystem. It supports multiple markup languages, including reStructuredText and Markdown, and offers features like automatic cross-referencing, code highlighting, and generation of API documentation. Sphinx is highly customizable and extensible. 6. Build Systems 6.1 CMake CMake is a popular build system that simplifies the process of building C++ projects across multiple platforms and compilers. It provides a unified build configuration language and generates platform-specific build scripts. CMake offers excellent scalability and flexibility, making it suitable for projects of any size. 6.2 Make Make is a classic and widely used build system for C++ projects. It utilizes makefiles to automate the build process by specifying dependencies and actions. Make is highly efficient and can handle complex project structures. It is a fundamental tool in the C++ development ecosystem, and many other build systems are based on its principles. 6.3 Ninja Ninja is a fast and lightweight build system designed for speed and efficient dependency tracking. It focuses on the minimalistic build process and supports parallel builds. Ninja is often used in conjunction with CMake, allowing for faster compilation and linking of C++ projects. Conclusion: staying up to date with the right tools can significantly improve a programmer's productivity and efficiency. The C++ tools mentioned in this article, including IDEs, debuggers, code editors, libraries and frameworks, documentation tools, and build systems, are essential for any C++ developer in 2023. By leveraging these tools, programmers can streamline their development process, write cleaner code, and build robust applications. Embrace these tools and take your C++ programming skills to new heights! FAQs FAQ 1: What are Integrated Development Environments (IDEs)? Integrated Development Environments (IDEs) are software applications that provide comprehensive tools and features to simplify the software development process. They typically include code editors, debuggers, build systems, and other utilities needed for efficient coding and debugging. FAQ 2: What are Debuggers? Debuggers are tools that help programmers identify and fix issues in their code. They allow developers to step through the code, set breakpoints, inspect variables, and analyze program execution to understand and resolve bugs and errors. FAQ 3: What are Code Editors? Code editors are software tools designed specifically for writing and editing code. They provide features like syntax highlighting, code completion, and navigation to enhance productivity and make coding easier and more efficient. FAQ 4: What are Libraries and Frameworks? Libraries and frameworks are collections of pre-written code that provide reusable functionality to programmers. They can simplify coding tasks by providing ready-made solutions for common problems, saving time and effort. FAQ 5: What are Build Systems? Build systems are software tools that automate the process of compiling and linking code to create executable programs or libraries. They manage dependencies, handle project configurations, and ensure that all required resources are properly built and linked together. Read the full article
2 notes
·
View notes
Text
What Tools and IDEs Are Used in a Typical Python Programming Training Course?

Introduction
Python is one of the most popular programming languages in the world, known for its simplicity and readability. It's used in web development, data science, AI, and more. But writing Python code effectively requires more than just understanding syntax; you need the right tools and integrated development environments (IDEs). In any comprehensive Python online training with certification, understanding and using these tools is a crucial part of the learning journey.
According to the 2024 Stack Overflow Developer Survey, Python ranks as the most wanted language among developers. This shows a strong industry demand and growing interest from beginners. To keep up, python programming online training courses are integrating a variety of tools and IDEs that help learners practice, debug, and build projects more efficiently.
In this blog, we’ll explore the most commonly used tools and IDEs in a typical Python programming training course. You’ll learn what each tool does, why it matters, and how it helps in real-world scenarios.
Understanding the Python Development Environment
Before diving into individual tools, it's important to understand what makes up a Python development environment. In a typical Python online training with certification, the environment includes:
An IDE or code editor for writing Python code.
A Python interpreter to run the code.
Package managers like pip to install libraries.
Version control tools to track project changes.
Notebooks or dashboards for interactive development. These components help create a seamless workflow for coding, testing, and debugging.
Top IDEs Used in Python Online Training With Certification
PyCharm
Why it’s used in Python courses: PyCharm by JetBrains is one of the most feature-rich IDEs for Python. It supports python language online development with intelligent code completion, error highlighting, and integrated debugging tools.
Features:
Integrated debugging and testing
Smart code navigation
Refactoring tools
Version control support
Integrated terminal and Python console
Example in training: In Python online training with certification, students often use PyCharm to work on object-oriented programming projects or web development with Django.
Visual Studio Code (VS Code)
Why it’s popular: VS Code is lightweight, open-source, and customizable. With the Python extension installed, it becomes a powerful tool for any Python programmer.
Features:
IntelliSense for Python
Built-in Git support
Extensive extensions marketplace
Integrated terminal
Jupyter Notebook support
Example in training: VS Code is commonly used when introducing learners to data science libraries like Pandas and NumPy.
Jupyter Notebook
Why it’s essential for data science: Jupyter is more than an IDE; it's a web-based interactive computing platform. It allows you to mix code, output, visualizations, and markdown.
Features:
Inline visualization (great for Matplotlib, Seaborn)
Segment-based execution
Easy documentation with Markdown
Works seamlessly with Anaconda
Example in training: Used extensively in Python online training with certification for data analysis, machine learning, and statistics-based modules.
IDLE (Integrated Development and Learning Environment)
Why it’s beginner-friendly: IDLE is Python’s built-in IDE. While basic, it’s often introduced first to help learners focus on understanding syntax and logic without distractions.
Features:
Lightweight and easy to install
Simple REPL environment
Good for small scripts and exercises
Example in training: Used during the early phase of the course for learning variables, control flow, and functions.
Essential Tools for Python Programming
Python Interpreter
Every Python course requires a Python interpreter to execute the code. Python 3.x is the standard for most training programs today.
Key Use: Interprets and executes your code line-by-line, providing immediate output or error messages.
Anaconda Distribution
Why it’s useful: Anaconda is a bundle that includes Python, Jupyter, and hundreds of scientific libraries. It's widely used in data-heavy training modules.
Benefits:
Easy package management via Conda
Comes with Jupyter pre-installed
Ideal for machine learning and data analysis
Real-world tie-in: Many professionals use Anaconda in industry settings for AI and analytics work, making it highly relevant in Python online training with certification.
Version Control and Collaboration Tools
Git and GitHub
Why it's taught in courses: Version control is a must-have skill. Students are introduced to Git for local version tracking and GitHub for remote collaboration.
How it’s used:
Commit and push changes
Work in teams on group assignments
Review and merge pull requests
Example Project: Building a multi-file Python project with collaboration using Git branches.
Python Package Management Tools
pip (Python Package Installer)
Used in nearly every course, pip allows students to install packages from the Python Package Index (PyPI).
Command Example:
bash
pip install requests
virtualenv and venv
These tools are used to create isolated environments, avoiding package conflicts across projects.
Why it matters in training: It teaches learners how to manage dependencies correctly.
Code Linters and Formatters
Pylint and Flake8
These tools help identify syntax errors, poor coding practices, and PEP8 violations.
How it helps learners:
Immediate feedback on bad code
Encourages good coding habits
Prepares for real-world collaboration
Black
Black is an automatic code formatter that enforces a uniform style.
Why it’s taught: In professional development environments, consistent code style is crucial. Black makes that easy.
Jupyter Notebooks and Interactive Coding Tools
Google Colab
Why it’s included: Google Colab provides free cloud-based Jupyter notebooks with GPU support. It’s great for training AI and ML models.
Features:
No local setup required
Supports Python 3 and major libraries
Shareable and collaborative
Thonny
A beginner-friendly IDE ideal for introducing students to debugging and variable tracking visually.
Used for: Explaining loops, conditionals, and function scopes visually.
Real-World Applications in Training Projects
Web Development
Tools Used: PyCharm, Flask/Django, GitHub
Project Example: Build a blog website with CRUD features.
Data Analysis
Tools Used: Jupyter, Pandas, Matplotlib
Project Example: Analyze COVID-19 datasets and visualize trends.
Machine Learning
Tools Used: Google Colab, Scikit-learn, TensorFlow
Project Example: Build a linear regression model to predict housing prices.
Automation Scripts
Tools Used: VS Code, Selenium
Project Example: Automate login and data scraping from websites.
Key Takeaways
Python online training with certification includes tools that mirror real-world job roles.
IDEs like PyCharm and VS Code enhance learning through code suggestions, debugging, and integration.
Jupyter and Colab are essential for data-driven modules.
Git, pip, and virtual environments introduce real-world development workflows.
Code linters and formatters help build professional-level coding habits.
Conclusion
Whether you're aiming for data science, web development, or automation, understanding the tools and IDEs used in a python programming training course is crucial. These tools don't just make learning easier, they prepare you for real-world coding jobs.
Ready to sharpen your Python skills and build job-ready projects? Start learning with the right tools today!
0 notes
Text
8 Game-Changing Developer Tools to Skyrocket Your Productivity.
Let’s be honest: Sometimes coding isn’t the hard part—it’s everything else. The context switching. The bugs you can’t reproduce. The terminal black hole you get sucked into at 2AM.
Over the past year, I tried dozens of tools. These 8? They legitimately changed the game for me.

Here’s the list I wish someone handed me earlier 👇
🧠 Raycast – It’s Like Mac Spotlight, but on Steroids You know that moment when you reach for Spotlight and it’s painfully slow?
Raycast fixes that. It's lightning fast, totally extendable, and lets me do stuff like:
Run scripts
Search docs
Control GitHub PRs
Even trigger workflows
All with a couple keystrokes.
Productivity level: 🔥 Programmer with a keyboard superpower
🤖 Tabby (formerly Codeium) – AI Autocomplete, No Cloud Required This is your AI pair programmer, but local. It runs on your machine, respects your privacy, and still feels scary accurate.
You just code—and Tabby whispers the next line before you think it.
Hot take: AI autocomplete is now baseline. Tabby just does it smarter.
🖥️ Warp – The Terminal You Didn’t Know You Needed The first time I opened Warp, I was like: “Wait… why hasn’t the terminal looked like this all along?”
Input blocks
Modern UI
Real-time suggestions
Collaboration built-in
Feels like: VS Code had a baby with your terminal—and it grew up fast.
🧑🤝🧑 Zed – Pair Programming, but Actually Fun Zed is a super snappy code editor with real-time multiplayer built in. Think Google Docs, but for code—with speed that makes VS Code look sleepy.
Perfect for: Pair programming, mentoring, or just working with your future self.
🔍 LogRocket – Debug Like You’re Watching a Replay Have you ever tried to debug a user issue with just an error log?
LogRocket is like, “Here, watch the actual replay of what happened.”
See user sessions
Capture console logs
Rewind the moment everything broke
Result: 10x fewer “Can you send a screenshot?” messages.
⚡ Fig – Terminal Autocomplete That Feels Like Magic Fig turns your CLI into a cheat code machine.
Flags? Autocompleted.
Scripts? Suggested.
Git commands? Faster than your memory.
Vibe: It’s like your terminal suddenly got a brain (and a heart).
🧯 Sentry – Know When Things Break Before Twitter Does Sentry tells you when your app throws an error—in real time.
It works across languages, frameworks, and stacks. You get:
Stack traces
Performance metrics
Release tracking
Translation: Fewer angry DMs from product managers.
🔒 Tailscale – Private Networking Without the VPN Pain Need to connect your laptop, server, and Raspberry Pi like they’re in the same room?
Tailscale makes that happen with zero setup hell.
No port forwarding. No crying into your terminal.
Just install → login → done.
🎉 TL;DR: Stop Fighting Your Tools Being a dev today means juggling:
Meetings
Bugs
Context switches
200 Chrome tabs
These tools helped me claw back hours every week—and made coding feel fun again.
0 notes
Text
Top Picks for the Best Courses for Front-End Development in 2025

In the age of digital-first experiences, the way users interact with apps and websites has never been more important. Companies, from tech startups to global enterprises, are constantly on the lookout for skilled front-end developers who can turn creative designs into functional, engaging interfaces.
If you're planning to enter tech or transition within it, enrolling in one of the best courses for front end development can set the foundation for a rewarding and future-proof career.
Let’s break down what front-end development entails, what skills you'll need, and which front end developer best courses can get you there in 2025.
What Does a Front-End Developer Do?
Front-end developers are the bridge between design and technology. They take static mockups and breathe life into them using code, ensuring websites and apps are not just visually appealing but also interactive, accessible, and responsive.
Key responsibilities include:
Converting UI/UX designs into code
Ensuring responsiveness across devices
Improving page load speed and user interactions
Debugging and maintaining front-end functionality
Collaborating with back-end teams and designers
To excel in this role, you’ll need to master a suite of tools and technologies.
Skills You’ll Learn in a Front-End Development Course
A good front end developer best course will teach you:
HTML, CSS, and JavaScript – The core building blocks
Responsive Design – Using media queries and frameworks like Bootstrap
JavaScript Frameworks – Such as React, Angular, or Vue.js
Version Control – Using Git and GitHub
APIs – Integrating with RESTful services
Testing Tools – Like Jest or Cypress
Dev Tools – Chrome DevTools, Postman, VS Code
More advanced programs also introduce deployment techniques, performance optimization, and accessibility best practices.
Why Take a Front-End Development Course?
With self-learning resources widely available, many wonder: why invest in a course?
Here’s why a structured program still matters:
Learning Path: Courses guide you from basics to advanced topics in a logical order
Project Work: Build real-world applications for your portfolio
Mentorship: Resolve doubts and get code reviews from experienced developers
Career Services: Resume help, mock interviews, and job connections
Consistency: Learn without getting overwhelmed by scattered resources
Top Platforms Offering the Best Courses for Front End Development
Here’s a curated list of the most career-oriented and practical learning options available in 2025.
1. NIIT Digital – Full Stack Product Engineering Program (Front-End Focus)
While designed as a full stack course, NIIT Digital’s program provides a robust front-end foundation ideal for beginners and upskillers alike.
Why it stands out:
Covers HTML, CSS, JavaScript, React, Git
Includes live mentor-led sessions and hands-on projects
Offers access to capstone projects and job support
Flexible learning schedules with a job-readiness focus
Aligned with the latest hiring trends in India
For those serious about entering the job market quickly, NIIT Digital provides one of the best courses for front end development with practical skills and support systems in place.
2. freeCodeCamp – Front End Development Certification
A great option for self-learners, this course covers:
Responsive web design
JavaScript algorithms
Front-end libraries like React
Projects to earn certification
3. Coursera – Meta Front-End Developer Certificate
Offered in partnership with Meta (Facebook), this program teaches:
HTML, CSS, JavaScript
React and UX principles
Front-end testing and final project
Industry-grade training with flexible timelines
4. Udemy – The Complete Front-End Web Developer Bootcamp
Popular for affordability, this includes:
30+ hours of on-demand video
Real-world exercises
Lifetime access
While less structured, it's a good option for budget-conscious learners looking to experiment.
How to Choose the Right Course for You
Here’s a quick checklist to help you select the front end developer best course for your goals:
Platforms like NIIT Digital score high across all these criteria, especially for learners who value guided instruction and career support.
Career Outcomes After Front-End Courses
Once you’ve completed a front-end course, you’ll be ready to apply for roles like:
Front-End Developer
UI Developer
Web Developer
React Developer
Junior Software Engineer
Final Thoughts
Becoming a front-end developer in 2025 is not just about learning to code—it’s about learning to create digital experiences. A high-quality program gives you the edge to stand out in a crowded job market.
Whether you’re just starting out or reskilling mid-career, investing in one of the best courses for front end development can accelerate your growth and job readiness.
Platforms like NIIT Digital bring together structure, community, and mentorship—all essential ingredients for success in tech. Choose a course that doesn’t just teach you to build web pages—but to build a career.
0 notes
Text
Full Stack Training

How Can Full Stacking Training Boost Your Skills?
In today’s fast-paced digital world, full stack training is more essential than ever. Businesses seek skilled developers who can handle both front-end and back-end development tasks. Whether you're a beginner or someone looking to upgrade your skill set, full stack training offers the knowledge needed to thrive in tech.
What Is Full Stack Training?
Full stack training teaches you how to build and manage both the client-side (front-end) and server-side (back-end) of web applications. This training covers essential languages, frameworks, and tools used to develop complete, scalable web applications.
Why Choose Full Stack Training?
There are several reasons why full stack development is a preferred path:
High Demand: Full stack developers are in high demand across industries.
Versatility: You can handle projects from start to finish.
Lucrative Salary: Full stack professionals earn competitive salaries globally.
Flexibility: Work as a freelancer, startup founder, or part of a corporate team.
By enrolling in full stack training, you're investing in a skill set that can lead to countless career opportunities.
Key Components of Full Stack Training
To become a successful full stack developer, you must understand both front-end and back-end technologies. Let’s break it down.
1. Front-End Development
The front-end is what users see and interact with on a website.
HTML: The foundation of any web page.
CSS: Used to style HTML content.
JavaScript: Adds interactivity and functionality to web pages.
Frameworks: React, Angular, or Vue.js for building dynamic user interfaces.
2. Back-End Development
The back-end manages databases, servers, and application logic.
Programming Languages: Node.js, Python, PHP, Java, or Ruby.
Databases: SQL (MySQL, PostgreSQL) and NoSQL (MongoDB).
APIs: Create and manage RESTful APIs for data exchange.
Server Management: Handling server setup, security, and performance optimization.
3. Version Control Systems
Git & GitHub: Essential for collaboration and code management.
4. Deployment and Hosting
Learn how to deploy apps using:
Heroku
Netlify
AWS or Azure
By mastering all these elements through full stack training, you'll be ready to tackle any web development project.
What to Look for in a Full Stack Training Program
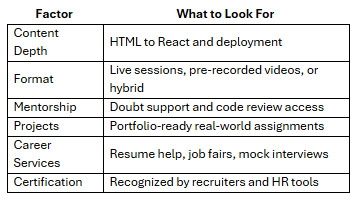
Not all full stack training courses are created equal. Here’s what to look for:
1. Comprehensive Curriculum
Choose a program that covers both front-end and back-end development, version control, deployment, and best coding practices.
2. Hands-On Projects
Practice is key. Look for training with real-world projects and assignments.
3. Expert Instructors
Experienced mentors can make complex topics easy to understand.
4. Certification
A recognized certificate can boost your credibility with employers.
Benefits of Full Stack Training
Still wondering why you should enroll in a full stack course? Here are some unbeatable benefits:
1. Accelerated Learning Path
Full stack training condenses years of knowledge into a structured, easy-to-follow format.
2. Career Flexibility
You can work in various roles such as:
Web Developer
Software Engineer
DevOps Specialist
Technical Project Manager
3. Job-Ready Skills
You’ll be prepared for real-world jobs with a strong portfolio of projects.
4. Freelance and Remote Work Opportunities
Mastering full stack development gives you the freedom to work from anywhere.
Full Stack Developer Salary Expectations
After completing full stack training, your earning potential significantly increases. In the US, entry-level full stack developers earn between $60,000 and $90,000 per year. Experienced professionals can earn well over $120,000 annually.
Freelancers often charge between $30 to $100 per hour, depending on skill and experience.
Online vs Offline Full Stack Training
Online Training
Flexible schedule
Affordable
Global access to top instructors
Offline Training
In-person interaction
Structured environment
Local networking opportunities
Choose the option that best fits your learning style and lifestyle.
Tools You’ll Learn in Full Stack Training
Here are some essential tools commonly taught in full stack programs:
VS Code (Code Editor)
Postman (API Testing)
Docker (Containerization)
Jira (Project Management)
Webpack (Module Bundler)
Conclusion: Start Your Full Stack Journey Today
Full stack training equips you with the tools, technologies, and confidence to become a complete web developer. Whether you're just starting or want to level up your career, the right training program can open doors to numerous job roles and freelance opportunities.
By investing in your education through full stack training, you gain job security, career growth, and the flexibility to shape your professional path.
1 note
·
View note
Text
Why Java Is Still the King in 2025—and How Cyberinfomines Makes You Job-Ready with It

1. Java in 2025: Still Relevant, Still Dominating Despite the rise of new languages like Python, Go, and Rust, Java is far from dead—it’s actually thriving.
In 2025, Java powers:
40%+ of enterprise backend systems
90% of Android apps
Global banking & fintech infrastructures
E-commerce giants like Amazon, Flipkart & Alibaba
Microservices and cloud-native platforms using Spring Boot
Java is reliable, scalable, and highly in demand. But just learning syntax won’t get you hired. You need hands-on experience, framework expertise, and the ability to solve real-world problems.
That’s exactly what Cyberinfomines delivers.
2. The Problem: Why Most Java Learners Don’t Get Jobs Many students learn Java but still fail to land jobs. Why?
❌ They focus only on theory ❌ They memorize code, don’t build projects ❌ No real understanding of frameworks like Spring Boot ❌ Can’t explain their code in interviews ❌ Lack of problem-solving or debugging skills
That’s where Cyberinfomines’ Training changes the game—we teach Java like it’s used in real companies.
3. How Cyberinfomines Bridges the Gap At Cyberinfomines, we:
✅ Teach Core + Advanced Java with daily coding tasks ✅ Use real-world problem statements (not academic ones) ✅ Give exposure to tools like IntelliJ, Git, Maven ✅ Build full-stack projects using Spring Boot + MySQL ✅ Run mock interviews and HR prep ✅ Help you create a Java portfolio for recruiters
And yes—placement support is part of the package.
4. Java Course Curriculum: Built for the Real World Core Java
Data types, loops, arrays, OOP principles
Exception handling, packages, constructors
File handling & multithreading
Classes vs Interfaces
String manipulation & memory management
Advanced Java
JDBC (Java Database Connectivity)
Servlet Lifecycle
JSP (Java Server Pages)
HTTP Requests & Responses
MVC Design Pattern
Spring Framework + Spring Boot
Dependency Injection & Beans
Spring Data JPA
RESTful API Creation
Security & authentication
Connecting with front-end apps (React/Angular)
Tools Covered
IntelliJ IDEA
Eclipse
Postman
Git & GitHub
MySQL & Hibernate
Live Projects
Library Management System
Employee Leave Tracker
E-Commerce REST API
Blog App with full CRUD
Interview Preparation
DSA using Java
Java-based coding problems
100+ mock interview questions
HR round preparation
Resume writing workshops
5. Who Should Learn Java in 2025? You should choose Java if you are:
A fresher who wants a strong foundation
A non-tech graduate looking to switch to IT
A teacher/trainer who wants to upskill
A professional aiming for backend roles
Someone interested in Android development
A student looking to crack placement drives or government IT jobs
6. Real Success Stories from Our Java Learners
Amit (BSc Graduate) – Now working as a Java backend developer at an IT firm in Pune. Built his confidence with live projects and mock tests.
Pooja (Mechanical Engineer) – Switched from core to IT after completing Cyberinfomines’ Java program. Cracked TCS with flying colors.
Rahul (Dropout) – Didn’t finish college but now works remotely as a freelance Spring Boot developer for a US-based startup.
Every story started with zero coding experience. They ended with real jobs.
7. Top Java Careers in 2025 & Salary Trends In-demand roles include:
Java Backend Developer
Full Stack Developer (Java + React)
Android Developer (Java)
Spring Boot Microservices Architect
QA Automation with Java + Selenium
API Developer (Spring + REST)
Starting salary: ₹4.5 – ₹8 LPA (for freshers with strong skills) Mid-level: ₹10 – ₹20 LPA Freelancers: ₹1,000 – ₹2,500/hour
Java is stable, scalable, and pays well.
8. Certifications, Tools & Practical Add-Ons After training, you’ll earn:
Cyberinfomines Java Developer Certificate
Portfolio with at least 3 GitHub-hosted projects
Proficiency in IntelliJ, Maven, Git, MySQL
Resume aligned with Java job descriptions
Interview recordings and performance feedback
9. What Makes Cyberinfomines Java Training Different
✔ Human mentorship, not just videos ✔ Doubt sessions + code reviews ✔ Classes in Hindi & English ✔ Live assignments + evaluation ✔ Placement-oriented approach ✔ No-nonsense teaching. Only what’s needed for jobs.
We focus on you becoming employable, not just completing a course.
10. Final Words: Code Your Future with Confidence Java in 2025 isn’t just relevant—it’s crucial.
And with Cyberinfomines, you don’t just learn Java.
You learn how to:
Solve real problems
Write clean, scalable code
Work like a developer
Get hired faster
Whether you’re starting fresh or switching paths, our Java course gives you the skills and confidence you need to build a future-proof career.
📞 Have questions? Want to get started?
Contact us today: 📧 [email protected] 📞 +91-8587000904-905, 9643424141 🌐 Visit: www.cyberinfomines.com
0 notes