#PuTTY on Linux
Explore tagged Tumblr posts
Visit Tumblr Blog
Explore Tumblr blogs with no restrictions, modern design and the best experience.
Last Seen Tumblr Blogs


Fun Fact
Post activity is at the highest at 4:00 pm EDT; notes peak at 10:00 pm EDT.
Text
Convert PuTTY PPK SSH keys to OpenSSH format for seamless use on Ubuntu systems. This step-by-step guide ensures your existing SSH keys work perfectly across different operating systems.
#Convert PPK Key for SSH#cross-platform SSH#key conversion#Linux security#OpenSSH#PPK format#PuTTY#SSH authentication#SSH client#SSH keys#Ubuntu
2 notes
·
View notes
Text
2 notes
·
View notes
Text
My dad has an old hard drive. Two Firewire ports, an eSATA port and a “Hi-Speed 2.0 USB” port. He wants to get all the data transferred to a drive with more modern connections.
I have a computer with SATA ports that I have no emotional attachment to I’m letting them borrow. They need an adapter that can’t get there before I leave.
They are quite low-tech, so I’ll need a constant visual to make sure they’re doing things correctly. They have no headset and the computer has no internal mic, so remote connection is the best option.
It cannot connect to WiFi remotely, so it needs a direct connection to their modem.
I gave up on Windows years ago, and it would be too much of a hassle to get set up on there anyway, so it has Linux Mint instead. My mom claims she needs a "backup computer," so this looks like the best way to introduce her to Linux.
So, our path of least resistance is currently, using an eSATA-to-SATA cable, connected to a workstation with its top popped off, itself sitting under the modem in their kitchen, with Linux Mint, that they’ll connect to via PuTTY while they have a video call.
When you’re the only comp sci grad out to second cousins, expect to get called upon for this sort of thing.
#Hard drive#USB 2.0#eSATA#SATA#Windows#Linux#Linux Mint#path of least resistance#PuTTY#computer science#comp sci
0 notes
Text
I juuuust turned in my stupid 3rd and final assignment (before the exam </3) literally less than an hour before it was due... ALL BECAUSE!!! We had to do it thru the EC2 Linux console & do like, a bunch of stuff... obviously... except the STUPID thing hated me so bad it kept telling me I "didn't have permission" to do X Y Z thing and I sent screenshots to my classmates like. Is anyone else seeing this... & they were like Wtf no???, like none of them had gotten any similar errors... not even while manipulating files or anything, just like. CONNECTING to that DAMN INSTANCE.... so I had to re-do basically the first 70% of the assignment twice... and then I kinda gave up on figuring out how to get in thru the website so I installed putty and tried doing it thru there, but in the end I did get into the online console! Don't remember how... still, had to do the whole thing again. AND THEN!!! I wanted to do cd .. , but I did cd -- instead, which is APPARENTLY an extremely fucked up & evil command because suddenly the directories + files that were the first half of the assignment? Gone. POOF... idek what cd -- does like, concretely, but I don't feel like googling it rn. I'm just gonna add cd -- to the endless list of entities I have strangely intense beef with. I did turn it in tho yaaayyy... except I forgot to screenshot a part of it before closing it, so I had to write it on my fucking. Notepad... like some sort of animal.
#diary#eugh.... I hope it turns out OK lol</3#I'm like 90% sure I cannot possibly fail this class atp but... still. I couldn't turn in the little report thing worth +0.3 points#and now this... Scared my brain got scrambled somewhere and I misunderstood what I had to do or smth..... SOBBB
5 notes
·
View notes
Text
Simon Tatham's puzzles are based on an open-source cross-platform backend for which implementing the frontend is relatively trivial which means it has been ported to, among other things
The Web
Windows
Mac
Linux
BSD
iOS
Android
PalmPilot
Nokia Symbian
Classic iPods
Nintendo DS
he's also the guy who wrote PuTTY
it should be illegal to put ads in apps or sites for solitaire or picross or sudoku tbh. playing classic puzzle games uninterrupted needs to be a HUMAN RIGHT
60K notes
·
View notes
Text
免费云服务器:全面指南与最佳选择

什么是免费云服务器?
免费云服务器是指云服务提供商为用户提供的无需付费即可使用的虚拟服务器资源。这类服务器通常具备基础的计算、存储和网络功能,适合个人开发者、学生或初创企业进行测试、学习和小型项目部署。
与付费云服务器相比,免费云服务器在性能、存储和运行时间上可能有所限制,但对于入门级用户来说,仍然是一个极具吸引力的选择。
免费云服务器的优势
1. 零成本体验云计算
使用免费云服务器,用户无需支付任何费用即可体验云计算的基本功能,包括虚拟机的创建、网络配置和应用部署。
2. 适合学习和测试
对于开发者、学生或IT爱好者来说,免费云服务器是学习Linux、Web开发、数据库管理等技术的理想平台。
3. 短期项目和小型应用部署
如果只是运行一个小型网站、API服务或测试环境,免费云服务器完全能够满足需求,避免不必要的开支。
4. 多家云厂商提供免费方案
目前,许多知名云服务商(如AWS、Google Cloud、阿里云、腾讯云等)都提供免费云服务器试用或长期免费套餐,用户可以根据需求选择。
主流免费云服务器推荐
1. Amazon AWS Free Tier
AWS提供12个月的免费云服务器(EC2)试用,包括750小时/月的t2.micro实例(1核1GB内存),适合初学者入门。
2. Google Cloud Free Tier
Google Cloud提供$300的免费额度,可用于创建免费云服务器(Compute Engine),有效期为90天,适合短期项目测试。
3. 阿里云免费套餐
阿里云为新用户提供12个月的免费云服务器(ECS),配置为1核1GB内存,适合国内用户使用。
4. 腾讯云免费体验
腾讯云提供1个月的免费云服务器(CVM)试用,配置为1核1GB内存,适合短期开发需求。
5. Oracle Cloud Free Tier
Oracle Cloud提供永久免费的免费云服务器(2个AMD实例,1核1GB内存),适合长期使用的开发者。
如何申请免费云服务器?
1. 注册云服务商账号
访问AWS、Google Cloud、阿里云等官网,使用邮箱或手机号注册账号。
2. 完成身份验证
部分平台(如AWS、Google Cloud)需要绑定信用卡(不会扣费),而阿里云、腾讯云可能需要实名认证。
3. 选择免费套餐
在控制台中找到免费云服务器相关选项,如AWS的“Free Tier”或阿里云的“免费试用”。
4. 创建并配置云服务器
按照指引选择操作系统(如Ubuntu、CentOS)、配置CPU和内存,并设置SSH密钥或密码。
5. 连接和管理服务器
使用SSH工具(如PuTTY、Termius)登录免费云服务器,开始部署应用或进行测试。
免费云服务器的限制与注意事项
1. 资源有限
大多数免费云服务器仅提供1核CPU和1GB内存,不适合高负载应用。
2. 时间限制
部分服务(如AWS、Google Cloud)仅提供12个月或更短的免费期,到期后需付费或迁移数据。
3. 流量和存储限制
免费套餐通常限制每月流量(如AWS免费套餐仅15GB出站流量),超出后可能产生费用。
4. 可能需绑定信用卡
部分平台(如AWS、Google Cloud)要求绑定信用卡,但不会自动扣费,除非超出免费额度。
5. 适合非商业用途
免费云服务器主要用于学习和测试,不建议用于商业项目,以免因资源不足影响服务稳定性。
免费云服务器的常见用途
1. 搭建个人博客或网站
使用WordPress、Hexo等工具在免费云服务器上部署个人博客。
2. 运行测试环境
开发者可以用它来测试代码、数据库(MySQL、MongoDB)或微服务架构。
3. 学习Linux和DevOps
通过SSH管理免费云服务器,学习Shell脚本、Docker、Kubernetes等技术。
4. 搭建VPN或代理
部分用户利用免费云服务器搭建Shadowsocks或WireGuard,实现科学上网(需遵守当地法律)。
5. 运行小型API服务
适合部署RESTful API、Webhook或自动化脚本,如Telegram Bot、爬虫等。
免费云服务器 vs. 付费云服务器
对比项免费云服务器付费云服务器���本完全免费按需付费性能低配(1核1GB)高配(可扩展)稳定性可能受限高可用适用场景学习、测试企业级应用技术支持有限专业客服
总结
免费云服务器是入门云计算、测试项目或学习技术的绝佳选择。虽然它们在性能和时长上有限制,但对于个人用户和小型项目来说已经足够。AWS、Google Cloud、阿里云、腾讯云等平台都提供了不错的免费方案,用户可以根据需求选择最适合的服务。
如果你是开发者、学生或技术爱好者,不妨尝试申请一个免费云服务器,开始你的云计算之旅!
1 note
·
View note
Text
Что такое виртуальный сервер и как им пользоваться, ProHoster
В современном мире всё больше сервисов, сайтов и приложений работают не на «железных» серверах, а на виртуальных серверах. Что это такое, зачем он нужен и как им пользоваться? Разберёмся!
Что такое виртуальный сервер
Виртуальный сервер (VPS — Virtual Private Server) — это часть физического сервера, которая работает как самостоятельный компьютер. Он имеет свою операционную систему, настройки, доступ по сети и может выполнять любые задачи, как обычный сервер.
Проще говоря, один большой мощный сервер делят на несколько «виртуальных», и каждый работает независимо от других.
Для чего используется виртуальный сервер
Виртуальный сервер подходит для:
Хостинга сайтов и интернет-магазинов
Развёртывания ботов, телеграм-каналов, чатов
VPN-серверов
Игр (например, Minecraft-серверов)
Тестирования программ, сервисов и баз данных
Как пользоваться виртуальным сервером
Выбор провайдера VPS Сначала нужно выбрать компанию, которая предоставляет VPS. Популярные варианты:
ProHoster
Hetzner
Timeweb
Selectel
OVH
Выбор конфигурации При заказе VPS нужно выбрать:
Объём оперативной памяти (RAM)
Количество процессоров (CPU)
Объём диска (SSD/HDD)
Операционную систему (чаще всего — Linux: Ubuntu, Debian, CentOS)
Подключение к серверу После покупки вы получите:
IP-адрес сервера
Имя пользователя (обычно root)
Пароль или SSH-ключПодключиться можно через терминал (если у ва�� Linux/macOS) или через программу PuTTY (если Windows). Пример подключения в Linux/macOS: ssh root@IP-адрес
Установка ПО и настройка После подключения вы можете устанавливать любое программное обеспечение:
Веб-сервер: Apache, Nginx
Языки программирования: Python, PHP, Node.js
Базы данных: MySQL, PostgreSQL
Панели управления: HestiaCP, ISPConfig, Plesk (если нужна графика)
Безопасность Не забудьте:
Сменить парол�� root
Настроить файрволл (например, ufw)
Отключить root-доступ по SSH (оставить доступ только по ключу)
Преимущества виртуального сервера
Гибкость — можно устанавливать всё, что нужно
Производительность — ресурсы не делятся с другими
Надёжность — работает круглосуточно, без зависимостей от вашего компьютера
Обучение — отличный способ научиться администрированию Linux
0 notes
Text
The Definitive Guide to Linux SSH Command Line Tools
An SSH terminal session using Putty client The Definitive Guide to Linux SSH Command Line Tools Secure Shell (SSH) is a powerful protocol used for secure remote administration of Linux and Unix-like systems. This guide covers essential SSH command-line tools, their use cases, and advanced features to help you manage remote systems efficiently. Basic SSH Commands Connecting to a Remote…

View On WordPress
0 notes
Text
Been an interesting day from a game dev standpoint.
Last night I abruptly realized that there’s a really simple way to accommodate the context switching trick my game will need using gui tools. So I don’t really need text mode after all.
Might do it that way anyway, just to make things interesting. I mean, with text mode, you get automatic Windows, DOS, and Linux support, plus the game can be run over the internet using tools like PuTTY. And since it runs in DOS, you get DosBox support, so anyone can run it. (Not to mention that AI can’t do anything that low resolution)
More importantly, I’ve actually got something of a plot now. Originally it was just going to be a quest-driven game, but this puts a new spin on things.
1 note
·
View note
Text
AWS Üzerinde Ücretsiz VPN Kurulumu: adım adım kılavuz

AWS (Amazon Web Services), güçlü ve esnek bulut altyapısıyla, kendi VPN sunucunuzü kurmak için harika bir platform sunar. Özellikle, t2.micro instance tipiyle aylık 750 saat ücretsiz kullanım hakkı sunması, bu işlemi daha da cazip hale getirir.
Gerekliler: - Bir AWS hesabı - Bir SSH istemcisi (Putty gibi) - Bir OpenVPN istemci uygulaması (Windows, macOS veya Linux için) Adım Adım Kılavuz: AWS Konsoluna Giriş Yapın: - AWS hesabınıza giriş yapın ve EC2 (Elastic Compute Cloud) servisini seçin. Yeni Instance Oluştur: - "Launch Instance" butonuna tıklayın. - AMI (Amazon Machine Image): Arama çubuğuna "openvpn" yazın ve uygun bir AMI seçin (örneğin, AWS Marketplace'teki OpenVPN Appliance). - Instance Type: t2.micro seçin (ücretsiz kullanım hakkı için). - Key Pair: Yeni bir key pair oluşturun veya mevcut birini seçin. Bu anahtar, instance'ınıza SSH ile bağlanmak için kullanılacaktır. - Security Group: Tüm trafiğe izin veren bir güvenlik grubu oluşturun veya mevcut birini seçin (daha sonra daha güvenli bir yapılandırma yapabilirsiniz). - Instance Launch: Instance'ı başlatın. SSH ile Bağlanın: - Oluşturulan instance'ın Public DNS veya Public IP adresini not edin. - SSH istemcinizi kullanarak instance'a bağlanın. - Komut: ssh -i your-key-pair.pem ec2-user@your-public-ip (your-key-pair.pem yerine kendi anahtar dosyanızın adını ve your-public-ip yerine instance'ın public IP'sini yazın.) OpenVPN Yapılandırması: - Yapılandırma Dosyasını İndirin: Genellikle /etc/openvpn dizini altında bulunur. - Yapılandırma Dosyasını Düzenleyin: İhtiyaçlarınıza göre (server, port, protokoller vb.) düzenleyebilirsiniz. - İstemciye Kurulum: İndirilen yapılandırma dosyasını OpenVPN istemci uygulamanıza ekleyin ve bağlantı kurun. Ek Bilgiler ve İpuçları: - Güvenlik: - Security Group: Sadece gerekli portları (OpenVPN için genellikle 1194 UDP) açın. - Key Pair: Anahtarınızı güvenli bir yerde saklayın. - Şifreleme: OpenVPN'in sunduğu güçlü şifreleme yöntemlerini kullanın. - Performans: - Instance Tipi: İhtiyaçlarınıza göre daha güçlü bir instance tipi seçebilirsiniz. - Ücretsiz Kullanım: - Aylık 750 saat ücretsiz kullanım hakkından sonra ücretlendirme başlayacaktır. - Diğer VPN Çözümleri: - Softether: Daha fazla özelleştirme imkanı sunan bir başka VPN çözümüdür. - WireGuard: Daha yeni ve hızlı bir VPN protokolüdür. Video Kılavuzları: - YouTube'da "AWS üzerinde ücretsiz VPN kurulumu" gibi anahtar kelimelerle birçok detaylı video bulabilirsiniz. Önemli Not: Bu kılavuz genel bir çerçeve sunmaktadır. Tam olarak sizin ihtiyaçlarınıza uygun bir kurulum için AWS belgesini ve ilgili kaynakları detaylı bir şekilde incelemeniz önerilir. Bu kılavuzu kullanarak kendi VPN sunucunuzu kolayca kurabilir ve internet bağlantınızı güvence altına alabilirsiniz. Başka sorularınız olursa çekinmeden sorabilirsiniz. Ek Not: Bu kılavuzda verilen bilgiler genel bilgilendirme amaçlıdır ve herhangi bir garanti taşımaz. Sisteminizde yapacağınız değişikliklerden kendiniz sorumlusunuz. Read the full article
#AWSgüvenlikgrupları#AWSileVPNmaliyeti#AWSücretsiztier#bulutVPNavantajları#evdençalışmakiçinVPN#OpenVPNistemciuygulaması#OpenVPNkonfigürasyon#sibergüvenlikönlemleri#SSHbağlantısı#t2.microinstance#uzaktançalışmaçözümleri#VPNileinternetbağlantısınıgüvencealtınaalma#VPNkurulumuadımadım#VPNprotokolleri
0 notes
Text
Hướng Dẫn Cài Đặt Và Sử Dụng VNG Cloud Server Cho Người Mới Bắt Đầu
Trong thời đại số hóa hiện nay, việc sử dụng dịch vụ đám mây đã trở thành một nhu c���u thiết yếu đối với các doanh nghiệp và cá nhân. VNG Cloud Server, một trong những giải pháp lưu trữ và quản lý dữ liệu hàng đầu tại Việt Nam, cung cấp các dịch vụ đám mây an toàn và hiệu quả. Bài viết này sẽ hướng dẫn bạn cách cài đặt và sử dụng VNG Cloud Server, từ những bước cơ bản cho người mới bắt đầu đến các thao tác nâng cao để tối ưu hóa trải nghiệm của bạn.
Giới thiệu về VNG Cloud Server
VNG Cloud Server là dịch vụ hạ tầng đám mây (IaaS - Infrastructure as a Service) được cung cấp bởi VNG Corporation, một trong những công ty công nghệ hàng đầu Việt Nam. Dịch vụ này cho phép người dùng triển khai và quản lý máy chủ ảo, lưu trữ dữ liệu và chạy các ứng dụng trên nền tảng đám mây một cách dễ dàng và an toàn.
Các bước cài đặt VNG Cloud Server
Để bắt đầu sử dụng VNG Cloud Server, bạn cần thực hiện các bước cài đặt sau:
Bước 1: Đăng ký tài khoản trên VNG Cloud
Truy cập trang web của VNG Cloud: Đầu tiên, bạn cần truy cập vào trang chủ của VNG Cloud tại cloud.vng.com.vn.
Đăng ký tài khoản: Nhấp vào nút “Đăng ký” ở góc phải trên cùng của trang và điền đầy đủ thông tin cá nhân như tên, địa chỉ email, số điện thoại, và mật khẩu. Sau khi hoàn tất, nhấn “Đăng ký” để hoàn thành.
Xác nhận tài khoản: Sau khi đăng ký, VNG Cloud sẽ gửi một email xác nhận tới địa chỉ email của bạn. Mở email và nhấp vào liên kết xác nhận để kích hoạt tài khoản của bạn.
Bước 2: Truy cập giao diện quản lý VNG Cloud Server
Đăng nhập tài khoản: Sử dụng email và mật khẩu đã đăng ký để đăng nhập vào tài khoản của bạn trên trang chủ VNG Cloud.
Truy cập giao diện quản lý: Sau khi đăng nhập, bạn sẽ được đưa đến giao diện quản lý chính của VNG Cloud Server. Tại đây, bạn có thể xem và quản lý tất cả các dịch vụ và tài nguyên đám mây mà bạn đang sử dụng.
Bước 3: Tạo máy chủ ảo (Virtual Server)
Chọn “Create Server”: Trên giao diện quản lý, chọn mục “Servers” và nhấp vào nút “Create Server” để bắt đầu quá trình tạo máy chủ ảo.
Cấu hình máy chủ ảo: Điền thông tin cần thiết như tên máy chủ, vùng dữ liệu (data center) muốn triển khai, hệ điều hành (Linux, Windows, etc.), và các cấu hình phần cứng (CPU, RAM, dung lượng ổ cứng).
Thiết lập bảo mật: Chọn thiết lập bảo mật phù hợp như mật khẩu đăng nhập, khóa SSH (Secure Shell) và các chính sách bảo mật khác.
Hoàn tất tạo máy chủ: Sau khi hoàn tất cấu hình, nhấn nút “Create” để khởi tạo máy chủ. Quá trình này có thể mất vài phút.
Bước 4: Kết nối đến máy chủ ảo
Sử dụng SSH để kết nối: Nếu bạn sử dụng hệ điều hành Linux hoặc MacOS, mở Terminal và nhập lệnh SSH cùng địa chỉ IP của máy chủ để kết nối. Nếu sử dụng Windows, bạn có thể sử dụng phần mềm như PuTTY để kết nối đến máy chủ.
Đăng nhập vào máy chủ: Sử dụng thông tin đăng nhập đã cấu hình ở bước trước để truy cập vào máy chủ. Nếu bạn sử dụng khóa SSH, đảm bảo rằng khóa công khai đã được thêm vào máy chủ và bạn có khóa cá nhân để xác thực.
Hướng dẫn sử dụng VNG Cloud Server
Sau khi cài đặt và kết nối thành công, bạn có thể bắt đầu sử dụng VNG Cloud Server cho nhiều mục đích khác nhau. Dưới đây là một số hướng dẫn cơ bản:
a. Quản lý máy chủ
Khởi động lại hoặc tắt máy chủ: Trên giao diện quản lý, bạn có thể dễ dàng khởi động lại hoặc tắt máy chủ thông qua các tùy chọn có sẵn.
Theo dõi hiệu suất: VNG Cloud cung cấp công cụ giám sát hiệu suất chi tiết, cho phép bạn theo dõi CPU, RAM, lưu lượng mạng và các thông số khác để đảm bảo máy chủ hoạt động ổn định.
b. Quản lý lưu trữ dữ liệu
Tạo và quản lý ổ đĩa: Bạn có thể tạo thêm ổ đĩa để lưu trữ dữ liệu, sao lưu hoặc phân vùng dữ liệu một cách hiệu quả.
Sao lưu và khôi phục dữ liệu: Sử dụng tính năng sao lưu của VNG Cloud để đảm bảo dữ liệu của bạn luôn an toàn. Bạn cũng có thể thiết lập lịch sao lưu tự động để đảm bảo không mất dữ liệu.
c. Cài đặt ứng dụng và dịch vụ
Cài đặt ứng dụng: Bạn có thể dễ dàng cài đặt các ứng dụng và dịch vụ phổ biến như Apache, Nginx, MySQL, và PHP trực tiếp từ dòng lệnh hoặc sử dụng các công cụ quản lý ứng dụng.
Triển khai website hoặc hệ thống: Với VNG Cloud Server, bạn có thể triển khai website, blog, hoặc các hệ thống quản lý nội dung (CMS) như WordPress, Joomla một cách nhanh chóng và dễ dàng.
d. Bảo mật và quản lý quyền truy cập
Thiết lập tường lửa (Firewall): Bảo vệ máy chủ của bạn bằng cách cấu hình tường lửa để chặn các kết nối không mong muốn và chỉ cho phép những kết nối từ địa chỉ IP tin cậy.
Quản lý người dùng và quyền truy cập: Tạo và quản lý người dùng với các quyền truy cập khác nhau để đảm bảo an toàn cho hệ thống của bạn.
Lời khuyên để tối ưu hóa sử dụng VNG Cloud Server
Luôn cập nhật phần mềm: Đảm bảo rằng tất cả phần mềm và hệ điều hành trên máy chủ của bạn luôn được cập nhật để tránh các lỗ hổng bảo mật.
Sử dụng bảo mật nhiều lớp: Sử dụng các biện pháp bảo mật nhiều lớp như xác thực hai yếu tố (2FA), quản lý truy cập mạng, và giám sát hoạt động để bảo vệ máy chủ của bạn.
Theo dõi và tối ưu hóa hiệu suất: Sử dụng các công cụ giám sát của VNG Cloud để theo dõi hiệu suất và thực hiện các điều chỉnh cần thiết để tối ưu hóa hoạt động.
Kết luận
VNG Cloud Server là một giải pháp đám mây linh hoạt, mạnh mẽ và an toàn dành cho cả doanh nghiệp và cá nhân. Với hướng dẫn cài đặt và sử dụng cơ bản này, hy vọng bạn đã có thể tự tin hơn trong việc triển khai và quản lý hạ tầng CNTT của mình. Hãy bắt đầu sử dụng VNG Cloud Server ngay hôm nay để trải nghiệm sự khác biệt và tối ưu hóa hoạt động của bạn!
Tìm hiểu thêm: https://vndata.vn/cloud-server/
0 notes
Text
Mixtile Edge 2 Kit– AI based bee detection and tracking
Here I describe usage of Mixtile Edge 2 Kit in agriculture, bee detection, which can be essential for health and survival of bees.

Story

Mixtile is professional IoT hardware solution provider specialized in Linux and Android-based embedded systems.Mixtile Edge 2 Kit is high-performance ARM single board computer. It comes in variants of 2GB of LPDDR4 DRAM and 16GB eMMC Flash storage, or 4GB of LPDDR4 DRAM and 32GB eMMC Flash storage. This single board computer comes with preinstalled Android 11, and it runs Ubuntu Linux operating system in Android container. It comes with large connectivity options (Bluetooth, 4G/5G Cellular, GPS, and Lora, Zigbee and Z-Wave). For those, you will need module, but it comes with default onboard Wi-Fi connectivity, Gigabit Ethernet Port (RJ45) and Serial Port (RS-485). Because it comes with RS-485 port, which is industrial standard, and it comes within a strong metal case, it seems to me that it can be really used in industrial projects. I used official Raspberry Pi 5 power supply in order to power up my Mixtile Edge 2 Kit.So, an idea came to me why not to use it in agriculture, bee detection, which can be essential for health and survival of bees.This project will cover setting up Mixtile Edge 2 Kit, and custom photo dataset form video in order to train custom YOLOv5 bee detection model. YOLOv5 models must be trained on labelled data in order to learn classes of objects in that data.I gathered data from video and trained model on my PC.To train a model, I used python and typed in command line:
python train.py --img 640 --batch 16 --epochs 3 --data coco128.yaml --weights best.pt
My training results are summarized in the following table:

Training results
From this table you can see that images are divided into 4 detection classes:
Bee
Drone
Pollenbee
Queen
Example for each class is summarized in a table below:

Bee classes
1. Getting started
First, I will write about software part of the project, and later on steps of starting the recognition.
1.1 What is YOLOv5?
If you have been in the field of machine learning and deep learning for some time now, there is a high chance that you have already heard about YOLO. YOLO is short for You Only Look Once. It is a family of single-stage deep learning-based object detectors. It was written using Python language, and the framework used is PyTorch.
To ease control, I connected usb mouse to the one of three Mixtile Edge 2 Kit USB3 port. I used Ubuntu Linux for this project. Ubuntu on container is installed in Android system of Mixtile Edge 2 Kit by default. When you boot Mixtile Edge 2 Kit, you get Android OS. Since I wanted to access Edge 2 Kit remotely, and get easier control, I installed droidVNC server from this link:
It is an Android VNC server using Android 5+ APIs. It does not require root access.
I started the VNC server, connected with VNC Viewer and I got the following Android 11 screen:

Android 11
After that, I installed SimpleSSHD from this link:
SimpleSSHD is a SSH server Android app, based on Dropbear.It allows user access (user ssh) or full root access (by setting the login shell to /system/xbin/su) (if root is allowed).
After I installed SSH server, I connected to it via putty SSH terminal. Username and Password are root/root.
Com.hubware.ubuntu is ubuntu on a container and we are connected to it immidiately.
Now we are going to install required software.
First, you will need to upgrade Ubuntu by typing in the command: apt-get upgrade.
Second, I installed python by typing: apt-get install python.
You will also need pip, the package installer for Python.
2. Installing the YOLOv5 Environment
To start off we first clone the YOLOv5 repository and install dependencies. This will set up our programming environment to be ready to running object detection training and inference commands.
Install git: apt-get install git
Clone YOLOv5 repository:
git clone https://github.com/ultralytics/yolov5
Move to YOLOv5 folder:
cd yolov5
Install dependencies:
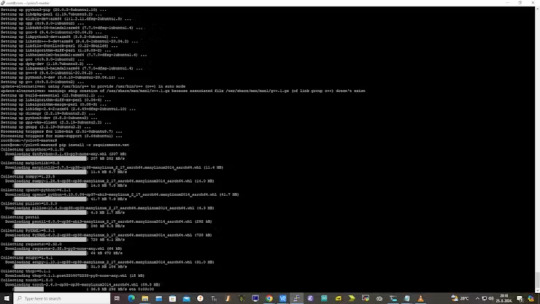
pip install -r requirements.txt
Wait some time to download and install all requirement packages, I waited 25 minutes, because there are a lot of python packages to install besides YOLOv5. YOLOv5 needs numpy package, scipy, OpenCV, etc.
The putty connection and installation process looks like below:
I transferred my model best.pt to the yolov5 installation folder via SCP, with MobaXterm.
You can simply download my model immidiate by typing:
wget https://github.com/sdizdarevic/beedetectionyolov5/raw/main/best.pt
Also, download original video by typing:
wget https://sdizdarevic.typepad.com/cr/bees-orig.mp4
Now, the final step is detection, and we are interested in the “result” content video.
python3 detect.py --weights best.pt --source bees-orig.mp4
The process of detection looks like below:

In the last lines from last picture we can see the detected number of bees at any point in time.
The summarized short steps to follow are below:
git clone https://github.com/ultralytics/yolov5
cd yolov5
pip install -r requirements.txt
wget https://github.com/sdizdarevic/beedetectionyolov5/raw/main/best.pt
wget https://sdizdarevic.typepad.com/cr/bees-orig.mp4
python3 detect.py --weights best.pt --source
Demonstrated videos are on urls with detection finished completely on Mixtile Edge 2 Kit. Output video is in folder runs/detect/exp2.
Original video:
youtube
Result video:
youtube
Last, but not less important: If you want to safely turn off your Mixtile Edge 2 Kit, I recommend you to install Shutdown (no Root) application: https://play.google.com/store/apps/details?id=com.samiadom.Shutdown&hl=en.
3.Conclusion:
After testing I found out that the Mixtile Edge 2 Kit is designed with wide range of applications, from industrial applications, IOT devices, smart home automation, to more than capable AI and edge detection. It is low powered device, with a lot of built-in connectivity options.
I would like to thank amazing Mixtile people for creating this amazing peace of hardware and especially for sending me the Mixtile Edge 2 Kit. Also, Mixtile nurtures the open source values and software, and I believe more people and companies will be involved in making projects with this board.
All in all, I recommend this board for implementing types of projects I described here.
0 notes
Photo

How to Log in with an SSH Private Key on Linux Using PuTTY 👉 Read the article: https://bonguides.com/how-to-log-in-with-an-ssh-private-key-on-linux-using-putty/?feed_id=820&_unique_id=667e9cb15c13e
0 notes
Link
Enigma2 est un système libre intégré dans tous les récepteurs basés sur Linux, tels que VU+ ou Dreambox. Pour les décodeurs Enigma2, la méthode couramment utilisée est avec les logiciels "DCC ou Putty" sur un ordinateur, utilisant le script d'abonnement IPTV envoyé après la commande. Cependant, pour ceux sans ordinateur, une application pratique pour Android et iOS appelée "Mobile Telnet" offre une alternative plus simple et similaire pour effectuer la même opération. Types des scripts IPTV pour Enigma2 Il existe deux versions des scripts pour les décodeurs Enigma2 : 1-Version OE 1.6 I cette version est compatible avec toutes les marques des décodeurs Enigma2. 2-Version OE 2.0 I il est conseillé d’utiliser cette version uniquement avec les décodeurs Dreambox. Exemples de script IPTV pour Enigma2 Exemple de script OE 1.6 : wget 6O /etc/enigma2/iptv.sh « http://lien-serveur.com/get.php? username=nom&password=passe&output=ts&type=enigma216_script » && chmod 777 /etc/enigma2/iptv.sh && /etc/enigma2/iptv.sh Exemple de script OE 2.0 : wget 6O /etc/enigma2/iptv.sh « http://lien-serveur.com/get.php? username=nom&password=passe&output=ts&type=enigma22_script » && chmod 777 /etc/enigma2/iptv.sh && /etc/enigma2/iptv.sh Avant de faire la configuration Avant de configurer votre abonnement IPTV sur Enigma2, vérifiez que votre appareil dispose d'une mémoire suffisante et d'un processeur puissant. L'IPTV implique principalement le codage et le décodage de formats vidéo, et une configuration insuffisante peut entraîner des problèmes de qualité ainsi que des décalages entre le son et l'image. Les étapes de configuration d’IPTV sur Enigma2 Voici les étapes a suivre pour configurer votre abonnement IPTV sur le décodeur Enigma2 : Sur votre Smartphone Android ou iOS, chercher et installer l’application « Mobile Telnetà » Trouver l’adresse IP local du décodeur a entrer sur l’application Mobile Telnet dans « Telnet settings » puis OK (noté que le smartphone doitêtre connecté au même réseau internet par wifi). L Afficher encore le menu et cliquer sur « Connect ». Un terminal de commandes va sortir, qui demande « login », taper « root » dans la barre d’écriture en bas et « Send ». La dernière étape sur l’application, copier et coller le script de votre abonnement reçu et cliquer encore sur « Send ». Cette étape va prendre 1 minute. Redémarrer votre décodeur et aller a la liste des chaines, puis bouton bleu « Favoris », un nouveau dossier nommé « IPTV » où vous allez trouvez la liste des chaines de votre abonnement. En conclusion Cette méthode n’est pas la seule mais c’est la plus simple et la plus rapide sans besoin d’ordinateur et des connaissances en informatique. Pour ceux qui on des connaissances sur comment installer des plugins pour Enigma2, vous pouvez installer le plugin « XStreamity » et utiliser les informations Xtream Codes de votre abonnement pour se connecter comme sur les applications des appareils Android.
0 notes
Text
SNOWFLAKE SSH

Title: Beyond the Web: Secure SSH Access to Your Snowflake Data Warehouse
Introduction
Snowflake’s cloud-based data warehousing solution offers a convenient web interface for management and queries — but sometimes, you need more profound control and flexibility. That’s where SSH (Secure Shell) comes in. In this blog post, we’ll explore the benefits of SSH access to Snowflake, how to set it up, and some common scenarios where it shines.
What is SSH?
A brief explanation of SSH as a secure network protocol that allows encrypted command-line access and file transfers to remote machines.
Why Use SSH with Snowflake?
Advanced Data Loading and Transformations: SSH lets you run complex shell scripts or tools on your local system to clean, transform, or load data directly into Snowflake.
Automation: To interact with Snowflake and orchestrate tasks (ETL pipelines, scheduled jobs) using your preferred scripting languages.
Enhanced Security: Key-based authentication with SSH can add an extra layer of security compared to solely relying on Snowflake’s web interface.
Troubleshooting: Connect directly to the Snowflake environment for in-depth debugging and problem resolution.
Setting Up SSH Access to Snowflake
Key-pair Generation: Use tools like ssh-keygen to create a secure public/private key pair.
Upload Your Public Key: Add your public key to your Snowflake user profile for authentication. (Snowflake’s documentation has detailed instructions)
Choosing an SSH Client: Popular options include the built-in command-line tools on Linux/macOS (Terminal) or dedicated clients like PuTTY (Windows).
Connecting: Connect to Snowflake using your SSH client and provide your Snowflake username, hostname, and private key.
Common Use Cases
Secure File Transfers: To move data files in and out of Snowflake, use tools like scp or sftp over the established SSH connection.
Managing Snowflake Objects: Connect to the SnowSQL CLI via SSH to perform advanced administration tasks (creating users, roles, warehouses, etc.)
Custom Tooling: Develop your scripts and tools in your favorite languages (Python, etc.) to automate interactions with Snowflake using the client libraries it provides.
Security Considerations
Enforce Key-Based Authentication: Always use key-based authentication instead of passwords with SSH.
Rotate Keys Regularly: Establish a schedule for rotating your SSH key pairs to maintain strong security.
Least Privilege: Grant specific Snowflake user permissions for the SSH connection, matching only the required actions.
Conclusion
Mastering SSH access to Snowflake opens up a new level of power and flexibility when interacting with your data warehouse. Whether you’re automating processes, performing intricate data manipulations, or prefer working in a command-line environment, SSH is invaluable for every Snowflake power user’s toolkit.
youtube
You can find more information about Snowflake in this Snowflake
Conclusion:
Unogeeks is the No.1 IT Training Institute for SAP Training. Anyone Disagree? Please drop in a comment
You can check out our other latest blogs on Snowflake here – Snowflake Blogs
You can check out our Best In Class Snowflake Details here – Snowflake Training
Follow & Connect with us:
———————————-
For Training inquiries:
Call/Whatsapp: +91 73960 33555
Mail us at: [email protected]
Our Website ➜ https://unogeeks.com
Follow us:
Instagram: https://www.instagram.com/unogeeks
Facebook: https://www.facebook.com/UnogeeksSoftwareTrainingInstitute
Twitter: https://twitter.com/unogeeks
0 notes
Text
A Comprehensive Guide: Logging into a Windows Server Using PuTTY
In the realm of computing, the interaction between different operating systems is inevitable. For instance, the Linux community often finds itself needing to access Windows Server environments, typically managed through Remote Desktop Protocol (RDP). In such scenarios, PuTTY, a versatile SSH and Telnet client for Windows and Unix platforms, becomes a vital tool. In this guide, we'll walk you through the process of logging into a Windows Server using PuTTY, bridging the gap between Linux and Windows environments seamlessly.

PuTTY serves as a bridge, enabling Linux users to connect to Windows Server environments securely. Before delving into the process, ensure you have PuTTY installed on your Linux machine. Once installed, launch PuTTY to initiate the login process to the Windows Server.
When connecting to a Windows Server via PuTTY, you'll require the server's IP address or hostname, alongside the port number. Typically, Windows Servers utilize the default SSH port 22 for secure connections. However, if your server administrator has configured a different port, ensure to specify it during the connection setup.
With PuTTY launched, you'll be greeted by a simple yet powerful interface. Begin by entering the server's IP address or hostname in the "Host Name (or IP address)" field. Next, ensure the connection type is set to SSH, as PuTTY supports various protocols, including Telnet and Rlogin, but SSH provides secure communication.
Upon entering the necessary details, click on the "Open" button at the bottom of the PuTTY window to initiate the connection process. If this is your first time connecting to the server, PuTTY might prompt you with a security alert regarding the server's SSH key fingerprint. Verify the authenticity of the fingerprint before proceeding.
Once authenticated, PuTTY will present you with a terminal window, prompting for login credentials. Enter your username and password provided by the Windows Server administrator. It's essential to ensure the accuracy of the credentials to establish a successful connection.
After entering the credentials, PuTTY will validate them with the Windows Server. Upon successful authentication, you'll gain access to the Windows Server command-line interface, akin to the Linux terminal. From here, you can execute various commands and perform administrative tasks on the Windows Server environment seamlessly.
In scenarios where users need graphical interface access to the Windows Server, PuTTY can facilitate that as well. By leveraging X11 forwarding, PuTTY allows you to run graphical applications from the Windows Server on your Linux machine. To enable X11 forwarding, navigate to the PuTTY configuration window, select the "SSH" category, and check the "Enable X11 forwarding" option.
With X11 forwarding enabled, you can run graphical applications on the Windows Server, and their interfaces will display on your Linux machine. This capability enhances the versatility of PuTTY, enabling Linux users to interact with Windows Server environments efficiently.
In addition to accessing Windows Servers via PuTTY, users may also need to change their passwords within the Remote Desktop Protocol (RDP) session. While PuTTY facilitates SSH connections, RDP allows users to access the graphical desktop interface of Windows Servers remotely.
To change your password within an RDP session, initiate an RDP connection to the Windows Server using a compatible client, such as Microsoft's Remote Desktop Connection. Once connected, navigate to the "Ctrl+Alt+Delete" menu within the RDP session and select "Change a password" to modify your login credentials securely.
It's important to note that while PuTTY facilitates SSH connections to Windows Servers, RDP remains the primary method for accessing the graphical interface remotely. Therefore, users may utilize PuTTY for command-line tasks and administrative functions, while relying on RDP for GUI-based interactions.
In conclusion, PuTTY serves as a versatile tool for Linux users seeking to access Windows Server environments securely. By following the outlined steps, you can establish SSH connections to Windows Servers seamlessly, bridging the gap between Linux and Windows environments effortlessly. Additionally, PuTTY's support for X11 forwarding enhances its capabilities, enabling graphical interactions with Windows Server applications on Linux machines. Whether you're a Linux enthusiast or a Windows Server administrator, PuTTY remains an indispensable tool for cross-platform connectivity.
Whether you're a seasoned Linux user or a Windows Server administrator, PuTTY simplifies the process of logging into a Windows Server from a Linux environment. With its user-friendly interface and robust feature set, PuTTY facilitates secure SSH connections to Windows Servers seamlessly. By following the steps outlined in this guide, you can bridge the gap between Linux and Windows environments effortlessly, ensuring efficient cross-platform connectivity for your administrative tasks.
0 notes