#Save time selecting your blog post images
Text

✨ Simple Gif Colouring for Beginners ✨
I wrote up my basic gif colouring process for a friend recently, but a couple of people here mentioned they'd also find it helpful! so, as requested, this is a beginner-friendly walkthrough of the way I colour my gifs :) it's aimed at brand new gif makers with no prior experience with photoshop or photo editing.
when I first started gif making I found colouring and photoshop in general suuuper daunting, so I've tried to simplify everything here as much as possible. hopefully this will be relatively easy to follow and not too intimidating!
a couple of things to begin with:
I'm only talking about colouring here - this is not a full gif making tutorial. I've linked to some of my favourites of those here!
I personally like to make bright, 'clean' looking gifs with vibrant but natural colours, so that is the style of colouring this tutorial is geared towards. most of gif colouring is subjective and about personal taste - the only thing that I'd say is possible to get wrong is skin tones, which I talk about a lot in this guide.
as I mostly gif Thai dramas, most of the advice is geared towards colouring for East Asian/South East Asian skin tones - but the techniques should be fairly universally applicable (and here are some tutorials that talk about gif colouring for other skin tones).
I'm not an expert! I'm not claiming this is the best or the only way to colour gifs - it's just how I do it.
this post is very image-heavy. if the images aren't loading (or the gifs are running slowly or cutting/looping weirdly), then try viewing the post in its own tab (rather than on the your dash or someone's blog) and refreshing the page.
okay, full walkthrough beneath the cut!
contents:
1. intro
a. natural gif colouring goals
b. very very basic colour theory
2. super simple colouring (the essentials)
a. curves
b. selective colour (and skin tone correction)
c. hue/saturation
d. saving and reusing colouring
e. another simple colouring example
3. other adjustment layers
a. brightness/contrast
b. levels
c. vibrance
d. colour balance
e. channel mixer
4. troubleshooting
a. curves
b. saturation
5. fin!
1. intro
the colouring part of gif making can be super overwhelming, especially if (like me when I first started!) you're completely new to photoshop and/or have no experience with colour theory or photo/video editing.
if you're opening photoshop and making gifs for the first time, I highly recommend getting used to making a few basic, uncoloured gifs to begin with. just to practice, rather than post anywhere (though you can always come back and colour them later if you want) - but it'll make the rest of the process much easier if you're already beginning to get used to working in timeline mode of photoshop. give yourself a bit of time to practice and get a feel for things like how many frames you tend to like in a gif, where you like to crop them for the best loop, what kind of aspect ratio you like etc* - so that you're not trying to navigate all of that for the first time on top of everything else!
* frames: for me between 60-90 frames is ideal, but 40-120 frames is the absolute min-max I'd personally use in a normal gifset
loops: for the smoothest loops, try to avoid cutting someone off mid-movement or mid-word if possible.
aspect ratio: for full-size (540px) gifs, I tend to go for either 8:5 (slightly 'skinnier' gifs), 7:5, or 5:4 (particularly big, thick gifs lmao)
✨ natural gif colouring goals
part of what can be so daunting about starting gif making is not knowing where to start or what you want to achieve. this is definitely something that gets easier with practice - the more gifs you make, the more you'll get a feel for what kind of look you like and the more instinctively you'll know how to get there. it also helps to see if any gif makers you like have made "before and after colouring" posts - these can help with getting a sense of the kinds of changes made through gif colouring. here's one I made!
in general, I like to make my gifs bright and 'clean' looking, with vibrant but natural colours. these are the things I'm usually hoping to achieve with colouring:
brighten dark scenes
remove muddy, yellowish lighting or filters
saturate colours
correct any skin lightening filters or overexposure
make lighting and colours as consistent as possible between gifs within a single gifset, especially gifsets featuring gifs from multiple scenes/episodes/videos
this guide is focusing on natural colouring, but of course there are many cool ways to make stylised/unnaturally coloured gifs. imo you'll need to master these basics first, but if you want to learn how to do things like change the background colour of gifs or use gradients or other cool effects, then @usergif's resource directory has loads of super helpful tutorials!
✨ very very basic colour theory
[disclaimer! I don't know shit about fuck. I do not study light or art. this is just an explanation that makes sense to me exclusively for the purposes of gif making.]
the primary colours for light/digital screens are red, blue, and green. having all three colours in equal measures neutralises them (represented by the white section in the middle of the diagram).

so to neutralise a colour within a gif, you need to add more of the colour(s) that are lacking.
in practice this usually means: the scene you want to gif is very yellow! yellow is made of red and green light, so to neutralise it you need to add more blue into your gif.
it can also mean the reverse: if you desaturate the yellow tones in a gif, it will look much more blue.
looking at the colour balance sliders on photoshop can make it easier to visualise:

so making a gif more red also means making it less cyan.
removing green from a gif means adding magenta.
taking yellow out of a gif will make it more blue.
tl;dr:
neutralise yellows by adding blue (and vice versa)
neutralise reds by adding cyan (and vice versa)
neutralise green by adding magenta (and vice versa)
2. super simple colouring (the essentials)
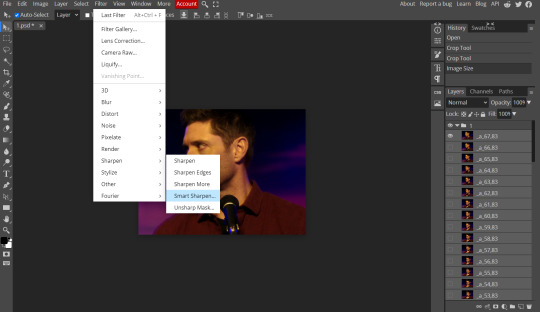
starting with a nice sharpened gif in photoshop in timeline mode. (these are the sharpening settings I use!)
some scenes are much harder to colour than others - it helps to start out practising with scenes that are bright/well-lit and that don't have harsh unnaturally coloured lights/filters on. scenes with a lot of brown/orange also tend to be harder.
I usually save a base copy of my gif before I start colouring just in case I end up hating it, or find out later that it doesn't quite fit right into a set and need to redo it etc.
so here is my base gif!

it's an okay gif, but it has a bit of a yellow tint to it that I want to reduce.
colouring is easiest to do in adjustment layers, which can be found under layer -> new adjustment layer - or for me they are here:

there are lots of different types of adjustment layers that do lots of different things - but for me the absolute essentials for colouring are curves, selective colour, and hue/saturation.
I also use brightness/contrast, levels, exposure, vibrance, colour balance, and channel mixer sometimes, depending on the gif - but I use curves, selective colour, and hue/saturation on every single gif.

✨ curves layer
the first thing I always do is a curves layer. when you first open one it will look like this:

first I usually click the ‘auto’ button, just to see what happens. sometimes it makes a big difference (it usually brightens the gif a lot) - but on this gif it didn’t do much.
if it had made the gif look nicer then I would have kept it and added a second curves layer on top to do the rest of these steps.
the next step is selecting the white and black points with the little eyedropper tools.
the bottom eyedropper lets you pick a white point for the gif. click somewhere super light on the gif to see what happens - for this gif, I clicked on the lampshade on the left. if it looks weird, I just undo it and try somewhere else - it usually takes a few goes to find something that looks good.
here's what that did to the gif:

then I pick the top eyedropper and use it to pick a black point by clicking somewhere really dark, again playing around until I find a black point that looks good.
here's what the gif looks like after picking the white and black points:

this can take some experimenting, but you can make super easy drastic changes to your gif just with this. in this case, the curves layer took out a lot of that yellowy tint.
and this is what the curves graph looks like now:

you can click and drag those lines to make further changes if you want - I usually leave them alone though. the colours of the lines indicate which colours have been changed in the gif - for example, you can see from that steep blue line on the graph that blue has been added to neutralise those yellows.
next I usually do another curves layer and just press the ‘auto’ button again to see what happens. usually it brightens the gif a bit more, which I like.
‼️if nothing is working: usually with a bit of fucking about a curves layer works well - but sometimes you can’t find a good white and black point anywhere, and instead your gif turns wacky colours and nothing looks good. this happens more often with very heavily colour tinted scenes :( the troubleshooting section at the end goes over some options, including starting with a levels layer instead.
✨ selective colour (and skin tone correction)
skin tones are made up of a mixture of yellow and red.
removing yellow (or adding blue or red) to a gif will make the skin-tones too red - and removing red (or adding cyan or yellow) to a gif will make the skin-tones too yellow.
adding blue to this gif with the curves layer took out the yellowy tint, which I wanted - but it also took the yellows out of Kim's skin tone, which I don’t want. so I need to put yellow back into the skin tones specifically - without putting it back into the rest of the gif.
selective colour layers let you select an individual colour and adjust the levels of other colours within that colour. you can change how yellow the green shades are, or how much cyan is in the blues, for example.
I need to add yellow back into the red tones to correct the skin tones on this gif. this is the case for most gifs in my experience - the vast majority of the time, unless a scene is very heavily tinted in another colour, a curves layer will add blue/remove yellow.
in the 'colors' dropdown, select the 'reds' section and drag the 'yellow' slider higher - this will add more yellow into just the red shades within the gif.

the amount of yellow you need to add back into the reds depends on how much yellow was taken out of the gif initially - I just play around with the slider until it looks right. if you're not sure, it helps to have some neutrally-coloured (not white-washed!) reference photos of the people in your gif to compare to.
here's the result. Kim's skin is a lot less pink toned and much more natural looking:

✨ hue/saturation
this adjustment layer lets you adjust the hue and saturation of the gif as a whole, and also of each colour individually.

I don't use the hue or lightness sliders unless I'm trying to do something more complicated with the colouring.
clicking the dropdown menu that says 'master' lets you edit the saturation of each colour individually. this is useful if your gif is still super tinted in one colour.
I thought the yellows on this gif were still slightly too bright, so I switched to the yellow channel and desaturated them slightly. (remember if you do this then you need to go back to selective colour and add more yellow into the red skin tones to balance out the desaturation!)
then I increased the 'master' saturation of all the colours to +5:
I usually find the right amount of saturation is somewhere between +5 and +12, but it depends on the gif.
‼️if the gif feels undersaturated, but the saturation slider isn't helping/is making the colours worse, try a vibrance layer instead.
done!

✨ saving and reusing colouring
you can copy and paste adjustment layers between gifs to make your colouring even across each of your gifs for one scene - so if you're making a set of multiple gifs of the same scene, or you think you might want to gif the same scene again in the future, you can save it as a psd so you can reuse the colouring again later.
each gif's colouring will then still need tweaking - different cameras/angles/shots of the same scene can still start out with slightly different colouring.
I recommend uploading the gifs as a draft post on tumblr so you can see what they all look like next to each other and catch any inconsistencies.
✨ another one! (speedrun!)

HI KEN!
the white point for the curves layer was in the window behind them.
the curves layer removes the muddy yellow tint, but again it makes their skin tones (especially Ken's) very red toned, which is adjusted by the selective colour layer.
3. other adjustment layers
imo many many gifs can be coloured really nicely with just those three adjustment layers, but some need different adjustments.
✨ brightness/contrast

pretty self explanatory!
I personally usually avoid using the 'brightness' slider because I rarely like the effect - I only tend to use the 'contrast' one.
the 'auto' button is sometimes useful though, especially if you’re struggling with the curves layer.
✨ levels

levels alters the white and black points of the gif, like curves - but unlike curves it doesn't also alter other colours.
use the sliders beneath the graph to alter how dark/light the gif is. you can slide the black slider further to the right to make the blacks darker, and the white slider to the left to make the whites lighter.
levels is a good place to start if your curves layer isn't working.
(I'm going to hit the image limit for this post lol so here are some screenshots of a table I made to demonstrate this rather than actual gifs. sorry!)


on both sides, I dragged the sliders up to where the big jumps are on the graph - this is usually a good place to start!
✨ vibrance
vibrance... makes the colours more vibrant. it's more subtle than saturation.
it's really helpful for gifs that feel grey. sometimes adjusting saturation just makes the greys kind of weirdly tinted, but a vibrance layer can fix that.

vibrance is much more subtle!
✨ colour balance

colour balance affects the overall balance of colours within a gif.
it's good for scenes with heavy tints.
I tend to stick to the 'midtones' dropdown, but you can also alter the colour balance within the shadows and highlights if you want.


✨ channel mixer
I avoided channel mixer for such a long time because it scared me. but it's great for scenes that are very heavily tinted in one colour.
basically, it works with the levels of red, green, and blue within a gif. you select an output colour and then play around with the levels of the colour you selected within each other colour.
kind of the reverse of selective colour?

so in the 'blue' channel, the levels of blue are at 100%, and the levels of red and green are at 0% - but you can impact how much blue is in the reds and greens and blues.
this tutorial explains it well - but imo the best way to get to grips with channel mixer is just to play around with it a bit (sorry)
(when I made this guide for my friend, I also made a slightly more complicated gif colouring walk-through that included using channel mixer. there isn't space to include it within this post, but if anyone is interested I could always upload it as an 'intermediate' gif colouring tutorial - lmk!)
4. troubleshooting
‼️curves
usually with a bit of fucking about a curves layer works well - but sometimes you can’t find a good white and black point anywhere, and instead your gif turns wacky colours and nothing looks good. this happens more often with very heavily colour tinted scenes :(
for example, with this base gif:

using many of the brightest points as a white point turn it wacky colours, like this:

yikes :(
some options for these cases:
try brightening the gif first with the 'auto' button on the curves layer or with a levels layer. having a brighter gif to start with can give you better options for picking a white point.
try finding an alternate, whiter/brighter white point. look for places the light reflects - on this gif, using the light on Porsche's cheekbone works well as the white point. it also helps to find places that would be white if the scene wasn't tinted - the lightest part of a white shirt is often a good place to start, for example.
skip the curves layer, and instead use a levels layer to alter your white/black points, and colour balance or channel mixer to balance the colours.
‼️over/undersaturation
if your gif (especially the skintones) is looking a little washed out or lifeless, it might be undersaturated. boost that saturation - or if that's not working, try a vibrance layer.
oversaturation is often easiest to spot in the mouths and ears of any people in a gif. if the mouths are looking unnaturally, vibrantly red, then you've gone too far with the saturation.
5. fin!
and done! I hope this was coherent helpful to somebody.
if there's anything that I've missed or that doesn't make sense pls feel free to shoot me an ask or a message and I'll do my best to help! I've also collated a bunch of additional reading/resources below.
happy gifmaking 🥰
✨ some links!
photoshop basics by @selenapastel
gifmaking for beginners by @hayaosmiyazaki
gifmaking guide for beginners by @saw-x
dreamy's gif tutorial by @scoupsy-remade (includes instructions on how to blur out burned-on subtitles or annoying video graphics)
beginner's guide to channel mixer by @aubrey-plaza
how to fix orange-washed characters by aubrey-plaza
colour correcting and fixing dark scenes by @kylos
does resampling matter? by usergif
how to put multiple gifs on one canvas by @fictionalheroine
watermarking using actions by @wonwooridul
resource directory by @usergif
#i got a couple of asks about this so i figured i'd type it up as a post#it's been sitting in my drafts for a while now though i'm so sorry omg.#i had to replace my laptop and it took me a while to get round to downloading photoshop on the new one#but i hope this is helpful!!#gif making#tutorial#photoshop tutorial#colouring tutorial#coloring tutorial#gif colouring#gif coloring#photoshop resources#gif tutorial#gif resources#userbunn#uservik#darcey.txt#darcey.gif#usergif
453 notes
·
View notes
Text
If you see any kind of news article, video, or blog post covering Palestine, make sure you back them up! Posts and videos are being deleted, corporations and governments are trying to erase history literally as it is happening!
Bookmark this page and pin it as a tab:
^ As long as the link in question is not a Tumblr post or Youtube video, make sure you select "save outlinks" -- (just don't do it for tumblr or youtube, otherwise it'll crash from the sheer number of other links. )
Once the Archive is done, check the archived version and see if the video plays.
A very quick way to do this is to get one of the official Wayback Machine extensions, which are linked here on the bottom left side:
Next, get this video downloader, it's meant for Youtube but works for a whole lot more too:
For ease of use with the above downloader, I recommend also getting this GUI addon:
Archive every single article and link you find, and download every video you find. Make copies, backup everything.
News articles and blog posts can be saved as PDFs by doing CTRL+P or selecting "print" from your browser's dropdown menu and selecting "save as pdf"
Save screenshots as well !
If your computer is Windows and has the Xbox Game Bar, you can also use that to screen record!
Make a free Archive.org account so you can easily find your Wayback Machine saves, and you can also upload videos and other documents.
Make a new, Google account just for archiving, make a free Mega account, make an empty Discord server just for saving links and images and documents all in one place in the cloud as a temporary "waystation" before saving them to the proper cloud + external harddrives.
If all this sounds exhausting, at minimum you should be getting the official Wayback Machine extension for whatever internet browser you are using, and click it any time you come across news!
#palestine#free palestine#israel#genocide#current events#october 2023#10-23-2023#signal boost please
143 notes
·
View notes
Text

PSDs For Dummies <3
— as written by a dummy
hello dear readers and welcome back to canarysage, the world’s least comprehensive tutorial blog. today, we’re back at it again with photopea for dummies, and we’re tackling something i probably should have done first: psds.

example psds are: 1 (@cutesiplushi) 2 (@didlivio) & 3 (@lumieron)
what is a psd?
excellent question, dear reader! psd stands for photoshop document, and it’s a type of file format (like .png or .gif) that allows you to store a project’s individual layers! it’s a file format that, for obvious reasons, is exclusive to photoshop and photopea.
in editing circles, psd has become shorthand for filter. people use psds to save configurations of adjustment layers that are then used to filter images consistently, without having to remake them every time. when someone posts a psd, they’re posting a folder (hopefully it’s in a folder) with their specific set of adjustment layers for anyone to use!
where can i get psds?
right here on tumblr! check your favorite edit blogs, as they may have posted some, or search ‘free psd’ or ‘psd coloring’ in the search function. tumblr doesn’t allow you to upload psds directly, so you’ll be redirected to a site outside tumblr. probably either deviantart, google drive, or ko-fi, all of which are easy to use. deviantart requires you to have an account to download anything (luckily, an account is free!) and ko-fi may require you to pay money. google drive doesn’t have a search function in and of itself, but it’s extremely easy to download off of.
also, shameless self plug, but i post psds right here on canarysage! i personally use deviantart, but again, an account is free. if send me an ask, i may be able to provide you with a google drive link, if you ask really nicely (。•̀ᴗ-)✧
and of course if you don’t want to use someone else’s psd, you can always make your own.
how do i use a psd?
once you have a psd of your choice downloaded, open up photopea! or photoshop, if you’re rich like that.
once you open photopea, click this here button right in the middle of the screen, the one that says “open from computer”
from there, go to choose files and open up your psd! depending on from whom you got it, psds will look different once you open them. i’m using one of my own as an example.

you can see there’s two layers in my psd, a folder, and an image. the image is just for me so i know which psd this is once i save it—i like to save all my psds with images of real people so i know how it looks on moodboards or stimboards.
the folder is the important part here, that’s where the adjustment layers are contained. to transfer a psd, you can either go to file > new
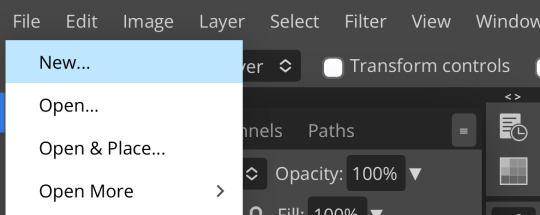
which lets you start an entirely new project, or you can open an image using file > open
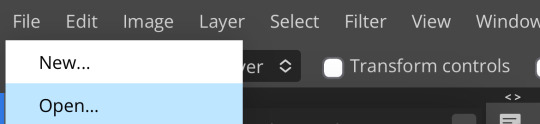
which will give you the image you selected.
as an aside, if you’re opening a psd and you already have a project in progress, make sure to click file > open and not file > open & place, as open & place won’t give you the adjustment layers.
then to move the folder, go to layer > duplicate layer into while having selected the folder (just tap on it, that will make it a lighter gray to show it’s selected) and duplicate the folder into whatever your image is
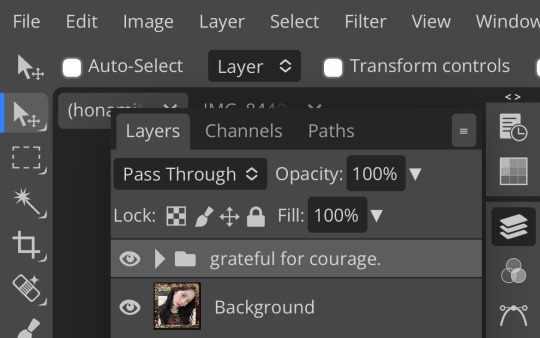

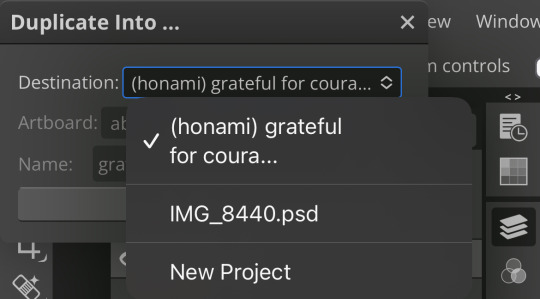
i’m moving mine to a random image of honami i found which is why it’s named like that. once the folder’s duplicated into your project, go over and take a look!
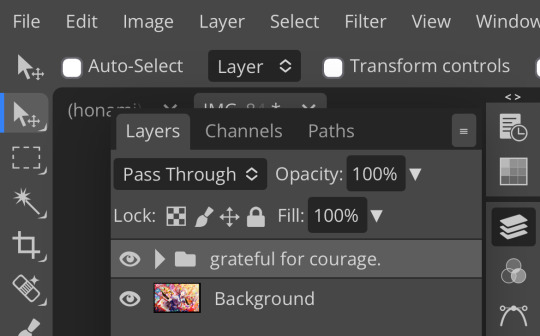
you should now see something like this! ensure that the folder is on top, as otherwise the adjustment layers won’t work.
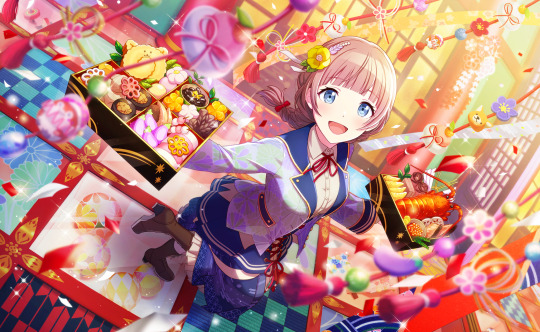
here’s the difference between the unfiltered image and the image with my psd!
to save images in photopea (like i did just now) go to file > export as > (your preferred file format)
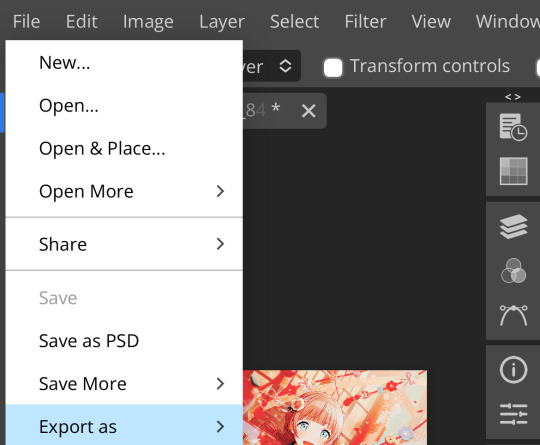
which will pull up something like this
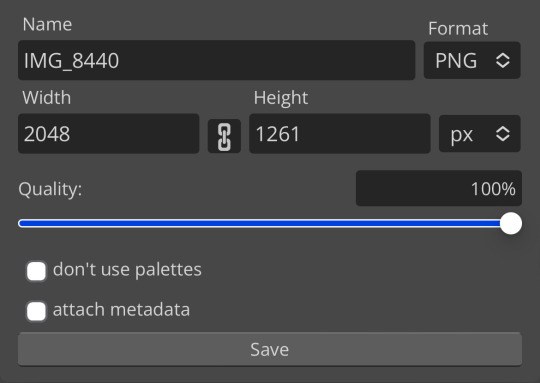
i recommend either saving as a png (for still images) or as a gif (for… gifs) but that’s up to you! in order to save a psd, go to file > save as psd! that will save your project to your device
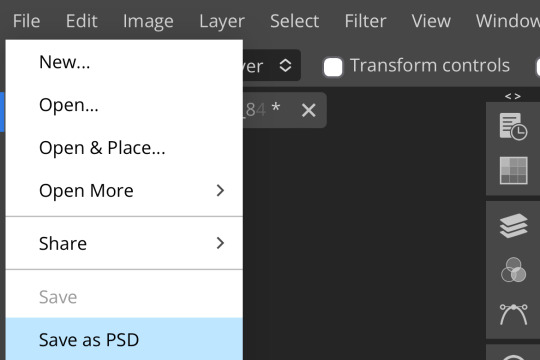
bear in mind that tumblr doesn’t accept psds as a file format, so if you’re going to post an edit, you have to save it as something else. also, don’t just save other people’s psds and claim them as your own—psds take a lot of time, effort, and skill, like any other art form.
can i make my own psds?
100% yes! i can’t give you a step-by-step process unfortunately, as there really is no one way to make psds. i recommend familiarizing yourself with adjustment layer and seeing what works.
shameless self plug again, but you can check out my other posts in this series to find out about some of the adjustment layers!
basically, i like to think of adjustment layers as a few different categories. light/darkness adjustments (ie: brightness/contrast, levels, curves, exposure, black & white, and threshold to a certain extent.) saturation adjustments (vibrance, hue/saturation.) color adjustments (hue/saturation, color balance, photo filter, channel mixer, selective color, gradient map depending on how you use it, and replace color.) and also, miscellaneous (posterize, which gives your images a pop-art crunchy kind of effect, invert, which… inverts your colors, and color lookup, which is a set of filters unto itself)
how you utilize adjustment layers is up to you! i personally like to use a variety and see what happens, my personal favorites being channel mixer, photo filter, and hue/saturation. you can also utilize blending modes (shameless self plug again,) or opacity.
if you have no idea where to start, you can look at other people’s psds to see their process. don’t copy or steal, for obvious reasons, but you can toggle layers on and off and see what happens and what each layer does.
making psds isn’t as intimidating as it sounds, you just have to start a project and start creating! it gets really fun once you get the hang of it (*'▽'*)
i don’t edit with photoshop or photopea, can i still use psds?
short answer: nope!
long answer: if you want use psds but you’re super used to ibis paint or whatever you currently use, have no fear! you don’t have to switch all your editing to photopea. you can make your main project in ibis or whatever as normal, then upload it to photopea and add a psd.
you can also make perfectly fine filters in ibis paint in your own right, with enough tweaking. there’s also apps such as polarr and picsart which come with filters, but i’ve never used them so i’m unable to vouch for how they work.
do i need to use psds when editing?
nope! psds are 100% optional. they’re a style like anything else—some people prefer them and some people don’t. it’s up to you.
did you genuinely write 1178 words answering questions no one asked?
yep.
what if i have a question you didn’t answer?
feel free to shoot me an ask! i don’t mind explaining further, and i promise i don’t bite. as with anything, this is just meant to explain to anyone who needs assistance—photopea for dummies by a dummy, after all. we can be confused together!
are you done now?
i am! congratulations for reading this far!
yours truly, canarysage
123 notes
·
View notes
Text
How to Back up a Tumblr Blog
This will be a long post.
Big thank you to @afairmaiden for doing so much of the legwork on this topic. Some of these instructions are copied from her verbatim.
Now, we all know that tumblr has an export function that theoretially allows you to export the contents of your blog. However, this function has several problems including no progress bar (such that it appears to hang for 30+ hours) and when you do finally download the gargantuan file, the blog posts cannot be browsed in any way resembling the original blog structure, searched by tag, etc.
What we found is a tool built for website archiving/mirroring called httrack. Obviously this is a big project when considering a large tumblr blog, but there are some ways to help keep it manageable. Details under the cut.
How to download your blog with HTTrack:
Website here
You will need:
A reliable computer and a good internet connection.
Time and space. For around 40,000 posts, expect 48 hours and 40GB. 6000 posts ≈ 10 hours, 12GB. If possible, test this on a small blog before jumping into a major project. There is an option to stop and continue an interrupted download later, but this may or may not actually resume where it left off. Keep in mind that Tumblr is a highly dynamic website with things changing all the time (notes, icons, pages being updated with every post, etc).
A custom theme. It doesn't have to be pretty, but it does need to be functional. That said, there are a few things you may want to make sure are in your theme before starting to archive:
the drop down meatball menu on posts with the date they were posted
tags visible on your theme, visible from your blog's main page
no icon images on posts/notes (They may be small, but keep in mind there are thousands of them, so if nothing else, they'll take up time. Instructions on how to exclude them below.)
Limitations: This will not save your liked or private posts, or messages. Poll results also may not show up.
What to expect from HTTrack:
HTTrack will mirror your blog locally by creating a series of linked HTML files that you can browse with your browser even if tumblr were to entirely go down. The link structure mimics the site structure, so you should be able to browse your own blog as if you had typed in the url of your custom theme into the browser. Some elements may not appear or load, and much of the following instructions are dedicated to making sure that you download the right images without downloading too many unnecessary images.
There will be a fair bit of redundancy as it will save:
individual posts pages for all your tags, such as tagged/me etc (If you tend to write a lot in your tags, you may want to save time and space by skipping this option. Instructions below.)
the day folder (if you have the meatball menu)
regular blog pages (page/1 etc)
How it works: HTTrack will be going through your url and saving the contents of every sub directory. In your file explorer this will look like a series of nested folders.
How to Start
Download and run HTTrack.
In your file directory, create an overarching folder for the project in some drive with a lot of space.
Start a new project. Select this folder in HTTrack as the save location for your project. Name your project.
For the url, enter https://[blogname].tumblr.com. Without the https:// you'll get a robots.txt error and it won't save anything.
Settings:
Open settings. Under "scan rules":
Check the box for filetypes .gif etc.
Make sure the box for .zip etc. is unchecked.
Check the box for .mov etc.
Under "limits":
Change the max speed to between 100,000 - 250,000. The reason this needs to be limited is because you could accidentally DDOS the website you are downloading. Do not DDOS tumblr.
Change the link limit to maybe 200,000-300,000 for a cutoff on a large blog, according to @afairmaiden. This limit is to prevent you from accidentally having a project that goes on infinitely due to redundancy or due to getting misdirected and suddenly trying to download the entirety of wikipedia.
Go through the other tabs. Check the box that says "Get HTML first". Uncheck "find every link".
Uncheck "get linked non-html files". If you don't want to download literally the entire internet.
Check "save all items in cache as well as HTML".
Check "disconnect when finished".
Go back to Scan Rules.
There will be a large text box. In this box we place a sort of blacklist and whitelist for filetypes.
Paste the following text into that box.
+*.mp4 +*.gifv -*x-callback-url* -*/sharer/* -*/amp -*tumblr.com/image* -*/photoset_iframe/*
Optional:
-*/tagged/* (if you don't want to save pages for all your tags.)
-*/post/* (if you don't want to save each post individually. not recommended if you have readmores that redirect to individual posts.)
-*/day/* (if you don't feel it's necessary to search by date)
Optional but recommended:
-*/s64x64u*.jpg -*tumblr_*_64.jpg -*avatar_*_64.jpg -*/s16x16u*.jpg -*tumblr_*_16*.jpg -*avatar_*_16.jpg -*/s64x64u*.gif -*tumblr_*_64.gif -*avatar_*_64.gif -*/s16x16u*.gif -*tumblr_*_16.gif -*avatar_*_16.gif
This will prevent the downloading of icons/avatars, which tend to be extremely redundant as each image downloads a separate time for each appearance.
Many icons are in .pnj format and therefore won't download unless you add the extension (+*.pnj), so you may be able to whitelist the URLs for your and your friends' icons. (Honestly, editing your theme to remove icons from your notes may be the simpler solution here.)
You should now be ready to start.
Make sure your computer doesn't overheat during the extremely long download process.
Pages tend to be among the last things to save. If you have infinite scroll on, your first page (index.html) may not have a link to page 2, but your pages will be in the folder.
Shortly after your pages are done, you may see the link progress start over. This may be to check that everything is complete. At this point, it should be safe to click cancel if you want to stop, but you run the risk of more stuff being missing. You will need to wait a few minutes for pending transfers to be competed.
Once you're done, you'll want to check for: Files without an extension.
Start with your pages folder, sort items by file type, and look for ones that are simply listed as "file" rather than HTML. Add the appropriate extension (in this case, .html) and check to see if it works. (This may cause links to this page to appear broken.)
Next, sort by file size and check for 0B files. HTMLs will appear as a blank page. Delete these. Empty folders. View files as large icons to find these quickly.
If possible, make a backup copy of your project file and folder, especially if you have a fairly complete download and you want to update it.
Finally, turn off your computer and let it rest.
101 notes
·
View notes
Text
↬ OC Verse Trading Cards
Here it is! The reason (well, one of the reasons) for why I've been so inactive lately. I saw this super cool trading card template by @squea and @buttertrait and thought it was super fun, so I wanted to make something similar for my mutuals and myself. And, as you can see, I rediscovered my love for art deco on the way, so it's very art deco lol
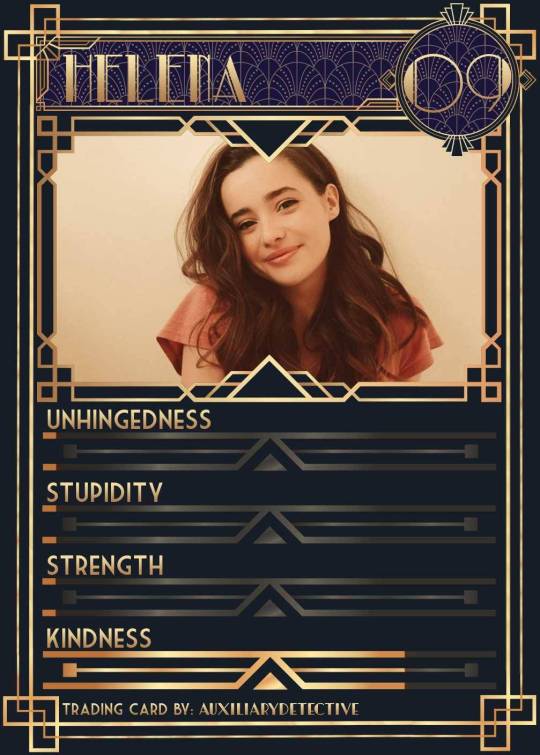
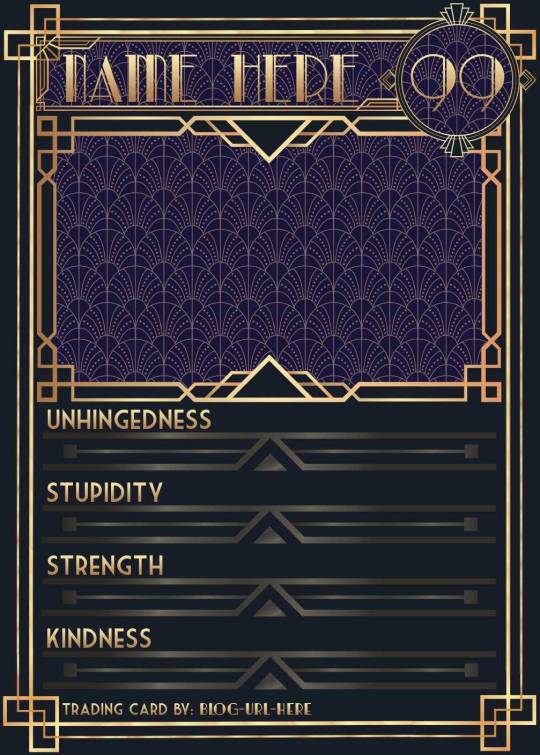
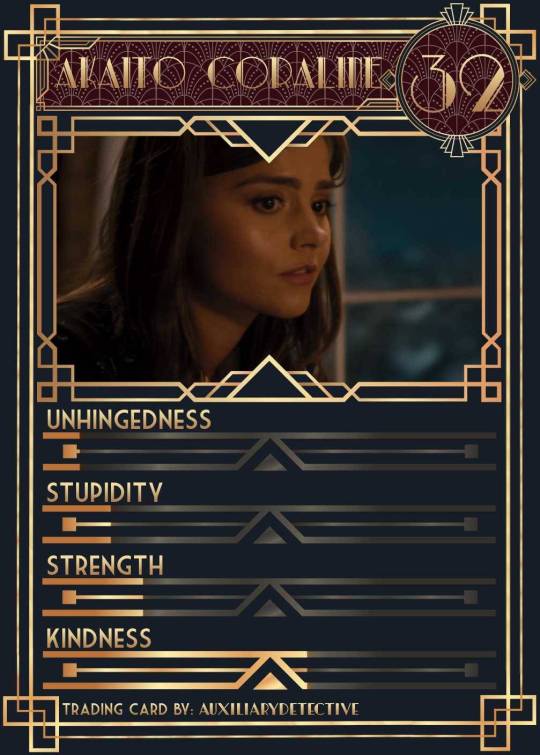
You can find the template to make your own cards here - and I explicitly encourage you to make your own, because I was kinda hoping I would get to see cards of you guys' OCs and we could collect them all in a binder like this one. It would be really fun! (The number next to the name is the power level btw - I wanted to imitate a set of Star Wars trading cards I used to collect as a kid) Make sure to @ me when you do and tag your post with #ocversetradingcards!
I tried to make the template as accessible as possible so that even beginners should be able to use it without any issues. So, I color-coded the layers!
The red layers are ones you shouldn't touch. They make up the main frame of the card. The orange layers are ones where you can play around with the colors, but that's for advanced photoshop/photopea users. The green ones are the ones where you put in text! Edit those freely. Blue ones are ones you have to select and move as a batch - if you don't know how to do that, check below the cut ^^
You'll need to download these fonts:
Park Lane (name & power level)
Market Deco (main text font)
Artisual Deco Black Italic (blog url)
Below the cut, you'll find a tutorial for the template and a list of the image resources I used - Quick info for everyone, including the more experienced Photopea users: Save your image at 50% quality. The template is a big file and the exported image will also be pretty big if you don’t save it at a lower quality. 50% is what you can see above and I think it's a nice size-quality ratio.
Tutorial Time
Opening the File
Step one: Get either Photoshop or Photopea. Photoshop costs money, Photopea is free and runs in your browser. Take three guesses which one I use. Yeah, it's Photopea. As such, this tutorial will be Photopea-centric, and I also have no clue what the Photoshop interface looks like, so I can't really help you if you work on Photoshop. But I'm told they're essentially the same, so...
Step two: Download the fonts listed above from the links in this post.
Step three: Click on the link above to go download the template. It's a bit of a big file, so I put it into a zip file for you. Don't worry, you don't need a special program to open it. Photopea will do that for you.
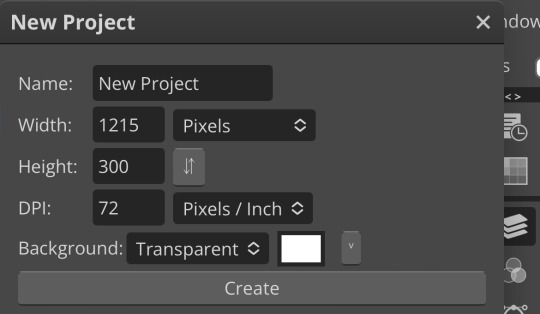
Step four: Open Photopea. Click on "File" -> "Open..." and select the "TradingCardTemplate" zip file.
Step five: Click "File" -> "Open..." again and select the zip files for the fonts. This will import them to Photopea. There are also preview images included in at least one of the zip files for the fonts, so just close the windows for those projects when they pop up by clicking on the little "x" next to their file name. You only need the "TradingCardTemplate.psd" tab to be open in your Photopea window.
Great! Now you're all set to edit!
Editing the name, power level and blog url
I decided to group these together because they function essentially the same way
Step one: Select the typing tool. It's the little "T" symbol in the toolbar on the left side of your screen.
Step two: Select the layer of the text you want to edit. The blog url one is in plain view. For the name and power ones, you need to open the corresponding folders first. They're the green layers in the folders!
Step three: Click on the text you want to edit. It's easiest to aim for the middle, that way you have the least chances of missing. The typing tool is a bit finicky with that sometimes, especially if the text is small.
Great! Now you can use your keyboard to delete the placeholder text and replace it with your own! The power level will only fit two digits and picking "00" will look bad. Your OC should have at least some power. They need it to breathe.
Changing the size of the name text
As you might be able to tell, the basic text size only works for fairly short names. So, you might have to make it smaller for your OC's name to fit
Step one: Enter your OC's name as described above.
Step two: Select the text as you would anywhere else in your browser.
Step three: Above the little tag where it says "TradingCardTemplate.psd", there's an options bar. You'll find a box there labelled "Size" with a box that says "150px" and a down arrow next to it. Click on the down arrow and a slider will pop up. Play around with that slider until your text has a good size. Then click on the checkmark.
Step four: Switch to the transformation tool. It's the cursor with the directional cross next to it, at the top of your left-hand tool bar. Move your text so that it aligns well with the left side of the frame but make sure it's below the middle.
Step five: You now have to select two layers at once. The text layer and the frame for the name tag. Do do that, either press and hold your control key on your keyboard while selecting the other layer or toggle the control key using the on-screen keyboard at the bottom left of the toolbar. If you use the toggle, don't forget to untoggle it after.
Step six: On your horizontal toolbar above your project window, click on the icon that's a horizontal line with two boxes centered on it.
Congrats, your text should now be centered!
Adding in your OC picture
Step one: Open the "Picture" folder and select the layer beneath "Add picture here". This will make sure your picture will be in the right spot. Also make sure to click on the eye next to the "Pattern" layer tag to make it go invisible.
Step two: Select "File" -> "Open & Place..." and pick a nice image.
Step three: Once the image has been imported, make sure you change the zoom percentage to 100%, that way the image doesn't look pixely or weird. Click on the checkmark.
Step four: Resize your image so your OC fits nicely into the frame. The image should fill the entire space inside the frame and can stick out as much as you want.
Step five: Right-click (or press and hold, if you're on mobile) your image' layer and select "Clipping Mask".
Perfect! Now your image should no longer stick out of the frame. Feel free to adjust your image's coloration, brightness etc. by selecting "Image" -> "Adjustments" and your preferred action.
Changing your stats bars
This works the same for each bar and I tried to make it as simple as possible.
Step one: Open the corresponding folder.
Step two: Select the set of three blue layers together. You can do this by selecting one layer normally, then selecting the other two while holding your control key or while having it toggled using the built-in on-screen mini keyboard at the bottom left of your screen. If you use the toggle, don't forget to untoggle it after.
Step three: Switch to the transformation tool (the one at the top of your left-hand toolbar, it's a cursor with a directional cross) and move your layers. By moving them to the right, you'll reveal more of the gold underneath the overlay. More gold = higher level of the corresponding stat.
Great job! Now adjust the bars to your liking.
Saving your project + card image
To save the project: Click on "File" -> "Save as PSD". This will download the current project under the same name as the file that you downloaded it as. So, it will be called "TradingCardTemplate (1)" or something similar. Make sure you change the name in your files so you know which is which. Alternatively, you can also change the name of the project by double-clicking the little square that currently says "TradingCardTemplate" and type in your new name. If you save again now, it will show the new project name! Make sure to save your project if you want to be able to recover it and/or work on it later!
To save the card image: Click on "File" -> "Export as >" and pick your preferred image file type. I suggest JPG for best results. Make sure to turn the quality slider to 50%, then hit the save button. This will download an image file of your chosen type, under the same name as the project name. To change that name, refer to the bullet point above or go to your files :)
Advanced: Changing the BG color of the pattern
Step one: Select the pattern background of either the name tag, power score or picture and turn it to 100% opacity.
Step two: Color-pick the current background color of the pattern.
Step three: Click "Image" -> "Adjustments" -> "Replace Color..." and click on the colored rectangle in the new pop-up. Replace the default color with your color-picked color. Now use the Hue, Saturation and Lightness sliders to get a new color that you like. Note down your slider values for later so you have them for the other elements.
Step four: Color-pick your new color and select the corresponding solid background layer. For those layers, click "Edit" -> "Fill..." and make sure you have "Foreground" and "Normal" selected, your Opacity is 100% and you have "Preserve Transparency" checked.
Step five: Don't forget to turn the opacity of your pattern layers back down to 60%.
Congrats! You have your colors changed! Repeat this process for the other two patterned elements.
Extra advanced: Changing the card's background color
NOTE: I DON'T recommend this. You can do it, but it's a lot of work.
Step one: Select the background layer and change its color to the new color you want. You can do it with the "Hue/Saturation..." adjustment, with the "Fill" edit as described above, or whichever way you want. Color-pick your new color.
Step two: Open the smart object PSDs for the frames for the frames for the picture, the name tag, and the power counter by double-clicking on the preview image of the layer.
Step three: Select the lowest colored layer of each and change its color to the same as your new card background color. Click on "File" -> "Save (Smart Object)". Close the project windows.
Step four: Open the folders for the various stat bars and select the "Color Overlay" layers. Change their colors the same way you did for the other layers. Warm colors and high-saturation colors will most likely not look good here and you might need to find a different way of making the stat bars look good. Playing around with the "Brightness/Contrast" adjustment layers above might help, but I can't promise anything. This is the main reason why I don't recommend changing the card background color. The stats bars are adjusted to the background color.
There we are! Either your card looks very pretty now or you understand why I don't recommend this. Either way: Good job!
Resources from Freepik:
Corners by tartila
Power counter frame
Picture frame by pch.vector
Stats bar by tartila
Pattern

Taglist (we're bringing out all fandoms today): @starcrossedjedis @oneirataxia-girl @daughter-of-melpomene @bravelittleflower @box-of-bats @fluffle-system @wheresmybloodynauglamir @nanukanal @supermarine-silvally @cody-helix02
#ocversetradingcards#artsy#photopea adventures#oc: akaito coraline#oc: helena#holy freaking shit i finally did it#look everyone!!!
18 notes
·
View notes
Text

Changing DESKTOP Tumblr Themes For Beginners (With Images)
Okay so, we've got an influx of new people on here. I thought I'd put together a tutorial on how to change your theme to make your blog look prettier and customize it however you want. You don't have to use the default theme, this isn't twitter.
Thankfully, tumblr is still full of very talented theme makers who regularly release new themes for you to use.
And remember - do not remove their credit!
They've spent hours, days and weeks coding those themes.
Also, it's common courtesy to like and reblog their theme posts. Promote their work to encourage them, you can even donate money on their ko-fi, Patreon or buy some of their themes. Support your local theme makers.
Let's start:
You need to find a theme that you like. Don't know where to start looking for themes? Well, you're in luck - there are blogs dedicated to promoting theme makers, the most popular are:
theme-hunter [LINK]
code-hunters [LINK]
codingcabin is also a good source for themes [LINK]
They have navigation pages where you can search your desired themes - one column, 6+ links, 540px posts, different fonts, headers and so much more- It's up to you which ones you like.
Honestly, I'm not going to hold your hand and show you every single theme makers' blog, because it's nigh impossible and you need to find a theme that specifically caters to you, so you need to keep digging on your own.
The rest is under the read more.
Found your theme? Okay. Now what do you do? Easy, find the theme post and look for the code. You can even look at the preview of the theme, so you know what it would look like on your blog.
Here is an example post [made by seyche]:
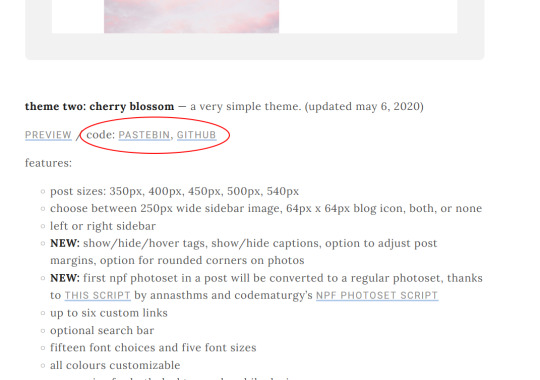
Note: Most theme makers host their codes on Pastebin and Github, but some may host them on Payhip or Patreon.
Now click either of the links, both will take you to the code, which looks like this:

Don't get scared if you've never worked with HTML, all you have to do is to copy the code. That's it. You don't have to do any coding yourself.
Now we paste the code. There are multiple ways on how to edit your theme on tumblr. I'll show you.
One way is going directly on your blog and clicking this palette icon in the upper right corner:
Or go to Settings > Blogs (lower right sidebar)
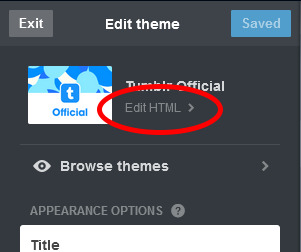
Make sure to enable custom themes and then click on Edit Theme.

You'll get directed to this page and a preview of your blog:

Now click Edit HTML in the upper left sidebar:
The sidebar changes to this:
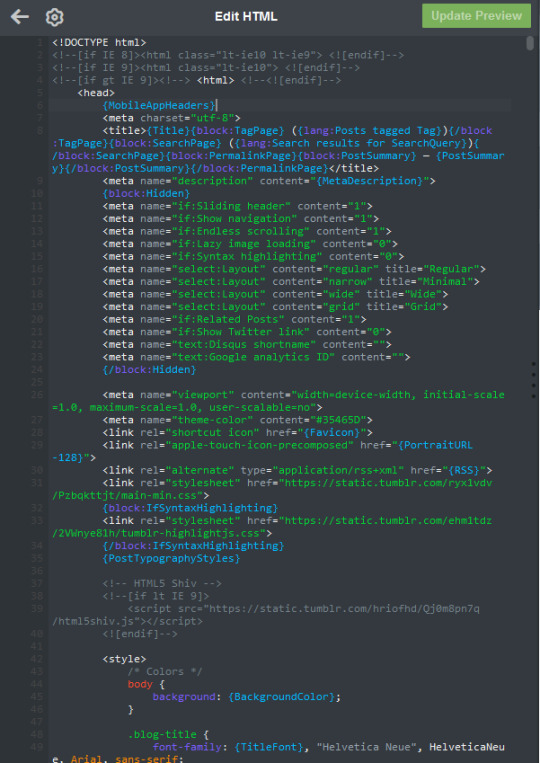
Now replace this code with the code you've copied. If you want to select all, then press Ctrl+A and paste/replace the code with Ctrl+V.
After you've pasted the copied code, click on Update Preview
After that, click on the arrow on the left to go back to the customization menu.
Now you can customize your theme to your heart's content.
(Note that these images are cropped, you can see your blog's preview.)
Every time you change something, the Update Preview button will show up and you have to click on it to see the changes.
When you're happy with your theme, then click Save. And you're done.

#themes#theme#tutorial#ref#this is for all the newbies#this has been sitting in my drafts for a while now
274 notes
·
View notes
Text
All resources in the AIO links were uploaded before Jan 13, 2024. THIS BLOG WILL NO LONGER RECEIVE UPDATES | NOTICE POST.
AIO link for Assets | Illustrations | Magazines & Manga
Please read the warnings before you decide to follow or interact with this blog.
It’s been a while since I last updated the navigation post, and since I’ve made a few minor adjustments in all of this blog’s current pages, I thought I should make a new easier-to-read one now. This post might be long so I’ll keep the main content under break.

IMPORTANT WARNINGS / BYF/BYI
First things first: I know there are a lot of complaints regarding miHoYo/HoYoverse’s character design and representation etc. etc. but tbh I don’t care and don’t want to give any duck about it either. I’m cool with people’s headcanons but I don’t want to see comments about real life social issues or politic shit in the reblogs, therefore I WILL BLOCK THOSE WHO DO SO IMMEDIATELY if I ever see any. If someone’s brain lacks the ability to separate fiction from reality and chooses to vent their bs here, I have all the rights to boot them out. Feel free to unfollow and block me if you don’t like how it sounds, take your complaints to miHoYo/HoYoverse/COGNOSPHERE directly, don’t do it here, thank you.
Secondly, this blog contains UNMARKED SPOILER, is NOT spoiler-free and will never be spoiler-free. However, I will never post leaks or any content related to leaks. All contents you see here were officially released by miHoYo/HoYoverse/COGNOSPHERE and/or their respective owners in-game and/or publicly by the time they are posted. If you’re not comfortable seeing any content(s) here, please consider blocking/muting/filtering respective tag(s).
BLOG NAVIGATION
» Tags Page «
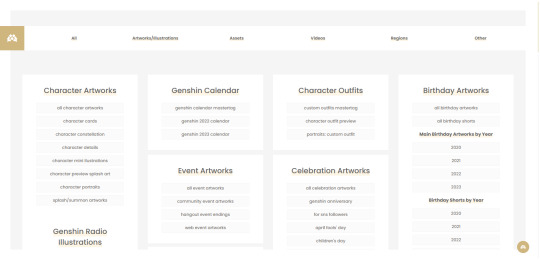
This page is the main masterlist of this blog. All tags assigned in this blog are grouped into categories and there’s a filter at the top of the page if when you want to see specific groups of tags. Read this post if you want to save image-type media in the largest size possible.
» Character Tags Page «
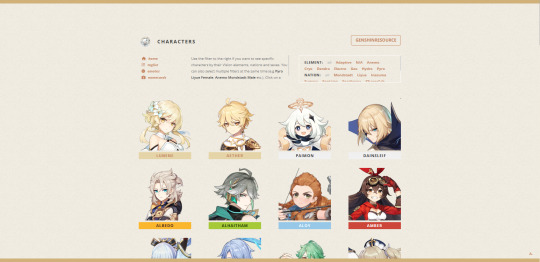
Nothing much to introduce here. There’s a filter box to the right where you can filter characters by their Vision elements, nations and sexes. Click on a character’s avatar to go to their tagged posts.
» Emotes Page «
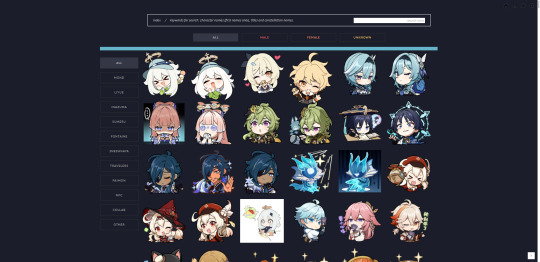
This page is the emote masterlist. All Genshin emotes in this blog will be added here soon after they’re posted in the newest -> oldest order.
» Namecards Page «

A gallery of all in-game namecards. Each namecard has its name shown when you hover your mouse over it. If you want to get the full-size image of any card, right-click on it and select “Open image in new tab” or just “Save image as”.
» Main Birthday Artworks/Birthday Shorts Gallery «
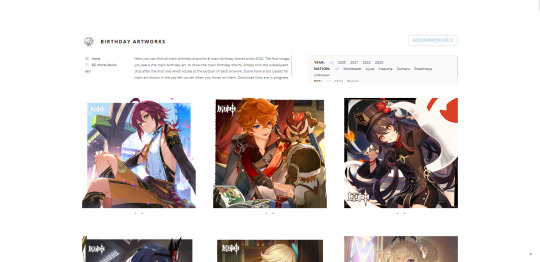
A gallery for main birthday artworks/birthday shorts. You can filter them by year, characters’ nations and sexes using the filter box on the right side. Switch between main birthday art and main birthday shorts by clicking the dots under each artwork. More info is in the description box.
» Birthday Shorts (Twins Version) Gallery «
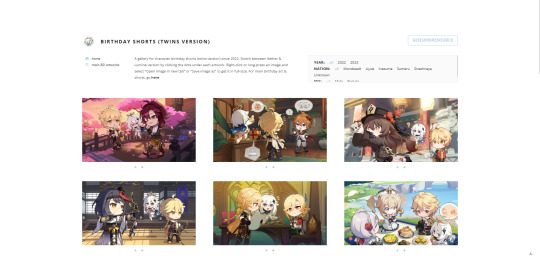
Nothing much to introduce here, it’s pretty much the same as the main birthday art gallery above but it’s for the twins version birthday shorts only.
» Genius Invokation TCG Card Gallery «


There are two versions of the TCG card gallery: Static and Dynamic. These pages use the same filter function that has been used in this blog’s other media pages so I believe everyone won’t have any issues navigating through them. Download instruction is inside the top right description box.

That’s all for now. I recommend bookmarking those pages so you can find your favorite stuff faster. Comments are permanently disabled here so these pages will make your simping life so much easier.
Last updated: January 24th, 2024
332 notes
·
View notes
Text
Tumblr cultural knowledge
The phrase 'cultural knowledge' is basically an insult and a criticism in my industry. If something isn't written down and shared in a way that's identifiable, accessible, and clear to the applicable individuals, it doesn't exist. Meaning that the correct usage will be lost as time and people change.
Here are a few things I've gleaned in my relatively short time of being an active tumblr user. (NOTE: 95% of my time here is via the mobile app). Please correct me if I've got anything wrong. I'd adore to see any that you've picked up as well.
Continue Reading Button: it's the last one in the tool bar. Looks like a zigzag line between two straight lines. I've added one to this post after this point. Even if you've selected the 'shorten long posts' option on your profile, that won't apply to reblogs. Save everyone's feeds and add it yourself to posts longer than three standard paragraphs.
Gifs: the search utility for gifs legit sucks. There is a logic applied but I can't say I've fully cracked it. What you CAN do if you want to add a specific gif to a post is paste the url of the gif's post into the gif search. Grab this via the three dots menu of any post, there'll be a copy link option. This will only grab the first image of that post though. BUT it will include the proper credit below the gif. Here's an example:

Gif credit: tapping the username below gif will open the source post.
Reblogs: the reason reblogs are so important for tumblr specifically is because the feed doesn't present posts to you outside of your parameters. Those parameters are mainly: 1) blogs you've followed and 2) tags you've followed. You reblogging a post gives it a chance to be seen again within the parameters you influence. So if you don't have any followers, you've got to add tags that ppl may have followed. If you don't use tags on posts, it can only be seen by those who follow you (theoretically, I've chatted with a few moots about the fact that we don't see each other's posts in the feed).
Post Edits: Reblogs don't sync with the original posts. If you edit a post, all of the reblogs will not update with the edits and will exist exactly as the post was when it was reblogged.
Was this helpful? I've got a few more oddities I've encountered but they seem more like workarounds to defects and I've tried to list the pain points I've personally noticed that seem to result from the intended design of tumblr.
#tumblr#tumblr usage#tumblr guide#to edit or reblog with an update-that is the OPs burden#seriously i know I'm a nerd butni dont know why ppl hate on SOPs so much-they just open doors for hiw to do stuff#pls stop holding the feed hostage with long posts. i want to read your long takes. i just don't want to scroll through it more than once#support gifmakers by adding their work to your sphere of influence but you gotta know what your sphere is first!#the tumblr search legit sucks though#it would help if gif posts had actual descriptive tags but apparently thats not cool
8 notes
·
View notes
Text
Xkit Rewritten settings across devices?
just a v quick little guide (with pictures!) for people who don't know how to transfer their XKit rewritten settings across their devices easily
(putting it under a cut because I've added alot of images and it takes up alot of room)
this is a pretty beginner guide, all you need to know/be able to do is to sign in across devices with the same account to access bookmarks or Google Docs on both devices, or just manually copy the Pastebin link
alternatively, you can use this basic recommended setup I made for a friend, to save you a little time, and tweak the settings to suit your needs
I'm running Google Chrome, but there's a Firefox version of XKit Rewritten too, and this should work the same
I've tested this so far on a Windows laptop, Chromebook and a Steam Deck, and all are working perfectly
here's a tutorial on getting Google Chrome on the Steam Deck (and getting it to open in Game Mode if you prefer that)
here's a tutorial on a workaround to use XKit Rewritten on mobile Firefox browser mode
I'm currently writing up my own tutorial on getting XKR to work on mobile, along with Chromium based browsers
(XKit Rewritten = XKR for simplicity)
my XKR backup is too long to paste into in a new Text Post and Save as Draft, which is usually my go to for saving/hosting things for Tumblr, and trying to check if I can add it to a new page on my blog crashes the tab/Chome entirely on both my Chromebook and my Steam Deck, so neither of these options are viable
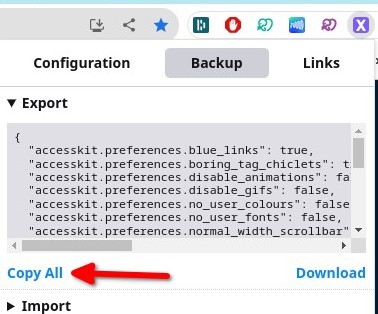
On the Exporting Device
go to your addons bar, select the XKit Rewritten "X" icon, backup, then "copy all"
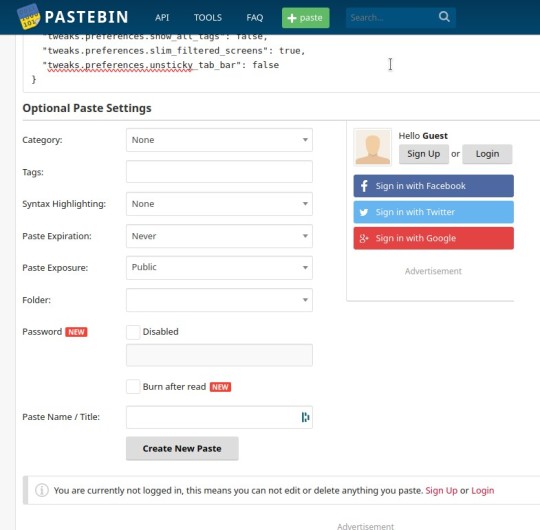
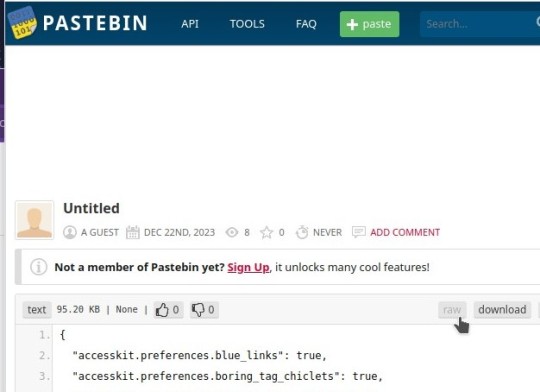
Pastebin method:
open pastebin, "+ paste", paste the code/text log into the box, and "Create New Paste". you don't need to add any tags or be signed in for this. you can leave everything blank
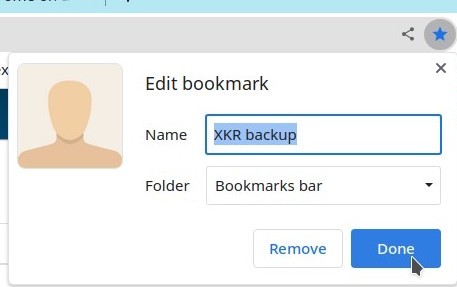
bookmark this text file and save it as something obvious like "xkit backup", for example. save it to a bookmark folder or just your bookmarks bar. not important as long as you can find it again
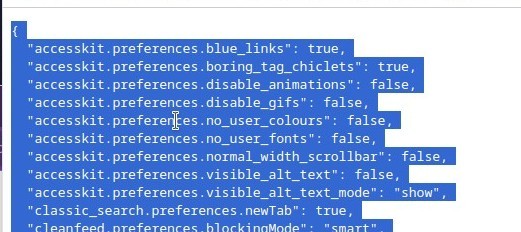
on the device you want to import the settings to, open the bookmarked page, then select all the text by selecting the "raw" option, click in the text somewhere and hit CTRL+A, CTRL+C. this will highlight all the text and copy it
Google Docs method:
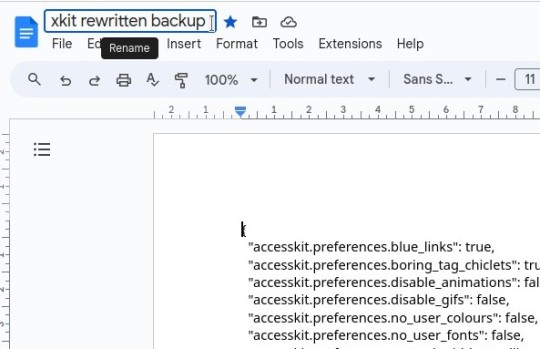
open Google Docs and log in with your Google Account. hit the big "+", "Create a New Document", and paste your code/text log in here. Save as something you'll remember like "xkit backup" for example
(you can bookmark this Doc for ease of finding, but it will be the last file in your list until you add more Docs)
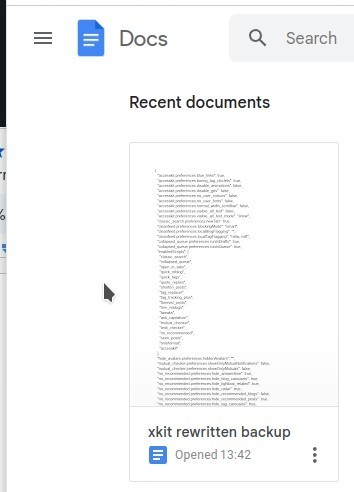
on the device you want to import the settings to, open the Google Doc, Select all text either by selecting "Edit", then "Select All", Right click, then "Copy", or just hitting CTRL+A, CTRL+C
On the Importing Device:
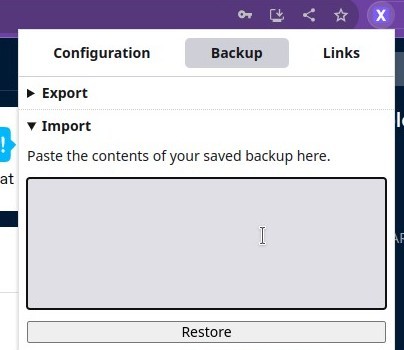
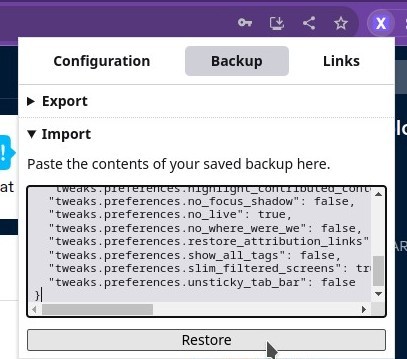
open the XKR addon tab again, "Backup", this time "Import", then paste the text into the box. When you hit "Restore" it'll say "Successfully restored"
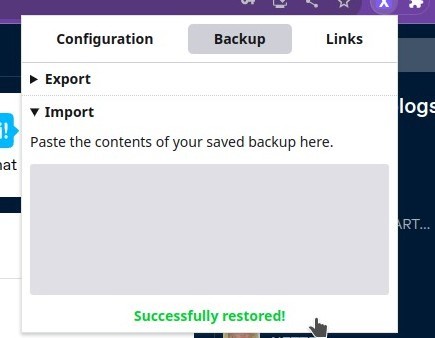
refresh your Dashboard and you should have all your settings restored!
Remember if you're transferring to a different blog, such as between RP Blogs, you will have all the tags and filters from your other blog, so you may need to go in and fiddle with those, but overall it's easier to import your existing settings than to start over from scratch!
#vatta tuts#xkit rewritten#rp ref#tumblr tips#steam deck#ok to rb#idk what else to tag this as lol#I got a REALLY bad leg cramp in the middle of doing this and had to take a break for a bit....#I'm using the Steam Deck to post this I'm not great with the editing software for the screenshot crops he's fiddly#a friend asked me for ways to get the settings over from their PC to their Laptop so! I obv decided to make a full on guide lmao#readmore.
10 notes
·
View notes
Note
Oops I didn't mean to post that anonymously. Yes, if you have the time to post more about giffing, that would be awesome!
Okay so I'll make a quick tutorial and I hope it's easy to understand ksjsk. It's very image heavy and I apologize for any typos. We'll be making this:
So I start by taking the screencaps with Potplayer. Just open your video (preferably 1080p x264). The shortcut to take your screencaps is Ctrl + G, it'll open this window:

(those are my configurations, it's in portuguese but it's easy to understand)
I usually create a folder in Documents for each gif. Also remember to start capturing a little earlier because it takes a few seconds to start, same thing when you finish.
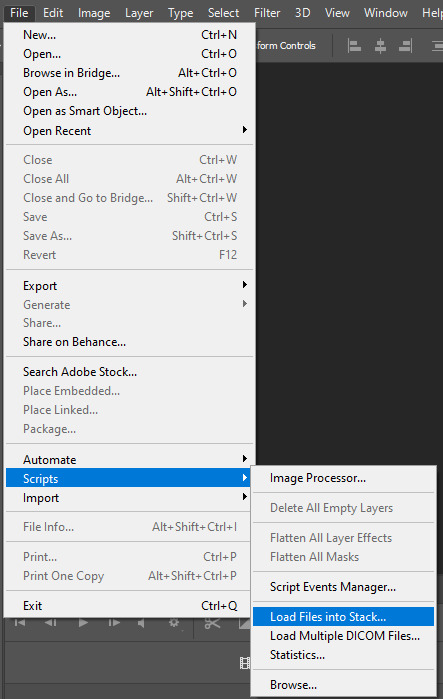
Now it's time to open it on photoshop! Make sure you have your timeline set up, if it's not showing up go to Window > Timeline. Now go to File > Scripts > Load File into Stacks
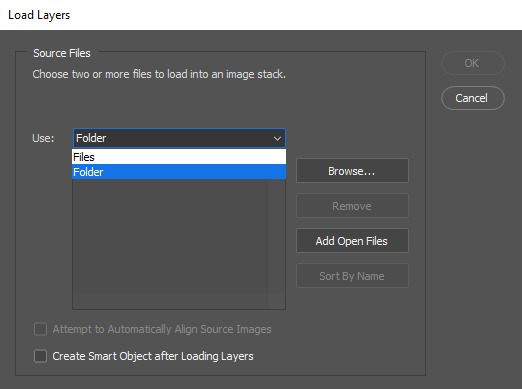
When this window opens, just choose your folder and click okay after it loads (might take a while if there's too many files)
So when it opens, you'll click on the 'Create Frame Animation' option in the timeline

It'll create a single layer, so go to the little button at the side and click on make frames from layers

they'll show up backwards, so go back and choose reverse frames

Now you're all set. It's time to delete what you don't want. Since tumblr accepts up to 10mb, I usually keep it between 60 frames. Really it depends on the scene and the dimensions you're gonna make your gif. (for example, if after your coloring, the background of your gif is completely black, you can go up to 175 frames, even if you make a 540x gif, i did that once lol)
So when you have your scene ready, select all frames and set your frame delay to 0,05.

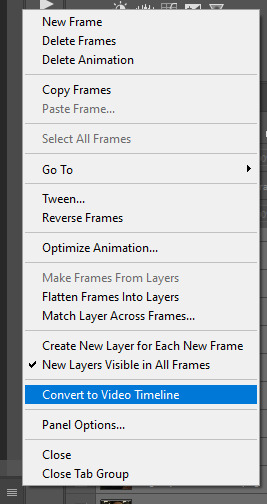
Then, with all your frames still selected, convert them to video timeline
Go to your frames, select all of them and convert them to smart object

So after that, you can crop your image! Check the tumblr dimensions here. When making big gifs I like to use 540x400, 500 or 600. Just what I think it'll fit best. For 2 per row, I usually use 268x180 or 268x200. For this gif I used 540x400 and cropped it, I always try to crop the borders so there's no risk of the gif having that weird white border around it.

Then go to Image > Image Size on top of the screen

Set to the dimensions you used when cropping, so for me it was 540 x 400:

I use bicubic smoother to resample but honestly i don't really know the difference kdjsk
Now let's sharpen it! I usually use this one for big gifs (comes with a better tutorial than this kdjsk) but it's got a lot of steps to it that i like to do it myself, so i just use to sharpen it. And if you're following this tutorial, we already did all the steps on the action, so just click on the Smart Sharpen.
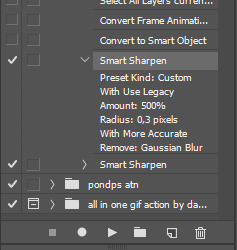
I also recommend this action for when you're making 268px gifs (two per row). I love this action too. Btw if you're just downloading your actions, you have to load them on those 3 little lines:

So for coloring! I use a base for most of my gifs and I edit them from there. Here's a great blog for coloring psds. If you want, I can make a separate tutorial on how I color my gifs, because it won't fit it all in 1 post.
Then I added my subtitles. Make sure the subtitle layer is on top of the coloring one so it doesn't look weird. Here's the settings I'm using for this one:
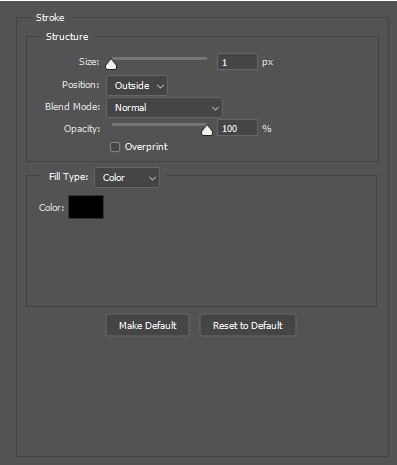
Now we're gonna add blending options. Go to the bottom of the screen with your subtitle layer selected and click on that little Fx:

I added drop shadow, outer glow and stroke:


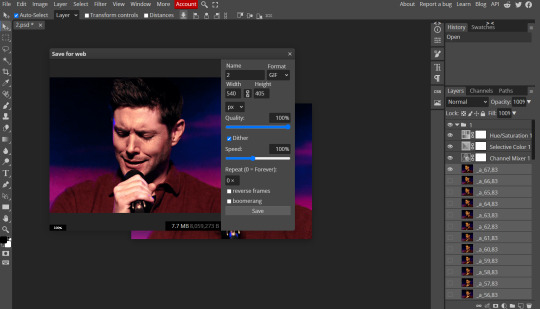
When you're done, you're gonna want to Save for Web. The shortcut is Ctrl + Shift + Alt + S. All at once. This window will open up:

This is how I like to save them. Don't forget to make sure your gif is set to forever and less than 10mb (you can check at the bottom of the screen, below your gif, mine is 5,5mb). And you're done!
Or not. I don't know why I have this problem, but after save it, my photoshop sets the frame delay back to 0,07, and that's too slow. So I open my gif again in File > Open. Or Ctrl + O.
Select all frames and set your frame delay to 0,05 again

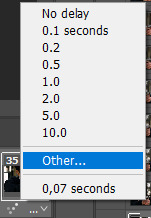
Do not convert to video timeline. Just Save for Web again. And now you're really done.
#gif tutorial#i hope this is not too confusing#im a terrible teacher#but please lemme know if you have any questions or if i didnt touch on something you were wondering
39 notes
·
View notes
Text

"I’ll save people whether or not it’s fair. ” ✳ private & selective canon divergent fushiguro megumi from jujutsu kaisen ✳ written by ammonia ✳ under 18 DNI ✳ please read the full pinned post before interacting ✳ megumi icons psd by @parieha ✳ current on anime/manga
IMPORTANT LINKS : character wiki/bio / images / threads / inspo / headcanons / meme tag / plotting calls / black clover au / black clover au threads
CURRENT ACTIVITY: answering asks, then drafts.
rules ->
ACTIVITY: writing is a hobby, and i have a chronic illness and a job that takes my time. please respect my slower activity level and do not pressure me for quick replies.
DRAMA: this is the most important rule! i do not tolerate vagueblogging, callout posts, rpc drama, harassment, pressure or abuse. i will block without warning.
DISCORD: i write mainly on discord, and my discord is available for mutuals. i also write other muses on discord from JJK and other anime.
18+ CONTENT: i don’t interact with writers who are minors. period. this blog may contain adult themes. i am currently not writing smut scenes and prefer to fade to black or skip over it.
GODMODDING: you should not write my character’s actions for me, nor should your character know mine’s inner thoughts/feelings or history.
TRIGGERS: i have no triggers that i request that you tag. i do my best to tag what i can in all posts. however, as this blog deals with mature themes on occasion, follow at your own risk.
SPOILERS: i will tag spoilers for new episodes up to 1 week after airing. be aware that i will only tag manga visuals post-anime and not not tag manga spoilers in threads as many of my threads take place post-anime canon. they will be tagged as the following example: #jjk spoilers. i am up to date on manga & episodes.
TRANSLATIONS: as i’m a native english speaker who can’t read japanese, the manga and anime i reference from are the official english translations. while i know they’re likely not as accurate, it’s what i have to work from.
PLOTS: i will not be writing adultery, or sexual assault as i choose not to. i prefer to pre-plot battle scenes in advance. i am open to writing with just about any character/verse. if it’s from media i haven’t read/seen/played i will ask you for a wiki so i can read up a little and become familiar. i like to focus on interpersonal relationships, not just romantic but familial, friends, enemies and anything in between. i am accepting of all oc's as long as i can find your character's info on your blog easily - and i am open to ship with oc's too if there is chemistry between the characters.
SHIPPING: i am open to write relationships, whether it is lovers, friendship, enemies, relatives or found family. if you want to write a dynamic of any kind with me, drop me a DM! i usually ship romance by chemistry.
8 notes
·
View notes
Text
Introducing Framespik: Your Ultimate Event Planning and Photography Companion.

Are you tired of juggling multiple tools and platforms to plan your events and capture those precious moments? Say hello to Framespik – the all-in-one solution for event planning and photography enthusiasts alike! In this blog post, we're thrilled to introduce you to Framespik and showcase how it can revolutionize the way you organize events and capture memories.
Simplify Your Event Planning Process
Framespik isn't just another event planning tool – it's a game-changer. With its intuitive interface and powerful features, organizing events has never been easier. Whether you're planning a birthday party, a corporate conference, or a wedding, Framespik streamlines every step of the process.
Seamless Collaboration: Invite collaborators, assign tasks, and keep everyone on the same page with Framespik's collaborative tools. Say goodbye to endless email chains and missed messages.
Dynamic Planning Boards: Visualize your event from start to finish with customizable planning boards. Drag and drop tasks, deadlines, and resources to stay organized and efficient.
Vendor Management: Easily connect with vendors and suppliers, track quotes, and manage contracts all within the Framespik platform. No more searching through your inbox for important documents.
Capture Every Moment with Framespik Photography
But Framespik isn't just about planning – it's also about capturing those unforgettable moments. With its integrated photography features, Framespik ensures that every aspect of your event is documented beautifully.
Professional Photography Services: Need a photographer for your event? Framespik has you covered. Browse through a curated selection of talented photographers and book the perfect one for your occasion.
Photo Sharing and Organization: Say goodbye to scattered photo albums and USB drives. Framespik's cloud-based photo storage allows you to easily organize and share your event photos with friends, family, and attendees.
Instant Editing and Filters: Want to add a touch of flair to your event photos? Framespik's built-in editing tools let you enhance your images with filters, effects, and adjustments – all with just a few clicks.
Why Choose Framespik?
Efficiency: Save time and streamline your event planning process with Framespik's comprehensive suite of tools.
Quality: From planning to photography, Framespik ensures that every aspect of your event is executed with precision and professionalism.
Convenience: With everything you need in one place, Framespik simplifies the event planning and photography experience, allowing you to focus on what matters most – creating unforgettable memories.
Get Started with Framespik Today!
Ready to take your event planning and photography to the next level? Sign up for Framespik today and experience the future of event management. Whether you're a seasoned event planner or a photography enthusiast, Framespik has everything you need to bring your vision to life. Join the Framespik community and make every event a masterpiece.
2 notes
·
View notes
Note
your gifs are so good!! do you have any resources for getting started? for context I'm a dumbass with a netflix account and destiel brainworms. <3
Hi, thank you, that is so kind of you to say!
First step is getting stuff to turn into gifs (which is the hardest part for me personally)
This post has a lot of links, since you have netflix you could probably just screen record it. I've never torrented so I'm no help with that.
I usually cut bigger files into smaller files (built in video editor on your machine should work for this) and then use this site to cut those into the clips I want to gif. This site does only let you cut 5 clips per day, but if you open it in an incognito page, cut 5 clips, close incognito and then reopen it again you can get 5 clips as many times as you need. Also I have to turn the speed to 50% to get the clips to work.
For actually making the gifs I use Photopea which is basically a free open source in-browser version of photoshop. (Some people create a gif in ez-gif forst and then put it in photopea, I just put the clips straight in.)
This post explains the basics of photopea and this blog has a lot of very helpful tutorials and tips. (Some people create a gif in ez-gif first and then put it in photopea, I just put the clips straight in)
The specifics of how I usually make a gif are under the cut here

Open your video and find the clip you want, I try not to go over 3 seconds because any longer than that tends to make the finished gif be larger than tumblr can handle, you can always cut out frames in photopea if that happens though. (Also happy pride month to bi lighting Dean who's my gif subject today)
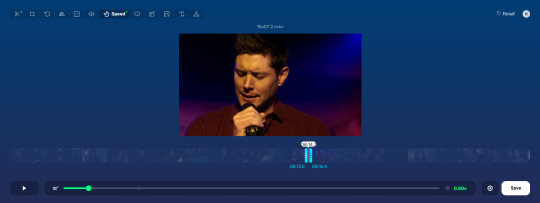
Go to the speed setting and set it to 50% and then save the clip

Go to Photopea > File > Open and then select the file

Leave the FPS set on 10.0, this is fine
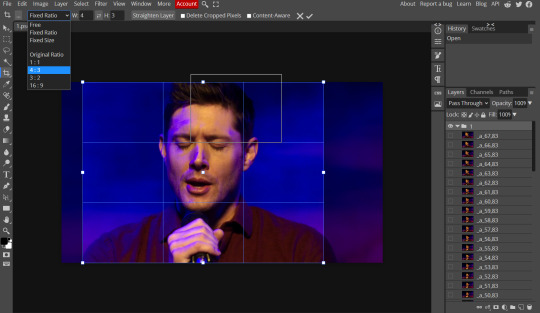
So now it's open and I'm going to crop it to a 4:3 ratio (I don't always do this, it depends on the clip, some look better uncropped)
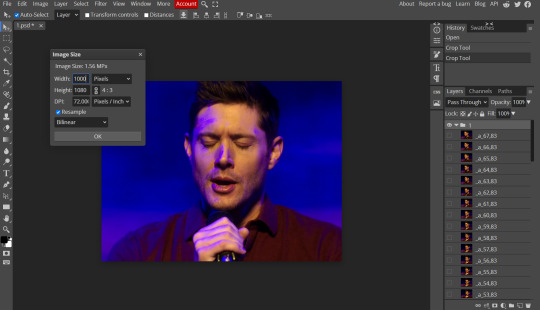
Now that he's cropped I'm going Image > Image Size and making the width 1000. this makes it sharpen much quicker.
Select all the frames (click the first one, hold down the shift key, and click the bottom one) and then go Filter > Sharpen > Smart sharpen
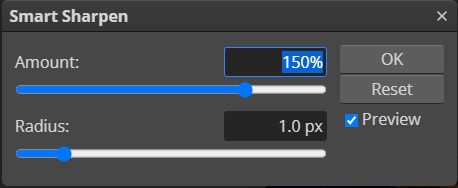
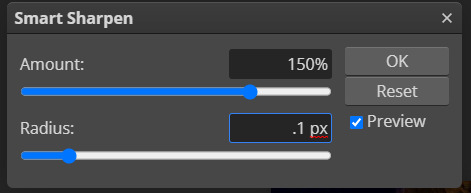
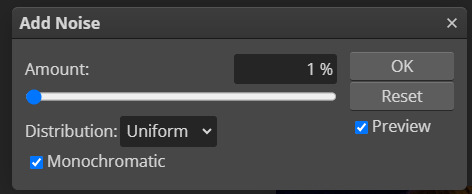

I usually sharpen twice (amount 150%, radius 1.0 and then .1) , add noise (amount 1, distribution: uniform, monochromatic) , and then sharpen again (amount 25%, radius 10.0 )

Now that the filters are done I just add some layers to change the color a bit (there's a lot of different stuff you can do with these, what you change is really a matter of personal taste)

Now I'm gonna change the width to 540, tumblr gifs are sized to 540 so you always want to do this so they fit right

Go to File > Export as > Gif
Make sure you press the dither button, this helps make the gif less pixelated, you can also change the speed if you want. After that save it


This is the gif with no edits but cropping vs. the sharpened, color edited gif
Happy gifmaking, I hope this helps you some!
9 notes
·
View notes
Text
how to customise your blog from within the app
With the whole Twitter exploding into a million tiny pieces situation we’re seeing a lot of people who haven’t been around for a good while or are completely/mostly new to Tumblr, and I’ve been seeing a lot of posts from regular tumblrinas saying “please change from the default icon and settings, you look like a bot”. I’ve been wanting to make some posts about fun ways to customise your tumblr experience and I thought I’d start with a basic bitch tutorial on what you can customise from within the app.
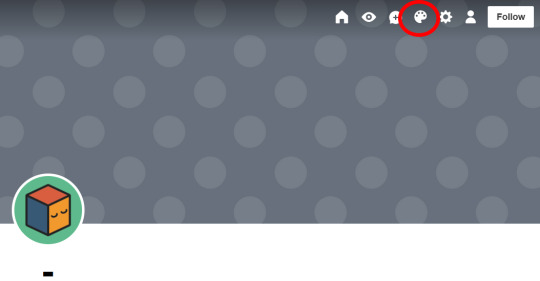
To give the app version of your blog the equivalent of a sick new haircut, go to the lil guy who lives in the bottom right? (?? I think it’s the right. I have dyscalculia but I promise I’m otherwise mostly reliable) side of your dash. Give him a smack on his phat bald head to gain entry to your profile page. Then go to the paint palette icon at the top of your profile.
From here you can change four five things:
Your blog title. This is different from your url and it doesn’t have to match your url or be unique, unless you personally feel the need to be unique. You can change it by tapping it to start editing; when you do you’ll see three menus come up. “Title” is where you change what the title is. “Font” allows you to select a font and some of the fonts have a bolded option. “Colour” will give you a colour sampler to pick a colour from. You don’t have to have a title and you can turn it off under the “font” menu, but having one will make it clearer that you aren’t a bot, especially if you don’t choose “sexyangiebabymilf6969” for your title.

Your bio. I have a Van Gogh quote because I have a separate about page*, so I’m fine letting my bio just be a faintly pretentious smudge of mystique. Other people will often have whatever name they go by online, their pronouns, and sometimes their age and what their main interests are, eg fandom, hobbies, special interests, you know, the neurodiverse slut stuff. People also put links there sometimes using html coding*, like the kids put their caard and some people put ko-fi. You can change your bio by tapping on it to edit. You don’t have to have a bio and can turn it off, but if you have one people will be much less likely to think you’re a bot, and they’ll get some vague idea of who you are and what content you like to paste into your online scrapbook.
Your blog background colour. This can be changed by tapping on the “background” button.
Your accent colour. This can be changed by tapping on the “accent” button.
Your header image. This can be changed by tapping on your header, and you’re able to zoom into a chosen picture to or drag it to reposition. You can also turn off your header or choose whether or not to stretch the image to the necessary size.
Your icon/avatar. This can be changed by tapping on the icon. You can choose to hide your avatar on your profile (it will still be visible on the dash), and select a square or round frame.
Extra note on colour customising. You can pick out a truly custom colour by messing about with the slider and colour sampler, but if you want quick and easy or you’re shite at colour sampling you can click on the circles of colour above the slider to see a range of different preset shades, including greyscale. Each circle has a range of a few pages you can swipe through. If they all turn out to be shite you can go back to the slider by clicking the rainbow circle.

Each time you change an aspect of your profile and are satisfied with it, hit “update” up in the corner before moving to the next thing. Once all the edits are made save them by hitting “save”, also in the upper corner.
Resources for headers and icons can be found by looking through the “headers” and “icons” tags. Please follow the rules of the people who make and share those (they’re usually just “don’t claim it’s your edit, don’t repost, and leave a like or reblog” but each person has their own). I’d also recommend image searching for patterns, as you can tile your header if you use a seamless pattern image, and looking through livejournal for icons (again, please follow creator rules, icons take time to make).
*This post is hopefully a precursor to a post or numerous posts about how you can customise your blog outside the app appearance, including adding pages and using coding to put links wherever you want, and I plan to link to more resources for customisation in said post/s. When/if I get around to writing that I’ll drop a link in a comment or reblog of this post.
Godspeed, have fun finding out how much of the bee movie script you can fit in your bio I remain ever faithfully yours etc
21 notes
·
View notes
Text
✨S!NFULLY P!NNED✨
THIS BE ME MAKING CAVE P!NK ACCESSABLE FOR MOBILE FANS, MOSTLY COPY + PASTEY CUZ I B LAZY 💅
New pinned image! 😇 me: *passive aggressive keking noises, i dont need to see a random's "vinegar shrug"*
Am I using your artwork and you want it removed? HMU with the post title and I’ll remove the art ASAP.🙏
If you are under the age of 18 and have no age in your bio, head on over to @candybowbeansies to read my SFW posts!!
I can't help but notice that a majority of my blog is unaccessable from the mobile app!
So let's fix that, shall we?~
AGE!
As of August, 2023...27!
Don’t be rood, doods, please refer to this old person as forever 21 😂
PRONOUNS!
They/Them
INTERESTS!
In manga/manhwa/anime? Isekai, shoujo, music, horror. Literally just ab anything except watersports, noncon, incest, yuri and scat 😂 my guilty pleasure is yaoi even tho i can’t write it to save my life
I love zombies, wargames like Enlisted, Heroes and Generals plus Mount and Blade(an oldie but a goodie), paranormal stories/movies/games, and I freaking love ROBOTS and Arnie’s the only rl dude I simp for ngl <3
I love holographic colors and holo in general. (blame the nailpolish channel on yt)
AND I FREAKING LOVE GAMES!
Ass😉ass😉in’s Creed, They are Billions, 7 Days to Die, Kynseed, Among us, Phasmophobia, the Dungeons series(i love slavedriving my minions and milking heroes of their ✨cash✨), Surviving Mars, Stranded Deep, and My Time At Portia to name only a select few. Aadit’s route needs to be completed!!11! 😭😭😭
Don't be afraid to hmu fellow simps! I don't bite. Much. 💅

Requestz
Open|Slow|Closed
Thirstz
Open|Slow|Closed
Limit
4/5
I’m slow as molasses, so keep an eye or two out for awhile if you send an ask! 💅 If the limit does not update within 12 hrs, it's safe to assume Tumblr ate your ask! I'm still figuring this stuff out. Thankies!~
Meet my new ✨S!NFULLY INDEXED!✨
Please keep in mind I only do this for
✨FUN!✨
So ask with a grain of salt, I may or may not submit our thirst, and the list of things I refuse to write may or may not grow. But still, try me! I’m pretty kinky. 🥴 THANKIES!~
My rules and info:
All Underage characters are aged UP!
No scat!
No (spit/piss)watersports! Willing to try cumplay.
No noncon or dubcon unless the character(s) specified and reader are consenting to yummy RolePlay. 🥴 (Don’t be shy to request Monster!ManxReader, including Incubi[they need Reader consent in dis hous]!)
No drowning, mummification, or full-on public nudity! I'm willing to try semi though~
WE NEED MORE YANDERE x CONSENSUAL!READER PULEASE 🥺👉👈
I don’t write reader skintones(white-POC-other). I will always endeavor to keep this sort of stuff neutral so readers can insert themselves. This blog is safe for everyone over 18, no matter ur ethnicity sweeties! 🥴 Also, to note; this ✨does not✨ expand to certain species!reader or species!character for obvious reasons-as an example, the typical fantasy orc is usually green, after all!
Who I write for!
Jujutsu Kaisen!
SUKUNA RYOMEN
MAHITO
KENTO NANAMI
SATORU GOJO
SUGURO GETO
YUJI ITADORI
MEGUMI FUSHIGURO
YUTA OKKOTSU
TOJI FUSHIGURO
TOGE INUMAKI
AOI TODO
My Hero Academia!
YAGI TOSHINORI
TAKAMI KEIGO
AMAJIKI TAMAKI
AIZAWA SHOUTA
SHIGARAKI TOMURA
BAKUGO KATSUKI
DABI
TODOROKI SHOTO
TODOROKI ENJI
KIRISHIMA EIJIRO
KAMINARI DENKI
TENYA IDA
TOKOYAMI FUMIKAGE
SERO HANTA
CHISAKI KAI
TETSUTETSU TETSUTETSU
TOYOMITSU TAISHIRO
SAKAMATA KUUGO
YOARASHI INASA
MIDORIYA IZUKU
TOGATA MIRIO
YAMADA HIZASHI
BUBAIGAWARA JIN
SIR NIGHTEYE
Demon Slayer!
HASHIBA
KAMADO TANJIRO
AGATSUMA ZENITSU
I Was a Teenage Exocolonist!
SYM
DYS
Trigun Stampede!
MILLIONS KNIVES
VASH
WOLFWOOD
I AM WILLING TO TRY WRITING OTHER CHARACTERS! ;D

COMMUNITY LABELS!~
I am taking part in Tumblrs new community labels update, and as of the day of this post, I've added labels to my corresponding pieces!
I write violent pieces(canon-violence and yummy yanderes), sexual content, and one or two(maybe more!) of my pieces include the use of or imply drugs and alcohol. If you are fine with these topics, and are the legal age for sexual content, please read this, it shows you how to tick everything! 💞
And please understand I live in a place where people under 18 are considered minors! Please respect this, as my works will forever be up and readable, so please wait until you are 18 to interact with my nsfw stuff in any shape or form! THANKIES!~
Fin
36 notes
·
View notes
Text
Makeover of photo background with PixelLab: Drip & Text on Photo

In today's digital age, photo editing has become an essential tool for anyone looking to enhance their photos and make them truly stand out. Whether you're a professional photographer or just someone who enjoys sharing moments on social media, having a reliable photo editing app can make a world of difference. One such app that has gained popularity for its versatility and powerful features is PixelLab: Drip & Text on Photo. Among its many features, the background eraser stands out as a handy tool for creating eye-catching images. In this blog post, we'll walk you through the steps to use the background eraser feature in PixelLab.
Why Use PixelLab: Drip & Text on Photo?
Before we dive into the background eraser feature, let's briefly explore why PixelLab is worth considering for your photo editing needs. PixelLab is known for its user-friendly interface and a wide range of features that allow you to unleash your creativity. Whether you want to add text to your photos, create stunning graphics, or manipulate the background, PixelLab has got you covered. Now, let's focus on the background eraser feature.
Using the Background Eraser Feature in PixelLabThe background eraser feature in PixelLab is a game-changer for anyone looking to remove or change the background of their photos. Whether you want to isolate a subject, create a transparent background, or replace the existing backdrop with something new, PixelLab's background eraser can do it all. Here's how to use it:
Step 1: Download and Install PixelLabIf you haven't already, head to your app store and download PixelLab: Drip & Text on Photo. Once it's installed, open the app.
Step 2: Import Your Image
Select the image you want to edit from your gallery or take a new photo using the app's camera feature. Once your image is loaded, tap on it to start editing.
Step 3: Access the Background Eraser Tool
To access the background eraser, tap on the "Effects" icon in the bottom menu. This will open a list of editing tools. Scroll down and select "Background Eraser."
Step 4: Adjust Eraser Settings
Before you start erasing the background, you can adjust the settings to suit your needs. You can change the brush size, hardness, and opacity of the eraser tool. Play around with these settings to get the desired precision.
Step 5: Start Erasing
Using your finger or a stylus, start erasing the background of your image. You'll notice that the background will become transparent as you erase it. Take your time and be precise, especially around the edges of your subject.
Step 6: Refine Your Selection
If you accidentally erase part of your subject, don't worry. PixelLab provides an "Undo" button for quick corrections. You can also switch to the "Restore" brush to bring back parts of the subject that were unintentionally erased.
Step 7: Replace or Edit the Background
Once you've removed the background, you can replace it with a new image or leave it transparent. PixelLab offers various options for adding a new backdrop, including solid colors, gradients, or even other photos from your gallery.
Step 8: Save and Share
After you're satisfied with your edited image, tap the checkmark or "Apply" button to save your changes. You can then save the image to your device or share it directly on social media platforms.
Conclusion
PixelLab: Drip & Text on Photo's background eraser feature opens up a world of creative possibilities for your photo editing endeavors. Whether you're looking to create professional-looking portraits or have fun with imaginative backgrounds, this app has the tools you need to achieve stunning results. With a user-friendly interface and a host of editing options, PixelLab is a must-have for anyone wanting to take their photo editing skills to the next level. Give it a try, and let your creativity shine!
Grab it for free now from here: https://apps.apple.com/app/id1658958601
#BackgroundErase#PhotoEditing#GraphicDesign#ImageManipulation#CreativeEditing#RemoveBackground#TransparentBackground#PhotoEffects#DigitalArt#PixelLabEraser#EraseAndReplace#PhotoRetouching#DesignTools#VisualContent#ArtisticEdits#PhotoEnhancement#DIYDesign#MobileEditing#SocialMediaGraphics#VisualCreativity
2 notes
·
View notes
Last Seen Blogs

askhuman-minecraftmobs
Ask The Human!Minecraft Mobs

secondchanceskyewardromance
Second Chance: SkyeWard Romance

himmich
S、射手、网调

guerra86c
solamente yo

dokidobe
yellow.dr.monv