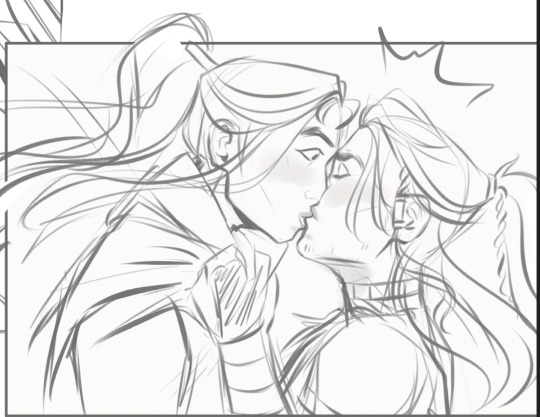
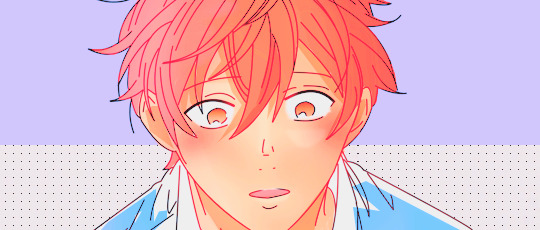
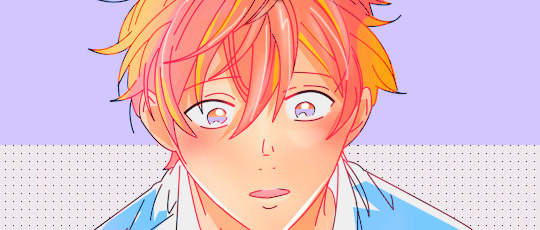
#also this is my first time going in first with a lineart pen instead of sketching beforehand and honestly i was afraid it would turn out ba
Note
Hey there! I hope you have OC interactions open so, may I ask how Matvey would feel about Captain Arjun? ☺️
Hiya !
Matvey's typically avoidant around his superiors besides a spare few but especially Cpt. Price or much of the captains(since everyone seems to have a bad history with his parents.) So he listens or watches before making his silent escape to leave, away from something out of his element or in general turbulent footing. Given the way he sees most of the captains and his dynamics with them he already has a preconception and expectation of Arjun given his current stance on everyone else high on the ladder. Luckily, Arjun's high enough rank to be on the "need to know" list and would likely know what he's getting into. Most of Matvey's preconceptions comes from his own history of being under scrutiny and bad history with authority, so it's hard for him to break out of it without going back into his shell. Arjun and Matvey play off each other as Arjun wanted to be a soldier while Matvey was pushed into a role he was never supposed to play. Arjun would have been there as well when he was first brought in, and it would not have looked pretty at all(malnourishment and blood loss is not a good look.)
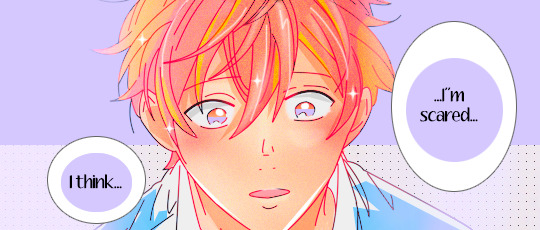
So, in regard to Arjun, given his protective nature Matvey would be at first confused and then grumbly on the outside but internally finds it rather endearing but also finds it an obstacle once Matvey's age shows and goes against people's professional concerns, including Arjun's. He's not used to being dependent on people nor those said people actually caring for him without ulterior motives. He finds it odd and unnatural and tries in any way he can to find something that isn't there "cause how could anyone care for me if they're not intending on using me for political games, influence, or money?" Arjun's only way of really getting past Matvey's defenses is proving to him that he means what he says and isn't faking his genuine words out of mere formalities.
Matvey's one weakness is his curiosity, and he does get curious about Arjun's past and would likely surprise Arjun with a few questions about personal things every once and a while, though the tone still feeling like Matvey's holding something back. Though... I do believe they'd bond over their mutual sweet tooths(Matvey is very curious about the new cuisine and food places nearby the base since he now doesn't have to live off of cans.)
Since Matvey's hunted by hired mercs and a large network with a large amount of money banking on his retrieval he's usually told to stay on base along with a protection order so everyone that's high up enough could keep a close eye on him. Though, there are times where he wishes to be "alone" and leaves base without even a note which anyone with a keen eye would notice. Honestly, don't know if Arjun would be amused at the gall of Matvey or just outright scolding him.
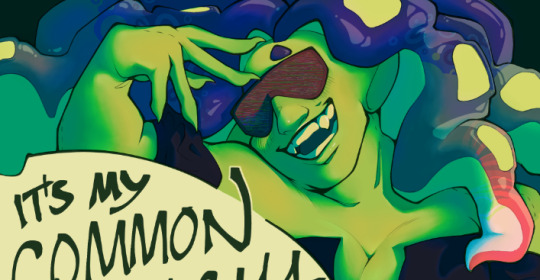
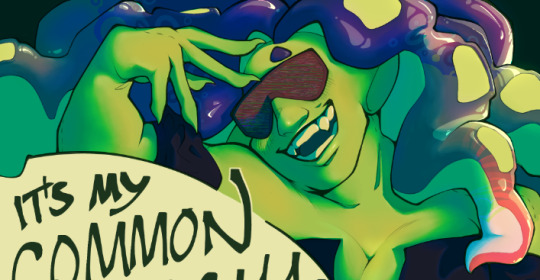
I hope I did Captain Arjun justice since I've never drawn people that were well-toned before ! ヽ(⌒∇⌒)ノ I had a lot of fun drawing him so here's Arjun finding him violating his protection order at a cafe both dressed all casual(Matvey of course avoiding the question of why he violated his protection order or why he's off on his own to begin with.) @welldonekhushi

#asks#welldonekhushi#captain arjun#other's ocs#cod oc: matvey-lukyan volkov-makarov#oc: matvey-lukyan volkov-makarov#cod ocs#cod oc art#matvey eventually gives him the title of “old man” in his mother language though tends to say it out of earshot#arjun is tired#when you accidentally wind up at the same cafe together and one of you is definitely not supposed to be there#tbf matvey wouldnt be that nervous about confrontation and would just not understand why everyone's up in arms about it#also this is my first time going in first with a lineart pen instead of sketching beforehand and honestly i was afraid it would turn out ba#but it didnt so im very happy#the dessert is a large waffle with whip cream in the middle and peeled dried fruit shaped like flowers#matvey swiped a wallet off some civ he can pay for it
6 notes
·
View notes
Note
Heya! As a baby artist I was just wondering how long it typically takes you to draw a character? And if you have any tips for getting the lines to look so clean :-) I love your art sm it always makes me smile
Hi! Ah, I'm so glad my art makes you smile! :')
I have...several possible answers for you, lol. First of all, the time it takes for me to draw a character varies. Something I’m working on to speed up my process is learning anatomy. Most of my time is spent trying to get the anatomy of a drawing down, and the more you know it, the quicker it can go.
But as for lineart, the number 1 way I've found for having clean lines is having a detailed sketch.

While the sketch was messy, around the face especially, all the lines were "in place." I wasn't having to resize things or change the shape. This makes lineart completely mindless for me, and that means I don't have to do as many corrections while drawing, keeping my lines clean.
However, when I first started out, it was hard to get here. If you're starting out, your art may look like this, with a bunch of short strokes:

There are two ways I've found to combat this (and it's honestly something I'm still working on...) Short strokes like this tend to happen when you're unsure of what you're drawing, which happens a lot when you're starting out. Planning out a drawing in your head and knowing where you're going to end each line when you start is helpful. (I.E. "I know the side of the face needs to go down enough to reach where a chin should be, so I'm going to try to do it in one stroke instead of seven). Proko has a good video about this here.
You can also practice drawing longer strokes just on their own. Lots of drawing books will tell you to start by practicing ellipses and lines from different directions to help you get used to longer motions. Becoming more confident in drawing full lines will help!
But, as you're learning, tools can help. I draw with a tapered pressure sensitive pen, which allows me to have some shorter strokes while hiding the results of it. (Although it's still good to practice avoiding this, because it'll help your drawing even with a brush that hides it a bit better.)

i hope this was helpful!
#asks#my tutorials#i still have a problem with this tbh which is why i love my brush but i'm trying to grow out of it lmao.#lineart#sometimes drawing a character takes fifteen minutes and bam it's done and sometimes i wrestle with a simple pose for days. it is how it is.#i think i have some better sketch to lineart examples. because sometimes my sketch is so detailed that it's sometimes a waste of time for m#to do lineart because it's almost redundant#by lineart's my favorite thing so i always do it anyway#except for the second turtle duck comic lol. some of those i didn't line and i just cleaned up the sketch so i probably should have used th#that as an example but i think this illustrates my point
70 notes
·
View notes
Note
WHAT R UR BRUSHES I ADORE UR ART + any tips on doing your style? (yes i am stealing it)
hi thank u!!!
i use the GvW ELDER P4 brush from the GvW Ink brush set (free). and i also use the Dry Ink Pen from the Rayna Brushes set (also free).
as for replicating my style ERMMM i’m not very good at explaining stuff but i’ll do my best!
• Do loose but sharp pen strokes, don’t worry about it looking good, you can fix that later. pretend you’re one of those weird crazy artists like in the movies
• For hair dont add too much detail, a few spiky triangles do the job just fine
• MAKE USE OF YOUR PEN PRESSURE make your first line super thin and the next one super thick, this is a lawless land
• add weird little zig zags on hair
• When doing lineart, fill in dark objects it saves a lot of time during the coloring process cuz 50% of the drawing was technically already colored during the lineart process . we love saving time in this house
• Don’t use the undo button, just loosely erase your lines with the eraser. i like it when art looks messy
• I try to make my art look a little ‘flat’ like in childrens picture books or those old cartoons so just throw all perspective rules out of the window
• For brighter/livelier colors try to color on a dark grey canvas instead of a white one it makes picking harmonizing colors very easy idk how that works but it does (a dark canvas is easier on the eyes as well) (change it back to white when ur done)
I CANT THINK OF ANYTHING ELSE LMAO just go with the flow ….. the goal is to have fun ok……. peace and love forever … u can ask for clarification btw i know i didn’t explain this very well
35 notes
·
View notes
Note
I AM ASKING U ABOUT THE SYMBOLISM IN THE JENNY PATCHES
I am SO glad you asked :D please allow me to ramble for. way too long probably. (original post this is in reference to)
Let's start with Thief because that's the one that I nailed down the design for first. In this design: an hourglass almost out of time, a ring of three keys - a house key, a car key, and a skeleton key - and a compass keychain.
Jenny the Thief is the one who held the gate as long as she could before vanishing into the night, the one who traded in her old car for a custom Kawasaki to leave behind a no-longer-safe house (ring of keys). Thief is the one who didn't know her time was up until it had gone, the one who had to live through everything ending to understand how it happened (hourglass). When she left, it wasn't towards anywhere particular, just away from here, pick a direction and run (compass). Additional note for the skeleton key specifically: that one is mostly for me, because I wear a key like that on a necklace and I thought it fit nicely, but also it's for places and stories we can only guess at, events locked outside the scope of the narrative.

I had a lot more trouble nailing down the design for Warrior - it went through a few iterations. The original one had a sword and a pen: battles to fight and stories to tell. I talked with my friend Sunny @paladinboyfriend for a little while about it, bouncing around ideas; ey said something about Jenny being a bastion of hope glowing like a lighthouse, but burning too bright and consuming herself in the process, and I decided to go with a lighter as a modern analogue to that.
To me, Jenny the Warrior is the kind of person that everybody knows someone like - a couple years older than you and leagues more confident, a steadfast support who's always ready for anything and has just the tool for whatever problem arises ("also jenny is butch, so there's that" - Sunny). She's not an ancient hero, she's here and now, a warrior with a motorcycle and a leather jacket and a house where you can crash for as long as you need. So she gets a pocketknife instead of a sword and a lighter instead of a torch, tools for someone who protects and guides. A pen for countless unknown stories lived and told, for lines drawn and lines held for as long as she could. I added a carabiner attached to the knife (which, yes I know you wouldn't do that irl, it's about the design) because I felt like it filled out the design a little bit, and also, again, in my heart jenny is butch, and it felt like a nice little nod to that.
For both designs, I used the same flat color palette of gold, off-white, and a dark warm gray, since those are the general colors of the album color. I also used a thick and slightly textured brush for the lineart, because I like the slightly more flawed and organic feel it gave the pieces.
I think that's pretty much it, but I can probably come up with more to say about specific aspects of the designs if there's anything else you're curious about! thank you so much for asking and enabling my rambling about this set of drawings :D
#.lyr#ask#the mountain goats#jenny from thebes#long post#i <3 symbolism i <3 things that mean other things#id in alt text#kes tag#<- resident symbolism enjoyer enjoys symbolism; to the surprise of absolutely no one <3
21 notes
·
View notes
Note
Remember that art you did that was just Nine and Sonic high fiving (except it were only hands)
Did you use any special brushes?????????? Or just what brushes did you use in general please dont gate keep 🙏🙏🙏🙏
Might as well just answer these asks in tandem because 1 that is literally one of the nicest things anyone has ever said to me?? You mean I have an artstyle?? that it is tangible??? That its good enough for someone to want to copy it, hello????? [Positive, extremely extremely positive, crying tears of joy positive]
And 2 I am so fucking sorry (but also maybe good news for you since you're looking to copy) if you were expecting some epik brushes or techniques, because I literally just use the basic pen, pencil, airbrush and mix2 brushes (plus the eraser ofc) in Fire Alpaca. Like dedass just the first one, no change in the settings nothing. Just these guys here with me against the world.

I do attempt to sometimes use different brushes for sketching but then always return back to basics
My art process is pretty much just scratch something with the pen (sketch that I clean out as I go, we don't do lineart in this house sir) slap on some colors, then put down shadows with the pencil, blend with the mix brush, realize the shadows make no sense once looking back at the light source, erase some parts and repeat until the shadows do kind of make sense
Like its just this for endless hours but it's also the only part of drawing that I genuinely enjoy x)
From time to time I also remember that the airbrush exists and I can use it now without the threat of it blowing up my computer, which is why the shading (well, the highlights) on the high five actually looks good (also cuz I had a clear reference picture, that does wonders) plus a pro-tip, when drawing a certain thing that glows, its easier to put the solid color of the glow down and than gaussian blurring the whole layer instead of fighting with the airbrush
True magic however, hides in messing around with the opacity and layer blender settings, I usually spend most of my time in there flipping between the options lmao. The starter basics would be Add for an extra pop in the highlights. Multiply for darker shadows, or used similarly as Overlay and that is if you can't be bothered changing the color of the shadow over multiple colors of the piece. Soft and hard light for tamer results of add and multiply. And than Messing around with Difference and Exclusion was also how I got the funky colors on my previous drawing, but that stuff is funky
So yea, no special brushes, just the bare basics and mixing them together!!
#I think. This is like an answer most artists will give#I always see so many people asking artists about their brushes#only for the artist to just go ''oh I just use this basic one for the program I have''#Not that it's wrong to ask ofc!!#I too wonder just what brush it is that makes the line look just ever so scratchy but not too much#that gives a really nice texture to the lineart#I will find it one day I'm sure#also other majority of artists actually have a special brush they made (??) but my ahh could never#raw-dogging this with the basics 💪💪#again this ask has made my day#well#midnight#but like yaaay I am finally good at art!!#at long last#i inspire people :]#it sparks joy#the silly ask box#art tips#me does arts
4 notes
·
View notes
Note
Hey! I adore your art and you seem to have a kinda similar style to me. I've only ever sketched/painted traditionally, but your art really inspires me to learn how to do digital art. Have you had experience doing art with traditional tools? I'd love any tips specifically on the transition process from being skilled with pencils to using digital tools for the first time, if you have any to give <3 :)
this is an old ask. hope you still accept an answer!
I started drawing digitally back in 2006 or 2007 was mostly coloring linearts i had drawn by hand and scanned. i didnt know how to separate the lineart from the paper color yet but i hated going over the lines in ps so i mis/overused layer styles soooo much. but i was also like, a lazy teen, so i wasnt very skilled at painting to begin with. my colors were very off and dark and muted, or too bright, so i did a lot of black and white painting at the beginning. eventually i started to pay attention to how digital art works and could be improved, instead of as a extension of traditional art, or a coloring tool. got my first wacom tablet soon too, which i only just replaced with a new one this year lol. if you dont mind taking your time transitioning from traditional, and playing around in the art programs, i guess get a non-display tablet. If you want a smoother transition where your strokes are more precise and the process, position and "feel" is more similiar to pen and paper, get a display tablet. Idk its hard for me to use my new display tablet, the position feels weird haha. but my setup isnt complete either so i cant say if its better yet.
Other than that, it's been so long i've forgotten how it all specifically worked.
hope thats somewhat helpful. get some extra opinions too!
19 notes
·
View notes
Note
I do traditional art as well, though I still have a lot to learn about illustration (I was trained in fashion illustration). Do you have any tips for what media to use/what your process looks like?
Hi!
I'll combine the answers with your other question:
It depends what would you like to improve. Practicing that you feel you lack or that you're interested in always help.
You can gather your fav works from artists and try to describe what you like about them then experiment.
Actually I don't know a lot about illustrations, I studied visual representation and animation. Tho we did learn about composition
and color theory which are very important. Tbh I usually just wing it, making sketches until it looks acceptable to me :')
As for what media to use, something you already know or like or it can be something you always wanted to try.
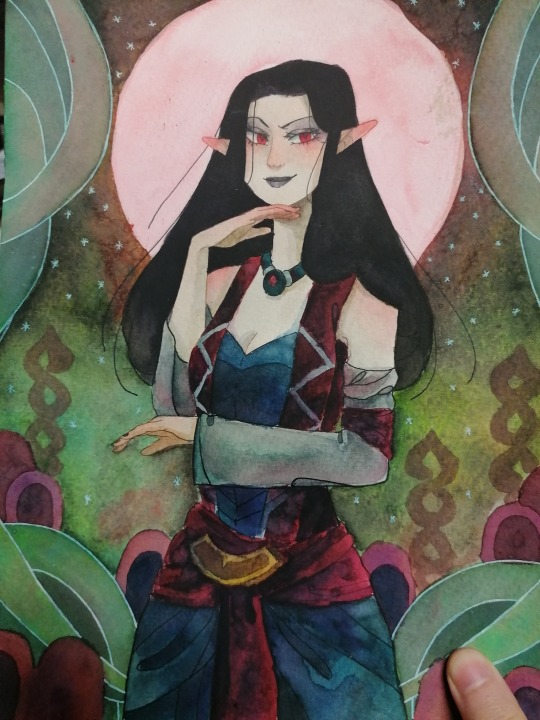
I'm using watercolors and anilinky now,but before that for years I only used colored pencils. Those drawings were more detailed,but more time consuming to make.
Watercolors are easier to use for me, and still can be detailed.You can add a lot of effect with things like salt or simply just pressing a tissue on the wet surface.
It's also fun to use markers like Copic/Touch for creating softer textures, finer gradients and acrylic pens like Posca/Pilot for creating bigger color patches.
Depends what you're going for. I usually combine these tools on my drawings. If you have the chance try to experiment with more tools, you don't have to stick to one :)
The process (under the cut, because this will be pretty long)
- thumbnail/colored sketch (it helps a lot!!!)
-sketch on watercolor paper

-lineart

-then I like putting the main colors on first, with inks.
This also helps to improve the picture as a whole instead of getting lost in the details

-main colors but now with watercolor, one by one.
If there's something blue then I just paint all of
the blues then go for the next color. Sometimes I start detailing and texturing here (like in this one, I overdid the background xD)

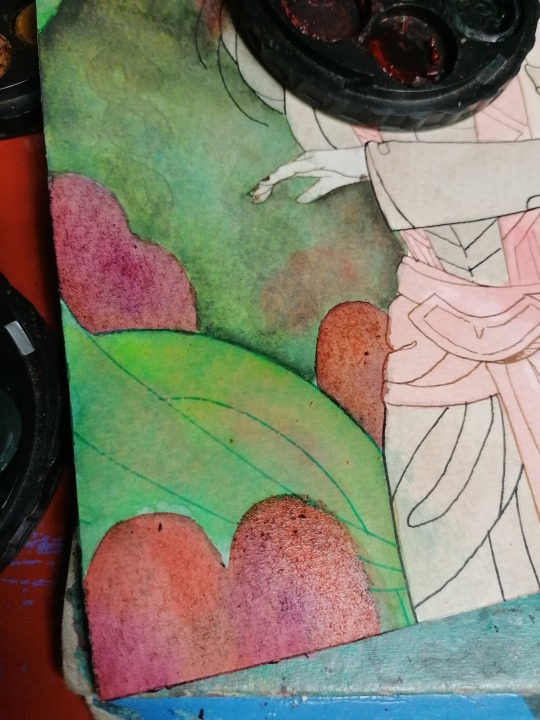

-details! textures! shadows!
-now the watercolor part should be done

-time for some extra details with colored or watercolor pencils/markers/posca and white gel pen
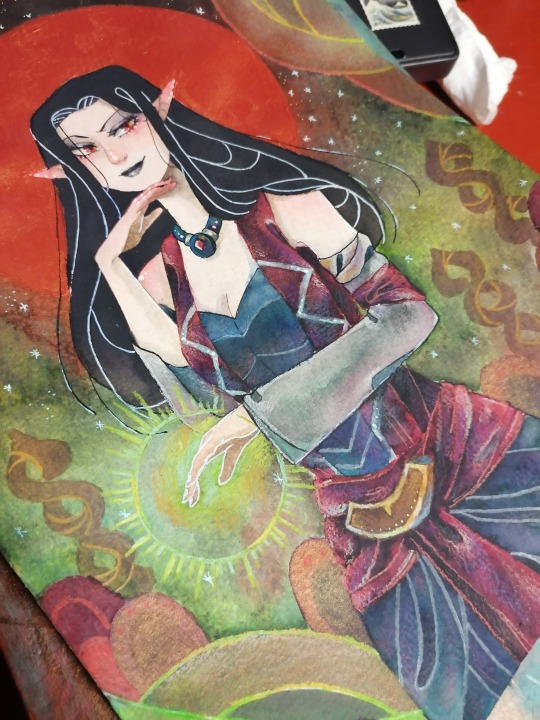
-lastly, don' forget to sign your work!
I hope I answered your questions. This became pretty long :'D
#ask#traditional art#asks#i also hope it wasnt overwhelming or generic#tbh practicing is the only way to improve#and experimenting to find what you like
7 notes
·
View notes
Photo


i finished my work tasks again so i’m sooo chatty on here today~~~
anyway i think doing digital art was great for me & i’ve been enjoying it a super lot when i DO do it! but i lost a lot of what i liked about my art style when i went from traditional & i don’t know if i still have it... my lines.....my monsters......my beasts......i’m not as good as traditional art as i used to be!! i used to just draw whatever on the back of worksheets & shit in middle school & high school. if i struggled with the anatomy i would just cut that limb off or put some weird body horror shit coming out. but now instead of something i do for fun when i’d otherwise be bored, drawing is something that has to be done Right TM.
it’s not like i haven’t improved either. i’ve learned a lot about colors & rendering stuff & cool effects. it’s not like i’m not happy with my art right now either......but i’m kind of not. somewhere along the way it became easier for me to draw a person than the things i always used to like drawing. i would rather go back to what i used to do but it’s not fun to draw that way digitally & when i put my pen to paper in my sketchbook it doesn’t feel the same. but i’ll get over it!
it’s all bc of lineart. the more art i do the less lineart i have bc i hate refining a sketch into nice lines, so i just paint directly over the lines most of the time & everything is time consuming. also i’m over-reliant on pose references. i’m so bad at drawing a person. if i can’t find a pose reference or get a good pic of myself i just don’t do it
anyway just thinkin some thoughts ^_^; in conclusion i should draw dys more bc she’s 1. full of lines, 2. not a person, & 3. i made her out of everything i liked drawing in 2012-2016. & 4. she’s my first oc. my babygirl forever. my violent woman. i’ve been neglecting her for gacha game characters.
2 notes
·
View notes
Text
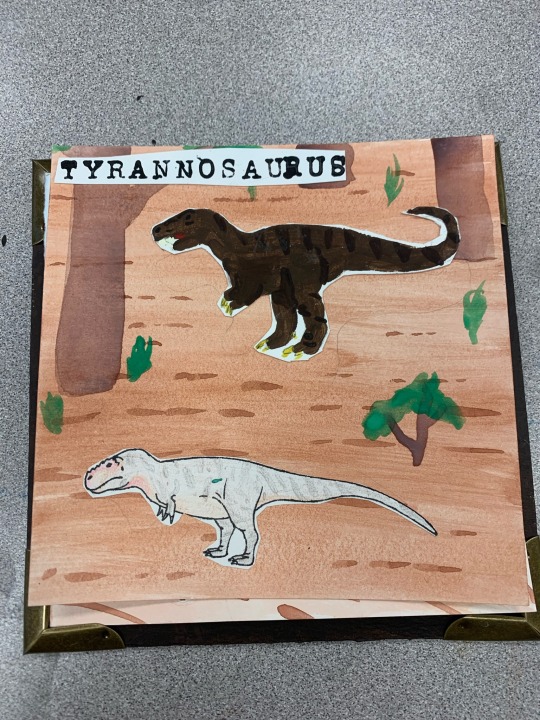
Dinovember day 16: triceratops! With no help from tumblr for deleting my first draft…. Also a little late because my wifi went down! Hopefully you’ll still take it…?
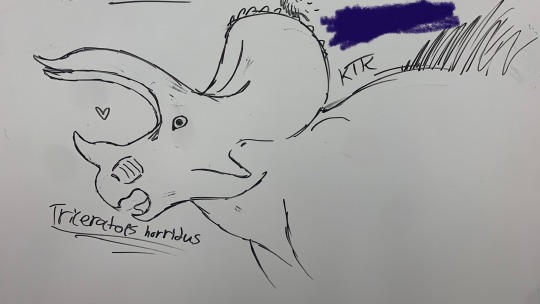
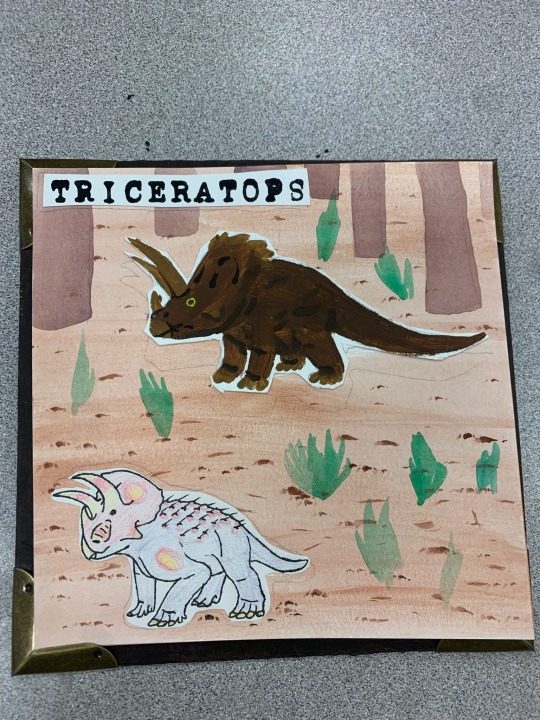
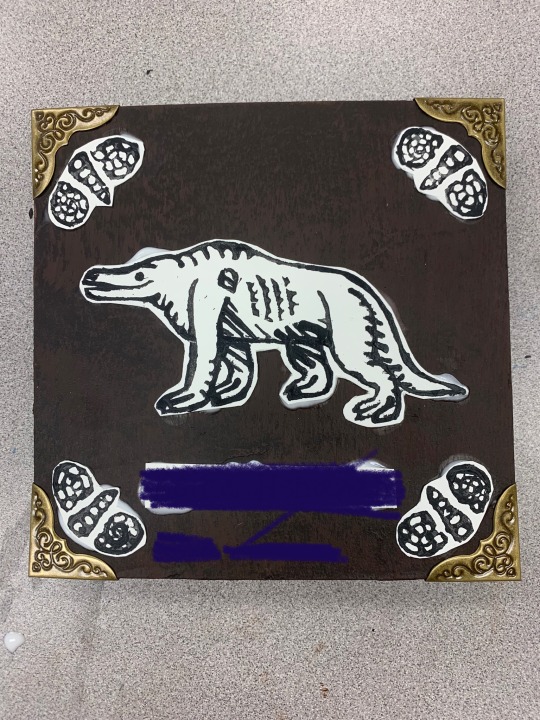
Just a couple things I made in art class a while ago! The first is a whiteboard doodle of a triceratops because I had free time, and the second is from a book I made! Our project was to make a book with at least 8 pages using multiple medias. I decided to make my book comparing vintage/pop-culture “dinosaurs” versus the modern ones! The backgrounds are all water color, the “old” in acrylic, the “new” in colored pencil and pen, and the names in letter stamps! The cover used acrylic, hand carved stamps, and book corners. I chose paint for the “old” dinosaurs to mimic oil paintings, and the lack of lineart helping represent our fuzzy understanding of them. The “new” dinosaurs have lineart, representing how much clearer they are to us, and the (cheap) colored pencil represents the new generation of paleontologists and paleoartists. The watercolor backgrounds were meant just to be out of the way, putting focus on the animals. The letter stamps are meant to resemble that of a typewriter. I was originally going to hand write info blurbs, but I ran out of time- for that same reason the paintings aren’t very refined and my book has no title on its cover and my name is sloppily hand written instead of stamped in. The title was supposed to be “a more modern Mesozoic” as a play on “a more ancient dorcet”, which is regarded as one of the first true paleoart pieces.
I realize too late that I could’ve used pages from this book for days that I had no motivation, so why not post them now? Under a cut, of course.
My name is of course blotted out once again. The details on the shells and the megalo nearly killed me since I had no fine detail carving tools or skill, but I persisted!
My name is of course blotted out once again. The details on the shells and the megalo nearly killed me since I had no fine detail carving tools or skill, but I persisted!
Dinovember day 13: Tyrannosaurus!
I’m not a fan of how static the poses are, and the painting could definitely be way better. As you can see I had a… small accident and got a bit of paint on my modern rex. Guess he was just born with a really weird birthmark. I also meant for him to be bigger than his fictional counterpart, but as you can see, that didn’t work out how I’d hoped.
Dinovember day 14: Parasaurolophus!
I actually did make a separate drawing for day 14, but it must have been hidden due to the warnings I put on it, because no one seemed to notice it. Oh well I guess. This is one of the pages, if not the page I dislike the most. The old one is too dark, the new one is too bland with bad patterning and pose, and I don’t even know what I was doing on that background. Guess para is just bad luck for me!

#art#dinosaurs#dinosaur#traditional art#paint#pencil#stamp carving#linocut#dinovember 2022#dinovember#triceratops#megalosaurus#tyrannosaurus#parasaurolophus
3 notes
·
View notes
Text
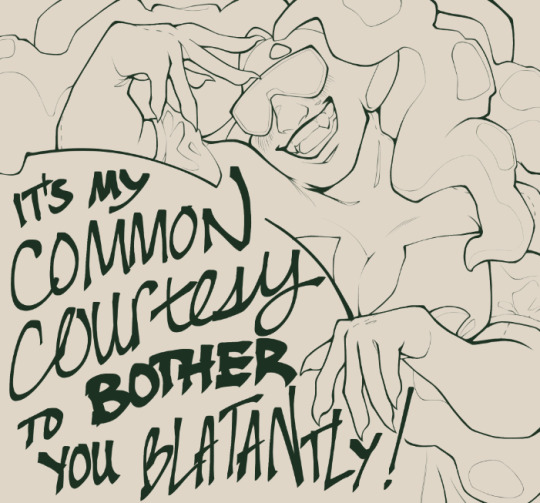
i don’t normally do this type of post, i never have reason to, but i wanted to write down or go relatively in-depth with the process of that last piece so i can hopefully replicate the results (or if anyone was curious). and also because i think the initial sketch is hilarious:

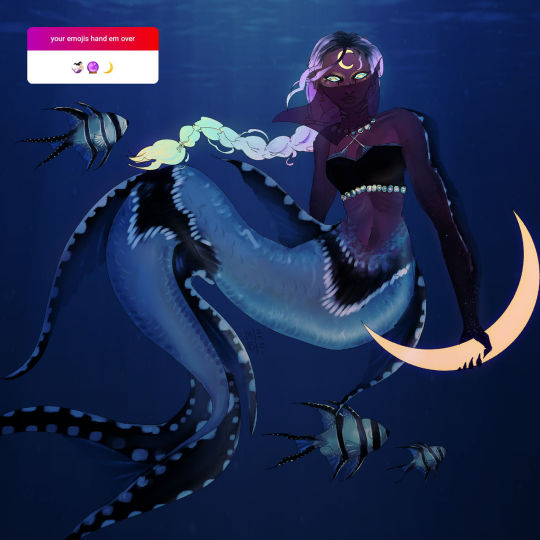
before i put a cut on this monstrosity of a post, these are the lines and flats; there were a few details that got lost under the shading so now you can see the gradients on her tentacles, etc.
now let’s get crack a lackin’
composition-wise i had a vague idea that i wanted both her hands in the shot, a prominent feature of her smile, and the lettering in the bottom left-hand corner; of which the hardest part was placing both her hands until i had the idea of her leaning against her shoulder.
since i swapped to csp from sai, my sketches have gotten looser and simpler in style, which isn’t a bad thing but wasn’t what i wanted out of this pic. i especially wanted to evoke the way i used to draw marlo’s teeth and did my best to replicate the brush i used to sketch in sai, and then i drew the rest of the owl. (and refined the text.)
(on god, there are no layers in-between these two.)
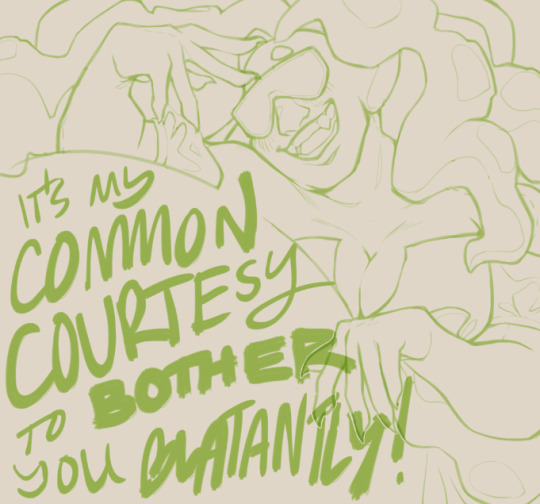
i did not have to line this from here but i wanted to, so i did. i think that took the bulk of the time spent on this... somewhere around 7 to 9 hours?

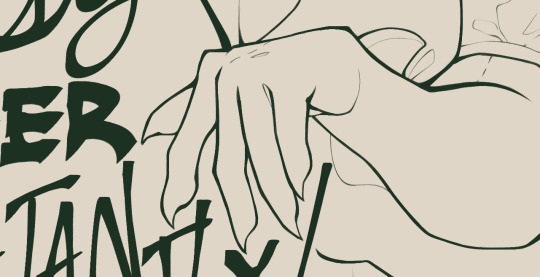
i wasn’t thinking about line-weight all that much, really, apart from mimicking the heavier and thicker areas of the sketch—normally i would have a light-source in mind already, and thin the lines which would be under direct light and thicken the ones in the shadows, but i really didn’t think i was gonna render this yet. for as long as it takes lineart is the least-complicated step so... that’s that.
for clarity, i won’t include this version in the process, but for all my artfight attacks thus far i’ve duplicated the lineart layer and used some effect to add some soft red rim to it all. in this instance the duplicated layer is a soft vivid red on color burn and blurred a little; the main lineart is on hard light so it can show against the darker colors.

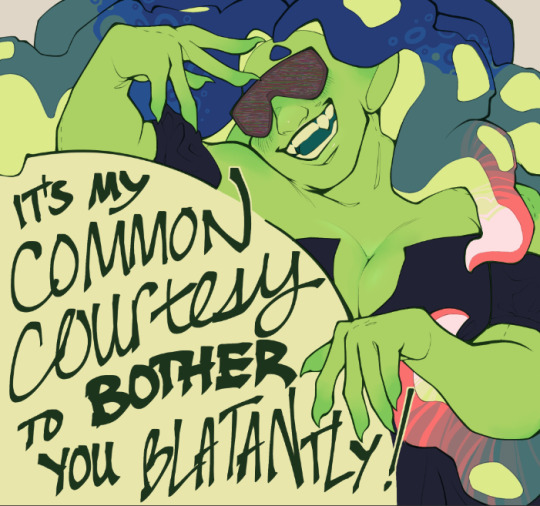
the flats have a few things going on; they’re a mix of my own color choices (for example, her main skin tone is the same color i used to sketch) and eyedropped, which i don’t normally do but you just can’t get better than dolly’s native colors imo. instead, the skin colors from her ref made up the highlights and flush points. i was gonna do the same thing on her tentacles but gave up because i couldn’t figure it out LOL. most everything was magic wand’d for ease of selection, though i like to color by hand.
oooookay, so now we get into shading. i wasn’t planning on doing anything extra beyond nab a few extra points with a rough excuse for ‘fully shaded’, but i started screwing around with layer modes and, well, that was all she wrote.
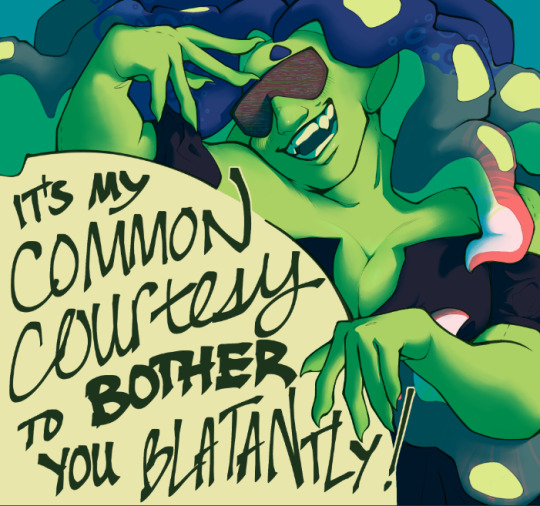
first step: saturated teal on 100% multiply. (i think it was a color i eyedropped from one of splatoon’s assets for my last zine piece, actually.) i blocked it in chunks and refined it with the g-pen and eraser, celshading everything like i normally do, and then stumbled face-first into blending instead. clip’s default gouache blender for that, at various sizes depending how broad or subtle i wanted the blend. i sort of kept the shadows crisp near where they were cast (i.e. her arm against her tentacle) and faded on wider planes like her arms & chest but mostly i did whatever i liked.
duplicated the layer and set it on top, a bright red on 100% saturation. i use the HSV sliders the most and the red was, itself, 100 saturation. i wanted extra vibrancy without having to literally paint with more saturated colors and this was the best solution i could come up with.

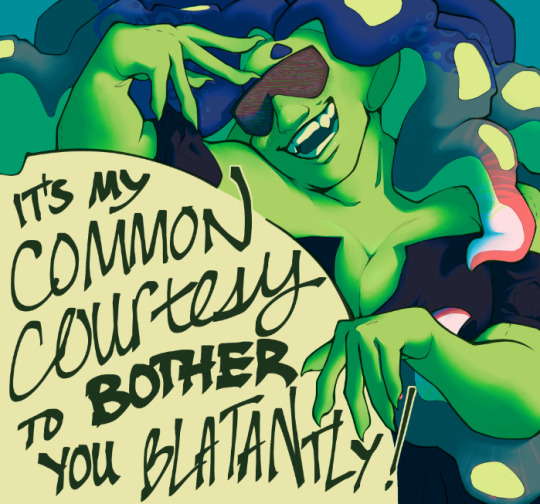
now the light source; a linear burn layer on 23% opacity, a rich gold color (i think one of the ones i’ve used for ness’ ink at some point); cool shadows mean a warm light source. normally i would magic wand the celshading and invert selection, but since i’d already painted everything, i ... did the same and expanded the selection significantly, overlapping with the saturation layer/‘subsurface scattering’, and softened the edges down. not recommended, will make sure to think ahead next time lmao.
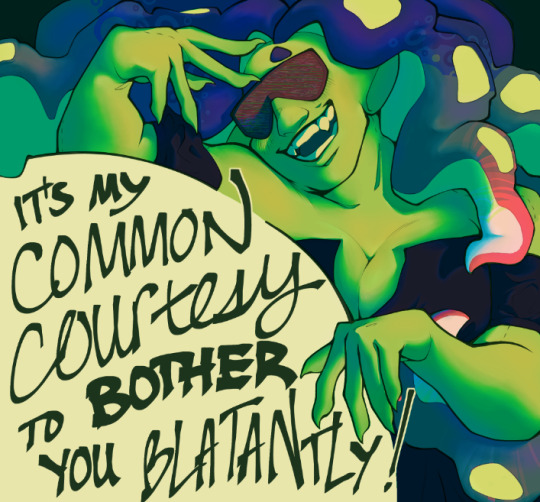
now we start to get complicated and i started throwing things to find if they stick. this one’s a soft light layer with pink and blue airbushed on; the pink to add further vibrancy and depth to her skin, accentuate the flush points from above, and create color variation and vibrancy in her tentacles. the blue got used for a rough approximation of bounce light and to create a bit more depth in the shadows. i wasn’t super precise with the placement, but it isn’t obvious either way.
the top is a very pale tan on soft light, there’s not a lot to this; it’s very broad highlights and i just kinda did whatever in terms of the shapes.
the bottom is the addition of another vivid light layer, a similar if not the same pale tan airbrushed over and around the broader gloss. i layered it heavier where that gloss was more pronounced, especially closest to the light source, but bled it out farther to create the illusion of... i don’t know if you would call it refraction or subsurface scattering again, but some extra depth. there’s also a few speckles to dampen the impact of the shine on her nose and lips & accentuate the shine of her teeth.
and that’s all of it! i made this whole thing up as i went along but i am Definitely gonna attempt recreating and refining it. if you read this far, thank you so much, i am handing you a plate of homemade sugar cookies
4 notes
·
View notes
Text
Trektober/Spocktober 2023!
Fuck it, I've decided to tackle a -tober drawing challenge for the first time in 4 years! I'm gonna be doing a combo of Trektober (Star Trek themed prompts) and Spocktober (Spock every day!), since my brain is on Star Trek lockdown atm.
In previous years, I've gotten about a week in and given up. I tried the official Inktober (2017 prompt list) in September 2018, then actual Inktober in 2018, then also in 2019, and the farthest I got was day 8 (Sept. 2018). I think my failure was due to being like "Yeah I'll just draw whatever strikes me each day, it's cool if I paint or use markers or--" and getting completely overwhelmed.
So, this year, I am setting some guidelines for myself:
Only inks. Literally just pen and ink. Nothing else.
Well, I'm allowed to do pencil undersketches. But those are only allowed to take 15 minutes, and the inking is only allowed to take 15 minutes, for a total of 30 minutes for each prompt (that way if I fall behind it shouldn't take too long to catch up... I hope...)
Thumbnailing ideas in advance. Takes the pressure off of sketching!
Set page size and notebook: all of these are gonna be A5 and in my main multimedia sketchbook so that if I want to paint them later I can
Post once weekly. In previous years I was trying to post every day, which was stressful and irritating, so instead I'm gonna post them in batches of seven. Or maybe four, actually. Uhhhh. We'll see??
EDIT:
The time limit is not happening, we're just going on vibes
I'm gonna post daily instead but with a delay so I can queue posts in advance
My main goals this October are:
To have fun :3
To get used to finishing drawings
To get used to posting them, too!
To have fun :3
To improve my sketching and lineart skills
To end up with a bunch of finished drawings (of Spock!!!) :3
To let go of a bit of my perfectionism
TO HAVE FUN :3
If this goes to shit and I don't get it all done, I'm still gonna be happy I tried. This is a warning to future me. Don't be a dick.
#original poast#artie talks#This is primarily a post for myself hence it being non-rebloggable#but I'm posting it here to hold myself accountable#and also in case anyone is looking forward to more of my art#there will be an amount! soon!#probably!#I am also doing something new and sketching in advance#so ideally most days should just have 15 mins inking#well. i was gonna sketch in advance. but I spent all of saturday sleep deprived and daydreaming about mcspirk so#I spent so long trying to decide whether to do a -tober that I was completely blindsided by it being october#next time I'll decide in advance and get the thumbnails and sketches started early#but oh well#here we go!
1 note
·
View note
Text
FAQ
~~~~~~~~~~~~~~~~~~~~~~~~~~~~~~~~~~~~~~~~~~~~~
1.0 TOOLS
.01 What materials/programmes do you use?
iPad Pro 2020, 12.9” with Apple Pencil Gen 2
iOS Procreate (drawing process)
Photoshop 2022 (post-edit process) + XP-pen Deco 01 (v2) tablet
.02 What brushes are you using?
I use a combination of brushes released by Lotusbubble, JingSketch, Jeremy Fenske, and Devin Elle Kurtz.
.04 Where would you suggest I learn about…
anatomy: Morpho Anatomy books, life drawing classes, pinterest, theposearchives (dA)
colour theory: Marc Brunet’s tutorials, Colour.adobe resources
character design: Marc Brunet’s tutorials
.06 Art book recommendations?
Here’s a list of my favourite books:
Creating a Champion (The Legend of Zelda: Breath of the Wild)
The Art of Raya and the Last Dragon
The Art of Encanto
Tokyo Storefronts by Mateusz Urbanowicz
The Art of Heikala by Heikala
The Art of Kiki’s Delivery Service
.07 Do you do tutorials?
Not at the moment. But in the future I would like to do tutorials on my Patreon page.
2.0 Art and Bee
.00 Who are you even?
I am a very short girl, who enjoys drawing fandoms such as Harry Potter and The Legend of Zelda. As of now, I am 26 years old, and I work as a freelance artist and ESL teacher. I LOVE peach tea.
.01 Did you go to art school?
No. I am self-taught. I actually have masters in chemistry. I dropped out of my Chemistry PhD in my first year because I realised that science is not something I want to pursue in my life. I do not regret studying chemistry though - it was a very interesting and valuable experience. Would I have the chance to choose now though, I’d go study degree in Illustration.
.02 Who are your favourite artists?
Here are some that I often turn to for inspiration:
Mimimaru, Heikala, Mateusz Urbanowicz, Ladowska, Mehkuni, Devin Elle Kurtz, Marc Brunet and many others.
.03 How do you motivate yourself to draw every day?
I really make sure I draw what I enjoy. There are days I wake up and I do not feel like picking up my pen. When this happens, it is about time to turn back to studying. I go to my Morpho books, youtube tutorials and my favourite artists and I dedicate the day to anatomy studies, colour theory etc. That way I do feel accomplished although no illustration is done in the process.
.04 How to get out of art block?
Take a break. No seriously. If art frustrates you, it is time to put it down and take-a-well-deserved-break. I hit the wall 2-3 a year and usually, it comes after a big project or when I refuse to pace myself.
This relates to the previous questions, but when a time like this hits, I often restrict myself to no art for up to 3-5 days. Instead, I go back to passive studying - watching tutorials, watching an animated film, reading some books, playing video games for inspiration.
Sometimes it also helps to switch a medium. So for example I go from digital to traditional.
.05 What is you digital art process like?
I start with light gesture drawings followed by detailed soft lineart. Then I shade in black and white. When this is done, I turn the black and white sketch to red (using curves) and with multiply layers, I block in the basic colours. Then I create a normal layers and I begin to paint in all other details. I often finish the background first before I move on to the characters.
.06 Why don’t you do traditional anymore?
In 2020 I had to move to my parent’s house for 4 months while I was recovering from an illness. I had to leave all my traditional media in my flat in a completely different country. I only had my old iPad with me, which was the only way I could do art. I have been drawing digitally on my iPad since.
Once in a while, I still use the good old pencil and paper, but I found that digital painting gives me great creative freedom and helps me to visualise my light-up fantasy brain cells. hahaha
In general - I just enjoy digital painting more at the moment.
I still do oil painting once in a while tho!
3.0 USE OF MY ART
.01 Can I use your art for my pfp?
Yes, BUT! Please do message me for permission and make sure you credit the art appropriately.
.02 Can I use your art for bookbinding fanfictions?
Now - please read this carefully.
I ONLY allow use of my art in fanfiction bookbinding if it’s a NON-PROFIT bind (ie only cost of materials is paid for). Please DO message me in dms (ig, twitter, tumblr) if you want to use my art in your binds. The chances are most likely I will say yes and be very excited to see the outcome!!!
4.0 COMMISSIONS
.01 Are you available for commissions?
Yes! You can find the link to all the details here.
.02 Why are your commissions so expensive?
I only charge for labour and the time spent on the commission. For a full-illustrated type of commission, I can spend up to 30 hours working on it, hence the high price.
.03 How long will your commission take?
I ask for my customers to count with 2-4 weeks from the date the payment is received. This is because often I have a couple of projects before I commence on your commission. I also count in any unexpected events such as an illness, my teaching job hurdles, art block, and inspiration dips.
.04 What you will/will not draw for me?
Will do: humans (fanart, OCs, irl), pfp’s, larger illustrations, and character designs
Will NOT do: nsfw, fetishes, gore, mecha, furry, animals/pets, hateful art, ships I am not comfy with
1 note
·
View note
Text
tanchirou’s coloring tutorial
hello!! i was asked to make a tutorial showing how i color a while ago, so here it is! i’m honestly not the best at explaining at all so i’m very sorry if i lose you somewhere along the way ;; you can always come ask me to clarify anything, my dms are open to everyone :)
also a quick disclaimer: this tutorial will only be focused on coloring, so i won’t be showing you how to redraw lineart. however if you are interested in what programs i use, i use clip studio paint to redraw and photoshop to color
besides this tutorial, i also want to link some others that are great for tips & learning!!
katsuke’s coloring tutorial
sugawara’s coloring tutorial
dicennio’s coloring tutorial
and without further ado, let’s go goooo
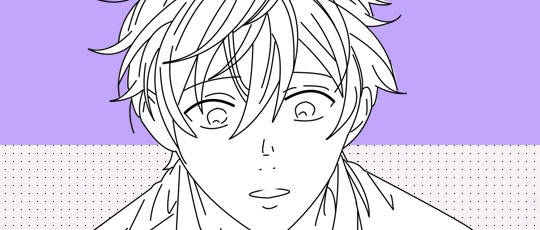
since coloring given is therapeutic for me, i’ll be using this manga cap for the tutorial:
first step: render, sharpening, psd
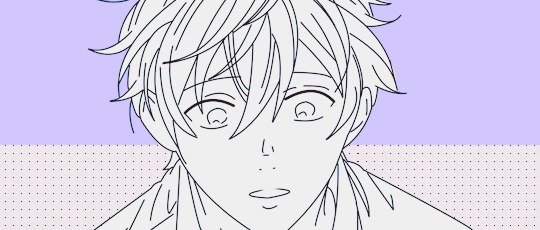
take your image, resize and sharpen accordingly to your liking! even though i have a lineart here, it is something that i have gotten into very recently and i have been able to achieve nice results in the past even without it.
some tips:
i find it easiest to use the pen tool to erase any background or redraw any lines. the eraser is also helpful for places that are harder to cut out.
play around with the levels adjustment before coloring. this can make your edit look sharper and cleaner if regular sharpening doesn’t do the trick.
if i ever need to clean something on normal mangacaps, i make a new layer above and then color it with a white brush like so:
i always like to add my psd before i start coloring, and simply make final adjustments with it later on (but this comes down to personal preferences as well). i have a psd that i’ve made for manga colorings, so the first thing i’ll do is just slap it on top of my panel
after adding my psd:
second step: base colors
fill in your base colors! when looking for what colors i want to use, i usually look for the character’s anime pictures as a reference. for mafuyu, i chose this picture

all my layers are set on top of the lineart as multiply. this is how my edit looks after filling in the base colors:
if at any point you don’t like how a certain color comes out, use the hue/saturation tool to adjust it!!
use a new layer for everything (eyes, hair, skin, etc.) so that it’s easy to fix if you ever need to go back
third step: shadows and blush
add your shadings!
i’m pretty amateur with this, but usually i try to imagine where the light source might be coming from and shade in the part where it seems like the light wouldn’t hit. for this picture, i imagined that the light will be coming from the right side of mafuyu’s face, so everything on the left side will be darker. this process definitely comes more intuitively after a while, so practice lots!
i like to set my shading as multiply on top of my base colors on 50% opacity
use the smudge and/or blur tool for a softer effect on the shading and to blend it nicely with the skin
i also pay close attention to the areas under the hair, neck and around the ears. using the same color that i did for the first shading, i will create a new layer, set is as multiply on 50% opacity, and shade in those parts as well. i won’t take the extra step of blurring it with the rest of the skin this time

next, using a pink color, i’ll color in the cheeks and mouth using a softer brush
fourth step: lighting
using a pastel color that matches the background, i’ll shade the right side of mafuyu’s hair to make it brighter (again, that’s where i imagine the light will be hitting him). this layer is set to soft light.

then to change the color of the lineart and make everything bright and pretty in general, i’ll choose a dark red color and set it to screen on top of everything else.
some tips:
you can try to see what colors work for you on your own edit by using the hues/saturation tool again. aside from red, i saw that orange and brown are also nice to color with
you can also try and set it to lighten instead of screen to see what kinds of effects you can get. go with whichever one you like more
fifth step: extra effects
this part is really fun for me and also gives me a chance to explore my creativity a lot! here i’ll add highlight to his hair wherever i want, to his face, eyes, etc. all of these are done with either the pen tool or the brush tool set at size 1.
the modes that i like to play with the most for this is either soft light or overlay
if you’ve ever seen me stream my colorings in the DailyAnime discord, you would see that i always use a looot of layers to experiment with things. so honestly just go wild with your colors!! don’t limit yourself!! :’)
lastly, i’ll be adding any extra things that i want such as speech bubbles and sparkles in his hair. i will also add some noise to the skin and the hair to make it look nicer too. here’s the final product
aaannnddd..... that’s basically it! i use the exact same coloring method for posts like these (x), (x), (x). hopefully this tutorial is able to help at least one of you! ^^
(and a quick thank you to narumii @narumii-chan, zebra @reddriot and jaime @itsyuurikatsuki for helping me look over this tutorial ♡ love you all sm )
545 notes
·
View notes
Text
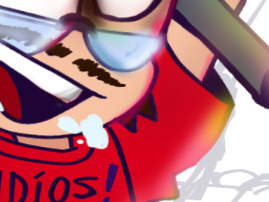
October of paperhat (inktober) 2021
Day 29 - Jealous

Cameooo lmao XD
Happy release day! 🖤🖤🖤🖤👏🏼👏🏼👏🏼👏🏼💖💖💖💖😩😩😩
*cries in America with the rest of the internet*
There's so much to say in such little time
Basically, the white pen is still dead 🙂
It's 11:40 and I'm in a hotel in Georgia pf
Bipolar snatched me up today from kicking my feet to that damn beat in the street like a beast and nobody can kill my mood this morning to- don't talk to me at all i angi, also my hear- A C K THERE IT IS AGAIN
Uhhhh h h hhh i worked on like 5 different arts today yaaay, they include my villainous "release day" art which IS done (and i started today) but i feel like something is missing and I've been awake since 5am and now it's 11:45pm sooo 👐🏼 maybe I'll just post it first thing tomorrow if i don't do it after this (here’s a preview tho :) ),

(The bh and Flug’s lineart is just b,jbjkbjmbmhbbhmbjhvjhvj 💕💕💕💕💕)
there was also two people in my D.E. Art i finished, and- OH YEAH Oh MY GOD i finally listened to Aldo Maldonado's logs and hOOOooOoh MY GOD- i can't- 🤌🏼🤌🏼🤌🏼 so I drew them instead haha (the top drawing was actually from 2 months ago when I left for Florida, There’s also 2 more doodles I added lol), that pic in the window -w-, and some other stuff maybe I think idk—-


Anyhmsbjbhjahjbsbhkhjsbj I should probably go now because there’s finally a real hoTEl ☁️ bed to sleep in and hUhuhHUhhi that’s my excuse, if you know the hotel bed comfort you’ll undeterstand. Also I should let myself off easy sometimes y’know? Ocd, anxitey, all that and all. So uhm, gn and hello new fans! 💖❤️🩹🖤
#gal3xystar#iza#THE EPISODES SOUND SO GOOD PLS#aldo maldonado#art#drawing#traditional art#villainous#digitalart#cameo#black hat#flug#ink#pen#villainous release#inktober 2021#inktober#October#paperhat#paperhattober#phtober#day 29#jealousy#misssnake visual art#me with#the wrong#prompt#doodles
44 notes
·
View notes
Note
hello! do you have any advice for switching from traditional art to digital? (i recently ran out of supplies so im relegated to my computer lol) i hope youre having a good day!
i sure do!
first off i really recommend clip studio paint, but i also recommend u wait for it to go on sale. it goes 50% off a few times a year, so imo it’s worth waiting, but it also is usually on sale for only a few days so u have to stay on top of it. they usually announce on twitter etc. the tools don’t make the artist and obviously it doesn’t Really matter what program u end up settling on, i’ve just been really pleased with CSP and i wanted to recommend it
second: nothing that u can do with digital art programs/tools is cheating and it took me way too long to really internalize + understand that. copy-pasting stuff instead of redrawing it, using symmetry rulers, using transform/ctrl+T to stretch or squash slightly off anatomy instead of starting over -- when i was first getting into digital i A. didn’t know u could do this stuff and B. felt weirdly guilty doing it once i figured it out, as if i was a worse artist for using the tools that are literally built into the software or that it was lazy or dishonest to do so. that, it turns out, is bullshit. any drawing is just a constant series of decision-making and a lot of digital tools just help u make or retract or edit those decisions faster than traditional does. it’s not better or worse, it’s just different, and it’s worth ur time to figure out which of those differences are the most convenient and useful. this stuff exists for a reason! use it! save ur wrists and ur patience and ur time!
figure out file organization early, because it’s something u don’t have to deal with irt traditional art and so it probably won’t come naturally, but it also makes ur life harder to have a desktop swarming with wip files that are all titled “kjsrhrfgdhgj.psd” or whatever. some ppl sort into folders by date; for me it works better to sort by content (i.e. i have folders for tvrn stuff, patreon stuff, different fandoms, dnd/ttrpg stuff, “misc ocs” for characters i don’t draw much and “misc fandoms” for one-off fanart that doesn’t merit its own folder, etc etc; this is what makes it easiest for me to find stuff, but ur system might end up different.) i admittedly still name my files keysmashes if it’s personal stuff rather than work/commissions, but at least it’s all sorted into a category where i can quickly find it again anyway
also, u can hybridize traditional and digital! i frequently like my traditional pencil lines better than what i can do digitally, so i often scan them in, turn them into lineart, and color digitally (here’s a tutorial on how i prep that). but even if u don’t have a scanner, a carefully taken phone photo with high contrast can still be used the same way. i tend to lay my sketchbook flat on the floor in front of a window, squat down and hold my phone as level as i can while i’m taking the pic, and then i blast it in my phone’s built in gallery editor (highlights/shadows and contrast) before sending it to myself and doing the same thing w tone curve/levels in csp. it’s not perfect, but it’s presentable, and it can be a good way to ease urself in if ur feeling frustrated w the learning curve on digital draftsmanship.
oh, and this tip is really small but it’s ended up being rly helpful for me: resist the urge to zoom in way past 100% scale view just bc u can. if there are times where u absolutely need to, sure, whatever, but there’s no point in regularly tweaking tiny things pixel by pixel at 250% zoom bc nobody who looks at ur art is gonna see that and ur just bloating ur own time spent on things and creating unnecessary stress for urself!! if 100% zoom doesn’t give u the control u want, that may just mean u need to work larger to begin with.
set up a comfortable workspace with a Good chair. look up proper posture and try to stick to it. i know we’re all gay and it sucks to sit in a chair properly but otherwise ur gonna hurt urself. take even more frequent breaks than u do when drawing traditionally! screen bad!
also, if ur tablet has a way to calibrate pressure, try that out. a lot of them are set in a way where you have to press really hard to get full line width and over time it can really seriously strain ur wrist; u can’t manually set pressure in traditional tools (besides like. using softer lead i guess lmfao) but u can with tablet pens and u should try it, bc if u can use a lighter touch overall it really goes a long way towards preventing injury in the long term.
this is all the stuff that came to mind immediately; i’m sure there are tons of basics i haven’t covered, depending on how much of a transition this is for u, but there are a lot of tutorials out there written by ppl more patient and more educationally-oriented than myself so you’d be doing a better service to urself seeking those out than if i were to try to clumsily emulate them lol. good luck + have fun!
221 notes
·
View notes
Note
Yo! It’s been a while, how have you been??
I was just wondering if you had any art tips and tricks? I’m looking to improve my digital art so I figured I’d ask (no pressure to answer of course)
aaa @edgynoise!! so good to hear from you again! I hope you've been doing well <3
and oh wow, of course! I'm not sure what kind of advice to offer but I'm happy to throw some things out here that might be helpful.
that said; here's some stuff that's personally worked for me
- spend a little time loosening up
this one helps me out a lot. if i go straight into a drawing from the start it's going to turn out stiff as hell for me every time so to combat this I usually spend about 5-10 doodling before getting into the actual meat of any kind of meaningful drawing. really helps wake up the hand meat muscles.
- get your thoughts down first and then tighten them up
i don't know if this would be applicable for everybody but generally I feel it's important to get whole of something down (no matter how busted it looks) before going in to correct certain things or agonize over anatomy. for me, the energy of a piece is it's foundation and that life is what everything else gets built around & up from. I find it much better to draw it messy & broken in the beginning rather than squeek through the whole thing erasing, redrawing & erasing on the same piece.. I feel a piece can just lose too much of it's energy that way. once i have the bare sketch worked out, I just set the sketch to a low opacity & redraw the lines for real-real on another layer over it.

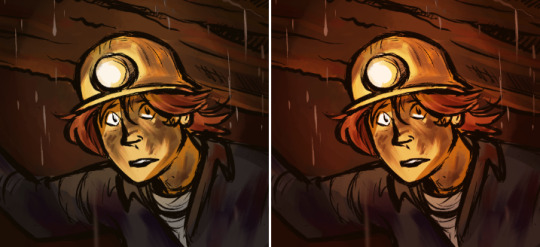
- listen to music!
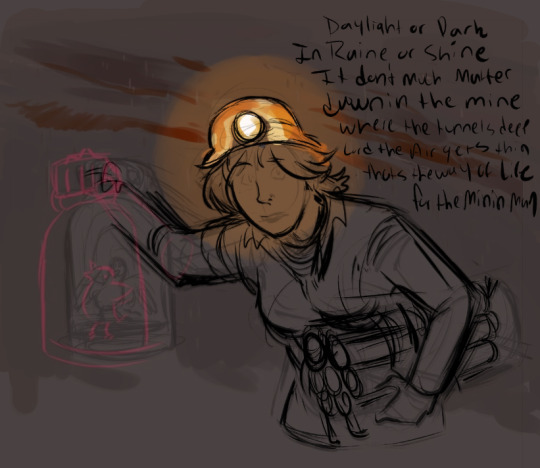
not always for everyone but i find picking music that matches the mood of what i'm working on generally helps me channel the vibe of something. for the mining piece above i listened to a lot of the old coal mining songs this was inspired by. i feel like it really helped me hit what i was going for.
- feel it out
so this may just be a me thing but when i do pieces i generally try to bring a lot of feeling and acting into them with me. if the character is concerned, i make myself feel that emotion while drawing them. If their face is sad or upset or fearful I make those same facial expressions myself in order to channel it into them. and if there's body language involved i'll sometimes even go the extra mile & act things out with my hands, depending. i don't know what it is about this but i find that it can really bring a lot of life to a piece. also just being aware of those facial muscles and how they feel in certain situations can make emphasizing & drawing them easier in general.
- try to vary your lineweight
this one really depends on what style you're going for but I find that, for myself, varying the line weight really helps add a lot of life to things. my lines in tend to run a little thicker overall but the general rule of thumb is broader / thicker lines where there's gravity, weight or in places where you want to emphasize the energy of something. (ex. bottoms of feet, arms, thighs, clothing, jawlines etc.) and then lighter/thinner lines for more detailed / finer areas like say the eyes, facial features, details in fingers etc.

not the best example but hopefully it more or less gets across what I'm stabbing at haha
as for digital / art program tips I'm not sure what I can offer that may be helpful but here's what I got!
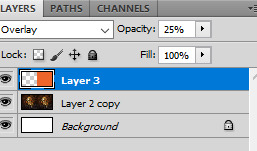
- keep everything on different layers.
this is a big one. 100% will keep you from wanting to rip all your hair out & setting it on fire. i'm not sure how familiar you are with layers yet but generally I set them up so that the lineart is on the top layer, the flat colors are on the bottom layer & the shading on the character is inbetween.
- when shading, try to avoid using straight black
unless there's a solid reason to shade with black (like say doing a strictly pen & ink piece) I generally try to avoid it. if you need dark colors for shading I find it's always way better to shade with a really deep red/purple or blue instead. even just that hint of color will make the overall colors in a piece far less dull & muddy.
- take advantage of the hue/saturation feature to adjust colors
this one's a huge time saver for me. basically if I have my characters shaded & i'm not really digging the colors or think they're popping off right I will select the layer or color & then use the hue/saturation function to adjust the areas i don't like accordingly until i hit on something that looks more harmonious. This is especially helpful if you're trying to find the right colors you want for something but just aren't sure what's going to look good. it's also super useful on things like your shading layer or if you're working with warm or cool light sources.
- deepen shadows / brighten up light sources
When a piece is near finished for me one of the small after effects I like to add is a light airbrushing in both the lightest & darkest areas. This helps add more contrast and if it's placed over top the linework layer it can sometime help to create ambient mood, depending on what you're going for of course. Anyway, for me this usually means creating a new shadow layer, deepening them up with a hit of darker airbrushing and then setting that layer to multiply & adjusting the opacity according to what looks good. For the light sources it's pretty much the same deal except the layer will be set to 'overlay' or' vivid light' whichever usually looks right to me.
- tie it together with local color
so this is a favorite trick of mine that i enjoy using from time to time & one i find can really help with pulling the colors in a piece together to make it look nice.
basically if a piece is finished & I just want to make it look more cohesive & tied together i will start by filling an entire layer with a local color (for example if the piece is warm i will make a layer of just straight orange), then i will move that layer to the top of all other layers where it can be king and then proceed to set the entire thing to overlay & lower the opacity to something between 8-25%. how much you lower the opacity depends on what you feel looks good of course but overall i find it can be a useful trick for quickly warming up or cooling down the tones in a piece. Overall it’s just handy for making an illustration look a bit more cohesive color-wise.
this examples a little on the extreme side but hopefully it can kind've show what i mean in the way of unifying the colors.
- study life
so this sort've falls under generic art advice but you can never go wrong studying from life. And I don't just recommend this in a 'it will get you good at drawing the human body' kind of way. What it will do is get you good at drawing people. Just observing the mannerisms people have, the way they gesture when they feel things, the way certain body types carry their weight, the body language that accompanies both stronger & lesser emotions, how people posture themselves to reflect (or reveal!) what's going on inside. When you really sit down & take the time to study & observe people you'll find that there's so much to take away from it. Everything from the way a person carries themselves to how they move their body can say so much about a person (whether they intend it to or not) and I've found that if you want to pull something really convincing out of a character then body language is where it's at. It's equally as important as facial expressions honestly & a good tip (if you're just looking to get better at body language only) is to draw the face last & force yourself to communicate emotions with the hands, body & posture instead.
- andrew loomis
so fun story back when i was studying art in college - one day my media teacher walked in & straight up told the class that if any of us had to drop out tomorrow we could basically just study creative illustration by andrew loomis & it would be the damn near equivalent of what we were all paying to be taught. To this day I've never forgotten that. And to this day it absolutely holds up. Really can't recommend this guy enough if you're looking to understand the fundamentals of illustration! And what luck! all of his books are free! :)
Fun With a Pencil (Beginner)
https://www.alexhays.com/loomis/Andrew%20Loomis%20-%20Fun%20WIth%20a%20Pencil.pdf
Figure Drawing for All It's Worth (Intermediate)
https://illustrationage.files.wordpress.com/2013/04/andrew-loomis-figure-drawing-for-all-its-worth.pdf
Creative Illustration (Intermediate-Advanced)
https://illustrationage.files.wordpress.com/2013/04/andrew-loomis-creative-illustration.pdf
Drawing the Head & Hands (Intermediate)
https://www.alexhays.com/loomis/Andrew%20Loomis%20-%20Drawing%20the%20Head%20and%20Hands.pdf
study other artists!
one of my favorite things to do! if you like what someone makes - study them. I do this near constantly with a lot of different people for a lot of different things. Everything from the way one artist colors, to the way one artists handles lighting, to the way another artist draws hands - if there's something i see that I like in a persons art or their style - I study it. Even if it's outside of my current comfort range (or skill level) I find there's always something to gain by either attempting to emulate it myself or just breaking it down & figuring out what makes it look the way that it does. One thing I find that's really helpful is breaking apart .psd files whenever an artist will offer them. just looking at the way other people handle their layers or add effects to things can really help broaden my perspective & way of doing things.
That said; if it would be helpful you're more than welcome to check out my own .psd file here if you feel it would help you out any!
https://www.dropbox.com/s/yigbm7b9b8eyb0g/run%20with%20us%20-%20full.psd?dl=0
At the moment it's one of the more put together ones I have so hopefully it can offer a better visual insight to some of the things I do. Again, if it's something that you think would help.
Anyway, I guess that's about it. Also wow this was a lot longer than I thought it would be so my bad if I got way too rambly or anything haha. Super excited for your future art endeavors here & think it's really awesome that you're exploring more! I'm so happy & excited for you <3 Feel free to hit me up if there's anything else I can help you out with.
#i hope this helps!#tysm for the ask#it really means a lot#srsly i'm flattered as hell that anyone would come to me for advice on this#i still have so much learning to do myself#hopefully this wasn't too long winded#ask#edgynoise
15 notes
·
View notes
Last Seen Blogs

castlechurchbrewing-blog
Castle Church Brewing Community

alokkhandelwal
Untitled

capasclub-blog
Capas Club

sailor8818
OLDER MATURE MEN ONLY
cadelinhalways
crazy baby