#blender resources
Explore tagged Tumblr posts
Visit Tumblr Blog
Explore Tumblr blogs with no restrictions, modern design and the best experience.
Last Seen Tumblr Blogs


Fun Fact
Celebrities use Tumblr as well.
Text
🧾️ blender resource list ↓ [updated 3/18/25]
blender version i use + current blender theme + cc4 + simripper
blender add-ons i use
blender kit $ city generator $ auto-rig pro $ procedural crowds $ scene skies
$ 3d asset creators i love [scenes, hair, clothing, + more]
hilifesimmer cocogames kikovanity eh sims noirangelz afrosimtric tao studio bbygirl. fashionsimsta frxsk0 delicious things necromancer decvyed cocogames kikovanity eh sims noirangelz afrosimtric tao studio bbygirl. fashionsimsta little heaven frxsk0 delicious things necromancer koimetaverse decvyed phantomdoll wisp parlour seoulsoul bella studios architecture sims
my favorite 3d artists
sikoi neishroom reallyhailey kikovanity cocogames simsadilla simphic afrosimtric whoopsim gleamer cyrenights
#a lot of stuff is missing but this is all i can remember from off the top of my dome#ima add more later#resources#blender resources
56 notes
·
View notes
Text
.dae shader node configuration - updated!


I found a small bug in my script, so I've updated it! There was an issue with how glass meshes imported, but I found the problem and resolved it.
This script automatically configures shader nodes for .dae files exported from TS4SimRipper for use in Blender - currently, imported .dae files do not have properly configured specular or normal maps, so I wrote this to do it for you ❤️ I'm working on converting this to a Blender add-on to make it more user-friendly (hopefully should be done in the next few weeks) but it's fully workable in its current form. If anyone wants to give it a shot, I'd love to get your feedback and I'm happy to answer any questions!
To use the script in its current form:
Make sure you're using Blender 4 - I've tested this with 4.3 and 4.4
Export your model using TS4SimRipper - you must choose either "single mesh and texture" or "solid and glass meshes and textures." It will NOT work with all separate meshes.
Open the scripting tab. Either create a new script and copy/paste my code there, or download my script and open the file.
Select the collection where you want the model in the outliner.
Hit the play/run script button at the top of the scripting tab.
Blender will have you select the .dae file you want to use.
And there you go! This is pretty much what you'd get if you imported your .dae normally, but if you hop over to the shader tab you'll see that everything is set up for you!
One note - I personally don't use the 'Clean DAE mesh?' option in TS4SimRipper (it can be kinda buggy) and instead merge vertices in Blender. If you would prefer not to use Blender to clean your mesh, remove line 34:
merge_vertices(model)
I recommend doing that if you get weird shadows, especially around the cheeks and hairline. This generally isn't a problem using EEVEE, but it's a huge issue with Cycles (which is what I always use). Alternatively, feel free to reach out - I'm happy to help! It took me ages to figure out how to import models correctly and I've probably experienced any problem you run into.
I haven't figured out how to automate everything, so you still need to:
Attach emission maps for vampire eyes/other glowing objects - these do not seem to export properly in SimRipper so you may need to export the textures with S4S and manually attach them
Remove the lamp that is automatically created when you import a model - it will be in the same collection as the model
Apply your own subsurf modifier if you're planning to do that - you might need to take a few extra steps to stop weird awful shadows forming at the cheeks & hairline. It took me ages to figure out how why that was happening, so feel to reach out if you want me to walk you through the steps to fix that.
6 notes
·
View notes
Note
How did you get the veins to show on your last render? It's really amazing
Hey nonny, thank you! 🥰
I'm using a modified version of Eden's Garden's skin shader! This is for blender only, fyi!
3 notes
·
View notes
Text
17 notes
·
View notes
Text
AUTISM MEGAMEAL


free to use with reblog/credit <3 as always free download/viewing here
roblox accessory here
#tw bright colors#tw eyestrain#rainbowcore#nostalgiacore#autism#f2u graphics#f2u with credit#f2u resources#artists on tumblr#digital art#blender#my art#web graphics#page decor#webcore#frodart#frodulus objects
5K notes
·
View notes
Text
Free Manual Wheelchair Reference Models

ID: A banner with grey 3D models of 5 kinds of manual wheelchairs in a line in front of the disability pride flag and text that reads "Manual Wheelchair References" /End ID
For disability pride month, I decided to release a pack of 3D manual wheelchair models.
The pack includes 5 wheelchairs:
2 Active urban-style chairs (one of which includes a smart drive)
1 off-road active chair
1 children's wheelchair
and 1 standard "hospital" wheelchair).
All the wheelchairs are based off either wheelchairs I or friends of mine have used
Downloadable here!
or on the Clip Studio Paint Asset Store (ID 2097442) (there's been an issue with the CSP version, but the models in the download folder can be imported into clip studio paint until I can fix it)
More info about the download contents below:
The first download link includes the original .Blend file with all 5 chairs, as well as individual .obj or .fbx files the chairs (All but 1 have an .obj file, as they're only meshes. The chair with the smart drive is rigged, which is why it has an .Fbx file instead so it will retain that information) as well as a "read me" file that explains in more depth what kind of disability/character/lifestyle each chair is made for (These are just what I had in mind when I designed them, they are usable by other characters who don't fit the suggestions for the most part!) I wanted to include the Read Me contents in the CSP Asset Store listing, but CS said it was too long lol.
Also, as the title says, these files are free to use! While it's not mandatory, I would appreciate credit if you use them (or even just a tag so I can see the cool art you make with them!!)
I actually made these ages ago, the original plan was to use them in a series of posts then release the pack, but I never got around to making the series and so they've just been sitting here. I took a day off from art fight attacks to clean them all up and get them ready to post. If you experience any issues, let me know and I'll try to fix it up.
I had a couple more that were supposed to be in the pack including a sports (basketball/Tennis) wheelchair and some different styles of wheelchair, but I think the files corrupted so once I fix (or remake) them, I'll probably make a second pack.
If you have any issues, please let me know!
#Writing Disability With Cy Cyborg#Disability in art#wheelchair#wheelchair user#disability#disabled#disability representation#mobility aids#drawing disability#drawing wheelchairs#art reference#art resources#Resources#manual wheelchair#art stuff#disabled artist#3d#3d model#blender#disability awareness#disabilities#disability in media
11K notes
·
View notes
Text
WHOA, this is amazing!
The Sims 3 Material Painter
Been working on a tool that easily creates The Sims 3 material maps based only on a few texture layers, most of it derived from height data. This was done long time ago, but very sloppily, and it was not at all approachable. Discovering THIS free blender add-on that lets you plaint layers in it, made me return to this project and finalize it for release.
The tool can export: - Multiplier, RGB+A - Normal Map, RGB+A - CAST Map, RGB+A - Specular Map - Overlay, RGB+A

~~Get it HERE, and please, make sure to get THIS blender plugin, it's NEEDED for this to work. Blender 4.2+ is also needed for these to work together.~~ I will make a tutorial and edit this post eventually, on how to use this efficiently.
206 notes
·
View notes
Text
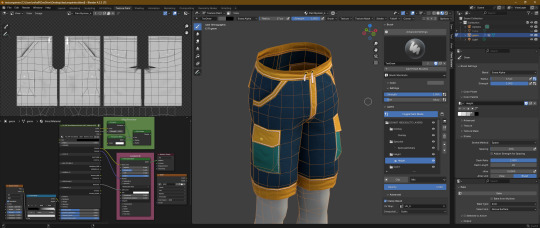
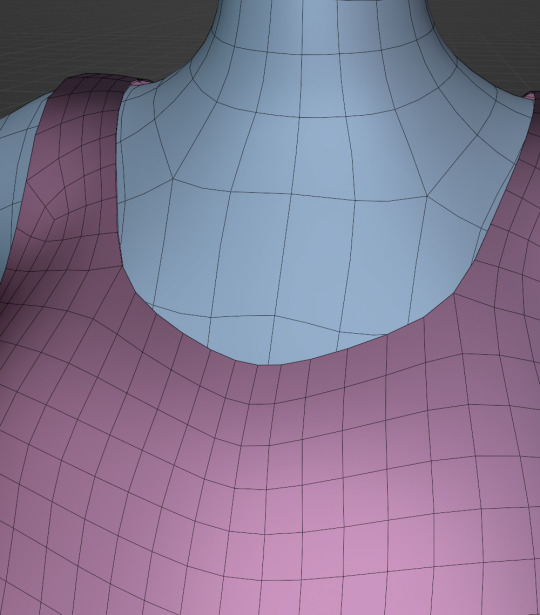
CC Creation Tutorial: Smooth Seams in Blender

In this tutorial, I will show you how to make your mesh seams smooth inside Blender (no Milkshape required!) and walk you through the process step by step. We will make a perfectly smooth mesh and transfer the normal data from that mesh to our main mesh using the Data Transfer modifier.
I am using Blender 3.6 in this tutorial (though you should be able to follow along using other versions as well)
You do not need to have much previous knowledge to follow this tutorial, but I assume you know some basics in Blender like how to select, things, navigate around, etc, and know how to import the meshes and put them into Blender.
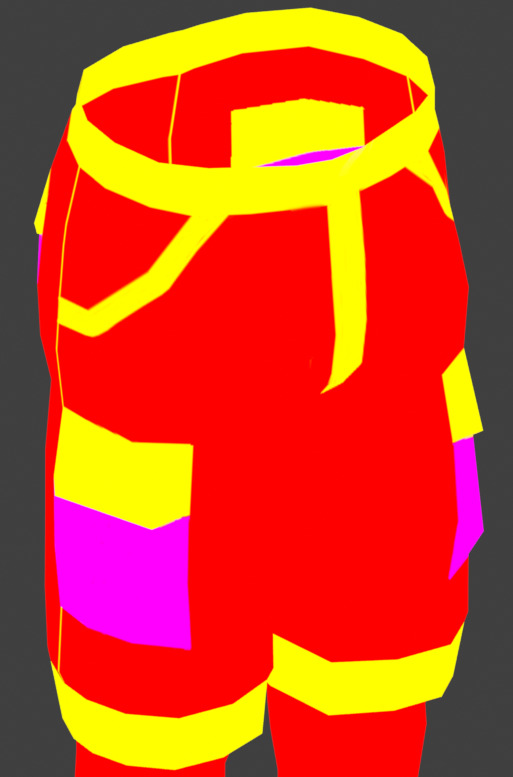
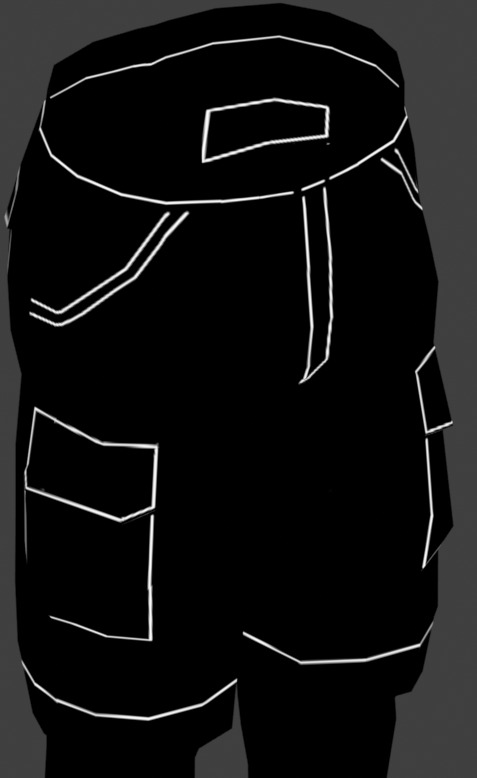
For this tutorial, I exported the Sims 3 afbodyEP4DressPromBigBow mesh with TSR Workshop. You can use any clothing mesh you like though, and works on any meshes, not just Sims 3 ones.

This is our mesh. You can already tell that it has the dreaded seams on the neck and the rest of the body.

First, we need to make a copy of the mesh (in Object mode, select the mesh and hit Ctrl+D Shift+D to duplicate it, then hit Esc to stop it from moving around).
Rename the mesh (I added Seamless to the mesh name).
Make sure the original mesh is hidden (click the eye symbol) and select the Seamless mesh.
Press the Tab key to go into Edit Mode.

Now we select the parts that we want to have smooth seams. Let's select everything that is skin (you can select a litte piece of the mesh and then press Ctrl+L to select the entire piece)!

Now, press M and in the menu, choose By Distance. (in older versions, this is called Remove Doubles).
This will remove all double vertices at the seams on the selection we made.

It will show you how many vertices it removed. The skin looks nice and smooth!
Let's switch back to our original mesh: Make sure you deactivate the eye on the Seamless mesh and activate the eye again on the main mesh. Then, select the main mesh.

Now, let's add a data modifier to our main mesh. Click the blue wrench icon in the vertical list of the properties panel and then onto Add Modifier, then choose Data Transfer from the list.

As the source, we choose our Seamless mesh.

Also toggle on Face Corner Data and click the Custom Normals button.
Hold on, there is a message saying that we should enable Auto Smooth in Object Data Properties. Let's do that next! (if the message does not appear for you, maybe Auto Smooth is already on).

Click the green inverted triangle button and in the Normals section, toggle on Auto Smooth.

Now we can switch back to the modifier tab by clicking the blue wrench icon again.
But hang on, what happened to our mesh? There are now black spots over the dress and shadows on the legs!

This is due to the Data transfer modifier's Mapping setting. If we change it to Topology, our mesh goes back to normal again. Phew!

Now that the normals look good, we can start the transfer of our new smooth normals from the seamless mesh to our main mesh. To do that, we hit the Generate Data Layers button. This button works destructively, so you cannot undo what it did, just FYI.

Note: On newer versions of Blender, Generate Data Layers may not be enough to transfer the normals and you may need to apply the modifier instead.
You can toggle the modifier's visuals on and off with the little screen icon to see the results after you click Generate Data Layers to see if it stuck. If it did not (and you see the seams of your base mesh when toggling it off), try to apply it instead.

I switched from textured to solid shading because the differences are just more noticeable in this mode. This is how our mesh looks now with the modifier turned off.
Because we clicked the transfer button, the normals have been permanently applied to our mesh. The skin is smooth now, and so is the dress (even though we did not smooth that one, hmm...)

If we toggle the modifier back on, suddenly the dress has seams again! What's going on there? I'm not exactly sure why, but Auto Smooth seems to be doing some smoothing on the dress mesh as well.
I am not sure if this is normal behavior or not, but let's pretend that this did not happen and the modifier in fact did not smooth the dress.
Maybe we just forgot to smooth some areas on the Seamless mesh that we noticed only later on. That's no problem. We simply modify our Seamless mesh again!

So let's swap back to the seamless mesh and select it (remember to click the eye icons so only the Seamless mesh is visible).

Let's select the main dress parts and press M -> merge by distance on them. We cannot smooth the whole dress all at once, because then that would remove some seams that we want (like those for the backfaces and the middle section of the dress where the bow is attached).
If we remove the wrong seams, we ruin our normals and will have black splotches.

Now, let's select the backfaces and areas we left out before and repeat this process: M -> merge by distance.

Look at how perfect our Seamless mesh is looking now! Now, let's transfer those beautiful normals to our main mesh.
Select the main mesh and toggle the eye icons again, to hide our Seamless mesh and reveal our main mesh.

Once again, we will use the Generate Data Layers button in our Data Transfer modifier. If you have previously applied the modifier, just add the modifier again to the main mesh and use the settings shown here.
And that's it, you are done! You have a perfectly smoothed mesh that you can export now.

Final Note: it is best to transfer the normals at the very end of your meshing process because any action that recalculates the normals can reset our custom-made smooth normals again.
Of course, you can simply use the Generate Data Layers button again to re-add them, but it saves you time to only do this step at the end.
I almost forgot to say: You still have to use Mesh Toolkit to fix the seams on the edges of your mesh and do the usual shenanigans.
188 notes
·
View notes
Text
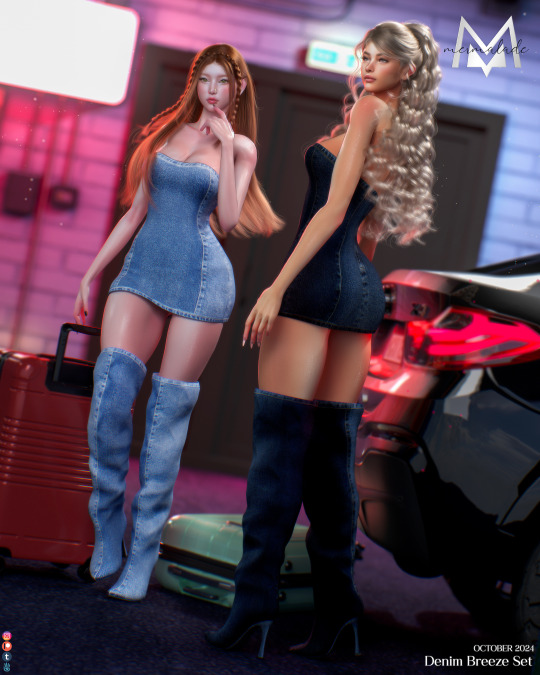
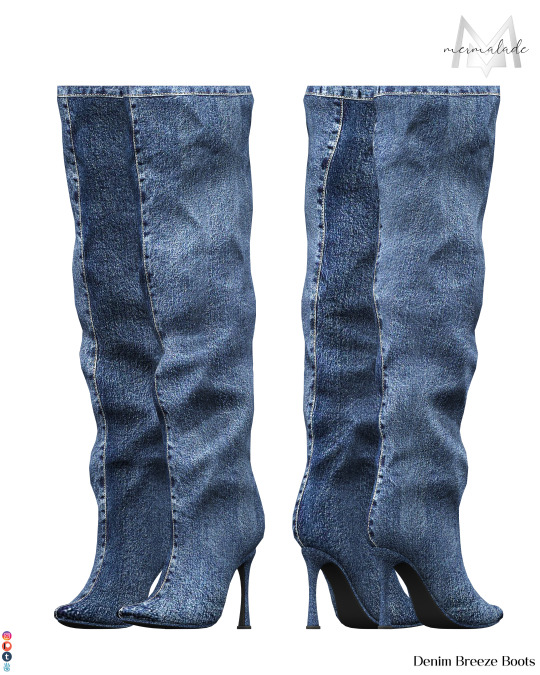
Denim Breeze Set
✨ New Release Alert: Denim Breeze Set! ✨
Step into effortless style with our brand-new Denim Breeze Set!
This set includes the Denim Breeze Dress and Denim Breeze Boots, both crafted with 30 stunning denim textures. Available as both a package and blend file, this set offers versatility and high-quality design for all denim lovers.
Get ready to rock that denim look! 💃💖

Denim Breeze Dress
- New Mesh
- All Lods
- 30 Swatches
- Custom thumbnail
- Compatible with HQ mod

Denim Breeze Boots
- New Mesh
- All Lods
- 30 Swatches
- Custom thumbnail
- Compatible with HQ mod
- Available slider and base game
- Slider Link
DOWNLOAD (PACKAGE)
DOWNLOAD (BLEND FILE)
SHOP
You can find me:
Tumblr: Click
Instagram: Click
The Sims Resource (TSR): Click
Patreon: Click
Secondlife: Click
#sims 4 custom content#the sims 4#mermaladesimtr#sims 4 cc finds#ts4 cc finds#sims 4 cc#the sims resource#ts4 custom content#ts4#sims 4 custom content finds#mermalade#mermaladesims#sims 4 gameplay#sims 4 screenshots#ts4 simblr#sims community#sims 4 legacy#sims 4 story#sims 4 patreon#sims 4#ts4 cc#ts4 cc download#ts4 alpha#the sims 4 custom content#ts4 download#sims4cc#ts4 cc free#ts4 cc cas#sims 4 blender#sims 4 blender community
182 notes
·
View notes
Text
32, unsorted


#blinkies#carrd graphics#web graphics#carrd resources#flash warning#da stamps#dividers#blender#futurama#pg13#moon#red aesthetic#userboxes#night#man door hand hook car door#mario kart#mars#stars#eyes#skull#super mario 64#sm64#red#minecraft#i/me/myself#clippy#tumblr#proship#ladybugs#lemon demon
124 notes
·
View notes
Text

tosses a >Rough< height chart in your general direction Chai's Blender height lands around 180 cm. But since Chai is canonically 170cm, I scaled him down until it looked right. Then I applied that same scaling values to the rest of the cast, which was at .950* *(Macaron is a whole different story with his game-wide 80% scaling value--maybe next time.) Here they are from the front (sorry did not have energy to fix 808's shaders here lol)
gotta go, I forgot to eat lunch and it's already mid afternoon o_o;
#hi fi rush#resource#blendering#someone from a discord server asked about it and i had enough time to squeeze it in today#i only ever eyeballed their scale tbh#bc i am lazy#but it's interesting to get some numbers down#skedaddling now to nab some nutriment
72 notes
·
View notes
Text
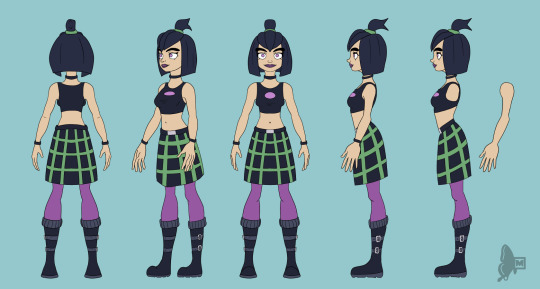
Road to 3D- Sam Manson (Part 2):
Character Modeling


Part 1: Model Sheet
Welcome to the second and final part of this project. Since people have asked how I do my models, I decided to make a write-up on how I approach these things using the example of a model of Sam Manson. The first part focused on how I make a model sheet fo a 3d model the second part focus just on the modeling. There are many more things about how to create a fully realized 3d character that I could make whole other chapters for, like UV unwrapping, texturing, shading and rigging, but I don't have enough knowledge past the fundamentals on these topics that could warrant their own seperate posts.
Additional stuff before I continue:
I use Blender for all my model
This not a beginners guide or something similar, it would be helpful to already know the general workflow of a modeling, how to use Blender and know different terminology like edgeflow, retopology etc.
If you are a beginner and want to learn more about character modeling I recommend the videoseries "Modeling for Animation" by Dikko on Youtube
Maybe I make some reference some tricks from this videoseries
That's it, let's go!


My first step is always the block-out phase. The block-out phase is what the construction lines and the first sketch in a drawing are. I align the frontview and sideview from the model sheet I made in part 1 with the z-axis (the blue line in the images above) and roughly shape out the forms with primitive forms. For this I mostly use a cube with a subdivide modifier.
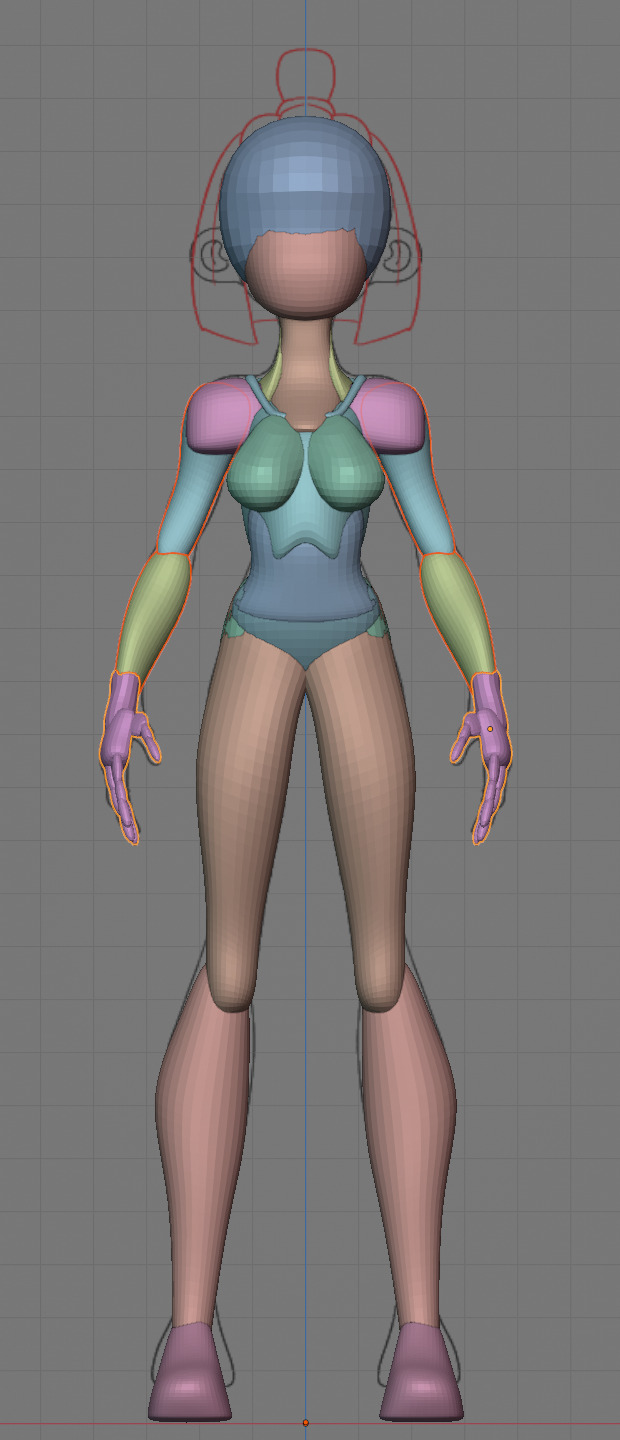


Having a modelsheet without the clothes obscuring the body makes it much easier the get the form right. The block-out phase is one of the most important steps, if it looks good than I have practically half the work done. This is also a good opportunity to practice anatomy.
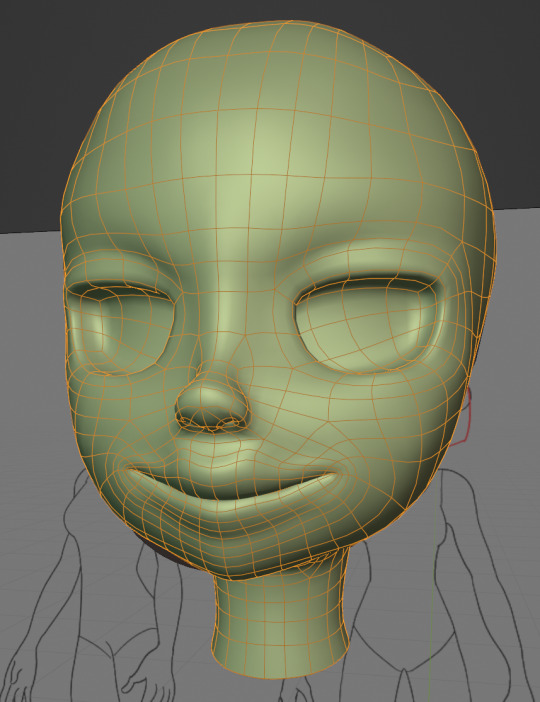

After this stage I continue with the head. First of all, don't forget to add the mirror modifier so I just need to model half of the model. There are different methods to approach modeling the head, like sculpt the head first, retopologize and than bake all the deatails onto the retopologized head. I actually prefer to polymodel the head especially when I have a good model sheet. I practially trace the lineart from the model sheet by extruding vertices, once from the frontview and once from the sideview. The most important points are the form of the eyes, the mouth, the form of the face and the jawline. The head block-out is used as an anchor point for the shrinkwrap modifier so that the traced forms actually look like they belong to a 3d form and not 2d lines floating space. From this point on it's just connecting everything, pull and push vertices so it looks like a 3d head and make sure the edgeflow is good. (It's also helpful to know how the planes of the head look like) After that I add the eyelashes, eyebrow, eyes and the ears, now it looks like something!
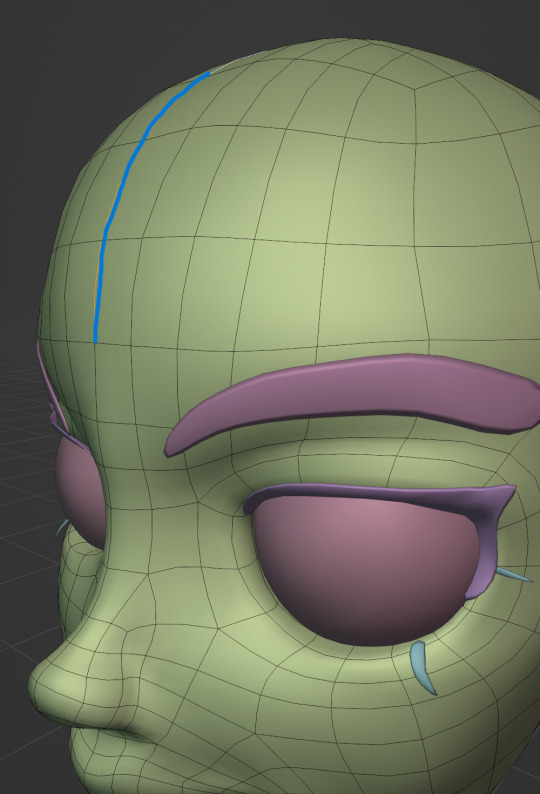
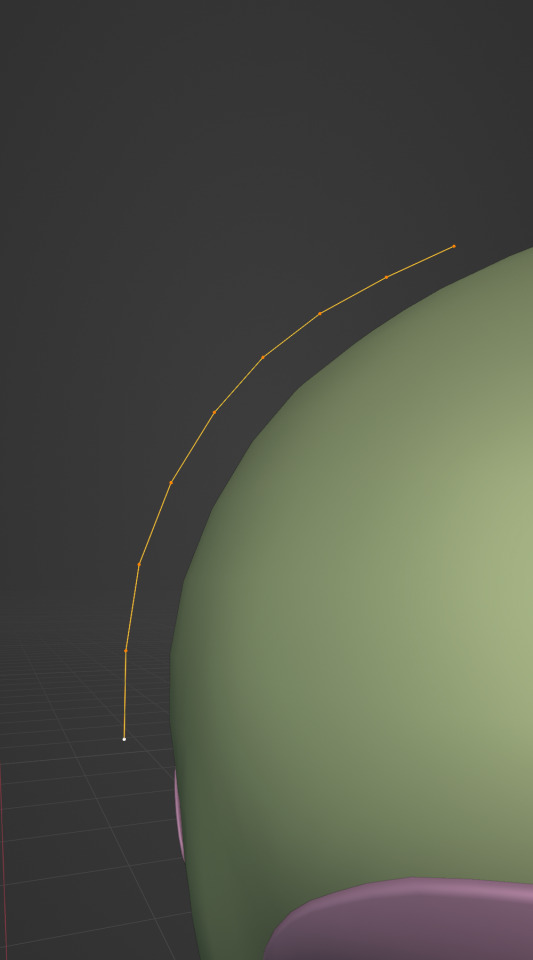
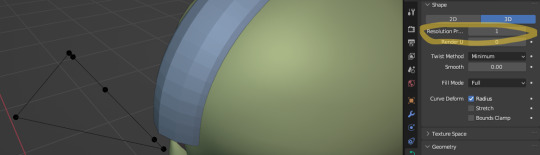
Now comes the hair. For the hair I used the "curve trick" like mentioned in the video series I recommended. Here is a tip to save time: I choose some edges from the head, duplicate and seperate it from the mesh. I convert this seperated line into a curve and choose a beziercircle as a bevel geometry. This is now the perfect foundation to model the hair further. One thing I needed a long time to notice: To get the beziercircle to a perfect square or in this case a triangle lower the Resolution U to 1 in the shape options. Now I just convert the curves into a mesh and add details and the head is done!
With the head finished I continue with the body. Remember how I wrote with a good block-out half of the work ist finished? Well, for this step I practically just use the smooth brush in sculpt mode and smooth everything out so everything looks connected. Then I retopologize the body and that's it. Well, ok there is a little bit more to it: Before smoothing things out I join the block-out part to a single mesh and remesh it with the remash modifier expept for the hands. I prefer to polymodel the hands seperatly without worrying about the rest of the body because they are difficult to model. I reattach them later. Speaking of reattaching, I make sure that the connection points have the same number of vertices while I retopologize/polymodel. To ensure that, I often use the following trick visualized with a simple example ( which is also described in the video series):

I want to reduce the amount of edges at the bottom of this plane, for this I merge 3 vertices from the middle into 1 vertice seen in the left image. After that I can select the blue marked edges from the center image and dissolve them. The result, which you can see on the right, is a nice clean edgeflow with a reduction in the number of edges.

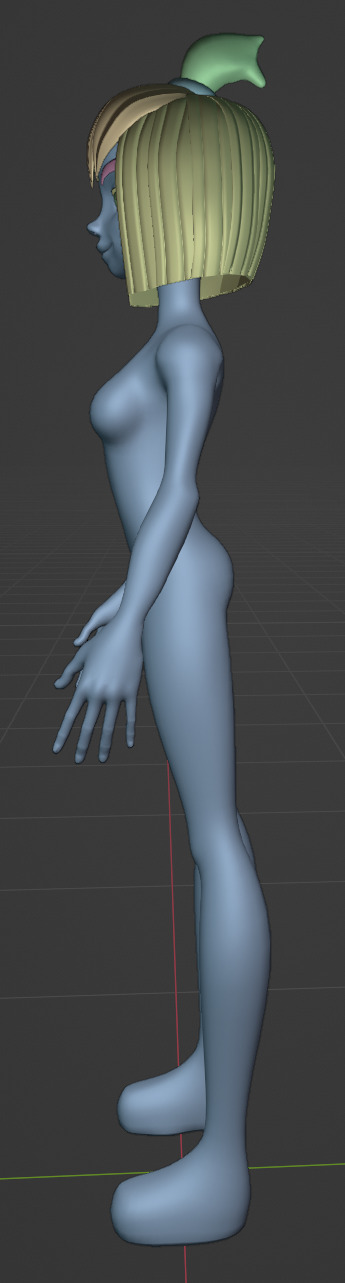
After modeling every part I attach them together and I have a finished bodymesh the work with.

Now onto the clothes, for this I use the model sheet with clothes as reference. Having a retopologized body makes it easier to model simple stuff like e.g. Sam's shirt. On the left image the marked faces of the the bodymesh already looks like a shirt. I just need to duplicate and seperate this area, clean it up a little and the shirt is basically finished. The more complex stuff like the boots I need to polymodel around the bodymesh.

With that the modeling part is done! Now comes the things I said above: uv unwrapping, texture painting, rigging and shading. These are whole other topics I cannot go deeper because I'm still learning how to do these things but I hope my little write-up about how I appoach character modeling was enough to learn one thing or two.
Thank you for your time and thank for reading!
#3d modeling process#3d model#blender#danny phantom#sam manson#long post#my animation#my art#art resources
239 notes
·
View notes
Text

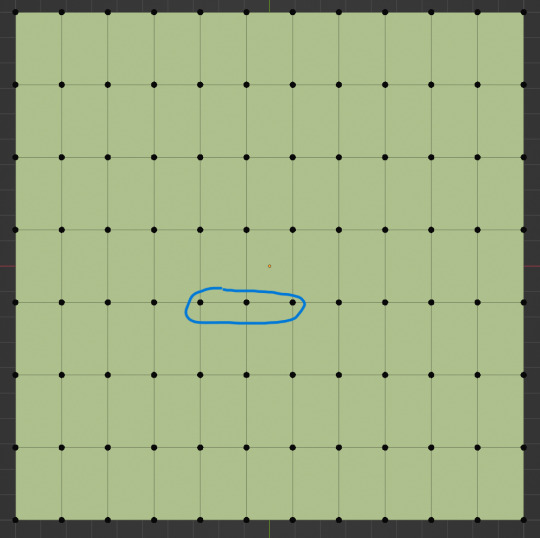
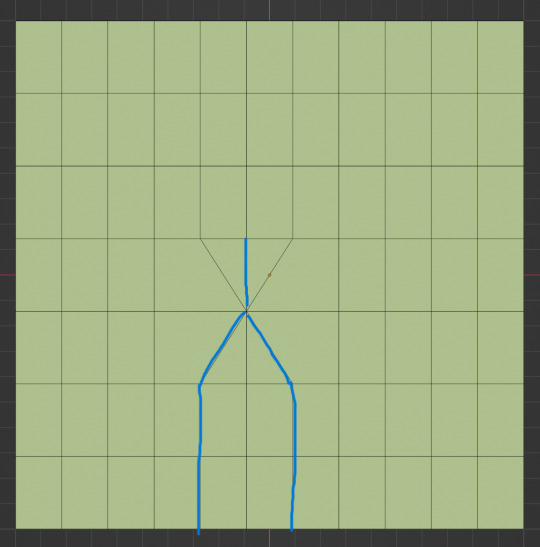
i cannot draw psychelocks to save my life so i modeled one as a drawing ref
#(ik theres an actual psychelock model but i couldnt find it on model resource oops) //#“why did you model the black lock instead of the red one” Well //#ace attorney#i should make a sideblog for this but for now they can go here //#gif#blender#wip#psychelock#fast gif
674 notes
·
View notes
Text


PUNK REBELS - ROXI MONROE | SIM FOR DOWNLOAD 🎸
Exclusive Female Sims already available for download in @thesimsresourceofficial ● Punk Rebels Collab ● For Sims4 Game ● Young Adult ✨️
DOWNLOAD HERE⬇️
Follow me on my Social Media! 🌐
MY INSTAGRAM
MY PATREON
#ts4 community#sims 4 gameplay#the sims community#simblr#sims 4#the sims 4#sims4ccfinds#ts4 cas#sim download#blender sims#ts4 custom content#ts4 gameplay#ts4 simblr#ts4cc#ts4clothing#ts4poses#ts4#my sims#sims4poses#sims 4 screenshots#sims4cas#sims4cc#sims4#thesims4cc#the sims resource#the sims cc#sims#thesims4
24 notes
·
View notes
Text
jus the brownie <3


f2u w/ credit as usual
#rainbowcore#nostalgiacore#autism#f2u graphics#f2u with credit#f2u resources#artists on tumblr#digital art#blender#my art#web graphics#page decor#webcore#frodart#frodulus objects#cosmic brownie#nostaligiacore
2K notes
·
View notes
Text
youtube
if you want to learn blender I encourage you to follow this angel and watch his tutorials they are a godsend
242 notes
·
View notes