#cricut.com/setup maker 3
Explore tagged Tumblr posts
Visit Tumblr Blog
Explore Tumblr blogs with no restrictions, modern design and the best experience.
Last Seen Tumblr Blogs


Fun Fact
Tumblr has been banned in Indonesia for providing people with access to pornographic content.
Text

Digital Crafting Delights: Cricut Design Space Wonders
Looking for a way to enhance your crafting experience? Here you go with a Cricut cutting machine. With a plethora of Cricut cutting machine models, Cricut meets every crafter enthusiast’s needs. Get started with your Cricut machine today by simply setting it up - visit cricut.com/setup. With Cricut, you can cut, score, emboss, and write over hundreds of materials. Be it a birthday party or a festive celebration, Cricut is always there for you!
Visit here for more Information :- https://cricutdesignspace-setup.com/
#designcricutcomsetup#cricutcom#cricutcomsetup#cricutdesignspace#cricutdesignspacedownload#cricut design space login#cricut.com/setup maker 3#cricut.com/setup app
0 notes
Text
7 Cricut Machine Projects: Get Inspired & Start Crafting
I know you are looking for Cricut machine projects, and you have landed in the right place. I'm excited to share some unique project ideas you must try. Each idea is created for beginners, keeping it simple, fun as well as inspiration.
In this guide, I won't bore you with unnecessary details. Instead, I will mention the crafting tools needed for each project & their main purpose and sometimes guide you on how to use them. You don't have to tackle anything complicated; just follow the ideas outlined in the blog. Regardless of your Cricut machine, I have covered all the projects you can create. Let's dive into our first project.
1. Customize Candle Jar
I love decorating my room, and I'm sure you do too. For cozy night time vibes, candles are a must. Why not customize your own candle jar with your Cricut machine? All you need is colored vinyl, a weeding tool, a clean jar, transfer tape, and of course, your Cricut cutting machine. Design in the Cricut software, cut, and apply to the jar!

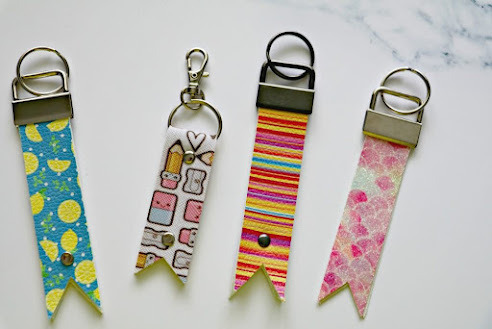
2. Leather Keychains
Keychains are often overlooked, but they are a great way to add personality to your daily items. I make keychains for my car, room, and locker, and people notice! If you are exploring Cricut machine projects, try creating faux leather keychains. You will need a Cricut machine, faux leather, iron-on vinyl, a Cricut Heat Press, and Design Space to get started.
3. Banners
Recently, I celebrated my daughter's birthday. I handled all the decorations with my Cricut machine. One Cricut machine project that stood out was creating a birthday banner. Planning a party becomes more enjoyable with Cricut crafts. With a Cricut cutting machine, cardstock, weeding tools, and designs from the Cricut app, you're all set!

4. Labels
Let's move on to other Cricut machine projects. Turn on your Cricut machine and start cutting out personalized text for your pantry items. You can also add designs with text on chalkboard vinyl if you want. This project will undoubtedly prove to be very useful as it allows you to easily label and identify your items.
5. Decals
If scratches on your laptop are causing trouble, it's time to solve this common issue. Create a custom design with Cricut software, cut it onto printable vinyl in your preferred color, and apply it to your laptop. This DIY solution is not only cost-effective but also allows you to personalize your device exactly how you want it.

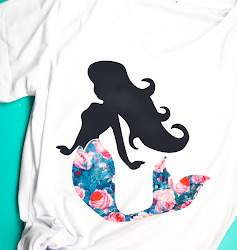
6. T-shirts
I can't overlook the excitement of t-shirt projects with a Cricut machine. It's not just any DIY project; it's an adventure filled with fun. For this, you will need a Cricut cutting machine and a Cricut Heat Press. Once you learn to make T-shirts with Cricut, you'll feel confident with iron-on and infusible ink projects, too.
7. Mug & Tumblers
Well, who doesn't love personalized tumblers or mugs? They add such an attractive and personal touch. The good news is you can make them yourself with the help of a Cricut Mug Press and a Cricut cutting machine. Simply cut the infusible ink and press it into the tumbler or mug using the Mug Press machine.
Final Thoughts
Whether it's the weekend or just a casual occasion, crafting with a Cricut machine is always a lot of fun, isn't it? However, sometimes, finding the right Cricut machine projects can be overwhelming. To address this, I have mentioned 7 creative and unique projects in the blog above, ranging from candle jars to t-shirts and banners. Once you have completed these DIY projects, you will be even more enthusiastic about Cricut crafting.
Frequently Asked Questions
How to get a free Cricut project?
The best and easiest way to make crafts with Cricut is by finding and creating your desired project for free.
First, open the Cricut app and select New Project.
Next, navigate to the design panel and choose images.
Click on Free under the highlighted categories and type in your desired project.
What is the easiest thing to make with a Cricut?
If you are a beginner in Cricut crafting, here are some easy Cricut machine projects you can start with.
Flowers
Shirt
Gift tags
Decals
Tumblers
Mugs
Stickers
Keychains
What can a Cricut machine do?
A Cricut machine is an electronic cutting machine that can cut symbols, designs, and images on a variety of materials with precision. In addition to cutting, the Cricut machine can also write, deboss, foil, and engrave with a variety of tools and blades. Some Cricut machines also have a print-then-cut sensor so you can cut out the printed design.
Source Url :- Cricut machine projects
Visit here for more Information :- cricut design space
Cricut cutting machine
#Cricut machine projects#cricut.com/setup#design.cricut.com/setup#cricut.com#cricut design space#cricut design space download#cricut design space login#design.cricut.com/setup explore air 2#cricut.com/setup maker 3#cricut.com/setup app#cricut.com/create#cricut.com/register
0 notes
Text

Cricut Maker Magic: Design Space Projects Made Easy
Looking for a way to infuse your crafting projects with innovation? Look no further than Cricut cutting machines. With a vast lineup catering to various crafting styles, Cricut offers endless possibilities to explore new realms of crafts. Set up your machine effortlessly by visiting cricut maker design space. Complete the setup and dive into the creative world of the Cricut machine. To unleash your imagination, the Cricut Design Space app is always there for you!
Visit here for more Information:- https://cricutmakerdesign.space/
#Cricut Design Space#cricut.com/setup#Cricut Design Space app#cricut.com#cricut design space download#design.cricut.com/setup explore air 2#cricut.com/setup maker 3
0 notes
Text
How to Connect Cricut to Your Device via Bluetooth: Full Guide
Connecting a Cricut machine to a device is essential for working on Cricut projects. Without this connection, it is impossible to use the Cricut Design Space app. You should know how to connect Cricut to your operating system to get started. Keep reading the blog, and by the end, you will know everything about connecting.
Connecting a Cricut machine to a device can be done either via Bluetooth or a USB cable. Most users prefer Bluetooth because it is a wireless connection. With Bluetooth, you can move around within the range and work on your DIY projects without being restricted to one place. In this write-up, I will explain how to connect your Cricut machine to compatible devices using Bluetooth.
How to Connect Cricut to Windows Using Bluetooth?
You can connect your computer to a Cricut machine via Bluetooth. There are a lot of benefits to using a Cricut machine on a computer. On a computer, you can work on multiple projects in different windows at the same time. Follow these steps to learn how to connect Cricut to your Windows PC:
How to Connect Cricut to Mac With Bluetooth?
The procedure for connecting to your Cricut machine via Bluetooth on a Mac computer is almost identical. Check out the steps below to learn how to connect Cricut to a MacBook.
How to Connect Cricut to Bluetooth on Your iOS Device?
If you want to set up a Cricut machine but don’t have a computer, then you can set it up and connect it to your iPhone. Now, you can do it easily. To learn the process of how to connect Cricut to your iPhone, these are the steps:
How to Connect Cricut to Bluetooth on Android Devices?
Similarly, you can use your Android phone to work on your Cricut projects as well. You can connect your Cricut machine to your Android phone with these simple procedures:
Connecting your device to your Cricut is not enough to work on projects. After the connection, download the Cricut Design Space app. After that, you have to log in with a Cricut ID, and then your machine will be ready to make beautiful items.
Conclusion
In this blog, you learned how to connect Cricut on your computer and mobile. Connecting a device to your Cricut machine is very important. Only after the connection can you work on your designs on your device and then cut those designs with a Cricut machine. For connection, you can also use a USB cable, but most users prefer Bluetooth because of its flexibility. You can connect your machine to a computer or phone according to your convenience and start working to make beautiful crafts using Cricut machines.
FAQs
Why Is My Phone Not Connecting to Cricut Bluetooth?
If you are not able to connect your phone to a Cricut machine, then you should go on to check a few things regarding the connection. First, check whether Bluetooth is turned on or not. If it is not on, you will have to turn it on. Next, verify the distance between your machine and the phone. If the distance is more than 10-15 feet, then your device will not find the machine. To solve this problem, bring the machine and the phone closer.
How Can I Find What My Bluetooth Connecting Code for Cricut?
When you use Bluetooth to connect your device to the Cricut machine, you need a password to connect. At least in the beginning, PIN is a must. The Bluetooth connection is wireless, and a security PIN is required to prevent it from connecting to unwanted devices. Most of the time, devices have a generic PIN, which is set by default. However, people can choose their own password. If you do not know your PIN code, your device has a default PIN. Type 0000 as the PIN, and the connection will be successful.
How Can I Reset Bluetooth Cricut connection?
If you use Bluetooth to connect your Cricut machine to a device and you are facing a problem, you can reset the Bluetooth connection on the device, and the issue will go away. To reset Bluetooth, you have to go to Bluetooth settings and turn it on. Now, you have to click on the right side of the machine and click on Unconnect the device. When the machine is unconnects, search for the machine and reconnect it. The reset is now complete.
Visit: install cricut design space app
Source: https://connectcricut.com/how-to-connect-cricut-to-your-device-via-bluetooth-full-guide//setup
#www.cricut.com setup login#www.cricut.com/setup#cricut.com/setup#install cricut design space app#cricut create connect to computer#cricut setup new device#cricut new product setup#cricut.com setup mac#cricut setup maker#cricut setup create account#cricut setup explore air 2 setup#cricut setup for pc#cricut setup on computer#cricut setup#cricut design space#cricut setup log in#cricut new machine setup#cricut crafts#cricut explore air 2#cricut explore 3
0 notes
Text
Cricut Maker 3 Set Up: Getting Started With 5 Easy Steps
Are you in search of a Cricut Maker 3 set up guide? I’ve got your back! Remember the day you made up your mind to start crafting with Cricut? You would have been thinking about the moment when you could make your own crafts hassle-free. In addition, you don’t have to buy anything from outside. Just create your own customized projects easily. I know it must have taken a lot of time to think it over. But better late than never!
Now, the question is how to get started with Cricut Maker 3. Buying a new machine is not enough. Therefore, I will walk you through every step of the Cricut machine setup. From unboxing to downloading the Cricut Design Space app or connecting the machine to a Windows PC, I will explain everything that you need. Let’s start learning how to set up Cricut Maker 3 on your Windows computer.
Step 1: Unboxing Cricut Maker 3
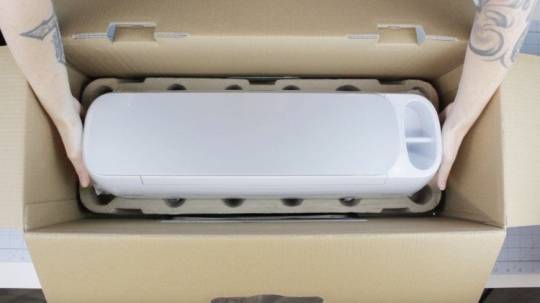
Here, I am going to show you the list of items that I received while unboxing my trust Cricut machine:
Maker 3 machine
Power adapter
Material for a test cut
Power cord
Quick Start Guide
Warranty document
Accessory Adapter (already installed in the clamp A)
USB cable
Bonus materials
Premium fine-point blade and blade housing (already installed in clamp B)
Safety document
Step 2: Verify System Compatibility
Okay, now it’s time to check for compatibility. In it, you need to find out whether your computer or any device you are using for the Cricut Maker 3 set up. Ensure your device or computer meets the basic system requirements.
In order to make it easier for you, I have added some information below for Windows computers only. Go through it and verify with your PC.
Operating System: Windows 10 or later
CPU: Intel Dual-Core or equivalent AMD processor
RAM: 4GB
Disk Space: 2 GB free
PC with Bluetooth in-built or USB port
Display: 1024px x 768px screen resolution
Now that you have checked the system needs, you should proceed further to download the Cricut Design Space app.
Step 3: Download & Install Cricut Software
Once you know whether your system is compatible with running this software, you can start downloading it on your PC. Don’t worry; I will keep the steps beginner-friendly. Let’s start!
First of all, you need to turn on your PC.
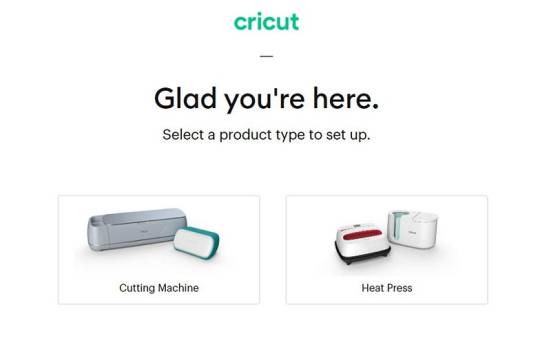
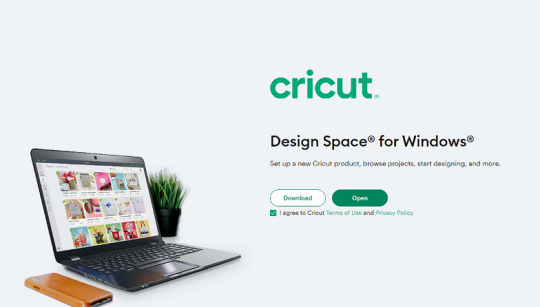
After that, open any browser that you prefer and visit cricut.com/setup.
As you enter the site, you will be prompted to select your product type: Cutting Machine.
After that, you have to click on to check the I agree checkbox.
Then, just click on the Download button.
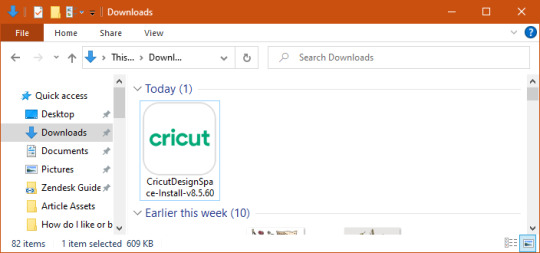
Head to the Downloads folder to install your software when it is downloaded.
To install it, you have to click on the downloaded file and start the installation.
All right, you have downloaded the software now. What’s next? The next step is the fun part: setting up the Cricut machine.
Step 4: Cricut Maker 3 Set Up
After downloading and installing the software, you have to launch it on your desktop. After launching the app, follow the steps in the section below and finish setting up your machine in no time.
Here’s how to set up Cricut Maker 3:
On your Design Space, click on Product Setup.
Then, create a Cricut account or sign in.
Next, select the Smart Cutting Machine.
Now, choose the Cricut model.
After that, follow the next step.
Step 5: Connect Cricut Maker 3 to PC via Bluetooth
Connecting Cricut to your PC is a piece of cake. All you need is a PC with built-in Bluetooth. However, you can connect your PC and machine using a USB cord. But here, I will explain how to connect Cricut to a PC via Bluetooth.
Here’s how to connect Cricut to Bluetooth:
Start by turning on your Cricut cutting machine.
After that, plug all the power cables into the wall outlet.
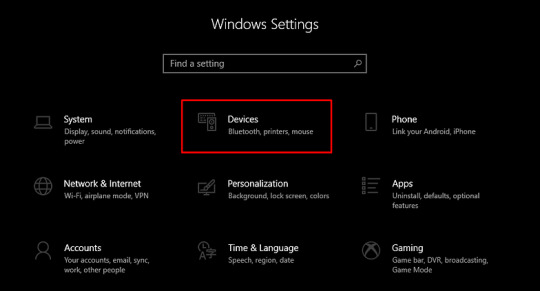
Then, you need to open Settings on your device.
After that, select the Devices option from settings.
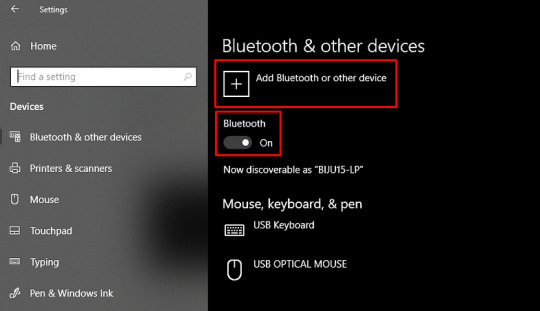
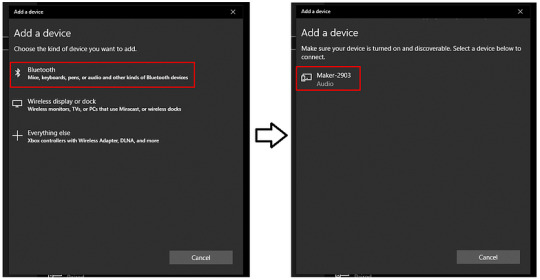
Finally, it will be paired in a while. Now, you are ready to use your machine to make any project you want.
That’s all in Cricut Maker 3 set up! If required, you might need to follow some screen prompts. Don’t worry, they are easier, and you can do it.
FAQs
Question 1: Which computer is compatible with Cricut setup?
Answer: The list is endless if you are looking for a particular computer. However, you can use a computer that runs the Windows operating system. In addition, MacBook is compatible with the Cricut Design Space software, meaning you can easily set it up using these two devices. No matter which brand of laptop you are using with Windows OS, the only thing you require is the Windows operating system.
Question 2: How do I connect Cricut Maker 3 to a PC via a USB cord?
Answer: In order to connect your machine to the USB cable, you have to follow the steps given below:
Insert one end of the USB cable into your machine’s USB port.
Then, insert another end to your PC.
Once connected, you can easily send your design to your machine.
Question 3: Why is my Cricut Maker 3 not connecting to Bluetooth?
Answer: If you found your machine not connecting to your PC via Bluetooth, then you need to check the following points:
Check the power connection to see whether your device is properly turned on.
Ensure the distance between your machine and PC is not more than 15 feet.
Check for Bluetooth connection and confirm whether you have turned it on.
Final Words
Finally, you have learned the Cricut Maker 3 set up. In this blog, I explain each step, from unboxing the Cricut cutting machine to the final setup; I’ve got your back. As mentioned above, don’t forget to check the system compatibility; this is a must otherwise, the Cricut Design Space will not run on your PC. Lastly, you have two ways to connect Cricut: Bluetooth or USB cable.
Source: Cricut Maker 3 set up
Visit here For More Information: Cricut Joy Xtra
Twitter
0 notes
Text
Cricut Maker 3 vs Explore 3: Which Machine Is Better for You?

Both the Cricut Maker 3 vs Explore 3 are the latest tools in their respective series. Both of these are the best Cricut models and are recommended by most Cricut users. So, let’s start with the introduction of these machines.
All About Cricut Maker 3 and Explore 3

Before we compare the devices, it is best to know about both Cricut machines first.
Cricut Maker 3
This Maker 3 is believed to be the finest crafting machine for any kind of DIY project. It is a versatile machine and is compatible with all Cricut blades. It works with different materials and has 10 times the cutting force as compared to the Explore Air 2. If you have been using the Cricut machine for a long time now, you would know that after Cricut Maker, there was no Cricut Maker 2. The machine is so advanced and versatile that it can be called a third-generation Cricut cutting machine. Now, you can understand that it is very advanced.
Cricut Explore 3
The Explore 3 is the most popular Cricut machine and for all the right reasons. This is a third-generation crafting machine, and it has significant changes from its previous models. With these latest changes, it is now much more sleek and efficient. The most noticeable thing about this latest Explore machine is that its Smart Set Dial has been removed. Earlier, to work on the Explore machines, you had to turn the dial to use various materials. Now, the process of selecting the materials can be done on the Cricut Design Space app.
Cricut Maker 3 vs Explore 3: Key Features

These are the major features of the Cricut cutting machines.
Cricut Maker 3
The Cricut Maker machine has 13 different tools.
This machine can cut up to 12 feet of the materials in one go.
It can cut fabrics, cards, plastic, leather, wood, and metals.
The machine has a standard cutting size of 12 x 24 inches.
It has available maltless cutting.
It can cut over 300+ materials.
You can use all kinds of blades with Cricut Maker 3, including Rotary Blade, Knife Blade, and Wavy Blade.
Cricut Explore 3
Number of tools in Explore 3 is 6.
It can cut more than 100+ materials.
The machine can cut materials like cardboard, artboard, paper, leather, plastic, and metals.
The standard cutting size of the machine is 12 x 24.
Explore 3 can also cut matless
The machine can cut 12 feet in one go.
It can be cut with blades like Fine-Point Blade and Deep-Point Blade.
Cricut Maker 3 vs Explore 3: Main Differences
One of the major differences between both cutting machines is the price. Cricut Maker 3 is $110–120, costlier than the Explore 3 machine. The difference in the price depends on which country you are living in. Cricut Explore 3 is relatively cheaper, and so it has its limitations. The second major difference is that in the Maker 3 machine, you can use up to 13 tools, so you can cut up to 300+ materials. In contrast, the Explore machine can only use up to 6 tools so that you can cut around 100 types of materials. Cricut Maker can use a Knife Blade and Rotary Blade, so you can cut thick materials that you cannot do on the Explore 3 machine.
Cricut Explore 3 has a standard cutting pressure and can only cut up to 2mm thick. The Maker 3 is a much more powerful machine and can cut up to 2.4mm thick. Cricut Maker 3 is a versatile machine, but the Explore 3 has its limitations.
Cricut Maker 3 vs Explore 3: What Should You Buy?
Which one of the two Cricut machines you should buy depends on your preference and budget. If you are looking for a relatively cheaper machine, then you should go for the Cricut Explore 3. Although it is a little cheaper machine, there is no denying the fact that it is the most popular Cricut machine and is preferred by most Cricut users. So, if you are looking for a cutting machine that does not require heavy performance, this machine is good for you. But, if you have no problem with the price and want a versatile machine that can fulfill all your needs, you can purchase a Cricut Maker 3 machine.
Conclusion
I would like to conclude with the hope that your confusion about Cricut Maker 3 vs Explore 3 is now resolved. In this blog, I have written everything about both Cricut cutting machines and their features in detail. I have also outlined the differences between the two machines. It should now be easier for you to decide which machine is better for you. You can get a machine according to your budget and requirements.
FAQs
What’s the Main Difference Between Cricut Maker 3 and Explore 3?
The first difference between the Cricut Maker 3 and the Explore 3 is their prices. The Explore 3 costs around $320, while the Maker 3 costs around $430. The Maker 3 is a powerful and versatile machine, while the Explore 3 is best for standard use. The Explore 3 can cut up to 3mm deep, whereas the Maker 3 can cut up to 2.4mm deep. The Maker 3 can cut 300+ materials, while the Explore 3 can cut up to 100 materials.
Which Is Better Cricut Explore 3 or Maker 3?
There is no denying that the Cricut Maker 3 is the best cutting machine. However, the answer to the question of which one is better depends upon the user’s preference. If you want a relatively cheaper machine, then the Explore machine is a better option. Cricut Maker 3 is a more powerful machine, and hence, it can cut with better speed, thickness, and efficiency. However, the Explore 3 is also a great machine, and depending on your needs, it can be the best choice for you.
What Materials Can I Cut With Cricut Explore 3?
With the help of the Cricut Explore 3, you can cut around 100 materials, such as cardstock, paper, cork, vinyl, iron-on vinyl, fabrics, plastic, leather, wood, metal, etc. By using the Explore 3 machine, you can cut fabrics and create beautiful designs on t-shirts, curtains, pillows, and many more. With wood cutting, you can create home signs, frames, puzzles, bookmarks, etc. The paper cuttings will help you create greeting cards, flowers, banners, and so much more.
Source: cricut maker 3 vs explore 3
Visit here For More Information: Cricut.com/setup
Pinterest
0 notes
Text
Cricut Design Space Setup: A Step-by-Step Tutorial
If you are looking to buy a Cricut machine, then you must learn about the Cricut Design Space setup. Setting up the Cricut software on your device is an easy task and can be done in a few steps. In this blog, I am going to write all the information you need to setup the Design Space app.
Cricut Design Space is an application that works on all Cricut machines. It is an amazing app that is compatible with any operating device you are using. It is available for free on your phone or computer (iOS, Android, Mac, or Windows). You can download it from the Cricut official website and connect it to your device. The Design Space is a free app, so you can use it to start cutting and crafting at home. However, if you want to use all the features that Cricut offers, you can get its subscription, Cricut Access.
Easy Cricut Design Space Setup Guide
Before you download the Cricut Design app, you have to setup your machine. After the setup process is done, download the app and log into your Cricut ID so that you can connect your machine to the app and work on your DIY projects. Follow the steps in the section below:
Connect Cricut Machine to Your Operating System
It's important to connect your Cricut to a device so you can easily download and log into the Cricut software. Follow the steps below to connect:
Download Cricut Design Space on Your Device
For the Cricut Design Space setup, the most important thing you have to do is download the Cricut app. The software is available to download for free on any device you are using. Do as written below, and you will learn how to download it on your device.
Create a New Cricut Account ID
To use all the features of Cricut Design Space, you must log into your account. But if you do not have a Cricut ID, you don’t have to worry about it. Follow these simple steps, and your Cricut account will be created.
Conclusion
In this blog, your question about the Cricut Design Space setup is solved. I am sure after reading this post, you know everything you were looking for. With the help of this guide, you can setup any Cricut machine on whichever device you have. You have to setup the machine first and then connect it to your operating system. After that, you must download and install the Cricut Design Space software and log into your Cricut ID. If you are new to Cricut, you can also create a new Cricut account with the help of this blog.
Frequently Asked Questions
Is Cricut Design Space a Free Software?
Yes, it is. Cricut Design Space is an amazing app that is available for all Cricut users. You can download the app on your desktop (Windows/Mac) and smartphone (iOS/Android). It has more images, text fonts, and pre-made projects available on the app than you can use for your crafts. Plus, you can go for a premium Cricut Access plan for unlimited features.
How Can I Setup My Cricut Machine on a Computer?
To connect your Cricut machine to the computer, you first have to supply the machine with a power supply. Then, connect your computer to the machine via Bluetooth or a USB cable. After that, go to a web browser and download the Cricut Design app. After downloading the app, log in with a Crictut account. That’s it! Your Cricut setup is done.
How Do I Connect Phone to Cricut Machine via Bluetooth?
Connecting your phone to the Cricut machine via Bluetooth is easy. First, you have to plug in the machine and give it the power. Next, go to your phone settings and open Bluetooth. Afterward, search for the device you want to connect. When you see the device, click on it. Finally, it will be connected.
Visit: cricut.com/setup
www.cricut.com/setup login
Source: https://cricricutdesigncut.wordpress.com/2024/05/31/cricut-design-space-setup-a-step-by-step-tutorial/
#www.cricut.com/setup login#design space setup#cricut.com setup#cricut.com/setup#cricut.com/register#cricut.com/create#cricut.com sign in#cricut.com design space#cricut.com setup windows#cricut.com/setup windows#cricut design space setup#cricut design space#cricut design space app#digital design#cricut explore 3#cricut explore air 2#cricut new machine setup#design cricut.com download#download cricut design space#design.cricut.com/setup#cricut setup#cricut setup on computer#cricut setup for pc#cricut setup create account#cricut setup explore air 2 setup#cricut setup maker
0 notes
Text
How to Use Cricut Maker: Create a Siser Easy Color DTV Project!
Have you just bought a new Cricut Maker and are wondering how to use Cricut Maker? This brilliant Cricut machine may be overwhelming for beginners, but it is simpler than you think. You get many amazing features with this crafting machine. Let’s get ready to use it and make creative DIY projects with it. I will tell you how to prepare a desired project using this Cricut cutting machine.
Cricut Maker offers various adaptive features that help you create unique and beautiful projects effortlessly. Plus, you get a slot for inserting pens and a number of Cricut tools and supplies. It will be all fun to create something with this ultimate machine. Here, I’ll tell you the best methods to prepare personalized apparel using Siser EasyColor DTV. You’ll learn more about it later in this blog. So, let’s get started.
Supplies and Tools You Will Need for Your Cricut Project
Before we get started to learn how to use Cricut Maker, you must gather some important accessories. I’m listing all of the best accessories here. Use them and follow my step-by-step instructions to create your own project. Check the steps below.
● Brand new Cricut Maker or Explore
● Siser EasyColor DTV
● Siser Easy Mask
● An inkjet printer
● Cricut StandardGrip mat
● A weeding tool
● A Cricut EasyPress
● A Cricut scraper tool
Let me tell you what a Siser EasyColor DTV is. It is an iron-on vinyl type that is typically used on lighter blanks such as garments, T-shirts, etc. This unique vinyl is very convenient and useful for creating better designs and sublimation projects. Let’s check the complete method to create the best project.
How to Use Cricut Maker to Make Personalized Apparel?
Finally, we are here to learn the process of creating personalized T-shirts. So, before we move on to the final steps, measure your blank so that you can create an appropriate design. So, let’s check how to use Cricut Maker for beginners.
Step 1: Upload an SVG File to Cricut Design Space
In the first and foremost step, you’ll need to upload your SVG design file to the Cricut software. If you want, you can create a design manually as well. Once you’re ready, just resize your design and make it fit to your blank.
As you’ll have to print this image, ensure that your Cricut machine will recognize it as a printable file and not a file to be cut. To ensure this, choose your image and hit the Flatten option beneath the Layers Panel.
After that, your Cricut machine will show a preview of the image. When you’re ready, just click the Make It button. And now, this design will go through a Print Then Cut feature. To access it, hit the Continue button.
In the next step, you’re allowed to send that image to your inkjet printer and select the paper type you want to print on. I prefer specialty matte. You can select one based on your printer. Get ready with your printer and insert the Siser EasyColor DTV into it.
Step 2: Start Cutting the Siser EasyColor DTV
In the following step, you’ll need to cut your material. On your Cricut machine, select your material as Premium Vinyl Permanent Glossy and set the pressure to More using the drop-down menu.
Next, load your vinyl material on the Cricut mat at the left-side corner and make it stick to the mat using a brayer tool. Now, load the mat with vinyl into the Cricut machine and hit the Play button to allow your Cricut to cut the image. Continue with the steps to learn how to use Cricut Maker.
Once the cut is done, take off the paper sheet from your mat, turn the mat over, and take the mat away from your DTV. Please note that you don’t have to peel off the DTV from the mat. You can also use a pair of scissors to cut the design if necessary.
Step 3: Weed Out the Excess Vinyl
Once you cut your design, you should weed out the excess vinyl from your design. Do this carefully, so that your design doesn’t ruin. This step will add more detail to your project.
Step 4: Cover Your Image With a Mask
Moving forward, cut your mask to the size of your design. Now, take off the transparent film from the mask and then apply the mask alone to your DTV image. Moreover, ensure that the final design is flat and that there are no air gaps between the mask and the design.
Step 5: Transfer Your Design to Apparel
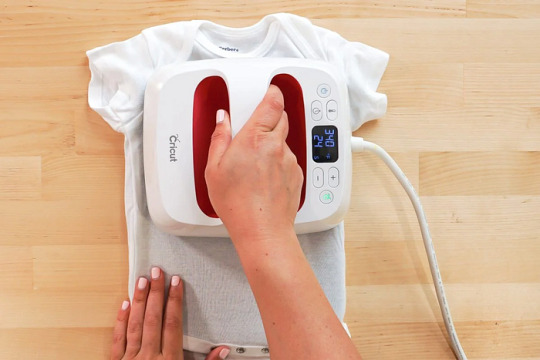

This design is so amazing; I love making it. This is how to use Cricut Maker to reap good results. All the best to all of you who are keen to make something unique and precise.
FAQs
How to Use a Cricut Maker to Make Shirts?
To create a shirt with your Cricut cutting machine, you’ll need to use the Cricut Design Space and a heating press to create a desired design. Get started with the Cricut software, make a design, resize it, and then print and cut it with your Cricut machine. Now, weed away the excess vinyl, and then preheat it with your Cricut heat press, and give a final heat to it.
Which Heat Press Is Suitable for Making an Iron-on Cricut Project?
As there are many options to create an iron-on Cricut project, you can use any of them depending on your requirements. So, the common machines are Cricut EasyPress, Cricut EasyPress 2 & 3, Cricut EasyPress Mini, etc. You can utilize a heat press to transfer the design to your apparel effortlessly.
Can You Use Regular Iron With a Cricut Machine?
Yes, you can. A regular iron is also effective for your minimalist iron-on projects. However, a regular iron may not deliver the results you want and not give a permanent design. Overall, we can say you can use a household iron for normal, sensitive projects but not for complex projects.
Read more: install cricut design space app
cricut.com/setup
cricut.com/setup mac
Source: How to Use Cricut Maker
#How to Use Cricut Maker#How to use cricut maker for beginners#how to use a cricut maker to make shirts#cricut.com/setup mac#cricut explore 3#www.cricut.com setup login#cricut design space#cricut explore air 2#cricut.com/setup#cricut new machine setup#cricut.com setup mac#cricut setup on computer
0 notes
Text
9 Unique Vinyl Cricut Projects to Make in 2024
Are you searching for some vinyl Cricut projects? Chillax, I’ve got your back! From the beginning, I have created many crafts using my Cricut machine and vinyl material. Working with these two is always my first choice, and I love making all sorts of DIY projects. As an expert in them, I also prefer to teach aspiring crafters who choose to craft for their long-term careers.
Till now, I have taught my cousin, brother, and one of my friend’s daughters. And you won’t be. She is just 12, and she knows how to use Cricut. This means crafting with Cricut is a cakewalk. Anyone with a little bit of guidance can do much better. In this blog, I will show you the 9 amazing craft ideas so that you can create Cricut projects with vinyl in no time. Let’s get started now!
1. Coffee Mug
If you are looking for vinyl Cricut projects for your friends and family, you must try this personalized coffee mug, which can be easily created using iron-on vinyl. This mug looks really great when created by Cricut. However, you will need one more tool, which is the Cricut Mug Press. So what are you waiting for? Get a Cricut Mug Press today and gift someone you love the most!
2. T-shirt
It’s time to wear something personalized or give someone who loves wearing a casual t-shirt a gift. I made this for my birthday as her birthday gift. See how beautiful it looks���. I used glitter black and golden vinyl, and then I created this design as suggested by my daughter. She first drew it on a piece of paper and asked me to add this design to her new blank t-shirt. And after a long process, this is what I have done! So, here is one more project idea for your vinyl Cricut projects.
3. Wooden Book Crate
A wooden book box can be the perfect gift for children as they can arrange all their old or new books in it. Although I made it as a Christmas gift, and it is an older one, I wanted to show it to you to give you an idea. If you are amazed by this crafting idea, give it a shot today and let your children see your creativity.
4. Hand Bag
If you want vinyl Cricut bookworm projects, try this book bag. This book and stuff tote bag can have a beautiful vinyl design, giving it an enticing look that nobody can ignore. Whether you want to carry something heavy or light, the bag always gives you an ecstatic feeling, especially for a book lover. So, what are you waiting for? It’s never too late to start something new.
5. Wall Decals
Wall decals can be really exciting and fun vinyl Cricut projects for someone who wants to decorate their home. They can also be used as a gift for a loved one by decorating your loved one’s room wall. Easily brighten up your space by adding such beautiful wallpaper to your wall. Whether you want text-based wallpaper or floral, you can try all of these with Cricut vinyl.
6. Coasters
Have you ever tried HTV vinyl on cork? Never? Don’t worry; it will look superbly cute when you end up creating it for the first time. So, I made these few coasters using cork and vinyl. And you can see the look, don’t you feel ecstatic after seeing them? They are my favorite and the first coasters I tried with Cricut.
7. Laptop Decals
When you have Cricut, don’t miss a chance to try a decal for your laptop. Yes, it is a great idea because, as a crafter, you will need to use the laptop more frequently. Since your laptop is your better companion during crafting, let’s make something exciting for it. The design is easy to find on Cricut’s official site. Go and give it a shot today!
8. Backpacks
Almost every child carries a backpack for school or when they hang out with friends. Whatever! If you want someone with a personalized or custom bag, you can try something with vinyl. These vinyl Cricut projects can be a superb, exciting craft and give you an ecstatic feeling wherever you carry them. Let’s start making them today and show the world your artistic ideas!
9. Yoga Mat
Self-care is so important these days. Hence, many people are changing their lifestyles and trying to improve them. Yoga is one of them, and it can transform anyone’s life in the long run. However, yoga-doers need yoga mats, and it’d be best to customize them using your Cricut and vinyl. Whether you have a Cricut Maker or Explore machine, every machine is capable of cutting the vinyl intricately.
FAQs
Question 1: What vinyl Cricut projects should I try for gifts?
Answer: Many Cricut projects can be made using vinyl materials, and they are easy to create with a Cricut cutting machine. Moreover, they are very suitable for making gifts, meaning you can gift anyone you love. Here is the list of projects that I have created using my Cricut vinyl material:
Custom T-shirts
Shoes with graphics
Bottles
Coffee mugs
Tumblers
Question 2: What is the life expectancy of Cricut vinyl material?
Answer: There are two types of mats available in the marketplace. One is for temporary uses, and the other one is for permanent uses. However, if you want to use Cricut permanent vinyl, you can use it, which is weather, and fade-resistant. Also, it has an adhesive that can last up to three years. I think that is enough even if you are making something like a personalized T-shirt.
Question 3: Which machine is the best for vinyl Cricut projects?
Answer: Although all the latest Cricut models, such as Cricut Maker and Venture, are suitable for making crafts with vinyl materials, if you are looking for a cutting machine that fits your budget, then you should try Cricut Explore 3, as it is the latest in Cricut Explore family and it comes in the right budget.
Source: Vinyl Cricut Projects
Visit here For More Information: cricut.com/setup
You tube
Pinterest
0 notes
Text

Windows Machine Mastery: cricut design space download
Have you ever wondered what you can do with a Cricut cutting machine? This robust machine is manufactured by a highly experienced team of engineers, encouraging crafters to get the most out of it. Cricut’s lineup has various cutting machines, such as Cricut Explore, Maker, Joy series, and Venture. All of them are designed for different purposes and project types. But before you use them, you will need to set it up. To set up, you can simply navigate to cricut.com/setup. Rest assured, screen prompts will guide you in setting up your machine with your compatible devices.
Visit here for more Information :- https://setupwindowsmachine.com/
#designcricutcomsetup#cricutcom#cricutcomsetup#cricutdesignspace#cricutdesignspacedownload#cricut design space login#design.cricut.com/setup explore air 2#cricut.com/setup maker 3#cricut.com/setup app
0 notes
Text

Cricut can perform a variety of tasks easily in less time. It has the ability to perform various operations, including Iron-On transfer, sewing, personalizing, scoring, writing, or cutting. So, choose the machine that can perform these tasks easily so that you will get what you want. I really love Cricut’s invention as it has made the crafters’ lives easier than before. However, you need to set up the machine when you have bought it recently. For setup, go to cricut explore air 2.
Visit here for more Information :- https://cricutdesignspace-setup.com/
#cricut.com/setup#design.cricut.com/setup#cricut.com#cricut design space#cricut design space download#cricut design space login#design.cricut.com/setup explore air 2#cricut.com/setup maker 3#cricut.com/setup app
0 notes
Text
The crafting industry has experienced rapid growth in recent years. Whether you're a professional crafter or a beginner, it's time to embrace crafting with the help of the Cricut machine. This craft machine offers precise cutting for any shape or design on different materials. The best part is that you can get started by downloading Cricut Design Space from cricut.com/setup.
1 note
·
View note
Text
How to Make Cricut Graduation Cards: Full Tutorial
Eighteen years of laughter, tears, birthday parties, prom nights, and dates. It will be a big day for every high school student to bid farewell to their high school and start a new chapter of their journey. Being the senior craft teacher of the school, the principal has given me the duty of making invitations for each of them. I feel lucky that she trusted me, and I would give her the best Cricut graduation cards for this event.
Creating attractive and simple invitations is undoubtedly a difficult task, thanks to my Cricut machine, as it will help me finish the craft on time. I can make several easy-to-make projects from Cricut products for this occasion, but my favorite is customized slider cards. In this tutorial, I've shared step-by-step instructions for making this project.
Step 1: First, Open the Cricut App and Create a Design
Start by opening the Cricut app and pressing the New Project button. Next, tick the Upload option and press the Upload Image box. Now, press the Browse icon, select the image from your system library, and save it. Afterward, go to Recent Upload Images, choose your image, and hit the Insert Image button. Following this, separate the layers by pressing Ungroup under the Layers panel.
Then, find the card base in the Layers section and change the fold line to score lines by selecting Score from the Operation section. At the same time, attach the scoreline and card base by selecting the Attach option in the lower right-hand corner. After that, repeat the same steps for the slider piece and four rosette pieces.
Select the Text tool and enter the text into your Cricut graduation cards. After finishing the text, select the whole text and apply a new font, color, size, and style. Now, you must change the line by returning to the Operation section and pressing the PEN option. Besides you can also change the color of your pen depending on your choice.
Next, cross-check that the design has been made correctly; if there are any mistakes, then instantly change it. Following this, tap the Make It, which appears blank on the top right-hand side of your canvas.
Step 2: Now, Choose the Material for Your Craft
You will see the mat on the mat preview page and press the Continue option. Also, select your material from the list of your choice and load the tools into the respective Clamps. Use a brayer or scraper tool to stick the material on the cutting mat properly. Then, you must prepare for the final writing and cutting process.
Step 3: Next, Insert the Mat Into Your Cricut Machine
Equally important, tap the Double Arrows button to ensure your cutting mat is in the correct position. When your craft machine starts flashing the C button, it indicates that it's time to cut the material. Please press the button and let it make the Cricut graduation cards without any disturbances. You must repeat the same steps until all the layers have been cut.
Step 4: Lastly, Assemble All the Layers
Following this, weed out all the materials from the Cricut mat with your weeding tool or tweezer. Ensure that you are accurately using the tool without causing any damage to the mat or design. It's time to assemble all the layers and give it the shape of a proper invitation.
Start assembling the card by sticking the diploma and Cricut graduation cards with strong adhesive glue. Keep both pieces aside for a few minutes, and let the glue dry completely. Afterward, fold the rosette pieces from the score lines back and forth or as you wish. Now, add a tiny bit of glue to one of the rosettes and stick the second piece of the same color. Then, add glue to the other end and attach both, making a continuous piece.
Just take your time and start folding the rosette flat while gathering all the pleats. Ensure that all the pleats are folded correctly, and it will instantly begin to take its shape. Next, put a small portion of glue in the center and put a diploma or graduation cap on it. Also, set aside the mat and messaging panel. After that, place the yellow mat on the blue base and the sentiment layer on the yellow mat.
Following this, fold the slider piece with the pull tab cutout at first, start with valley fold, mountain fold, and then again valley fold. After doing that, flip the slider and add glue at the bottom of the tab. Flip the pull tab and stick it correctly with the slider, ensuring the edges line up.
Now, you need to add glue on all sides of the slider and attach it to the top of the sentiment layer. Simultaneously, pull up the pull tab and add the rosettes to the raised portion. Once it is done, fold the card base and add the messaging panel on the base. Lastly, complete your Cricut graduation cards by adding the slide to the front of the card base.
That's it! Making this customized project from your cut-die machine will take a few minutes. Moreover, you can also create different crafts for this event, such as dorm moving bags, window signs, cake toppers, car decals, and many more.
Source Url:- cricut graduation cards
Visit here for more Information:- Cricut Design Space,
Cricut Design Space app,
Cricut design space login
#cricut graduation cards#Cricut Design Space#cricut.com/setup#Cricut Design Space app#cricut.com#cricut design space download#cricut design space login#design.cricut.com/setup explore air 2#cricut.com/setup maker 3#cricut.com/setup app#cricut.com/create
0 notes
Text
How to Connect Cricut to App: A Stepwise Setup Guide
So, here you will learn how to connect Cricut to app. Right? But before I dive further into this blog, I would like to clarify one thing. This blog talks about how to connect your Cricut machine to an app (Cricut Design Space), but I don’t think it is the same as connecting Cricut to your computer or mobile phone.
Connecting a Cricut to an app and connecting Cricut to a compatible device are two different things. Don’t get confused! The question is, if both are different, then what are we going to learn from this blog? In this blog, I will teach you how to connect a Cricut machine to an app. However, it is also called a Cricut setup. We will be learning about machine setup on Windows computers. Let’s dive into it without any further ado!
Step 1: Unboxing a Cricut Product
Okay, so to get to the exciting part of the Cricut machine setup, we will first need to unbox the machine. However, if you have already unboxed it, enjoy🥳and move to the second step in order to learn how to connect Cricut to app.
Here, let me share my experience of unboxing my Cricut.
I opened the box’s lid and saw a matted folder over the top surface of the Cricut machine. Here I am, actually, opening my Cricut Explore Air 2 machine. It came with a blue LightGrip mat. Those who got the Cricut Maker machine then will receive a green StandardGrip mat.
The list is long; let me show you what else I got with my Cricut Explore:
Step 2: Open Your Cricut Cutting Machine
To open the Cricut machine, I pressed the Open button (on the left side). As I pressed the button, the rest of the doors opened on their own. Here, Cricut Maker users need to lift the top lid. After that, the front door will open on its own (automatically).
Note: Do not open the doors that open automatically. Just wait and let them open slowly on their own.
When your Cricut is opened, you need to remove the foam and other tape on the side.
Step 3: Plug Into a Cricut Machine
Plugging the power cable into the Cricut cutting machine is the first step in learning how to connect Cricut to app. Now, it’s time to turn it on. Yes! So, let’s grab the power cords that come with our Cricut machine.
You can just plug the main plug into the wall outlet and insert the other into the back of your Cricut machine. But, here, you have to plug in the machine; you don’t need to turn it on the machine here. We’ll do it later.
As the machine is turned on, you need to move to the next step, where we will start setting up our machine.
Step 4: Pair Cricut to a Computer via Bluetooth
I have connected my Cricut using a USB cable, too. Currently, I am using a Bluetooth wireless connection. So, let me show you how to connect Cricut to PC via Bluetooth:
Now, let’s download a Cricut app so that you can understand how to connect Cricut to app, i.e., how to setup Cricut.
Step 5: Download Cricut Design Space
The machine setup requires software called the Cricut Design app. To download the software, you need to go through the steps given below:
Next, follow the prompts until your installation is done. Once done, move to the last steps to learn how to connect Cricut to app.
Step 6: Finish the Cricut Setup
Launch the Cricut Design Space software, and you will see the option to select your Cricut cutting machine on the app. Select the type of machine you want to setup. Next, sign in to your Cricut account. If you don’t have an account, sign up to create one.
Once you have created an account, you need to sign in and then start connecting your Cricut to your app. Although you will get screen prompts to setup the machine, I will explain it briefly.
First, turn on the machine by pressing the power button, and then you need to connect your machine. After that, your setup is done!
HURRAY!!!!!!!!! 😍 YOU DID IT!
FAQs
Question 1: Can I connect my Cricut to an app on my mobile phone?
Answer: Yes, absolutely! Connecting Cricut to the app or setting it up is the same. For this, you will need a Cricut app that you can download from an online app store where you can download the app. For example, if you want to install the Cricut software on iOS, then you can get the application from the App Store, and for Android, you need to go to the Google Play Store. In short, you can easily connect your Cricut machine to an app.
Question 2: Is Cricut machine setup difficult or time-consuming?
Answer: Setting up the Cricut machine is easy and not that time-consuming if you have the right software. The simple-to-use interface of Cricut Design Space will walk you through the easy directions to setup the Cricut cutting machine, which will take you a few minutes. So, install the right software on a compatible device, and then you will be ready to go.
Question 3: Is Bluetooth compulsory for Cricut machine setup?
Answer: No, it is not necessary if your Cricut has a USB cable. Except for the Cricut Joy machine, all the Cricut models have USB ports so that they can be connected via USB cords, too. However, for Cricut Joy users, Bluetooth is compulsory when setting up the machine. In short, Bluetooth is compulsory only for machines for which Bluetooth is not available.
Source: https://desincricut.wordpress.com/2024/04/16/how-to-connect-cricut-to-app-a-stepwise-setup-guide/
#cricut.com/setup#cricut.com setup download#cricut.com setup#cricut.com setup mac#cricut.com setup windows#cricut.com/create#cricut.com sign in#cricut.com/register#cricut.com design space#www.cricut.com setup mac#install cricut printer#install cricut design space app#install cricut explore air 2#cricut explore air 2#cricut create connect to computer#connecting cricut maker to computer#cricut com setup#cricut setup#setting up my cricut maker#setting up your cricut maker#cricut new product setup#cricut design space app#cricut design space#cricut new machine setup#cricut software app#cricut explore 3#cricut account on setup#cricut setup on account#cricut
0 notes
Text
How to Download Cricut: Installation Guide for Computer/Phone
Are you looking to learn how to download Cricut? Look no further than this guide. Cricut Design Space is an important software if you want to use your Cricut machine. When I first purchased my Cricut, I had a lot of tasks to do, such as downloading the Cricut app, setting up my machine, and connecting it to my desktop or smartphone.
After years of use, I also started assisting many novice crafters using my online platform, which I used to guide them regarding Cricut. I provided details for the Cricut setup and troubleshooting issues. Hence, I am doing the same thing here with this write-up. Let’s get into it and learn how to download the Cricut software on your operating system.
How to Download Cricut on a Computer?
You can easily download the Cricut software on the computer, whether you have to download it on Windows or Mac. So, if you want to download the Cricut Design Space for Windows and Mac, you have to follow the steps below:
For Windows
In the beginning, power on your Windows PC.
You have to click on the Start menu from the taskbar on your taskbar.
Then, you will have to type Chrome or another internet browser name. I use Google Chrome, but you can choose any browser you want.
Also, navigate to the browser search bar and type the URL design.cricut.com.
After that, you need to hit the Enter key on your keyboard.
Next, you will go to a page where you should navigate to a checkbox and click on it.
Now, you must click on the Download tab and begin downloading the software right away.
Once you have downloaded the app, you need to navigate to the Downloads folder.
There, find the downloaded file and double-click on it to install it.
Afterward, you will be asked whether you trust the application. Select Yes to accept.
Wait for the installation and sign in with your Cricut ID and password.
For Mac
To start, you have to open the Chrome browser on your Mac computer.
Then, you will be required to enter the link design.cricut.com on the browser’s search bar.
Once you reach Cricut’s page, you will need to click the checkbox.
Hit the checkbox, and it will enable the Download tab.
Further, you click on the Download tab and start downloading the Cricut app on your Mac.
Once it is downloaded, go to your Downloads folder and find the .dmg file.
Then, double-click on the .dmg file and begin to install the software.
To start the installation process, you will need to drag the Cricut icon to the Applications folder.
How to Download Cricut on a Mobile Device?
Cricut Design Space is easy to download on mobile phones as well. This easy-to-download software is used to operate the Cricut Design app and can help you setup your Cricut machine. To download and install the app on iOS and Android devices, follow the steps given below:
For Android
First, switch on your Android smartphone.
After that, you will need to find the Google Play Store icon on your device.
In the search bar, you will need to type Cricut Design Space software.
Now, you will need to look for the apps offered in the given result below.
Once you find them, you need to click on them.
And then you will need to press the Install button and begin installing the software.
Once your Cricut app has been installed, you will notice your software is available on your home screen.
For iOS
First, navigate to the App Store on your iPhone/iPad device.
Next, you should type Cricut Design Space in the search bar.
Now, look for the app and select the Cricut app from the visible results.
Here, you need to hit the Get tab to install the app on your iPhone or iPad.
If asked, you will need to verify the download using an iTunes password.
Once you start your Cricut machine, you will need to set it up in no time.
You might have understood how to download Cricut on various platforms, like Mac, Windows, Android, and iOS. Download the software and create wonderful, intricate designs that capture everyone’s attention.
FAQs
Question 1: Why is my Cricut Design Space not working?
Answer: There are various reasons that can hinder your Cricut software from working. The reasons are:
Unmet minimum system requirements.
Unstable internet connection.
Damaged or corrupted cache files.
Outdated versions.
However, you can easily fix them by cleaning the app cache, installing the application that is compatible with your OS, resetting the Cricut account password, and forcing the application to be reloaded.
Question 2: Why do I need Cricut Design Space?
Answer: Cricut Design Space is used to setup a Cricut machine. Therefore, users need to install it on their systems or devices. Besides, the software is mainly used to create, edit, and modify the design you want to cut on the machine. Therefore, you will need a Cricut software.
Question 3: How to download Cricut Design Space on an ASUS laptop?
Answer: Go through the steps below to download the Cricut app on an ASUS laptop:
First, you will need to launch an internet browser.
After that, visit design.cricut.com.
Now, you should agree to the Terms of Use and Privacy Policy.
Then, you have to click on Download.
Here, double-click the downloaded file downloaded into your Downloads folder
Lastly, you have to follow the on-display steps to install the Cricut Design app.
Source: how to download Cricut
Visit here For More Information: Cricut.com/setup
Pinterest
0 notes
Text
Cricut Explore Air 2 Setup: A Comprehensive Guide
Cricut Explore Air 2 is a magnificent machine if you want to start crafting and cutting your materials. If you are looking to buy a new Cricut machine and wondering what you should go for, I would suggest you buy an Explore Air 2 machine. The Cricut Explore Air 2 setup is one of the first things that you are going to need to learn. In this blog, I will cover everything you will need to know, like what’s in the box, complete machine setup procedure, and many more. So, without any further delay, let’s get started now!
What Comes in the Cricut Explore Air 2 Box?
Before you start setting up your machine, you have to open the box and check for the tools and the supplies. When you open the box, you will see the following things:
Cricut Explore Air 2 Setup on Your Operating System
You have to follow the steps below to setup your Cricut cutting machine on your computer or smartphone.
Download Cricut Design Space on Your Device
You have to download the Cricut Design app on your phone or computer in the process of the Cricut Explore Air 2 setup. You can download it from the Internet. Full details are given below.
How to Create a Cricut Account on a Device?
Before starting to cut on your Cricut cutting machine, logging into your Cricut account is necessary. You may log in if you have already made an account. But if you do not have an account, there is nothing to worry about. You can create an account by following these steps.
Conclusion
So, if you were worried about your Cricut Explore Air 2 setup, I am sure now all of them have gone away. These are the four simple steps that you can follow to setup your Explore Air 2 machine with your device. You have to check for the items and then setup the machine. After the machine is setup, download and install the Design Space app and log into the Cricut account. If you don’t have a Cricut account, create one so that you will be ready for your first cut.
FAQs
What software do I need for my Cricut Explore Air 2?
The software or app that you need to use for the Cricut Explore Air 2 is Cricut Design Space. This app is available on the Internet for free. You can open any web browser and go to cricut.com/setup. Next, download the Cricut software and log in to your account. But if you want a better experience and access to its complete features, go for the Cricut Access plan.
How to connect Cricut Explore Air 2 via Bluetooth?
Connecting your Cricut cutting machine to your device through Bluetooth is very easy. First, you have to plug in the machine and turn it on. Then, go to your operating device’s settings and open Bluetooth settings. If Bluetooth is off, you should turn it on. Now, search for your Cricut model. Once it pops up, tap on your machine and select connecting. It will be connected.
What is the connectivity issue my Cricut Explore Air 2 is having?
If your Explore Air 2 is having connectivity issues, check if your machine is on or not. When it is on, make sure it is not more than 10 to 15 meters away. In that case, your device will not be able to locate the machine. If you are trying to connect it using a USB cable, maybe your cable is old and has a straining problem. In that case, you will need to buy a new cable.
Visit: www.cricut.com/setup login
Source: https://cricricutdesigncut.wordpress.com/2024/05/17/cricut-explore-air-2-setup-a-comprehensive-guide/
#Cricut Explore Air 2 Setup#design space setup#digital design#cricut.com/setup explore air 2 setup#cricut.com/setup mac#cricut.com/setup#cricut explore air 2#cricut new machine setup#cricut maker 3#cricut design space#cricut.com setup mac#cricut setup#cricut setup explore air 2#cricut setup explore air 2#cricut setup explore air 2 setup#cricut com setup#design.cricut.com/setup#cricut design space setupp#cricut.com setup windows#setup cricut design space
0 notes