#garlic vegetable saut
Photo
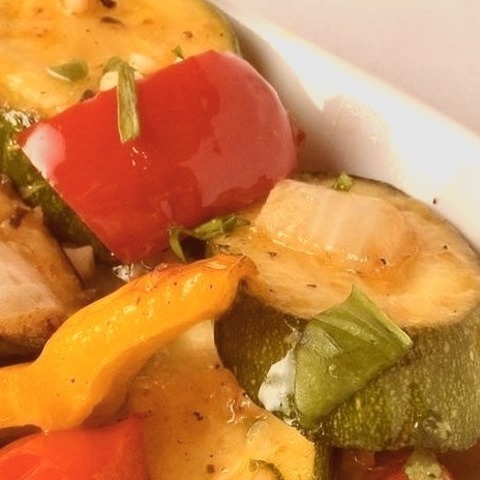
Recipe for Garlic Vegetable Saut
With the addition of fresh jalapenos and paprika, this sauteed vegetable recipe features a delicious combination of zucchini, garlic, red and yellow bell peppers, and zucchini.
0 notes
Photo

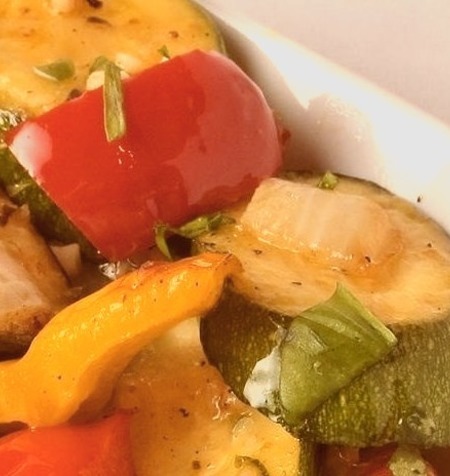
Squash - Garlic Vegetable Saut
This sauted vegetable recipe is a delicious mix of zucchini, garlic, red and yellow bell peppers, spiced up with fresh jalapeño and paprika.
0 notes
Photo
Garlic Vegetable Saut Recipe
This sauted vegetable recipe is a delicious mix of zucchini, garlic, red and yellow bell peppers, spiced up with fresh jalapeño and paprika. 1 pinch paprika, 1 yellow bell pepper cut into chunks, 1 tablespoon butter, 1 shallot sliced, freshly ground black pepper to taste, 1 red bell pepper cut into chunks, 2 zucchini halved lengthwise and sliced, 1 jalapeno pepper seeds and ribs removed minced, 1/4 teaspoon salt, 3 cloves garlic finely minced, 1 tablespoon olive oil
0 notes
Photo

Thai Noodles
Mushrooms, cucumbers, bell peppers, and carrots are added to an aromatic saute of soy-marinated chicken, garlic, ginger, and onions. Peanut sauce, oyster sauce, and hot chili sauce are also used to flavor the dish. Serve with chopped peanuts on top and serve over rice noodles.
1 note
·
View note
Text
Recipe for Chicken Creole

A simple vegetable saut with a little cayenne makes a tasty sauce for baked chicken Creole.
0 notes
Text
Wicked Garlic Tofu Saute

Amazingly simple, delicious, and healthy recipe. Even the husband, who usually isn't a big fan of tofu, likes it. Although I prefer it with lots of garlic, you can use less if you have to. It's approximate because I don't measure the oyster sauce. Use it according to your taste; it's fairly salty. Although cooked white rice can be served with it, it tastes just as good on its own.
0 notes
Text
24 Hour Red Sauce
Since I am making this right now as I type, I thought I would share one of my sauce recipes. The long cooking time may seem daunting but that's also what makes it difficult to mess up. There are probably typos and I never before have written this down but here it is.
24 hour red sauce
People ask me sometimes “How did you make this sauce?” and I usually say something like, “Well, I cook it a really long time.” But now I will share, roughly, how I do make that sauce.
In spite of my part-Italian family, This is my recipe not a family one. My mother and Italian grandmother showed me how to make sauce but frankly, theirs was not that great. Okay, serviceable, not amazing. Perhaps, like many people I learned to cook at an early age because I didn’t like other people’s food. I went to one of those terrible schools where they would make you eat what they gave you. I’m stubborn and refused their overtures, and as I went forth in life I said no to many things. and thus never developed a taste for them. I’m basically the opposite of Anthony Bourdain.
Because I am a vegetarian, I would bring Lasagna or the like to holiday meals for friends and family and over time I endeavored to make a sauce that would stand up in lasagna, stuffed shells or other sauce killers. I make other sauces but this is the favorite of my friends because, I think, the long cooking time makes for a complex flavor.
I’m not the New York times, so this is a little rough in terms of measurements but the beauty of red sauce is that you taste as you go.
-7 tablespoons extra virgin olive oil (I use Tuscan olive oil such as Vetrice for critical stuff but it can be waste of money in long cooking sauce. Any good olive oil with a little bite will work)
-2 28 oz cans of Bianco DiNapoli crushed tomatoes. (you can also use San merican, Mutti or what have you, but I like these best)
- 14 ounce Bianco DiNapoli whole tomatoes (opinions differ on crushed vs whole, I use a mix)
-25-35 cloves fresh garlic, finely chopped
-½ to 3/4 oz fresh basil leaves, chopped (this depends on how many stems you get and how pungent the basil is)
-Vegetable broth (this will add salt, if you want less salt use low sodium broth. If you’re not a vegetarian, you can use beef or chicken broth too).
-Full bodied red wine, like Cabernet, Merlot or Rojas. Don’t break the bank but don’t use something disgusting, you’re eating this.
-1 dried bay leaf (yes you have to)
-¾ teaspoon crushed red pepper (I use a whole teaspoon actually)
-½ teaspoon coarse ground black pepper
-1 medium to large sweet onion
Get a big sauce pan because red sauce will splatter as cook it and it's easier if that doesn’t end up on your stove.
Chop the whole tomatoes (I do this by hand but you can use a food processor) set aside in a bowl.
Under low heat, put the olive oil in and add the garlic and the red pepper, saute a little until the garlic becomes a little glassy.
Add the crushed and chopped whole tomatoes, increase the heat to medium. Set aside the cans.
Peel your onion (you can use two if they are small) and chop it in half. Now look where the sauce comes up to in your cooking pot. Make a little mark (obviously on the outside) of your pot or just wing it.
Fill one empty can half way (14 oz) with vegetable broth and slosh it around to get the remaining tomatoes out of it. Add the black pepper and bay leaf and pour into the sauce.
Fill the other empty can half way with red wine (also 14 oz), a Cabernet is good here, slosh it around and add to the sauce. Now you have wasted nothing except your life cooking this sauce.
Add the two halves of your onion to the sauce. Stir in about half the chopped basil.
Cover the sauce with a lid with a hole in it or half cover it allowing some steam out and turn the stove way down below a simmer. You should even being seeing regular bubbles I the sauce at first and they shouldn’t be appearing rapidly ever.
Every hour tell Michael to stir the sauce (or do it yourself)
Pour a glass of wine and drink it.
Cook it half covered for 4-6 hours on as low heat as possible. You should see occasional bubbles. If the cooked sauce falls below the line you made on your cooking pot, you’re cooking it too fast, but no matter, if that happens, add a cup of 1/3 wine, 1/3 water and 1/3 broth and stir it in. Taste the sauce, it should be pretty good.
Go to bed and out the sauce in the ice box (My grandmother said Ice Box, refrigerator is what it means).
When you get back up in the afternoon (if you get up early, who even are you) uncover the sauce and put it back on low heat simmering or below. Add another two cups of the wine-broth-water mixture and cook for another 5-8 hours. Remember to stir.
When the sauce tastes amazing and you can’t stop tasting it, remove the onions and bay leaf and throw them away. Turn the stove off. Add the rest of your fresh basil and stir it in. You don’t have to use all the basil but basil is not a bad thing. Let the sauce cool for at least an hour. Serve or store. Drink the remaining wine.
It’s actually difficult to ruin this sauce if you follow these guiding principles-
1- You want roughly the same amount of sauce you started with before you added the liquids (wine, water and broth). So you want to see about 50-65 oz of finished sauce depending on how thick you like it.
2- Cooking the onions provides the sweetness to take the acidity out of the sauce, if it’s not sweet enough to can add another onion but it should all even out with more cooking. More sugar will be released from the onions over time. The sauce should be spicy and somewhat strong and acidic but also smooth and flavorful. Add more of your liquids if the sauce is too thick, cook more if it’s too thin. Don’t use sugar.
3- The red wine is a big flavor in this, the alcohol will cook off but flavor is part of the dynamic. Sicilians will tell you to use paste, but that’s a different sauce.
4- I cook this sauce for as long as 24 hours but you don’t have to to make it good. It depends a lot on how high your heat is, how much liquid you use etc. but I would recommend no less than 7 hours of cooking. Otherwise the magic doesn’t happen.
5- Make this often, tweak to your taste, you will return to it each time affirming its power to sustain you in a harsh and unkind world.
366 notes
·
View notes
Text

Nutrient-dense meal prep recipes that can help promote healthy eyesight:
1. Salmon and Quinoa Salad:
- Cook quinoa according to package instructions and let cool.
- Season salmon fillets with olive oil, lemon juice, and herbs, then bake until cooked through.
- Combine quinoa, mixed greens, cherry tomatoes, cucumber, and avocado in a bowl.
- Top with flaked salmon and a drizzle of balsamic vinaigrette.
2. Roasted Vegetable and Chickpea Buddha Bowl:
- Toss chopped sweet potatoes, bell peppers, zucchini, and red onion with olive oil and seasonings.
- Roast in the oven until vegetables are tender and slightly crispy.
- Serve over cooked quinoa or brown rice, along with roasted chickpeas and a dollop of hummus.
3. Spinach and Feta Stuffed Bell Peppers:
- Cut bell peppers in half lengthwise and remove seeds and membranes.
- Saute spinach, diced tomatoes, garlic, and feta cheese in a skillet until wilted.
- Stuff the bell peppers with the spinach mixture and bake until peppers are tender.
4. Lentil and Vegetable Soup:
- Saute onions, carrots, celery, and garlic in a large pot until softened.
- Add lentils, diced tomatoes, vegetable broth, and seasonings.
- Simmer until lentils are cooked through, then stir in chopped kale or spinach before serving.
5. Greek Chicken Bowls:
- Marinate chicken breasts in olive oil, lemon juice, garlic, and oregano.
- Grill or bake chicken until cooked through, then slice into strips.
- Serve over a bed of cooked quinoa or brown rice, along with cucumber, cherry tomatoes, red onion, feta cheese, and a drizzle of tzatziki sauce.
These meal prep recipes are packed with nutrients that are beneficial for eye health, including vitamins A, C, E, and zinc, as well as omega-3 fatty acids and antioxidants.
#food for thought#food fight#healthy food#comfort food#fast food#food photography#foodie#food#foodpics#foodlover#japanese food#tw food#foodmyheart#reciprocity#pasta recipe#salad recipes#soup recipe#recopilación#recipies#recipe#recipes#pasta recipes#tra reciepts#healthy salad recipes#healthy lunch ideas#healthy lunch#healthy diet#healthy#healthy living#healhtylifestyle
162 notes
·
View notes
Text
hi birds of paradise and of prey! I sincerely hope your 2024 has been kind to you so far, and if it hasn't, I hope it starts being fucking nicer soon. We got eyes on it and are ready to take it out should it fail.
I'm coming to the end of my list here soon, so if anyone has ideas on what they'd like to see next, please do hit me up! Even if its just a piece of media with interesting food in it and not a specific dish you wanna see. My roommate got me a recipe book from that TikTok fantasy tavern guy, "recipes from the lucky gryphon"? So we could also take a shot at a few of those, although im not really familiar with his work. Regardless-
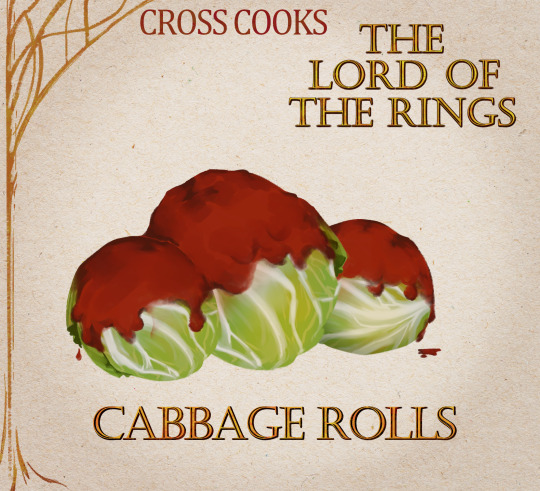
We will be making Stuffed Cabbage from Lord of the Rings Online today!
(As always you can find the cooking instructions and full ingredient list under the break-)
MY NAMES CROSS NOW LETS COOK LIKE ANIMALS
SO, “what goes in to this Stuffed Cabbage?” YOU MIGHT ASKYou cant kinda put whatever you want for seasonings and even the meat filling. I used ground beef but pork and lamb are also stellar candidates.
Yellow onion
Garlic
2 eggs
Ground beef
Rice
A head of cabbage
Oregano
Thyme
Red pepper flakes
Cumin
Crushed tomato
Tomato sauce
AND, “what does this Stuffed Cabbage taste like?” YOU MIGHT ASKBa bawsa
Very, very filling wow
2 rolls filled me up for a meal and i made about 20-ish from one head of cabage
A bit plain tbh, the texture is great but I'd really double up on the seasonings
A blank canvas for you to impart your spice preferences onto
Reheating makes it taste almost identical to fresh
Would pair well with a hot sauce dip
could also go well with an artichoke dip
If you run out of room and need to layer the rolls, I'd try experimenting with pouring some of the crushed tomato and sauce inbetween the stacked rolls. Otherwise the ones at the bottom lack a lot of the tomato flavor. However it might make the bottoms on the rolls laying ontop soggy?
. Where rice called for, used long grain white rice
-----------------------------------------------------------------------------------------------------------
I've never blanched anything before. Theres not much western food that calls for it, meanwhile whenever my friend from malaysia shows a dish they ate, 9 times out of 10 the vegetables are blanched. Much easier process than the fancy name might suggest- boil water and dunk the thing in until its done. Whatever 'done' may be for the thing you are cooking.
Also for the ground beef (or whichever meat you use) you don't have to cook it beforehand, but in doing two tries at making these cabbage rolls i would recommend you at least season your meat before mixing it with everything else. The meat will cook to a safe temperature inside the cabbage rolls, i just prefer the taste and texture of it when cooked twice.
I give this recipe a meandering 7/10 (with 1 being food that makes one physically sick and 10 being food that gives one a lust for life again.)
I want to review more horrible recipes, truly i do, so that the rating scale isnt always a 6 and above, but whenever i try something horrible its like "why the fuck would i put all the effort into making and sharing a review of this thing i Do Not Want others to eat????" yknow?? Would people be interested in roasting horrible recipes?
🐁 ORIGINAL RESIPPY TEXT BELOW 🐁
Ingredients:
1 yellow onion
6 cloves of garlic
2 eggs
2 lbs ground beef
1 1/2 cup cooked rice
1 large head of cabbage
28oz crushed tomato
14oz tomato sauce
Oregano
Thyme
Red pepper flakes
Cumin
Salt/pepper
Method:
Saute garlic and onion in butter over medium heat until onions are caramelized. When done, remove from heat and let cool.
Season the beef to your liking with cumin, red pepper, and salt. Very, very lightly cook the beef in the same pan used for the garlic and onions. Cook until it starts to brown, but dont let it darken.
Beat eggs thoroughly with oregano, thyme, salt, and pepper.
Add all of the above ingredients together in a bowl with (cooked!) rice. Mix thoroughly then cover and let rest in the fridge.
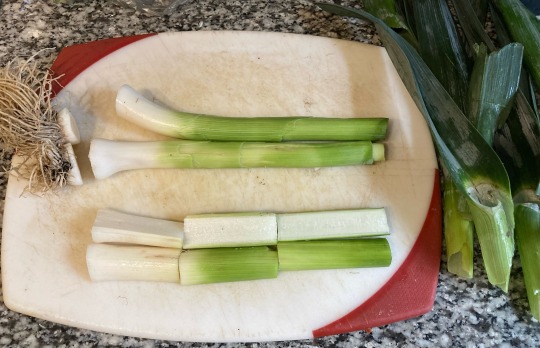
Core and blanche your cabbage in boiling water, peeling them off as they become limp.
Once you've separated all the leaves, cut off any thick stems that would prevent the leaf from folding.
Put roughly 2 tablespoons of meat filling into each leaf. Fold the sides of the leaf inwards and roll it up. Place each cabbage roll seam-down into a casserole dish.
If they don't all fit in one layer, its more than okay to stack. Try not to stack more than 2 layers though.
Once you've used all the cabbage, take your can of tomatos and pour them over the rolls. Mix some oregano into the tomato sauce and pour that over the rolls as well.
Bake uncovered in the oven at 350 for about 2 hours. Dont worry if a bit of tomato on top looks burnt.
IF REHEATING LEFTOVERS: Bake 10 cabbage rolls in the oven at 320 for about 40 minutes. Reduce time for less rolls.
243 notes
·
View notes
Text


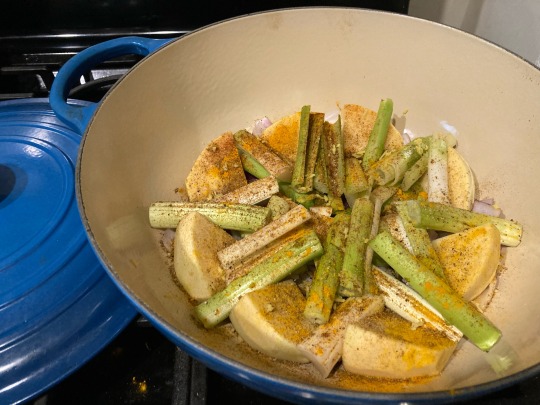
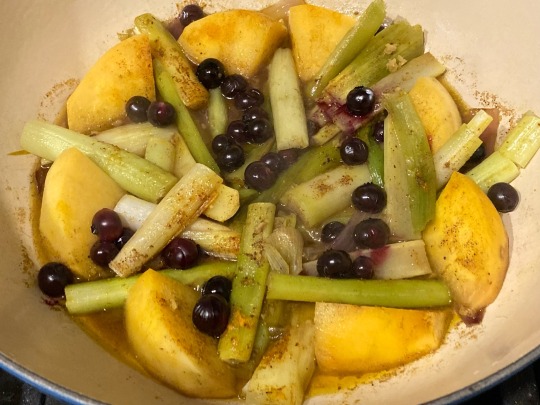
[ID: Two photos of a saucy dish in a bright blue serving vessel with offset lid. End ID]
Blueberry-leek tajine
A typical Moroccan spice profile and cooking method with an unusual flavor combination. Slow steam cooking brings a hint of sweetness out of the mild, earthy leeks and rutabaga; blueberries cook down to a deep, jammy tartness; fennel and mint add sharpness and complexity. The result is a surprising, well-balanced dish that pairs well with a crusty Moroccan bread, or may be served as a side with seitan lamb chops.
Recipe under the cut!
Patreon | Paypal | Venmo
Ingredients:
Serves 2-3.
3 leeks
1/2 rutabaga, halved and cut into wedges
1 red onion, cubed
4 cloves garlic, chopped
1/2" chunk ginger, peeled and minced
1 tsp table salt
1/2 tsp ground cumin
1/2 tsp ground black pepper
1/4 tsp ground turmeric
1/4 tsp ground fennel
1/4 tsp ground allspice
1/4 tsp ground paprika
3/4 cup blueberries
2 sprigs fresh mint, roughly chopped or torn
1/4 cup (60mL) good olive oil
Instructions:
1. Prepare leeks by chopping off the root end and the tough dark green upper leaves; reserve the latter for a saute or to boil for stock. Cut the remaining white and light green portion of the leek in half lengthwise, and in half or thirds widthwise. Soak in cool water while you prepare the rest of the vegetables to remove dirt.
2. Halve a rutabaga lengthwise (through the root) and reserve half for another use. Halve the remaining half again widthwise and peel, then cut into large wedges. Cube the onion and chop the garlic.


3. Add onion, garlic, ginger, and a large pinch of salt to the bottom of a tajine, Dutch oven, slow cooker, or heavy-bottomed pot. Arrange rutabaga and leeks on top of the aromatics.
4. Sprinkle salt and spices over the rutabaga and leeks. Drizzle olive oil over top. Slowly add about 1/2 cup (120mL) water over top (so as not to rinse off all the spices).
5. Heat pot on medium low, or as necessary to maintain the water at a very low boil. Cover and let cook without stirring until the leeks and rutabaga are almost finished cooking, 1-2 hours. Occasionally use a spoon to pour broth from the bottom of the pot over the vegetables.
6. Add blueberries and mint, and, if necessary, a little bit of water. Cover and continue to cook until blueberries, rutabaga, and leeks are very tender. Taste and adjust salt.
95 notes
·
View notes
Text
Mushroom Broth Recipe

There's a pretty simple backstory here: I wanted to make soup, but when I went to buy groceries the store was out of both vegetable broth and bouillon, but had mushrooms on sale. I did some Internet searching and learned that making your own broth is pretty simple and easy, so I decided to try making my own mushroom broth to use as a substitute for vegetable broth in my recipes.
In my Internet searching, I also learned the actual difference between a broth and a stock. Although most people use the words interchangeably, stock is traditionally made from bones, while broth is made with meat and/or vegetables. This is kind of fun, because it means that "bone broth" is actually, by definition, bone stock, and "vegetable stock" doesn't exist.
This recipe is my own creation but it's very, very flexible. You can swap out the vegetables and herbs to suit your own tastes. If you wanted to, you could switch the brown mushrooms for a trendier medicinal mushroom, like reishi or chaga, or for whatever your grocery store has. You could also use the same method to make other homemade broths, like vegetable broth or chicken broth.
Ingredients:
One carton of brown mushrooms (these are sometimes labeled baby bella mushrooms or crimini mushrooms)
One onion, roughly chopped
[optional] One cup of dry white wine (I used chardonnay)
8 cups water
Dried thyme, to taste
Salt and pepper, to taste
Garlic powder, to taste
Olive oil or another cooking oil
Recipe:
Saute the mushrooms in olive oil over medium heat for 10 minutes.
While the mushrooms are cooking, go ahead and chop the onion. I like to leave the skin on when I'm making broth (it adds a really nice color), but you can remove it if you want.
Add the onions to the pan, and saute for another 10 minutes (or 20 minutes if you decide to skip the next step).
Add your white wine, stir everything together and let it simmer for (you guessed it!) another 10 minutes to let the alcohol cook off.
Add 8 cups of water to the pot with your mushrooms. Add the thyme, garlic powder, salt, and pepper. Turn the heat up to high.
When the water comes to a boil, turn the heat down to low and cover the pot with a lid. Let simmer for at least 2 hours.
When your broth is done simmering, use a sieve to strain out the mushroom and onion chunks and transfer the liquid to a clean container. Store the container in the fridge and use it in the same ways you would use vegetable, chicken, or beef broth when cooking.
#mushroom broth#mushrooms#mushroom soup#kitchen witch#kitchen witchcraft#cottagecore recipes#witchy recipes#cottagecore#cottage witch#green witchcraft#green witch#garden witch#vegetarian recipes#vegetarian#vegan recipes#vegan#herbalism#herbs#my writing#hobbitcore
768 notes
·
View notes
Text
What do you do when you've got three unexpected guests on your little island? You get cooking!
Fun fact: Moonfish is a real fish! However, I think the one in the comic is a whitefish, while actual moonfish is a redfish. I'll put the recipe I made for the script below the cut!
(Castoff Fanart Marathon #12: Marina Time #2)
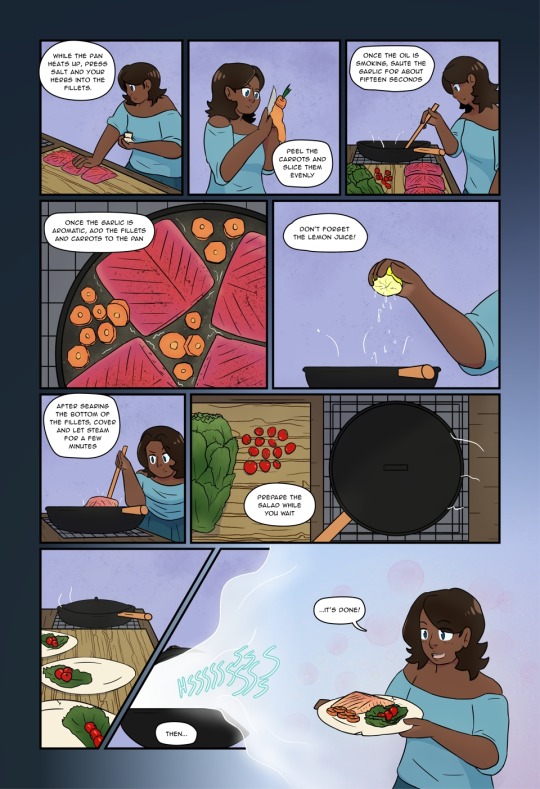
Moonfish Filet & Fresh Vegetables
Marina's quick and filling meal for new friends
Ingredients
1 moonfish, cut into fillets with skin removed
Lemon
Garlic, ~1 clove per fillet, minced
Herbs, rough chopped (sage, basil, and parsley)
Salt
Carrots
Kale or lettuce
Cherry tomatoes
Directions
Coat pan with a thin layer of oil and preheat so the oil begins smoking.
Cover both sides of each fillet with salt and herbs.
Peel and slice the carrots.
Saute garlic until aromatic (about 15 seconds).
Add fillets and carrots to the pan and immediately squeeze lemon over them.
When fillets are seared on the bottom, cover pan with lid and steam everything for a bit.
Meanwhile, wash leafy greens and arrange on plate with tomatoes.
Plate fillets and carrots next to the salad.
Serve and impress your surprise guests!
#my art#colored lineart#comic#castoff#fanart#marina#castoff fanart marathon#technically I did this before marina time 1 but I had already numbered the files...
49 notes
·
View notes
Text
Rasta pasta Recipe
1)Slice the bell peppers into strips, chop the onions, scotch bonnet and garlic and set aside�
2)Clean and devein the shrimps then season with ½ tablespoon of jerk seasoning, mix to combine and marinate for about 10 minutes or longer
3) boil the penne pasta in salted water until aldente, reserve about 1 cup of pasta water drain pasta and set aside. In order to stop the pasta from clumping up, add about 1 tablespoon of oil and toss to combine. Alternatively, run the pasta under cold water to get rid of starch.�
4) heat up olive oil on medium high heat, carefully add the shrimps to the hot pan and cook on each side for about 2 to 3 minutes each depending on the size of the shrimp. Do not overcook as you would be adding it back to the pasta later. Take it out of the pan and transfer unto a plate then set aside.�
5)still using the same pan you sauteed the shrimps, add chopped bell peppers and onions and saute for about 1 to 2 minutes moving it around the pan so it doesn’t burn. Add scallions, jerk seasoning, salt and black pepper and cook for another minute. Deglaze the pan with the chicken stock. Add chopped garlic and cook for another minute or two.�
6)Pour the double cream over the sauteed vegetables, add chopped scotch bonnet, smoked paprika, allspice and stir to combine. Stir in parmesan cheese and cheddar cheese into the creamy sauce until melted. Taste and adjust seasoning to preference.
7)Add the cooked pasta to the sauce and stir to combine, add some of the reserved pasta if the sauce is too thick. Finally, return the cooked shrimps to the pasta and stir to combine. Take it off the heat and serve immediately

#rasta#pasta#shrimp#dinner#mexican recipes#mexican cuisine#mexicanfood#baking#mexican dress#recipes#seafood
126 notes
·
View notes
Text
While Rosh Hashanah is generally known for its sweet foods like apples and pomegranates, there’s an ancient, slightly less-sweet, Sephardic tradition of eating foods for what they represent rather than what they taste like. Dark and leafy beet greens, plucked from their sweet, earthy roots are one of those foods.
It all stems from the fact that beet greens were once the favored part of the crop. Gil Marks wrote in “The Encyclopedia of Jewish Food” that early Mediterranean farmers cultivated beet greens and not their roots, which were stringy and small — and not desired until much later. It wasn’t until the mid 1500s that the modern juicy red beet root was cultivated, in Germany or Italy.
On Rosh Hashanah, beet greens or chard (“silka” in Aramaic) became a symbol for the new year, along with squash, fenugreek, leeks and dates, each with their own symbolic meaning.
These foods are served and reflected upon with special blessings full of word play and puns during the the Sephardic Rosh Hashanah seder. Beet greens (“selek” in Hebrew and “silka” in Aramaic), for example, embody the hope that all enemies will be removed in the new year. Both “selek” and “silka” resemble ways of saying “removal” in Hebrew and Aramaic.
Over time, beet roots were favored over their leafy tops, but today, resourceful cooks are using the whole plant. If it’s there, why not put it to use? You’ll reduce your food waste and boost your meal with added vitamins and minerals while you’re at it.
You can find beets and their greens at farmers markets or in well-stocked produce sections. You’ll have to remove the greens from the beets yourself, and it’s best to do this as soon as you can — that way, the beets stay firm and the leaves stay fresh. I often remove the leaves and place them in a separate bag right after I purchase them at the farmers market, so that they don’t get damaged on the way home.
Cooking the greens is the easy part — just use them in place of spinach or Swiss chard. And don’t worry, you can cook the stems too — my favorite thing to do is add them to vegetable stock or saute them with the leaves.
Here are five recipes that might inspire you to bring the beet greens into your Rosh Hashanah tradition:
Iraqi False Mahshi: Layered Swiss Chard, Beets, Rice and Beef from The New York Times
Fried Beet Greens Meatlessballs from Food 52
Greek Beet and Beet Greens Pie from The New York Times
Sauteed Beet Greens with Garlic and Walnuts from Edible Berkshires
Salad of Beet Greens and Walnuts from the Los Angeles Times
7 notes
·
View notes
Text
Ukrainian Borscht (Український борщ)

So I've only ever had cold beetroot soup so I looked around the internet to find a Ukranian Borscht and I found this old recipe on a reddit sub for good Ukranian food. It was highly rated in the sub and it does look like it'd be very good!
This is the second prepared food mentioned in the series. Transcribing the image below for anyone who can't load images or is using a screen reader.
Ingredients:
2 tbsp vegetable oil
2 tbsp butter
1 cup chopped onion
1 tsp minced garlic
3/4 pound beets (weighed without tops, Peeled and shredded
1 cup shredded celery root or chopped celery
1 cup grated parsley root or 2/3 cup chopped parsley
1 cup grated parsnip
2 tsp sugar
1/4 cup red wine vinegar
1 can (1 lb) tomatoes, broken up
1 tbsp salt
1 quart diced potatoes
2 quarts beef stock
1 pound shredded cabbage (6 quarts, loosely packed)
2 cups diced cooked beef (brisket or shank meat)
Chopped Parsley and Sour Cream
Heat oil and butter in heavy saucepan. Add onion and garlic. Saute about 5 minutes. Add shredded or chopped vegetables (not cabbage), the sugar, vinegar, tomatoes and salt. Cover and simmer about 30 minutes.
Meanwhile, add potatoes and stock to soup pot. Bring to a boil and simmer until potatoes are just tender. Add cabbage, cooked beef mixture, and diced beef. Bring to a boil; reduce heat and simmer 20 to 30 minutes. Season to taste with salt and pepper. Serve garnished with sour cream and parsley.
Enjoy!
#sherlock & co#sherlock and co#recipes#borscht#Український борщ#It sounds like it would be delish.#next dish will be the pampushka he mentions right after lol
23 notes
·
View notes
Text
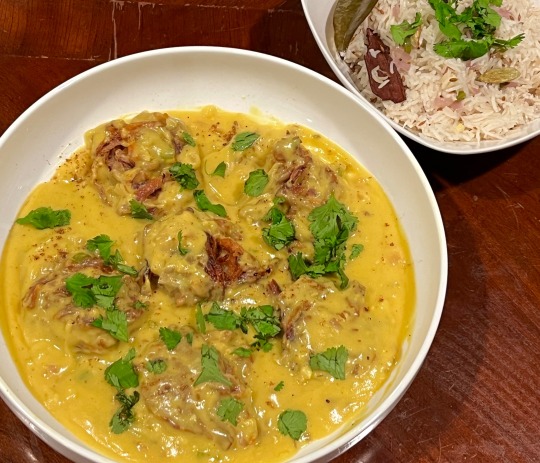
[ID: A large, shallow bowl filled with a bright yellow curd and golden brown pakora garnished with cilantro. A small bowl of jeera rice with green cardamom, cinnamon, bay leaf, and cilantro sits to the right. End ID.]
Vegan Punjabi kadhi pakora / ਪੰਜਾਬੀ ਕੜ੍ਹੀ ਪਕੌੜਾ
Kadhi is a comfort food popular in north and central India and southeast Pakistan. The base of the dish is spiced curd or buttermilk, to which chickpea flour, vegetable fritters, and spiced tadkas (temperings) are sometimes added. Unlike the sweeter, thinner, and unadorned variations to the south, Punjabi kadhi is slowly reduced to a thick, creamy consistency and studded with onion pakoras.
Recipe under the cut!
Patreon | Tip jar
For the pyaaz ke pakore (onion fritters):
1 cup besan (chickpea flour)
2 medium yellow onions, thinly sliced
1/2 tsp table salt
1/2 tsp mirchi (ground red chilis)
1/2 tsp ajwain (carom seeds)
A couple cups of a neutral oil, for frying
For the curd:
1 cup (220g) unflavored vegan yoghurt
1/2 cup (60g) besan
1/2 tsp amchur (dried mango powder; optional)
4 cups water
In Punjab, kadhi is often made with full-fat buttermilk, and sometimes with yoghurt. Vegan yoghurt (I used oat) will provide a similarly smooth, fatty, slightly sour base.
Adding less water to the curd mixture will allow it to cook down faster if you’re short on time; but a long, slow simmer is more typical with this dish.
For the kadhi:
2 Tbsp neutral oil
Pinch hing (asafoetida)
1 medium yellow onion, chopped
2-inch piece (20g) ginger, minced
4 cloves garlic, minced
2 green chilis, chopped
2 tsp cumin seeds (jeera)
1/4 tsp fenugreek seeds (methi)
1 tsp ground coriander
1/2 tsp mirchi (ground red chilis)
1/2 tsp ground turmeric
1/2 tsp garam masala
3/4 tsp table salt, or to taste
Mustard oil is typical, but any neutral oil (sunflower, canola, vegetable) will work.
For the tadka (optional):
1 Tbsp non-dairy margarine
1 tsp cumin seeds
1 dried red chili
1/2 tsp mirchi
Instructions:
1. Start the pakore. Cut onions in half through the root and lay cut-side down. Slice thinly vertically (perpendicular to the root) and then cut the root off. Whisk together other pakora ingredients (except for the oil) in a large bowl; add the onions and toss well to combine. Cover and set aside for 30 minutes to allow onions to release moisture.
2. Make the curd mixture. Whisk yoghurt and besan together in a large bowl. Add amchur (or substitute apple cider vinegar) if the yoghurt you are using is not particularly sour, to taste. Add water and whisk until a smooth mixture forms. Set aside.
3. Make the kadhi. Heat 2 Tbsp of a neutral oil in a large pot on medium-high. Fry fenugreek and cumin seeds for a few minutes until they are fragrant and popping into the air.
4. Add hing and cook for 30 seconds. Add onion, chili, and salt and saute for 3-4 minutes, until onion is translucent.
5. Add ginger and garlic and sauté for 30 seconds to a minute, until no longer raw-smelling. Add coriander, mirchi, and turmeric and sauté another 30 seconds.
6. Add the curd mixture and stir to combine. Allow to come to a boil, then lower the heat to low and allow it to cook, stirring occasionally, for 30-45 minutes, until thickened.
7. Meanwhile, finish the pakore. Stir the onion slices to distribute any moisture they may have released. Add just enough water to hydrate all the besan and allow the pakoras to hold together.
8. Heat about an inch of neutral oil on medium in a large pan. Once hot, drop small handfuls of pakora mixture into the oil. Fry, flipping once, until golden brown on both sides. Remove onto a paper-towel-lined plate or wire rack.
9. Add pakoras to the kadhi, along with garam masala, and allow to simmer for another 5-10 minutes until kadhi is very thick and creamy. Remove into a serving dish.
10. Make the tadka. Heat margarine in a small skillet until sizzling. Add cumin seeds, chili pepper, and mirchi and heat until fragrant. Pour the oil, seeds, and chili over the finished kadhi and serve immediately.
Serve with roti, paratha, rice, or jeera rice.
#recipes#vegan recipes#cooking#Indian recipes#Indian#Punjabi#yoghurt#yogurt#besan#chickpea flour#pakora
357 notes
·
View notes
Last Seen Blogs

alienus-alm
Blog ALIENUS-ALM - Importar Produtos é com IMPORTARFACIL.NET

deepseapotato
Salty Potato

tellytantra
TellyTantra