#geo nodes
Explore tagged Tumblr posts
Visit Tumblr Blog
Explore Tumblr blogs with no restrictions, modern design and the best experience.
Last Seen Tumblr Blogs


Fun Fact
Tumblr was the first site to host the blog for President Barack Obama in 2011.
Text
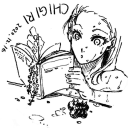
BLENDERY ADVETURES FROM THE LAST 4 WEEKS #3
I´m so so so sorry... I said in this post that I would uptade 𝐿𝑒 𝓅𝓇𝑜𝒿𝑒𝒸𝓉 "next week". I said that LAST MONTH. Its just that Square took way longer to do than I thought he would, + I had a TON of problems to fix in all my rigs so... TvT
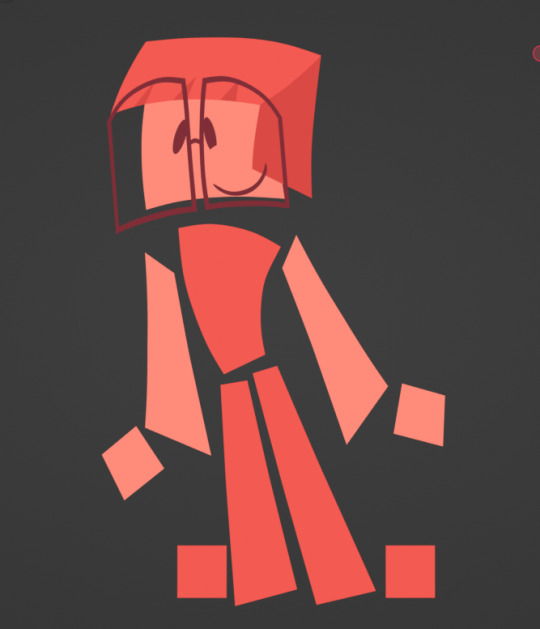
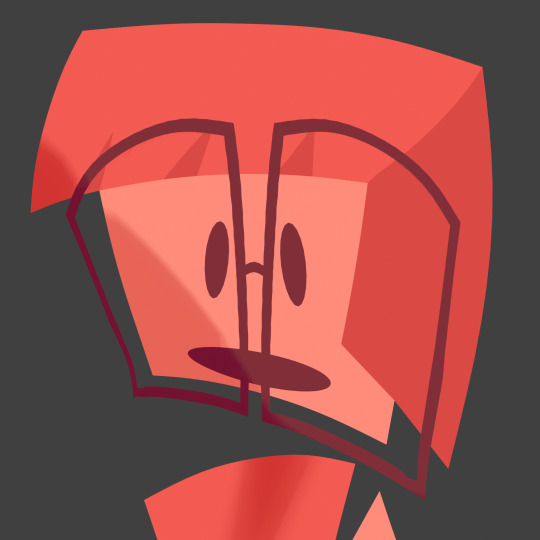
BUT NOW THE BOY IS DONE!!!!! BEHOLD
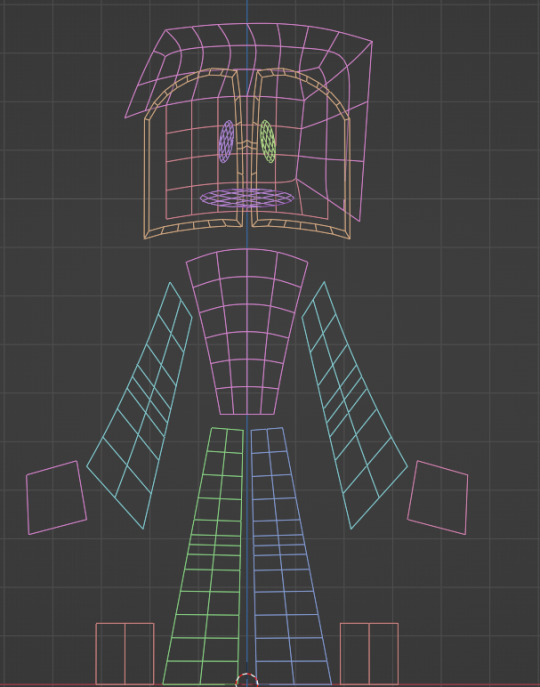
SQUARE
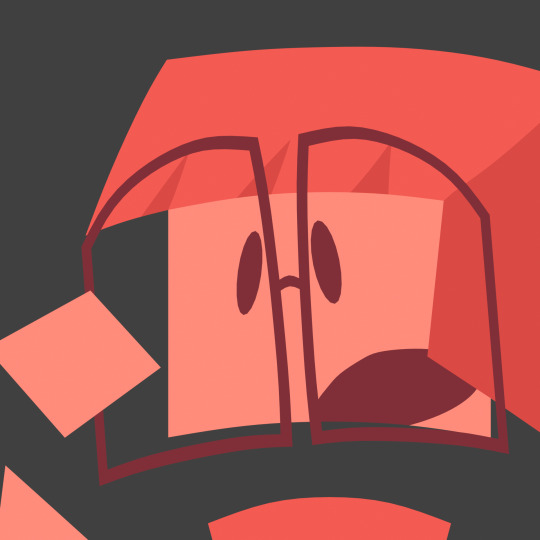

In the story he is basically the nerd (he is SUCH a square...), but he is nice to talk to and really caring about his and his friend´s well being!
What I did this last month:
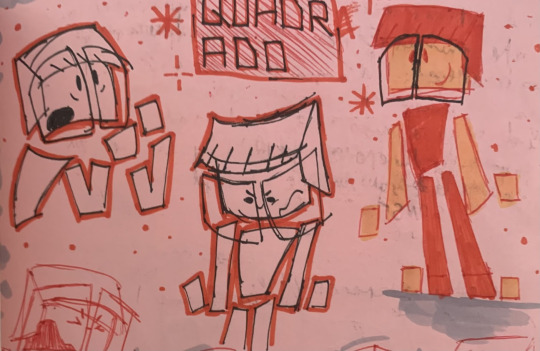
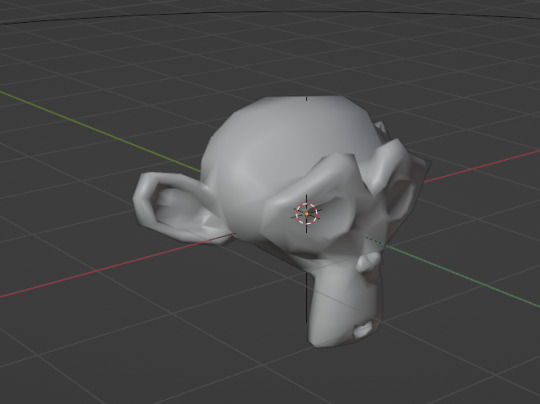
First I modeled him
Then I rigged him, as I did with all the characters
But after that, I had to tackle a really big problem:
For all my 2D characters' faces I use booleans, to cut out their facial features to different colors. BUT blender´s boolean algorithm only work in manifold-geometry -- manifold-geometry are meshes that: 1) have a volume bigger than 0, and 2) have a distinct separation from their inside from outside / don't have any holes.-- In other words, booleans HATE 2D geometry... So what I did? I forced the booleans to work! How?
GEOMETRY NODES
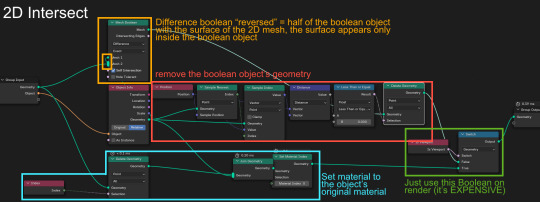
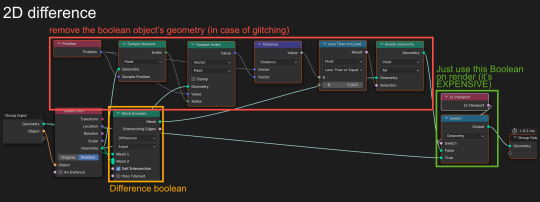
(unobstructed view)
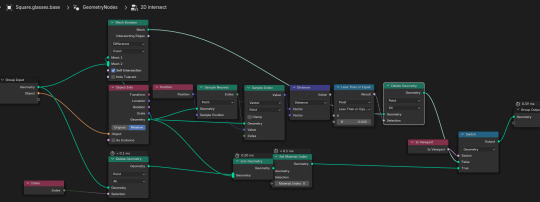
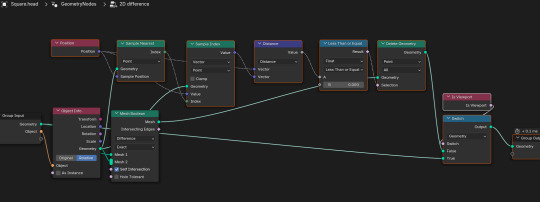
If any of you are going to use this node tree and encounter glitches or errors feel free to message me! THIS WORKED WONDERS!!!!! It only glitches really bad if your boolean object has fliped normals (if I can say so, it isn't even a glitch, it's just incompetence on my part...), so its really easy to fix.
And the last thing I did for this character was his glasses. They needed a bit more care in the rigging process, but now they work and twist like magic!
And that was it for this little guy! I know I really won't update as much here because now I will focus on the story-boards. But maybe I will show the cut models when I come to that! (cutting models is a practice to make animating less glitchy)
#blender#blendery adventures#blender3d#blender rig#geometry nodes#blender geometry nodes#geo nodes#blender geo nodes#boolean#blender boolean#non manifold boolean blender#𝐿𝑒 𝓅𝓇𝑜𝒿𝑒𝒸𝓉#Square#geometry#math#mathblr#from 2D to 3D#3D#2d model
4 notes
·
View notes
Text
Trying to make a procedural movie theatre in blender.
3 notes
·
View notes
Text
i'm 3d now...
#kaybee#my ocs#big thanks to my gf for doing the animation & geo nodes#i just made the model & textures#3d animation#low poly#character art#blender
36 notes
·
View notes
Text

This post is gonna flop like crazy, but I wanted to try blender!!
I fear in the amount of time it took for me to figure out geometry nodes I could have placed all those leaves manually o_O

#this killed my computer#it almost took me out as well#my art#art#artists on tumblr#blender#blender 3d#3d art#3d artwork#FUCK GEO NODES
3 notes
·
View notes
Text
blender is incredible. new update is good, go learn geometry nodes. this is just greasepencil lineart + geo nodes, no real modelling
252 notes
·
View notes
Note
what are the 3d assets for if i may ask
so because i've been wanting to brush up on my 3d stuff, but also and mainly because i am unwell in the head, i've been working on a bunch of little interface elements to freshen up Cookie Clicker mobile's UI with the ulterior goal of adapting some of it back to the desktop version in the future


i'm not exactly building up the skills i'd really like to practice ie. making little animated meshes for use in 3d games, but i'm still having a lot of fun with the geo/material node systems conjuring abominable noodle soups no one but me should ever lay eyes on. i kinda lost my mind on the procedural wood. look at this horror

627 notes
·
View notes
Text
Who wants neat Blender stuff? GP_Mesher is a one-node solution to turn any Grease Pencil object into a mesh. Coming to my Blender Market Page in the next few days, or get it now at my Patreon!
Extra Special Thanks to Joey Carlino, who's Geo Nodes remeshing process changed the way I work forever, and who's experiments with Grease Pencil in Blender 4.3 formed the bedrock of this node setup.
147 notes
·
View notes
Note
Are there any psx blender tutorials that you would recommend or for you was it more of a "I just learned how to model via blender might as well make something low poly"?
Oh yeah, I actually did a lot of research on how to do PSX-style stuff. Because outside the models themselves, there's some hardware limitations unique to PS1 that give it that specific look. Some good videos on that are: https://www.youtube.com/watch?v=BvfrewlWrss and https://www.youtube.com/watch?v=cUiyph17F3A . If you want to get into the very technical/mathematical aspects of it - Acerola just did one here: https://www.youtube.com/watch?v=y84bG19sg6U
The modeling was easier since I'm used to doing higher poly stuff, so it was just a matter of doing less. Tbh, my model and texture resolutions are higher than PS1, but I chose to play with that.
To learn how to model using limits they would have had in the PS1 era, you can reference actual PS1 models here: https://www.models-resource.com/playstation/ - You can download a bunch, bring them into Blender, and check out the poly count/texture sizes.
Reviewing assets someone else made is a good way of learning. An artist I really like who also makes tutorials on low-poly modeling and texturing is Stark Crafts on Youtube. Here's a good one where he goes through how to turn yourself into a low-poly character: https://www.youtube.com/watch?v=D47_JIAcGIM He also has some free assets you can download and learn from here: https://starkcrafts.itch.io/
Another low poly artist I really like who has a bunch of models viewable on Sketchfab is Elbolillo - https://sketchfab.com/3d-models/6twelve-8c2c49cab08e402d8681434a4ade4ed0. I've purchased so many of his assets, and he makes a lot for free too - https://elbolilloduro.itch.io/ - definitely recommend supporting him if you can.
For texturing, there's a shader for Substance Painter that I really like called pixel8r2 - you can get it here https://actiondawg.itch.io/pixel8r2 - really speeds up the process. But if you can't afford that or don't have Substance, this is a good tutorial that does it with paint.NET which is free - https://www.youtube.com/watch?v=nHqLn8AsN5k .
Outside of modeling and texturing, there are other aspects that give something the psx "look" - for instance vertex snapping/wobbling, affline mapping (warping of the texture itself), etc. The videos I linked in the first paragraph would go over what those things are. When I started I used this really good asset pack from Drips to dupe those things in Blender - you can buy that here - https://superhivemarket.com/products/dripspsxefx---lofi-playstation-1-effects That creator also has a channel with a tutorial on how to do the affline mapping in Blender with geo nodes here - https://www.youtube.com/watch?v=TtkkBz1ryIE
Finally, this is a (silent) tutorial from a fantastic artist who shows you how to model/texture/composite a PS1-style scene in Blender - https://www.youtube.com/watch?v=sNgSiLOIW70 - that one is really beginner-friendly, and she shows some free add-ons for things like vertex snapping. She sells a guide on it here - https://buymeacoffee.com/dreamyrobot/e/271588
Hope this helps! :)
13 notes
·
View notes
Text
i am extremely irritated at "secrets" in blasphemous. why are you locking essential upgrades behind breakable walls that are literally impossible to find without looking it up or doing it on accident?
hollow knight for example either made the secrets easy to find (visible breakable walls)
or they would be non-essential stuff like geo nodes or lore tablets or relics that don't contribute to your completion progress or really even achievements
why is half the content in this game only discoverable by looking it up. don't piss me off. i don't feel accomplished i just feel annoyed that i need to have 3 tabs open on my browser just to get my character upgraded.
honestly maybe i AM biased towards hollow knight but it just never felt like i *NEEDED* to look stuff up for game progression or completion. discovering secrets was much more rewarding bc it wasnt essential upgrades locked behind impossible to find breakable walls with no indication of them being breakable. dont piss me off
15 notes
·
View notes
Text
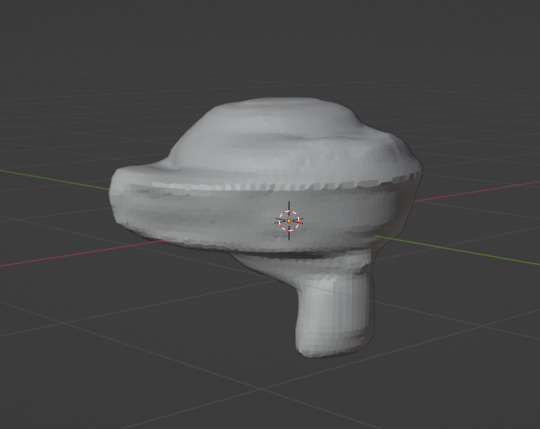
CT scanner in Blender almost working now.
Leftmost image is the source I'm using. Center image is the 'xray' image that I created from the source. With enough 'xray' images from different angles the source object should be recreatable, and that what the rightmost image is suppose to be.
My previous attempt used 250 cubes rotates around with volume shaders to produce a fog of the object. This causes some problems as the fogs dont really 'add' in blender and was hitting some limits in the depth cause not enough information to come through.
This new method uses geometry nodes. Instead of creating the fogs through the shader and rendering it is done using geometry nodes at runtime.
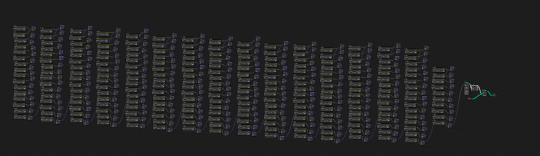
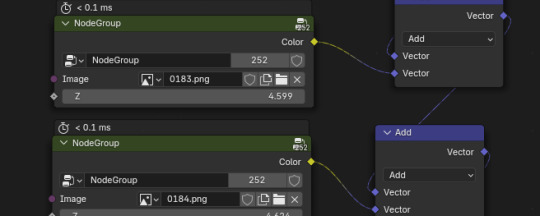

each node holds a small instruction set that adds the image at a small rotation. Each node was created by hand, as geo nodes scripting is a little different from shader nodes scripting and this process really wasnt that difficult to do (mostly just me remembering how many nodes I need to create as I can copy paste blocks).
With this being done in geo nodes I can also do more to the object. Something I see from CT scanners is slicing up the created object to view slices.
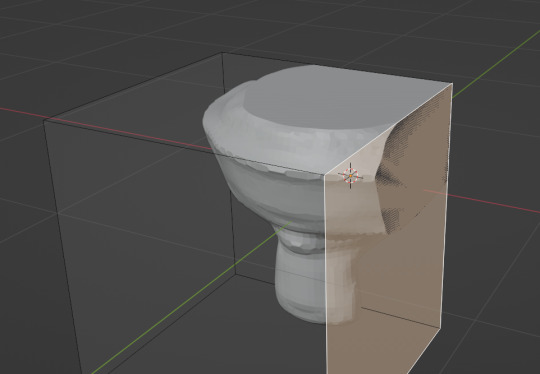
With geo nodes this is quite easy and in theory I should be able to start pulling internal data if I had any to begin with.
I think at this point its a problem with the 'xrays' I made. There should be a way to make them better as it was something I made in 20 minutes after a job interview about Tomography. But thats for later, my back hurts and I'm starting to see grid lines from all those nodes.
Shoutout to that one weirdo who told me to continue. You understand.
#blender#3d design#mathematics#b3d#3d model#3d modling#blender3d#geometry nodes#ct scan#computer graphics
6 notes
·
View notes
Note
Did you do any sculpting in making the ship? Or just hardcore modeling?
One more Q: you said you used geo nodes for the stars, what about the general space background? Environmental texture (HDRI?) or something else?
For the ship I used only hardcore modeling. In general, I use sculpting only for organics.
For the general space background I made a World material based mainly on variations of the Noise Texture node. I connected Volume to the World material for an additional dust/nebula effect. However, in Blender 4.2 this method of connecting Volume no longer works.

12 notes
·
View notes
Text
Yandere Baizhu X GN reader
YANDERE BAIZHU! YANDERE BAIZHU! YANDERE BAIZHU!

GN reader.
Warnings: This is pretty morbid, induced illness, death, grief angst, horror, mentions of blood, Baizhu is full yandere, reader is clueless.
<̴̖̖̮̼̻͛̎̈̄3̸̙̞̺̎͊̊̓̀ <̴̖̖̮̼̻͛̎̈̄3̸̙̞̺̎͊̊̓̀ <̴̖̖̮̼̻͛̎̈̄3̸̙̞̺̎͊̊̓̀
In the late afternoon sun, the gentle petals of the flower wither. It elicits a strange smell, lingering in the clinic between the bitter nodes of the herbs.
Sweet.
It had almost become a routine now, you dragging the kid in for her weekly medication and promising her sweets afterward. This time it was almond tofu.
You hunched over to talk to Little Meng again, and a faint scar peeked from under your shirt as it rode up.
But looking at you was never really easy. Baizhu peeled his eyes away from your skin. It was the cut that he had sewn up for you. He had felt a pit in his stomach when he had seen that wound, splitting open your skin like a red mouth.
You had come in grinning after you had an untimely face off with a geo-vishap. He remembered every wound he healed on your body. Every scar like the back of your hand.
"I was just collecting Core lapis." You had explained airily, fanning yourself.
“It will need ssstichess.” Changsheng stated.
“Qiqi…will…get…the…suturing…tools.” The zombie said before hurrying inside. Baizhu crouched down, lifting the hem of your shirt to inspect the wound better. The thin fabric clung to your skin from the sweat.
“You must be more careful,” he said. His voice sounded light, strained from the proximity. A feverish haze clouded his mind as he smelled your blood.
His fingers worked deftly, practiced strokes as he stitched up the wound.
"All done." He sighed, his tone noticeably somber. "Why did you have to go there alone?" He asked you,
You looked at him as if it was obvious. "My brother needed it," you explained through an adoring smile. You shook your head as you continued "he wouldn't shut up about it, plus you can sell them for a good price..."
You chatted on but Bazihu's face soured. You were too attached to that brat. Snotty-nosed and idiotic. Hung on you like an albatross around your neck. He took up all of your time, what's worse was that he demanded it. A weight you would better be rid of.
And when it wasn't your stupid brother, it was the entirety of Liueye.
You were always on your toes, skipping from place to place, a blur before him, like the wind that never stops blowing. Of course, he was a patient man, but even his resilience had limits.
"Even so," Baizhu replied, "You must learn to take better care of yourself," he said, he dropped the scissors and string in the bamboo-sewn basket beside him.
"Yes, doc." You replied sheepishly before hopping to your feet.
"Wait a minute now, I haven't given you any ointment-"
But you were already halfway out, "Sorry Baizhu I gotta run, I'll come by for some later I promise!" You replied, the departing smile craving into flesh.
Something in him stilled as he watched you run back.
"Does... this... go... in the... incinerator?" QiQi asked him. The doctor gritted his teeth, biting down on his cheek so hard he drew blood. His fingers dipped into the basket, pulling out the cloth soaked in your blood.
"Yes QiQi." He replied, dismissing the zombie. The child followed through at once, trotting away with the basket. Baizhu knew that this was the borderline. It was sick and psychotic. A line couldn't return from once he crossed it.
"What are you doing?" Changshen hissed as he brought it to his lips. But the desire was maddening. The metallic taste of your blood curled in his mouth. A part of you to keep to himself forever. His fingers curled around the cloth, droplets of blood sliding down his knuckles. Surprisingly his heart was perfectly still as he snaked his tongue out to taste it again. To taste you again.
"Oh Baizhu." Changsheng's voice hissed out.
At that moment the thought was as simple as it was sudden. He had to own you.
His amber eyes followed your figure as it walked back to the bustling crowd of the harbor.
And if he had to own you that deadweight of a brother had to go.
<̴̖̖̮̼̻͛̎̈̄3̸̙̞̺̎͊̊̓̀ <̴̖̖̮̼̻͛̎̈̄3̸̙̞̺̎͊̊̓̀ <̴̖̖̮̼̻͛̎̈̄3̸̙̞̺̎͊̊̓̀
He was taken by surprise when it actually worked. Being the most trusted doctor in the harbor, his ways weren't even questioned. Your brother's death was easily brushed past as a tragedy.
It had been perfect, everything he had dreamed of. You had sobbed silently, trembling as the rain poured down outside. He could tell you had run back to the village in the rain. Your clothes were completely drenched, but he didn’t mind at all. He had never felt so full before. The way you had curled into him in your moments of grief, burying your face in his chest.
He had held you regardless, ignoring how the poison was already causing the corpse to rot, flooding the room with a sap-like sweet smell. Ignoring how you were still soaked from the ice-cold rain and ignoring Director Hu's steely- skeptical gaze.
That moment was his epiphany. His fingers trailed down your arms, it was the moment he had waited for all this time. This is how he could have you. This was the only way you would ever need him.
Through grief and pain.
But it didn't last.
You had gotten better.
Healed they said. With everyday you learnt to live with the pain, you pulled further away from him. Your visits to the phramcy getting shorter.
Your pursuits taking you further and further away from liuye, further and further away from Him.
He couldn’t fucking let that happen. Not when he had come so close. Not now when he had gotten away with so much.
If he had to own you, he couldn't have you jumping around.
<̴̖̖̮̼̻͛̎̈̄3̸̙̞̺̎͊̊̓̀ <̴̖̖̮̼̻͛̎̈̄3̸̙̞̺̎͊̊̓̀ <̴̖̖̮̼̻͛̎̈̄3̸̙̞̺̎͊̊̓̀
"Why don't I get you a full dish of Almond tofu to celebrate later?" You said.
The child looked up at you with a tear-soaked face, "Y-You promise?" She choked out through her sobs.
"Of course!" you said, "You can even help me make it later."
"Okay." The child replied, shifting on her feet. "I'll have it."
Gui gave out a relieved sigh, " Then I shall prepare it right away." he said clapping his hands.
You gave him a weary smile, finally deciding to sit down on a chair near you. His eyes caught the faintest tremor in your legs as you did.
It won't kill you now. He would never do that. He just loves you so much, he wants you away from all the danger.
And watching you today he can tell it's working already. The small amounts he had given you wouldn't show the direct effects right away. It would happen over time, lazily, lulling you into a false sense of safety.
The faint flush on your cheek, the ragged out-of breath manner in which your chest heaved. Such a reaction from just walking up the stairs to the pharmacy.
The delight was almost too much for him.
"Everything all right?" He asked you, finally deciding to step in. You gave him an exhausted smile, "Yeah." you replied shakily, "Just a little tired."
He had made the poison with so much love, so much dedication. Crafted from changsheng's own venom and sweetened it with honeydew. He wondered if he would taste it on your lips. He would finally taste something else then, something other than the harsh bitter medicine he had to drink all his life.
He had known there would be no cure. Something made from changsheng's venom couldn't ever be negated. By no one else, and after a while even he wouldn't be able to stop it. You would have to live with it, to bear it's pain for the rest of your life, live every breath laboured. Yes it sounded harsh but that's what you had done to him, didn't you see?
Crippled him with the thought of you, day and night. This way you'd know what it felt like. This way you would need him. You'll need him to live. Always.
You shook your head, "I feel like I'm getting lightheaded more often." You said softly.
His fingers were clammy as they felt your forearm. “Remember the medicine takes it own time to show its full effects.” Baizhu replied,
“That aside, are set for the trip to Inazuma? I heard the Crux is leaving tomorrow morning.”
A darkness crept onto your features. Your shoulder’s slumped, a feign smile lacing your lips, “I- decided against it this time.” You replied.
“I see,” Baizhu said.
And if you didn't already, you'd learn to love him eventually.
"C-can i g-get almond tofu n-now?" Meng sobbed curling her small arm around your leg.
You gave her head a small pat, "of course."
Baizhu smiled as he handed you your poison, "Now don't forget your own medicine either." He reminded you, the vial was small, fitting in the palm of your hand. "He stayed up lasst night to make it," Changsheng added.
The gratitude in your eyes tightened his chest, "Thank you, doctor." You chimed back, "You do too much for me."
Baizhu smiled, behind him the violet of the flower looked hauntingly beautiful. The setting autumn sky making it glow like a yellow-eyed predator.
You'll need him forever.
"It's only my duty."
<̴̖̖̮̼̻͛̎̈̄3̸̙̞̺̎͊̊̓̀ <̴̖̖̮̼̻͛̎̈̄3̸̙̞̺̎͊̊̓̀ <̴̖̖̮̼̻͛̎̈̄3̸̙̞̺̎͊̊̓̀
im soory if this got a little too intense, but goddamn do I love insane yandere baizhu or what TTTT
#genshin imagines#baizhu#genshin headcanons#genshin yandere#yandere#genshin baizhu#gn reader#Reader x baizhu
99 notes
·
View notes
Text

Im so close to figuring out the hair. I don't want to place the hair cards manually, but I might have to for the hair in the front. Personal thoughts under cut so I don't forget
I forgot about geometry nodes. I might be able to place the cards that way as well 🤔 but only have a primitive understanding of geo nodes so it will definitely be an uphill battle
i think there is a plugin for it but I haven't had much luck with plugins
2 notes
·
View notes
Text
i made a guide on how i got the style of my short 'kick it', and how you can use simple geo nodes for your own art too!
youtube
70 notes
·
View notes
Text
TF2 Blender Guide: Adding the Kritz Effect to Weapons
This is a guide on how to add hisanimations' Blender recreation of the Kritz effect to weapons. Guide by Katy133.

(Above image by hisanimations.)
The Shader Material
Select the mesh (not armature) of the weapon. (Image: Labeled 1 in screenshot)
In the Material Properties tab, select the weapon's material from the material slots (if there's a slot with gold in the name, it's the weapon's Australium material, which you can ignore if you aren't using that one. Ditto the RED/BLU team variant you aren't using). (Image: 2)
Go to the Shading workspace tab at the top. In the Shader Editor window, select the New Material button, located to the right of the name of the selected material. You've now created a copy of the weapon's material (its name ending with the .001 prefix). Rename this new material something clear, like c_scattergun_kritz (adding the _krtiz prefix to the name). (Image: 3)
Add > Color > Mix Color. Change the node's blend mode from Mix to Overlay and the node's Factor to a value of 1.0. For the B colour, select it and change the Hex to #FF423E (red). Then plug the $basetexture node's Color to the Overlay node's A. Plug the Result to the VertexLitGeneric node's $basetexture [texture]. (Image: 4)
For the VertexLitGeneric node, change the values of the following node properties:
$selfillum [bool]: 1.0
$selfillummask [texture alpha]: 0.230
Selfillum strength: 48.740
The weapon should now appear bright red, with the textures of the weapon appearing underneath. Depending on the weapon you are altering, you may want to play around with these values. (Image: 5)
To keep the data of the original weapon material shader, go to the Material Properties tab, press the Add Material Slot (the + button), and then add the name of the original (unedited) copy of the weapon material to the slot. (Image: 2)

The Lightning Geo Node
Go to the Modifiers property tab. Select Add Modifier > Geometry Nodes. There should now be a Geo Node modifier to the mesh. (Image: 1)
At the top of the screen, select Edit > Append… In the new window, find the .blend file for hisanimations' Kritz Effect. Select it > Node Tree > Kritz Effect > Append.
Back in the Modifiers property tab, select Kritz Effect from the dropdown menu of the Geo Node modifier. You will now see a bunch of new properties. (Image: 2)
For Spark Color, change the Hex to #FF4144 (red). Change Emission to 5. Change Max Jitter to 900. The lightning should now appear on the weapon when you play the Timeline. The lightning will face the active camera. (Image: 3)
Turning it Off/On For Animations

Sometimes, for an animation, you want a shot where a weapon becomes Krtiz-ed or a shot where the Kritz effect wears off. For that, you can keyframe the necessary values on/off, which I will list below for both the material shader and the lightning geo nodes.
To add keyframes to a value, you can either hover over it and press the add keyframe hotkey, or right-click on the value and select Insert Keyframe. Yellow means there is a keyframe on the frame you are currently on in the Timeline. Green means that there is a keyframe somewhere else on the timeline.
For the shader material: Keyframe the Overlay node's Factor's value from 1.0 to 0.0 (1 being 100% on, and 0 being fully off).
For the lightning: Keyframe on/off the Realtime and Render visibility buttons in the Geo Node modifier (via the Modifiers property tab).

4 notes
·
View notes
Note
Has no one asked how you made the eyeball yet?? I wanna know! I know nothing about Blender, so if you'd care to infodump about 3D animation while you're at it, you have a captive audience >:]
I already told someone about my favourite parts of making it, so you're getting all my least favourite parts! Buckle up because this is gonna take literally forever!
First off: I used this tutorial (because I'm just about getting the hang of geo nodes, still) to make the eye:
youtube
Now, you'll note that the thumbnail on the video shows veins, which would have been perfect for the horror vibes. Unfortunately, from the back, it looks genuinely ass :( So I had to get rid of them. This was only one of the many, many things that went horribly wrong in this event.
Now, I'd waited so long to try out geo nodes that half of the tutorial was outdated and yours truly ended up jury rigging the shader for the cornea, because the settings that they used no longer existed :/ which is why it doesn't look quite as shiny as it was meant to.
And then there was the glorious HDRI issue. the hdri is what provides the lighting and background of the animation, which would have been all fine and dandy, except I couldn't find any horror hdris. At least not free ones. So I had to take a random room and run it into Photoshop to turn it red.
Of course that was when I started finding issues with the animation. I wanted the eyeball to be a softbody, so it could be squishy, but for whatever reason every time I tried to turn it on, the eyeball itself would disappear.
So I decided to just go with rigidbody instead :/ I thought that I could maybe swap it out for some blood simulations instead but it nearly killed my poor laptop..
Unfortunately because of the shape of the cornea the damn eye kept trying to tilt at random angles so I had to disable the geometry nodes and pretended the eyeball was a perfect sphere for the simulation. Oh, and there was the time I forgot to save and my computer deleted several hours worth of work.
So yeah. That's how we ended up with this. Thanks for the ask, jamieeee
4 notes
·
View notes