#how to clear cache on iphone 10
Explore tagged Tumblr posts
Visit Tumblr Blog
Explore Tumblr blogs with no restrictions, modern design and the best experience.
Last Seen Tumblr Blogs


Fun Fact
Tumblr Inc. has $15.1M in annual revenue.
Text
youtube
Learn how to clear WhatsApp cache on iPhone with this full guide. Free up space and improve performance on your device with just a few simple steps!
#how to clear cache data in whatsapp on iphone#how to clear cache on iphone#how to clear app cache on iphone#how to clear iphone cache#clear app cache on iphone#how to clear cache on iphone apps#how to clear whatsapp cache android#how to clear whatsapp cache#how to clear browser cache on iphone#how to clear whatsapp cache on iphone#how to clear cache on iphone 10#clear cache whatsapp#clear cache#iphone cache#clear cache iphone#how to clear cache on iphone 11#Youtube
0 notes
Text
How to Watch IPTV on Phone?

How to Watch IPTV on Phone: Full Step-by-Step Guide
In today’s fast-paced world, the ability to stream your favorite live TV channels, sports, and movies directly from your smartphone is more convenient than ever. Thanks to IPTV (Internet Protocol Television), you can now watch high-quality content on the go, right from your Android or iOS phone.
This complete guide will show you how to watch IPTV on your phone, step-by-step, with real examples from IPTV providers like StreamView IPTV and Digitalizard. Whether you use Android or iPhone, this tutorial will help you get started easily.
What is IPTV?
IPTV (Internet Protocol Television) delivers live TV channels and on-demand video content through internet connections, rather than traditional cable or satellite. With IPTV, all you need is:
A reliable IPTV subscription (e.g., Streamview IPTV or Digitalizard),
An IPTV player app,
A good internet connection.
Requirements to Watch IPTV on Your Phone
To watch IPTV on your smartphone, you need:
📶 Stable internet connection (minimum 10 Mbps recommended)
📲 A compatible IPTV app for Android or iOS
🔐 Your IPTV credentials (M3U playlist link or Xtream Codes)
🔄 An updated Android or iOS device
How to Watch IPTV on Android Phone? Step-by-Step Guide
Step 1: Get Your IPTV Subscription
Sign up with a reliable IPTV provider like:
🔹 Streamview IPTV – Offers M3U and Xtream Code login, with 24/7 channels and VOD content.
🔹 Digitalizard – Known for HD quality and global channels, compatible with many IPTV players.
Once registered, they’ll email you:
M3U Playlist URL
Or Xtream Codes (Username, Password, and Server URL)
Step 2: Download a Reliable IPTV Player App
Some of the best IPTV apps for Android:
IPTV Smarters Pro
TiviMate IPTV Player
XCIPTV Player
GSE Smart IPTV
Go to Google Play Store, search for one of these apps, and install it.
Step 3: Load IPTV Playlist
Open the IPTV app (e.g., IPTV Smarters Pro).
Choose how you want to login:
Load Your Playlist or File URL (M3U)
Login with Xtream Codes API
Enter the details you received from Streamview IPTV or Digitalizard.
Tap Add User and wait for the channels to load.
Start streaming your favorite live TV channels, sports, or movies.
How to Watch IPTV on iPhone (iOS)? Step-by-Step Guide
Step 1: Subscribe to IPTV Service
Choose from verified providers like:
Streamview IPTV – Offers multi-device support including iOS.
Digitalizard – Offers fast delivery of login details and mobile-compatible links.
Step 2: Download an IPTV Player App for iOS
Top IPTV apps for iPhone:
IPTV Smarters – Player
GSE Smart IPTV
iPlayTV
Smarters Player Lite
Go to the App Store, search for one of these apps, and install it.
Step 3: Configure the App
Open the IPTV app on your iPhone.
Select either Xtream Codes Login or M3U Playlist option.
Enter:
Server URL
Username
Password (provided by Streamview IPTV or Digitalizard)
Tap Login and wait for the channel list to load.
Enjoy streaming HD content directly on your iPhone.
Key Features You’ll Enjoy
When using services like Streamview IPTV or Digitalizard, here’s what you typically get:
✅ 10,000+ Live TV Channels
✅ Video On Demand (Movies, TV Shows)
✅ 24/7 Sports & PPV Channels
✅ EPG (Electronic Program Guide)
✅ Catch-up & Recording Options (depends on player)
✅ Anti-freeze Technology
Use a VPN for Secure Streaming
To protect your privacy and avoid ISP throttling, it’s recommended to use a VPN while streaming IPTV on your phone. Apps like NordVPN, ExpressVPN, or Surfshark work great with mobile devices.
Troubleshooting Tips
Buffering? Switch to a lower-quality stream or use a VPN.
Can’t login? Double-check M3U/Xtream details or contact support.
App not loading? Clear cache or reinstall the IPTV player.
Final Thoughts
Watching IPTV on your phone is one of the easiest ways to enjoy live TV, sports, movies, and shows wherever you go. Whether you're using Android or iPhone, all you need is a trusted IPTV provider like Streamview IPTV or Digitalizard, and a reliable IPTV player app.
With a simple setup and internet access, you’ll have 24/7 entertainment right in your pocket.
FAQs
Can I watch IPTV on multiple devices?
Yes, both Streamview IPTV and Digitalizard support multi-device use. Check your plan for simultaneous connections.
Is it legal to use IPTV on my phone?
Using licensed IPTV services is legal. Avoid using pirated or unverified sources.
Do I need a VPN for mobile IPTV?
A VPN is not mandatory but is highly recommended for security and privacy.
Can I record IPTV on my phone?
Some apps like XCIPTV support recording on Android. iOS options may be limited.
#blog#blog intro#ask blog#blogging#shifting blog#tech#iptv subscription#best iptv#iptv#iptv service#iptv usa#abonnement iptv#iptv firestick
3 notes
·
View notes
Text
10 Methods Of Facebook Reels Download by Triveni World
10 Methods Of Facebook Reels Download by Triveni World
Facebook Reels Download are now a popular way of sharing short, funny videos to the world. Whether it is funny clips, tutorials, or motivational videos, you might want to Facebook Reels Download and watch or share offline. But Facebook does not provide a direct download. So, how do you Facebook Reels Download? Let us know!

Why Facebook Reels Download
Facebook Reels Download is useful to:
Offline Viewing: Watch your favorite Reels without the internet.
Content Generation: Leverage videos as a content bank and resource for future content.
Sharing: Share Reels effortlessly between apps.
Educational Uses: Bookmark useful tutorial videos for later use.
10 Ways to Facebook Reels Download
1. Facebook Reels Download online
There are certain third-party websites where you download Facebook Reels by simply copying the video's URL.
Steps:
Open Facebook and find the Reel you wish to download.
Press the three-dot menu (⋮) and press Copy Link.
Go to a web downloader like SaveFrom.net, SnapSave, or FBdown.net.
Paste the link you copied into the provided field.
Click on Download and choose the video quality.
This content is saved locally on your own device.
2. Using Screen Recording
Or if you prefer not to employ third-party programs, screen recording is an easy method to capture Reels.
Steps:
On Android:
Swipe down and select Screen Recorder from Quick Settings.
Play the Reel and capture.
Save the recorded video.
On iPhone:
Swipe down and select Screen Recording.
Open Facebook and view the Reel.
Complete the recording upon completion.

3. Via Browser Extensions
There are also Chrome and Firefox browser extensions through which you can download Facebook Reels.
Steps:
Download a Facebook video downloader addon (e.g., Video Downloader Plus).
Open Facebook and view the Reel.
The plugin will recognize the video and provide a download.
Click Download and download the video.
4. Downloading from Telegram Bots
There are some Telegram bots that offer Facebook Reels for download straight away.
Steps:
Get a Facebook video download bot on Telegram.
Paste the Reel link into the bot chat.
The bot will execute and give a download link.
Click here to download the video.
5. Use Facebook Reel-Specific Apps
It can also be downloaded with apps like FastSave, Facebook Video Downloader, or Snaptube.
Steps:
Install a popular app from the Play Store/App Store.
Copy and paste the Reel link into the app.
Click on Download to download the video.

6. Using the Facebook Lite App
A few users have also stated that Facebook Lite also temporarily caches video and it can be recovered.
Steps:
Open Facebook Lite and watch the Reel.
Clear your phone's temporary files folder.
Locate the cached video and save it to another folder.
7. Using Shortcuts on iPhone
iOS. Facebook Reels Download can be automated using the Shortcuts app.
Steps:
Download a Facebook Reel downloader shortcut.
Open the Reel and click on Share > Shortcuts.
Click on the shortcut to download and save the video.
8. File Manager Application Availability
Certain Android file managers are able to record cached video once played.
Steps:
Play the Reel while keeping the File Manager open.
Continue with cached videos.
Copy the file to a directory for ease.
9. Asking the Creator for the Reel
If you need the Reel for personal use, it would be best to contact the creator.
Steps:
Contact the Reel creator via DM or comments.
Request permission to download or acquire a copy.
If granted, download the file sent by the creator.
10. Desktop Video Download Software
Programs like 4K Video Downloader or JDownloader have sophisticated video download programs.
Steps:
Install a desktop video downloader.
Copy the Reel link and paste it into the software.
Select the resolution you want and save the file.
Is Facebook Reels Legal to Download?
It is okay to Facebook Reels Download for personal use but never for sharing or business purposes. Always get the consent of the creator before using their content.

Conclusion
With these 10 ways to Facebook Reels Download by Triveni World, you will never be late in downloading your favorite videos. Whether you are using online tools, apps, screen recording, or Telegram bots, choose the one most suitable to you. Want more tech tips? Stay tuned for more Triveni World tutorials!???? Need a tutorial on editing downloaded Reels????? Let me know!
0 notes
Text
Phone Won’t Connect to Wi-Fi? Try These Solutions

In today’s connected world, Wi-Fi has become essential for work, entertainment, and everyday tasks. So, when your phone won’t connect to Wi-Fi, it can be incredibly frustrating. Fortunately, most Wi-Fi connectivity problems are easy to resolve with a few troubleshooting steps. In this article, we will guide you through common reasons your phone may not connect to Wi-Fi and provide practical solutions. We’ll also discuss how a phone diagnostic software can help identify the issue and address potential storage issues that could affect Wi-Fi connectivity.
1. Check Your Wi-Fi Network
Before diving into deeper troubleshooting, make sure that the issue isn’t with your Wi-Fi network itself. Here’s how to do a quick check:
Ensure Wi-Fi is Turned On: It may sound simple, but ensure that Wi-Fi is enabled on your phone. Head to your phone’s settings, tap on “Wi-Fi,” and toggle it on.
Verify the Network Name and Password: Ensure you're trying to connect to the right network, and double-check if the password is entered correctly.
Restart Your Router: Sometimes the issue is not with your phone but with the router. Unplug the router, wait for 30 seconds, and then plug it back in. After it restarts, try reconnecting your phone.
If the network is functioning and other devices are connected without any issues, you may need to investigate potential problems with your phone.
2. Toggle Airplane Mode
A quick fix for Wi-Fi issues is toggling your phone’s Airplane Mode. This can reset network settings without the need for a full restart. Simply swipe down from the top of your screen to access the quick settings panel, tap on the Airplane Mode icon to turn it on, wait for about 10 seconds, and then turn it off. This might refresh the phone’s connection to Wi-Fi.
3. Forget and Reconnect to the Wi-Fi Network
If your phone has saved the wrong credentials or there’s a glitch in the connection, forgetting the network and reconnecting can resolve the issue. Here’s how:
Go to Settings > Wi-Fi.
Find the Wi-Fi network you're trying to connect to.
Tap on the network name and select Forget Network.
Afterward, reconnect by entering the network password again.
This method resets the connection and can clear any stored data or incorrect settings that might be preventing you from connecting.
4. Restart Your Phone
If the basic checks don’t resolve the problem, the next step is to restart your phone. Sometimes, temporary software glitches can prevent your phone from connecting to Wi-Fi, and a restart can refresh all processes and connections.
5. Check for Software Updates
If your phone hasn’t been updated recently, outdated software may be causing connectivity issues. Head to Settings > System > Software Update to check if any updates are available. Software updates often contain fixes for bugs and network-related issues that could be hindering your Wi-Fi connection.
6. Clear Cache and Free Up Storage Space
A storage issue could potentially affect how well your phone manages its resources, including Wi-Fi connections. Clearing the cache can help:
On an Android device, go to Settings > Storage > Cached Data, and tap to clear cached data.
On an iPhone, you can clear app caches by offloading unused apps or by performing a soft reset.
Freeing up storage space ensures your phone runs smoothly, and this may help resolve connectivity issues. If your phone is low on storage, deleting unnecessary files or using a phone diagnostic software to identify and clean junk data can improve overall performance, including Wi-Fi connectivity.
7. Check for Interference from Other Devices
Electronic devices such as microwaves, cordless phones, and even baby monitors can interfere with Wi-Fi signals. If possible, place your phone closer to the router or reduce the number of devices connected to the same network. Additionally, switching your router’s frequency from 2.4 GHz to 5 GHz (if supported) can often result in better connection stability and speed.
8. Reset Network Settings
If none of the above solutions work, resetting your phone’s network settings can help resolve more stubborn connectivity issues. Here’s how to reset network settings:
On an Android device, go to Settings > System > Reset Options > Reset Wi-Fi, Mobile & Bluetooth.
On an iPhone, go to Settings > General > Reset > Reset Network Settings.
This option clears all saved Wi-Fi networks and Bluetooth connections, so you’ll need to reconnect to your Wi-Fi network afterward. However, it can be a highly effective solution for network problems.
9. Use Phone Diagnostic Software
When you’ve tried all the usual troubleshooting steps and your phone still won’t connect to Wi-Fi, a phone diagnostic software can be a valuable tool. This type of software scans your phone’s hardware and software for any issues affecting connectivity, providing a detailed report and solutions. Some phone diagnostic apps can even check for specific problems like weak signal strength, malfunctioning network adapters, or outdated drivers.
These diagnostic tools often come with additional features, such as detecting background apps that could be hogging your phone’s resources, further helping to identify and fix storage issues that may affect performance.
10. Consult a Professional
If your phone still won’t connect to Wi-Fi despite trying all the solutions above, it might be time to consult a professional technician. There could be a hardware issue with the Wi-Fi antenna or internal components, which requires expert attention.
Conclusion
Wi-Fi connectivity issues can be frustrating, but in most cases, the solutions are straightforward. By following these troubleshooting steps, from basic checks like restarting your phone to more advanced fixes like resetting network settings or using phone diagnostic software, you can quickly get your phone back online. Don’t forget to monitor potential storage issues, as they can indirectly affect your phone’s ability to maintain a stable connection.
#mobile phone repair#mobile phones#phone diagnostic#software development#wifi issue#phone wifi problem#fix phone wifi
0 notes
Text
How to Clear Cache on Windows 10/11


6 Comprehensive Methods to Clear Cache on Windows 10/11!
Windows 10 is a powerhouse, designed to offer a seamless user experience. Yet, over time, accumulated cache can occasionally bog down its performance. Fear not, for this article will be your comprehensive guide on how to clear cache on Windows 10/11, allowing your PC to breathe freely again. 1. Clear Browser Cache: Your Gateway to the Internet https://www.youtube.com/watch?v=NYevMttVAFM Clear Cache on Windows 10/11: Video From Youtube Web browsers such as Chrome, Firefox, and Edge constantly store data to enhance your browsing experience. To ensure they don't become the reason for a slowdown: - Launch your preferred browser. - Use the shortcut Ctrl + Shift + Delete for instant access to data clearing options. - Opt to clear cached images, files, and any other relevant data. - Confirm by clicking Clear. 2. Microsoft Store: Clearing for a Smooth Shopping Experience Sometimes, glitches with the Microsoft Store trace back to cache problems. To sort this: - Input "wsreset" in the Windows search bar and select the application. - A blink-and-you-miss-it command prompt window will appear, followed by the Microsoft Store launch. Voila! Cache cleared. 3. Temporary Files and System Cache: Unseen but Crucial These files can accumulate swiftly and clog system performance. - Search for "Disk Cleanup" in Windows. - Opt for the drive you want to refresh (commonly the C: drive). - Tick boxes like "Temporary files" and any other clutter you'd like to get rid of. - Finalize by clicking "OK" and then "Delete Files". 4. Windows Update Cache: Ensuring Smooth Updates Updates are essential, but sometimes they might face hiccups due to cache. - Initiate a Command Prompt with administrator rights. - Key in "net stop wuauserv" and proceed with Enter. - Journey to C:WindowsSoftwareDistribution and discard everything inside. - Revert to the Command Prompt and restart the update service with "net start wuauserv". 5. Thumbnail Cache: For Those Perfect Previews Thumbnails give you quick previews, but cache issues can disrupt this. - Look up "Disk Cleanup" on Windows. - Choose the typical C: drive. - Ensure "Thumbnails" is checked alongside any other options you wish to address. - Wrap up with "OK" and a "Delete Files" confirmation. 6. DNS Cache: Streamlining Your Connection Encountering odd website behaviors? DNS cache might be at play. - Start an administrator-level Command Prompt. - Simply type "ipconfig /flushdns" and give it an Enter. All done! Also Read: How to clear cache on Android
Features
- Immediate System Refresh: Deleting cache instantly declutters and refreshes your system. - Enhanced Browsing Experience: Clearing browser cache ensures you're seeing the latest version of websites. - Optimal Microsoft Store Performance: Ensure a glitch-free shopping experience with cache maintenance. - Smooth Windows Updates: Keep updates running smoothly by managing the Windows Update cache. - Quick Thumbnail Loading: Prevent broken or slow-to-load thumbnail previews. - Uninterrupted DNS Performance: Ensure a stable connection by addressing DNS cache. Also Read: How to Clear Phone Cache on iPhone
Benefits
- Speed Boost: With cleared cache, most users notice an immediate improvement in system responsiveness. - Storage Recovery: Cache files can take up a significant amount of storage. Clearing them can free up precious space on your drive. - Problem Prevention: Regular cache management can preemptively solve many problems before they arise. - Enhanced Security: Clearing cache, especially in browsers, can help ensure your privacy and protect sensitive data. External Sources: Windows 10 Support, Wikipedia on Computer Cache Knowing how to clear cache on Windows 10 effectively can feel like wielding a magic wand. With the right steps, you can instantly boost performance, ensuring your Windows 10 experience is as smooth and efficient as it was meant to be. Happy computing!
FAQs
Why is clearing cache on Windows 10 important? Clearing cache helps in enhancing the speed and performance of your system. Over time, accumulated cache can slow down your computer and hinder its functionality. How often should I clear my browser cache? While there's no strict rule, it's generally recommended to clear browser cache every 4-6 weeks. This ensures you're viewing the most updated versions of webpages and prevents websites from loading slowly. Does the "wsreset" command clear cache for all Windows apps? The "wsreset" command is specifically designed to reset the Microsoft Store. It clears the cache of the Microsoft Store app, which can solve certain functionality issues. Are there any risks associated with clearing Windows Update Cache? While clearing the Windows Update Cache can solve update-related issues, there is a slight risk. Deleting the wrong files can cause further update complications. Always ensure you're following the steps correctly and only deleting contents inside the specified folder. What does the "ipconfig /flushdns" command do? This command is used to clear the DNS (Domain Name System) cache. DNS cache stores the IP addresses of web servers that contain recently viewed websites. By clearing it, you're removing all the old and possibly incorrect entries, which can resolve some connectivity issues. After clearing cache, will my computer instantly speed up? In many cases, clearing cache can lead to noticeable improvements in speed. However, the first time you revisit certain applications or websites, they might load slightly slower as they rebuild their cache. Do I need third-party software to clear cache? While the methods mentioned in the article utilize built-in Windows features, there are third-party software options that can automate and provide deeper cleaning. However, always download such software from reputable sources to avoid malware. Why do thumbnails need cache? Thumbnails use cache to quickly display previews of content, such as pictures or videos, without needing to fully load the file. Clearing the thumbnail cache can help when these previews aren't displaying correctly. Is clearing cache the same as deleting my saved files and data? No, clearing cache will not delete personal files or essential data. Cache consists of temporary files meant to speed up tasks. When cleared, some tasks might take slightly longer the first time as the cache rebuilds. Can I selectively choose what cache to clear? Yes, tools like "Disk Cleanup" provide options on which types of cache and temporary files you wish to clear, offering users flexibility in their cleaning process. Read the full article
1 note
·
View note
Text
How to Manage Storage on My iPhone 14 Effectively: A Comprehensive Guide
Introduction
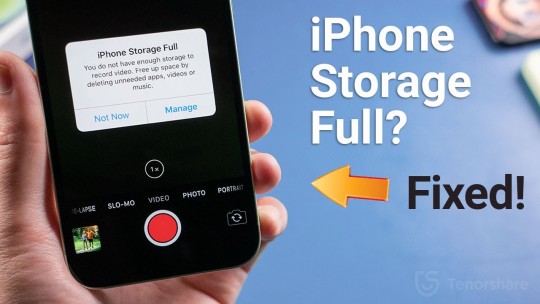
In this digital age, where we heavily rely on our smartphones for various tasks, managing storage on our iPhones effectively has become a crucial concern. With limited storage capacity, it's essential to optimize and organize the content on our devices to ensure smooth functioning and prevent storage-related issues. In this comprehensive guide, we will explore practical tips, tricks, and strategies to help you effectively manage storage on your iPhone. Whether you are struggling with storage limitations or seeking proactive measures to maintain an organized device, this guide has got you covered. So, let's dive in!

Introduction How to Manage Storage on My iPhone 14 EffectivelyStep 1: Assess Your Storage Usage Step 2: Offload Unused Apps Step 3: Delete Unnecessary Files and Media Step 4: Optimize iCloud Storage Step 5: Utilize Storage-Optimized Apps Step 6: Clear Safari Cache and Website Data Step 7: Manage App Data and Documents Step 8: Use iCloud Photo Library Step 9: Streamline Messages and Attachments Step 10: Reset Settings and Start Fresh Frequently Asked Questions (FAQs)FAQ 1: How can I check my iPhone's storage capacity? FAQ 2: Can I increase the storage capacity of my iPhone? FAQ 3: Will offloading apps delete their data? FAQ 4: How does iCloud Photo Library work? FAQ 5: Is it safe to reset my iPhone's settings? FAQ 6: Can I recover deleted photos from my iPhone? Conclusion
How to Manage Storage on My iPhone 14 Effectively
The process of managing storage on your iPhone can be simplified into several key steps. By following these steps diligently, you can reclaim storage space, enhance device performance, and enjoy a seamless user experience. Step 1: Assess Your Storage Usage To begin managing storage on your iPhone effectively, it's crucial to understand how you currently utilize the available space. Go to the Settings app on your iPhone, navigate to General > iPhone Storage, and you will see a detailed breakdown of your storage usage. This breakdown will highlight the apps and content consuming the most space on your device. Identifying the space-hogging culprits will enable you to make informed decisions about optimizing your storage. Step 2: Offload Unused Apps If you find that certain apps are consuming a significant amount of storage but are rarely used, consider offloading them. Offloading apps removes the app itself while preserving its data. This way, you can reclaim storage space without losing any important information. To offload an app, go to Settings > General > iPhone Storage, select the app you want to offload, and tap Offload App. Step 3: Delete Unnecessary Files and Media Review your files and media library to identify items that are no longer needed. This includes old photos, videos, documents, and downloads. You can manually delete individual files or use the Files app to browse through your documents and remove unnecessary ones in bulk. Similarly, you can go to the Photos app to delete unwanted photos and videos. Step 4: Optimize iCloud Storage Apple's iCloud offers a convenient way to store your data in the cloud, reducing the burden on your iPhone's local storage. To optimize iCloud storage, go to Settings > > iCloud, and enable iCloud Photos and iCloud Drive. This will automatically back up your photos, videos, and files to the cloud, freeing up valuable space on your device. Step 5: Utilize Storage-Optimized Apps Many apps offer built-in features to optimize storage usage. For example, music streaming apps like Spotify and Apple Music allow you to download songs for offline listening while keeping the storage footprint minimal. Similarly, messaging apps like WhatsApp and Telegram provide options to automatically delete media files after a certain period. Utilize these features to ensure efficient storage utilization. Step 6: Clear Safari Cache and Website Data Over time, Safari accumulates cache and website data, occupying valuable storage space on your iPhone. To clear this data, go to Settings > Safari, and tap Clear History and Website Data. This will remove all browsing history, cookies, and cached data, freeing up storage while maintaining your privacy. Step 7: Manage App Data and Documents Certain apps store data and documents that may no longer be necessary. You can review and delete app-specific data to reclaim storage space. Go to Settings > General > iPhone Storage, select the app, and you will find options to manage the app's data. Delete any unnecessary data associated with the app to optimize storage. Step 8: Use iCloud Photo Library
Enabling iCloud Photo Library allows you to store your entire photo library in the cloud, making it accessible across all your Apple devices. This feature not only saves local storage but also serves as a reliable backup for your precious memories. To enable iCloud Photo Library, go to Settings > > iCloud > Photos and toggle on iCloud Photos. Step 9: Streamline Messages and Attachments Text messages and attachments can quickly accumulate and consume a significant portion of your iPhone's storage. Regularly delete unnecessary messages, photos, videos, and other media files from your conversations. Additionally, you can set your device to automatically delete messages after a specified period. Go to Settings > Messages > Keep Messages, and choose the desired duration. Step 10: Reset Settings and Start Fresh If you have tried all the above steps and are still struggling with storage limitations, you can consider resetting your iPhone's settings. This will remove all personalized settings and configurations without affecting your data. Go to Settings > General > Reset > Reset All Settings to initiate the process. Remember to back up your data before proceeding with this step. FEATURED
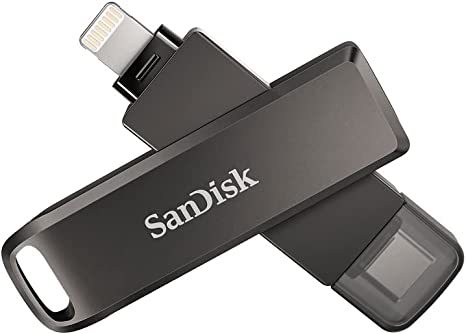
SanDisk 128GB iXpand Flash Drive Luxe for iPhone and USB Type-C Devices
5For iPhone, iPad Pro and iPod compatibility, see official SanDisk website for more details. iXpand Drive app required .Available for download from the App Store. iOS 10.0.2 or higher required. Set up automatic backup within app settings.Password protection is supported by iOS 10.0.2 and higher, Mac OS X v10.9 and higher, Windows 7, Windows 8 and Windows 10.- USB-C 3.1 and Lightning cable connection + Sturdy metal body - - Secure Vault Access app for Apple and Windows built-in (password protection) - Don’t see Secure Vault Access app or vault compatibility for Android Buy Now
Frequently Asked Questions (FAQs)
FAQ 1: How can I check my iPhone's storage capacity? To check your iPhone's storage capacity, go to Settings > General > iPhone Storage. Here, you will find a detailed breakdown of your storage usage, highlighting the space occupied by various apps and content. FAQ 2: Can I increase the storage capacity of my iPhone? No, the storage capacity of iPhones is fixed and cannot be upgraded. However, you can utilize cloud storage services like iCloud to store your data and free up local storage. FAQ 3: Will offloading apps delete their data? No, offloading apps only removes the app itself while preserving its data. When you reinstall the app in the future, your data will be restored. FAQ 4: How does iCloud Photo Library work? iCloud Photo Library syncs your entire photo library across all your Apple devices. When you take a photo or video on one device, it automatically appears on all other devices connected to the same iCloud account. FAQ 5: Is it safe to reset my iPhone's settings? Resetting your iPhone's settings will remove personalized configurations and settings without affecting your data. However, it's always recommended to back up your data before initiating a reset. FAQ 6: Can I recover deleted photos from my iPhone? If you have recently deleted photos, you can check the Recently Deleted album in the Photos app to restore them. Photos in this album are automatically deleted after 30 days.
Conclusion
Managing storage on your iPhone effectively is crucial for maintaining a smooth user experience and preventing storage-related issues. By following the steps outlined in this comprehensive guide, you can reclaim valuable storage space, optimize storage utilization, and enjoy a clutter-free device. Remember to regularly assess your storage usage, offload unused apps, delete unnecessary files and media, and utilize cloud storage services like iCloud. With these strategies in place, you can make the most out of your iPhone's storage capacity and ensure an optimal mobile experience. Read the full article
#iCloudstorage#iPhonestorage#iPhonestoragetips#managingiPhonestorage#offloadingapps#storageoptimization
1 note
·
View note
Text
How to download and Setup IPTV Smarters Pro for PC, Windows 11
IPTV (Internet Protocol Television) is a service that provides live and download streaming of television programs and other video content delivered by service providers over specific IP networks. In addition to streaming video content over private networks, IPTV can also be used through a subscriber-based model. However, subscriber-based models are preferred over private networks because of their reduced complexity, lower network latency, and no scalability issues. Today, a wide range of IPTV providers are known, including major companies such as Netflix, Google, Apple, and Microsoft, as well as Sony, which offers video streaming services via both smart TVs and internet-enabled devices. Other notable IPTV providers of his include Roku, Hulu, and YouTube, including Amazing TV, FalconTV, SelectTV, and more.
What is IPTV Smarters?
IPTV Smarters is an application that acts as a video streaming player, allowing IPTV users to stream selected content from multiple IPTV subscriptions. For example, Live TV, VOD, Series, TV Catchup on Android, iOS devices, smart TVs, MAC OS/Windows PCs/Laptops. More or less similar to Smart IPTV. IPTV Smarters Pro is free unlike Smart IPTV which requires a one-time activation fee. About the app
Name – IPTV Smarters Pro
Pricing – Free and paid versions with premium features.
Review – 4.8 out of 5.
Devices supported by IPTV Smarters Pro –
Android – Android phones, Android TVs, Android TV boxes, Android FireTV sticks, and other Android sticks or devices.
Smart TVs – LG & Samsung (you can download the app in the store).
iOS - iPhone, iPad, TVOS (Apple TV). Windows/MAC – All versions of macOS including Windows 8/10 and latest versions.
IPTV Smarters Pro is available on both Google Play Store and Apple Store for Android and IOS users.
Features of IPTV Smarters PRO
Unlimited live streaming of movies, series and radio streaming with UI themes and master search options.
It also has a TV program guide with some external sources.
It supports TV catch-up streaming, continue watching, recently added movies and series, loading M3u files and URLs, and playing local audio/video files. Supports both single stream, multi-screen and multi-user
It has parental control features that allow parents to easily select content for their children.
It also has great features like language switching, autoplay next episode, auto clear cache, upload playlist or file/url.
How to download IPTV Smarters Pro for PC using emulator?
Step 1 - Download and install a suitable Android emulator on your Windows or Mac.
Step 2 – Once the app is installed. Select the appropriate language, enter your Google account information and complete the first step.
Step 3 – Go to Home screen. Open Google Play Store and type IPTV Smarters pro in the search bar.
Step 4 - Open the IPTV Smarters Pro app and click the Install button.
Step 5 – Once installed, IPTV Smarters pro is ready to use on your device.
How to download IPTV Smarters Pro for PC from Windows Store?
IPTV Smarters PRO is also available in the Windows Store. Follow the steps to download IPTV Smarters for PC from Windows Store.
Step 1 - Open Windows Store on your PC/Laptop.
Step 2 – Find the IPTV Smarters Pro application.
Step 3 – Select and install the IPTV Smarters application on your device.
Step 4 - Unlimited entertainment is just a click away.
Additional requirements for using IPTV Smarters pro for PC
IPTV Smarters Pro does not host any channels or have its own playlists. An application that allows you to stream IPTV media. To use IPTV Smarters for live streaming, you need credentials for another IPTV service such as Netflix, Hotstar. Or we can say that using IPTV Smarters pro on FireStick and other devices requires a subscription from your IPTV service provider.
Note
Only works with IPTV services that support M3U playlists or have the Xtream Codes API.
Why use IPTV Smarters Pro?
One of the reasons to use IPTV Smarters Pro is that you can subscribe to multiple IPTV subscriptions. This means you can access all IPTV services in one place.
Steps to use IPTV Smarters Pro on your device
Step 1 - Open the IPTV Smarters Pro app.
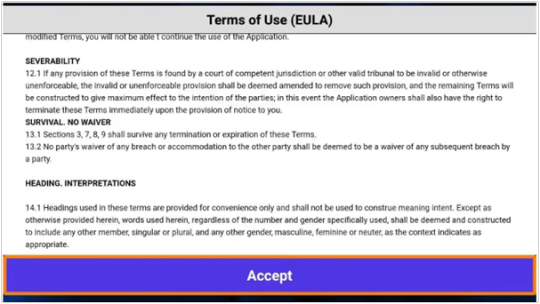
Step 2 – A Terms of Use window will appear on your screen. Scroll down and click I Agree.
Step 3 – Click Add User in the top right corner or click Add New User in the middle of the screen.

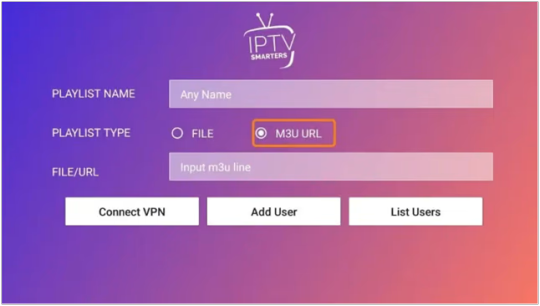
Step 4 – A window will appear with two login options.
load a playlist or file/url
Sign up using the Xtream Codes API

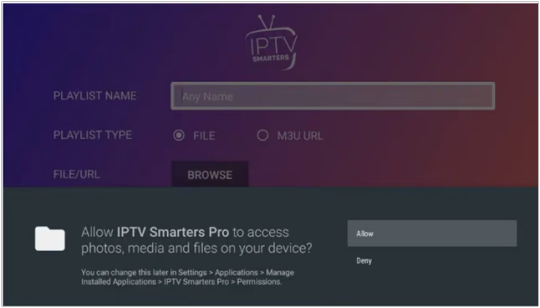
Step 5 - Sign in to upload a playlist or file/URL
When you purchase a subscription plan, you will receive an email from your IPTV service provider with login details, M3U playlists and EPG links. follow the steps;
Load a playlist or file/URL option > Allow > Enter M3U playlist link > tick the M3U URL box > enter any name in the Playlist name section > File Enter the M3U URL in the /URL section > Click Add User.
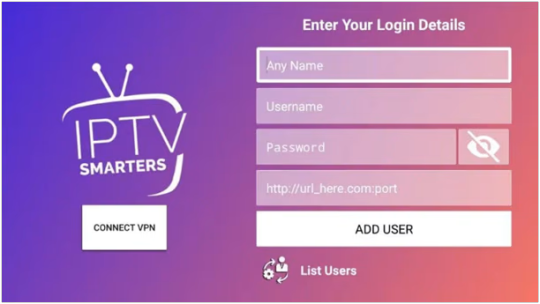
Step 6 – If you want to sign up using the second option, the Xtream Codes API, follow these steps:
The Xtream Codes API will also be sent via email from your IPTV provider with the M3U playlist URL and login credentials. After clicking on the Xtream Codes API option, the following window will appear. Enter the details and click the Add User button to continue.
Step 7 – Now you can conveniently use IPTV Smarters Pro on your PC or Android device.
Frequently Asked Questions
Is IPTV Smarters pro completely free?
The answer isYes. All basic services are available free of charge. However, there is also a premium version with some dynamic features. It is also free.
What are the steps to download IPTV Smarters Pro for Windows 11? BlueStacks > Google Play > Find IPTV Smarters Pro > Install.
How to Download IPTV Smarters on Smart TV
The app can be easily downloaded from LG and Samsung stores.
Which of the two login options is better?
I personally recommend using the second option, the Xtream Codes API. Because it's shorter and easier to type, unlike M3U playlist URLs, which are long and hard to type into the app. If you did not receive an M3U playlist URL when you subscribed, please contact your IPTV provider.
3 notes
·
View notes
Text
Top 10 mobile phone tips for users in Central and South America:
Top 10 mobile phone tips for users in Central and South America:
1.How to clear the Bluetooth cache on your phone or tablet to fix issues with your connection
2.OnePlus Nord N200 will get only one major Android update
3.Here’s how to make money playing games on your phone
4.Mobile app lets users borrow Php500 Beep credit with ‘pamasahe loan’
5.How to Localize Siri Shortcuts
6.iPhone 11 Users Report Increase In Battery Health after iOS 14.5 Battery Recalibration
7.4 Reasons Why Small Businesses Need Mobile Apps
8.Infinix Note 10 Pro Price, Full Specifications, and Review
9.Apple Faces Antitrust Investigation Over Market Dominance in Germany
10.How to install VLC Player on Amazon Fire TV Stick
1 note
·
View note
Text
How To Clear Up Ram

When you’ve used all the available RAM on your PC or laptop you might notice the system taking way to long to complete tasks, for instance, opening the This PC on Windows 10 or open software from the start menu. This is due to all the physical and available RAM on your system is completed used. Now to make your work smoother you have to clean the computer of yours.
How To Clear Up Ram On Iphone
Free Ram Cleaner For Windows 10
Here, we are typing 'Clear Unused RAM' and hit on the 'Next' button. Once the shortcut is created, switch to the desktop and double-click on the shortcut to clear memory cache on Windows. Method 2: Clear General Cache Disk Cleanup is an integrated feature of Microsoft Windows that. Restarting the PC is a common but effective fix for many computer issues, so is for the issue-insufficient RAM space. You can free up RAM on Windows 10 by rebooting the PC, which can help reset all the running programs and completely clear RAM.
Now you’re thinking, how do I free up ram on windows 10? there are some ways or methods that can be used to free up ram on the computer to boost the speed of the system processing without getting more ram. In this article, we are going to share some of the easy ways to free up ram on Windows 10 PC or laptop without having a hassle.
15Final Words
What is RAM? And Its Use on Computer

Well, RAM (Random Access Memory) is stored in the chipset on your computer motherboard same goes for the laptop. On this chipset, the computer store the short terms data in technical terms the RAM is the hub of the storage for all the programs and activities running on the computer system.
The computer used this stored information to complete the tasks while getting the data on the same time. So technically, when you used all the ram of your computer this may cause slow processing and you might seem all the programs and applications start processing slowing.
Overall the speed of your computer system performance will be decreased. To speed up your computer performance and processing can be easily increased again by cleaning some of the RAM storage on your system. Use below given methods to free up the RAM without hassle.
How To Free up ram on Windows 10 (15 Ways)
If you’re struggling with low Windows 10 system performance or 100% memory usage, High CPU. Then use these methods to free up memory on your computer system to speed up the performance and reduced memory usage.
Restart The Computer System
The Ram is volatile memory, you’ll lose its contents when your computer turned off. Restarting your computer system will clear memory saved on RAM and reset all the running programs and applications. However, this method won’t clear the complete memory but it will boost up the processing speed of the system. By cleaning up apps running on the background on Windows 10.
Update The Windows 10 & Softwares
It is most important to run an updated version of applications and software including Windows to get better system performance.
You must update all the software on your computer system along with the Windows 10 updates. For this Press Windows + I to open Windows settings. Go to the Updates & Security section and click on Windows update > check for updates.
How To Clear Up Ram On Iphone
Lookup RAM Usage
Before getting started the clean of RAM in Windows, you must see what program or application causing the RAM usage for this to follow these below-given steps.
Press Ctrl+Shift+ ESC buttons together to open Task Manager.
Now, Click on More Details to expand the full utility.
Under the Processes tab, click on the Memory heard to sort the app which using more memory
For more deep information regarding the system memory usage, you can go to the Performance tab. Under the CPU section click on Memory to complete an overview of the RAM usage on your computer system. Click on the Open Resource Monitor at the bottom of the Task Manager to get more information.
Use Low Memory Management Web Browsers
If you’re using the default web browser such as Microsoft Edge or Internet Explorer on Windows 10. Then you must try to change the web browser such as Google Chrome or Firefox. Both web browser has low memory management feature that consumes less memory of the RAM. Technically these two browsers are best for memory management on Windows 10 for fast web suffering and downloading.
Remove Bloatware Apps
You must don’t know some of the bloatware apps that you’ve installed on your Windows 10 PC that you’re currently not using them. Such as Skype, WhatsApp, Facebook, Messenger, and many more. These bloatware apps use more RAM of the computer.
If you don’t really need these apps on your computer. Then follow below-given steps to remove apps from Windows 10 PC to free up memory of the computer.
Go to the Start Menu and type in the search bar “Apps and features” and open it.
Now, Scroll to the bloatware app for example “WhatsApp”. Then click on it.
Select the “Uninstall” button to remove it from the PC.
Follow the on-screen uninstallation process to successfully remove the application.
After that restart, the PC to see the performance improvement or Else move to the next method.
Disable Startup Programs & Apps
If you’re using your Windows 10 computer for more than a year. Then you’ve downloaded and installed fair more software and some of this software and now some of that software was no longer in use. By using the third method Lookup Ram usage, Now you know which program using more memory and some of these apps are on startup.
This means the startup apps will automatically start running when you start your computer system. So to avoid this you can disable the startup apps on Windows 10 to boost up the memory of RAM.
Follow these below-given steps to disable startup programs.
1. Press Ctrl+Shift+ESC buttons together to open Task Manager.
2. Now, Go to the Startup tab.
3. Right-Click on the app that you no longer use on your PC.
4. From the pop-menu, select the “Disable” button.
Clear Web Browser Cookies & Cache Files
If you’re using the web browser on a regular basis to open different types of websites daily. Well, you must that every website has its cookies and cache that will be saved into the computer memory. When visited that website, Basically the cookies and cache help the web browser to load the web page faster for the next time when you open that website.
So, if you’ve haven’t cleared the cache on the web browser that you’re using on your computer for far longer. Then you’ve saved cookies and caches in GB that consuming the memory of the RAM. You can easily free up the RAM by clearing the cookies and cache of the web browser.
Note: After removing the cookies and cache in a web browser all the auto-login credentials will be deleted. You need to again login into the website.
To clear Cache and Cookies from a web browser (Google Chrome)
1. Open the Web Browser using the Start Menu or Desktop Shortcut.
2. Now Click on the (…) icon given at the right top corner to open the menu list.
3. Select, then Settings from the popup menu.
4. Navigate to the Privacy and Security section.
5. Now, Clear the Browsing Data, Cookies, Cache.
For the different web browsers such as Microsoft Edge, Firefox, etc. There are different steps to clear the browsing history along with cookies and cache files.
Disable Background Apps
In Windows 10 lots of apps were running on the background of the system that cannot be seen in the display screen. However, these apps are consuming memory of the RAM and some of these apps are malware that affects computer running performance.
To increase the performance of the computer along with RAM memory, you’ve to stop the background running apps on the Windows 10.
Free Ram Cleaner For Windows 10
1. Press Windows + I keys from the keyboard to open Windows Settings.
2. Go to the Privacy section.
3. Scroll down the left side panel. Then select “Background Apps” from the panel.
4. Now, disable the app that no longer in use.
Apps are often to run on the background of the computer system. This enables the apps to send notifications and update the software automatically which consumes lots of RAM memory without taking your permission. So you can easily turn off background apps on Windows 10 that are no longer useful.
Turn off Visual Effects
Windows 10 comes with pre-install visual effects such as tooltips, menus, and many more. This visual effect consumes lots of RAM space on the device, however, these visual effects won’t cause many issues. But if you’re device has lesser RAM then, in this case, you can disable visual effects to speed your computer performance by reducing the RAM storage.
To disable visual effects on Windows 10 follows –
1. Press Windows + E keys to open the File Explorer window.
2. Now, Right-Click on the This PC and choose Properties.
3. Go to the Advanced System Settings.
4. After, this Click on the Settings option given at the Performance section.
5. Click on “Adjust for the best performance”.
Now all the visual effects will be disabled with these settings. In case if you want to customize the visual effect settings and click on custom and select any visual effect that you want to use or like.
Modify Virtual Memory on Windows 10
In Windows, the page file that used hard disk storage and works as virtual memory and you can make adjustments in virtual memory to speed your computer and free up RAM on Windows 10.
Follow the steps to change virtual memory on Windows.
1. Open Control Panel using the Start Menu.
2. Change the Category view to Small icon (if needed)
3. Click on the “Advanced System Settings” to open it.
4. After this, on the Advanced tab, Select the Settings given under the Performance panel.
5. Switch to the Advanced tab again and click on the Change button.
Remove Web Browser Extensions
We all used Google Chrome, Firefox, or Edge browser on Windows 10. It doesn’t matter which browser you’re using on your system. However, to get additional features such as download any video from the web page we used web extension.
Technically, these extensions carry malware with them into your PC that used lots of the RAM. For instance, you can see using the Task Manager in the processes tab. Sometimes the Google Chrome using lots of RAM this is because of the extensions that you’ve installed on the Chrome browser.
To free up the ram on Windows 10 remove the unwanted web extensions from the web browser that you’re used on a daily basis such as Google Chome.
Clear Page File Before Turning off PC
When you restart your PC the page files don’t get cleared because they are stored in the memory of the RAM technically the short term files store in hard drive. So after the shutdown of the PC, the page files don’t remove the file still remain the same and consume the memory of the RAM.
Technically, clearing the page files from the PC hard drive will free up the RAM space on your computer system. Fortunately, you can make page files deleted automatically when the system shutdown. To do that follow below-given steps.
Type “Registry Editor” in the start menu search bar.
On the pop-up window select “Yes” to allow Registry Editor.
On the left, scroll to, and select “HKEY_LOCAL_MACHINE ” > ��SYSTEM” > “CurrentControlSet. ”
Find and choose “Control ” > “Session Manager.”
Now, choose “Memory Management.”
Select “ClearPageFileAtShutdown.”
Enter the number “1” under the value data and hit OK.
Tip: Copy and paste this link to the registry editor to avoid steps
Final Words
All these methods helped you to clear the RAM of your computer system to boost system performance. These steps help me out a lot of increase my laptop gaming performance on Windows 10. Because due to this I ‘ve free up lots of RAM storage on the device.
Unlike me, you can also try all these methods to free up the RAM on Windows 10 PC or laptop to get smoother computer experience.
Related Articles:
1 note
·
View note
Text
260 - Cattle Rustler with an AirTag With Ben Roethig
The latest In Touch With iOS with Dave he is joined by Ben Roethig. iOS 16.5.1 security update was released a must install. The case of the cattle rustler and AirTag. The very first visionOS SDK is released. Chrome for iOS AI address detection, Apple's new subcategories in its podcast app, and the upcoming CarPlay updates in iOS 17. Tune in to catch up on all things Apple.
The show notes are at InTouchwithiOS.com
Direct Link to Audio
Links to our Show
Click this link Buy me a Coffee to support the show we would really appreciate it. intouchwithios.com/coffee
Another way to support the show is to become a Patreon member patreon.com/intouchwithios
Website: In Touch With iOS
YouTube Channel
In Touch with iOS Magazine on Flipboard
Facebook Page
Twitter
Instagram
News
Chrome Browser for iOS Getting Improved Translation, Google Lens and Maps Features - MacRumors
Apple Podcasts App Updated With Enhanced Search Functionality - MacRumors
Apple expands Self Service Repair with iPhone 14, M2 Macs, system config changes, more
iPhone App Store rolling out new ad format, visible on Today tab without scrolling - 9to5Mac
Apple Music’s hidden social network is basic but great for discovery
Fiberglass cattle rustler foiled by a strategically placed AirTag
AirPlay coming to hotel TVs soon thanks to LG and Apple partnership | AppleInsider
Topics
iOS 16.5.1 was released must update with security fixes. iOS 16.5.1 and macOS 13.4.1 Address Actively Exploited Vulnerabilities, Make Sure to Update
Apple Releases watchOS 9.5.2 With Security Fixes - MacRumors
Apple Releases iOS 16.5.1 With Fix for Lightning to USB Camera Adapter Bug
Beta this week iOS 16.6 Beta 3 was released. Apple Releases Third Public Betas of iOS 16.6 and iPadOS 16.6
visionOS Beta released for the first time. Apple Releases First Ever visionOS Beta
Apple Vision Pro Developer Tools Now Available With New visionOS SDK
Apple releases visionOS SDK to developers and details testing process
iOS 17 Beta 2 was released this week.
Apple Seeds Second Betas of iOS 17 and iPadOS 17 to Developers
Everything New in iOS 17 Beta 2
Apple Seeds Second Beta of tvOS 17 to Developers
Apple Seeds Second Beta of watchOS 10 to Developers
New finds in iOS 17
iOS 17 and macOS Sonoma Add Passkey Support to Your Apple ID
Apple adds passkeys to Apple ID, iCloud logins
iOS 17 lets users ask Siri to play media on the HomePod using iPhone apps
What is new with CarPlay in iOS 17? Everything New With CarPlay in iOS 17
iOS 17 superguide: Everything you need to know about the next iPhone update
Tips
How to turn off iCloud's default settings in macOS and iOS
Apple Arcade Guide: Everything that's available [New: Bold Moves+]
OneNote on iOS is about to get a big boost for organizing notes
How to clear cache on your iPhone
Macstock 7 is here! Tickets are Sold Out but Virtual Tickets are available.Dave is speaking again at the event along with Jeff Gamet, Brittany Smith, Chuck Joiner, and many others. Please join in all the fun July 22-23, 2023! Speakers Link.
Our Host
Dave Ginsburg is an IT professional supporting Mac, iOS and Windows users and shares his wealth of knowledge of iPhone, iPad, Apple Watch, Apple TV and related technologies. Visit the YouTube channel https://youtube.com/intouchwithios follow him on Mastadon @daveg65,
Twitter @daveg65.and the show @intouchwithios
Our Regular Contributors
Jeff Gamet is a podcaster, technology blogger, artist, and author. Previously, he was The Mac Observer’s managing editor, and Smile’s TextExpander Evangelist. You can find him on Mastadon @jgamet as well as Twitter and Instagram as @jgamet His YouTube channel https://youtube.com/jgamet
Ben Roethig Former Associate Editor of GeekBeat.TV and host of the Tech Hangout and Deconstruct with Patrice Mac user since the mid 90s. Tech support specialist. Twitter @benroethig Website: https://roethigtech.blogspot.com
Here is our latest Episode!
0 notes
Text
How I Fix Peacock Not Showing Up On LG Smart TV

LG Smart TVs are popular for their ability to access various streaming services such as Peacock by NBCUniversal. However, sometimes Peacock may not show up on your LG Smart TV, and this can be frustrating for users. I have uncovered all the reasons which cause Peacock to not work on your LG Smart TV which I will briefly explain. There are many solutions for this issue and some of them have worked for our LG TV and ultimately, We were able to show up Peacock on our TV.
Reasons: Why Peacock Not Showing Up On LG Smart TV?
Network Connectivity Peacock requires a stable internet connection to work properly. If your LG Smart TV is not properly connected to the internet, you may experience difficulties in accessing Peacock. Subscription You may not have an active subscription to Peacock which is why it has stopped working App Issues Sometimes, issues with the Peacock app itself can prevent it from working on your LG Smart TV. You may need to update the app or reinstall it to fix any problems. Geographical Restrictions Peacock is only available in certain regions. If you're trying to access Peacock from outside its supported region, you may not be able to access the service. Compatibility Peacock may not be compatible with your LG Smart TV. Make sure your TV meets the system requirements for Peacock. When You are able to resolve all these issues, you can watch Peacock on LG Smart TV.
Fix Peacock Not Showing Up On LG Smart TV in 7 Steps
Restart Your TV The first method is the easiest one to try. It is a simple reset method. First, unplug your TV from the wall outlet and wait 60 seconds now don't be impatient here wait the whole 60 seconds then plug it back in this is very This is different from turning your TV on and off with your remote control. This is what we call a hard reset of your TV so make sure you do this method carefully.
Reset Your Router Unplug the power to your router for 60 seconds and then plug it back in. Sometimes, connectivity issues can cause problems with streaming services, so resetting your router can help. Check Internet Speed Make sure that you have an active internet connection. Because slow internet speed might not allow Peacock to work. You can search Speed Test in your browser search bar and check your connection speed. The normal speed for this streaming is around 9-10 MBPs.

If your Internet speed appears to be unreasonably low, then you may need to contact your Internet Service Provider for help. Clear App Cache Go to your device settings, and then scroll all the way down to “General”; and tap on it. Then tap on “iPhone storage”. From here, search for the app, and tap on it. Once you’re on this screen, you need to tap on “offload app”. Tap again to confirm. It’ll take a bit for processing, and then a reinstall button will show up, Simply tap on it to reinstall the app.

Disable VPN Services VPNs sometimes make the server down which is why we have to face issues with certain apps and streaming services crashing on our Smart TVs. So, ensure that you disable them before using them. Update Your LG Smart TV The next step is to update your LG Smart TV. An outdated TV software can cause issues with streaming services. To update your LG Smart TV: https://www.youtube.com/watch?v=o7We3QjdvEI Go to the home screen on your LG Smart TV. Navigate to the Settings option. Click on the General option. Select the About This TV option. Check for software updates and install them if available. Check Server Status Sometimes, this issue can happen due to server issues. First, you need to open up this webpage on your web browser and check its server status. In case, you find a temporary outage, wait for some time and try again later. But, if you experience no outage here, and still encounter this issue; then you need to completely reinstall the app.

Re-Install Peacock App If you have tried all the above methods and you are unable to resolve the problem. You might need to uninstall the app and re-install it on your device. You may need to consider using a different streaming player, such as a Roku stick, Fire Stick, or Apple TV 4K. These devices are affordable and easy to use. You can plug them into your TV and use them as your main streaming player to access Peacock TV. Check Your Peacock Subscription If Peacock is not showing up on your LG Smart TV, it may be due to an issue with your subscription. Make sure your Peacock subscription is up-to-date and active. You can check your subscription by logging in to your Peacock account on a web browser or another device. Contact LG or Peacock Support If none of the above solutions work, you can contact LG or Peacock support for assistance. They will be able to troubleshoot the issue and provide a solution.
List of Peacock App Compatible LG Smart TVs
You must check that your TV is compatible with the Peacock streaming service. Here is the list of all compatible LG Smart TVs. LG OLED TVs (2020, 2019, 2018) LG NanoCell TVs (2020, 2019, 2018) LG UHD TVs (2020, 2019, 2018) LG Smart TVs (2020, 2019, 2018) On the above-mentioned models, you can watch Peacock streaming service. For installing other Third-party apps on LG TV, you can check their compatibility separately.
Frequently Asked Questions
Can I install Peacock on my LG Smart TV? Yes, you can install Peacock on your LG Smart TV. You can download and install the Peacock app from the LG Content Store, which is accessible from your TV's home screen. If you can't find the app, try searching for it using the TV's search function. Do I need to subscribe to Peacock to access its content on my LG Smart TV? Yes, you need to subscribe to Peacock to access its content on your LG Smart TV. Peacock offers a range of subscription plans, including a free plan that offers limited content with ads. To access all of Peacock's content, you'll need to sign up for a Premium or Premium Plus subscription. What should I do if Peacock is buffering or not playing correctly on my LG Smart TV? If Peacock is buffering or not playing correctly on your LG Smart TV, there are a few things you can try to fix the issue. First, check your internet connection to make sure it's strong enough to stream Peacock content. You can also try restarting your TV and router, as well as clearing your TV's cache. If the problem persists, try contacting Peacock support for further assistance. About Author Read the full article
0 notes
Text
How to Clear Phone Cache on iPhone


10 Essential Steps: How to Clear Phone Cache on iPhone for a Faster Device
Every iPhone user has encountered a moment when their device seems to be lagging or not operating at its peak performance. One probable reason behind this slowdown? A cache cluttered with unnecessary files. But fret not, because the solution might be simpler than you think. This article sheds light on how to clear phone cache iPhone enthusiasts would benefit from, providing you with a faster, more efficient device experience. What is the iPhone Cache What is Cache? The cache is a collection of temporary files stored on your device, primarily created when you use applications. It's essentially the data that apps store to work more efficiently and load quicker the next time you launch them. Why Does iPhone Store Cache? The iPhone, like other smartphones, uses cache to provide a seamless user experience. By storing frequently used data temporarily, apps can retrieve this information faster, cutting down on loading times and ensuring smoother operations. How to Clear Phone Cache iPhone Guide The Significance of Clearing Cache As the saying goes, "too much of a good thing can be bad." This holds true for cached data. Over time, the cache can accumulate outdated or redundant files that may bog down your device's performance. Clearing the cache refreshes your apps and can often solve glitches or lags. Manual Cache Cleaning Steps https://www.youtube.com/watch?v=fxMUSrZiKmM Clear Phone Cache on iPhone: Video From Youtube To manually clear the cache of specific apps on your iPhone: - Go to Settings. - Tap on General, then iPhone Storage. - Scroll to find the app you want to clear the cache for. - Tap on the app name and then Offload App. This will delete the app but retain its data. - Reinstall the app. The cache will be cleared, but your data remains intact. Using Third-Party Apps While Apple doesn’t endorse or promote any specific third-party apps for cache cleaning, many users have found certain apps beneficial. Some popular options include Cleaner Pro and Magic Phone Cleaner. Always ensure you're downloading trusted apps to avoid security breaches. The Advantages of Clearing Cache Boosting Device Speed One of the most noticeable benefits is the improved device speed. With fewer temporary files clogging the storage, your iPhone can operate much faster. Saving Storage Space Clearing cache can also free up significant storage space, especially if it hasn’t been done in a while. This means more room for photos, apps, and music! Enhancing App Performance Apps often work better and crash less frequently after a good cache clearing. They run smoother and load faster, providing an improved user experience. Common Misconceptions Clearing Cache vs Deleting Data It's crucial to differentiate between clearing cache and deleting data. While the former removes temporary files, the latter deletes all app data, which may include important files, preferences, and login details. Cache and Memory: Are they the Same? No, they aren't. While both deal with data storage, cache pertains to temporary data storage for apps, whereas memory (RAM) deals with the data currently being processed. When to Clear Cache Observing Device Lags If your iPhone isn't as snappy as it used to be, it might be time to clear that cache. After a Major OS Update Post a significant OS update, it's a good practice to clear cache as old cached data might not be compatible with the new system version. When Apps Behave Strangely If apps are crashing or not working correctly, clearing their cache might be the magic touch they need. Also Read: How to clear cache on Android FAQs Why does my iPhone slow down over time? An accumulation of cache, among other factors, can lead to a slower iPhone. Regularly clearing the cache can mitigate this slowdown. Is clearing cache harmful to my device? No, it's a safe and recommended practice. It won't delete crucial data or harm your iPhone. How often should I clear my iPhone's cache? There's no fixed frequency, but doing it once every few months or when you notice performance issues is a good rule of thumb. Does clearing cache improve battery life? Indirectly, yes. With apps running more efficiently post cache-clearing, they might consume less power and thus potentially improve battery life. What's the difference between cache and cookies? While both are types of stored data, cache aids in app performance, and cookies store data from websites to personalize the browsing experience. Are there other ways to speed up my iPhone besides clearing cache? Absolutely! Updating your iOS, managing background app refresh settings, and ensuring your device has some free storage space can all enhance performance. Also Read: How to take a screenshot on iphone
Futures
- Expertise Showcase: Establishment as an authority on iPhone functionalities and maintenance. - Increased Traffic: Enhanced website visibility due to SEO-driven articles. - User Engagement: A boost in reader interactions, comments, and shares. - Updated Content: A continuous stream of fresh insights, like the significance of cache clearing after OS updates. - Building Trust: Positioning as a reliable source by addressing misconceptions and FAQs. - Affiliate Opportunities: Potential collaborations with software or app developers. - Subscriber Growth: A growth in readership due to compelling, high-quality articles. - Enhanced Online Presence: A broadened online footprint by sharing on social media or forums. Also Read: How to Take a Screenshot on iPhone 16
Benefits
- Ad Revenue Boost: Potential increase in ad impressions and clicks due to higher traffic. - Improved User Experience: Becoming a go-to hub for iPhone users by offering problem-solving content. - Trust and Credibility: Gaining readers' trust by delivering accurate and reliable information. - Community Building: Creation of an engaged community around the topic, leading to repeat visits. - Affiliate Revenue: Earning through recommendations or reviews of third-party apps or tools. - Retention: High chances of readers returning for more in-depth, quality content. - Brand Recognition: Establishing the blog's brand in the niche of iPhone maintenance and tips. - Collaboration Opportunities: Drawing the attention of industry experts or companies for potential partnerships or guest posts. Also Read: How to transfer data from iPhone to Android? Clearing the cache on your iPhone is an efficient and safe way to improve your device's performance. Not only does it ensure a smoother user experience, but it also paves the way for faster app loading times and more storage space. By understanding how to clear phone cache iPhone users can take a proactive approach, ensuring their devices remain speedy and efficient. Read the full article
#CachevsData#ClearCache#howto#iOSupdate#iPhone#iPhoneapps#iPhonemaintenance#iPhoneperformance#iPhonestorage#PhoneCleanerapps#SpeedupiPhone#Techhow-to#Technology
0 notes
Text
Change windows folder color

CHANGE WINDOWS FOLDER COLOR HOW TO
CHANGE WINDOWS FOLDER COLOR INSTALL
CHANGE WINDOWS FOLDER COLOR ARCHIVE
Next, in Preview app, go to File > New from Clipboard > Markup tool icon. How to use Bing images within Office and Edge on Windows 10 PC. What to Know Use Preview App: First, copy folder.
CHANGE WINDOWS FOLDER COLOR ARCHIVE
On the left hand side you have a list of Folders: Inbox - change from black to blue Drafts Sent Items - change from black to red Deleted Items - change from black to green Archive Hope this is a little bit clearer. How to properly remove the Windows.old folder on Windows 10 I want to change the color of the folder names font from my Inbox from black to whichever color I choose. Right-click a folder in the left-hand navigation panel 1 (you can also right. How to create a System Restore Point in Windows 10 with a simple double-click Change a folders color Navigate to the space containing the relevant folder. How to make a full backup of a Windows 10 or Windows 8.1 PC Is your Windows 10 PC slowing you down, and the SFC utility is unable to fix the problem? Then use DISM to repair the Windows image to enable SFC to do its job. Outlook hangs on loading profile? Solutions Outlook 2013 max file limit: “The file you’re attaching is bigger than the server allows.” Tutorial: Outlook signature image with hyperlinkįix for Outlook: “Contacting the server for information” How to always pop-out an email window in Outlook 2013 Being able to change Windows folder color can help you separate all the items across the entire File Explorer it’s a game changer If same old yellow folders already bored you, Folder Colorizer is a lifesaver It’s simply the easiest, most intuitive way to change folder color on Windows 11 or 10. How Do I Enable Skype for Business/Lync Logging? Getting Started With Lync Mobile 2010 For Windows Phone Getting Started With Lync Mobile 2010 For iOS How Do I Clear Skype for Business/Lync Cache? While it does let you change the folder icon by right-clicking on the folder, selecting Properties and then switching to the Customize tab, you can’t change the default folder color to a custom color. Troubleshooting Skype for Business/Lync Secure Chat And Conferencing As you know, Windows 8, just like previous version of Windows, doesn’t allow users to change the default folder color. Getting Started With Lync 2010/2013 For Windows Getting Started With Skype for Business for Windows How to Downgrade to an Older Version of iOS on an iPhone or iPad How Can I Secure My Microsoft Office Files? MS Office : View my options and settings in the Trust Center Introducing Send Email in Access 2013 web appsġ6 Terminal commands every user should know How to back up notes in OneNote 2016 for Windows You can change the Icon, which has a similar effect. This folder is used by apps like Paint 3D and Mixed Reality Viewer. No, you cannot change the color of the folders in Windows 10.
CHANGE WINDOWS FOLDER COLOR HOW TO
How to set up an Internet email account in Outlook 2013 or 2016 How to Change or Restore 3D Objects Folder Icon in Windows 10 The 3D Objects folder was added to This PC in the Windows 10 Fall Creators Update.
CHANGE WINDOWS FOLDER COLOR INSTALL
How To Make UEFI Bootable USB Flash Drive to Install Windows 8 How to make a self extracting archive that runs your setup.exe with 7zip -sfx switch Choose the color for folder and make your computer more Comfortable and easy to use.
0 notes
Text
Chrome download for mac

#CHROME DOWNLOAD FOR MAC HOW TO#
#CHROME DOWNLOAD FOR MAC FULL#
#CHROME DOWNLOAD FOR MAC DOWNLOAD#
#CHROME DOWNLOAD FOR MAC MAC#
#CHROME DOWNLOAD FOR MAC WINDOWS#
Even if you've already tried to delete the program using conventional steps, CleanMyMac X can locate and remove all leftovers that remain on your system. The Uninstaller module of CleanMyMac X designed to remove entire applications, including all app-related files.
#CHROME DOWNLOAD FOR MAC MAC#
Anthony Karcz from Forbes called it a ‘toolbox your Mac needs’. How to uninstall Chrome with CleanMyMac XĪmong various uninstallers for macOS, I go for CleanMyMac X by MacPaw. It’ll help you remove the app and all associated data with one shot. To fully get rid of Chrome, I recommend using a dedicated uninstaller. Note that even if you thoroughly follow all steps highlighted above, some specific service files, as caches and launch agents, might remain on your computer. Empty the Bin to finish the uninstallation.Be careful not to delete any system-critical files. Select all the folders and trash them.Paste ~/Library/Application Support/Google/Chrome in the window that appears and click Go.Or head over to the Go menu in the Finder and choose Go to Folder. Use Command-Shift-G key shortcut to open the Go to Folder window.Locate the Google Chrome icon and drag it to the Bin.ĭelete Chrome profile information stored on your Macįinally, you need to eliminate all Chrome service files stored on your hard drive.Menu icon A vertical stack of three evenly spaced horizontal lines.
#CHROME DOWNLOAD FOR MAC DOWNLOAD#
Go to the Applications folder to get rid of the app. Its easy to download Google Chrome on your Mac, PC, or iPhone and sync your browser data across devices.
Or use the Command-Option-Esc keyboard shortcut to open the Force Quit Applications window.
If Google Chrome is in your Dock, right-click it, and choose Quit.
First, let’s ensure that the browser isn’t running. Now, it’s time to remove the main app from your computer.
Check the box next to the data you want to delete.
Select a time range from the drop-down menu (e.g., last hour, last 7 days, all time).
Or use the Shift-Command-Delete key shortcut to open the Clear browsing data window.
Choose More tools > Clear Browsing Data.Īlternatively, paste chrome://settings/clearBrowserData to the address bar and hit Enter.
Open Chrome and click at the top right.
So first, clear your browsing data from your Google Account and other devices. But it could still store on Google's servers if syncing is on. When you completely remove Chrome from your computer, you erase your browsing data as well.
#CHROME DOWNLOAD FOR MAC HOW TO#
Let's get started! How to uninstall Chrome from Mac manually You’ll also find out how to clear your browsing data and profile information from Google servers. So, how do I completely remove Chrome from my Mac? Today, I’ll give you a detailed guide on how to do that. Whatever the reason, you should know how to uninstall it properly. Maybe you want to switch to another browser or fix some Chrome-related issues.
#CHROME DOWNLOAD FOR MAC FULL#
With a full Google Account integration and a rich feature set, Chrome proved to be a gold standard for browsers.Įven so, you may need to uninstall it from your Mac. But if you want to do it by yourself, check out our step-by-step guide below.įeatures described in this article refer to the MacPaw site version of CleanMyMac X.Ĭhrome is one of the most widely used web browsers so far. 135 (64-bit) for Mac.So here's a tip for you: Download CleanMyMac X to uninstall Chrome quickly and safely. cer file will be created in the location you drag it to. Drag the large certificate icon to a Finder window.
A box pops up showing information about the certificate.
Click the Certificate Information link.
In the box that pops up, click the Connection tab.
(Edited 2/10/17: I have added a more up-to-date answer in a comment: How to Export Certificate from Chrome on a Mac?) I don't know of any workaround at the present.) (Edited 2/24/19: is correct, this no longer works. If you don't hold down Option when you drag, then you will instead get the certificate contents in human-readable form, which can also be handy. Note: If you did not follow the steps above in exactly the order stated, you may need to first single-click within the Chrome window so that TextEdit doesn't become hidden when you Option-click.
Hold down Option and drag from the large certificate icon to the body of the TextEdit document.
In the dropdown list, click Certificate.
In Chrome, click the icon to the left of the URL in the address bar.
#CHROME DOWNLOAD FOR MAC WINDOWS#
Arrange windows so that the TextEdit window and the Chrome window are both visible.
In TextEdit, click Format | Make Plain Text.
0 notes
Text
Download microsoft edge for mac os

DOWNLOAD MICROSOFT EDGE FOR MAC OS HOW TO
DOWNLOAD MICROSOFT EDGE FOR MAC OS DOWNLOAD FOR WINDOWS
DOWNLOAD MICROSOFT EDGE FOR MAC OS INSTALL
System Requirements: macOS Sierra (10.12) and later. Uninstall Microsoft Edge and reinstall it. Follow the instructions above to update your Edge browser.įix 5. Open Microsoft Edge, click the three-dot icon and click Settings, click “Choose what to clear” under Clear browsing data, check Browsing history, Cookies and saved website data, Cached data and files, and click Clear button to clear cookies and cache in Microsoft Edge.įix 4. Clear cache and cookies if Microsoft Edge doesn’t work or respond. Run a virus scan with antivirus software.įix 3. If your Microsoft Edge browser is not working or won’t open, you can try the solutions below to fix the issue.įix 2. How to Uninstall, Restore, Reinstall Windows 10 Built-in AppsĦ Tips to Fix Unable to Uninstall Program Windows 10 Issue Fix Microsoft Edge Won’t Open on Windows 10 – 5 Tips Microsoft doesn’t let you easily uninstall the built-in apps. If you go to Start -> Settings -> Apps -> Apps & features, and click Microsoft Edge, you can see the Uninstall button is greyed out. How to Uninstall Microsoft Edge on Windows 10 Click Start -> Settings -> Update & Security -> Windows Update -> Check for updates to update Windows 10.
DOWNLOAD MICROSOFT EDGE FOR MAC OS INSTALL
You can perform a Windows update to install the latest version of Edge browser. Tip: If you don’t find this option, it might because the version of your Microsoft Edge browser is too old.
Click the three-dot menu icon at the top-right corner, select Help and Feedback -> About Microsoft Edge to update your browser to the newest version.
How to Update Microsoft Edge Browser on Windows 10
Then scroll down to find Web browser Click the current browser and select Microsoft Edge to set it as the default browser on your Windows 10 computer.
If you like Microsoft Edge browser and want to make it the default engine, you can click Start, type default apps, click Default apps system settings.
DOWNLOAD MICROSOFT EDGE FOR MAC OS HOW TO
Read More How to Make Microsoft Edge Default Engine
After downloading, you can click the installation file to install Microsoft Edge on your Windows 10 PC.
Alternatively, you can also go to Microsoft Store to search for Microsoft Edge and download the browser.
DOWNLOAD MICROSOFT EDGE FOR MAC OS DOWNLOAD FOR WINDOWS
Go to and click Download for Windows button to download Edge browser.Hard drive space: Windows 10 32-bit – 16 GB, Windows 10 64-bit – 20 GB.How to Download Microsoft Edge for Windows 10 However, if your computer doesn’t have the Microsoft Edge browser yet or you unexpectedly remove it from your computer, you can check below for how to download Microsoft Edge on Windows 10, macOS, Android, or iPhone. It is the default web browser for Windows 10 and comes with Windows 10 OS. Microsoft Edge is one of the most popular browsers letting you fast browse online. For more computer solutions, data recovery and disk management tips, please visit MiniTool Software official website. Learn how to download Microsoft Edge browser on Windows 10, Mac, Android, or iPhone.
0 notes