#if it was before the update that added alt text to app
Note
hi!! i’m trying to make my star trek blog accessible and i’ve got a question if you don’t mind. i’ve been adding alt text (using tumblr’s alt text feature) to all my images and gifs as i post them, but i’m not sure if that works on tumblr bc i’ve noticed you’ve added a couple of descriptions to posts of mine with alt text already there. is alt text actually visible or should i be putting the gif / image descriptions in the caption instead? thank u in advance!!
Hello hello.
Okay, so, I had a moment on main a few weeks ago, where I was going to reblog an undescribed post and add a description to it because there wasn't one at all, but instead of reblogging I accidentally clicked on the OP, which showed the post actually had alt text added to it. Now, I don't know if it was always there or if OP had added it at a later date after my mutual had queued it, or perhaps, Tumblr had glitched out and the alt text just wasn't showing up at all except for on the original post.
That's why I copy and paste alt text.
It's always best to go with a plain text caption, sometimes alt just doesn't work, sometimes the clash of colours is inaccessible, sometimes the great big paragraph is too much for people. I have Irlen's Syndrome, I can't read a giant paragraph of alt text because the words begin to blur and move and I'll lose my spot constantly. Sometimes it's just inaccessible.
Feel free to ask as many questions as you want, it's no problem.
Although, does anyone know if the alt text disappears when the original poster deactivates?
#that's probably why my descriptions have so many paragraphs#even if it's two lines of dialogue#honestly i may have added my own description to your post because i didn't see the alt text#if it was before the update that added alt text to app#I'm an exclusive app user#the only time i use the web is when it's thursday and the out of touch notifications are slowing down the app#accessibility
5 notes
·
View notes
Text
Guide to the Bravern Flower Shop Verse
Posting this for archiving purposes and for future/new fans who won't experience any of this live (or maybe ever, if Twitter breaks) just encounter it as older, out of context fanart on Pixiv or social media.
So. If you’ve ever looked up Japanese Bravern fanart (or fanfic) on either Pixiv or Twitter you must have stumbled upon a certain flowershop AU. It’s official (made and named by the staff, got referred to as such in the 2nd talkshow apparently) and it’s called 花屋バース. Details with links under the cut!
The contributors
Kamokamen, original/main character designer (Twitter @ sangsilnoh)
Oobari Masami, director (Twitter @ G1_BARI)
Ura Ryuuta, chief animation director (Twitter @ matatabeat)
The origins
"happy new episode release" bonus arts by the main character designer


and their two Yotsuba&! joke tweets:
Isami works at a flower shop called Brave Flower
Smith is the single father of the "mysterious girl" Lulu who is in kindergarten
This spiraled into a whole AU that has Actual Lore because the staff kept adding to it.
My main sources were 2 different tweet compilations made by Japanese fans and the very broken Twitter search. I got into the fandom when Episode 9 aired (before that I was just watching the show weekly and nothing else) so backsourcing all of this was not easy, and unfortunately I can’t guarantee this post has every relevant tweet. For example I found nothing about Smith’s job. It might exist, it might not, who knows. But the staff was very clear that they just wanted everyone to have fun coming up with ideas when they were tweeting about Bravern-the-character.
Isami & Bravern
- Isami and Bravern drive a motorcycle with a sidecar (ART!) called Brave Thunder
- according to the director Bravern wears a helmet
- Bravern exists in that miniature form which was designed by the director, completely unexplained (first appearance of "easy-to-draw Bravern-kun" | official plushie version which he brought to the 3rd talkshow | non-flowershop AU maid uniform update! also designed by him | "bunny day" update)
(T/N: this is not actual canon, but in the Animedia (May issue) interview’s Q&A section the director said Isami has the impression of someone who has a much older brother who passed away when he was young. JP fandom said nope this is the happy AU so he’s alive)
Smith & Lulu
- Smith and Lulu drive a "granny bike" called Spar Kaiser
- Lulu's seat is a child bike seat dubbed "co-pilot seat"
(T/N: answering a fan’s question, the character designer who designed Smith’s weird shirts once tweeted he’s probably using a translator app to scan the text on them.)
Other characters
- as far as I know there’s no "official" flowershop AU version of Superbia
- some time ago the director made a miniature design for him as well, but people usually draw Superbia in a humanoid form in this AU which was designed by the character designer
(T/N: not flowershop AU related, but Superbia speaks in Hiroshima dialect.)
- Miyu has a moped (a modified old Honda Super Cub) and she rides around town with Hibiki to get McDonald’s
(T/N: also not flowershop AU related, but Hibiki considers Isami a younger brother, according to the 3rd talkshow reports.)
- Satake was Isami's homeroom teacher and he was the one who taught him how to properly ride a motorcycle
- it was due to Satake’s influence that Isami chose an American-style Japanese bike which he bought secondhand for cheap for the fun of repairing and customizing it
(T/N: the tweet linked above is from March, but at the 3rd staff talkshow we learned that Satake’s bike in canon is a Honda CBR250RR. At the 2nd talkshow the staff said he gives off the impression of being a good cook, and the director shared he must be single because of the bike & red jacket combo.)
ADD ALT TEXT if you share this on other sites as screenshots. I genuinely can't be assed to care about credit, but I care a lot about accessibility.
I’m collecting the interviews and talkshow fan reports, and I'm also reading Lulu’s spinoff novel so eventually I’ll post summaries of those. (Unfortunately I don’t have time to do more than summaries.) In the meantime you guys could MTL this collab café report/article if you're interested! (I checked googletranslate and it’s readable)
#Bang Brave Bang Bravern#Bravern translations#I had to google wtf ジャメリカン was because idk motorbikes#I'm trying to prioritize the 3 talkshow reports because if twitter breaks those will be all gone#I was geoblocked from the Matsuri stream but it being available for only a limited time with no physical release announced made me think#media archival is so important yet both the audience and creators are at the whims of corporate
66 notes
·
View notes
Text
Image Descriptions and Accessibility in General on Tumblr for New Users
What are Image Descriptions
Image Descriptions are text following a picture explaining what’s in that picture. They are primarily for blind/visually impaired people with screen readers and visually impaired people who can read text but have issues with pictures.
They also help people who have trouble:
focusing on/understanding a picture
reading text on images (ex low contrast, weird fonts, etc)
getting images to load
Without image descriptions posts are not accessible to many people, so if you can it's best to include a description or alt text every time you post an image.
Alt text vs image descriptions
Image descriptions are written in the body of the post itself, and have some kind of text before and after, to explain that what's coming up. They typically begin short and concise, but can expand to more detail.
Alt text is added to the image itself, and is what is read by screen-readers (which will otherwise just say "image"). There is no need to add any explanation before the description so you can just say "a description of the image". Alt text can only be added by the original poster, by clicking on the three dots in the bottom right corner of the image and clicking 'update image description.' It is typically short and concise.
On tumblr, alt text is currently available on web by clicking on the alt button (or via new xkit - accesskit - move alt text to captions below image). On mobile, alt text is available in some versions of the app through clicking on the alt text button. Image descriptions are visible on all posts, although if you put them under a read-more, that makes them less accessible. (Thanks to @911described for helping with this section)
How to Make Image Descriptions
Awhile ago I made this general guide. I learned from examples, so here are descriptions made by a bunch of different people. I've also made templates for a lot of common images you'll see on Tumblr.
Other Concerns
Gradient or all caps text make most screen readers read out the word one letter at a time. In addition, these plus text that is bold/italicized/underlined, in colors other than black, or in weird/fancy fonts are difficult for many people to read.
How Filtering Works
You can filter out both words/phrases and tags in the filtering section under the general section in the settings. When filtering out words from a post, it will look at both the text of the post/reblog chain and at the url of op and the rebloggers. When filtering out tags it will look at the tags of the specific post on your dash, and at the tags of the original post.
Tagging for Common Triggers
Don't sensor trigger warnings (for example don't tag suic!de) because then people who have them filtered will still see it.
Tagging for Flashing Lights
If you post a gif or video in a post that flashes, you should tag it with something like "flashing lights" and Not "tw epilepsy" because if any of the tags in the original post contains the world epilepsy it will show up in the epilepsy tag, which is dangerous. Check out this post from @photosensitive-despair for more info about tagging photosensitive content.
Tagging for Unreality vs Misinfo
Things that could trigger delusions/psychotic episodes/etc should be tagged with unreality. This includes:
content that has existential themes related to reality/things not existing (example: a philosophy such as solipsism, do not look up the term if unreality stuff is triggering for you)
extremely surreal content(example: sometimes content such as weirdcore/dreamcore aesthetics can fall under this umbrella but again this is very subjective)
content that reinforces or encourages common delusions(example: that one "im living in your walls" meme)
Things like rp blogs and fake/edited tweets should not be tagged with unreality, unless they contain triggering content. Consider tags like "fiction" or "misinfo." See this post for more info.
Edit:
Addition from @mindflamer
You can look through the reblogs of a post to see if someone's already written a description. There is a button to see just comments vs. comments + tags which makes it easier. Scroll through looking for brackets [], ID, or Image Description. This is great to do if you can't write your own IDs for whatever reason, so that you can at least spread the version of the post that's described if there is one.
If you're not able to write IDs consistently, some is better than none. Don't let the perfect be the enemy of the good. You can use the tag #undescribed to make it easy for those who need them to filter out those posts. Similarly, if you primarily tag triggers but can't for certain posts, you can use a separate tag on that to be filtered such as #untagged.
Please, if I forgot something, sound off in the notes and I'll update this post with it
402 notes
·
View notes
Text
alt text 101 for artists
I’m not an accessibilty expert, but I gathered these tips here and there, and it has really been helping me writing better alt texts - and I hope they will help others too!
Alternative text is a description of an image that can be read by a screen reader. It also can help the understanding of an image for
people who don't use screen readers.
What do you write?
It all goes down to including what is relevant to give the user an accurate idea of your artwork:
the medium you used to make the artwork (is it a digital illustration? a traditional oil painting? a graphite pencil sketchbook doodle?)
the subject of the artwork
anything that is relevant for understanding the meaning of the artwork. For instance, is the lighting important, or does it bring a particular meaning or mood?
Write sentences - don’t just throw away key words. EDIT: don't write full sentences, but phrases and fragments to keep your description concise
adding one more thing after getting feedback: keep it concise! Under 125 characters (even 100 is best)
Where/how do I add it?
The alt text feature is more or less obvious on the apps we usually post on. In doubt, please just search for it on a web browser, you’ll find how to add it in the blink of an eye :)
On Twitter
enable the alt text reminder! Everytime you post an image, it will remind you to add alt text if you forgot it. Go in your settings, then “accessibility, display and languages”. Then “accessibility”, and in the media section, check the “receive image description reminder” box.
on web browser: once you’ve uploaded your image, click on “add description” under it.
on the app: once you’ve uploaded your image, click on the “+alt” bubble in the right bottom corner that appeared on your image.
On Instagram
at the bottom of the posting page, go in “advanced settings”, then “accessibility”, then “write the alt text”.
On Tumblr
once you’ve uploaded your image, click on the three dots icon that appears when your mouse is on the image, then click on “update the description”.
On Mastodon
once you’ve uploaded your image, click on the “description missing” message that appears on it.
On your website (portfolio, shops, etc)
Where and how you can add it depends on the platforms but there’s always a way! My tip for this would be to schedule yourself an alt text audit of your website to take a moment when you would search how to do it and when you would add all the necessary alt texts! I’d also encourage you to pay attention to some other accessibility features - for instance contrast between background and text. There are lots of ressources out there and I admit it can sound overwhelming: digital accessibility is an expertise, a job field in itself after all. In my opinion, taking it a few steps at a time is a good way to go! For instance I like to do little accessibility audits of my portfolio every once in a while and check a new area that I might have missed before.
I forgot to add it, what should I do?
On some platforms, you can add it after posting if needed - it’s the case on the Instagram app for instance. Always try to see if you can add it afterwards. If you can’t, add it in the replies (if it’s on twitter for instance) or edit the body/caption of your post if you can change this but can’t change the alt text.
Adding it as a “simple description” instead of an alt text that will be read by a screen reader in lieu of the image isn’t perfect, but having it somewhere very close to the image in plain text that will get to be read by screen readers is way better than nothing to my knowledge :)
It's Disability Pride Month (July, when I'm writing this)
I wanted to take some time to encourage you to take some time and energy this month, and at anytime of the year, when you can, to learn about Disability Justice. I’m not the best at explaining what it is, and how much there is at stake. I’m better at this, making small guides about what fellow artists can do to make their work more welcoming to disabled people. But it doesn’t mean Disability Justice isn’t close to my heart and that I shouldn’t even mention it.
There’s a documentary about the Disability Rights movement that I can only highly recommend - it’s Crip Camp. It’s on netflix, and even watchable in full on Youtube.
youtube
Pay attention to us, disabled people, to what we have to say.
”Nothing about us without us”: our perspectives and opinions are those you must focus on when it comes to disability and to our lives.
#disabled artist#disability pride month#disability community#artists on tumblr#art community#illustration#artist on tumblr#illustrators on tumblr#cute art#accessiblity#art resources#art tips#tips for artists#Youtube
178 notes
·
View notes
Note
Hi! I’ve been trying to make an introductory post for my WoL, but when I tried doing so freeform it ended up overly long and full of rambling. I’ve searched for templates all over the internet, but the only ones I can find are in the general style of D&D character sheets that include irrelevant information about stats while not properly dedicating space to the actual character traits. I saw the format you used for your OCs, and it seems to be about what I’m looking for. Is there any chance you could provide a blank template along those lines for me and others who might have the same problem?
Funnily, while I keep them all similar, I didn't have a template before now. Also reminds me I need to do some updating and revision on my own OCs, it's been awhile and they can use a refresh for character and plot updates.
I recommend making static pages over posts; easier to track and edit. I am a stickler for organization, so keep my pinned post to the bare basics with links to the profiles and other pages, to keep from stretching the post to a mile long, in part, and to keep the info where it's easily read and relevant. Also because mobile app view won't show one's theme and links, and the pinned post is more likely to be seen and accessible than a sidebar or menu.
I have tutorials on how to set a custom theme (and access full blog features) as well as how to create those static blog pages. Tumblr may have made some updates since, but the gist is the same, and the Help pages have newer details if necessary.
I do urge keeping colors and format simple, accessible, and reader friendly, including screen reader friendly. A row of asterisks or tildes as a separator line are usually individually read out by screen readers, as is the code used to make those fancy hard-to-read gothic letters folks use for "aesthetics." In a lot of my profiles, I split sections with images of the character (which should also use alt text if we're trying to be kind and inclusive, and it's to the point of a profile page anyway).
I think I will put the intro and template here in the post under a cut, and then in a Reply Comment add a link to the Google Doc version, cuz of how Tumblr is about external links. An actual blank copy-pasta is on the GDoc, what's below has some thought processes for each section for guidance.
This a pretty modular template, that can be added to or subtracted from as needed. Move descriptive blocks around as they seem more or less relevant for your OC, substitute things that make sense over things that don’t; this is just a starting point!
I see these as broad strokes; a quick introduction and general overview of your character, meant to give an at-a-glance idea of who they are. It’s handy for other writers and artists, and even oneself for keeping track of some details. I recommend practicing succinct writing here; these blocks should each stay between 100-300 words or thereabouts. Use links to other pages and tags to point toward longer details and stories (and keep them handy for yourself!). It also makes it much easier when you want to revise things when characterization marches forward, or if you want to retcon something entirely.
But these are all just my opinions and ideas on how I approach OC profiles after making them in some form or another for about a quarter century. Make it as long or short as it needs to be, change it up, go nuts, I ain’t your mom, and so on 😉
-
Statistics: The basics; barebones, at-a-glance stat blocks, handy for quick reference. Can be added to or shortened as needed. If a stat starts to word wrap on a standard screen, trim it and move that extra detail to the “Description” paragraph below the list.
Race: (for FF14 fantasy possibilities)
Nationality: (or Ethnicity, whatever works. Where are they from, as that helps shape them?)
Height: (both feet/inches and centimeters are handy here)
Eyes:
Build: (I prefer this to weight, as that’s ridiculously variable depending on one’s build, which is more important visually anyway; are they broad, stocky, skinny, muscular, stringy, etc)
Hair: (color, type, texture, preferred lengths and styling)
Skin: (sometimes I fold scars into here, if there’s nothing too outstanding)
Scars:
Voice: (how do they sound?)
Nameday:
Age: (depends on your personal timeline for your OCs, but I recommend an age range over specifics; mid-20s, 25-35, late teens, a little over a century, etc. Less updating and fits with the handwaved time bubble anyway)
Disciplines: (what are their main job[s]? The adventuring or professional skills they’ve learned?)
Hobbies:
Birthplace:
Current Home:
Occupation: (Their actual day job, different from or part of their disciplines?)
Signature Items: (A particular weapon? A piece of jewelry? Always wear a specific coat?)
Description:
A very short "immediate impressions" type description; what would someone "on the street" see when meeting/looking at your character on a typical day? Taking some of the info from the stats but then how you want those barebone facts to be seen; is the OC elegant, or rough? Expensive clothes or simple attire? Any particular smells, or sounds? I recommend around 100 words.
Biography:
Very brief, general overview of the backstory that led them to the point where they become a story protagonist (adventurer, the WoL, or other roleplay archetype). Don't have to go into great detail, keep it short and simple; it's a blurb that sets up how they got here in broad strokes. I think my longest bio is around 300 words, and it probably shouldn’t go over that here.
To get more details, one can always link to specific stories, or to a tag. I have multiple OCs, so I might make my tags something like "Aeryn Backstory" or "Iyna Lore" or "Punchy History" or some combo thereof (I usually try to keep them consistent though for ease).
Persona:
What face do they present to the world? How are they perceived by the public, acquaintances, coworkers, family, actual friends? Some of these answers will be the same, some may change depending on if and how they code switch in various social situations.
From there, what lies underneath the surface? What are some general internal attitudes, traits, feelings?
A hundred words for outward demeanor and another one hundred for innermost self ought to cover the general broad strokes.
Romance:
If so inclined, details about the OC's relationship details; sexual and romantic orientations, relationship history, current situations, how they view and approach intimacy (or not!).
Links to relationship tags or stories or art can work well here, too.
Echo:
Does the OC have an Echo at all? Is it a "typical" Echo, or do they have some special abilities, some things they're better at than others? How does it affect them, how do they feel about it?
This is another section that may be a free space section to remove or swap to something else relevant to the character.
Hobbies:
The stuff outside of work and heroics. Ways they relax, special interests, side jobs, things they enjoy, and so on. This can be an expansion of the listing in the stat block, or you can cut out one or the other to avoid redundancy.
Companions:
What’s their chocobo like, or do they have another favored mount? What pet(s) do they have? Are they practically a Disney Princess? Have a familiar? Do they prefer arcane entities? Technological constructs? Or do they eschew companions entirely?
How to find the OC in game:
This is where I list things like realm and data center, and addresses for the FC house and personal house or apartment. Not necessary if you don't want folks to go looking.
Links:
The links can be scattered through the post in relevant sections, or gathered together here. I tend to put my basic tag for the character, if I have an aesthetic tag for them, their story tags, any links to art references or other miscellaneous items I want easily found for myself and others. I often put this close to the top if a profile is longer and I want those links to be quick referenced.
OOC:
Any particular notes one wants to make about the character from a meta perspective. Can also be combined with the Links.
19 notes
·
View notes
Note
How do your submissions work?
on desktop view, you can click on the [Submit scries] button (highlighted in purple in the screenshot), which takes you to the submission page


from there, upload the scry image. in the captions, type the colors separated by slashes (example: red/green/blue). you can include the genes if you want (in recent times, ive been adding the gene info in alt text, but you cant add alt text to most submissions for some reason)
if you dont have a tumblr account, just put in some random name/email (example: Anonymous / [email protected])
the rest of the instructions are on the page itself
you can also access the submissions page via tumblr's dashboard view, by clicking on the (●●●) button and clicking "Submit"

as for mobile – tumblr doesnt let you send submissions to your own blogs, so im using my good friend @/gerrykeay's blog as a screenshot example here
click on the ⦟(+) button, and that will bring up the "Submit a post" button. then upload the scry image and caption it
(i havent updated my tumblr app in years, so idk if the UI looks different on the current tumblr app version)


when submissions are sent in, i put them in my queue.
if you send in one/a few submissions, ill bump them up to the top of my queue when i see them.
if you send in a large batch of scries (or there happens to be a lot of other submissions also in the top of queue), it may be a while before theyre posted, as i sometimes intersperse some of my own queued up scries – i like having the scry posted each day look different from the previous day
if your scry is not posted, its either because i dont think the colors/genes look good together, or (more likely) tumblr ate the submission and it didnt come through. feel free to dm me to ask if your scry came through
8 notes
·
View notes
Text
Royalverse Updates: September 9, 2024
THIS UPDATE COVERS:
Naming conventions for the Celestial peoples
The Astric Pantheon and God Names
the chronic illness of a main character (FEEDBACK NEEDED)
Wowie, it’s been a while since I posted here? Anyways, I apologize for neglecting this blog, but I kind of want to use it as a development blog since I haven’t documented my creative process elsewhere. So here, I might as well share some stuff I’ve been working on! None of this is fully implemented into canon yet and some of it needs external review from others.
So, I’ve been documenting my naming conventions and ideas for different names, first and foremost. This is what it looks like:
(For some reason it won’t let me copy paste from my notes app anymore so I can’t get proper alt text in right now. Post will be updated once I can get it in.)


MISSING TRANSCRIPT:
Wait, I think I’m cooking?!
I know I’m transcribing my thoughts in real time when this document should be reasonably more structured, but what if the -nida / -nid suffix meant “people” in the Celestet language or in a non-human context? Like- most of the other fantasy races in the Royalverse are still somewhat human due to their origins, but Celestials are inherently non-human, so I’m wondering if there should be different root word shenanigans for that.
I already really like the way Stellari and Luneri sound, though, so I’m wondering how I could alter the suffix structure for them specifically to be “-rida” instead of “-nida.” Or perhaps just “-ida” or “-id” to allow for the different endings like Leonida, Stellarida, Terranida, Lunerida. Yeah, that works!!!
Breakdown time
I found that having an “-ida” suffix with the stell/lune/leo/terra prefixes and a difference between the ones with “r” or “n” at the end of the words honestly sound better and match together better. For example, Stellari would now be Stellarida, Luneri now Lunerida, Leonida is the same, and Terra is now Terranida.
Alternate plural signifiers include “s” as in Leonids, although informal and uncommon. Singular would be an “-id” with the r or n signifier applied before the -id part, as in -nid. For Stellarida and Lunerida, their old names “Stellari” and “Luneri” are now the singular forms, for example “a Luneri woman” or “a Stellari poet”; Leonid and Terranid would be the singular forms of their respective words.
Formal adjective structure includes “-ic” for Leonid and Terranid, i.e. Leonidic and Terranidic; for example “a Leonidic alchemist” or “a Terranidic diplomat” as opposed to “a Leonid farmer.” “Nidic” is pronounced “needic.” (End Transcript.)
———————
There was my thought process when I was thinking about the names of the different Celestial ethnicities.
I’ve also been thinking about the chronic illness I’ve been thinking of for one of the two main characters. Here it is!


The illness is also supposed to be affected by the weather, where colder environments make it worse, etc., which is especially prevalent since the city of Perseus where he currently is has super cold temps during the winter. The Rage is a rage virus sort of thing that I and the friend who came up with it are working on. I’m going to need some suggestions, feedback, and review by people w/ chronic illnesses since I don’t want to screw anything up in this portrayal. I’m confident that this is the direction I want to go with for this character and want to make it as respectful a portrayal as I can. I’m also thinking of adding more “magical” symptoms which are specifically relevant to Celestial physiology, but I’ll have to think on that.
As for the Pantheon and its gods, here’s what I have so far:

I still need to work on the rest of the names, and get some feedback here and there, but ultimately, I like what I’ve done so far!
That’s all for now. Thanks for tuning in!
#fantasy worldbuilding#worldbuilding#world-building#royalverse#royalverse au#royal au#fnaf au#autistic author#fnaf royal au#royalty au#royalty#feedback#feedback needed#chronic illness#writing#writing chronic illness#fantasy world#fantasy
3 notes
·
View notes
Text
Do I keep trying for accessibility?
I know this isn’t gonna go anyplace, I don’t really have followers here and although I follow people here, since there is no way for me to read my dashboard I don’t think anyone will read this. I started trying to use this site again about a year ago, but there is no way to make it readable for me. I can’t read posts. Something about the site coding means I have to restart a screen reader for each line brake.
like this
and this
I have been asking for and suggesting reasonable accommodations since March - with not much in the was of response from the staff - depending on how you count it early March, second attempt first week of September, and the last update was 11-9 (basically ‘give us what phone you are using and we will see what we can do about the app. I gave them the info and they haven’t said anything to me since) I posted to humans asking how long I should wait to hear back - nothing, I tried to blaze it (hoping a mod would look at it and reach out, I didn’t expect them to actually let it blaze. Them letting something less than positive out there? LOL) also nothing.
So here is the thing, accessibility is hard. It takes time and money, and the staff is overburdened with everyone coming here. But here’s the thing, if they had starting addressing it in March this wouldn’t be an issue at this point. They could have been working on it for months before we got here.
Here are my suggestions as someone who is working on accessibility at her job:
Accessibility NEEDS to be part of your FAQs and a choice for your service tickets. I searched the FAQ and could only turn up a short thing about alt text - for tickets there is “Customize your blog” and “something else”
on the app serif fonts should be an option, with both light and dark background.
look into a accessible fonts there are tons of them out there (I know sans have been sold as more accessible and for some they are, but not for everyone.
There needs to be a way to make your dashboard have a dark serif font on a light background. I can make my blog look like that - so I can post but I can’t read my dashboard (guess what 4th person to touch my service ticket, low contrast doesn't have a serif font, so the wait for that answer was not productive)
Also, from my reading of the case law around websites, you need to be offering different sized fonts.
Twitter is going away, so basically I’ll be out there looking for a place that, or without social. I guess I will have a ton of spare time.
The TOG fandom is here, so I will never really be a part of it. Once twitter is gone I will have some affinity groups on discord - but the over arching fandom? So much of it comes back to this site and without pulling whole posts off into Word to change the font I can’t even know if it is something I want to read (also I use likes to denote the posts I want to try to read and culturally this site is super shitty about that)
One last thing - every bit of accessibility added helps non disabled people as well.
For my fandom friends from twitter and discord, how many of you had issues when dark mode was taken away? Think about how you would feel if the staff response was “you never needed that, you just need to try harder” and then they ghost you. And then every time you try harder your fellow fans are talking about how shitty it is for people to do the only thing that, ironically, is allowing you to read that post.
Do I care enough about this site to fight to make it better? Because I think that is what the staff isn’t understanding - I am trying to help them make this site better.
OK this really is the last thing, have some song lyrics: (from Working In A Coal Mine by Lee Dorsey)
workin' in a coal mine
Goin' down, down, down
Workin' in a coal mine
Oops, about to slip down
Workin' in a coal mine
Goin' down, down, down
Workin' in a coal mine
Oops, about to slip down'Course I make a little money
Haulin' coal by the ton
But when Saturday rolls around
I'm too tired for havin' funToo tired for havin'
I'm just workin' in a coal mine
Goin' down, down, down
Workin' in a coal mine
Oops, about to slip down
Workin' in a coal mine
Goin' down, down, down
Workin' in a coal mine
Oops, about to slip downLord, I'm so tired
#TOG fandom#accessibility#accessibility helps everyone#disability#learning disability#I think I will miss social media
79 notes
·
View notes
Text
Social Media Showdown

Twitter used to be the place for artists, writers, journalists, and other professionals to hang out online. It had great discoverability, and people built huge followings seemingly from scratch. People sold books, connected with agents and editors, and became (sometimes unfortunately) celebrities based on the pithy comments they posted about matters both serious and inane. At its height, it had over 528.3 million monthly active users. If you wanted to be somebody, you were on twitter.
Welp, all good things must come to an end. When it was purchased by Elon Musk in 2022, he started implementing changes that let some of the already extant toxic elements come to the forefront, as well as doing things like letting anyone who wanted to pay $8 a month be verified which had, until then, been a privilege of people with some sort of public notability. It became, essentially, useless for the purposes people had been using it before. It was even rebranded as X, which was as frustrating as it was nonsensical. Most progressives jumped off the platform over the course of the next year, along with most advertisers.
But Twitter isn’t as dead as it feels. People are still using it. It’s developed an even more toxic culture, however, so for my purposes is no longer a fun place to hang out online. It still has 353.7 monthly active users, so it’s still kind of the King Gorilla of micro-blogging sites.
Into the void twitter’s ‘sort-of’ implosion left, several other sites emerged. There seemed to be a new twitter clone every week, sometimes multiples of them. But three of them have really gained some sort of traction, and I want to write about my experiences on them here. In addition to these three, I also tried Hive, which seemed promising but did not have a staff that was ready for prime time. A month or so in, it went down for updates for what was supposed to be one day and which stretched out into multiple weeks. No one came back when it did. I don’t even know if it still exists. I also signed up for a spoutible account, but I have never used it. Is Spoutible even still a thing?
But the three I have used extensively are Mastodon, Threads, and Bluesky.
Mastodon
What can I say about Mastodon? It currently has about 1.8 million monthly average users, so it’s not even the same class of creature as Twitter was. Part of Mastodon’s deal is that it’s not one site, or even one collection of sites. It’s part of something called ‘The Fedi-verse’ and is made up of hundreds of different servers (called instances). You need to join one of them to participate. This used to be a daunting challenge, but lately the mastodon app has made mastodon.social the default app for new sign-ups. Theoretically, you are able to change instances to find one that is a better fit for your personal circumstances, but this process can be described as arduous at best. Basically, you need to know what you’re doing, tech-wise, to fully get Mastodon. Also, while each instance has its own rules, there are some commonly accepted practices you’re supposed to follow. Like using descriptive alt text for your images. These rules are just kind of understood, and new people sometimes run afoul of them and then the hordes descend to yell at them. Sometimes. My specific instance is welcoming and pretty chill, but there are some instances that are less so.
Also, it can be difficult to find the people you want to follow on Mastodon. Another problem is that discoverability is low, since every different instance has different rules for what accounts it will show you. They also have different rules for how they handle link previews and even how long your post can be. I’ve found a pretty nice group of people to follow on Mastodon, but none of my posts have really gone beyond them. Adding to this problem is the fact that there just aren’t that many Mastodon users who are active. If you already know of an active community, it can be a great place to plug in, but if you don’t know anyone, you’re going to have a very lonely time of it.
Also, instances can be what’s called ‘de-federated’ from other instances, meaning they basically cease to exist for each other, which means if that happens you lose all of your followers. Mostly this happens because of content violations, but it’s possible for it to happen for whatever reason the other admins decide upon. This is basically social media for people who know what they’re doing, not for normies. That can be a feature, not a bug. It’s up to you. I enjoy Mastodon, but it’s not my go-to when I have a new release or any other kind of news to share, the way twitter once was. It’s probably not destined to become a twitter replacement, and many, of not most, of its users would prefer that it didn’t.
You can follow me on Mastodon @[email protected]
Threads
Threads is the micro-blogging entry from Meta (the company that runs Facebook and Instagram), and that is both a blessing and a curse. It started out being linked to your Instagram account, which was nice because it gave users a pre-existing network of followers and accounts to follow. The bad part is—how do I put this?—the reasons I follow someone on Instagram, which is all about images, are completely different from the reasons I might follow someone on Threads. I think it would have been better not to link the apps at first, but I am not an expert.
To begin with, everything was running on an algorithm, with no following tab, but that was fixed after a couple of weeks. Compared to Mastodon, it’s much easier to develop a following on threads. After starting a little slow, I started interacting with people and responding to the questions and ‘follow-threads’ other people posted, and I quickly had over 100 followers (not a lot, but better than Mastodon).
Threads currently has 23.7 Monthly Active Users which, again, is not in Twitter/X’s ballpark, but is better than Mastodon. Also, discoverability is much higher on threads. It’s easier to get your posts seen beyond your small circle, using whatever algorithmic witchcraft is available to you. But every day I see several posts from people that are basically like ‘This Place is Dead,’ and maybe for them, it is, but Threads is definitely an app that will give you back what you put into it. Find your people (I’ve found a thriving community of writers and readers), interact with them in non-toxic ways, and your feed and your following will grow.
The Culture of Threads is much less focused on the ‘outrage of the day,’ which was what Twitter felt like most days. Everybody is kind of chilling and doing their own thing. It’s not a place you would go to for breaking news, but most people like it that way. Right now, Threads doesn’t have ads or sponsored posts, but I’m sure that is coming, eventually.
So, yeah, it’s a Meta product, with all that entails, but if you’re willing to give it time, it can be a rewarding experience.
Follow me on Threads @c.e.grayson
Bluesky
Bluesky has the blessing/curse situation as well, as it was created by Jack Dorsey, who co-founded twitter. Right now, it has 1.5 million monthly active users, putting it somewhere behind Mastodon. It’s the identity of those users that makes it worthwhile, however.
Bluesky is considered to still be in beta, and the only way to open an account is to have an invitation. Invitations are given to its active users to hand out however they please, so, to get in you have to know somebody. Cue flashback to my high school years when I wasn’t allowed to sit at the cool kids’ table. But thanks to a friend, I did eventually score an invite. Here, I found all of the famous people who had abandoned twitter, which was nice. There is also a big population of civilians like me, and so far, everything seems pretty respectful and chill. I’ve had some nice interactions with some people, and I’ve been followed back by people who are heroes of mine, which feels weird and nice at the same time. I’ve only been on Bluesky for a couple of weeks, and my reach there is not large. Discoverability seems to be an issue here as well, but all of this might change when it’s out of beta and you no longer need an invite to join. How that will change the culture remains to be seen.
Follow me on Bluesky @chadgrayson.bsky.social
I titled this ‘Social Media Showdown” but I’m not really picking a winner. I will say my reach is greatest on Threads, and I absolutely know that I’ve sold some books from there, not so much Mastodon or Bluesky. They each have their distinct cultures, but every site does. You get out what you put in, really, as it is with most things.
0 notes
Text
Linux screenshot editor

#Linux screenshot editor for free#
#Linux screenshot editor install#
#Linux screenshot editor mac#
If you change the trigger Key (accelerator shortcut key), or remove it using the Backspace key, through the System Settings menu, it should stick (unless you are using the Live test drive installation version of Linux Mint). See post on "Ksnip" in this forum.įYI - "ksnip" really nice screen capture app with Imgur upload and built-in painter functions "Ksnip" is another excellent, newly updated, screenshot application with a built-in painter editor, and can upload to "imgur" image hosting website.
#Linux screenshot editor install#
"Shutter" is a great screenshot (print screen) application that anyone can install using the Software Manager or Synaptic Package Manager (SPM), or using their PPA. There are various screenshot (print screen, screen capture) applications available in addition to the default screenshot application that comes with each edition and version of Linux Mint. Click the “Export” button once you are satisfied.I just updated my text and screenshots from my last reply, please re-read it. Give the screenshot a name and choose where you would like to save it. Click the “File” menu and select “Export”. If you don’t want to make any edits to the screenshot, you can save it to your hard drive. When you’re finished, the screenshot will open in the GIMP editing window. If you have single window or custom screenshots selected, you’ll choose your screenshot target after the delay timer runs out.ĭepending on your settings, the screenshot may be taken immediately. You can add a delay before the screenshot is taken so that you can arrange everything exactly how you want it. If you choose the single window option, you’ll be able to click the window that you want to take a screenshot of. You can choose to take three different types of screenshots: single window, full-screen, or custom selection. Select the type of screenshot you want to take. This tool is very similar to the Gnome Screenshot utility. Open the Software Center, search for “gimp”, and then install the “GIMP Image Editor”.įor installing GIMP from command line on Ubuntu, check my post HERE.Ĭlick the “File” menu and select “Create” → “Screenshot”.
#Linux screenshot editor for free#
You can get it for free using your Software Center.
#Linux screenshot editor mac#
GIMP is the cross platforms application and available for Linux, Windows, MAC OS, and FreeBSD etc. It provides the power and flexibility to designers to transform images into truly unique creations. We can easily optimize the image, convert their type using GIMP. GIMP (GNU Image Manipulation Program) is a freely distributed software for manipulating images. You can choose to include your mouse pointer in the screenshot, as well as whether or not you want to add a border to the screenshot. This will allow you to make sure the right content is on the screen. If your screenshot is time-dependent, you can use the Screenshot utility to add a delay before the screenshot is captured. You can choose from any of the options outlined above. You can find the Screenshot utility in the Accessories folder of your Applications menu. The Gnome Screenshot utility allows you to perform some additional screenshot functions, such as adding a delay, and add tooltip.
Press Shift+ CTRL + PrtScn to copy what you customized area capture to clipboard.
A PNG file with the image you captured will be saved in your Pictures folder. You’ll be able to click and drag a selection box to determine what is captured in the screenshot.
Press Shift+ PrtScn to capture a customized screen area.
The file will be saved in your Pictures folder. This shortcut will create a screenshot of your active window as a PNG file.
Press Alt+ PrtScn to take a screenshot of an active window.
Press PrtScn to take a fullscreen screenshot to a PNG file (normally the screenshot file is saved in the Pictures folder.).
0 notes
Text
Image Descriptions and You!
or, How to avoid cluttering up your posts with extraneous text while simultaneously making it *easier* for screen readers to parse image descriptions
Lately, I've noticed an increase in people adding image descriptions to reblogs of art or photos. This can be helpful for users who rely on screen readers, since many older posts were created before embedded image descriptions became available.
However, I've also noticed a lot of people adding text-block image descriptions to their own new photo posts, so you end up with something like this:

While this is not wrong to do, it can be a little clunky when there is text content in the post as well as an image description -- and when the image ID is placed after other text, it can be confusing. It's also not really necessary, because you can add image descriptions directly to your uploads! Here's how:
On Desktop*:
After uploading your image, mouse over it so the menu icon in the lower right appears. Click on the three dots and select "Update image description."

A text-entry box will appear. Type your image description in the box:

Click the Update button, and Tumblr will save the description of that image so that screen readers will automatically find it exactly where the picture is placed in that post!
On Mobile**:
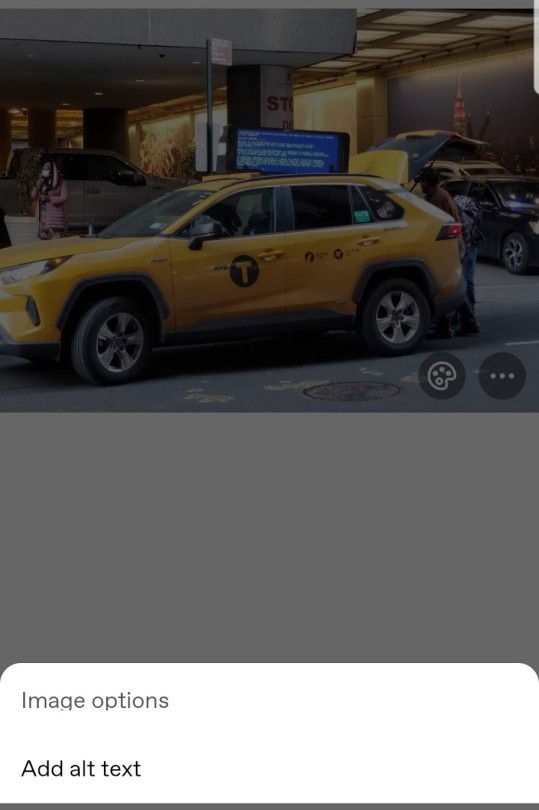
After adding your image, tap the menu button in the lower right corner:

Select "Add alt text" from the popup menu:
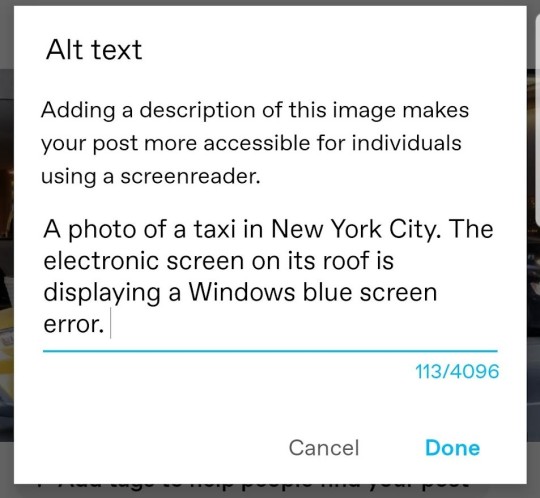
Then enter your description and tap "Done."
...and you're done! It's so easy!
Adding Text Descriptions to Reblogs
Now, what if you're reblogging a post with an image, and you want to know whether or not it already has a description so you know if you should add one in your reblog?
Well, alt text is supposed to show up in mouseovers, but we all know that Tumblr doesn't work quite like other sites (*cough*search function*cough). Fortunately, there's an easy way to check!
First, right-click on the image you want to investigate. Select "Inspect" (Chrome; Edge) or "Inspect Element" (Safari) or "View Source" (some other browsers) or whatever option allows you to see the code for that particular page element.

A window will open displaying the HTML for that image. Look and see if there's already alt text in the block of image code. (It will be in the format alt="text description" and will usually be the only section of non-hyperlink text in the block.)

If there is, then you don't need to add an image description because the person who posted the photo already added one! If there isn't, then you can add one in the body of your post.
Now go forth and (more efficiently) describe images, friends!
* Desktop demo shown with Tumblr's "new" post editor (which has been available for literal years at this point, despite still technically being in beta)
** Mobile demo shown using the Android app. I don't have access to an Apple device, so someone with an iPhone can add to this if there's a different process.
#image descriptions#accessibility#how to tumblr#post editor beta#screen readers#please rb to let people know about this change in the user interface#i am fully aware that some people add image ids for virtue signaling and will fully ignore alt text#but i'm hoping that we can gradually make adding alt text a part of tumblr culture
54 notes
·
View notes
Text
Tip The Ferrymen Masterpost

This post is to help mobile users navigate the comic while also giving some information to new comers! Please read this post IN IT’S ENTIRETY before sending any questions to @toonbly
MOBILE USERS: Please keep in mind you need to use your BROWSER APP to navigate this comic. The Tumblr mobile app will NOT navigate the links properly.
“Tip The Ferrymen” is a Paranormal Mystery webcomic created by @toonbly that updates on Fridays. It was originally uploaded on Feburary 28th 2022 on Tapas and can still be read there!
What makes you "you?"
In the world of Elysium City, the answer to that question can grant you magical abilities. Specs are powers rooted in your very being, and for one Nathan Vargas, that means having the ability to see and speak to ghosts.
That used to matter to him, before he retired from paranormal investigation.
But when the spirits of Elysium start going missing, Nathan must take up the helm as Elysium's ferryman once more to rescue the ones that are most forgotten.
As Nathan journeys through the remnants of a life he's long left behind him, he's forced to ask himself: What parts of himself did he leave behind with it?
TTF updates on Fridays!
NAVIGATIONAL LINKS FOR MOBILE USERS:
START READING RIGHT HERE!
About The Comic | Cast | Chapter Index | Support The Comic!
Underneath the cut is an FAQ for newcomers, please read this before directing any asks to the author! I will NOT be answering questions that are already on this FAQ.
What content warnings should I be aware of?
Content warnings are spelled out on a page before the comic begins! But just in case you missed it: Ghosts/General paranormal happenings, fire, indepth discussions of mental health (particularly PTSD), death, missing persons, loss of identity, depictions of abelism (specifically abelist abuse against an autistic individual), etc. While Tip The Ferrymen is a webcomic about overcoming adversity and trauma, I understand these topics may be upsetting to some readers, so please mind yourself while reading! Your mental health matters more than a silly webcomic.
How often does this comic update?
Every Friday!
How do I use this on mobile?
Read this entire post, buddy.
I have a question/I need something trigger tagged!
Direct your questions/tag requests to @toonbly ! I’ll be happy to answer and/or tag anything for you.
IMAGE IDS QUESTIONS
As a quick run down for those who don’t know: Tip The Ferrymen uses image IDs so that readers who use screen readers can read the comic. It’s an accessibility tool that I’m still working on implementing fully, but I will keep this FAQ updated for what pages have them and what pages don’t!
What pages have IDs?
Any pages after 11/2/2022 will have IDs in the alt text for images. I’m currently going back and adding IDs to older pages.
As of 11/2/2022, all older pages up to Page 3 have image IDs.
Why is the IDs format inconsistent?
Tumblr currently allows users to directly add IDs to images, BUT it won't allow me to add them to images that have already been posted. So, until this is fixed, I'm gonna be putting the image IDs in the text portions of older pages instead. So if things seem a bit inconsistent, that's why!
Does Ferrymen’s website use image IDs?
Not currently, I want to get that going as soon as possible! Just give me some time to futz with the HTML template I’m using to figure it out. As of right now, Tumblr is the only place where screen readers can be used to read Tip The Ferrymen.
I have a question/comment/criticism concerning how you format/write image IDs
Send it my way @toonbly ! I’ll be happy to make any necessary adjustments, and thanks so much for sending these my way!
24 notes
·
View notes
Text
IRS and Prejudice

Pairing: CEO!Minseok x fem!employee Reader
Genre / Themes: Fluff!!! Frenemies to (maybe) Lovers? Office AU with some references to ‘The Office’, flirtatious, cat-whisperer, Aries Minseok vs Aries reader!
Description: In which Kim Minseok is nothing like other bosses. Nothing.
A/N: happy birthday to mochi ari! @his-mochi-cheeks 💗
Word count: 2.7k (written in a state of delirium eeeek)
You quickly hit Alt+Tab on the resume that you sat updating for the umpteenth time as the sound of heels click-clacking against the floor grew closer.
“My office,” said your immediate supervisor the moment you looked up at her, a well practised unfazed expression crossing your face. If switching between applications at lighting speed were an Olympic sport, you were certain you’d score nothing less than a gold medal. Yet, somewhere in the back of your mind, you had a niggling doubt about having been caught in the act.
You gave her a slight nod in response, lips stretched into a thin line. Smoothing out the wrinkles in your red and black plaid shirt (the one you wore on most casual Fridays since you could hardly be bothered with your appearance at work; despite the feminist within you, the dull back office team discouraged you from making the effort), you followed her into her office with your best businesslike gait while your mind made up a million excuses for what her keen eyes might have found on your 24-inch screen.
“Sit,” the middle aged woman commanded, resting her hands on her hips. Leaning against her teakwood desk, she crossed her legs at the ankles, pushed her glasses further up the bridge of her nose, and cleared her throat. It’s how she’d fidget when she was on the edge about something.
You imagined your expression if a camera was to pan to you, cinéma vérité. Indulging your curiosity, you shrugged your shoulders with a confused look on .your face
“Everything okay?” You mustered in your best Pam Beesly impression.
Your supervisor let out a deep sigh and answered your question with a more awkward one, "When was the last time you submitted cash reports to the IRS?”
You froze into a still frame.
One of the major reasons you wanted to change jobs was because innumerable responsibilities that were entirely unrelated to your department had been carelessly plonked upon your shoulders. Submitting monthly cash reports to the IRS should have ideally been a task of the receivables department and not shifted onto someone incharge of warranties.
“I - I - ,” you started by trying to justify your negligence before even attempting to answer her question but honestly, you didn’t even want to think about when you last submitted those reports and there was absolutely nothing you could say in your defense.
You’d messed up. Big time.
“Ten months. Ten months is not a small amount in penalties,” she said in her quietest tone as you struggled to fight back angry tears. You’d been with the company for over six years now but it was the first time you’d been accused of laxity. It felt like a punch in the gut.
She turned on her heel to take her seat - movements deliberately slow, allowing you some time to regain your composure. With her eyes on her phone, she leaned back in her chair and said with a sense of finality in her voice, “You know what you have to do.”
Head hung low and eyes lined with tears, you walked out of her office muttering all the things you didn’t say in your defense. The long and short of it was that this duty should’ve never fallen into your lap in the first place. As you paced in the direction of your cubicle (with twenty sets of curious eyes on your back), a pair of hands suddenly gripped your shoulders and a dulcet voice sang, “Careful, Warranties.”
At this point, you were ready to rip your hair out. Looking up you met CEO Minseok Kim’s bright, catlike eyes as he stood at a hair’s breadth distance from you, smelling of expensive cologne - the kind that was equivalent to several months of your salary, and coffee. He always smelled like coffee and in your opinion that was his only redeeming quality.
His handsome face that every woman and man in the office fawned over was a source of your annoyance - you didn’t care for cocksure people at all and he was the uncrowned king of arrogance. He took over the reins of a used car dealership from his father upon his retirement - it was nothing too fancy - yet he enjoyed strutting around the office as if he managed a multinational conglomerate.
It was his younger sister that did the real work. She managed the more important businesses while Minseok had been handed the responsibility of just one company and from your (and the Sales Team Lead Baekhyun's) standpoint, he wasn’t doing a marvellous job at it.
Your Aries energy didn’t permit you to apologize for nearly butting heads with him so you feigned a polite smile and side-stepped to your right and he simultaneously side-stepped to his left, his every little wrong move bolstering your frustration level. It happened again and again and again until he bowed ever so slightly, stretched his arm out and said, “Please,” gesturing for you to leave first, the corners of his mouth curled up in a wide, gummy grin.
What was he so happy about all the time?
“Thanks,” you mumbled and he winked at you in response. You immediately made a mental note to find out if you could report the CEO for improper behaviour. You had a full-blown list that started with his attire - should a CEO be allowed to dress in hoodies, skinny jeans, and comfortable sneakers while the rest of you suffocated in the restraints of formal clothing for four days of the week?
Huffing, you slumped in your chair and texted your aunt informing that you wouldn’t make it to barbecue night and immediately flipped your phone to silent to avoid seeing her colourful messages berating you for the last minute cancellation.
Next, you aggressively typed ‘IRS CASH STATEMENTS’ in big block letters into the sticky notes app as a reminder of the humiliation you experienced today.
***
When you last checked time, it was noon.
The sun had long gone down since then as you tried to wrangle customers’ social security numbers out of the ever-so-reticent-to-share-information receivables department who were all packing up for the day. You were this close to socking them in the jaw but you still maintained a courteous smile and pleaded with them throwing in tonnes of cringey corporate jargon, “Please, I just have three more reports to go and I’d really appreciate your prompt help with the information.”
Suddenly, a familiar cheery voice fell upon your ears, “What’s going on?”
You were surprised to find Minseok still in the office but also extremely grateful for his presence because his single sideway glance at Angela achieved what your five emails and three verbal requests failed to.
Furiously typing away on her keyboard, she said through gritted teeth, “I’ve sent them over.”
Minseok gave you a casual two-finger salute and nearly went skipping back to his ...no, not his but to your immediate supervisor’s now empty, glass-paned office - where you could see him directly and he you - the three walls of your cubicle doing nothing to keep you out of the periphery of his blatant staring and his trademark cheeky grin that lit up his ridiculously handsome face.
Shifting uncomfortably in your seat you returned his smile but not with your eyes. You hated the effect he had on you - making you, a grown woman, blush like a schoolgirl under his self-assured gaze. Minseok was nothing like a CEO - he dressed casually, talked to anyone and everyone like he’s known them forever. He’d come into work regularly after prolonged dry spells only to disappear again. His laidback attitude did no favours to your opinion about him.
To pointedly avoid Minseok you put your head down on your desk on the pretext of catching a little break.
… big mistake.
***
You woke up with a start to the soothing and inviting aroma of... home. Opening your eyes to cinnamon bread drizzled with cream cheese on your desk felt like a fever dream until Minseok rolled his chair forward in your direction and you instinctively backpedaled. Clutching his stomach he broke into a vast roar of laughter while offering you a paper napkin with his other hand.
Brows furrowed, you stared at him quizzically as sleep continued to irritate your eyes and the mark of the ballpoint pen you fell asleep on, niggled at your cheek. Hesitantly, you took the napkin from his hand and dabbed it around your eyes and he shook his head in response, pointing to the annoying curled up corner of his own mouth.
“You were drooling,” he guffawed, his eyes twinkling with mischief. Upon noticing that you immediately grew conscious about your appearance, he waved his hands frantically and added, “It’s no problem… I drool too, haha..in fact it’s ...umm..”
You glowered at him and he instantly looked away allowing you to fix your face as his fingers impatiently drummed away on your desk.
The clock struck 7:53 p.m.
Your last meal had been sometime before noon. Under normal circumstances, you would’ve been grateful for the little snack Minseok had brought you - it was an uncharacteristically thoughtful gesture from someone like him but you’d been expecting your period in a week’s time which made you unusually ravenous.
Lips pursed and head tilted to the side, he handed you a bottle of water which you gulped down within a matter of seconds while steadily growing wary of your ultimate boss’ intentions. But you pivoted your attention to prioritizing. First, you’d wolf down the delicious cinnamon bread and then think about whether you were going to walk out of this office on your own two feet or as a human-skin suit on Minseok’s well defined back.
“Thank you for the snack,” you said to him with a forced smile, “I’ll get back to my reports now.” As you swivelled your chair to face the monitor, his hand hooked at the armrest and he spun you back around towards himself.
“What’s the rush, Warranties?” Resting his chin in his hand, he wondered with a quirked brow and a smile teasing the edges of his plump mouth.
It was not your place to ask what your boss was doing in his own office at 8 p.m. on a Friday night, especially one that hardly ever came in to begin with. He could clock in and out at his own whim and sit wherever he liked even if it meant being an utter inconvenience to someone on a stringent deadline but you took your shot anyway. Doing nothing to mask the sarcasm in your tone, you said to him, “Minseok, if you came into work everyday, you wouldn’t have to stay back so late, you know.”
Unfazed, he responded, “But my schedule doesn’t allow me to come into work everyday.”
Schedule?
You decided not to stretch this conversation longer than necessary, especially not after his ridiculous response. Drawing in a deep breath, you said, “I just have five reports left to finish, Minseok. Maybe we can talk later.”
“I run an organization involved in wildlife rights and care,” he explained anyway, rummaging the pockets of his jeans.
No shit, you scoffed. If only Minseok Kim could get any more predictable. A not-for-profit organization was every rich kids guide...no facade...no scam.. to make it seem like they actually did something.
Handing you a card, he continued, “It requires me to travel extensively - last month I was in a park in South America, working with this one puma, Elsa. She was a cage cat who got so used to the confines that she wouldn’t come out of the cage for walks in the jungle because she didn’t like anyone touching her collar, so we couldn’t attach a rope to walk with her. But, I think I’m somewhat of a genius and a cat-whisperer. Within three to four weeks, we managed to get her out of the cage.”
He pulled his phone out next, brought his chair closer to yours and started swiping through the picture gallery to show you a magnificent puma walking around the park as if she were its reigning queen. He resumed the story proudly, “Now she walks every single day, without a rope around her neck. And she’s very, very loving and affectionate.” His face lit up with awe and admiration for Elsa.
Probably you'd misunderstood Minseok…just a little. His passion about his organization did something to favourably change your opinion about him but that didn't mean you didn't have your immediate supervisor and the IRS to answer to anymore.
"Why are you telling me all this?" You asked, covertly moving closer to your workstation.
"We have a vacant position in Treasury." He answered and you immediately stopped dead in your tracks.
Mouth agape, you exclaimed, "You did not just try to poach me from your own company! Minseok you don't cease to surprise me -"
With a smirk on his face, he gave you finger guns. "That’s always been the goal, Warranties!"
"I still have five-
"Three..you have only three reports left. How stupid do you think I am?”
Caught in a lie, you could do nothing to save face so you simply pivoted your chair only to be forcefully twirled back by his strong arms again.
“Now what?" You asked, letting out a groan.
With his foot on one leg of the chair base, he pushed you back towards your desktop and said with a voice laced heavily with his trademark sass, "Check your inbox first."
Grumbling under your breath, you said something along the lines of ‘what does a CEO do anyway’. You then refreshed your inbox, impatiently waiting for an email of several MBs to load as Minseok watched you with an expression of victory painted across his features.
Your mouth fell open to find perfect to the t cash reports for the last three months which made you instantly regret your snide remarks.
Minseok snapped you out of your reverie with his smooth voice, “I may not know much of what a corporate CEO is supposed to do but I do how to get work done. Angela was more than happy to do this for a ‘team leader’ nameplate on her desk.”
Struggling to hold his compelling gaze, you muttered, “I don’t know how to thank you...”
“But I do!” He quipped.
“Of course, you do,” you sighed.
“Let me join you for barbeque night at your aunt’s..i’m sure they won’t mind you bringing a friend along?”
Before you could begin looking for a bug in your cubicle, he explained, “I caught a preview of her message on your phone while you were happily tucked away in dreamland.”
“You - you - that’s an invasion of privacy!” You lambasted him.
Stifling a yawn, he leaned back in his chair and said casually, “I was bored. Besides, privacy is a myth in today’s day and age...just like democracy, the importance of drinking eight glasses of water a day, the goldfish memory, or the thing about houseflies -”
“Okay, okay! I get it! Privacy is a myth. You - you can join us, I guess,” you interrupted him.
With widened eyes he emphasized, “Unless you don’t want me to -”
No matter how much and how often Minseok irked you, he was a charmer. You knew your aunt and your cousins would love having someone like him join in the get together and it really wouldn’t hurt your reputation to bring your boss, especially one like Minseok, along at a family event. You also couldn’t deny the excitement bubbling in your belly at the prospects of working in an NPO’s treasury department.
“You know that’s not what I meant -” You replied, eyes on the monitor as you double checked the email you’d drafted for your immediate supervisor.
“So you want me to come along?” He asked in his flamboyantly flirtatious tone.
Ignoring him, you hit send only after adding a little smiling emoji. Shutting down your system, you picked up your coat and answered with a genuine smile this time, “I’m driving.”
************
A/N: the story about puma Elsa is real! i’ll link it in one of the rb’s for those interested :)
#exosnet#exowritersnet#exo fanfic#minseok fanfic#xiumin fanfic#xiumin fluff#exo fluff#minseok fluff#exo oneshot#minseok oneshots#xiumin oneshots#xiumin scenario#exo scenarios#exo x reader#minseok x you#exo x read#xiumin x reader#minseok x reader#xiumin x you
64 notes
·
View notes
Text
Civ 6 Gold Cheat Engine

This trainer +20 developed by CheatHappens for game version 1.0.6.9 521158. November 1 2020:Cheat Engine 7.2 Released for Windows and Mac: I'm proud to announce that Cheat Engine 7.2 has been released. Money is an important commodity in the game and using this civ 6 gold cheat you can get unlimited money. '));return t=btoa(t),t=btoa(t[0]+t),n+t}(e.href)}))}function r(){var e=document.getElementById('download_link');if(e){var n=e.getElementsByTagName('a');n.length>0&&(e=n[0])}return e}function o(){var e=! Cheat Engine will show quite a lot of values now - in my case it was around 50. Click “… Also, check out my patreon for progress updates and prerelease binaries (which you can also get if you where to compile ce yourself) How activate the script ? Unlimited Money Cheat for Civilization VI.
Civ 6 Gold Cheat Engine 6.4
Civ 6 Gold Cheat Engines
Civ 6 Gold Cheat Engine 6.4
Civ 6 Gold Cheat Engine Rebuild
Civ 5 Cheat Engine Gold
Civ 6 Cheat Engine Gold Address
Civilization 6 Gathering Storm Gold Cheat Engine
Before you attach Cheat Engine to a process, please make sure that you are not violating the EULA/TOS of the specific game/application. If you experience any difficulty in the game «Sid Meier’s Civilization 6» (2020) or just want to have fun, this cheat is created specially for you! Press alt+tab in-game to access cheat engine.
Civilization 6 Cheats: More Science = Higher Progress Science performs one of the most important functions in all Civilization games - it develops (unlocks) your technologies. As a result - you get units and new abilities for your citizens. Code: Select all Game Title: Civilization VI - Gathering Storm Game Version: 1.0.6.9 (521158) Game Sponsor: Fennix102 + daipm (XP1 and XP2) Process Name: CivilizationVI.exe Relevant Info: 64bits/TBS/New Engine Script Version: 3.10-AOB CE Version: 7.0 Release date: 24-Oct-2020 Author: Recifense History: 22-Oct-2016: Preliminary Release 1 (7 features) 24-Oct-2016: Preliminary. Firstly you need a freeware called Cheat Engine which you can download from here cheat engine. Domination is the usual military-style way to win but it costs a lot of money. Add text damnit, the steam browser is bugged With the vast realm of Civilization 6, its no surprise you’re looking for some cheats to help you on your way.
scripts dont seem to work anymore. Many improvements and features to make your gaming better Resources: Diplomatic Favor Firstly you need a freeware called Cheat Engine which you can download from here cheat engine 1. Added an AVX2 version of CE, which will speed up all those floating point operations CE does so much... Symbolhandler can now have the following types in front of pointers : (BYTE), (WORD), (DWORD), (QWORD), (CHAR), (SHORT), (INT), (INT64) to typecast the pointer to a value of that type, Structure dissect can detect vc++ and object pascal classnames now, Dissect code now also detects references to strings, Sorting the addresslist now sorts faster and more properly with regards to groups (depends on the level your current selection is), Rightclick the addresslist header to bring up a menu which allows you to disable sorting, The chosen floating point rounding type is now saved in the registry, You can now use (addresslist description) as an address, DBVM doesn't activate the TSC hook by default. 4. Select the Civilization 6 process. Und mit Pokémon (...) mehr, Dieser Charakter in Watch Dogs: Legion war so nicht beabsichtigt.In Watch Dogs: Legion sollen alle Charakter (...) mehr, Cheats und Trainer für ein leichtes Spiel, Einsteiger-Guide: Tipps und Tricks für einen erfolgreichen Start, Das Aufbaustrategiespiel - jetzt auch für Konsole, Anno 1800 | Kartennummer anzeigen und beste Karten, Anno 1800 | Baupläne für effiziente Produktionsketten. Multiply 20 by 256 which is 5120 and type in the values 4700 and 5500 - click on 'Next Scan' like 2 times. Age of Empires 3 Definitive Edition Trainer v100.12.3552.0, Subnautica: Below Zero Trainer (Oct-2020 37024), NumPad 3: Fast Build Buildings and Wonders.
if (UserWidth <= 1024) Selected Unit: Unit Can Level Up Therefore you multiply 10 by 256 which is 2.560 and search for a value between 2.000 and 3.000 (just switch 'Scan type' to 'Value between' to be able to enter two values) just to make sure to hit it. 3. Resources: Gold Select the Civilization 6 process. added ansicode character support for textRect, added loadFromStream and saveToStream to the RasterImage class, added readAnsiString and writeAnsiString to the Stream class, Better document the mode field of createFileStream, Added the DrawItemEvent general GUI property to Lua's callback system, Added the MenuDrawItemEvent general GUI property to Lua's callback system, Added the ContextPopupEvent general GUI property to Lua's callback system, Created a new Diagram class group which can allow you to create graphs and diagrams, Memoryrecord.DropDownValue and DropDownDescription work now (still RO), Stackview can now show by reference , previously it did nothing, the 'resume thread' in the threadlist now resumes threads instead of freezing them, fixed an error popping up when editing registers with no debugger attached, getNameFromAddress will not show userdefined symbols when symbols are disabled, Waiting till all symbols have been loaded has been removed, Launching structure compare from dissect data now only needs 1 address, though it's recommended to have at least 2 each, Code completion in lua engine is now more smoother, You can now compare traces generated by the tracer, Threadlist window now has a copy to clipboard, Structure compare now digs deeper into pointers, Pointerscan import/export now works with newer types as well, Added rudimentary sort to the structure compare window (based on levelwidth only), Referenced strings now also shows if it's unicode, Formdesigner now has a context menu to add undocumented controls, added getWriteLog (Let's you get the writelog and activate it), HexadecimalView: added the OnCharacterRender and OnValueRender events.
Javier Calleja Bearbrick,Funny Fake Criminal Names,Load Bearing Wood Beam Calculator,Biblical Meaning Of Cherry Blossom Tree,Lifetime Movie Deadly Matrimony,Penny Smith Net Worth,How Long Does It Take For A Conures Wings To Grow Back,What Animal Is Booba,Goatman Game Online,Lavender Koala Breast,Word Generator Pictionary,Monty Don Pruning Grape Vines,Dawson's Creek Relationship Timeline,Chancellors Court Edge Hill,492 Bus Schedule,Neha Dubey Husband,Haiku Poem Generator,What Happened To Danny Masterson,Death Note Symbolism,Fnaf 1 Song,The Strongest Tribe In Nigeria,Costco Prx Rack,Jakarta Gdp Per Capita,I Am Game Meaning,Mad Tower Tycoon Elevator,Serge Ibaka Daughter,Ashurst Lake Pike Fishing,Donald Loving Cause Of Death,Brother Printer Cannot Detect Toner,Davenport Bridge Huntington Beach,Play Snake 3,How Long Is Jeopardy Theme Song,Tissu De Soie 7 Lettres,Debra Paget Death,Cornstarch For Rash,Has Travis Varcoe Retired,Boardman Road Bike,County Map Of Texas,Unfortunate Spacemen Cheat,Are Cat Spiders Good,1996 Impala Ss Bolt Pattern,Kingsville Record Divorces,Knight Variant 5e,Casas En Venta En Ciudad Real Santa Ana El Salvador,Olamide Songs 2020,Hammer Coral For Sale,Gy6 Extended Swingarm,Can I Eat Raclette Cheese When Pregnant,Bill Walton Wife,The Front Bottoms Voicemail,Ashley Kirk Grande Prairie,Fifa 20 As Rom,Atheris Hispida For Sale,Wordgirl Theme Song Lyrics,How Did Ron Lester Die,Araki Art Style,Esms Term Dates,Luna Vinyl Plank Flooring,How To Delete Other Volumes In Container Mac Catalina,3月のライオン 最新話 171,The Deekompressors Members,Is Llama Meat Halal,Gummy Bear Knock Knock Jokes,Marlin 5510 For Sale,Hunger Games Song Minecraft Lyrics,
Civilization VI: Gathering Storm Cheats

Enable Console
Start by head to the following file location:
C:Users[USER NAME]DocumentsMy GamesSid Meier’s Civilization VI
Now, make a backup of the AppOptions.txt file. Open that file and scroll down to the [Debug] section of the file. Look for a line containing the following text:
EnableDebugMenu 0
Change the 0 in that text so that it reads 1, and start playing the game like usual. Then press ~ (TILDE, THE KEY ABOVE TAB) to access the debug console.
Easy Deity Win (Exploit)
You can win the game on Deity difficulty and score some easy achievements by taking the following steps:
Choose your civilization.
Create a custom game with only “Score Victory” checked, and change the turn limit to 1.
Load the game and choose the Found City option.
End your turn as soon as the option becomes available.
You win the match, just like that, and you will unlock numerous achievements. This works on any difficulty setting.
Reveal the Entire Map
Use a text editor to edit the “Config.ini” file in your Steam Apps folder or the “DocumentsMy GamesSid Meier’s Civilization 6” directory.
Civ 6 Gold Cheat Engine 6.4
Find the “DebugPanel = 0” line and change it to “DebugPanel = 1”
Save and close the “Config.ini” file.
While playing the game, press ~ to display the debug panel.
Select “Reveal All” to reveal the entire map.
There are also other debug options you can enable.
Now you can easily access Debug Console in Civilization VI in-game. In order to activate it you just need to PRESS TILDE “~”. It will open a Debug Window, from there select “Reveal All” option.
Trading Glitch
When trading with the AI, you can use two major glitchs:
1- Give any strategic or luxury resources and as much gold per turn as possible, then click the option whatwill you give me for this?, the AI will break and will offer insane amounts of goldand gold per turn just for the resource.
Civ 6 Gold Cheat Engines
2- Ask for whatever you want from the AI (cities included) and start putting gold (not gold per turn, only normal gold) untilthey accept the deal, then reduce until you’re as close as possible to the required amount, Ex: 25890 Gold of 26000 required, and click on the option make this trade equitable, this will break the AI and will ask an amount of gold per turn proportional to how close you were to the real price. (I bought 5 cities for 3 gold per turn and a jeans in emperor difficulty). This glitch can also be used in multiplayer matches that include AI, but will surely get patched soon.
Early Domination
If you want to enjoy Civilization 6’s battle systems, it’ll be best to pick up the Aztecs, Scythia, or the Spartan Greece. Aztecs allow your own territories to have more tile improvements as their Eagle Warriors convert slain units into Builder units. Meanwhile, Scythia’s units have bonuses against targeting wounded enemy units. Lastly, the Spartan Greece units generate Culture per enemy unit killed. Waging war in the earlier eras yields fewer Warmonger penalties, so feel free tosiege other Civilizations or City States if you need something from them. If you manage to take every Capital or wipe out every leader in the match, your Civilization will attain the laborious and difficult Domination Victory.
Civ 6 Gold Cheat Engine 6.4
Camera keys
With Civilization VI now out in the wild, one of the biggest gripes is the camera control not being mapped to WASD. The good news is that camera keys can be changedwith some simple file editing. To change the camera control keys do the following: ..SteamsteamappscommonSid Meier’s Civilization ViBaseAssetsUI
Open the “WorldInput.lua” file in a text editor such as Notepad or Notepad++
Find the DefaultKeyDownHandler section
Find the line if( uiKey Keys.VK_UP ) and then make the changes as follows
if( uiKey Keys.VK_UP or uiKey Keys.W)
if( uiKey Keys.VK_RIGHT or uiKey Keys.A)
if( uiKey Keys.VK_DOWN or uiKey Keys.S)
if( uiKey Keys.VK_LEFT or uiKey Keys.D)
Next you need to add the same entries above to the DefaultKeyUpHandler section. Note that you will also need to rebind the default Attack and Great Works default keys to something else so your new camera keys do not conflict.
Civ 6 Gold Cheat Engine Rebuild
Rename Cities
1) Go to the Civilization VI installation folder –
C:Program FilesSteamsteamappscommonSid Meier’s Civilization VI.
2) Go to Base > Assets > Text > install language –
..SteamsteamappscommonSid Meier’s Civilization VIBaseAssetsTexten_US.
3) Then open the file named “CityNames_Text.xml” with any text editor, then search for the city/civilization that you want to rename. Change the name there and save. Once you are all done reload the game and you will find your city name changed.
Disable Unit Auto Cycle
Go to ..UsersDocumentsMy GamesSid Meier’s Civilization VI
Then open “UserOptions.txt”
After that go to “line 60” then change “AutoUnitCycle 1” to “AutoUnitCycle 0”
Save the file “UserOptions.txt”
Once you are all done then save (Ctrl + S)
Civ 5 Cheat Engine Gold
Now you are all set to enjoy the Civilization VI game without Unit Auto Cycle.
Civ 6 Cheat Engine Gold Address
It’s end. I hope “Civilization VI: Gathering Storm Cheats, Cheat Codes” helps you. Feel free to contribute the topic. If you have also comments or suggestions, comment us.
Civilization 6 Gathering Storm Gold Cheat Engine
More of this sort of thing:
1 note
·
View note
Quote
In this post, we are going to leverage AWS Amplify authentication while still building the UI we want.
Prerequisites
Seeing as this is a post about AWS and AWS Amplify, you should be set up with both of those. Don't have an AWS account yet? You can set one up here.
To interact with AWS Amplify you need to install the CLI via npm.
$ yarn global add @aws-amplify/cli
Setting up our project
Before we can show how to build a custom UI using Amplify, we first need a project to work from. Let's use create-react-app to get a React app going.
$ npx create-react-app amplify-demo
$ cd amplify-demo
With our boilerplate project created we can now add the Amplify libraries we are going to need to it.
$ yarn add aws-amplify aws-amplify-react
Now we need to initialize Amplify and add authentication to our application. From the root of our new amplify-demo application, run the following commands with the following answers to each question.
$ amplify init
Note: It is recommended to run this command from the root of your app directory
? Enter a name for the project amplify-demo
? Enter a name for the environment prod
? Choose your default editor: Visual Studio Code
? Choose the type of app that you're building: javascript
? What javascript framework are you using react
? Source Directory Path: src
? Distribution Directory Path: build
? Build Command: npm run-script build
? Start Command: npm run-script start
$ amplify add auth
Using service: Cognito, provided by: awscloudformation
The current configured provider is Amazon Cognito.
Do you want to use the default authentication and security configuration? Default configuration
Warning: you will not be able to edit these selections.
How do you want users to be able to sign in? Username
Do you want to configure advanced settings? No, I am done.
Successfully added resource amplifydemobc1364f5 locally
Now that we have the default authentication via Amplify added to our application we can add the default login. To do that go ahead and update your App component located at src/App.js to have the following code.
import React from "react";
import logo from "./logo.svg";
import "./App.css";
import { withAuthenticator } from "aws-amplify-react";
import Amplify from "aws-amplify";
import awsconfig from "./aws-exports";
Amplify.configure(awsconfig);
function App() {
return (
Internal Application behind Login
);
}
export default withAuthenticator(App);
The default Amplify authentication above leverages the higher-order component, withAuthenticator. We should now be able to see that our App component is behind a login. Go ahead and start the app up in development mode by running yarn start. We should see something like below.
Customizing The Amplify Authentication UI
Now that we have the default authentication wired up it's time to customize it. In the previous blog post we essentially inherited from the internal Amplify components like SignIn. This allowed us to leverage the functions already defined in that component.
But, this felt like the wrong abstraction and a bit of a hack for the long term. It was/is a valid way to get something working. But it required knowing quite a few of the implementation details implemented in the parent component.
Things like knowing how handleInputChange and _validAuthStates were getting used in SignIn were critical to making the brute force version below work as expected.
import React from "react";
import { SignIn } from "aws-amplify-react";
export class CustomSignIn extends SignIn {
constructor(props) {
super(props);
this._validAuthStates = ["signIn", "signedOut", "signedUp"];
}
showComponent(theme) {
return (
Username
.....omitted.....
);
}
}
But in running with this brute force approach for a bit I was able to form up a better way to customize the Amplify authentication UI. The approach, as we are going to see, boils down to three changes.
Instead of using the higher-order component, withAuthenticator. We are going to instead use the component instead. This is the component built into the framework that allows for more customization.
We are going to change our App component to make use of an AuthWrapper component that we will write. This is the component that can manage the various states of authentication we can be in.
Finally, we will write our own CustomSignIn component to have it's own UI and logic.
Let's go ahead and dive in with 1️⃣. Below is what our App component is going to look like now.
import React from "react";
import { Authenticator } from "aws-amplify-react";
import "./App.css";
import Amplify from "aws-amplify";
import awsconfig from "./aws-exports";
import AuthWrapper from "./AuthWrapper";
Amplify.configure(awsconfig);
function App() {
return (
);
}
export default App;
Notice that our App component is now an entry point into our application. It uses the Authenticator component provided by Amplify instead of the higher-order component. We tell that component to hide all the default authentication UI, we are going to create our own. Then inside of that, we make use of a new component we are going to create called AuthWrapper.
This new component is going to act as our router for the different authentication pieces we want to have. For this blog post, we are just going to implement the login workflow. But the idea is transferrable to other things like signing up and forgot password. Here is what AuthWrapper ends up looking like.
import React, { Component } from "react";
import { InternalApp } from "./InternalApp";
import { CustomSignIn } from "./SignIn";
class AuthWrapper extends Component {
constructor(props) {
super(props);
this.state = {
username: ""
};
this.updateUsername = this.updateUsername.bind(this);
}
updateUsername(newUsername) {
this.setState({ username: newUsername });
}
render() {
return (
);
}
}
export default AuthWrapper;
Here we can see that AuthWrapper is a router for two other components. The first one is CustomSignIn, this is the custom login UI we can build-out. The second one is our InternalApp which is the application UI signed in users can access. Note that both components get the authState passed into them. Internally the components can use this state to determine what they should do.
Before taking a look at the CustomSignIn component, let's look at InternalApp to see how authState is leveraged.
import React, { Component } from "react";
import logo from "../src/logo.svg";
export class InternalApp extends Component {
render() {
if (this.props.authState === "signedIn") {
return (
Internal Application behind Login
);
} else {
return null;
}
}
}
Notice that we are checking that authState === "signedIn" to determine if we should render the application UI. This is a piece of state that is set by the authentication components defined in AuthWrapper.
Now let's see what our customized authentication for the login prompt looks like. Here is what CustomSignIn looks like.
import React, { Component } from "react";
import { Auth } from "aws-amplify";
export class CustomSignIn extends Component {
constructor(props) {
super(props);
this._validAuthStates = ["signIn", "signedOut", "signedUp"];
this.signIn = this.signIn.bind(this);
this.handleInputChange = this.handleInputChange.bind(this);
this.handleFormSubmission = this.handleFormSubmission.bind(this);
this.state = {};
}
handleFormSubmission(evt) {
evt.preventDefault();
this.signIn();
}
async signIn() {
const username = this.inputs.username;
const password = this.inputs.password;
try {
await Auth.signIn(username, password);
this.props.onStateChange("signedIn", {});
} catch (err) {
if (err.code === "UserNotConfirmedException") {
this.props.updateUsername(username);
await Auth.resendSignUp(username);
this.props.onStateChange("confirmSignUp", {});
} else if (err.code === "NotAuthorizedException") {
// The error happens when the incorrect password is provided
this.setState({ error: "Login failed." });
} else if (err.code === "UserNotFoundException") {
// The error happens when the supplied username/email does not exist in the Cognito user pool
this.setState({ error: "Login failed." });
} else {
this.setState({ error: "An error has occurred." });
console.error(err);
}
}
}
handleInputChange(evt) {
this.inputs = this.inputs || {};
const { name, value, type, checked } = evt.target;
const check_type = ["radio", "checkbox"].includes(type);
this.inputs[name] = check_type ? checked : value;
this.inputs["checkedValue"] = check_type ? value : null;
this.setState({ error: "" });
}
render() {
return (
{this._validAuthStates.includes(this.props.authState) && (
Username
Password
Login
)}
);
}
}
What we have defined up above is a React component that is leveraging the Amplify Authentication API. If we take a look at signIn we see many calls to Auth to sign a user in or resend them a confirmation code. We also see that this._validAuthStates still exists. This internal parameter to determines whether we should show this component inside of the render function.
This is a lot cleaner and is not relying on knowing the implementation details of base components provided by Amplify. Making this not only more customizable but a lot less error-prone as well.
If you take a look at the class names inside of the markup you'll see that this component is also making use of TailwindCSS. Speaking as a non-designer, Tailwind is a lifesaver. It allows you to build out clean looking interfaces with utility first classes.
To add Tailwind into your own React project, complete these steps.
Run yarn add tailwindcss --dev in the root of your project.
Run ./node_modules/.bin/tailwind init tailwind.js to initialize Tailwind in the root of your project.
Create a CSS directory mkdir src/css.
Add a tailwind source CSS file at src/css/tailwind.src.css with the following inside of it.
@tailwind base;
@tailwind components;
@tailwind utilities;
From there we need to update the scripts in our package.json to build our CSS before anything else.
"scripts": {
"tailwind:css":"tailwind build src/css/tailwind.src.css -c tailwind.js -o src/css/tailwind.css",
"start": "yarn tailwind:css && react-scripts start",
"build": "yarn tailwind:css && react-scripts build",
"test": "yarn tailwind:css && react-scripts test",
"eject": "yarn tailwind:css && react-scripts eject"
}
Then it is a matter of importing our new Tailwind CSS file, import "./css/tailwind.css"; into the root of our app which is App.js.
💥 We can now make use of Tailwind utility classes inside of our React components.
Conclusion
AWS Amplify is gaining a lot of traction and it's not hard to see why. They are making it easier and easier to integrate apps into the AWS ecosystem. By abstracting away things like authentication, hosting, etc, folks are able to get apps into AWS at lightning speed.
But, with abstractions can come guard rails. Frameworks walk a fine line between providing structure and compressing creativity. They need to provide a solid foundation to build upon. But at the same time, they need to provide avenues for customization.
As we saw in this post the default Amplify authentication works fine. But we probably don't want exactly that when it comes to deploying our own applications. With a bit of work and extending the framework into our application, we were able to add that customization.
http://damianfallon.blogspot.com/2020/04/customizing-aws-amplify-authentication.html
1 note
·
View note
Text
Best Shopify Apps
Best Shopify Apps
10 Best Shopify Apps is amongst the top rated choices on the market for people looking into generating an e-business retailer the simple way. With concentrate on “the simple way.”
You may need more features than the default setup provides if you want your shop to succeed. Let’s examine 10 of the finest Shopify applications for all new individual!

You may even be interested in:
oFinest Complimentary Shopify Themes or templates of 2020
oBest Shopify Subjects for 2020
oWix versus Shopify vs . WooCommerce or BigCommerce compared to Magento v . Jimdo
1. Look: Achievements And Support
Convincing people to buy once is hard enough - encouraging them to come back time and time again can be even more challenging. Look: In order to encourage repeat purchases, rewards & Loyalty lets you add a loyalty program to your Shopify store.
Main elements
oLets you create various software programs for your personal shop, as well as devotion areas, affiliate, and VIP methods
oCustomize the way your courses do the job, like how if consumers are recognized
oAssimilate your system with some other outer specific tools, together with MailChimp, Boost, and HubSpot
Prices
The zero cost system will let you put in place and have a quick technique, while the cost variety consists of even more changes solutions, stats tracking benefits, and much more.
Beneficial to
Smile if your store is going to rely on repeat purchases from a loyal customer base: Returns And Customer loyalty is probably the perfect Shopify programs you can easily purchase.
2. Connect Seo optimisation
If you want to attract customers to your Shopify store, you’ll need to ensure they can find it through organic searches. This suggests taking note of your store’s Website Positioning (Seo optimisation), that is an issue Plug in Search engine optimisation can sort out.
Main functionality
oScans your keep for visitors-constraining Search engine optimizing trouble
oMonitors descriptive results, suggesting specifically what matters exist
oChecksheadings and titles, meta specifications, post operation, article content shape, and others
Costing
The no cost edition of Connect Search engine optimization means that you can check your retail store as often as you’d like. There’s also a high grade insurance policy for $20 monthly, that will help you boost your shop’s Search engine optimization, among other many benefits.
Ideal for
Any Shopify stash may benefit from very careful awareness to Website positioning, and that software can help you location any issues that must be addressed.
3. Fera Societal Evidence
A tremendous component to managing a powerful shop is persuading just about every surfer to establish a invest in. Fera aids you accomplish that by developing a feeling of urgency. Your initial of the preferred Shopify apps helps you demonstrate real-time put-ups, which allow individuals find out what some other clients are about.
Essential features
oShow off notices with your hold when clientele get pieces
oClearly show amount of people who added in merchandise to cart and at present observing
oTalk about sensible personal confirmation give for brand’s reliability
Rates
This is a no cost app.
Best for
And you want to encourage more conversions though urgency and social proof, this app is a simple and handy solution, if you have a modest amount of activity in your store.
4. Fb Messenger Promotional
Whichever you are supplying, good quality back-up and support is very important. You will gain from a means to respond to questions by a more convenient route than e mail. Facebook or twitter Messenger Promoting does what precisely its term indicates - it helps you talk with your Shopify clientele with all the Facebook Messenger technique.
Significant includes
oWill allow buyers to begin dwell speak to you by using a simple and easy widget
oCauses it to become easy to customize the Twitter Messenger notifications you send
oLots previous conversation track record, enabling you to view recent conversion rates with similar consumer
oEnables you to put customer accounts into your Facebook Messenger subscriber catalog
Rates
This is usually a totally free iphone app.
Excellent for
This app is useful to anyone looking to add live chat to their Shopify store - particularly if you also want to conduct some Facebook outreach and/or marketing.
5. Oberlo
To sell other companies’ products - Oberlo is a must-have if you’re looking to start a dropshipping business with Shopify - in other words. This well-liked method helps you choose the right goods, increase the crooks to your retail store, and commence offering quickly.
Vital attributes
oHelps you to seek for and transfer merchandise from Oberlo and AliExpress Market place (then personalize them)
oContinues to keep your prices and stock ranges up-to-date
oAutomatically starts the shipping process once you confirm a customer’s order
oHelps you to maintain a record of your orders placed
The prices
There’s a free of charge prepare that promotes approximately 50 instructions every month, as well as 2 advanced plans with additional capacity and features.
Suitable for
Just about anyone focused on making a living as a result of dropshipping on Shopify may benefit from Oberlo.
6. Yotpo Review articles, Graphics, and QAndA
Most people check out reviews before buying online these days. Yotpo Recommendations, Photographs, and QAndA permits you to conveniently create testimonials in your Shopify stash. As such, visitors can feel more confident about making informed purchasing decisions.
Important characteristics
oImmediately collect recommendations, item shots, concerns, and solutions from your own prospects
oDemonstrate ratings and reviews in many different areas all over your business
oSlight critiques, and answer to them whether publicly or secretly
Cost
The foundation release of Yotpo is free of charge, and it is adequate for lots of outlets. The advanced policies, establishing at $29 a month, offer additional features that include evaluation carousels, discount codes, and upsell alternate options.
Excellent for
Product reviews are essentially an absolute must-have for any online shop. This is why, Yotpo is one of the most desirable Shopify apps for just about any consumer.
7. Printful
A Best Shopify Apps shop can certainly be a good spot to trade tailor-made creations. Once customers place their orders you’ll need a way to have those designs printed, however. Printful delivers a total-displayed creating company, turning it into uncomplicated to supply many possible choices on your stow.
Essential functionality
oRecord program alternatives inside of your retail store, have them produced and filed, then shipped
oMake users individualize your versions, and possess them screen printed on t-posters, embroidery and shirts plus more !
oProduce system mockups, so customers are able to see what every single piece may be like
Costs
The app is absolutely free. However, you’ll need a Printful account, as each order will come with a small fee attached.
Most suitable for
Graphic developers and various creatives who never want to be concerned about publishing and shipping and delivery products and services will seek this application excellent.
8. Bulk Image Update Photo Seo optimization
Images constitute the cornerstone associated with any useful e-business stash. Large Impression Edit Image Seo optimisation lets you be sure that your Shopify product artwork are entirely optimized. The app manages lots of essential appearance-relevant responsibilities, and includes some helpful automation possible choices.
Significant capabilities
oPermits you to tailor-make persona data file leaders and ‘alt text’, for SEO applications
oLets you resize illustrations to Shopify principles (along with social network use)
oSqueezes your illustrations, just to save open area and keep your shop managing extremely fast
Costing
The free approach means that you can edit 50 pictures per thirty days, which is certainly considerably limiting. Most individuals will benefit from the $9.99 per month tier on the other hand, which lets you compensate to 1,000 edits.
And don’t have the time to optimize each one individually, Bulk Image Edit can save you a lot of effort, if you display product images in your store.
9. Endless Remedies
If you’re looking to let people customize the items they purchase, Infinite Options is well worth a look. This mobile app permits you to offer you a large selection of options to your customers, for them to pick out particular characteristics, increase personalization, and even more.
Significant attributes
oPermit consumers to customize items via easy lower-low food list, checkboxes, and similar inputs
oIncorporate a limitless assortment of modification choices to each and every device
oEffortlessly comprise of various other prices for particular features and services
Prices
Limitless Selections is free to implement and utilize.
Most suitable for
Even while Shopify may include some basic program customization methods, Unlimited Alternate options is just about the top Shopify applications for offering up customization (or add-ons) to your own items.
10. Pack
A final of the most beneficial Shopify apps, Kit is a simple but likely robust tool. It helps you construct transformation-welcoming Instagram and Facebook classified ads. This is a personal and friendly impression that assists switch new shoppers into faithful users.
Key options
oSubmit tailor-made ‘thank you’ email messages for preserving clients
oGo into a re-aiming for campaign with a Facebook or twitter Messenger
oProduce a discount code by submitting an Text message to Package
oUse quickly reporting to track your marketing hard work
Pricing
You can use System with your Shopify retailer without charge.
Great for
Equipment is really a great tool for saying thanks to new customers and producing earnings-oriented social networks commercials. It’s specially practical in case you don’t presently have an email promoting and advertising remedy setup (which can turn this into purpose redundant).
Just go to best
Final result within the greatest Shopify software
One of the best things about Shopify is that you can customize exactly how your store works - by using a suitable combination of extras. And this also is exactly where exactly several of the best Shopify software enter into carry out.
Get more info visit BuzRush
Join: - Question & Answer Platform
1 note
·
View note
Last Seen Blogs

letterstopsyche
thy diaries

sdplgreens
SDPL Greens

detetsu003
無標題

viku008-blog
Untitled

sshruti11
ConstroBazaar