#im trying to figure out acrylic paint
Text
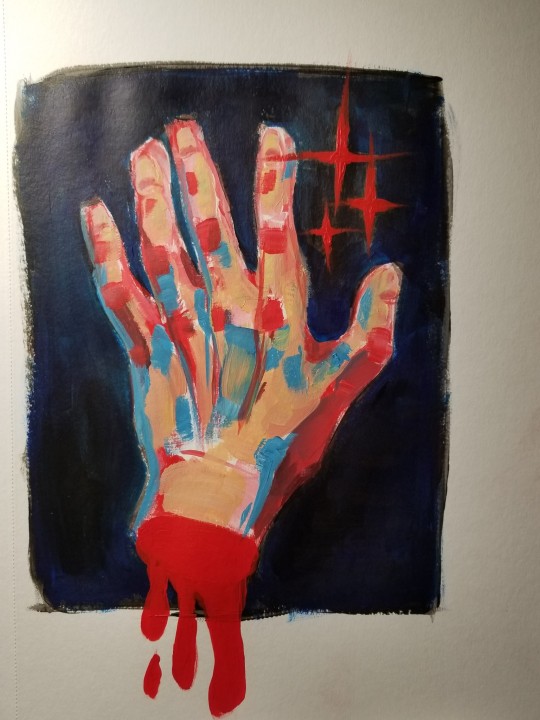
idk why "stick my hand out and draw/paint it" is the default when im practicing something new, but it is!
#im trying to figure out acrylic paint#i don't like how fast it dries! i need to get or make one of those stay wet palettes#this was just like a quick little thing to practice. im going to sleep now xoxo#good god look at the time oops#my artwork
8 notes
·
View notes
Text
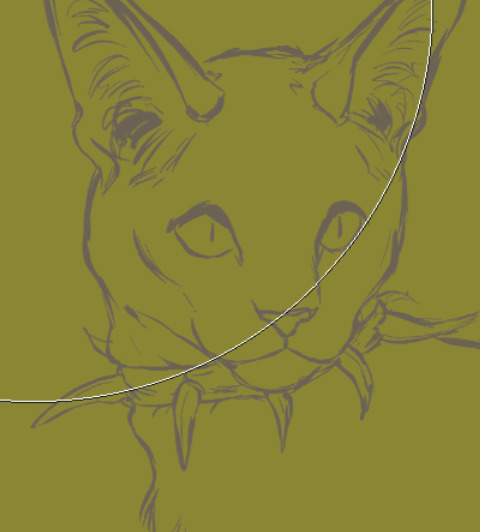
ermmmm (sneak peek)
#my art#do not copy trace or steal#didnt mean to include the brush/cursor but i personally think it adds to the wip feel and bc i dont want it being nabbed BAHAHA#im actually so mad so im upstairs for the next few weeks/month or so to keep an eye on pasty (this isnt the part where im mad)#so my dad helped me get my tablet fixed up to my laptop since i dont want to have to move all of my office stuff upstairs and after we got#that figured out i just needed to get my brushes back since my main ones arent preset brushes. theyre the pastel brush and marker brush#specifically and i also love the bumpy art pen and faint acrylic paint brush (< casually drops all of my brushes#bc i love them so much and i think everyone who has firealpaca should at least try them out bc they are so good)#ANYWAY. so im looking at the brush store and i see the chopstick brush. YALL im actually so mad how good it looks and how i feel using it#an actual gamechanger what in the world#i thiiiiink id like to do more of these semi realistic wc drawings so we'll see how this one turns out + how i feel about it
29 notes
·
View notes
Text
You've heard of Jars of Eyeballs, now get ready for:
Vials of Eyelashes
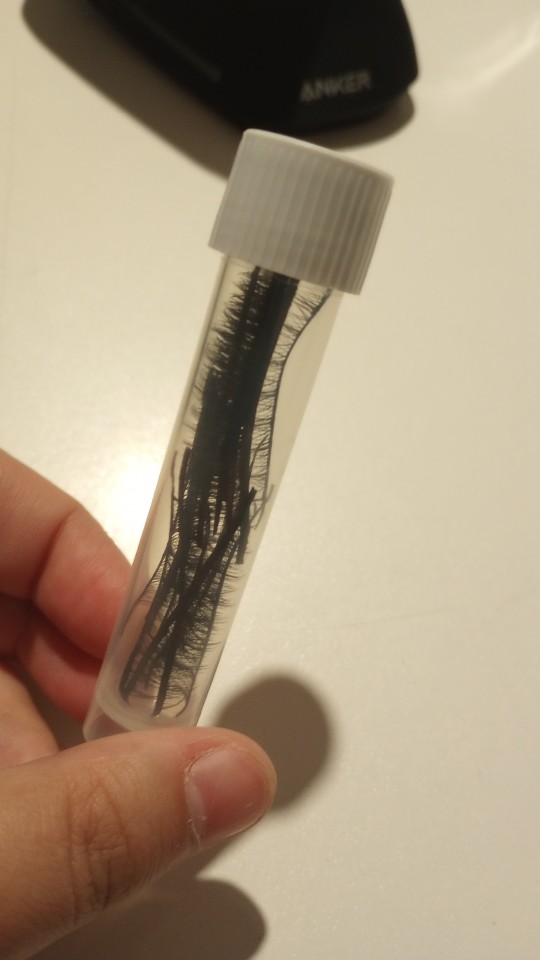
#should i tag this dollblr. would that make people less confused about the eyelash vial. or the eyeball jar#dollblr#actually i dont keep my eyes in jars i have em in awkward little baggies#the homemade glass cabochon ones in one and the professionally made acrylic and glass ones in another#my eyeball baggies. is that better or worse than the eyeball jar#im reorganizing all my stuff so like craft supplies and eletronic cables and whatever#and i had some package of really cheap ass fake eyelashes that i thought about using in a faceup#(never actually got around to using em LOL someday i'll try out eyelashes on faceups but rn ive been much more on the like)#(cartoony and simplified end of doll face painting so i havent felt much need for em)#(especially because im partial to anime style dolls)#and the packaging was really bulky to yknow keep the eyelashes pristine. but these were REALLY really cheap lashes so they were just like#by default slightly wonky. which doesnt matter too much to me because they would only be used for dolls or art anyway so they dont need to#like. keep the perfect human eye shape LOL so i was trying to figure out how to store em without taking up too much space#and i remembered all my vials for fountain pen ink and well. the rest is history. the rest is the eyelash vial#now time to put this deep in a drawer unlabeled to forget about and then give myself a jumpscare about mysterious vial years later
6 notes
·
View notes
Text
look at my art boy
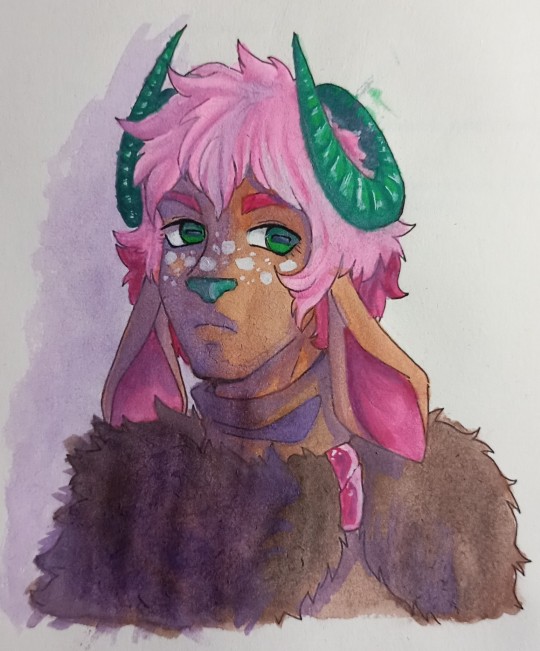
its Dex my friend Dex that i painted saturday night with my watercolors ^_^
#wind howls#myart#im trying to let go of how i usually draw digitally and with acrylics/oil paints and actually figure out watercolors#they dont tend to give me the result i want because i dont treat watercolors like watercolors and instead try to shape them otherwise#its very hard !!!#but im learning and im quite proud of this !#i particularly like how i shaded the face. it looks like theyre being illuminated by warm light and i think that fucking rules#the rest... im still learning. i havent fully colored segmented horns since i was in secondary school (so about like. 3-4 years ago !)#and i used to draw those in with wooden crayola pencils so its definitely something else with watercolors#anyway i like this. the paper sucks shit which is why its all chewed up and warbled but it got better after i left my sketchbook closed
1 note
·
View note
Text
its so amazing that art is therapy for some people because all I wanna do is punch a hole through this canvas right now
#art#artists on tumblr#painting#acrylic paint#acrylic on canvas#trust the process#i know its going to work out eventually but right now im trying to figure out how to 1v1 with the art gods
0 notes
Text
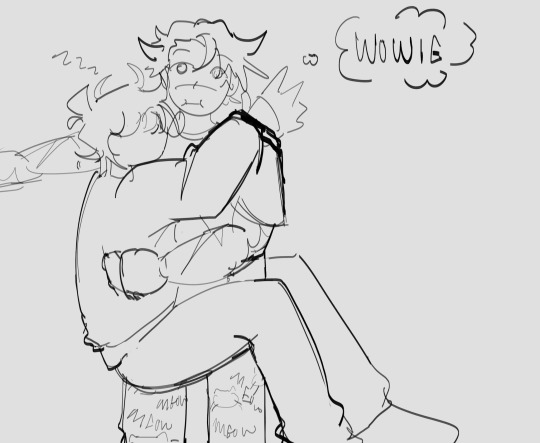

artist au... smiles
more under the cut
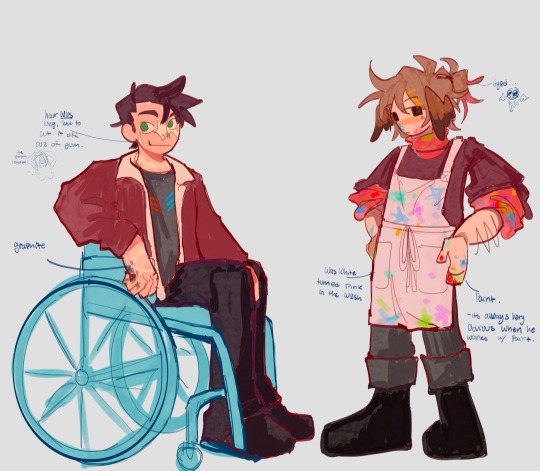
artist au where grian and scar are both artists. they met in college coz they both were assigned each other as a roomie and they both just really clicked🙊... anyways got a place tgt, now they js live tgt. this au is just them being domestic sorry its very boring😭...
grian is a freelance artist, looking for work. he mostly works with acrylics and oil paints but has been kinda stumped recently n has been rly into pottery. hes trying sculpture but its kinda difficult for him to get the hang of it. mostly likes using the pottery wheel. he helps out as an assistant in art classes at the college he graduated from sometimes, sometimes does figure drawing art modeling whatever thats called when asked? shrugs
scar is an architect (act surprised) who has like a legitimate Talent for art. this kinda pisses grian off (competitive) coz grian does study after Study.... and art js doesnt click for him the way it seems to click for scar and it frustrates him. They still r esch others motivation and inspiration (CORNYYYY) anyways back to scar hes mostly does like Ideas / drafts... he rly wants to do landscaping but he js has a knack for buildings- like apts, shops, office spaces yeah... Like Ideally he wants to do theme park stuff Then landscaping- but he has a stable career working as a building architect so he just is content. he mostly works from home, most of his work is online so a lotta his colleagues r js like Via Zoom And whatever so he rly like getting out when he can
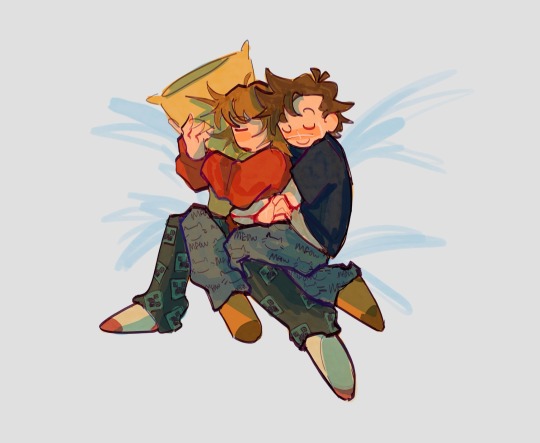
grian usually is like Im going to go sit and draw in the Rose Gardens. and scar joins him they do parallel play or whatever
Btw theyre not tgt theyre just heavily pinning (Theyve been pinning for the last 5 yrs.
1K notes
·
View notes
Note
How can I cultivate the same, "just keeping making stuff all the time" kind of energy you have? It's very impressive and something I wish I could do!
well, theres a couple reasons i think! one is that i just found ways to be satisfied with small amounts of work. its in part because of my ADHD, but my parents were always trying new things (motorcycles, leatherwork, acrylic paint, collage art, photography, video editing) so that definitely rubbed off on me; i had a great example of people just wanting to try stuff. i keep making stuff all the time because i love trying out new things; you don't have to be an expert to try something new! you just have to have a desire for it! wanna make a zine? google it! wanna write a comic? give it a shot! wanna get into woodworking? buy a carving knife and find a stick or something! i think theres plenty of ways to find entry points into interesting stuff and you gotta let yourself be okay with making shit that sucks just because its fun. which leads me to my second point!!
im okay with being dogshit at stuff! i try new things, i kind of suck at them, and i think it's either 1. cool that i made it this far or 2. kinda funny that this is what its like at the moment. i know that sucking is never permanent, everything can be improved with time, and rarely does anyone ever magically get good at something first try. i think of myself as a talented artist, but its over the course of 2+ decades of drawing; im always improving, and no matter what im going to find things i want to get better at, so why fault myself now for not being perfect? a couple of months ago i really wanted to try woodcarving, so i made spoon with my dad. did it turn out great? not really! you cant even use it as a spoon! but im glad i tried it, it was fun, i had a great time with my dad, and now i know a little bit more going in next time. the idea that you have to be perfect or make tangible progress every single time you try something new is a recipe for burnout. i promise you, it doesnt matter if something doesn't come out like God's Gift to Humanity! Did you have fun? did you learn something? are you satisfied in some small part? good!
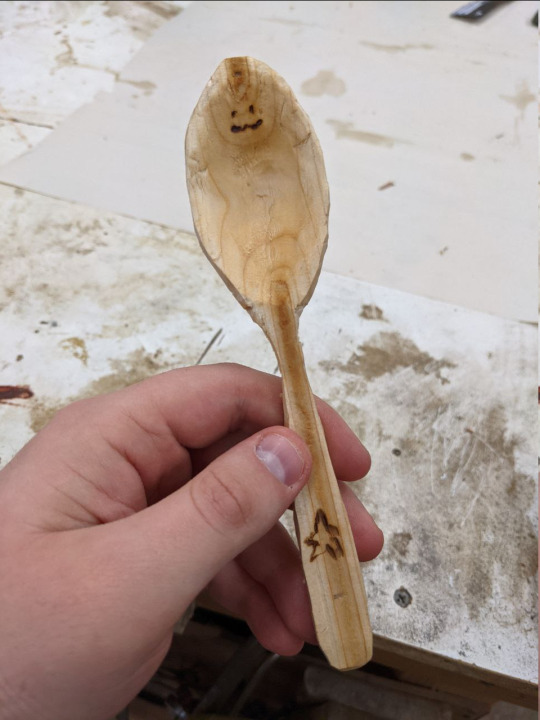
(pictured: tha spoon)
last, im just really easy to please myself! I'll make a doodle or implement an idle animation in my game or color a piece and go "wow! thats so cool i did that :)" and it really is just a matter of realizing that its fucking COOL to create stuff, no matter how small! whatever you made didn't exist before you, especially in your own unique way, and now it does! doesn't that rule?! i'm obsessed with it! even if its just a stick figure, its a stick figure you made, and it wasn't there before. thats fucking awesome!!! art is so cool!!!! i think that being happy with small goals and victories is a great way of trying out new things and showing off cool stuff u made, no matter what skill level. :)
this turned into a whole big thing, but i hope this helps! tl;dr is try things if they seem fun, be okay with not being good at them, and find stuff about it that makes you happy or satisfied!
765 notes
·
View notes
Text
HOW TO GET GOOD GRADES - a realistic guide!!
okay so you’re here because you wanna get good grades!! welcome, grab a notebook if you want and just read bcs im about to start shitting information :)
👏 PAY ATTENTION IN CLASS 👏 participate!! if anyone understands the struggle for this, it’s the girl with crippling ADHD but trust me, shit gets so much easier to understand when you actually listen to the teacher’s yapping, no matter how hard it is.
go to school actually ready to learn!! like for me, i grab a coffee at this coffee shop near my school, i read a book before class to warm up my brain and i make a whole ritual out of going to school, that slowly it made me enjoy it more. now i show up to school well rested, nourished and ready to learn.
take notes YOU like. i’m not telling you to go buy $200 acrylic paint markers just to make your title pretty, i’m telling you that no matter what color your pen is, how little or much you write, take notes YOU understand and i guarantee shit will get so much easier for you. (and for the love of god use a pencil for maths!!!)
study the way you want. study in a cafe, library, or your own room for all i care, just do it in a way you love! the more you like it the more you’ll want to do it. you can start by learning about something that interests you if you’d like, and then slowly move onto the topics you have to learn. be sure to take breaks and turn your phone off when you’re doing it!
manage your time efficiently. i don’t wanna be the one to tell you this but babe, priotise your shit. don’t choose to work on a bullshit extra credit project over an assignment that gives you a final grade. do your harder shit first and then move on to the easy stuff.
hang out with people that motivate you. this is more of a tip for life in general but it can apply to academics. if you hang out with 4 idiots, you’ll become the fifth. hang out with people who motivate you to grow and learn as a person.
discover a study method that works for you!! if colour coding works, do it! if blurting works, do it! don’t let anybody force their method on you if yours works best for you!! you know you better than anyone, try some stuff out and figure out what works best for you.
extra tips!!
check your answers after every test!
don’t ever dumb yourself down <3
take lots of breaks to avoid burnout!!
do your homework!
ask for help!!!!
here’s a little reminder that grades aren’t everything, i know how it feels atm but still just fall in love with your life and all of the rest will follow after <3
#hot girl tips#it girl#glowup#self care#glow up#self love#good grades#how to get good grades#older sister advice#older sister tips#girl tips#school tips#good grades tips
27 notes
·
View notes
Text
making bjd eyes is one of the things i’m THE most passionate about, but i’m struggling a bit finding the best way to make them, both in regards to their longevity, but also my health. im going to talk about it and ask if anybody has any ideas :3
i want to use the least toxic materials i can. i started off using uv resin as everybody seemed to use in their tutorials, and because of that i didn’t know how ridiculously toxic the fumes are. be careful with that stuff!!!!!!!!!! im now using non toxic slow cure resins, which is less convenient, but i’d rather not die for little plastic eyeballs!!!!!! be mindful of your health please!!!!!!
im also worried about the yellowing rates of all materials i could use. i’d like my eyes to hold up for as many years as they can!! for eye bases, im currently experimenting with said non toxic resin that’s also meant to be quite uv stable, combined with titanium dioxide powder for colouring which is also used as an anti uv ingredient in sunscreen…but im not a chemist and don’t know what fumes they make together. the resin on its own can be nontoxic because it doesn’t react with anything but itself, but i don’t know what adding the titanium dioxide will do. so far it’s working okay! i just need to find ways to grind the powder better as it likes to clump (pestle and mortar isn’t working super great for me rn). i did try polymer clay for the bases, but found it really hard to get into all the nooks and crannies so they came out wrong!! as well as it being near impossible for me to keep ALL the dust out. painting over it with acrylic paint made them a bit sticky…and therefore dusty again…
for the irises i use polymer clay! i tried pan pastels, but i can’t get it to look anything but grainy and muddy, so polymer clay is best for me. im currently waiting for some new moulds that should fit the irises, so i can cure them separately and then insert them into the bases. i am NOT !! putting resin in the oven after all that work to detox the process
it’s so difficult!!! but i want to make sure i can deliver the best product i possibly can while keeping myself safe. im so passionate about my craft but it’s so hard to meet problem after problem!!!! and it’s so stressful to see people sell uv resin eyes they didn’t use proper ppe to make!!!! stop that!!!! also while i’m at it, cure your polymer clay inside the resin, the polymers will break down the resin eventually and it’ll just suck and be nasty!!
a lot of my other ideas would be super expensive to set up too, so they’re going on the back burner for now. i hope all this is worth it and people will like my eyes once i figure it all out. im still happy just to make them for myself, but i don’t have enough dolls to justify sitting and making eyes all day for that!! if anybody has any experience or ideas for how to reduce fumes and increase longevity, please tell me!!!! im trying Everything i can get my hands on. sometimes i feel like i’m losing my mind thinking solely of little plastic eyes all day long
~Anonymous
12 notes
·
View notes
Note
SOL!!! HI!!! i have a question for u. so im gonna be putting together a 3d printed cosplay prop weapon very soon (not as complex as the outrage but still Large) and i was wondering, do u have any tips for putting it together, whether that be materials or paints to use or ways to go about it? if not no worries, but i figured i'd ask since youre the person i know that's done something similar to this :D
YES ok so first off real biggie Ok. Don't be like me and try using Bondo because you'll be sanding it for like 2 entire actual months. Smooth the layer lines with XTC-3D by Smooth-On (Amazon) because you'd end up spending that much on Spot & Glaze putty anyway lol The XTC-3D can be sanded too, so if you use too much in one spot or whatever it's easy to fix (remember to get a mask to filter out the particles)
Epoxy glue is pretty damn good for PLA but if your prop isn't Outrage-size/weight (<10lbs), you could get away with using Gorilla Glue brand super glue too since it's cheaper. They sell that at Walmart. Make sure you do it somewhere well ventilated because the fumes hurt!! <-learned the hard way
Any acrylic paints are fine for painting. I used like shitty $1.50 Walmart paints for a good chunk of the Outrage. Get a decent primer though. I think I used like Krylon matte white spray primer and it worked pretty good. Krylon's matte clear sealer's what I'm gonna use once I finish the last of the tiny details/touch up on the Outrage too. You can also seal with the XTC-3D for a high gloss finish.
For additional durability, you could install some rods. I went the insane route and put two like 3.5ft long all-thread steel rods in the Outrage. You don't have to do that lol I think maybe putting some wooden pegs in around any pegs that were printed with the prop parts themselves would be enough. Idk what your prop is though so this is just an optional thing. The Outrage was pretty sturdy even before the rods and it's 4ft x ~1.5ft x ~6" and 10lbs
20 notes
·
View notes
Note
Hey i think your art is amazing! How long have you been drawing? And do you partake in any other mediums?
thank you so much!!
two different answers about how long ive been drawing . i probably started drawing at 2 and drew a LOT like i still wish i had the capacity to just think of whatthefuckever and draw it. my favorite thing to use was markers until i got "ooo i dont think youre allowed to use those"'d in first grade. idk where to fit it on the timeline but i started figuring out digital art via mspaint at 6
except in a way idk if that counts when people ask about """serious""" work. i started trying to mimic speedpaints at 9 and actually wanted to make illustrations so thats where i took my starting point as; that would be almost a decade ago now
nowadays the only other mediums ive drawn in are pencil for time-passing doodles and colored pencils for other illustrations but i don't do much traditionally anymore? ive done paintings for assignments (acrylic, watercolor, india ink) which were really fun but i fear i'd make a mess or something doing it at home (i also just don't have the space to do it period)
i kind of wish i could perceive the "non-artist mindset" again? how different would my art look if i wasn't even worried about pursuing fully-complete illustrations. what would i draw if i was not conscious of an audience. what would it look like now if there was nothing to compare to. would i even consider myself an artist at all or would i be creating something more unique on its own. now im thinking about it!!!
8 notes
·
View notes
Note
hey i think you've done this before, but im new to punk do you have any tips?? also im thinking of starting a patch jacket but im not sure how to go about it - ufoboy
I think I have too, and I have a few different ones under the DIY section of my masterlist, but I figured I’d add a few more basic ones here too!
Thrift the base or use something you already have if you can. You want it to be comfy, maybe a *little* oversized. Color/material really doesnt matter as long as you like it
If you want to bleach or dye all or part of it, do it before you add stuff to it
There are so many tutorials out there on how to make patches. I usually just paint on an old pair of jeans
I typically mix 50/50 fabric and acrylic paint
If you are painting a patch on black fabric, start with a black base layer. Your other colors will be able to pop with less layers
You are not limited to patches and pins, you can paint on the jacket, you can sew pop tabs on, festival wristbands, zippers, extra pockets, literally anything you want
You can sew patches on with anything. I’ve used thread, fishing line, and floss. Personally, I prefer to use floss (especially for premade patches) but to each their own
If you have trouble threading a needle, they make a thing to help with that. I had to get one lol. Thimbles are also helpful
If you are still struggling, try a bigger needle. I use ones designed for denim
Dont worry about needing to meet a certain requirement for it. As long as YOU like it, thats all that matters. Remember, this jacket is a reflection of YOU and YOU alone
29 notes
·
View notes
Text
hmmmm..... sabo figure repainting.....
im trying to decide what the problem areas actually are besides needing to repair his missing face bandages (it was rubbed off-- just a dab of flat white acryllic on his face will fix it, the base layer of his skin looks fine to me)
but i think if i get at his detailing with a hobby knife i can smooth out some of the rough edges on his mold in general and i REALLY want to mess with the paint job on his jacket tbh. not only clean up the rough parts of the paintjob but i think it would look cute if i added my own detailing (like a patch)
his belt and hat also need touching up imo. maybe i could make his goggles reflective?
4 notes
·
View notes
Text

staff number 2: the moon staff!
this one was made with a metal pole i found on the street, styrofoam hollow egg, a lot of airdry clay, and a fancy ribbon.
infodumping abt the creation process under the cut
the clay i used for the egg was new to me, so thats why you can see some cracks on the moon; it tended to fall apart if i didnt apply glue on top of it while it was still wet, so i had to work in bits and bobs and didnt figure out that i could blend the clay with water until i was a third way into the sculpting process. oops.
the pole was originally red, and either sandpapering it until it lost all colors or getting some paint remover which might not even work seemed like too much work, so i just wrapped it in silver wallpaper. my clumsy hands struggled too much with applying it on smoothly, but im actually okay with that, as it created a pretty cool wobbly effect.
as for keeping the egg connected to the pole, i used once again hot glue, and some kinesiology tape i had laying around and wanted to use for chest taping, but the stripes were too narrow to work for my body, so instead i just used them as support for the moon.
however, the bodytype color had this yucky orangey skintone color, so i covered it up with the fancy blue ribbon. gluing the ribbon onto the prop wouldve been too messy, so i used a whole lot of sewing pins to keep the fabric in place. i mightve overdone it a bit, but it looks quite pretty in my opinion.
lessons learnt from this project:
airdry clay is better for small details, as the moon turned out a bit heavy. im going to try paper machete instead for bigger sculpted parts on my next staff.
using a mix of black clay and water for detailing the moons crevices and curves was a bad idea. i shouldve used a color that flattered the pastel tones the moon was painted in better. maybe a blue or purple
use thicker wallpaper the next time i decide to cover a part with it. the silvery stuff i got is very thin and tends to scratch up very easily
using white acrylic to prime black clay for painting takes forever. using white spray paint to apply a base layer was my most effiecent move in building staffs so far
even if you think you know your material, if youre using a new brand or type of it, give it a test run. save yourself some work in the long run
6 notes
·
View notes
Text
So I guess I'm the type of person who has a "spare" Airbrush now?
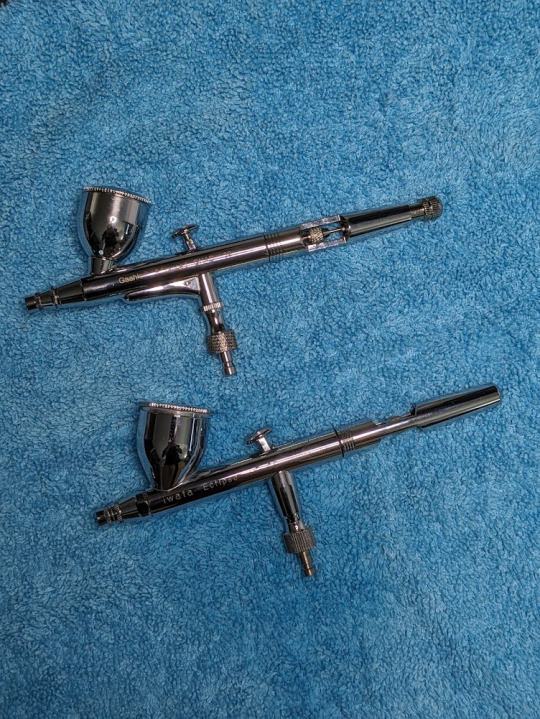
TLDR If you want to try airbrushing but are intimidated by the price of the bigger name brands like Iwata or Harder and Steenbeck, maybe give Gaahleri a look.
So I have had my Iwata Eclipse HPCS for about 18 months now and I love it, it has handled pretty much everything I could throw at it until I tried using Mission Models Paint on my most recent build. They are a waterbased acrylic and I had no trouble with Vallejo, Citadel, Army painter and Pro-Acryl (Easily my favourite water based paint), but MMP does not thin the way I have any other paint, they recommend no more than 20% (5:1 paint to thinner) and it is just so thick (and that's before adding their poly additive).
I persevered and got through the project, but not without continually having to clear clogs and dry tips. I had been wondering if getting a .5mm needle/nozzle for the eclipse might be worth a try but figured I'd wait until my next project to experiment.
Flash forward about a month and I've been seeing Gaahleri airbrushes promoted eeeeeevry where and they were cheap not actually that much more than getting a new needle kit $40 for everything I would need to change vs $45 for the Gaahleri kit with both a .35 and .5 needle. So I decided I'd grab one to try out, well prime day comes around and they had it on sale for $35 so that was an instant buy.
It arrived last week and I had a chance to test it out today and first things first, if you have used a higher end brush, you can feel the difference right away, the fit and finish is just not quite there, threads are rough the trigger is stiff and sticks a little at the end, even after lubing it. I had seen others mentioned that the pre-installed .35 needle was kind of jammed in when they got theirs and while mine wasn't bad, it definitely felt like everything was a little over tightened.
The thing is though for $45 or less, I really can't complain. It's a little heavier than my Iwata, but not in a way that seems like a problem and honestly you might prefer a little extra chonk. The .35 needle performed just fine, I got paint on plastic without too much trouble and had the same issues with the gloopy Mission Models Paints. Then I cleaned up and switched over to the .5 needle and I was able to just hose a bunch of spoons down with their primer without a second though, the tip did not dry out and the brush did not clog once during the entire process. I tried their top coats, their flat coat is garbage and it was still garbage through the .5 needle, but the gloss was fantastic.
Cleaning was pretty much the same as my other brush, except for the removable cup, which I thought would be a nice feature, but honestly the number of times I started to loosen it while cleaning the cup during a paint swap did get a little annoying YMMV if your used to a removable cup, im sure its not that bad.
Overall I'm pretty happy with my purchase as it was less than the cost of the alternate parts for my Iwata and now I don't have to swap everything over when I want to use a different needle, I can just grab the brush that has the one I want.
5 notes
·
View notes
Text
Paintbrush, PlasGlue, and Holy Clippers: Sparse Marns Part IV: Basecoats Part I
Heya! So my painting project's going well, but the steps are... So Much, and my time to paint each day is So Limited, and the photos Im taking are So Numerous, so I'm changing the terms of the deal and covering the painting in multiple posts instead of one OvO
Ok So: Here's an idea of how they all looked just before I started painting, via Stumbly and Done, with I think two days of the prime drying, and in Crispier, more artificial light than I've been shooting:
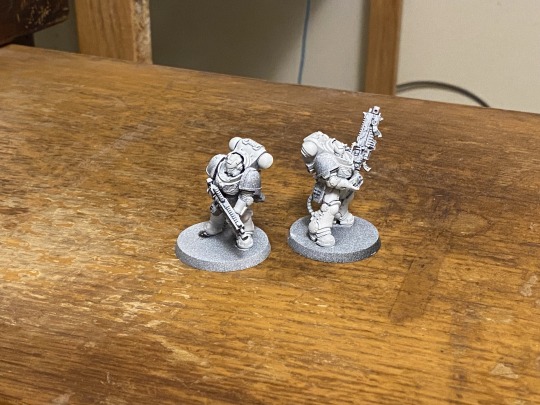

And now: The Team
Brushes
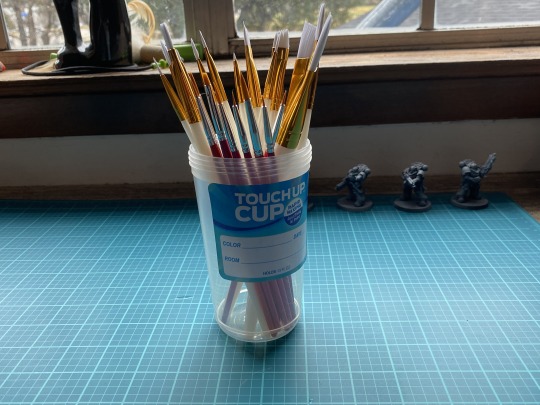
These are two different packs, from two different brands, from the local Michaels, in a paintcup from Lowes. I think the orange ones were 5 bucks(Hodge-Podge I wanna say?) and the white ones were 8? I should have probably recorded prices at time of purchase -__-
Next: Some towels for wiping my brushes with and general cleanliness-Utility:
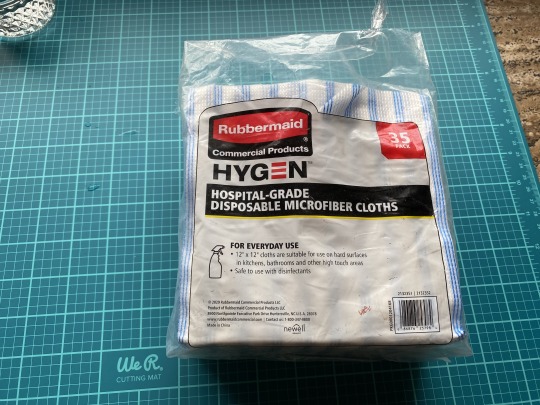
These are disposable microfiber cloths, again from Lowes. Im pretty sure paper towels would work just as well but I've found myself in the painting section often of late, was curious how these would do, and they were EXTREMELY cheap.
Then: some jars for cleaning my brushes.
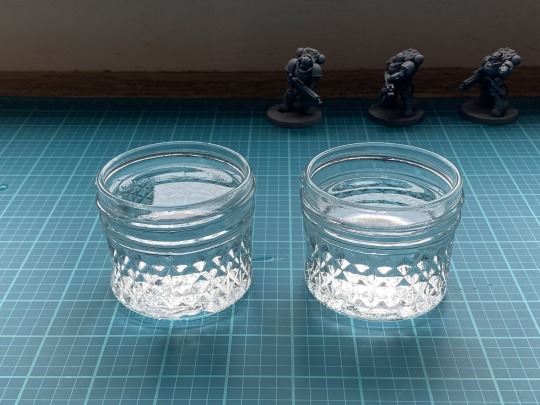
I used two so that I would have a jar of absolutely CLEAN water for wetting my brush after I've washed it in the other one and dried it on the cloth. Im using exclusively water-based paints so it's just water in these jars; there's no reason to use a mask for the painting part of this project as no turpentine or other such solvents will come anywhere NEAR this project(except for Mr. Dissolved, of course, and we're passed that uwu uwu uwu)
Ok next I wanted to try using a wet palette, something I've never done before, and, while I COULD just go buy one, I figured I'd try making one instead as it seemed fairly easy to do(actl it seems easier that the official version? Looking around at Michaels the "Acrylic paper" they use for wet palettes requires soaking in BOILING WATER for like 15 MINUTES before use??? Maybe I found the wrong stuff tho). So, I went and got a rubbermaid box I wasn't using

(Pentel R.S.V.P. bk90 Fine for scale), Put a paper towel in it like so
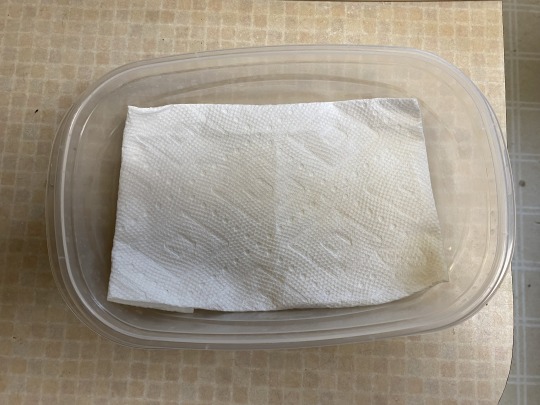
Got it wet(just damp; not soaked), poured off(and wrung out) any excess, then cut a piece of waxpaper to shape and pressed it in
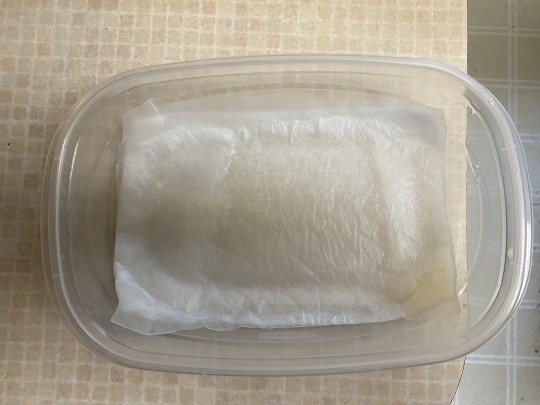
The idea here is that the paint will sit safe from slurp and dissolution on the waxpaper while water wicks up SLOOOOOWLYYYY through it from the paper towel, keeping it moist without diluting it. This generally worked well, tho it took me awhile to get used to it and to working with the paint, which I got anxious/paranoid over a few times.
And lastly, of course, because one should NEVER go ANYWHERE without at least 3-5 notebooks on their person, a memobook and pen

Obvsl I'd include these purely on Principle, but as a practical matter it's useful to have a method for recording how many Parts of Which Color go into any colors you might mix in the course of painting u_u u_u
OK: Now it's time to make some Motherfucking CHOICES >:3
Originally, my plan was to paint these as Ultramarines. They're a Pretty Basic Blue, Red, Gold(with some white accents; GEE I wonder where that color scheme comes from???) scheme, which are all really Solid, Vibrant, Reliable colors. This subfaction is also quite literally the Model Spess Marins and posterboys for the whole model line/faction, and so there are LOTS of painting tutorials and examples out there for them and also-also I could use the box art as a handy painting-reference :> :>
BUT!
If I ever decide to play WH40k, I wouldnt want to do it with Gillman's Legionnaires(no offense to them; they're about the closest things to 'Good Guys' as Spess Marins[and WH40K humans generally outside the Adeptus Custodes/sisters of silence] GET), but rather with mine own Best Lad brainfruits: the Nova Paladins uvu uvu uvu
if I painted them as Ultramrines, I could never use them as part of that army(well I could, but only as an allied detachment, which would cause all sorts of complicated rules Shenanigans that I dont want to get into, unless I played the NPs under UM rules cuz, obvsl, you cant just PLAY your own madeup ruleset with other ppl--- It's Complicated Alright >:| >:|)
This is supposed to be a Fun and Learning experience and, as Dear Old Bob was so fond of saying, painting is about Doing What You Want; this is my own world with ALL the Happy Little Trees I WANT godsdammit so:
I decided to paint them as the Nova Paladins :3
But this Immediately presents a problem! The Nova Paladin paint scheme is (a skeletal, yellowish)white, yellow, and orange, and these are the three MOST finicky and difficult paints to paint with(allegedly u_u u_u and, spoilers, they SORT of are but theyre not THAT bad u_u u_u u_u) u_u My solution was simple: I LIKE difficult and finicky things and thus Do Not Care >:3 >:3
SO:
The Paints: and oh no! The initial pictures I took of these SUCKED so I just took some new ones with better, more LEGIBLE, lighting X| X| X|

These are my basecoats. I Know this looks intimidating but plz calm down!
The general concept for the Nova Paladins is a Bright, Warm, Friendly, almost EXPLODY(hence the name) "Heroic" color scheme: Knights in Shining Armor, vaporizing everyone they meet with the fury of 10000 Suns(ie: concentrated plasma rifles). The majority of each model(like 90% of them) is going to be the corax white there on the left: that's the "Primary" color which I planned to use for their armor. Then the imperial fist yellow would be my secondary color, for their pauldrons(the big shoulder bits), and for the sergeant's helmet. The Orange I planned to use as an accent color, tho at the time I hadn't really decided WHAT I'd be accenting with it. The mid-brown(bloodreaver flesh) I'd use for any leather details, such as their belts and pouches. The light beige there(Zandri dust) I'd use for any scroll or ribbon details. The red is a sort of secondary accent I planned to use exclusively for their grenades, and I held to that. Next to it, entirely illegible(X| X|), is Screamer Pink, which Im going to use for the seals/rosettes(which they are is a question whose answer properly lies only in the heart of each individual painter, and dont let anyone tell you different u_u) any ribbons will be attached to, and then the abaddon black I planned to use on the joint-bits showing through the armor, any tubing, and the Iron Sights on the guns, because Im Insane -__- I would MOSTLY follow this plan, but not entirely u_u u_u u_u
So, using This brush

I applied the white-layer, and here's Sarge to show how that looked
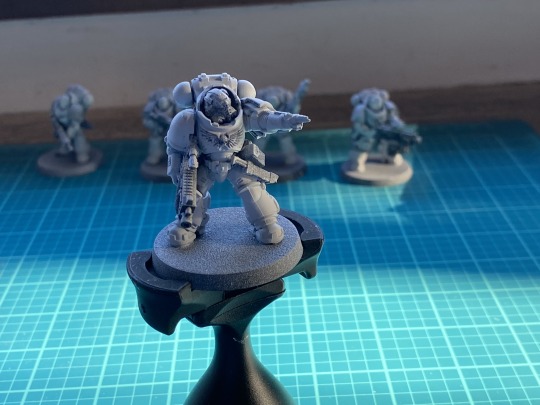
Pretty Spiffy! This was, I think, after the 2nd coat, and unfortunately a mouldline managed to survive through my ministrations on this one |:T It's not a HUGE deal; it disappeared as I built up layers.
I didn't find the white PHYSICALLY difficult to work with as others warned(it pretty much went where I wanted it too and didn't slink around), but it DID take me awhile to figure out the proper paint-water ratio with the brush, and I had a really hard time seeing it on the palette. Also, most painting vids will tell you to paint in "two thin coats" of each color, both to avoid globbing/unruly paint and to get a smoother, fuller finish without visible paintstrokes, but I ended up doing... A LOT of coats on these. Somewhere between 4 and 6 per model, and some sections maybe even more. Probably should have taken notes in my memopad during the painting for the sake of later accuracy :p :p That MIGHT have been the paint, it might have also been me using the wrong brush(I felt it worked fine, but it's a little short and bristly and its possible that's meant as a drybrush) but honestly it felt more like a combination of my learning how to properly work with the paint and my obsessive meticulousness. Building up progressive thin layers to a creamy full coat was... Satisfying OuO
Also, obvsl, I really struggled with workflow on this bit. My idea was to do All The Armor on one, then All The Armor on the next, etc etc, but I kept both circling back to sections I wasn't satisfied with AND forgetting sections I intended to paint with that approach which is BAD cuz you need to give the paint time to set; it was simply Too Broad a remit for my brain's Tendencies and I needed to pare it down. I would Form Resolves, considering this.
This step was my longest; my painting times have been deeply uneven day-to-day, but I'd say I easily spent 8 hours spread over 2.5 just on this. Again: I AM VERY DETAIL ORIENTED AND FINICKY: most ppl would NOT take this long on the primary base coat on their minis, even using white paint(which I'm pretty sure I was thinning down WAY too much at the start), and nor should they. But: I got the results I wanted, gained valuable experience with the paint and brush, and realized I needed to think harder about my workflow to get it Efficient. Also I think the black-grey-white tonal I used for the priming may have been too dark for such a bright scheme, but I'll get into that in my concluding/future projects post.
Once I was satisfied with the white coat, I turned to the yellow, and a different brush

This fellow. It's a longer brush, but the tip is finer and I thought that would help with the more detailed work. Generally I feel it worked well, tho there were moments where I or it slipped, and it painted where I didn't want it to. Not to worry! The base layer's just the start and touchup is always possible later. If, in your painting, you do get paint where you dont want you can either just paint over it once it dries with the color you like or, if you're fast enough and have a clean brush handy, try to swipe some of that paint off onto a brush, or even push some water into it to dilute it.
Immediately I recognized that Imperial Fist was too thin for what I wanted, especially with the prime I'd given it. tl;dr: Imperial Fist is a "Contrast Paint" and Contrast paints are a new line by GW meant to compete with "speedpaint" lines from other manufacturers which,building from a full-white prime, allow you to quickly paint up allot of figures. As thin paints(practically inks and nearly washes, imo) they settle into the recesses of the model giving you, as the name implies, good Contrasts and gradients across the model as a whole with just a few coats of a single color, and eliminating the need for lots of shading thereby. Imperial Fist just did not work with the prime I had. I thought this might be the case(despite some of the GW painting guides I'd found reccing it) so I bought a backup yellow which I now turned to:
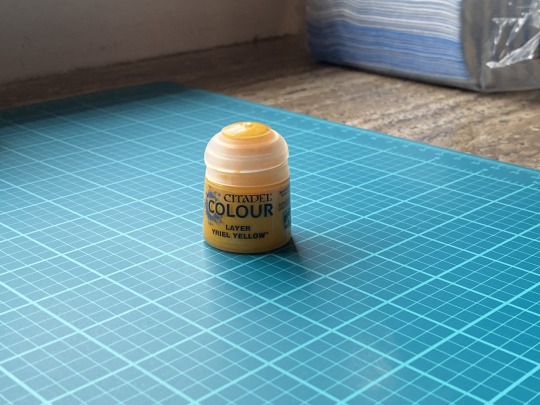
Yriel yellow was much thicker, though "cooler" and not as red/orange/redgold a yellow as I really want for this scheme(IF absolutely has that sort of punch). I decided to give it a shot though, and it worked fine.
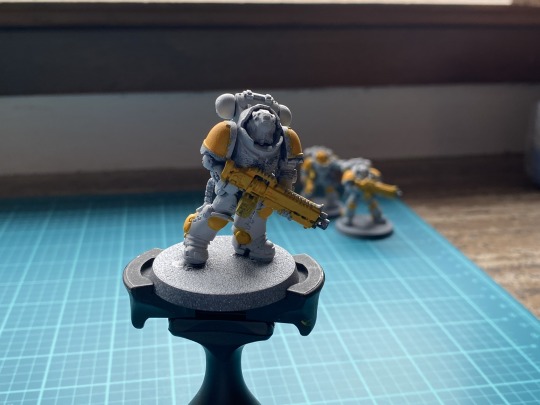
As I began to paint, I put my Resolves from the white layer into action. I would start painting section-by-section model-to-model (ie left shoulder on all of them, then right shoulder, then gun, etc etc). This approach worked allot better, for Me: it helped me to stay focused on One Thing and to move btwn the miniatures, letting each layer lay as it lie, knowing I could come back to "fix" any issues I had with it once dry, and preventing me from endlessly circling one model, trying to get everything Just So. Also: I began to move the minis from one side of the workspace to the other as I finished a layer, which helped me to keep track of which ones were done and which ones still needed work, and gave a satisfyingly tactile, concrete, and repetitive aspect to my progression. I feel like this approach would have sped up the white layer SIGNIFICANTLY.
It took about 3-4 coats until I was satisfied with the intensity of color on thier shoulders and the sergeant's helmet...
...and that was when I decided to do their guns in yellow too. GW aims for a bit of a 'Tacticool' aesthetic these days and as such the guns tend to be dark and metallic, but back when I first started following the hobby they were much more colorful and cartoony(with DANGER STRIPES, Even!), and I thought it'd be kind of a waste of that great yellow to just put it on the shoulders, and and I always preferred that more colorful approach anyway, so I painted the gun casings too :> :>
...and THEN I decided to paint their knees, also, in this yellow, cuz why not >:> >:> >:> Sometimes having one knee painted in the secondary color is used as a rank signifier for Spice Mariners, but I didn't care and different chapters do thing different all the time so It's Fine.
... and THEN-then, I decided the circle bits at the ankle of Primaris marine boots would look Neat in that yellow, too, so I painted THAT yellow also >:D >:D AND the matching interior circles >:D
Then, glutted with my POWA, I took some pics maniacally giggling ONLY SLIGHTLY:


Starting to come together >:> >:> I thought this looked really nice, but I still wanted that reddish PUNCH the Imperial Fist yellow had, and it occurred to me that, seeing as it looked like a wash and ACTED like a wash, I might as well try USING IT as a wash, so I did! And this is after that:


I think that IF contrast wash really gave the yellow bits a fuller, warmer, Snappier tone ^v^ ^v^ ^v^ Or at least I hope so: again, the pics are pretty blurry in the editor so idk how they look to y'all.
Anyway! I think I'll stop there for today cuz this post is Huge and has lots of pictures in it. Basecoats part 2 will include the Accents, All of the 8its, and also the Metallics :> :> Seeya then ^v^
#zA Paints#zA Hobbies#GamesWorkshop#WH40K#Space Marines#Heavy Intercessors#Nova Paladins#Base Layers#Hobbyposts
4 notes
·
View notes
Last Seen Blogs

moneymindsmap
MoneyMindsMap

rataton34
Sans titre

petras-drizzt-corner
Petra (!!)

dooguard
DooGuard Headgear
dooguard
DooGuard Headgear