#learn arduino
Explore tagged Tumblr posts
Visit Tumblr Blog
Explore Tumblr blogs with no restrictions, modern design and the best experience.
Last Seen Tumblr Blogs


Fun Fact
In 2020, Tumblr had 29.4 million users in the US.
Text
I AM SO GOOD AT CIRCUIT BUILDING AND PROGRAMMING RAAAAA
C++ script under cut :3
int UpDown; //value for the Y direction of controller
int LeftRight; //value for the x direction of controller
int LR_neutral; //value for the 0 position in the y direction of controller
int UD_neutral; //value for the 0 position in the x direction of controller
int Bprev; //value for button edge detection
int Bcurr; //value for button edge detection
int R;
int Y;
int G;
int B;
void setup() {
Serial.begin(9600); //begin communication
pinMode(A2, INPUT); //button press detection
pinMode(4, OUTPUT); //set pin 4 to power the Red LED
pinMode(5, OUTPUT); //set pin 5 to power the Yellow LED
pinMode(6, OUTPUT); //set pin 6 to power the Blue LED
pinMode(7, OUTPUT); //set pin 7 to power the Green LED
LR_neutral = analogRead(A1); //set zero position of controller
UD_neutral = analogRead(A0); //set zero position of controller
//WARNING!!! YOU CAN NOT TOUCH CONTROLER WHEN INITALIZATION HAPPENS!!!! WILL MESS CONTROLLER UP
}
void loop() {
LeftRight = analogRead(A0); //read X position of controller
UpDown = analogRead(A1); //read y position of controller
Bprev = Bcurr; //set current button state to previous state
Bcurr = analogRead(A2); //set current button state equal to actual button state
if ((Bprev == 0) && (Bcurr > 0)){
//turns all LED on
digitalWrite(4,HIGH);
digitalWrite(5,HIGH);
digitalWrite(6,HIGH);
digitalWrite (7,HIGH);
delay(100); //wait
//turns all LED off
digitalWrite (4,LOW);
digitalWrite (5,LOW);
digitalWrite (6,LOW);
digitalWrite (7,LOW);
}
if (UpDown >= UD_neutral) { // checks if controller is up
B = 0; //if up turns blue LED off
R = map(UpDown, UD_neutral,1023,0,255); //if up turns red LED on
}
else {
R = 0; //if down turns red LED off
B = map(UpDown, UD_neutral,0,0,255); //if down turns blue LED on
}
if (LeftRight >= LR_neutral) { // checks if controller is right
G = 0; //if right turns green LED off
Y = map(LeftRight, LR_neutral, 1023,0,255); //if right turns yellow LED on
}
else {
Y = 0; //if left turns yellow off
G = map(LeftRight, LR_neutral, 0,0,255); //if left turns green on
}
//writes values to LEDs
analogWrite(4,R);
analogWrite(5,Y);
analogWrite(6,B);
analogWrite (7,G);
}
#Do you want to learn C++#because I know C++#people who know what they are doing know that this code has several issues tho :/#but it works!!!#And I'll take that#programing#circuit diagram#curcuits#prototype circuit#arduino#I'M GONNA MAKE A ROBOT AND NO ONE CAN STOP ME#yes this is unironically my homework#I love college!
5 notes
·
View notes
Text
Arduino Mega 2560 Starter Learning Kit
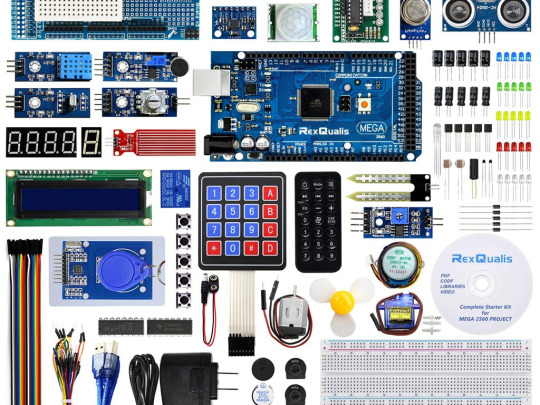
The AINOW Arduino Mega 2560 Starter Learning Kit is an ideal choice for those interested in microcontrollers and electronic components. It includes instructional videos and a guidebook to make learning easy. The tutorials cover basic coding using Arduino software and operating electronic devices. Previous experience is not necessary as the kit teaches coding and working with electronics from the ground up. And, there’s no need for soldering skills – simply plug and play for a fun learning experience.
The main idea is that repetition should be avoided when rephrasing the following paragraph with the same tone.
A fantastic set suitable for all levels, from novice to advanced.
These components have versatile applications and are built for durability.
The kit contains a diverse range of materials to create a multitude of Endless Projects.
An excellent method to gain knowledge on sensors of both analog and digital varieties.
The characteristic is a prominent aspect that sets it apart and makes it stand out.
This kit is ideal for both novices and seasoned professionals in this particular area.
Our selection includes both Analog and Digital Sensors, perfect for those looking to make their own DIY projects.
Discovering the world of microcontrollers is a breeze with Arduino Mega 2560.
Our resources include a User Guide, Codes/Sample Programs & Reference books/Video Tutorials, and other valuable materials.
3 notes
·
View notes
Text
youtube
#robotics for kids#robotics#kids#stem#k12#education#kids learning#kids robotics#arduino#microbit#Youtube
0 notes
Text
me after like .3 seconds of trying to do anything new

#sees too many big words and starts to cry#trying to pick up arduino again for a project i mean i took a class in high school and im going take more lessons at this local place but#like it immediately makes me want to cry it seems like the hardest thing in the world if you look up basically anything#like stop stop slow down stop. first whats a computer.#this is actually the one place where reddit comments make everything immediately fucking worse#i dont want to learn to code i just want to do the bare minimum . for my arts and crafts. SOBS.#moving parts.....lights...etc
1 note
·
View note
Text
i love quantum science so much u_u why do i have to do the other parts of science too just to do quantum...???? IT MAKES ME SICK genuinely. like why do you think i care about organic synthesis. i'm trying to develop basis functions jesus christ. also why do you think i care about arduino boards. I'M TRYING TO FIND THE WAVE FUNCTION
#citrustalk#(sorry to my followers who love arduino boards u_u)#whatever. i sound like one of those people who's like 'why do i need to learn calculus to do biology'. WHATEVER
0 notes
Text

Learning and Robotic Kits Online In India
Discover a world of learning and robotic kits online in India at Tomson Electronics. Explore our selection for innovative educational tools. Start your journey into robotics today!
0 notes
Text
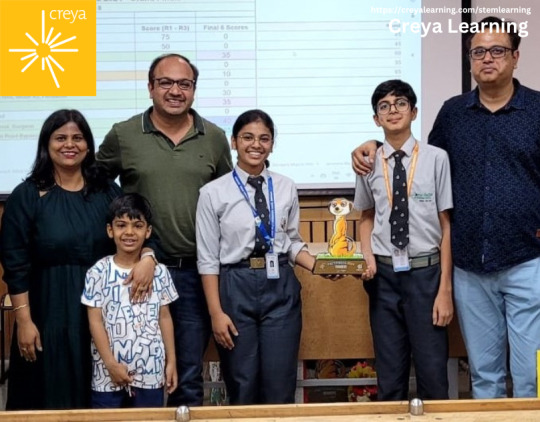
Creya Learning & Research the pioneer and most awarded STEM learning and Design Studio Program inspires 50,000+ school students every day to become inventors and innovators by working on projects across diversemanipulative sets from Robotics to Engineering design to Coding to Cameras and IoThttps://www.creyalearning.com/stemlearning/
#ai coding for schools#stem lab companies india#robotics lab#top stem learning company india#best coding program for schools#3d printing projects for schools#iot arduino projects for schools#best stem learning company india#innovation labs for schools#design lab for schools
0 notes
Text
A4988 Pinout: A Comprehensive Guide
Discover the functionality and versatility of the Stepper Motor Driver Module A4988 Pinout, a crucial component in the world of robotics and automation. Let’s delve into the key details, with a specific focus on the A4988 pinout for a clearer understanding.
Stepper Motor Driver Module A4988
The A4988 is a stepper motor driver module that plays a pivotal role in controlling the precise movements of stepper motors. Whether you’re working on a 3D printer, CNC machine, or any other project requiring accurate motor control, the A4988 is a go-to choice.
A4988 Pinout Configuration
Understanding the A4988 pinout configuration is essential for effectively integrating the A4988 into your projects. Here’s a breakdown of the key pins:
MS1, MS2, MS3 (Microstep Resolution): These pins determine the microstep resolution, allowing you to set the stepping mode for the stepper motor. Configuring these pins enables fine-tuning of motor movement.
VMOT (Motor Power Supply Voltage): Connect this pin to the motor power supply voltage (typically 8V to 35V) to ensure the proper functioning of the stepper motor.
GND (Ground): Establish the ground connection by linking this pin to the ground of your power supply or microcontroller.
VDD (Logic Power Supply Voltage): Provide the logic power supply voltage (typically 3V to 5.5V) to this pin to power the internal logic circuitry of the A4988.
DIR (Direction Input): Control the direction of the stepper motor by connecting this pin to a digital output on your microcontroller.
STEP (Step Input): Trigger individual steps of the stepper motor by connecting this pin to another digital output on your microcontroller.
RESET (Reset Input): This pin resets the internal translator circuit, and it is optional to use.
SLEEP (Sleep Input): Putting the A4988 into sleep mode is achieved by connecting this pin to a digital high signal.
Read More: A4988 Pinout
#A4988#stepper-motor#microcontroller#Arduino#Raspberry-Pi#electronics#pinout#wiring#tutorial#DIY#project#hardware#software#programming#electronics-projects#microcontroller-projects#Arduino-projects#Raspberry-Pi-projects#open-source#maker#fabrication#prototyping#engineering#technology#innovation#learning#education
0 notes
Text
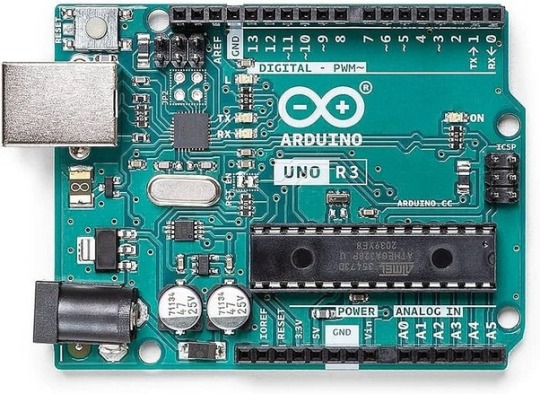
Teaching Kids the Basics of Electronics and Coding with Arduino
Are you looking for a fun, hands-on way to introduce your kids to the world of electronics and coding? Look no further than Arduino!
Arduino is an open-source platform that allows users to create and control electronic projects through coding. This makes it an excellent tool for introducing kids to the basics of Electronics and coding in a way that is both engaging and accessible.
One of the best things about Arduino is its versatility. You can create a wide range of projects, from light-up robots to temperature sensors, all using the same platform. This means that there’s no limit to what your kids can create with Arduino, and it’s a great way to encourage their creativity and problem-solving skills.
Getting started with Arduino is easier than you might think. The platform is designed to be user-friendly, with plenty of resources available Online to help beginners get started. There are also countless tutorials and project ideas available, making it easy to find inspiration and start creating right away.

Photo by Arnold Francisca on Unsplash
One fun project that kids can create with Arduino is a light-up Robot. Using simple components like LEDs, resistors, and a servo motor, kids can create a robot that can move and light up in response to different stimuli. For example, they could create a robot that moves forward when it senses light or one that spins in circles when it hears a sound.
Another great project to try is a Temperature Sensor. With a few basic components and some simple Coding, your kids can create a sensor that can measure the temperature in a room and display the results on an LCD screen. This is a great way to introduce them to the basics of programming and engineering while also teaching them about the importance of temperature control.
Overall, Arduino is an excellent tool for introducing kids to the world of electronics and coding. Its versatility, ease of use, and endless possibilities make it a fun and engaging way to encourage creativity, problem-solving, and STEM learning. So why not give it a try and see what kind of amazing projects your kids can create?
#artificial intelligence#coding#education#programming#coding for kids#digital world#future#innovation#tech#coding course#coding for beginners#engineering#programmer#javascript#learn to code#arduino#3d printing#smart house#smart
0 notes
Text
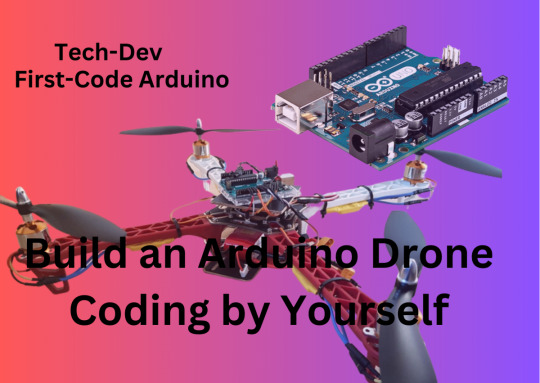
Learn to Make the Drone through Arduino Uno Yourself || Chapter#1
Learn to Make the Drone through Arduino Uno Yourself || Chapter#1 #code #learn #homemade #drone
To make the Drone you may Understand the Basics of Arduino Drone coding is written in C++ Language which is not much hard but to understand and write the Code yourself. You must understand the basics of arduino code and electronics Components. Here is your the first chapter and begin of our Drone programme If you want to learn the C++ more deeply you may prefer to my C++ Programme Here You…
View On WordPress
#arduino tutorial#coding#dailyprompt#dailyprompt-1996#dailyprompt-2000#Drone#earn#free course#Home#homemadedrone#learn#learn and earn#learn to code
1 note
·
View note
Text

extreme mood
I swear no Donna cosplayer who attempts to make Angie comes out of it sane 🫡😔
Proof:

#I swear one day I will learn how to arduino so I can put a speaker with her lines in her#also yes I brought my girl to work for halloween#I delight in my coworker's fear#donna beneviento#re8#gonna tag it#my art#cause I don't think I posted this picture before and I want to have things in one place
261 notes
·
View notes
Text
Ad | Some Humble Bundle Goodies
One for the audio engineers - The Audio Arcade bundle gives you a whole bunch of royalty-free music and SFX as well as plugins to insert in all the major game engines. Ambient tracks, environmental sounds, explosions, you name it.
Money raised goes towards Children's Miracle Network Hospitals.
For those who dabble in Virtual Reality, the Upload VR Showcase with Devolver Digital has a bunch of Serious Sam VR games as well as the Talos Principle, a really solid puzzle game.
Money raised goes to Special Effect which helps people with disabilities enjoy games via accessible controllers. I've seen the stuff they do and it's honestly great.
Want to get into programming but don't know where to start? The Learn to Program bundle has a tonne of resources covering everything from HTML and CSS through to Python, C# and Ruby.
Money raised goes towards Code.org which seeks to expand participation in computing science by helping women and students of colour.
The Future Tech Innovators Toolkit is a software bundle with courses on Robotics, Electronics and programming with Raspberry Pi and Arduino.
Money raised goes towards Alzheimers Research UK.
The Home How-To Guides bundle offers a complete set of books for home improvements and projects. Want to know more about plumbing, home repair, bathrooms, wiring or carpentry? This bundle has you covered.
Money raised goes to It Gets Better, a charity that supports LGBT Youth.
Want to pick up the latest Elden Ring DLC? It's also available on the Humble Store with the key being redeemable on Steam.
105 notes
·
View notes
Note
What's the thing that's probably wrong with this very cheap robot arm? I know the good ones start at like $10k so presumably it's something. https://www.amazon.com/LewanSoul-Robotic-Arduino-Software-Tutorial/dp/B074T6DPKX?source=ps-sl-shoppingads-lpcontext&ref_=fplfs&psc=1&smid=A1K1UK7O5KP6WQ&gQT=1
(clickable link) looks like your average cheap servo arm -- lots of pinch points and low weight capacity, but the real problem is the precision, or lack thereof. there's gonna be a lot of slop and backlash, which makes the already tricky project of manipulation basically impossible for anything more difficult than Brightly Colored Foam Cubes. fortunately the natural habitat of this type of arm is, like, "learn to robotics!" school projects where Brightly Colored Foam Cubes are the only kind of object in existence. (but keep in mind that i'm no big city mechanical engineer or anything.)
#the trashcan speaks#technoholic robotronic#i guess this is an 'answering robotics asks' type of evening
20 notes
·
View notes
Text
Look man at this point I think you gotta start getting funky with it and make your own
My raticate goes through chews very fast. I suspect it's due to her high level, but Kanto doesn't supply anything hardier than what we've already tried that's fitting for her teeth because of how few people raise strong raticate. Any chew toy recommendations for rodent pokemon with large incisors from other regions?
#<- ended up learning to design and weave on an arduino powered jacquard loom myself for that reason
11 notes
·
View notes
Note
Hi, I'm a junior in university right now working towards my bachelor's in electrical engineering and I've since realized I have no idea wtf I'm doing. Do you have some resources on how to begin designing electric circuits and programming in C? You seem like you know what you're doing
So I've thought about this a good bit and what helped me learn both times was hands on practice so I'd see about getting a cheap breadboard kit like this:
But probably not this one exactly, you can get something similar for way cheaper.
As for specific literature for circuitry I don't have a recommendation but I can recommend picking varying difficulties of diy projects that require circuitry at the beginning to get comfortable and bringing that comfortability to your school projects.
For using C with circuitry I'll say the best path is definitely buying a cheap esp32 board, something based on the c3 would probably be cheapest. There is tons of documentation on how to use these boards and I've found that PlatformIO + VS code/vscodium is a very good setup for programming these boards.
19 notes
·
View notes
Note
Are any of the toys Internet savvy? And would any of them get fooled by early scams and viruses, like the Pikachu email one?
DogDay is fooled by almost half of the early scams and viruses before he learns how to actually use a computer lmao, but Bubba, Delight, Long Legs and Kickin are all very internet/tech savvy. One of the mini huggies, nicknamed "Driver" by Angel but whose actual name was Pauline, is the ACTUAL go-to girlie when it comes to repairing tech. She loves it!!!! Prototype isn't internet savvy but he's very helpful with hardware. Kickin likes building computers, and I think Delight starts building little drones and learning arduino!
#poppy playtime#poppy worldwide#save everyone au#ask tag#dogday#bubba bubbaphant#miss delight#mommy long legs#kickinchicken#oc: driver
54 notes
·
View notes