#Arduino-projects
Explore tagged Tumblr posts
Visit Tumblr Blog
Explore Tumblr blogs with no restrictions, modern design and the best experience.
Last Seen Tumblr Blogs


Fun Fact
The Tumblr app for Google Glass was released on May 16, 2013.
Text
A4988 Pinout: A Comprehensive Guide
Discover the functionality and versatility of the Stepper Motor Driver Module A4988 Pinout, a crucial component in the world of robotics and automation. Let’s delve into the key details, with a specific focus on the A4988 pinout for a clearer understanding.
Stepper Motor Driver Module A4988
The A4988 is a stepper motor driver module that plays a pivotal role in controlling the precise movements of stepper motors. Whether you’re working on a 3D printer, CNC machine, or any other project requiring accurate motor control, the A4988 is a go-to choice.
A4988 Pinout Configuration
Understanding the A4988 pinout configuration is essential for effectively integrating the A4988 into your projects. Here’s a breakdown of the key pins:
MS1, MS2, MS3 (Microstep Resolution): These pins determine the microstep resolution, allowing you to set the stepping mode for the stepper motor. Configuring these pins enables fine-tuning of motor movement.
VMOT (Motor Power Supply Voltage): Connect this pin to the motor power supply voltage (typically 8V to 35V) to ensure the proper functioning of the stepper motor.
GND (Ground): Establish the ground connection by linking this pin to the ground of your power supply or microcontroller.
VDD (Logic Power Supply Voltage): Provide the logic power supply voltage (typically 3V to 5.5V) to this pin to power the internal logic circuitry of the A4988.
DIR (Direction Input): Control the direction of the stepper motor by connecting this pin to a digital output on your microcontroller.
STEP (Step Input): Trigger individual steps of the stepper motor by connecting this pin to another digital output on your microcontroller.
RESET (Reset Input): This pin resets the internal translator circuit, and it is optional to use.
SLEEP (Sleep Input): Putting the A4988 into sleep mode is achieved by connecting this pin to a digital high signal.
Read More: A4988 Pinout
#A4988#stepper-motor#microcontroller#Arduino#Raspberry-Pi#electronics#pinout#wiring#tutorial#DIY#project#hardware#software#programming#electronics-projects#microcontroller-projects#Arduino-projects#Raspberry-Pi-projects#open-source#maker#fabrication#prototyping#engineering#technology#innovation#learning#education
0 notes
Text

The Power of Many: Arduino Uno-Based Swarm Intelligence in Robotics
Description:
The main goal of this project is to build swarm intelligence robots in the course of the work. Arduino Uno with autonomous teamwork capabilities to tackle difficult problems with the help of decentralized communication and coordination.
In the realm of robotics, one concept that has garnered increasing attention is swarm intelligence. Unlike traditional robotics, where a single robot is programmed to perform specific tasks, swarm robotics leverages the power of multiple robots working together in a coordinated manner. At the heart of this approach lies Arduino Uno, a versatile microcontroller board that serves as the brain of these intelligent swarms.
Understanding Swarm Intelligence:
Swarm intelligence draws inspiration from nature, where collective behaviors observed in colonies of insects, flocks of birds, or schools of fish enable them to accomplish complex tasks without centralized control. Similarly, in robotics, swarm intelligence involves multiple robots (or agents) interacting with each other and their environment to achieve common goals.
The Role of Arduino Uno:
Arduino Uno serves as the cornerstone of swarm intelligence in robotics due to its flexibility, affordability, and ease of use. With its rich ecosystem of sensors, actuators, and communication modules, Arduino Uno enables robots to perceive their surroundings, communicate with one another, and make autonomous decisions in real-time.
Collective Decision-Making:
One of the key advantages of swarm intelligence is its ability to facilitate collective decision-making. Rather than relying on a single decision-maker, each robot in the swarm contributes to the decision-making process based on local information and interactions with neighboring robots. This decentralized approach not only enhances the scalability of robotic systems but also improves their robustness and adaptability in dynamic environments.
Adaptive Behaviors:
Another remarkable aspect of swarm intelligence is its capacity for adaptive behaviors. By continuously exchanging information and adjusting their actions in response to changing conditions, swarm robots can exhibit emergent behaviors that are greater than the sum of their individual parts. This adaptability allows swarm robotics systems to tackle a wide range of tasks, from exploration and search to monitoring and surveillance, with unparalleled efficiency and resilience.
Applications of Arduino Uno-Based Swarm Intelligence:
The applications of Arduino Uno-based swarm intelligence in robotics are diverse and far-reaching. In agriculture, swarm robots can collaborate to optimize crop management practices, such as planting, watering, and harvesting, leading to increased yields and reduced environmental impact. In disaster response scenarios, swarm robots can autonomously navigate hazardous environments, locate survivors, and coordinate rescue efforts, thus saving lives and minimizing risks to first responders.
Challenges and Future Directions:
Despite its promise, swarm intelligence in robotics still faces several challenges, including scalability, coordination, and robustness. Addressing these challenges will require advances in algorithms, hardware, and interdisciplinary collaboration. Looking ahead, the integration of artificial intelligence, machine learning, and swarm robotics holds tremendous potential for revolutionizing various domains, from manufacturing and logistics to healthcare and environmental monitoring.
Conclusion:
In conclusion, Arduino Uno-based swarm intelligence represents a paradigm shift in robotics, enabling robots to collaborate and adapt like never before. By harnessing the power of many, swarm robotics systems can accomplish tasks that would be impossible or impractical for individual robots alone. As we continue to unlock the full potential of swarm intelligence, the possibilities for innovation and discovery in robotics are truly limitless. More info
0 notes
Text
hiiiii
tested an ips tft display i have since ahh... spring. not so long ago ive got an idea to embody a scene from 8:11, when ryker got splashed with blood at the screen with leon.


its a wip now but i hope i would not be eaten by exams due this week..


heres more photos of display, but now in a dark.
less interesting - while writing the code it turned out that i didnt have the library i needed, which wasn't even in the built-in ide library search. so i went to github, and there it turned out that the library was outdated and in its place there was a new one (since 2020 ig), the version of which was already downloaded. i had to download the archive and upload it to ide to make everything work. also, i need to edit the program a little and clean it from unnecessary #includes, so there is no confusion.. and i also used a breadboard

#richterursidae#811#811 game#811 leon#811 leon tremblay#eight eleven#leon tremblay#arduino#hardware#electronics#electronics hobby#computing#arduino projects#is this that necessary to put so many tags?#anyways sorry for my uhh english it isnt my first language#im also bilingual
88 notes
·
View notes
Text

Выпаял пару экранов для моих будущих проектов. Занимаюсь своего рода переработкой отходов. Иначе их просто выкинули бы.
#diy#diy projects#arduino#фотоархив#фотоблог#мои фотографии#фотография#фото#личный тамблер#мой тамблер#русский тумблер#личный блог#личный дневник#мой tumblr#мой блог#моя жизнь#русский тамблер#русский текст#тумбурочка#турумбочка#тамблер на русском#русский tumblr#русский блог#русский пост
29 notes
·
View notes
Text
Skaven warpstone lantern prototype!
Warning: flashing lights


Here's a little Arduino project I've been working on for my Skaven themed LARP group! It's a multifunctional lantern with three different modes, an unstable warp stone powered light, a standard flame lantern and a full bright white light for those late-night toilet runs.
I'm pretty proud of the warpstone effect, I made it so when the light dims the warpstone becomes unstable and starts crackling unpredictability as it tries to restabilize, then eventually once it destabilizes it glows more solidly and more brightly for a time before it fades and destabilizes again.
#3d printing#larp#larp costume#skaven#warhammer fantasy#arduino#diy craft#diy projects#rgb lights#led lights#led lamp#electronic
9 notes
·
View notes
Text
Today I fixed up my Mini-Hakkero prop for my cosplay!
Originally made it last year, but bringing it to cons ended up killing my terribly loose solder and crimp jobs for the admittedly janky internal wiring. For my fix I ended up having to skip 3 unreachable LEDs and attach new wires to the LED spiral (the shell stuck too much together and I could not reach under the battery holder anymore). A compromise, but one that ended up looking alright.
It's not the cleanest thing, but it was my first ever arduino project and with the new pattern i set up, it works decently enough as a cosplay prop :)
#marisa kirisame#touhou project#東方project#touhou#arduino#cosplay#diy projects#3d printing#my cosplay#touhou cosplay
41 notes
·
View notes
Text
DIY Laser Tripwire Security System Using Arduino

The project consists of a laser module that continuously emits a beam aimed at a laser receiver sensor. When an object (such as a person) obstructs the laser, the receiver detects the interruption and triggers an alarm via a buzzer. This system is ideal for securing doorways, hallways, or any restricted area.
COMPONENTS REQUIRED
Arduino Uno
Laser LED Module
Laser Receiver Sensor Module
Buzzer
Jumper wires
Breadboard
Circuit Diagram

CODE
#define LASER_PIN 7
#define RECEIVER_PIN 8
#define BUZZER_PIN 9
void setup() {
pinMode(LASER_PIN, OUTPUT);
pinMode(RECEIVER_PIN, INPUT);
pinMode(BUZZER_PIN, OUTPUT);
digitalWrite(LASER_PIN, HIGH); // Laser ON
Serial.begin(9600);
}
void loop() {
int status = digitalRead(RECEIVER_PIN);
if (status == 1) { // If laser beam is blocked
Serial.println("⚠️ Intruder Detected!");
digitalWrite(BUZZER_PIN, HIGH);
} else {
Serial.println("✅ Area Secure");
digitalWrite(BUZZER_PIN, LOW);
}
delay(500);
}
youtube
9 notes
·
View notes
Text
need a bit of advice on something rather new to me... i have been DYING to get into some semblance of diy electronics/robotics, specifically regarding the idea of building a flipper zero knockoff with a raspberry pi/esp32/arduino. or a hack rf one ripoff, etc. u get it? i wanna make a lil handheld pwnagotchi pet style device for rolljam rf shit, something that can copy and paste and send and receive rf signals, but homemade by my self....
please if anyone has experience, resources, ideas, anything at all= hit me up right now immediately asap today please.... i am so passionate and ready to do this please help me make device go beepboop
#flipper zero#hack rf one#raspberry pi#esp32#arduino#diy electronics#diy#diy hacking#car hacking#hacking hardware#hacking#help#hacking help#hacking question#need advice#diy projects#diy craft#diy punk#upcycle#homebrew
14 notes
·
View notes
Text


really interesting projects ive seen on instructables dot com
6 notes
·
View notes
Text
Numpad Jr
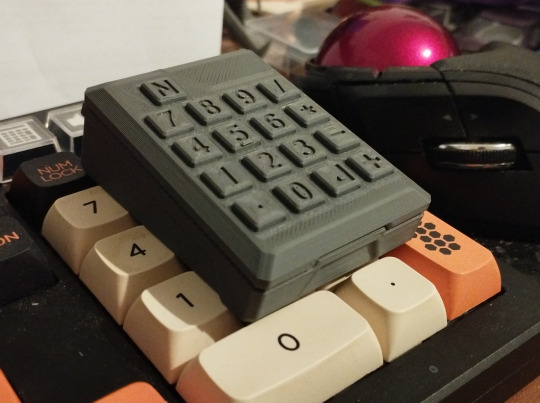
My thinkpad doesn't have a numpad and could use something more portable than the average USB ones, so… just made one! Used Kailh square mouse buttons and an Arduino Pro Micro.
Sure, tactility's compromised due to size… but look at the cute lil' thingy lol.
13 notes
·
View notes
Text
realized nobody is gonna know how to read my geiger counter i built in that picture. it clicks and blinks the leds when there’s radiation. i have the potentiometer all calibrated and everything and have tested it extensively on uranium glass there’s simply no radiation coming out of that tv
#btw you can build your own geiger counter it's fun#there's open source projects online#mine has the ability to connect to an arduino and add a screen and everything but i usually just use it plain#https://sites.google.com/site/diygeigercounter/
11 notes
·
View notes
Text
medovik
#richter ursidae#811 game#811#ryker dublin#ryker 811#811 ryker#arduino nano#arduino#arduino project#electronics#electronics hobby
20 notes
·
View notes
Text
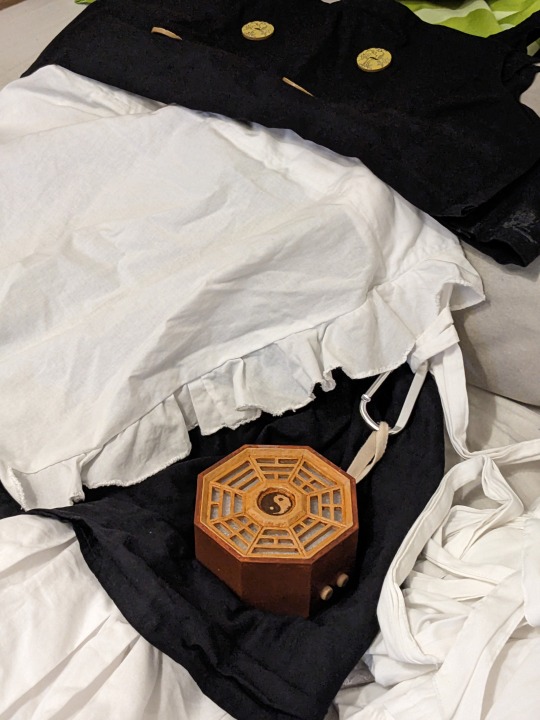
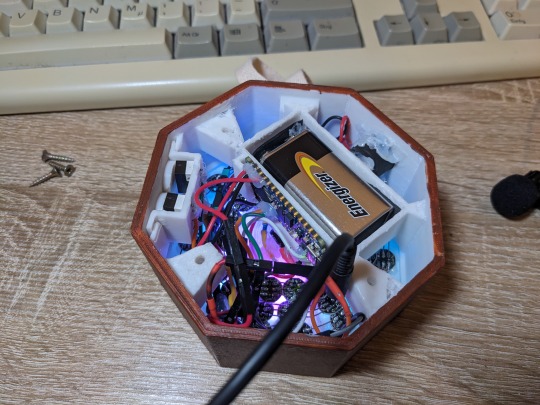
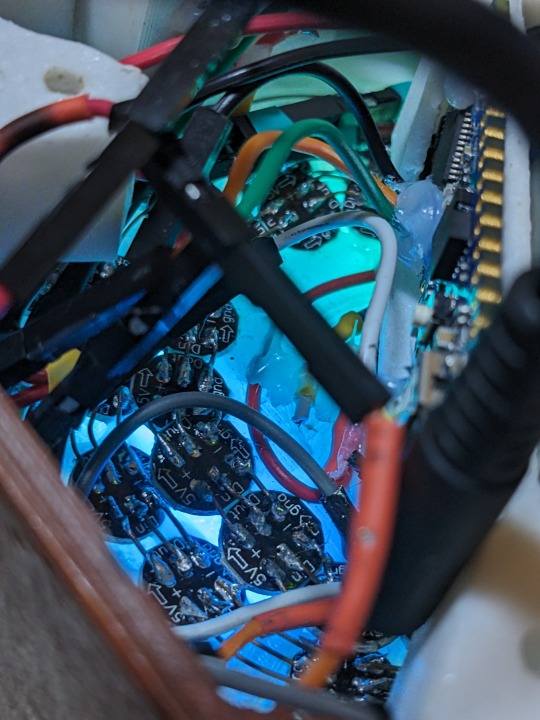
В догоночку. Анимация работы.
#личный тамблер#мой тамблер#русский тумблер#личный блог#личный дневник#мой tumblr#моя жизнь#русский тамблер#русский текст#мой блог#arduino#diy projects#diy#турумбочка#тумбурочка#тамблер на русском#русский tumblr#русский блог#русский пост
33 notes
·
View notes
Text
youtube
2 notes
·
View notes
Text

Realest review out there
#im looking at more components to buy for the arduino i already have or maybe another kit too and this was basically my xp when i gkt my#first one#its too fun all the projects you can do#lasar being incoherent#tech
2 notes
·
View notes
Text
ESP Terminal with 3.5" SPI Capacitive Touch Display
youtube
Product Info: https://www.elecrow.com/wiki/esp-terminal-with-35inch-spi-capacitive-touch-display.html Elecrow sent me this cute little 320x480 ESP32-S3 based SPI capacitive touch display with OV2640 camera. I am going to use this screen to create a touch panel for my home automation system. In this video, I am going to unbox and show you guys how to program and use this cute little touchscreen from Elecrow using SqareLine Studio. You can order this touch screen display from www.elecrow.com. The product link is in the description below.
2 notes
·
View notes