#npm tutorial
Explore tagged Tumblr posts
Visit Tumblr Blog
Explore Tumblr blogs with no restrictions, modern design and the best experience.
Last Seen Tumblr Blogs


Fun Fact
Tumblr is used by 21% of adults online aged 18-29 years.
Text
here's a list of all the intermediate coding tutorials i've written so far!
git / github tutorial
npm (and node.js) tutorial (+ how to use the command line) (this one's a prerequisite for the following 2 tutorials)
webpack tutorial (a module builder for JavaScript and (S)CSS)
11ty (eleventy) tutorial (a super easy static site generator!)
if you have ideas/requests, feel free to contact me!
more beginner coding tutorials are coming VERY soon! meanwhile, check out my common questions and common mistakes pages!
#web development#coding#coding tutorials#neocities#git tutorial#npm tutorial#webpack tutorial#eleventy tutorial#static site generator#coding tutorial#git#github#npm#webpack#eleventy#11ty
20 notes
·
View notes
Text
Getting Started with Node.js: A Beginner's Guide
Getting Started with Node.js: A Beginner's Guide
Introduction Node.js has revolutionized server-side programming with its non-blocking, event-driven architecture. As a JavaScript runtime built on Chrome’s V8 JavaScript engine, Node.js allows developers to use JavaScript for both client-side and server-side programming, streamlining the development process and enabling a seamless experience across the stack. This guide will walk you through the…

View On WordPress
#Beginner&039;s Guide#JavaScript#Node.js#NPM#Programming Basics#Rapid Development#Scalability#Security#Server-Side Programming#Tutorial#web development
0 notes
Text
0 notes
Text


I finished coding my Rogue Trader character sheet template! It's now open sourced on GitHub 🤖
☆ Features
Display your character's stats in (almost) the same way as you've seen in Warhammer 40,000: Rogue Trader CRPG
Multiple sections for character building:
Summary: Character origin info, alignment level, history, and biography.
Features: Show off your build by listing abilities & talents that your character has gained throughout the course of the game.
Inventory: Your Rogue Trader's equipment, armour, etc. goes here.
Relations: Detail the relationship of your Rogue Trader and their retinue members.
Gallery: Place to show off your fanart, commissioned art, fanfics, playlist. Anything goes!
Cool floating servo skulls (only visible in certain screen sizes).
Responsive. Not horrible to look at even in small screens.
☆ Requirements
You would need a static site hosting service for this to work. I recommend Neocities or GitHub pages. Both are free.
Some experience with using npm.
Some experience with basic HTML and JS object/JSON is recommended.
I really wish that it's easier to use and set up, but it's just not possible due to the tech stack I chose initially... I did write a beginner's tutorial on the repository's wiki, but I don't know if it makes sense to normal people who do not code... If you have any questions, let me know and I'll see what I can do.
Tech stack: SvelteKit, SCSS, TypeScript
Bonus:

Name too long? No problem :)
#link to the github repo is in the source!#I made a draft of this post then posted this on Reddit then forgor about it again rip.#rogue trader#warhammer 40k rogue trader#warhammer 40k#warhammer 40000 rogue trader
282 notes
·
View notes
Text
Geese, Guides, and Good Luck Cookies 🪿📔🥠... and a (paid) Call for Writers 📝💰
It's out! Check out this month's update, including: our visit to #ATmosphereConf (feat. geese yaoi 🪿), our plans for the fortune cookies revenue 🥠, news on the GitHub Guide Beta and... A 💰PAID💰 opportunity for daring—not to mention aspiring—tech writers 📝⬇️

Call for hire
This month we’re once again happy to share a paid position: come forth technical writers (and aspiring such), and let us bring you on a Now Paying Money adventure!
Smithing Words📝…for Money (💰): After much time, feedback, and outlining, the “Introduction to JavaScript with NPM” articles financed through our founding campaign are ready to be written! Now we’re finally looking for technical writers (fannish background appreciated) to help us inspire new, confident explorers of everything the NPM ecosystem has to offer—and yes, we (also) mean Astro. Check out some of the articles in our learning website for an example of what the final artifacts should look like, and get in touch if you’re up for the (paid) task! We require both basic computer knowledge and the willingness to run simple command line programs, but we don’t require previous experience with professional technical writing NOR pre-existing knowledge of NPM/JavaScript. Just send us some tutorials or other explainers you’ve written!
Smithing Videos📹…for Glory: Are you willing to wrangle video wranglers? BobaBoard’s documentation bubble is looking for a wondrous lead volunteer to coordinate our wonderful video volunteers as they turn our many, many hours of recorded web development and BobaBoard documentation into something the whole FujoVerse™ and beyond can put to good use. If you have previous experience with managing work on video, or have been part of similar work and want to build some managing experience of your own, reach out!
If any of these calls for aid sound up your alley, or if you’d like to get involved in other ways, please reach out at [email protected] or via DMs!
17 notes
·
View notes
Note
Your iterator "voice" clips are cool as fuckkkk would you ever consider taking commissions for them or doing a tutorial on how you make them? You have the sound of them totally nailed
PROOOOBABLY I can do a tutorial but I'm pretty averse to commissions since all my art is self-fufilling
The process is super easy, really, so long as you have a decent audio editing software and fl studio
I still have 2 more clips I want to make before I probably never touch it again for 7 months and I'll do a recording of my process making them
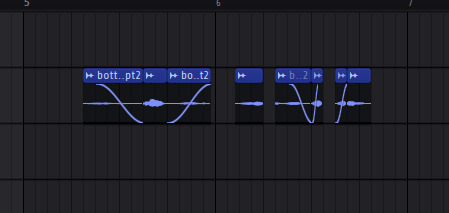
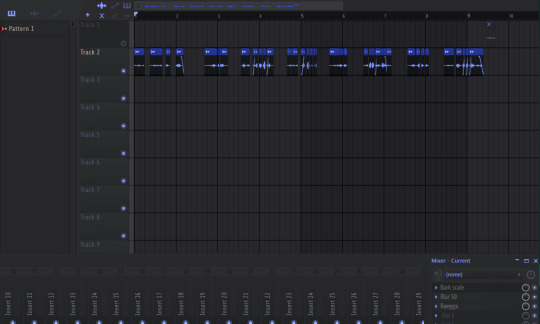
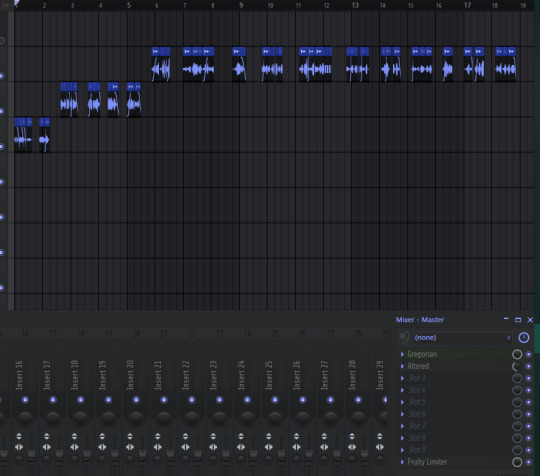
Though if you don't want to wait here are the steps I usually take for making iterator voices - Take a compilation of voice clips from whatever source you want - Reverse + speed up the audio slightly - Adjust pitch to whatever feels right - Add reverb/phaser/whatever you effects you think fit the iterator in question - Splice the audio to HELL. Make it cut out occasionally or lag and repeat
Usually it looks something like this when I'm done: (Quartz, NPM, and Sulfur respectively)
For a bonus you can reverse and pitch edit your results and see if you can still hear the original audio
20 notes
·
View notes
Text
Mini React.js Tips #5 | Resources ✨

Continuing the #mini react tips series, this time it's SCSS/SASS' time to shine! CSS is great and all but I am a SCSS girlie and I wanted to learn how to add SCSS files to my projects. It's a bit different to how to add CSS files to your project so heads up~!
What you'll need:
know how to create a React project >> click
know the default React project's file structure >> click
know how to create a component >> click
know basic SCSS or SASS
basic knowledge of using the Terminal

What The Project Will Look Like:

*very basic but just want some SCSS styling to prove that the tips work~!
Big disclaimer: I have deleted all the code inside of the App()'s return() so that the default project is gone and the guide starts on a clean slate. I have also created a NavBar component beforehand as my testing component for this guide~!
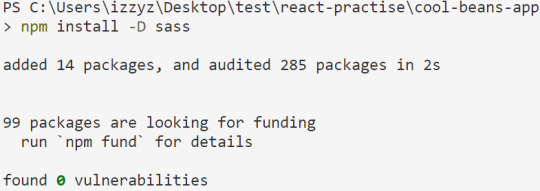
[ 1 ] Open Terminal And Install Sass: Launch the terminal within your project folder. Execute the following command to install Sass as a development dependency for your project:
npm install -D sass
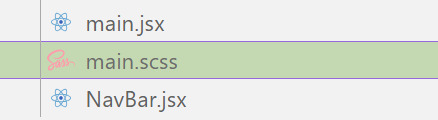
[ 2 ] Create SCSS File: In the 'src' folder, create your SCSS file - it ends with .scss for SCSS files and .sass for SASS files. Feel free to organize it into subfolders for a structured project.
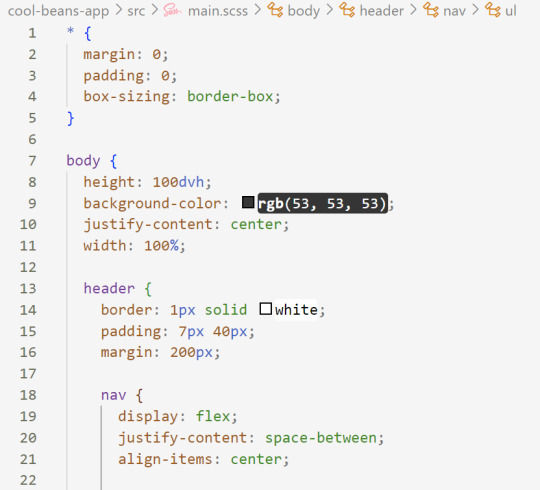
[ 3 ] Style Your SCSS: Open the newly created SCSS file and add your styles, take advantage of variables, nesting, and more. (This is not all of my SCSS code):
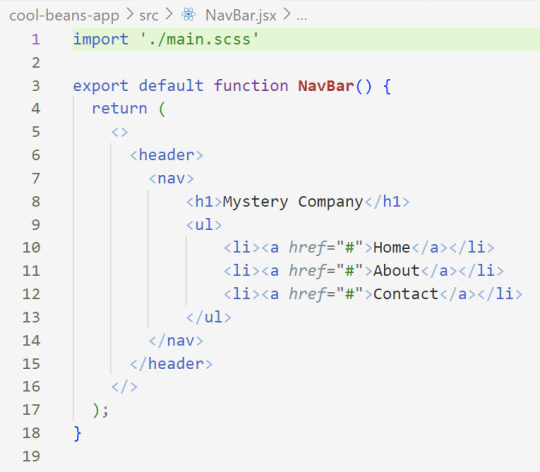
[ 4 ] Import SCSS in Component: In the React component file where you want to apply these styles, import your SCSS file at the top:
import './[location of you SCSS/SASS file]';
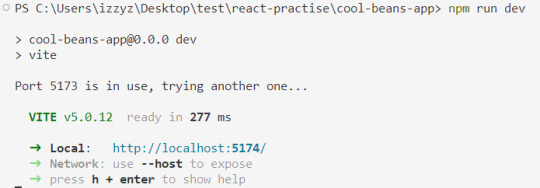
[ 5 ] Run the Development Server: Start your development server with the command in the Terminal (the 'Local' link) + make sure your component is in the App() in App.jsx:
npm run dev
Congratulations! You've successfully added SCSS/SASS to your React project~!
Resources:
BroCode's 'React Full Course for Free' 2024 >> click
How to use Sass in React with Vite >> click
Sass Tutorial for Beginners - CSS With Superpowers >> click
React Official Website >> click
🐬Previous Tip: Tip #3 Adding CSS files to your project >> click
Stay tuned for the other posts I will make on this series #mini react tips~!
#mini react tips#my resources#resources#codeblr#coding#progblr#programming#studyblr#studying#javascript#react.js#reactjs#coding tips#coding resources
11 notes
·
View notes
Text
06/09/2023 || Day 75
Oh god, I feel like it's been forever since I did some programming even though it's really only been 5 days. However, apparently that was a good enough break for me because I feel rejuvenated and was able to consume more knowledge on programming. So, here's a quick list of things I accomplished today:
Did a refresher on the Bubble Sort and Insertion Sort sorting algorithms, since it's been a few months since I touched their implementation
Continued on with Node.js tutorial videos
Started mySQL videos (specifically, how to use it with Javascript and Node.js)
Abandoned the mySQL videos/topic after 20 mins and decided to get my hands dirty with actually using and connecting Node.js to a frontend client. Will do this with API calls
Realized I didn't want to have to constantly install npm packages when I switch between my laptop and my PC, so I started watching a tutorial on Docker
All in all, I did a bunch of random programming-related stuff today, but didn't delve deeply into any one topic. Tomorrow I plan on actually using Docker to set up a new project that will use Node.js to deal with server stuff and React to deal with the client-side UI. It's gonna be a small project, but hopefully it'll be fun! Will post more about it tmr.
8 notes
·
View notes
Text

Master React: A Complete React Tutorial for Beginners
In the ever-evolving landscape of web development, React has emerged as one of the most powerful and popular JavaScript libraries for building user interfaces. Developed and maintained by Facebook, React allows developers to create dynamic, high-performance web applications with ease. If you’re a beginner looking to dive into the world of React, this comprehensive tutorial, "Master React: A Complete React Tutorial for Beginners," will guide you through the essential concepts, tools, and techniques needed to become proficient in React development.
What is React?
React is a declarative, component-based library that enables developers to build reusable UI components. Its primary goal is to make the process of creating interactive user interfaces more efficient and manageable. Unlike traditional web development approaches that manipulate the Document Object Model (DOM) directly, React uses a virtual DOM to optimize rendering performance. This means that React only updates the parts of the UI that have changed, resulting in faster and more responsive applications.
Why Learn React?
Learning React is a valuable investment for any aspiring web developer. Here are a few reasons why you should consider mastering React:
Popularity and Demand: React is widely used by companies of all sizes, from startups to tech giants like Facebook, Instagram, and Airbnb. Proficiency in React can significantly enhance your job prospects and career opportunities. Component-Based Architecture: React’s component-based structure promotes reusability and modularity, making it easier to manage and scale applications. This approach allows developers to break down complex UIs into smaller, manageable pieces. Rich Ecosystem: React has a vast ecosystem of libraries and tools that complement its functionality. From state management solutions like Redux to routing libraries like React Router, the React ecosystem provides everything you need to build robust applications. Strong Community Support: With a large and active community, finding resources, tutorials, and support for React development is easier than ever. Whether you’re facing a coding challenge or looking for best practices, the community is there to help.
Setting Up Your React Environment
Before diving into coding, you need to set up your development environment. The easiest way to get started with React is by using the Create React App (CRA) tool, which sets up a new React project with a single command. To create a new React application, follow these steps:
Install Node.js: Ensure you have Node.js installed on your machine. You can download it from the official website.
Create a New React App: Open your terminal and run the following command:
npx create-react-app my-first-react-app cd my-first-react-app npm start
This command creates a new directory called my-first-react-app and starts a development server that you can access at http://localhost:3000.
Understanding React Components
At the heart of React are components. A component is a self-contained piece of UI that can be reused throughout your application. There are two main types of components in React:
Functional Components: These are JavaScript functions that return JSX (JavaScript XML), which looks similar to HTML. Functional components are simpler and easier to read, making them the preferred choice for most developers. Example of a functional component:
function Welcome(props) { return <h1>Hello, {props.name}!</h1>; }
Class Components: These are ES6 classes that extend the React.Component class. Class components can hold state and lifecycle methods, but with the introduction of hooks, functional components are now more commonly used. Example of a class component:
class Welcome extends React.Component { render() { return <h1>Hello, {this.props.name}!</h1>; } }
JSX: The Syntax of React
JSX is a syntax extension for JavaScript that allows you to write HTML-like code within your JavaScript files. It makes it easier to visualize the structure of your UI. JSX expressions can include JavaScript expressions wrapped in curly braces {}.
Example of JSX:const element = <h1>Hello, world!</h1>;
State and Props: Managing Data in React
In React, data flows in one direction, from parent components to child components. This is achieved through props (short for properties) and state.
Props: Props are read-only attributes passed from a parent component to a child component. They allow you to customize components and make them reusable. Example of using props:
function Greeting(props) { return <h1>Welcome, {props.name}!</h1>; }
State: State is a built-in object that allows components to manage their own data. Unlike props, state is mutable and can be updated using the setState method in class components or the useState hook in functional components. Example of using state with hooks:
import React, { useState } from 'react'; function Counter() { const [count, setCount] = useState(0); return ( <div> <p>You clicked {count} times</p> <button onClick={() => setCount(count + 1)}>Click me</button> </div> ); }
Lifecycle Methods and Hooks
In class components, React provides lifecycle methods that allow you to run code at specific points in a component's life, such as when it mounts or unmounts. Common lifecycle methods include componentDidMount, componentDidUpdate, and componentWillUnmount.
With the introduction of hooks in React 16.8, functional components can now manage side effects and lifecycle events using the useEffect hook. This allows for cleaner and more concise code.
Example of using useEffect:import React, { useState, useEffect } from 'react'; function DataFetcher() { const [data, setData] = useState(null); useEffect(() => { fetch('https://api.example.com/data') .then(response => response.json()) .then(data => setData(data)); }, []); // Empty array means this runs once on mount return <div>{data ? JSON.stringify(data) : 'Loading...'}</div>; }
Routing with React Router
For building single-page applications (SPAs), React Router is an essential library that enables navigation between different components without refreshing the page. It allows you to define routes and render components based on the current URL.
Example of setting up React Router:import { BrowserRouter as Router, Route, Switch } from 'react-router-dom'; function App() { return ( <Router> <Switch> <Route path="/about" component={About} /> <Route path="/" component={Home} /> </Switch> </Router> ); }
State Management with Context and Redux
As your application grows, managing state across multiple components can become challenging. React Context provides a way to share data globally without prop drilling, while Redux is a popular state management library that offers a centralized store and predictable state updates.
Best Practices for React Development
To ensure your React applications are maintainable and efficient, consider the following best practices:
Keep Components Small and Focused: Each component should have a single responsibility, making it easier to understand and test.
Use Functional Components and Hooks: Prefer functional components and hooks over class components for cleaner and more concise code.
Leverage PropTypes or TypeScript: Use PropTypes for type checking or consider using TypeScript for static type checking to catch errors early.
Optimize Performance: Use React. Memo to prevent unnecessary re-renders and implement lazy loading for components to improve performance. Maintain a Modular Folder Structure: Organize your project files in a way that promotes modularity and ease of navigation.
Building Real-World Projects
The best way to solidify your React skills is by building real-world projects. Start with simple applications like a to-do list or a weather app, and gradually move on to more complex projects like an e-commerce site or a social media platform. This hands-on experience will help you apply what you’ve learned and prepare you for real-world development challenges.
Conclusion
Mastering React is a rewarding journey that opens up numerous opportunities in web development. This tutorial, "Master React: A Complete React Tutorial for Beginners," has provided you with a solid foundation in React concepts, tools, and best practices. By dedicating time to practice and build projects, you will gain the confidence and skills needed to create dynamic, high-performance web applications. Embrace the challenge, stay curious, and let your journey into the world of React begin! Whether you’re looking to enhance your career or simply explore the exciting realm of web development, mastering React will empower you to create innovative solutions that make a difference.
0 notes
Text
Socket.IO setup

Building Real-Time Applications with Socket.IO setup: Step-by-Step Tutorial
Socket.IO setup. In today's interconnected world, real-time applications are becoming increasingly essential. Whether it's for live chat applications, collaborative tools, or gaming, real-time communication enhances user engagement and makes interactions more dynamic. One powerful tool for building real-time applications is Socket.IO. In this tutorial, we will guide you through the process of building a real-time application using Socket.IO, focusing on key concepts and practical implementation. What is Socket.IO? Socket.IO is a JavaScript library that enables real-time, bidirectional communication between web clients (like browsers) and servers. Unlike traditional HTTP requests, which follow a request-response model, Socket.IO provides a persistent connection, enabling instant data exchange between the client and server. Socket.IO works on top of WebSockets, but it provides fallback mechanisms for environments where WebSockets may not be available. This ensures that real-time communication is possible in a wide range of conditions, making it a versatile choice for building interactive web applications. Prerequisites Before we dive into the tutorial, make sure you have the following: Basic knowledge of JavaScript and Node.js Node.js installed on your machine. You can download it from nodejs.org. A code editor (like Visual Studio Code or Sublime Text). Step 1: Setting Up the Project Start by setting up a basic Node.js project. Create a new directory for your project: bash mkdir real-time-app cd real-time-app Initialize a new Node.js project: bash npm init -y Install Express and Socket.IO: bash npm install express socket.io Express is a lightweight web framework for Node.js that simplifies the creation of web servers. Socket.IO will handle real-time communication between the server and the client. Step 2: Create the Server Now that we've set up the dependencies, let's create a simple server. Create a file called server.js in the project root: js const express = require('express'); const http = require('http'); const socketIo = require('socket.io');// Create an instance of Express app const app = express();// Create an HTTP server const server = http.createServer(app); // Initialize Socket.IO with the HTTP server const io = socketIo(server); // Serve static files (like HTML, CSS, JS) app.use(express.static('public')); // Handle socket connection io.on('connection', (socket) => { console.log('a user connected'); // Handle message from client socket.on('chat message', (msg) => { io.emit('chat message', msg); // Emit the message to all clients }); // Handle disconnect socket.on('disconnect', () => { console.log('user disconnected'); }); }); // Start the server server.listen(3000, () => { console.log('Server is running on http://localhost:3000'); }); Step 3: Create the Client-Side Next, we need to create the client-side code that will connect to the server and send/receive messages in real time. Create a public folder inside the project directory. In the public folder, create an index.html file: html Real-Time Chat Real-Time Chat Application Send const socket = io(); // Connect to the server// Listen for messages from the server socket.on('chat message', function(msg){ const li = document.createElement('li'); li.textContent = msg; document.getElementById('messages').appendChild(li); }); // Handle form submission const form = document.getElementById('form'); form.addEventListener('submit', function(event){ event.preventDefault(); const input = document.getElementById('input'); socket.emit('chat message', input.value); // Send the message to the server input.value = ''; // Clear the input field }); Step 4: Run the Application With the server and client code in place, it’s time to run the application! In your terminal, run the following command: bash node server.js Open your browser and go to http://localhost:3000. You should see the chat interface. Open multiple browser windows or tabs to simulate multiple users. Type a message in the input field and click "Send." You should see the message appear in real-time in all open windows/tabs. Step 5: Enhancements and Improvements Congratulations! You've built a basic real-time chat application using Socket.IO. To enhance the application, consider adding the following features: User authentication: Allow users to log in before they can send messages. Private messaging: Enable users to send messages to specific individuals. Message persistence: Use a database (e.g., MongoDB) to store chat history. Typing indicators: Show when a user is typing a message in real time. Emoji support: Allow users to send emojis and other media. Conclusion Socket.IO setup. In this tutorial, we covered the basics of building a real-time application using Socket.IO. We walked through setting up a Node.js server with Express, integrating Socket.IO for real-time communication, and creating a simple chat interface on the client side. Socket.IO makes it easy to add real-time features to your web applications, enabling more dynamic and interactive experiences for users. With this foundation, you can now start exploring more advanced real-time features and take your applications to the next level! Read the full article
#communication#CreatetheClient-Side#CreatetheServer#Enhancements#function#History#Improvements#RuntheApplication#Setting
0 notes
Text
Set Up Server-Side Rendering with React: A Complete Guide
Step 1: Project Setup Initialize Project: mkdir react-ssr-tutorial cd react-ssr-tutorial npm init -y Install Dependencies: npm install express react react-dom react-router-dom Step 2: Project Structure Create the following structure: react-ssr-tutorial/ ├── client/ │ ├── App.js │ ├── index.js │ └── routes/ │ └── Home.js ├── server/ │ ├── index.js │ └── routes/ │ └── serverRoutes.js └──…
0 notes
Text
Master JavaScript in 30 Days with Coding Brushup
JavaScript is one of the most in-demand programming languages in the world. Whether you're looking to become a front-end developer, a full-stack developer, or simply want to understand how the web works, JavaScript is an essential skill. At Coding Brushup, we've designed a job-oriented JavaScript course that helps you go from beginner to proficient in just 30 days.

In this comprehensive guide, you'll learn how to master JavaScript step-by-step with our structured 30-day plan, trusted resources, and real-world projects—backed by the teaching experience and expertise of Coding Brushup.
Why JavaScript?
Before we dive into the 30-day roadmap, it’s important to understand why JavaScript matters in today’s job market:
Versatility: JavaScript is used in web development, app development, server-side scripting (Node.js), and even game development.
High demand: JavaScript consistently ranks in the top 3 programming languages in developer surveys.
Great salary potential: Skilled JavaScript developers command high salaries globally.
Strong community: With millions of developers and tons of open-source tools, you’ll never feel alone.
At Coding Brushup, we leverage this potential by offering a job-oriented JavaScript course that focuses on practical skills and hands-on experience.
What Makes Coding Brushup Different?
With so many tutorials online, why choose Coding Brushup to learn JavaScript?
✅ Industry-Relevant Curriculum: Our course is built with feedback from hiring managers and senior developers.
✅ Project-Based Learning: You'll build 5+ real-world projects that simulate job-ready tasks.
✅ Mentor Support: Access guidance from professionals with years of coding and teaching experience.
✅ Job-Oriented Focus: The job-oriented JavaScript course is designed to help you build a portfolio, prepare for interviews, and land your first job.
30-Day JavaScript Mastery Plan
Here's your JavaScript learning roadmap curated by Coding Brushup:
🔹 Week 1: JavaScript Basics
Day 1–2: Introduction to JavaScript, variables, and data types
Day 3: Functions and scope
Day 4: Conditional statements and loops
Day 5: Arrays and objects
Day 6: Basic DOM manipulation
Day 7: Mini project – To-Do List
🔹 Week 2: Intermediate JavaScript Concepts
Day 8: JavaScript ES6+ (let, const, arrow functions)
Day 9: Array methods (map, filter, reduce)
Day 10: Object-oriented JavaScript
Day 11: Error handling and debugging
Day 12–13: Working with the browser DOM
Day 14: Mini project – Weather Ap
🔹 Week 3: Asynchronous JavaScript & APIs
Day 15: Callbacks and promises
Day 16: Async/await explained simply
Day 17–18: Fetch API and consuming REST APIs
Day 19–20: JSON and local storage
Day 21: Project – Movie Search App using an API
🔹 Week 4: Final Projects and Job Prep
Day 22–24: Build a CRUD application (e.g., Notes app)
Day 25–26: Introduction to JavaScript frameworks (React basics)
Day 27–28: Final capstone project – Portfolio Website
Day 29: Resume writing and GitHub profile setup
Day 30: Mock interview & feedback session with Coding Brushup experts
Real Success Stories from Coding Brushup
“I had zero coding background. Thanks to Coding Brushup’s JavaScript course, I built a strong portfolio and landed a front-end developer role within 3 months!” — Aarti S., Junior Developer
“Coding Brushup doesn’t just teach JavaScript—it prepares you for real jobs. The mentor sessions and interview prep gave me the confidence I needed.” — Neeraj T., Full Stack Developer
Our mission is simple: make you job-ready with hands-on JavaScript skills and personalized mentorship.
Tools & Resources You’ll Use
During your JavaScript journey with Coding Brushup, you’ll gain hands-on experience with:
Code editors: VS Code
Version control: Git & GitHub
Browser DevTools: Chrome Developer Tools
APIs: OpenWeatherMap, OMDB, JSONPlaceholder
Build tools: Node.js, npm (for basic module use)
Every tool used in the course is chosen with the job market in mind, making the experience more than just theoretical.
Is This Course Right for You?
The job-oriented JavaScript course from Coding Brushup is ideal for:
Students and freshers aiming for their first developer role
Working professionals switching to web development
Self-learners needing a structured path and mentorship
Freelancers who want to sharpen their JS skills for better projects
No prior programming experience is required. All you need is commitment and a willingness to learn.
Conclusion: Your JavaScript Journey Starts Now
Mastering JavaScript in 30 days may sound ambitious, but with the right roadmap, resources, and mentorship, it's absolutely possible. At Coding Brushup, we combine technical instruction with career guidance to ensure you're not just learning JavaScript—you're learning how to use it in the real world.
Ready to launch your career in web development?
👉 Enroll in the Job-Oriented JavaScript Course by Coding Brushup and start your 30-day journey to mastering JavaScript today!
0 notes
Text
Understanding ReactJS – A Beginner-Friendly Guide

Introduction
ReactJS is widely used in various industries, including web development company in Bangalore, which leverage its capabilities to build dynamic and scalable applications.
Imagine a world where building a website is like assembling LEGO blocks—each block representing a specific function. This is exactly what ReactJS does! ReactJS is a powerful JavaScript library developed by Facebook that helps developers create interactive user interfaces in a structured, reusable, and efficient way. Since its release in 2013, it has become a game-changer in web development, powering applications like Facebook, Instagram, and Airbnb.
ReactJS has revolutionized front-end development by making it easier to build large-scale applications with reusable components and a seamless user experience. In this guide, we will break down ReactJS into simple, digestible concepts, making it easy for beginners to grasp and use effectively.
What is ReactJS?
ReactJS is an open-source JavaScript library designed to create fast and dynamic web applications. Unlike traditional HTML and JavaScript, where each change refreshes the entire webpage, React uses a smart feature called the Virtual DOM to update only the necessary parts. This significantly boosts performance and enhances user experience.
Why Choose ReactJS?
Component-Based Structure: Applications are built using reusable components, making development organized and efficient.
Lightning-Fast Performance: The virtual DOM optimizes updates, improving speed.
Strong Community & Support: With a vast developer community, solutions and tutorials are readily available.
SEO-Friendly: Unlike other JavaScript-heavy frameworks, React supports server-side rendering, improving search engine rankings.
Scalability: From small projects to large enterprise applications, React scales seamlessly.
Cross-Platform Development: React Native, a React-based framework, allows developers to build mobile applications using the same concepts.
Core Concepts of ReactJS
1. Components – The Building Blocks
Think of React components as small, reusable pieces of a website, just like individual LEGO pieces. A component can be a button, a form, or an entire page!
There are two types of components:
Functional Components – Simple, stateless components that return UI elements.
Class Components – More powerful components that can manage their own state and lifecycle events.
Components help in modular development, making it easier to maintain and scale applications.
2. JSX (JavaScript XML) – Writing HTML in JavaScript
React uses JSX, a special syntax that looks like HTML but works inside JavaScript. JSX makes UI code easier to read and write, reducing complexity and improving development speed.
3. Props – Passing Data Between Components
Props (short for properties) allow components to communicate with each other by passing data. They help in making components dynamic and reusable.
4. State – Managing Dynamic Data
State is used to store and manage data that can change over time. Unlike props, which are read-only, state can be updated dynamically. This makes applications more interactive and responsive.
5. Virtual DOM – The Secret Behind React’s Speed
Traditional web applications update the entire webpage when a change occurs. React, however, creates a Virtual DOM, a lightweight copy of the actual DOM. Instead of reloading everything, it updates only the changed elements, making applications incredibly fast.
Getting Started with ReactJS
Setting up a React project is simple. Follow these steps:
Install Node.js and npm: React requires Node.js, which comes with npm (Node Package Manager).
Create a React App: Open the terminal and run npx create-react-app my-app.
Navigate to the project folder: Use cd my-app.
Start the development server: Run npm start. Your app will open in the browser at http://localhost:3000/.
This setup creates a structured environment to build React applications efficiently.
Advanced React Features
1. React Hooks – Making Functional Components More Powerful
Hooks allow functional components to manage state and side effects. The useState hook is one of the most commonly used, replacing class components in many cases.
2. React Router – Handling Multiple Pages
React applications often need navigation between different pages. React Router enables this functionality without requiring full-page reloads, ensuring smooth transitions between components.
3. Redux – Managing Complex Application State
As applications grow, managing state becomes challenging. Redux is a popular library that helps manage state in a predictable and structured way, making applications easier to debug and maintain.
4. Context API – An Alternative to Redux
For applications that do not require a complex state management system, React provides the Context API. It allows data to be passed globally without the need for prop drilling, improving code efficiency.
5. Server-Side Rendering (SSR) – Improving Performance and SEO
React supports SSR, which allows content to be rendered on the server before being sent to the client. This enhances page speed, improves SEO, and ensures better user engagement.
Best Practices for React Development
Keep Components Small and Focused: Each component should have a single responsibility.
Use Functional Components and Hooks: They make code simpler and more readable.
Optimize Performance: Use techniques like lazy loading, memoization, and avoiding unnecessary re-renders.
Follow a Consistent Folder Structure: Organizing components, assets, and utilities properly improves maintainability.
Use Error Boundaries: They help in handling errors gracefully without breaking the entire application.
Write Clean and Reusable Code: Reusing components and avoiding redundant code improves efficiency.
Future of ReactJS
React continues to evolve with new features and improvements. Some trends shaping its future include:
Concurrent Mode: Improving performance by allowing multiple tasks to run simultaneously.
React Server Components: Enhancing server-side capabilities.
Better Developer Experience: With updates in developer tools and debugging features.
With strong community support and continuous updates, ReactJS remains a top choice for front-end development.
Conclusion
ReactJS is a powerful tool that makes web development easier, faster, and more efficient. With its component-based architecture, virtual DOM, and advanced features like hooks and routing, it’s no wonder that companies worldwide rely on it.
By learning React, you unlock the potential to create stunning, high-performance web applications. Whether you’re a beginner or an experienced developer, mastering ReactJS will open doors to countless opportunities in the tech world.
With its vast ecosystem, seamless integrations, and continuous improvements, ReactJS remains at the forefront of web development. If you're planning to dive into front-end development, ReactJS is the perfect technology to master.
Keywords: ReactJS, JavaScript, Web Development, UI Components, Virtual DOM, Front-End Development, React Hooks, Redux, Server-Side Rendering, React Router, Context API, Web Development Company in Bangalore
#ReactJS#WebDevelopment#JavaScript#FrontendDevelopment#ReactComponents#VirtualDOM#ReactHooks#WebDevelopmentCompany#BangaloreTech#SEO#UIUX#SoftwareDevelopment#Programming#Coding#ReactNative#TechTrends
0 notes
Text
What is React.js? A Complete Guide for 2025

What is React.js?
What is React js? A Complete Guide for 2025 dives deep into React.js, the groundbreaking JavaScript library that has transformed the way developers build dynamic and interactive user interfaces. As one of the most powerful and widely adopted tools in modern web development, React, originally created by Facebook (now Meta), continues to dominate the industry with its efficient, component-based architecture and unparalleled flexibility. Whether you're a beginner or an experienced developer, this guide will equip you with everything you need to master React.js in 2025 and beyond.
Reasons for Popularity:
Fast and efficient: Utilizes Virtual DOM for performance and optimization
Component-based: Allows for code reusability and organization
Huge ecosystem: There are many libraries and tools out there that enhance the development experience
It is backed by Meta: All the time updates and new features are added
History and Evolution of React.js
React.js was originally launched in 2013 by Facebook. Over the years, it has passed through several major versions:
2015: React 0.14 was introduced with functional components.
2016: React 15 was designed to improve performance, and so was the implementation of the Fiber architecture.
2017: React 16 brought in Hooks and Error Boundaries.
2020: React 17 emphasized easier upgrades and gradual adoption.
2022+: React 18 introduced concurrent rendering with automatic batching.
Why to Learn React.js by 2025?
Performance and Speed
With fast UI updates made possible by the React Virtual DOM and concurrent rendering, React will be an indispensable framework for modern applications.
Large Community Support
React has a vast user base consisting of millions of developers, and thus, finding resources, tutorials, and support is easier than before.
Flexibility and Scalability
Applications of any size can be developed using React, whether they are small projects or enterprise-level applications.
Core Features of React.js
Virtual DOM
In React, unlike in the normal DOM, only those parts of the UI that were actually changed would be updated, thereby giving faster performance.
Component-Based Architecture
In React, an application is made up of building blocks called components, which are reusable, thereby minimizing redundancy.
JSX (JavaScript XML)
JSX enables developers to write markup directly inside the code.
One-Way Data Binding
This aids in keeping tighter control over the data flow, which is beneficial for easier debugging.
Setting Up React.js in 2025
Install Node.js and npm.
Create a React app using:
npx create-react-app my-app
cd my-app
npm start
Use Vite for faster builds:
npm create vite@latest my-app --template react
Building a Basic React.js Application
Creating Components
function Welcome(props) {
return <h1>Hello, {props.name}!</h1>;
}
Using State with Hooks
import { useState } from 'react';
function Counter() {
const [count, setCount] = useState(0);
return (
<button onClick={() => setCount(count + 1)}>
Count: {count}
</button>
);
}
React.js Best Practices for 2025
Functional components are preferred over class components.
Keep components small and reusable.
Render optimization through memoization (React.memo, useMemo).
Follow proper folder structures.
Error boundaries should be implemented.
Learning React.js at the TCCI Computer Coaching Institute
TCCI offers a comprehensive course on the training of React.js:
React from the beginning to advanced
Projects work from real life
Personal mentorship
Getting certified after completion
Conclusion
React.js will dominate frontend development in 2025. No matter whether you're a fresher or have many years of experience in programming, learning React opens doors to innumerable opportunities. Join TCCI Computer Coaching Institute to master React.js practicing real-time!
Location: Ahmedabad, Gujarat
Call now on +91 9825618292
Get information from https://tccicomputercoaching.wordpress.com/
FAQ
What is React.js mainly used for?
React.js is used for building fast, interactive user interfaces for web applications.
How long does it take to learn React.js?
Depending on prior experience, it can take 2-3 months to become proficient.
Is React.js still relevant in 2025?
Yes, React remains one of the most in-demand frontend technologies.
What are the prerequisites for learning React.js?
Basic knowledge of HTML, CSS, and JavaScript is recommended.
Can I use React.js for mobile development?
Yes! React Native allows you to build mobile apps using React.js.
#ReactJS#WebDevelopment#LearnReact#ReactTutorial#FrontendDevelopment#JavaScript#Coding#TechGuide#Programming#ReactJS2025
0 notes
Text
HEIC (High-Efficiency Image Format) is a popular image format used by Apple devices, offering high-quality images with smaller file sizes compared to JPEG. However, this format is not universally supported, which might necessitate converting HEIC images to a more accessible format like PDF. In this article, we'll explore how to convert HEIC images to PDF using JavaScript Node.js. A working example of this tool is available on this page . Prerequisites To follow along with this tutorial, you'll need: Basic knowledge of JavaScript and Node.js. Node.js installed on your system. Familiarity with npm (Node Package Manager). Step-by-Step Guide Step 1: Set Up Your Project First, create a new directory for your project and initialize it with npm. mkdir heic-to-pdf cd heic-to-pdf npm init -y Step 2: Install Required Packages We'll use the following npm packages: heic-convert to convert HEIC images to PNG. pdf-lib to create PDF documents. Install these packages by running: npm install heic-convert pdf-lib Step 3: Write the Conversion Script Create a new JavaScript file, convert.js, in your project directory. This script will handle the conversion process. const fs = require('fs'); const heicConvert = require('heic-convert'); const PDFDocument = require('pdf-lib'); async function convertHeicToPdf(inputPath, outputPath) // Read the HEIC file const heicBuffer = fs.readFileSync(inputPath); // Convert HEIC to PNG const pngBuffer = await heicConvert( buffer: heicBuffer, format: 'PNG', quality: 1 // Set quality to 1 (highest) ); // Create a new PDF document const pdfDoc = await PDFDocument.create(); // Embed the PNG image into the PDF const pngImage = await pdfDoc.embedPng(pngBuffer); const pngDims = pngImage.scale(1); // Add a blank page and draw the PNG image on it const page = pdfDoc.addPage([pngDims.width, pngDims.height]); page.drawImage(pngImage, x: 0, y: 0, width: pngDims.width, height: pngDims.height ); // Serialize the PDF document to bytes (a Uint8Array) const pdfBytes = await pdfDoc.save(); // Write the PDF to a file fs.writeFileSync(outputPath, pdfBytes); console.log(`Converted HEIC to PDF: $outputPath`); Example Usage of the function // Example usage convertHeicToPdf('input.heic', 'output.pdf'); Running the Script To convert a HEIC image to a PDF, run the following command: node convert.js Ensure you have an input.heic file in your project directory. The script will generate an output.pdf file in the same directory. Conclusion Converting HEIC images to PDF using JavaScript is straightforward with the help of heic-convert and pdf-lib. This solution reads a HEIC file, converts it to a PNG image, embeds the PNG into a PDF document, and saves the PDF file. This approach can be extended and integrated into larger applications, providing a practical solution for handling HEIC images in a more accessible format. With this method, you can efficiently convert HEIC images to PDF, making them easier to share and view across different devices and platforms.
0 notes
Text
Build Portfolio Website in Laravel 11: Your Comprehensive Guide
Building a portfolio website is an essential step for showcasing your skills, projects, and achievements in today's competitive world. Laravel 11, the latest version of the robust PHP framework, offers unparalleled tools and features to create a stunning and functional portfolio website. In this guide, we’ll walk you through the process of building a portfolio website in Laravel 11, ensuring you have a step-by-step roadmap to success.
Why Choose Laravel 11 for Your Portfolio Website?
1. Modern Features
Laravel 11 introduces enhanced routing, improved performance, and advanced tooling that make it the go-to choice for web development.
2. Scalability
Whether you're a freelancer or a business owner, Laravel 11's scalability ensures your website can grow as your portfolio expands.
3. Security
With built-in authentication and security features, Laravel 11 protects your data and provides peace of mind.
4. Community Support
Laravel’s vast community ensures you’ll find solutions to problems, tutorials, and plugins to enhance your website.
Key Features of a Portfolio Website
To build a portfolio website in Laravel 11, ensure it includes:
Homepage: A welcoming introduction.
About Section: Your background and expertise.
Projects: A gallery showcasing your work.
Contact Form: Easy communication.
Blog Section: Share insights and updates.
Responsive Design: Optimized for all devices.
Getting Started with Laravel 11
Step 1: Install Laravel 11
Start by setting up Laravel 11 on your local environment.
composer create-project --prefer-dist laravel/laravel portfolio-website
Step 2: Configure Your Environment
Update your .env file to set up the database and other environment variables.
DB_CONNECTION=mysql
DB_HOST=127.0.0.1
DB_PORT=3306
DB_DATABASE=portfolio
DB_USERNAME=root
DB_PASSWORD=yourpassword
Step 3: Set Up Authentication
Laravel 11 offers seamless authentication features.
php artisan make:auth
This command generates routes, controllers, and views for user authentication.
Step 4: Design Your Database
Create tables for your portfolio items, such as projects, blogs, and user profiles. Use migrations to structure your database.
php artisan make:migration create_projects_table
In the migration file:
Schema::create('projects', function (Blueprint $table) {
$table->id();
$table->string('title');
$table->text('description');
$table->string('image')->nullable();
$table->timestamps();
});
Run the migration:
php artisan migrate
Building the Frontend
Step 1: Choose a CSS Framework
Laravel integrates well with frameworks like Tailwind CSS and Bootstrap. Install Tailwind CSS for modern and responsive designs:
npm install -D tailwindcss
npx tailwindcss init
Configure your Tailwind file and integrate it into your project.
Step 2: Create Blade Templates
Laravel’s Blade templating engine simplifies building dynamic pages. Create a layout file in resources/views/layouts/app.blade.php:
<!DOCTYPE html>
<html>
<head>
<title>@yield('title')</title>
<link rel="stylesheet" href="{{ asset('css/app.css') }}">
</head>
<body>
<div class="container">
@yield('content')
</div>
</body>
</html>
Use this layout in other views:
@extends('layouts.app')
@section('title', 'Home')
@section('content')
<h1>Welcome to My Portfolio</h1>
@endsection
Step 3: Dynamic Content
Fetch portfolio items from the database and display them dynamically using controllers.
public function index() {
$projects = Project::all();
return view('home', compact('projects'));
}
In your Blade template:
@foreach ($projects as $project)
<div class="project">
<h2>{{ $project->title }}</h2>
<p>{{ $project->description }}</p>
<img src="{{ $project->image }}" alt="{{ $project->title }}">
</div>
@endforeach
Advanced Features
1. Search Functionality
Add search to help visitors find specific projects or blogs.
public function search(Request $request) {
$query = $request->input('query');
$projects = Project::where('title', 'LIKE', "%{$query}%")->get();
return view('search-results', compact('projects'));
}
2. File Uploads
Enable uploading images for projects.
public function store(Request $request) {
$request->validate([
'title' => 'required',
'description' => 'required',
'image' => 'nullable|image',
]);
$imagePath = $request->file('image')->store('projects', 'public');
Project::create([
'title' => $request->title,
'description' => $request->description,
'image' => $imagePath,
]);
}
3. Integrate Analytics
Use Google Analytics or similar tools to track visitor behavior.
4. Deploying Your Website
Deploy your Laravel website using platforms like Laravel Forge, AWS, or Heroku. Ensure to optimize the performance with caching and minification.
Optimizing Your Portfolio Website for SEO
Keyword Integration: Use keywords like “Build Portfolio Website in Laravel 11” strategically in titles, meta descriptions, and content.
Fast Loading Times: Optimize images and use caching.
Responsive Design: Ensure compatibility with mobile devices.
Content Strategy: Regularly update your blog to attract organic traffic.
Conclusion
Building a portfolio website in Laravel 11 is an enriching experience that showcases your skills and work to the world. By leveraging the framework’s capabilities and integrating advanced features, you can create a website that stands out in the digital landscape. Start your journey today and make your mark with a professional portfolio website
0 notes