#photoshop-tutorial-2020
Explore tagged Tumblr posts
Visit Tumblr Blog
Explore Tumblr blogs with no restrictions, modern design and the best experience.
Last Seen Tumblr Blogs


Fun Fact
Tumblr.com is the 103rd most visited website in the world.
Text
⭐ So you want to learn pixel art? ⭐
🔹 Part 1 of ??? - The Basics!
Edit: Now available in Google Doc format if you don't have a Tumblr account 🥰
Hello, my name is Tofu and I'm a professional pixel artist. I have been supporting myself with freelance pixel art since 2020, when I was let go from my job during the pandemic.


My progress, from 2017 to 2024. IMO the only thing that really matters is time and effort, not some kind of natural talent for art.
This guide will not be comprehensive, as nobody should be expected to read allat. Instead I will lean heavily on my own experience, and share what worked for me, so take everything with a grain of salt. This is a guide, not a tutorial. Cheers!
🔹 Do I need money?
NO!!! Pixel art is one of the most accessible mediums out there.
I still use a mouse because I prefer it to a tablet! You won't be at any disadvantage here if you can't afford the best hardware or software.
Because our canvases are typically very small, you don't need a good PC to run a good brush engine or anything like that.
✨Did you know? One of the most skilled and beloved pixel artists uses MS PAINT! Wow!!
🔹 What software should I use?
Here are some of the most popular programs I see my friends and peers using. Stars show how much I recommend the software for beginners! ⭐
💰 Paid options:
⭐⭐⭐ Aseprite (for PC) - $19.99
This is what I and many other pixel artists use. You may find when applying to jobs that they require some knowledge of Aseprite. Since it has become so popular, companies like that you can swap raw files between artists.
Aseprite is amazingly customizable, with custom skins, scripts and extensions on Itch.io, both free and paid.
If you have ever used any art software before, it has most of the same features and should feel fairly familiar to use. It features a robust animation suite and a tilemap feature, which have saved me thousands of hours of labour in my work. The software is also being updated all the time, and the developers listen to the users. I really recommend Aseprite!
⭐ Photoshop (for PC) - Monthly $$
A decent option for those who already are used to the PS interface. Requires some setup to get it ready for pixel-perfect art, but there are plenty of tutorials for doing so.
Animation is also much more tedious on PS which you may want to consider before investing time!
⭐⭐ ProMotion NG (for PC) - $19.00
An advanced and powerful software which has many features Aseprite does not, including Colour Cycling and animated tiles.
⭐⭐⭐ Pixquare (for iOS) - $7.99 - $19.99 (30% off with code 'tofu'!!)
Probably the best app available for iPad users, in active development, with new features added all the time.

Look! My buddy Jon recommends it highly, and uses it often.
One cool thing about Pixquare is that it takes Aseprite raw files! Many of my friends use it to work on the same project, both in their office and on the go.
⭐ Procreate (for iOS) - $12.99
If you have access to Procreate already, it's a decent option to get used to doing pixel art. It does however require some setup. Artist Pixebo is famously using Procreate, and they have tutorials of their own if you want to learn.
⭐⭐ ReSprite iOS and Android. (free trial, but:) $19.99 premium or $$ monthly
ReSprite is VERY similar in terms of UI to Aseprite, so I can recommend it. They just launched their Android release!
🆓 Free options:
⭐⭐⭐ Libresprite (for PC)
Libresprite is an alternative to Aseprite. It is very, very similar, to the point where documentation for Aseprite will be helpful to Libresprite users.
⭐⭐ Pixilart (for PC and mobile)
A free in-browser app, and also a mobile app! It is tied to the website Pixilart, where artists upload and share their work. A good option for those also looking to get involved in a community.
⭐⭐ Dotpict (for mobile)
Dotpict is similar to Pixilart, with a mobile app tied to a website, but it's a Japanese service. Did you know that in Japanese, pixel art is called 'Dot Art'? Dotpict can be a great way to connect with a different community of pixel artists! They also have prompts and challenges often.
🔹 So I got my software, now what?
◽Nice! Now it's time for the basics of pixel art.
❗ WAIT ❗ Before this section, I want to add a little disclaimer. All of these rules/guidelines can be broken at will, and some 'no-nos' can look amazing when done intentionally.
The pixel-art fundamentals can be exceedingly helpful to new artists, who may feel lost or overwhelmed by choice. But if you feel they restrict you too harshly, don't force yourself! At the end of the day it's your art, and you shouldn't try to contort yourself into what people think a pixel artist 'should be'. What matters is your own artistic expression. 💕👍
◽Phew! With that out of the way...
🔸"The Rules"
There are few hard 'rules' of pixel art, mostly about scaling and exporting. Some of these things will frequently trip up newbies if they aren't aware, and are easy to overlook.
🔹Scaling method
There are a couple ways of scaling your art. The default in most art programs, and the entire internet, is Bi-linear scaling, which usually works out fine for most purposes. But as pixel artists, we need a different method.


Both are scaled up x10. See the difference?
On the left is scaled using Bilinear, and on the right is using Nearest-Neighbor. We love seeing those pixels stay crisp and clean, so we use nearest-neighbor.
(Most pixel-art programs have nearest-neighbor enabled by default! So this may not apply to you, but it's important to know.)
🔹Mixels
Mixels are when there are different (mixed) pixel sizes in the same image.

Here I have scaled up my art- the left is 200%, and the right is 150%. Yuck!
As we can see, the "pixel" sizes end up different. We generally try to scale our work by multiples of 100 - 200%, 300% etc. rather than 150%. At larger scales however, the minute differences in pixel sizes are hardly noticeable!
Mixels are also sometimes seen when an artist scales up their work, then continues drawing on it with a 1 pixel brush.

Many would say that this is not great looking! This type of pixels can be indicative of a beginner artist. But there are plenty of creative pixel artists out there who mixels intentionally, making something modern and cool.
🔹Saving Your Files
We usually save our still images as .PNGs as they don’t create any JPEG artifacts or loss of quality. It's a little hard to see here, but there are some artifacts, and it looks a little blurry. It also makes the art very hard to work with if we are importing a JPEG.

For animations .GIF is good, but be careful of the 256 colour limit. Try to avoid using too many blending mode layers or gradients when working with animations. If you aren’t careful, your animation could flash afterwards, as the .GIF tries to reduce colours wherever it can. It doesn’t look great!

Here's an old piece from 2021 where I experienced .GIF lossiness, because I used gradients and transparency, resulting in way too many colours.
🔹Pixel Art Fundamentals - Techniques and Jargon
���❗Confused about Jaggies? Anti-Aliasing? Banding? Dithering? THIS THREAD is for you❗❗ << it's a link, click it!!
As far as I'm concerned, this is THE tutorial of all time for understanding pixel art. These are techniques created and named by the community of people who actually put the list together, some of the best pixel artists alive currently. Please read it!!
🔸How To Learn
Okay, so you have your software, and you're all ready to start. But maybe you need some more guidance? Try these tutorials and resources! It can be helpful to work along with a tutorial until you build your confidence up.
⭐⭐ Pixel Logic (A Digital Book) - $10 A very comprehensive visual guide book by a very skilled and established artist in the industry. I own a copy myself.
⭐⭐⭐ StudioMiniBoss - free A collection of visual tutorials, by the artist that worked on Celeste! When starting out, if I got stuck, I would go and scour his tutorials and see how he did it.
⭐ Lospec Tutorials - free A very large collection of various tutorials from all over the internet. There is a lot to sift through here if you have the time.
⭐⭐⭐ Cyangmou's Tutorials - free (tipping optional) Cyangmou is one of the most respected and accomplished modern pixel artists, and he has amassed a HUGE collection of free and incredibly well-educated visual tutorials. He also hosts an educational stream every week on Twitch called 'pixelart for beginners'.
⭐⭐⭐ Youtube Tutorials - free There are hundreds, if not thousands of tutorials on YouTube, but it can be tricky to find the good ones. My personal recommendations are MortMort, Brandon, and AdamCYounis- these guys really know what they're talking about!
🔸 How to choose a canvas size
When looking at pixel art turorials, we may see people suggest things like 16x16, 32x32 and 64x64. These are standard sizes for pixel art games with tiles. However, if you're just making a drawing, you don't necessarily need to use a standard canvas size like that.
What I like to think about when choosing a canvas size for my illustrations is 'what features do I think it is important to represent?' And make my canvas as small as possible, while still leaving room for my most important elements.
Imagine I have characters in a scene like this:

I made my canvas as small as possible (232 x 314), but just big enough to represent the features and have them be recognizable (it's Good Omens fanart 😤)!! If I had made it any bigger, I would be working on it for ever, due to how much more foliage I would have to render.
If you want to do an illustration and you're not sure, just start at somewhere around 100x100 - 200x200 and go from there.
It's perfectly okay to crop your canvas, or scale it up, or crunch your art down at any point if you think you need a different size. I do it all the time! It only takes a bit of cleanup to get you back to where you were.
🔸Where To Post
Outside of just regular socials, Twitter, Tumblr, Deviantart, Instagram etc, there are a few places that lean more towards pixel art that you might not have heard of.
⭐ Lospec Lospec is a low-res focused art website. Some pieces get given a 'monthly masterpiece' award. Not incredibly active, but I believe there are more features being added often.
⭐⭐ Pixilart Pixilart is a very popular pixel art community, with an app tied to it. The community tends to lean on the young side, so this is a low-pressure place to post with an relaxed vibe.
⭐⭐ Pixeljoint Pixeljoint is one of the big, old-school pixel art websites. You can only upload your art unscaled (1x) because there is a built-in zoom viewer. It has a bit of a reputation for being elitist (back in the 00s it was), but in my experience it's not like that any more. This is a fine place for a pixel artist to post if they are really interested in learning, and the history. The Hall of Fame has some of the most famous / impressive pixel art pieces that paved the way for the work we are doing today.
⭐⭐⭐ Cafe Dot Cafe Dot is my art server so I'm a little biased here. 🍵 It was created during the recent social media turbulence. We wanted a place to post art with no algorithms, and no NFT or AI chuds. We have a heavy no-self-promotion rule, and are more interested in community than skill or exclusivity. The other thing is that we have some kind of verification system- you must apply to be a Creator before you can post in the Art feed, or use voice. This helps combat the people who just want to self-promo and dip, or cause trouble, as well as weed out AI/NFT people. Until then, you are still welcome to post in any of the threads or channels. There is a lot to do in Cafe Dot. I host events weekly, so check the threads!
⭐⭐/r/pixelart The pixel art subreddit is pretty active! I've also heard some of my friends found work through posting here, so it's worth a try if you're looking. However, it is still Reddit- so if you're sensitive to rude people, or criticism you didn't ask for, you may want to avoid this one. Lol
🔸 Where To Find Work
You need money? I got you! As someone who mostly gets scouted on social media, I can share a few tips with you:
Put your email / portfolio in your bio Recruiters don't have all that much time to find artists, make it as easy as possible for someone to find your important information!
Clean up your profile If your profile feed is all full of memes, most people will just tab out rather than sift through. Doesn't apply as much to Tumblr if you have an art tag people can look at.
Post regularly, and repost Activity beats everything in the social media game. It's like rolling the dice, and the more you post the more chances you have. You have to have no shame, it's all business baby
Outside of just posting regularly and hoping people reach out to you, it can be hard to know where to look. Here are a few places you can sign up to and post around on.
/r/INAT INAT (I Need A Team) is a subreddit for finding a team to work with. You can post your portfolio here, or browse for people who need artists.
/r/GameDevClassifieds Same as above, but specifically for game-related projects.
Remote Game Jobs / Work With Indies Like Indeed but for game jobs. Browse them often, or get email notifications.
VGen VGen is a website specifically for commissions. You need a code from another verified artist before you can upgrade your account and sell, so ask around on social media or ask your friends. Once your account is upgraded, you can make a 'menu' of services people can purchase, and they send you an offer which you are able to accept, decline, or counter.
The evil websites of doom: Fiverr and Upwork I don't recommend them!! They take a big cut of your profit, and the sites are teeming with NFT and AI people hoping to make a quick buck. The site is also extremely oversaturated and competitive, resulting in a race to the bottom (the cheapest, the fastest, doing the most for the least). Imagine the kind of clients who go to these websites, looking for the cheapest option. But if you're really desperate...
🔸 Community
I do really recommend getting involved in a community. Finding like-minded friends can help you stay motivated to keep drawing. One day, those friends you met when you were just starting out may become your peers in the industry. Making friends is a game changer!
Discord servers Nowadays, the forums of old are mostly abandoned, and people split off into many different servers. Cafe Dot, Pixel Art Discord (PAD), and if you can stomach scrolling past all the AI slop, you can browse Discord servers here.
Twitch Streams Twitch has kind of a bad reputation for being home to some of the more edgy gamers online, but the pixel art community is extremely welcoming and inclusive. Some of the people I met on Twitch are my friends to this day, and we've even worked together on different projects! Browse pixel art streams here, or follow some I recommend: NickWoz, JDZombi, CupOhJoe, GrayLure, LumpyTouch, FrankiePixelShow, MortMort, Sodor, NateyCakes, NyuraKim, ShinySeabass, I could go on for ever really... There are a lot of good eggs on Pixel Art Twitch.
🔸 Other Helpful Websites
Palettes Lospec has a huge collection of user-made palettes, for any artist who has trouble choosing their colours, or just wants to try something fun. Rejected Palettes is full of palettes that didn't quite make it onto Lospec, ran by people who believe there are no bad colours.
The Spriters Resource TSR is an incredible website where users can upload spritesheets and tilesets from games. You can browse for your favourite childhood game, and see how they made it! This website has helped me so much in understanding how game assets come together in a scene.
VGMaps Similar to the above, except there are entire maps laid out how they would be played. This is incredible if you have to do level design, or for mocking up a scene for fun.
Game UI Database Not pixel-art specific, but UI is a very challenging part of graphics, so this site can be a game-changer for finding good references!
Retronator A digital newspaper for pixel-art lovers! New game releases, tutorials, and artworks!
Itch.io A website where people can upload, games, assets, tools... An amazing hub for game devs and game fans alike. A few of my favourite tools: Tiled, PICO-8, Pixel Composer, Juice FX, Magic Pencil for Aseprite
🔸 The End?
This is just part 1 for now, so please drop me a follow to see any more guides I release in the future. I plan on doing some writeups on how I choose colours, how to practise, and more!
I'm not an expert by any means, but everything I did to get to where I am is outlined in this guide. Pixel art is my passion, my job and my hobby! I want pixel art to be recognized everywhere as an art-form, a medium of its own outside of game-art or computer graphics!

This guide took me a long time, and took a lot of research and experience. Consider following me or supporting me if you are feeling generous.
And good luck to all the fledgling pixel artists, I hope you'll continue and have fun. I hope my guide helped you, and don't hesitate to send me an ask if you have any questions! 💕
My other tutorials (so far): How to draw Simple Grass for a game Hue Shifting
28K notes
·
View notes
Text
Dance flyer design.
#flyer design#party flyer design#flyer design tutorial#party flyer design in photoshop#design a flyer#event flyer design#flyer design photoshop#flyer design in photoshop#flyer#photoshop flyer design tutorial#graphic design#diy flyer design#poster design#flyer design ideas#flyer design techniques#flyer design in procreate#design flyer#how to design a flyer in photoshop 2020#best flyer design#flyer design online#custom flyer design#dance flyer design#ahshanhabib
0 notes
Text
My GIF Making process: Screen capturing using MPV player, Organizing files, 3 Sharpening settings, Basic Coloring PSD + Actions set

This is a very long post so heads up.
I’ll try to be as thorough and true as much as possible to the way I make my gifs (I already use Photoshop Actions which I’ve long since set up but now for this tutorial I’m reviewing them to show you the exact steps I’ve learned to create my gifs 😃) and present them to you in a semi-coherent way. Also, please bear with me since English is my second language.
First things first. Below are the things and tools we need to do this:
Downloaded 4K or 1080p quality videos (let’s all assume we know where to get these—especially for high definition movies and tv series—so this post doesn’t get removed, okay? 😛)
Adobe Photoshop CC or the CS versions can work as well, but full disclosure I haven’t created gifs using the CS versions since 2020. I’m currently using Adobe Photoshop 2024.
mpv player. Use mpv player to get those frames/screenshots or any other video player that has a screen grabber feature. I’ve used adapter for the longest time but I’ve switched to mpv because the press to screenshot feature while the video is playing has been a game changer not to mention ultimate time saver for me. For adapter you need to play it in another video player (like VLC player), to get the start and end timestamps of the scene you want to gif which takes me ages before I can even open Photoshop.
Anyway! Please stop reading this post for a moment and head over to this amazing tutorial by kylos. She perfectly tells you how to install and use mpv player, both for Mac and Windows users.
One thing I have to share though, I had a tough time when I updated my MacOS to Sonoma since MPV is suddenly either duplicating frames or when I delete the duplicates the player seems to be skipping frames :/ I searched and found a solution here, though it didn’t work for me lol. My workaround for this in the meantime is decreasing the speed down to 0.70 then start screenshotting—it’s not the same pre Sonoma update but it works so I’ll have to accept it rather than have jumpy looking gifs.
Now, after this part of kylos’ tutorial:

you can continue reading the following sections of my gif tutorial below.
I want to share this little tip (sorry, this will only cater to Mac users) that I hope will be helpful for organizing the screenshots that MPV saved to the folder you have selected. Because believe me you don’t want to go through 1k+ of screenshots to select just 42-50 frames for your gif.
The Control + Command + N shortcut
This shortcut allows you to create a new folder from files you have pre-selected. As you can see below I have already created a couple of folders, and inside each folder I have selected screenshots that I want to include in one single gif. It's up to you how you want to divide yours, assuming you intend to create and post a Tumblr gifset rather than just one gif.

Another tip is making use of tags. Most of, if not all the time, I make supercorp gifs so I tag blue for Kara and red (or green) for Lena—just being ridiculously on brand and all that.
Before we finally open Photoshop, there's one more thing I want to say—I know, please bear with me for the third? fourth? time 😅
It's helpful to organize everything into their respective folders so you know the total number of items/frames you have. This way, you can add or delete excess or unnecessary shots before uploading them in Photoshop.
For example below there are 80 screenshots of Kara inside this folder and for a 1:1 (540 x 540 px) Tumblr gif, Photoshop can just work around with 42-50 max number of frames with color adjustments applied before it exceeds the 10 MB file size limit of Tumblr.

Sometimes I skip this step because it can be exhausting (haha) and include everything so I can decide visually which frames to keep later on. You'll understand what I mean later on. But it's important to keep the Tumblr 10 MB file size limit in mind. Fewer frames, or just the right amount of frames, is better.
So, with the screenshot organization out of the way, let's finally head over to Photoshop.
Giffing in Photoshop, yay!
Let’s begin by navigating to File > Scripts > Load Files into Stack…

The Load Layers window will appear. Click the Browse button next.
Find your chosen screenshots folder, press Command + A to select all files from that folder then click Open. Then click OK.
After importing and stacking your files, Photoshop should display the following view:

By the way, I'll be providing the clip I've used in this tutorial so if want to use them to follow along be my guest :)
If you haven't already opened your Timeline panel, navigate to Windows > Timeline.
Now, let's focus on the Timeline panel for the next couple of steps.
Click Create Video Timeline, then you’ll have this:

Now click the menu icon on the top right corner then go to Convert Frames > Make Frames from Clips

Still working on the Timeline panel, click the bottom left icon this time—the icon with the three tiny boxes—to Convert to Frame Animation
Select Make Frames From Layers from the top right corner menu button.
So now you have this:

Go and click the top right menu icon again to Select All Frames
Then click the small dropdown icon to set another value for Frame Delay. Select Other…

The best for me and for most is 0.05 but you can always play around and see what you think works for you.
Click the top right menu icon again to Reverse Frames.
I think Photoshop has long since fixed this issue but usually the first animation frame is empty so I just delete it but now going through all these steps there seems to be none of that but anyways, the delete icon is the last one among the line of feature buttons at the bottom part of the Timeline panel.
Yay, now we can have our first proper GIF preview of a thirsty Lena 😜

Press spacebar to watch your gif play for the very first time! After an hour and half of selecting and cutting off screenshots! 😛 Play it some more. No really, I’m serious. I do this so even as early (lol) as this part in the gif making process, I can see which frames I can/should delete to be within the 10 MB file size limit. You can also do it at the end of course 🙂
Now, let’s go to the next important steps of this tutorial post which I’ve numbered below.
Crop and resize to meet Tumblr's required dimensions. The width value should be either 540px, 268px, or 177px.
Convert the gif to a Smart Object for sharpening.
Apply lighting and basic color adjustments before the heavy coloring. I will be sharing the base adjustments layers I use for my gifs 😃.
1. Crop and Resize
Click on the Crop tool (shortcut: the C key)

I like my GIFs big so I always set this to 1:1 ratio if the scene allows it. Press the Enter key after selecting the area of the frame that you want to keep.
Side note: If you find that after cropping, you want to adjust the image to the left or another direction, simply unselect the Delete Cropped Pixels option. This way, you will still have the whole frame area available to crop again as needed and as you prefer.
Now we need to resize our gif and the shortcut for that is Command + Opt + I. Type in 540 as the width measurement, then the height will automatically change to follow the ratio you’ve set while cropping.
540 x 540 px for 1:1
540 x 405 px for 4:3
540 x 304 px for 16:9
For the Resample value I prefer Bilinear—but you can always select the other options to see what you like best.
Click OK. Then Command + 0 and Command + - to properly view the those 540 pixels.

Now we get to the exciting part :) the sharpen settings!
2. Sharpen
First we need to have all these layers “compressed” intro a single smart object from which we can apply filters to.
Select this little button on the the bottom left corner of the Timeline panel.


Select > All Layers
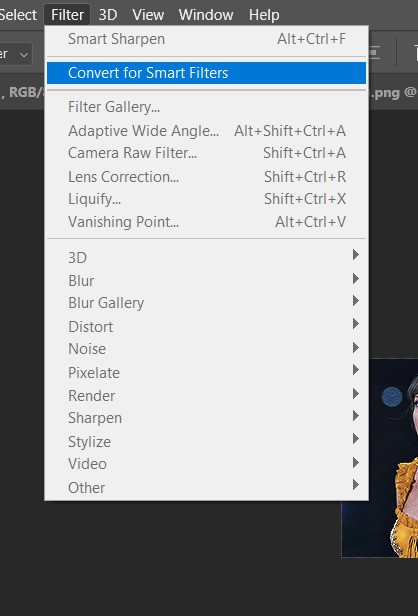
Then go to Filter > Convert for Smart Filters
Just click OK when a pop-up shows up.
Now you should have this view on the Layers panel:

Now I have 3 sharpen settings to share but I’ll have download links to the Action packs at the end of this long ass tutorial so if you want to skip ahead, feel free to do so.
Sharpen v1
Go to Filter > Sharpen > Smart Sharpen…
Below are my settings. I don’t adjust anything under Shadows/Highlights.
Amount: 500
Radius: 0.4
Click OK then do another Smart Sharpen but this time with the below adjustments.
Amount: 12
Radius: 10.0

As you can see Lena’s beautiful eyes are “popping out” now with these filters applied. Click OK.
Now we need to Convert to Frame Animation. Follow the steps below.
Click on the menu icon at the top right corner of the Timeline panel, then click Convert Frames > Flatten Frames into Clips
Then Convert Frames > Convert to Frame Animation
One more click to Make Frames From Layers
Delete the first frame then Select All then Set Frame Delay to 0.05

and there you have it! Play your GIF and make sure it’s just around 42-50 frames. This is the time to select and delete.
To preview and save your GIF go to File > Export > Save for Web (Legacy)…
Below are my Export settings. Make sure to have the file size around 9.2 MB to 9.4 MB max and not exactly 10 MB.

This time I got away with 55 frames but this is because I haven’t applied lighting and color adjustments yet and not to mention the smart sharpen settings aren't to heavy so let’s take that into consideration.
Sharpen v1 preview:

Sharpen v2
Go back to this part of the tutorial and apply the v2 settings.
Smart Sharpen 1:
Amount: 500
Radius: 0.3
Smart Sharpen 2:
Amount: 20
Radius: 0.5
We’re adding a new type of Filter which is Reduce Noise (Filter > Noise > Reduce Noise...) with the below settings.

Then one last Smart Sharpen:
Amount: 500
Radius: 0.3
Your Layers panel should look like this:

Then do the Convert to Frames Animation section again and see below preview.
Sharpen v2 preview:

Sharpen v3:
Smart Sharpen 1:
Amount: 500
Radius: 0.4
Smart Sharpen 2:
Amount: 12
Radius: 10.0
Reduce Noise:
Strength: 5
Preserve Details: 50%
Reduce Color Noise: 0%
Sharpen Details: 50%
Sharpen v3 preview:

And here they are next to each other with coloring applied:
v1

v2

v3

Congratulations, you've made it to the end of the post 😂
As promised, here is the download link to all the files I used in this tutorial which include:
supercorp 2.05 Crossfire clip
3 PSD files with sharpen settings and basic coloring PSD
Actions set
As always, if you're feeling generous here's my Ko-fi link :) Thank you guys and I hope this tutorial will help you and make you love gif making.
P.S. In the next post I'll be sharing more references I found helpful especially with coloring. I just have to search and gather them all.
-Jill
#tutorial#gif tutorial#photoshop tutorial#gif making#sharpening#sharpening tutorial#photoshop#photoshop resources#psd#psd coloring#gif coloring#supercorp#supercorpedit#lena luthor#supergirl#my tutorial#this has been a long time coming#guys. i'm BEGGING you. use the actions set - it was a pain doing all this manually again ngl LMAO#i've been so used to just playing the actions#so this has been a wild refresher course for me too 😆
678 notes
·
View notes
Text
Hello! I've decided to make an updated tutorial on how I gif, since some of my giffing methods have changed since I made my first one (and this one is still valid, by the way! I've just changed a few things and I thought the update would be good.)
In this tutorial you'll find:
A download link for Photoshop CC 2020;
Step-by-step instructions on how to make gifs and color them;
A sharpening action for your gifs;
A base psd for gifs.
Get the tutorial here (just type 0 to get it for free, and if you'd like to support me, any amount is extremely appreciated).
I accept commissions for tutorials + support me on ko-fi?
#tuserdee#dailyresources#completeresources#userbecca#gif tutorial#gif resources#mine#resources#*#my tutorials#tutorials#my resources#gif#my psds#my actions#psds#actions#reposting it on main bc fucking sideblog is shadowbanned LOL!!!!!!!!!!!
362 notes
·
View notes
Note
hi! any chance you can make a quick tutorial on how to make tiled backgrounds? i can never get mine to repeat properly.
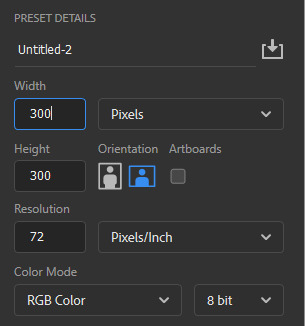
no problem!! my method is very simple and uses photoshop 2020 (adobe dont ask how i got photoshop...) but likely would work in other programs.
first set up your canvas and the element you want to tile. it doesn't matter what size as long as you remember how many pixels make up your dimensions, this will be important!!
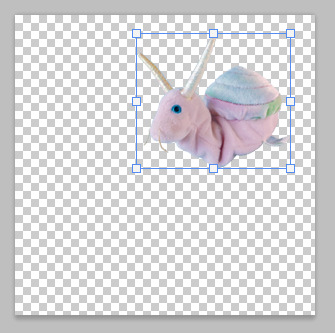
drag your element over the edge of the canvas, wherever you want it to be.

now make a copy of the layer by dragging the layer down to the "new layer" button. for some reason copy-and-paste moves the layer slightly in photoshop?? so don't use it. you want your copied layer to be EXACTLY where your original layer is.


now comes the magic. drag the new layer over to the opposite edge of the canvas. photoshop has a little tooltip to show how far you're dragging it. you want it to be at a 0 on the horizontal axis and the EXACT dimension of your canvas (in this case 300px) on the vertical.
(there is another method where you use a command to move the element by a certain number of pixels, but i forgor how to do it!! it might work better in other programs if there's no tooltip)

for horizontal elements, use the same method only swap your horizontal and vertical dimensions.

it can take a bit of fiddling about to get a nice looking pattern. it's possible to do corner elements too! you'll have to make four layers for each corner element, rather than two.
ta-da, finished pattern!

see it in action here: link
i hope that's useful! this method can be easily finessed for more complex designs, mine are just very simple.
basically, keep the dimensions of your canvas in mind as you work!!
85 notes
·
View notes
Text
Hi, everyone! @reputayswift asked me how I made this gif where I put several gifs in one using shapes, so I thought I'd write a quick tutorial. Under the cut, just a heads up, this is very screenshot-heavy!
Difficulty level: Easy, basic gifmaking skills are required
Software being used: Photoshop CC 2020, but any version is fine, and I'm sure this can also be adapted to Photopea.
Firstly, you have to pick which shape/png you want to use. For this gifset, I used this maple leaf png that I got from cleanpng.com , a website that I highly recommend for getting transparent pngs.
After picking the png, make your gifs. Just remember that the smaller gif and the base gif need to have the same number of frames. And that the shape/png and the smaller gif need to have the same dimensions.
Okay, so after you've made both gifs, go to the smaller gif and convert it to a smart object. It will make it easier to put it inside the shape, since it will convert all the layers into one. Just follow these steps: select > all layers > filter > convert to smart filters:

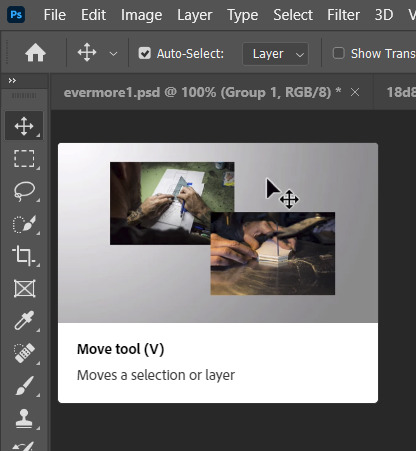
Okay, now open the png you've picked on Photoshop and resize it, so that its dimensions are the same as the smaller gif's. After you've resized the png, select the move tool (shortcut: V key in your computer keyboard), drag the png and drop it on top of the smaller gif:
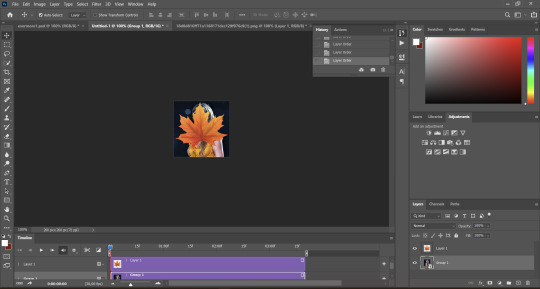
Now, drag the png layer underneath the gif layer:

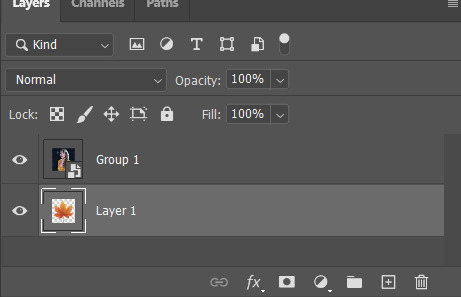
After that, right-click on the gif layer (not the png layer) and then select "create clipping mask":
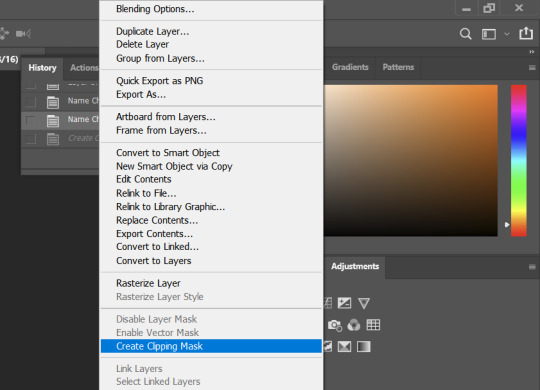
And here's what we're left with:

Now, it's time to put the smaller on the base gif, which is pretty simple. Select the move tool (shortcut: V key on your keyboard), drag the smaller gif and drop it on the top of the base gif:

And here's our final result:

I hope this helps! Feel free to reach out if you have any questions <3
54 notes
·
View notes
Text
☆ UPSCALING LOW QUALITY FOOTAGE
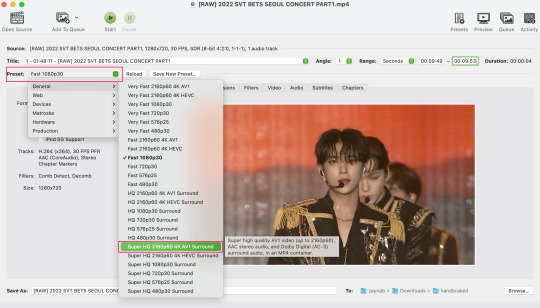
what i used: • 2021 macbook pro with m1 chip (390/500gb storage used she's hanging in there) • photoshop 2020 • mpv (for screencaps but this isn't needed!) • handbrake (available for linux, mac and windows here) • video source to gif
what is handbrake? basically its a software that helps you change the format of videos, such as for certain devices or screens, or in the case that we're going to utilise, quality and frame rate!
disclaimer: handbrake is super easy to use and very beginner friendly for this procedure and it can make a video go from 30fps to 60fps however it does not replace the quality of true 4k/blue/master-pro res files. in the gif below, this is the level of detail in a master pro-res file.

getting started it's easiest first to note the timestamps of the video you want to encode, and keep in mind that unless your computer is incredibly powerful, i wouldn't try to encode an hour worth of footage in one run! my laptop could handle about 30 seconds in one go before she started toasting.
using handbrake: once you've downloaded the software, open the software and it will come up with a pop up window asking you to open the video source (that is presumably saved within your folders) and go ahead and do so!
in the range section, use the drop down button to navigate to seconds and enter your timestamp. the duration on the side will show how long of the footage you're gonna encode is!

then go down to the save as, and give your footage 'to be snipped' a name. this isn't necessary but useful because if you're planning to say, encode 3 or 4 small parts of footage in one sitting, each encoding instance will overwrite the previous one. so i just call mine 'cut 1', 'cut 2' and so on.

next go to preset, and there you'll see such a wide variety of options that you can play around with, with differing qualities, frame rates, sound options, and so on. for the sake of this tutorial, i'm using 'superhq 2160p60 4k av1 surround' and i've used the drop down menu to select it! then go ahead and press start! the time taken to complete depends on the duration of footage that you sent to encode! you'll find your encoded video as an .mp4 file in your designated folder (which you can change via browse at the bottom)
what next? • if you prefer to open footage directly into photoshop (my ps can't handle it), then go for it! • if you screencap as i do, then just use mpv or whatever screencapping program you prefer to make the screencaps and open in ps in your usual manner. • you can use the timestamps to further process the video through vapoursynth to denoise, but i've yet to try that!
the results for this first set of example footage, i used footage from the be the sun concert file, which is almost 2 hours in length and 4gb in file size.


you can see the difference in the smooth frame rate of the footage, as well as the quality of the sharpening!
and to utilise the bane of gifmaking, a gose episode, notorious for dodgy pixelated frames and less hd quality in 1080p on youtube, i ran it through the same settings!

these are the exact same files, downloaded using 4k video downloader and with the same sharpening, but see how on the original file, the sharpening looks a bit more harsh and 'outlined' while it seems to sit softer on the encoded 4k version!
so i mainly use handbrake for dvd files, or not-so-hd 1080p youtube videos or videos that seem a bit clunkier but i had never tried them on a tv/film file so take a look below! i used a 1gb (so not very good quality) of a show (as compared to its 4gb files).
as i said at the start in the disclaimer, handbrake can't replicate true file quality, as you'd expect to see in a proper hd bluray/t*rrent file of a show but there's an interesting difference in the frame rate. personally it's not something i would utilise much there but its all up to individual preference on how someone prefers to have their gifs <3
this is a very basic run-through of how i used handbrake, as i haven't really explored all its features and i use this as a quick process when i'm running through seventeen dvd/dl files but i feel like it would work well on general youtube videos (such as interviews, episodes, behind the scenes) and feel free to send an ask/message for any help/clarification! <33
#ps help#usergif#gif tutorial#kpop gif tutorial#seventeen#completeresources#2605#userace#niniblr#emification#usershreyu#heymax#arieslofi#tusermlee#userbloomingwarrior#uservivaldi#userzil#userfanni#userrozza#usermoonchild#userraffa#tuserjen#usernik
372 notes
·
View notes
Note
hi!! i love all the gifs you make of older games (even reminding me of games i used to play but since forgotten. ive gotten some nice memories back. thank you so much for that! <3). ive kinda been wanting to get into gif making myself, but all the resources i find dont list what program is used or the program doesnt give good results. i was wondering what program(s) you use to make your gifs and how you like how they come out vs how you wish they come out? i tried looking for a faq but couldnt find one. if you do have it listed somewhere my apologies!
Aaaw I'm super glad to hear that!! I also love replaying games I used to play as a kid, it brings so many good memories hehe ✨💖✨💖
I actually made a tutorial on my process a couple of months ago! (I should put it on my pin LMAO), but to keep it short, for gif editing I use Photoshop 2020, and for recording I use various programs depending on what I'm making a gif of (DesMuMe for DS games, OBS studio or Camtasia Studio 9 for other games). Having a hq recording is the very first step to make a nice gif, if the quality is bad you won't be able to make it better no matter what.
The second most important step is knowing the limits. You have almost total freedom to make gorgeous gifs... if you are not going to post them anywhere. But if you want to show them on Tumblr you have to take into account that there's a limit of 10MB for the file size and 540px for the image's width (Photoshop also has a limit of 500 frames in total). When you've made enough gifs you kinda intuitively know when something is going to be too big or require a lot of editing, but generally, the more information there's in a gif, the heavier it will be. Long gifs, gifs with lots of colors, gifs with lots of details, etc. will cause the biggest problems and those are the gifs that will not come out like you wanted.
I know there are people out there who make incredible gifs with cool layouts and pretty effects, but those take a lot of patience and determination and I have none of those "OTL Nowadays I mostly focus on DS games because they're the easiest to make and don't cause many problems, so my expectations are pretty much equal to the end result. But when I make gifs of Wii, 3DS or PC games I have to lower my expectations a lot, and more often than not I can't even make what I want because I have to sacrifice the quality.
So yeah, depending on what you want to make a gif of, lowering your expectations and learning to work within the tight limits it's going to be part of the process :( But there are many workarounds to get your gifs to look as closely as you can to your expectations, it just takes more patience! At the end of that tutorial I wrote a couple of recommendations to reduce the file size, so make sure to check it out and see if it helps!
And don't feel discouraged!! Making gifs is not very pleasant at the beginning because the process is tedious and not very intuitive but once you get used to it and know your abcs the results are very rewarding ❤💕❤
#asks#and ofc if you need help with anything more specific feel free to send another ask or dm me! i'm always glad to help 💞💞💞
14 notes
·
View notes
Text
Okay a bunch of people on my dash are posting their old art and I want to butt in because I have a funny comparison because I drew the same characters in pretty much the same composition like 15 years apart.
Here's a screenshot redraw of the Almighty Tallest from 2020:
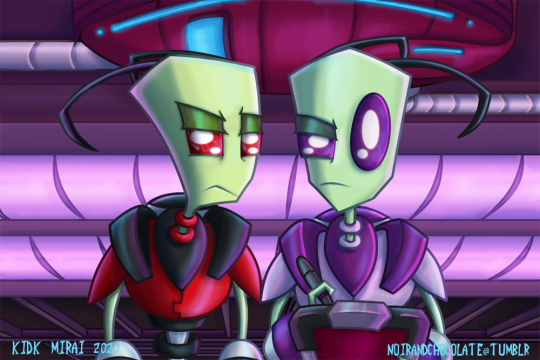
And here's a drawing I did of the Tallest in I believe 2005, possibly 2006? It might be even earlier than that because I've had multiple computers since then (so the "modified" date in the file properties might not be correct) and I cannot read the date I typed on the bottom corner because the picture is too small:


In my defense I drew that interior background with a janky trackball mouse. In NOT my defense, I absolutely drew one Tallest on paper, scanned it in, did the lineart, and then flipped said lineart to get the other Tallest (as if that wasn't obvious). I also followed a tutorial for how to create an exploding planet using Photoshop, and cut the spaceships out of screenshots to stick them onto the exterior background!! 8D;;
I used to draw a lot, but fell out of the hobby because of job taking up all my time and energy loooollllslakfjsalkdfjsalkfj oh wellllllllllllll. But I had a lot of fun making art while I was still doing it.
PS for @firefly-factory here's a Lord of the Rings/Silmarillion dragon I drew in 2004, just because:

#kidk says stuff#i am old did everyone know that? i think i have said so#i'm not tagging this as anything i am not interested in putting this in any fandom tag lol#i did not draw a lot of dragons but a friend of mine at the time did and so i tried to#idk where i got the idea ancalagon the black looks like this but y'know? i think he looks all right all things considered#a scant few intrepid fellow travelers I am still mutuals with to this day may remember my tallest blow up a planet art!#from the deviantart days!
23 notes
·
View notes
Text


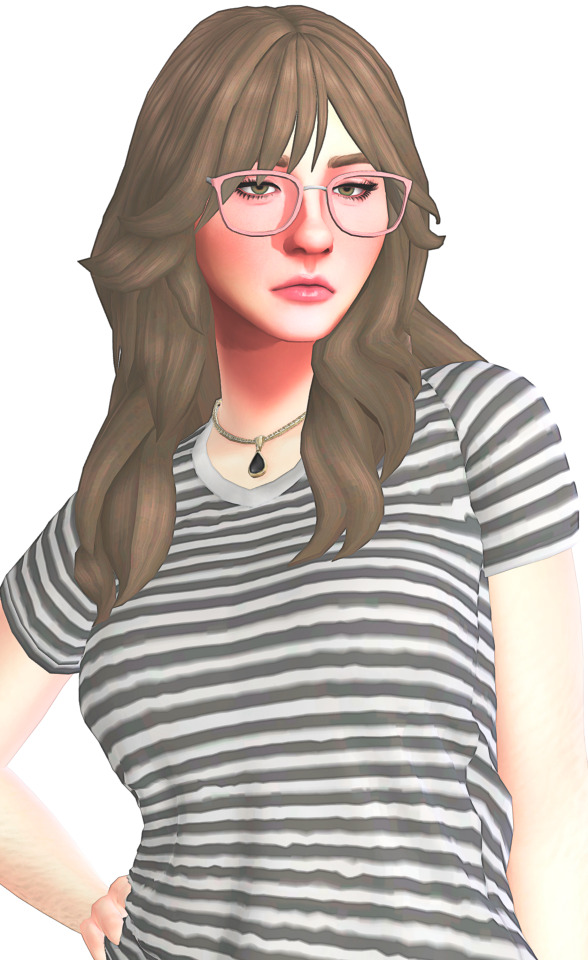

New Simblr Introduction ♡
Although I've had this account for about a month now, I guess I can still be considered a "new simblr" because I'm relatively small, and when I did this the first time Tumblr didn't show me in tags so I didn't get any reach... So here we go again!
Basic Information:
Name: Lauren Age: Young adult (18) Aspiration: Computer Whiz Traits: Family Oriented, Overachiever, Loyal, Music Lover, Childish Job: Tech Guru Simself: Pictured above
I've been playing Sims since 2016 and was inspired by simtubers and simblrs like @farfallasims, @pixelglam, @marilynjeansims @largetaytertots and @oshinsimblr to create my own Simblr and share my work.
I am a heavy modder and CC user, and use maxis-mix CC. I would consider my gameplay style cozy and I usually play happy family dynamics. However, I'm very open minded and love to see other gameplay styles!
I (used to) play sims on a 2020 Macbook and have taken years to work out how to make it run decently with minimal lag and good graphics. Now I play on a shitty Lenovo Z13 ThinkPad which gives me the ability to use shaders! NOW I play on an Asus Zenbook 14 which is amazing!! (Let’s ignore that I went through 3 computers since I’ve had this account)
On my account, you'll see CAS screenshots, lookbooks, sim dumps, CC recommendations, photoshop tutorials, gameplay photos and more! I am very WCIF friendly so if you ever want to ask a question I'm more than happy to answer it. Also, sim requests are always open! :) Just send an ask (for WCIF and requests)
There will never be any NSFW content on my page, and as a general thing please don't expect a follow back if your page is full of sexually explicit content.
I would really really love to find new active mutuals and friends!! I am always always looking for new mutuals so if you’re an active simblr I'll follow back (I'm a good mutual, I'll like and comment [and rb] anything you post). And if you ever wanna chat, just DM me because I'd love to talk :)
Please, feel free to like, comment, follow and reblog this post (help a gal out)
#the sims 4#sims 4#sims 4 gameplay#new simblr alert#new simblr#ts4 simblr#ts4#sims 4 simblr#simblr#sims blog#sims 4 cas#ts4 community#sims 4 community#new sims blog#small simblr#new simmer#the sims#maxis mix
110 notes
·
View notes
Note
raiy, o seu Photoshop é pago? eu tô a tempos querendo baixar mas ele é mto caro e eu queria saber se você usa alguma versão crackeada
Viva a pirataria!
Photoshop CS6
Link para download (canal LipãoTech) + Tutorial simples de instalação.
Photoshop CC 2019
Link para download (canal PlasSquare)
Tutorial simples:
1. Após baixar o arquivo, extraia no seu computador (é necessário ter o programa Winrar); 2. Abra a pasta que foi criada e dê duplo clique em "Set-up.exe"; 3. Escolha o idioma na página de instalação que foi aberta; 4. Clique em "Continuar" e espere o Photoshop ser instalado. Depois, busque ele nos seus programas. Está pronto para ser usado!
Photoshop CC 2020
Link para download (canal New Boss)
Tutorial simples:
1. Após baixar o arquivo, extraia no seu computador (é necessário ter o programa Winrar); 2. Abra a pasta que foi criada e dê duplo clique em "Photoshop-PT-BR (x64)"; 3. Siga os passos na página de instalação que foi aberta e espere o Photoshop ser instalado. Depois, busque ele nos seus programas. Está pronto para ser usado!
92 notes
·
View notes
Text
Opened Photoshop and Illustrator at work for the first time and they have like, the actually bought latest versions here (unlike mine that are all pirated from 2020) and in those an automatic video straight up jumps at you like "Hello, you're going to watch the video tutorial of how to use AI in your work!" and I'm like "The fuck I will, this is commercial work and I don't want blurry shit where different elements melt into each other on it because I have standards but also I'm making SIMPLE LOGOS, what would I need this stupid tool for???"
75 notes
·
View notes
Note
How/where do you make your blinkies? I wanna make a few 😁
For generators, blinkies.cafe is great & also the only one I can think of off of the top of my head (and just added a ton of new templates since the last time I checked/rules if you don’t have to have any graphics knowledge or programs etc.) I don't use them often but I see them around the most often & think it's cool how accessible it is. I'll tell people to use this site 56278 times because it's simple & there's plenty of options. (And with the saved images you can kind of dissect them frame by frame if you're trying to learn how they work to make blinkies from scratch, later.)
Example of one of the few blinkies I've made there:

Useless information about how I personally make blinkies:
For blinkies like the ones on my Neocities - I use Photoshop & the "how" is honestly just via being old (I should make a tutorial if I have the time - but I've been making blinkies since the mid-00s so it's second nature, frame by frame - there's a few other people on here have written too! It's just infinitely looping animation at .1s speed @ 150x20px.)
Examples of blinkies I've made myself:


I'll preface this by saying I've been making pixel art in general for fun for over half of my life at this point so being a picky bitch, 90% of the time I make my own templates/frames/borders, & usually make my own pixel art or just resize things. (Pencil tool in any program - set to 1px) For text I either use old mini-pixel fonts (that I've had on drives since like, 2007 - like the text in my pinned post) or hand-make them (The text in both of these I'm fairly sure I did pixel by pixel because I couldn't find something I liked, bare minimum I know the Type O one is my own "font") IIRC you can do the same process using GIMP but I haven't touched that program since maybe 2007 cuz it's not intuitive for me. (Yes, I know this is a totally useless & nonsensical description of how I make things lmao)
(If anyone would actually like a tutorial let me know, right now I'm using PS 2020 but it runs like CS6, which runs like CS3 & the steps for building the blinkies/pixels themselves aren't program specific IMO. I used to save frames in Apple Paint & upload them frame by frame to sites that would make them into .gifs for me!)
#sorry i sound like a bitch lol#ive just been making shitty oldweb stuff since it wasn't oldweb so idk how to explain it properly besides “idk I fuck with it til i get it”#blinkies#asks#also reminder to not give adobe a damn cent!!!!
24 notes
·
View notes
Note
hi i wanted to get into gif making may i ask what you use for your gifs?
Sorry for not answering sooner! Wanted to get my laptop to answer this so I had all the links laid correctly lol
there's plenty of tutorials on here but have a look at a few and try it out yourself to get the hang of it! I have a few linked here and here
To get the screenshots I want to make the gif I use mpv player, it can be tricky to get it set up correctly but this video tutorial shows how to do it! Once you get it set up it's really easy to use!
As for the program to make the gifs i use photoshop 2020 that i found SOMEWHERE and would not link here
I use the sharper action from this pack that basically automates a lot of the tedious parts of making gifs so i can get to the fun part that's colouring!
11 notes
·
View notes
Note
If I wanted to get into making gifs, how does one start? WHERE does one start?
Sorry for the late response! I feel like I might not be the best person to ask, just because I don't make my gifs in the most typical way. There are a bunch of ways to make gifs, and none of them are wrong per se, but most other gifmakers go frame by frame, whereas I like to import the video files directly onto the Photoshop timeline. My way was easier to learn, but can be a little limiting in what I can do with them. I'll include an updated tutorial on how I make mine under the cut below, but if you'd like to go the more typical route, then I recommend checking out one of the popular gif making tutorials, such as this one, as a base tutorial and then playing around with it.
How I Make My Gifs
Needed:
- Adobe Photoshop (I currently use 2023) - Any video editing program (I currently use Adobe Premiere Pro 2020) - A screen recording program (I use OBS)
How to:
1 - Record your game footage using OBS (or any screen recording program). Always make sure your game is running the highest settings. 2 - In Premiere Pro (or any video editing program), import your captured footage and create short, identical length clips that are under 2 seconds each. I recommend exporting in 1080p, no less than 30fps, using the best quality. Export as .avi or .mp4, something Photoshop accepts. 3 - In Photoshop, create a new 1920×1080 file. 4 - Click the Windows tab and make sure you have Timeline ticked. 5 - On the Timeline, click Create Video Timeline. 6 - Click the down arrow to the left of the video layer, and add as many New Video Groups as you have clips. 7 - Click the down arrow on each of those video layers and Add Media (your clips). One video per layer. 8 - Right click on one of the videos in the timeline and change the speed (I usually go 70% but if you like slower gifs, go with 60% or 65%). Then bump the Duration slider all the way up. Do this for all the video clips. 9 - In the layers tab to the bottom right, convert each video clip to a Smart Object. 10 - Resize and crop depending on which size is needed for the set. Here are the dimensions to use for Tumblr. The height can be whatever you want, but the width is very important. 11 - Now for colouring. If you're unfamiliar with editing in Photoshop, it might be helpful to look through the #psd coloring tag and finding something you like. I personally make mine from scratch because game lighting is so unpredictable and varied. It's up to you! 12 - I really recommend some Smart Blur and Smart Sharpen on each of the video layers. How much or little you use will personal preference. At the moment I'm typically doing 0.3-0.5 Smart Blur radius and 0.4-0.5 Smart Sharpen radius. 13 - If you're looking to use subtitles, check this tutorial out. 14 - Click on File > Save for Web, and save each clip this way. Play around with the settings. Just make sure each gif comes out under 10mb, because that's what Tumblr's current limit is. That's it! Hope that was easy enough to follow. If you do make/post some, please feel free to tag me in them. I'd love to see! :)
15 notes
·
View notes
Text
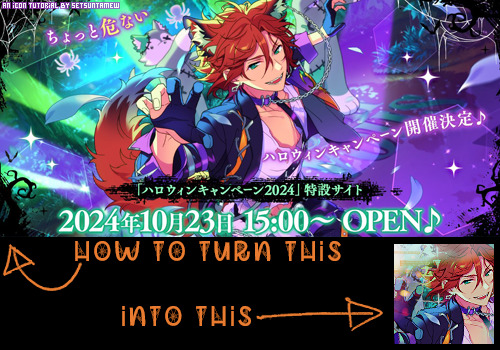
Welcome back to "Icon Making With Killian: An Intro to the 'Lost' Art of LiveJournal Icons"
aka, you didn't think I was one and done, right?
This tutorial was written in Photoshop 2020, but you can probably recreate it in as far back as CS2-ish (since I still use the same sort of techniques I've been using since then, lmao). It also assumes basic understanding of the software, though I've tried to be as clear as possible throughout.
I was possessed with a need to both make an icon of Madara's new event card and then write a tutorial, so let's all be proud that I busted it out before Halloween 💪
I started with the bloomed art of Madara from The Howling Forest★Lupine Halloween event (image from the Halloween 2024 campaign announcement, because the event hasn't started yet).
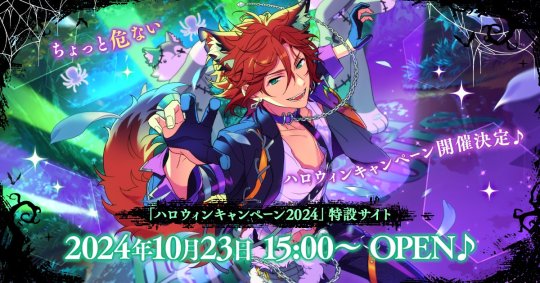
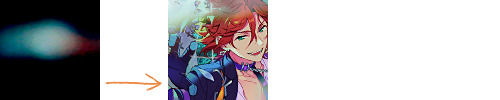
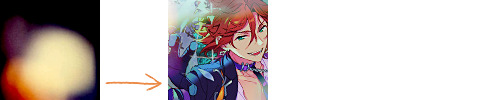
Since there's a lot of extra text & etc on this, I knew I'd be cropping it pretty close. I started with a blank 100x100 canvas, pasted the original image in, and then resized + rotated it until I liked the composition/crop.

First up, I wanted to get some cobwebs in here (for Halloween!), but didn't want them to overwhelm the whole icon. I used a texture from lookslikerain, set to Lighten, and rotated it a bit before erasing anything covering his face.

Next, I used another texture from lookslikerain and set it to Darken. There's a lot of green in the images for this event and I wanna pull some of that back into the icon, since it most got cropped out.

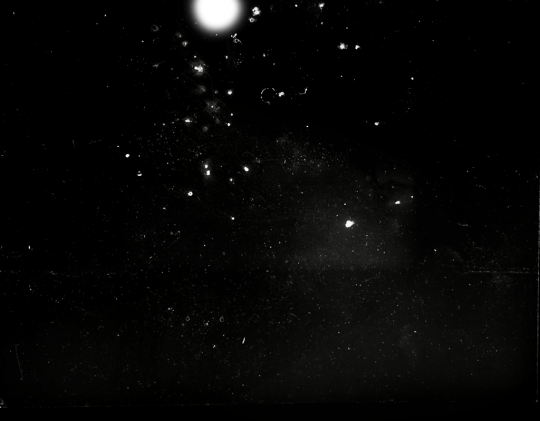
Time for light textures!!! I used a bunch in this icon~ I started with one from lookslikerain (can you tell I love their resources?), rotated it, and set the layer to Lighten, before deciding that it was too harsh. I used a small, soft brush set to 30% Opacity to erase most of the texture from his face, as well as softening the edges of the light.

The next few light textures are kinda subtle, but overall add to the icon. I'd say sometimes less is more, but I'm a maximalist at heart XD For the next few steps, just assume that the light textures were rotated/resized/moved/etc as I saw fit. I used yet another texture from lookslikerain, set to Lighten, and tucked in the bottom right corner.
This light texture from Sanami276 is also set to Screen. I moved it around to get just a bit of orange in the top left corner- gotta keep those Halloween colors in there!! :D
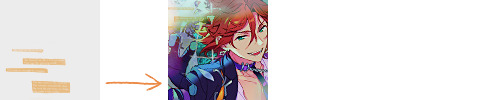
I wanted some more depth/texture in the upper left corner, so I decided to use part of a texture from Sanami276.

However, it's way to harsh to just throw in there like that...at least not for my purposes. I decided to invert the colors and recolor the black parts orange. My go-to method is with a Gradient Map adjustment layer. The easiest place to find it is in the Adjustments window.
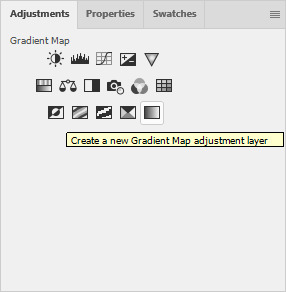
I then used these colors for the gradient itself: #e7b676 at 0% and #ececec at 100%.
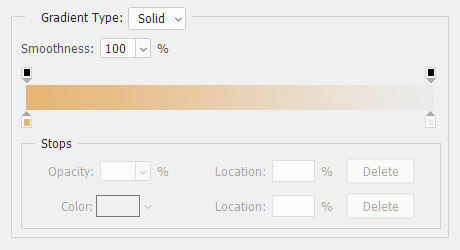
And it left the texture looking appropriately orange! I then pasted it into the actual icon, moved it so the rectangles were in the upper left corner, and set the layer to Darken.
Now for more light textures!! I used a couple from ianthinae, set them to Lighten, and went to town. I cut them up, moved them around, rotated them...just about anything to make them fit where I wanted. I love playing with light textures in general, and I find that even when I use similar ones a lot, they can look very different depending on how they're place.

Finally, I used part of a large grunge-y texture that I've unfortunately lost the source to D: I inverted it and set the layer to Multiply, before moving it around a bunch until I found a spot that looked good.
And with that, it's done! You've now got some new skills to make icons with~
If you have any questions, please feel free to ask, and I'll answer as best I can- as long as it's not about making icons in other software D: I only know Photoshop (and Paint Shop Pro, but I don't think anyone uses that anymore). If there are any other icons of mine you're interested in seeing tutorials for - or even just specific techniques! - just lemme know. I love helping :D
Also, I'm happy to share where I get icon resources from. I have a whole post dedicated to that on my DW graphics journal, though tbh that's the best place to talk to me about making graphics in general. But I will absolutely answer asks/replies/etc about icons here on tumblr, don't worry!!!!
#livejournal#icons#tutorials#graphics#icon tutorial#graphic tutorial#photoshop#LJ icons#100x100#100x100 icons#tutorial#reference#halloween#madara mikejima#enstars#ensemble stars
12 notes
·
View notes