#postgres config file ubuntu
Explore tagged Tumblr posts
Visit Tumblr Blog
Explore Tumblr blogs with no restrictions, modern design and the best experience.
Last Seen Tumblr Blogs


Fun Fact
Women make up for the other 50% of Tumblr’s audience.
Text
Spring Boot Microservice Project with Postgres DB Tutorial with Java Example for Beginners
Full Video Link: https://youtu.be/iw4wO9gEb50 Hi, a new #video on #springboot #microservices with #postgres #database is published on #codeonedigest #youtube channel. Complete guide for #spring boot microservices with #postgressql. Learn #programming #
In this video, we will learn, how to download, install postgres database, how to integrate Postgres database with a Spring Boot Microservice Application and perform different CRUD operations i.e. Create, Read, Update, and Delete operations on the Customer entity. Spring Boot is built on the top of the spring and contains all the features of spring. And is becoming a favorite of developers these…

View On WordPress
#database#microservices#microservices postgres#postgres#postgres and pgadmin install#postgres and pgadmin install mac os#postgres and pgadmin install ubuntu#postgres and pgadmin install windows#postgres and pgadmin install windows 10#postgres and pgadmin install windows11#postgres config file location#postgres config file max#postgres config file ubuntu#postgres config file windows#postgres configuration#postgres configuration file#postgres configuration in spring boot#postgres configuration parameters#postgres configuration settings#postgres configure replication#postgres connection command line#postgres connection in java#postgres connection to server#postgres database#postgres database configuration#postgres database setup#postgres db#postgres docker#postgres installation#postgres installation error
0 notes
Text
Mainframe Community / Mattermost
So, last night I ‘launched’ a MatterMost instance on https://mainframe.community. To summarize MatterMost (via wikipedia) it is: an open-source, self-hostable online chat service with file sharing, search, and integrations. It is designed as an internal chat for organisations and companies, and mostly markets itself as an open-source alternative to Slack[7][8] and Microsoft Teams. In this post I wanted to quickly explain how and why I did this. Let’s start with the why first. But Why? Last week, while working for one of my clients, I discovered they are starting to implemen MatterMost as a cross-team collaboration tool. And I discovered it has integrations, webhooks and bots. Being the Mainframe nerd I am, I quickly whipped up some lines of REXX to call CURL so I could ‘post’ to a MatterMost channel straight from The Mainframe. It was also quite easy in the wsadmin scripts to have jython execute an os.system to call curl and do the post... Now I wanted to take it a step further and create a “load module” that did the same, but could be called from a regular batch-job to, I donno, post messages when jobs failed, or required other forms of attention. Seeing as I was going to develop that on my own ZPDT/ZD&T I needed a sandbox environment. Running MatterMost locally from docker was a breeze, yet not running as “https” (something I wanted to test to work from the still to be made load-module. So, seeing as I already had the “mainframe.community”-domain, I thought, why not host it there, and use that as a sandbox....turned out that was easier done than imagined. But How? The instructions provided at https://docs.mattermost.com/install/install-ubuntu-1804.html were easy enough to follow and should get you up and running yourself in under an hour.
Seeing as there already ‘some stuff’ running at the local datacenter here I already had an nginx-environment up and running. I started with creating a new VM in my ProxMox environment (running Ubuntu 18.04) and made sure this machine got a static IP. From there on I did the following:
sudo apt update sudo apt upgrade sudo apt install postgresql postgresql-contrib
That then made sure the VM had a local database for all the MatterMost things. Initializing the DB environment was as easy as;
sudo --login --user postgres psql postgres=# CREATE DATABASE mattermost; postgres=# CREATE USER mmuser WITH PASSWORD 'x'; postgres=# GRANT ALL PRIVILEGES ON DATABASE mattermost to mmuser; postgres=# \q exit
Of course the password is not ‘x’ but something a bit more secure...
Then, make a change to the postgres config (vi /etc/postgresql/10/main/pg_hba.conf) changing the line
local all all peer
to
local all all trust
Then installing mattermost was basically these next commands:
systemctl reload postgresql wget https://releases.mattermost.com/5.23.1/mattermost-5.23.1-linux-amd64.tar.gz mv mattermost /opt mkdir /opt/mattermost/data useradd --system --user-group mattermost chown -R mattermost:mattermost /opt/mattermost chmod -R g+w /opt/mattermost vi /opt/mattermost/config/config.json cd /opt/mattermost/ sudo -u mattermost ./bin/mattermost vi /opt/mattermost/config/config.json sudo -u mattermost ./bin/mattermost vi /lib/systemd/system/mattermost.service systemctl daemon-reload systemctl status mattermost.service systemctl start mattermost.service curl http://localhost:8065 systemctl enable mattermost.service restart mattermost systemctl restart mattermost
Some post configuration needed to be done via the MatterMost webinterface (that was running like a charm) and then just a little nginx-config like specified at the MatterMost docs webpages and it was all up and running. Thanks to the peeps at LetsEncrypt it’s running TLS too :) Curious to see how ‘busy’ it will get on the mainframe.community. I’ve setup the VM with enough hardware resource to at least host 2000 users. So head on over to https://mainframe.community and make me ‘upgrade’ the VM due to the user growth :)
1 note
·
View note
Text
Project Quay is a scalable container image registry that enables you to build, organize, distribute, and deploy containers. With Quay you can create image repositories, perform image vulnerability scanning and robust access controls. We had covered installation of Quay on a Linux distribution using Docker. How To Setup Red Hat Quay Registry on CentOS / RHEL / Ubuntu In this guide, we will review how you can deploy Quay container registry on OpenShift Container Platform using Operator. The operator we’ll use is provided in the Operators Hub. If you don’t have an OpenShift / OKD cluster running and would like to try this article, checkout our guides below. Setup Local OpenShift 4.x Cluster with CodeReady Containers How to Setup OpenShift Origin (OKD) 3.11 on Ubuntu How To run Local Openshift Cluster with Minishift The Project Quay is made up of several core components. Database: Used by Red Hat Quay as its primary metadata storage (not for image storage). Redis (key, value store): Stores live builder logs and the Red Hat Quay tutorial. Quay (container registry): Runs the quay container as a service, consisting of several components in the pod. Clair: Scans container images for vulnerabilities and suggests fixes. Step 1: Create new project for Project Quay Let’s begin by creating a new project for Quay registry. $ oc new-project quay-enterprise Now using project "quay-enterprise" on server "https://api.crc.testing:6443". ..... You can also create a Project from OpenShift Web console. Click create button and confirm the project is created and running. Step 2: Install Red Hat Quay Setup Operator The Red Hat Quay Setup Operator provides a simple method to deploy and manage a Red Hat Quay cluster. Login to the OpenShift console and select Operators → OperatorHub: Select the Red Hat Quay Operator. Select Install then Operator Subscription page will appear. Choose the following then select Subscribe: Installation Mode: Select a specific namespace to install to Update Channel: Choose the update channel (only one may be available) Approval Strategy: Choose to approve automatic or manual updates Step 3: Deploy a Red Hat Quay ecosystem Certain credentials are required for Accessing Quay.io registry. Create a new file with below details. $ vim docker_quay.json "auths": "quay.io": "auth": "cmVkaGF0K3F1YXk6TzgxV1NIUlNKUjE0VUFaQks1NEdRSEpTMFAxVjRDTFdBSlYxWDJDNFNEN0tPNTlDUTlOM1JFMTI2MTJYVTFIUg==", "email": "" Then create a secret on OpenShift that will be used. oc project quay-enterprise oc create secret generic redhat-pull-secret --from-file=".dockerconfigjson=docker_quay.json" --type='kubernetes.io/dockerconfigjson' Create Quay Superuser credentials secret: oc create secret generic quay-admin \ --from-literal=superuser-username=quayadmin \ --from-literal=superuser-password=StrongAdminPassword \ [email protected] Where: quayadmin is the Quay admin username StrongAdminPassword is the password for admin user [email protected] is the email of Admin user to be created Create Quay Configuration Secret A dedicated deployment of Quay Enterprise is used to manage the configuration of Quay. Access to the configuration interface is secured and requires authentication in order for access. oc create secret generic quay-config --from-literal=config-app-password=StrongPassword Replace StrongPassword with your desired password. Create Database credentials secret – PostgreSQL oc create secret generic postgres-creds \ --from-literal=database-username=quay \ --from-literal=database-password=StrongUserPassword \ --from-literal=database-root-password=StrongRootPassword \ --from-literal=database-name=quay These are the credentials for accessing the database server: quay – Database and DB username StrongUserPassword – quay DB user password StrongRootPassword – root user database password
Create Redis Password Credential By default, the operator managed Redis instance is deployed without a password. A password can be specified by creating a secret containing the password in the key password. oc create secret generic redis-password --from-literal=password=StrongRedisPassword Create Quay Ecosystem Deployment Manifest My Red Hat Quay ecosystem configuration file looks like below apiVersion: redhatcop.redhat.io/v1alpha1 kind: QuayEcosystem metadata: name: quay-ecosystem spec: clair: enabled: true imagePullSecretName: redhat-pull-secret updateInterval: "60m" quay: imagePullSecretName: redhat-pull-secret superuserCredentialsSecretName: quay-admin configSecretName: quay-config deploymentStrategy: RollingUpdate skipSetup: false redis: credentialsSecretName: redis-password database: volumeSize: 10Gi credentialsSecretName: postgres-creds registryStorage: persistentVolumeSize: 20Gi persistentVolumeAccessModes: - ReadWriteMany livenessProbe: initialDelaySeconds: 120 httpGet: path: /health/instance port: 8443 scheme: HTTPS readinessProbe: initialDelaySeconds: 10 httpGet: path: /health/instance port: 8443 scheme: HTTPS Modify it to fit you use case. When done apply the configuration: oc apply -f quay-ecosystem.yaml Using Custom SSL Certificates If you want to use custom SSL certificates with Quay, you need to create a secret with the key and the certificate: oc create secret generic custom-quay-ssl \ --from-file=ssl.key=example.key \ --from-file=ssl.cert=example.crt Then modify your Ecosystem file to use the custom certificate secret: quay: imagePullSecretName: redhat-pull-secret sslCertificatesSecretName: custom-quay-ssl ....... Wait for few minutes then confirm deployment: $ oc get deployments NAME READY UP-TO-DATE AVAILABLE AGE quay-ecosystem-clair 1/1 1 1 2m35s quay-ecosystem-clair-postgresql 1/1 1 1 2m57s quay-ecosystem-quay 1/1 1 1 3m45s quay-ecosystem-quay-postgresql 1/1 1 1 5m8s quay-ecosystem-redis 1/1 1 1 5m57s quay-operator 1/1 1 1 70m $ oc get svc NAME TYPE CLUSTER-IP EXTERNAL-IP PORT(S) AGE quay-ecosystem-clair ClusterIP 172.30.66.1 6060/TCP,6061/TCP 4m quay-ecosystem-clair-postgresql ClusterIP 172.30.10.126 5432/TCP 3m58s quay-ecosystem-quay ClusterIP 172.30.47.147 443/TCP 5m38s quay-ecosystem-quay-postgresql ClusterIP 172.30.196.61 5432/TCP 6m15s quay-ecosystem-redis ClusterIP 172.30.48.112 6379/TCP 6m58s quay-operator-metrics ClusterIP 172.30.81.233 8383/TCP,8686/TCP 70m Running pods in the project: $ oc get pods NAME READY STATUS RESTARTS AGE quay-ecosystem-clair-84b4d77654-cjwcr 1/1 Running 0 2m57s quay-ecosystem-clair-postgresql-7c47b5955-qbc4s 1/1 Running 0 3m23s quay-ecosystem-quay-66584ccbdb-8szts 1/1 Running 0 4m8s quay-ecosystem-quay-postgresql-74bf8db7f8-vnrx9 1/1 Running 0 5m34s quay-ecosystem-redis-7dcd5c58d6-p7xkn 1/1 Running 0 6m23s quay-operator-764c99dcdb-k44cq 1/1 Running 0 70m Step 4: Access Quay Dashboard Get a route URL for deployed Quay: $ oc get route quay-ecosystem-quay quay-ecosystem-quay-quay-enterprise.apps.example.com quay-ecosystem-quay 8443 passthrough/Redirect None
Open the URL on the machine with access to the cluster domain. Use the credentials you configured to login to Quay registry. And there you have it. You now have Quay registry running on OpenShift using Operators. Refer to below documentations for more help. Quay Operator Github Page Red Hat Quay documentation Project Quay Documentation
0 notes
Text
How To Install Odoo 15 In Ubuntu 18.04 ? | Steps To Install Odoo 15
How To Install Odoo 15 In Ubuntu 18.04 LTS ?
Technical
Steps To Install Odoo 15 On Ubuntu 18.04
Odoo is the most popular all-in-one business software in the world.To Install Odoo 15 on Ubuntu 18.04 you just need to follow the below steps. There are many ways to install Odoo depending on the requirements and the easy and quick way to install Odoo by using APT repositories. If you want to work with running multiple Odoo versions on the same system then you can either use docker compose or docker Install Odoo in a virtual environment. This blog is to provide steps for installation and configuration of Odoo for production environment using Git source and Python environment on an Ubuntu 18.04 system. Note : Odoo 15 is not launched yet so we have used the “master” branch for Installation.
To install Odoo 15 on Ubuntu 18.04 LTS you just follow the below steps.
Step 1 : Update Server
sudo apt-get update
sudo apt-get upgrade -y
Step 2 : Create Odoo User in Ubuntu
sudo adduser -system -home=/opt/odoo -group odoo
Step 3 : Install PostgreSQL Server
sudo apt-get install postgresql -y
Step 4 : Create Odoo user for postgreSQL
sudo su - postgres -c "createuser -s odoo" 2> /dev/null || true
Step 5 : Install Python Dependencies
sudo apt-get install git python3 python3-pip build-essential wget python3-dev python3-venv python3-wheel libxslt-dev libzip-dev libldap2-dev libsasl2-dev python3-setuptools node-less libjpeg-dev gdebi -y
Step 6 : Install Python PIP Dependencies
sudo -H pip3 install -r https://raw.githubusercontent.com/odoo/odoo/master/requirements.txt
Step 7 : Install other required packages
sudo apt-get install nodejs npm -y
sudo npm install -g rtlcss
Step 8 : Install Wkhtmltopdf
sudo apt-get install xfonts-75dpi
sudo wget https://github.com/wkhtmltopdf/packaging/releases/download/0.12.6-1/wkhtmltox_0.12.6-1.bionic_amd64.deb
sudo dpkg -i wkhtmltox_0.12.6-1.bionic_amd64.deb
sudo cp /usr/local/bin/wkhtmltoimage /usr/bin/wkhtmltoimage
sudo cp /usr/local/bin/wkhtmltopdf /usr/bin/wkhtmltopdf
Step 9 : Create Log directory
sudo mkdir /var/log/odoo
sudo chown odoo:odoo /var/log/odoo
Step 10 :Install Odoo
sudo apt-get install git
sudo git clone --depth 1 --branch master https://www.github.com/odoo/odoo /odoo/odoo-server
Step 11 : Setting permissions on home folder
sudo chown -R odoo:odoo /odoo/*
Step 12 : Create server config file
sudo touch /etc/odoo-server.conf
sudo su root -c "printf '[options] \n; This is the password that allows database operations:\n' >> /etc/odoo-server.conf"
sudo su root -c "printf 'admin_passwd = admin\n' >> /etc/odoo-server.conf"
sudo su root -c "printf 'xmlrpc_port = 8069\n' >> /etc/odoo-server.conf"
sudo su root -c "printf 'logfile = /var/log/odoo/odoo-server.log\n' >> /etc/odoo-server.conf"
sudo su root -c "printf 'addons_path=/odoo/odoo-server/addons\n' >> /etc/odoo-server.conf"
sudo chown odoo:odoo /etc/odoo-server.conf
sudo chmod 640 /etc/odoo-server.conf
Step 13 : Now Start Odoo
sudo su - odoo -s /bin/bash
cd /odoo/odoo-server
./odoo-bin -c /etc/odoo-server.conf
0 notes
Text
How To Install Odoo 15 In Ubuntu 18.04 LTS ?

Steps To Install Odoo 15 On Ubuntu 18.04
Odoo is the most popular all-in-one business software in the world.To Install Odoo 15 on Ubuntu 18.04 you just need to follow the below steps. There are many ways to install Odoo depending on the requirements and the easy and quick way to install Odoo by using APT repositories. If you want to work with running multiple Odoo versions on the same system then you can either use docker compose or docker Install Odoo in a virtual environment. This blog is to provide steps for installation and configuration of Odoo for production environment using Git source and Python environment on an Ubuntu 18.04system. Note: Odoo 15 is not launched yet so we have used the “master” branch for Installation.
To install Odoo 15 on Ubuntu 18.04 LTS you just follow the below steps.
Step 1 : Update Server
sudo apt-get updatesudo apt-get upgrade -y
Step 2 : Create Odoo User in Ubuntu
sudo adduser -system -home=/opt/odoo -group odoo
Step 3 : Install PostgreSQL Server
sudo apt-get install postgresql -y
Step 4 : Create Odoo user for postgreSQL
sudo su - postgres -c "createuser -s odoo" 2> /dev/null || true
Step 5 : Install Python Dependencies
sudo apt-get install git python3 python3-pip build-essential wget python3-dev python3-venv python3-wheel libxslt-dev libzip-dev libldap2-dev libsasl2-dev python3-setuptools node-less libjpeg-dev gdebi -y
Step 6 : Install Python PIP Dependencies
sudo -H pip3 install -r https://raw.githubusercontent.com/odoo/odoo/master/requirements.txt
Step 7 : Install other required packages
sudo apt-get install nodejs npm –ysudo npm install -g rtlcss
Step 8 : Install Wkhtmltopdf
sudo apt-get install xfonts-75dpisudo wget https://github.com/wkhtmltopdf/packaging/releases/download/0.12.6-1/wkhtmltox_0.12.6-1.bionic_amd64.debsudo dpkg -i wkhtmltox_0.12.6-1.bionic_amd64.debsudo cp /usr/local/bin/wkhtmltoimage /usr/bin/wkhtmltoimagesudo cp /usr/local/bin/wkhtmltopdf /usr/bin/wkhtmltopdf
Step 9 : Create Log directory
sudo mkdir /var/log/odoosudo chown odoo:odoo /var/log/odoo
Step 10 :Install Odoo
sudo apt-get install gitsudo git clone --depth 1 --branch master https://www.github.com/odoo/odoo /odoo/odoo-server
Step 11 : Setting permissions on home folder
sudo chown -R odoo:odoo /odoo/*
Step 12 : Create server config file
sudo touch /etc/odoo-server.confsudo su root -c "printf '[options] \n; This is the password that allows database operations:\n' >> /etc/odoo-server.conf"sudo su root -c "printf 'admin_passwd = admin\n' >> /etc/odoo-server.conf"sudo su root -c "printf 'xmlrpc_port = 8069\n' >> /etc/odoo-server.conf"sudo su root -c "printf 'logfile = /var/log/odoo/odoo-server.log\n' >> /etc/odoo-server.conf"sudo su root -c "printf 'addons_path=/odoo/odoo-server/addons\n' >> /etc/odoo-server.conf"sudo chown odoo:odoo /etc/odoo-server.confsudo chmod 640 /etc/odoo-server.conf
Step 13 : Now Start Odoo
sudo su - odoo -s /bin/bashcd /odoo/odoo-server./odoo-bin -c /etc/odoo-server.conf
Now your odoo instance is up and running.
Go to web browser and access your odoo at localhost:8069
#odoo 15#install odoo 15 in ubuntu#installation steps#ubuntu 18 04#odoo installation guide#install odoo#steps for installation#install odoo 15
0 notes
Text
Odoo 14 Installation On Ubuntu 20.04
How To Install Odoo 14 In Ubuntu 20.04?

Steps For Odoo 14 Installation On Ubuntu 20.04
There are many ways for Odoo 14 Installation On Ubuntu 20.04 but here we are giving steps to install using Git Repository.
Step 1: Update Server
sudo apt-get update
sudo apt-get upgrade -y
Step 2: Create Odoo User in Ubuntu
sudo adduser -system -home=/opt/odoo -group odoo
Step 3: Install PostgreSQL Server
sudo apt-get install postgresql -y
Step 4: Create Odoo user for postgreSQL
sudo su - postgres -c "createuser -s odoo" 2> /dev/null || true
Step 5: Install Python Dependencies
sudo apt-get install git python3 python3-pip build-essential wget python3-dev python3-venv python3-wheel libxslt-dev libzip-dev libldap2-dev libsasl2-dev python3-setuptools node-less libjpeg-dev gdebi -y
Step 6: Install Python PIP Dependencies
sudo apt-get install libpq-dev python-dev libxml2-dev libxslt1-dev libldap2-dev libsasl2-dev libffi-dev
sudo -H pip3 install -r https://raw.githubusercontent.com/odoo/odoo/master/requirements.txt
Step 7: Install other required packages
sudo apt-get install nodejs npm -y
sudo npm install -g rtlcss
Step 8: Install Wkhtmltopdf
sudo apt-get install xfonts-75dpi
sudo wget https://github.com/wkhtmltopdf/packaging/releases/download/0.12.6-1/wkhtmltox_0.12.6-1.bionic_amd64.deb
sudo dpkg -i wkhtmltox_0.12.6-1.bionic_amd64.deb
sudo cp /usr/local/bin/wkhtmltoimage /usr/bin/wkhtmltoimage
sudo cp /usr/local/bin/wkhtmltopdf /usr/bin/wkhtmltopdf
Step 9: Create Log directory
sudo mkdir /var/log/odoo
sudo chown odoo:odoo /var/log/odoo
Step 10: Install ODOO
sudo apt-get install git
sudo git clone --depth 1 --branch 14.0 https://www.github.com/odoo/odoo /odoo/odoo-server
Step 11: Setting permissions on home folder
sudo chown -R odoo:odoo /odoo/*
Step 12: Create server config file
sudo touch /etc/odoo-server.conf
sudo su root -c "printf '[options] \n; This is the password that allows database operations:\n' >> /etc/odoo-server.conf"
sudo su root -c "printf 'admin_passwd = admin\n' >> /etc/odoo-server.conf"
sudo su root -c "printf 'xmlrpc_port = 8069\n' >> /etc/odoo-server.conf"
sudo su root -c "printf 'logfile = /var/log/odoo/odoo-server.log\n' >> /etc/odoo-server.conf"
sudo su root -c "printf 'addons_path=/odoo/odoo-server/addons\n' >> /etc/odoo-server.conf"
sudo chown odoo:odoo /etc/odoo-server.conf
sudo chmod 640 /etc/odoo-server.conf
Step 13: Now Start Odoo
sudo su - odoo -s /bin/bash
cd /odoo/odoo-server
./odoo-bin -c /etc/odoo-server.conf
Now your odoo instance is up and running.
Go to web browser and access your Odoo at localhost: 8069
Source: Odoo Installation Blog
Check Our Other Technology Related Blogs, Here
#Ubuntu 20.04 LTS#Installation Odoo 14 On Ubuntu#Installation Steps#Odoo#Odoo 14#Odoo 14 Installation
0 notes
Text
Client For Postgresql Mac

Advertisement
Email Effects X v.1.6.9Email Effects X 1.6.9 is a useful program specially designed for the Mac OS or Windows 95/98/NT for getting the most out of email. With it, you can send pictures, drawings and tables with simple plain text. It is also the world's premier ASCII art ..
JaMOOka v.2.01JaMOOka is an applet-based MOO client. Designed for JHCore MOOs, it uses Amy Bruckman's MacMOOse utilities and the MCP 2.1 protocol to facilitate a number of advanced MOO editing and programming tasks through client ..
Sesame Windows Client v.1.0A Windows GUI application for RDF. SWC is a client tool for a Sesame 2 RDF server or SPARQL endpoint, and can be used as a out-of-the-box local triplestore. It offers advanced SPARQL querying and handles Sesame server administrative tasks.
Microsoft Remote Desktop Connection Client v.2.0 Beta 3Remote Desktop Connection Client for Mac 2 lets you connect from your Macintosh computer to a Windows-based computer or to multiple Windows-based computers at the same time. After you have connected, you can work with applications and files on the ..
Citrix ICA Client v.10.00.603Citrix ICA Client 10.00.603 is a communication tool which can help users access any Windows-based application running on the server. All the user needs is a low-bandwidth connection (21kilobytes) and the ICA client, which is downloadable free from ..
VPN-X Client for Mac OS v.2.4.1.44VPN-X:Java/ Cross-platform P2P/SSL/TLS VPN solution. Client has an individual Virtual IP Address.It can help employees on errands use company LAN resource, help your friends access your computer play LAN games, all the network data is encrypted and ..
Imperial Realms Standard Client v.0.4.1imperial_realms is the standard client for the Imperial Realms multi-player online strategy game. It is open-source and runs on Windows, Linux and other operating ..
Mahogany mail and news client v.0.67An extremely configurable portable GUI email and news client for Windows/Unix (including OS X) with IMAP, POP3, SMTP, and NNTP support, SSL, flexible address database, Python scripting, powerful filtering, and many other features for advanced ..
Mud Magic Client v.1.9OpenSource mud client designed to work on both windows,linux and MAC OS X. Written in Gtk+ and C with SQLLite, Python, MSP, MXP, HTML, and ZMP support. Provides plugin support, automapper functionality, triggers, aliases and ..
STUN Client and Server v.0.97This project implements a simple STUN server and client on Windows, Linux, and Solaris. The STUN protocol (Simple Traversal of UDP through NATs) is described in the IETF RFC 3489, available at ..
Scalable Java Database Client v.1.0The scalable Java DB Client is a customizable java application where fields and general DB info is entered in a config file and the proper GUI is generated at run-time. Entries can then be added, and a final submit/update to the (PostgreSQL/MySQL) ..
Vicomsoft FTP Client v.4.6.0FTP Client 4.6 represents the culmination of over 10 years experience in FTP transfers on the Mac platform. Extreme performance and unrivaled reliability, married with a sleek and intuitive user interface is the result.
Windows 7 Utilities v.7.54Windows 7 Utilities Suite is an award winning collection of tools to optimize and speedup your system performance.
Windows 7 Cleaner v.4.56Windows 7 Cleaner suite is an award winning collection of tools to optimize and speedup your system performance. this Windows 7 Cleaner suite contains utilities to clean registry, temporary files on your disks, erase your application and internet ..
Windows 7 Optimizer v.4.56Windows 7 Optimizer can quickly make your Windows 7 operating system (both 32 bit and 64 bit) faster, easier to use, and more secure. And all operations performed on the operating system are completely safe, because all changes are monitored by ..
Windows 7 System Optimizer v.6.0Windows 7 system optimizer: this is a multi-functional system performance and optimization suite for Windows 7. This collection of tools lets you supercharge your PC's performance, enhance its security, tweak and optimize its settings, and customize ..
Windows 7 System Suite v.6.3Slow down, freeze, crash, and security threats are over. Windows 7 system suite is a comprehensive PC care utility that takes a one-click approach to help protect, repair, and optimize your computer. It provides an all-in-one and super convenient ..
Windows System Suite v.6.1Windows System Suite is power package All-in-one application for cleaning, tuning, optimizing, and fixing PC errors for high performance. Direct access to a wealth of Windows configuration and performance settings many of them difficult or impossible ..
Windows XP Cleaner v.7.0Windows XP Cleaner is a suite of tools to clean your system; it includes Disk Cleaner, Registry Cleaner, History Cleaner, BHO Remover, Duplicate files Cleaner and Startup Cleaner. this Windows XP Cleaner suite allows you to remove unneeded files and ..
Icons for Windows 7 and Vista v.2013.1Icons for Windows 7 and Vista is an ultimately comprehensive collection of top-quality interface icons that will be a perfect fit for any modern website, online service, mobile or desktop application.
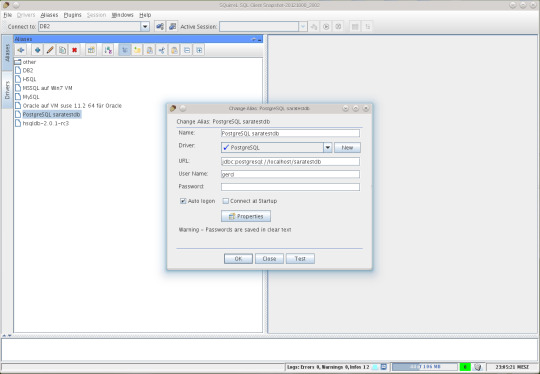
GUI Client Apps. There are many clients for PostgreSQL on the Mac. You can find many of them in the Community Guide to PostgreSQL GUI Tools in the PostgreSQL wiki. Some of them are quite powerful; some are still a bit rough. Postgres.app is a simple, native macOS app that runs in the menubar without the need of an installer. Open the app, and you have a PostgreSQL server ready and awaiting new connections. Close the app, and the server shuts down. How To Install Postgresql On Mac. I started off programming Ruby on Rails applications on a Windows machine with an Ubuntu virtual machine running on top. But when I got my first job at a startup in California, I received a brand new shiny Macbook laptop.
Download CCleaner for free. Clean your PC of temporary files, tracking cookies and browser junk! Get the latest version here. CCleaner is the number-one tool for fixing a slow Mac Download Ccleaner Mac for free and enjoy! Download Ccleaner Mac. Ccleaner for Mac. Mac running slow? A Mac collects junk and unused files just like a PC. Find and remove these files with the click of a button so your Mac can run faster. Speed up boot times with easy management of Startup items. CCleaner for Mac! Clean up your Mac and keep your browsing behaviour private with CCleaner, the world's favourite computer cleaning tool. Introducing CCleaner for Mac - Learn about the basics of CCleaner for Mac, and what it can do for you. Using CCleaner for Mac - Find out how to run every aspect of CCleaner for Mac. CCleaner for Mac Rules - Explore what each option in the Mac OS X and Applications tabs and how you can customize it to fit your needs. CCleaner for Mac Settings - Learn about CCleaner for Mac's other options. Ccleaner for mac 10.6.8. Download CCleaner for Mac 1.17.603 for Mac. Fast downloads of the latest free software!
Postgresql Client Windows software by TitlePopularityFreewareLinuxMac
Sequel Pro Postgres
Today's Top Ten Downloads for Postgresql Client Windows

Mac Install Postgresql
Citrix ICA Client Citrix ICA Client 10.00.603 is a communication tool which
Folx torrent client With Folx torrent client downloading and creating torrents
Windows 7 System Suite Slow down, freeze, crash, and security threats are over.
Windows XP Cleaner Windows XP Cleaner is a suite of tools to clean your
Windows 7 Utilities Windows 7 Utilities Suite is an award winning collection
Icons for Windows 7 and Vista Icons for Windows 7 and Vista is an ultimately
Windows 7 System Optimizer Windows 7 system optimizer: this is a multi-functional
VanDyke ClientPack for Windows and UNIX VanDyke ClientPack is a suite of tools for securely
VPN-X Client for Mac OS VPN-X:Java/ Cross-platform P2P/SSL/TLS VPN solution. Client
Windows Desktop Icons High quality professional royalty-free stock windows
Best Postgresql Client For Mac
Postico For Windows
Visit HotFiles@Winsite for more of the top downloads here at WinSite!
0 notes
Text
Fathom installation on a Ubuntu Server running NginX

As we got closer to opening up TunePad to more classrooms, we wanted to have some web analytics set up. While Google Analytics is almost the default choice in such a scenario, we were looking for alternatives. Fathom seemed promising.
This guide documents the installation and deployment process. It draws heavily from Fathom’s own excellent documentation, but hopefully, the screenshots and slightly more detailed notes would come handy for someone.
Download and install Fathom
Before using the wget command below to download the file, go to this link to find the most recent release of Fathom for Ubuntu. In our case, we used version 1.2.1. Thereafter, unzip it /usr/local/bin and then add execute permission to it.
wget https://github.com/usefathom/fathom/releases/download/v1.2.1/fathom_1.2.1_linux_386.tar.gz sudo tar -C /usr/local/bin -xzf fathom_1.2.1_linux_386.tar.gz sudo chmod +x /usr/local/bin/fathom
Run “fathom --version” to check if the installation was successful.
Basic configuration
Somewhere on the server create a directory.
sudo mkdir fathom-analytics sudo chown sadmin:www-data fathom-analytics/
Create fathom environment config file
vi .env
In that file enter the following config options:
FATHOM_SERVER_ADDR=9000 FATHOM_GZIP=true FATHOM_DEBUG=true FATHOM_DATABASE_DRIVER="postgres" FATHOM_DATABASE_USER="tunepad" FATHOM_DATABASE_PASSWORD=“XXXXXXX” FATHOM_DATABASE_NAME=“fathom" FATHOM_SECRET=“XXXXXXXXXXX”
Now, cd into the “fathom-analytics” directory (or whichever directory you created in above), and run
fathom server
you should see something similar to this.

Go to http://<your_domain>:9000 (for now, make sure you are not trying to use https) If this is not working, try changing the firewall settings.
sudo ufw allow 9000 sudo ufw status
Add a fathom user
fathom user add --email="[email protected]>" --password="XXXXXXXXX"
(this is the user name and password we shall use to log in to the analytics dashboard) To start fathom on boot (add it as a service)
sudo vim /etc/systemd/system/fathom-analytics.service
In the fathom-analytics.service file, add the following:
[Unit] Description=Starts the fathom server Requires=network.target After=network.target [Service] Type=simple User=sadmin Restart=always RestartSec=3 WorkingDirectory=/srv/projects/fathom-analytics ExecStart=/usr/local/bin/fathom server [Install] WantedBy=multi-user.target #then reload and start the service sudo systemctl daemon-reload sudo systemctl enable fathom-analytics sudo systemctl start fathom-analytics
Since we have HTTPS on our domains, we needed to do a couple of more steps Using NGINX with Fathom Create the following file:
sudo vim/etc/nginx/sites-enabled/fathom
add the following lines to it:
server { server_name tunepad.codes www.tunepad.codes; location / { proxy_set_header X-Real-IP $remote_addr; proxy_set_header X-Forwarded-For $remote_addr; proxy_set_header Host $host; proxy_pass http://127.0.0.1:9000; } }
This is what what the directory structure looks like on our server

This is the fathom service file (Certbot added the https stuff, we cover that later):

Test NGINX configuration
sudo nginx -t (#to test NGINX configuration)
Reload NGINX configuration after adding symlink to sites-enabled
sudo ln -s /etc/nginx/sites-available/fathom /etc/nginx/sites-enabled sudo service nginx reload
Make sure that for the domain use for Certbot, has the Name and A-records set correctly (tunepad.codes looks like this on Namecheap).

Then, on the server, run Certbot
certbot --nginx -d tunepad.codes
Once this is done, try going to the domain (tunepad.codes in this case) and logging in with the credentials set using Fathom’s add-user command.
Copy the Tracking snippet from the Fathom dashboard and add it to the pages that need to be tracked. If something went wrong, try going through the steps listed here: Fathom Github.

0 notes
Text
How To Install Odoo 15 In Ubuntu 18.04 ? | Steps To Install Odoo 15
Steps To Install Odoo 15 On Ubuntu 18.04
Odoo is the most popular all-in-one business software in the world.To Install
Odoo 15
on
Ubuntu 18.04
you just need to follow the below steps.
There are many ways to install Odoo depending on the requirements and the easy and quick way to install Odoo by using APT repositories.
If you want to work with running multiple Odoo versions on the same system then you can either use docker compose or docker Install Odoo in a virtual environment.
This blog is to provide steps for installation and configuration of Odoo for production environment using Git source and Python environment on an Ubuntu 18.04 system.
Note :
Odoo 15 is not launched yet so we have used the “master” branch for Installation.
To install Odoo 15 on Ubuntu 18.04 LTS you just follow the below steps.Step 1 : Update Server
sudo apt-get update
sudo apt-get upgrade -y
Step 2 : Create Odoo User in Ubuntu
sudo adduser -system -home=/opt/odoo -group odoo
Step 3 : Install PostgreSQL Server
sudo apt-get install postgresql -y
Step 4 : Create Odoo user for postgreSQL
sudo su - postgres -c "createuser -s odoo" 2> /dev/null || true
Step 5 : Install Python Dependencies
sudo apt-get install git python3 python3-pip build-essential wget python3-dev python3-venv python3-wheel libxslt-dev libzip-dev libldap2-dev libsasl2-dev python3-setuptools node-less libjpeg-dev gdebi -y
Step 6 : Install Python PIP Dependencies
sudo -H pip3 install -r https://raw.githubusercontent.com/odoo/odoo/master/requirements.txt
Step 7 : Install other required packages
sudo apt-get install nodejs npm -y
sudo npm install -g rtlcss
Step 8 : Install Wkhtmltopdf
sudo apt-get install xfonts-75dpi
sudo wget https://github.com/wkhtmltopdf/packaging/releases/download/0.12.6-1/wkhtmltox_0.12.6-1.bionic_amd64.deb
sudo dpkg -i wkhtmltox_0.12.6-1.bionic_amd64.deb
sudo cp /usr/local/bin/wkhtmltoimage /usr/bin/wkhtmltoimage
sudo cp /usr/local/bin/wkhtmltopdf /usr/bin/wkhtmltopdf
Step 9 : Create Log directory
sudo mkdir /var/log/odoo
sudo chown odoo:odoo /var/log/odoo
Step 10 :Install Odoo
sudo apt-get install git
sudo git clone --depth 1 --branch master https://www.github.com/odoo/odoo /odoo/odoo-server
Step 11 : Setting permissions on home folder
sudo chown -R odoo:odoo /odoo/*
Step 12 : Create server config file
sudo touch /etc/odoo-server.conf
sudo su root -c "printf '[options] \n; This is the password that allows database operations:\n' >> /etc/odoo-server.conf"
sudo su root -c "printf 'admin_passwd = admin\n' >> /etc/odoo-server.conf"
sudo su root -c "printf 'xmlrpc_port = 8069\n' >> /etc/odoo-server.conf"
sudo su root -c "printf 'logfile = /var/log/odoo/odoo-server.log\n' >> /etc/odoo-server.conf"
sudo su root -c "printf 'addons_path=/odoo/odoo-server/addons\n' >> /etc/odoo-server.conf"
sudo chown odoo:odoo /etc/odoo-server.conf
sudo chmod 640 /etc/odoo-server.conf
Step 13 : Now Start Odoo
sudo su - odoo -s /bin/bash
cd /odoo/odoo-server
./odoo-bin -c /etc/odoo-server.conf
Now your odoo instance is up and running.
Go to web browser and access your odoo at localhost:8069
0 notes
Text
How To Install Odoo 15 on Ubuntu 20.04 LTS ? | CandidRoot Solutions
Steps To Install Odoo 15 On Ubuntu 20.04
Odoo is the most popular all-in-one business software in the world.To Install Odoo 15 on Ubuntu 20.04 you just need to follow the below steps. There are many ways to install Odoo depending on the requirements and the easy and quick way to install Odoo by using APT repositories. If you want to work with running multiple Odoo versions on the same system then you can either use docker compose or docker Install Odoo in a virtual environment. This blog is to provide steps for installation and configuration of Odoo for production environment using Git source and Python environment on an Ubuntu 20.04 system. Note : Odoo 15 is not launched yet so we have used the “master” branch for Installation.
To install Odoo 15 on Ubuntu 20.04 LTS you just follow the below steps.
Step 1 : Update Server
sudo apt-get update
sudo apt-get upgrade -y
Step 2 : Create Odoo User in Ubuntu
sudo adduser -system -home=/opt/odoo -group odoo
Step 3 : Install PostgreSQL Server
sudo apt-get install postgresql -y
Step 4 : Create Odoo user for postgreSQL
sudo su - postgres -c "createuser -s odoo" 2> /dev/null || true
Step 5 : Install Python Dependencies
sudo apt-get install git python3 python3-pip build-essential wget python3-dev python3-venv python3-wheel libxslt-dev libzip-dev libldap2-dev libsasl2-dev python3-setuptools node-less libjpeg-dev gdebi -y
Step 6 : Install Python PIP Dependencies
sudo apt-get install libpq-dev python-dev libxml2-dev libxslt1-dev libldap2-dev libsasl2-dev libffi-dev
Step 7 : Install other required packages
sudo apt-get install nodejs npm -y
sudo npm install -g rtlcss
Step 8 : Install Wkhtmltopdf
sudo apt-get install xfonts-75dpi
sudo wget https://github.com/wkhtmltopdf/packaging/releases/download/0.12.6-1/wkhtmltox_0.12.6-1.bionic_amd64.deb
sudo dpkg -i wkhtmltox_0.12.6-1.bionic_amd64.deb
sudo cp /usr/local/bin/wkhtmltoimage /usr/bin/wkhtmltoimage
sudo cp /usr/local/bin/wkhtmltopdf /usr/bin/wkhtmltopdf
Step 9 : Create Log directory
sudo mkdir /var/log/odoo
sudo chown odoo:odoo /var/log/odoo
Step 10 :Install Odoo
sudo apt-get install git
sudo git clone --depth 1 --branch master https://www.github.com/odoo/odoo /odoo/odoo-server
Step 11 : Setting permissions on home folder
sudo chown -R odoo:odoo /odoo/*
Step 12 : Create server config file
sudo touch /etc/odoo-server.conf
sudo su root -c "printf '[options] \n; This is the password that allows database operations:\n' >> /etc/odoo-server.conf"
sudo su root -c "printf 'admin_passwd = admin\n' >> /etc/odoo-server.conf"
sudo su root -c "printf 'xmlrpc_port = 8069\n' >> /etc/odoo-server.conf"
sudo su root -c "printf 'logfile = /var/log/odoo/odoo-server.log\n' >> /etc/odoo-server.conf"
sudo su root -c "printf 'addons_path=/odoo/odoo-server/addons\n' >> /etc/odoo-server.conf"
sudo chown odoo:odoo /etc/odoo-server.conf
sudo chmod 640 /etc/odoo-server.conf
Step 13 : Now Start Odoo
sudo su - odoo -s /bin/bash
cd /odoo/odoo-server
./odoo-bin -c /etc/odoo-server.conf
Now your odoo instance is up and running.
Go to web browser and access your odoo at localhost:8069
0 notes
Text
How To Install Odoo 15 on Ubuntu 20.04 LTS
Steps To Install Odoo 15 On Ubuntu 20.04
Odoo is the most popular all-in-one business software in the world.To Install Odoo 15 on Ubuntu 20.04 you just need to follow the below steps. There are many ways to install Odoo depending on the requirements and the easy and quick way to install Odoo by using APT repositories. If you want to work with running multiple Odoo versions on the same system then you can either use docker compose or docker Install Odoo in a virtual environment. This blog is to provide steps for installation and configuration of Odoo for production environment using Git source and Python environment on an Ubuntu 20.04 system. Note : Odoo 15 is not launched yet so we have used the “master” branch for Installation.
To install Odoo 15 on Ubuntu 20.04 LTS you just follow the below steps.
Step 1 : Update Server
sudo apt-get update
sudo apt-get upgrade -y
Step 2 : Create Odoo User in Ubuntu
sudo adduser -system -home=/opt/odoo -group odoo
Step 3 : Install PostgreSQL Server
sudo apt-get install postgresql -y
Step 4 : Create Odoo user for postgreSQL
sudo su - postgres -c "createuser -s odoo" 2> /dev/null || true
Step 5 : Install Python Dependencies
sudo apt-get install git python3 python3-pip build-essential wget python3-dev python3-venv python3-wheel libxslt-dev libzip-dev libldap2-dev libsasl2-dev python3-setuptools node-less libjpeg-dev gdebi -y
Step 6 : Install Python PIP Dependencies
sudo apt-get install libpq-dev python-dev libxml2-dev libxslt1-dev libldap2-dev libsasl2-dev libffi-dev
Step 7 : Install other required packages
sudo apt-get install nodejs npm -y
sudo npm install -g rtlcss
Step 8 : Install Wkhtmltopdf
sudo apt-get install xfonts-75dpi
sudo wget https://github.com/wkhtmltopdf/packaging/releases/download/0.12.6-1/wkhtmltox_0.12.6-1.bionic_amd64.deb
sudo dpkg -i wkhtmltox_0.12.6-1.bionic_amd64.deb
sudo cp /usr/local/bin/wkhtmltoimage /usr/bin/wkhtmltoimage
sudo cp /usr/local/bin/wkhtmltopdf /usr/bin/wkhtmltopdf
Step 9 : Create Log directory
sudo mkdir /var/log/odoo
sudo chown odoo:odoo /var/log/odoo
Step 10 :Install Odoo
sudo apt-get install git
sudo git clone --depth 1 --branch master https://www.github.com/odoo/odoo /odoo/odoo-server
Step 11 : Setting permissions on home folder
sudo chown -R odoo:odoo /odoo/*
Step 12 : Create server config file
sudo touch /etc/odoo-server.conf
sudo su root -c "printf '[options] \n; This is the password that allows database operations:\n' >> /etc/odoo-server.conf"
sudo su root -c "printf 'admin_passwd = admin\n' >> /etc/odoo-server.conf"
sudo su root -c "printf 'xmlrpc_port = 8069\n' >> /etc/odoo-server.conf"
sudo su root -c "printf 'logfile = /var/log/odoo/odoo-server.log\n' >> /etc/odoo-server.conf"
sudo su root -c "printf 'addons_path=/odoo/odoo-server/addons\n' >> /etc/odoo-server.conf"
sudo chown odoo:odoo /etc/odoo-server.conf
sudo chmod 640 /etc/odoo-server.conf
Step 13 : Now Start Odoo
sudo su - odoo -s /bin/bash
cd /odoo/odoo-server
./odoo-bin -c /etc/odoo-server.conf
Now your odoo instance is up and running.
Go to web browser and access your odoo at localhost:8069
0 notes