#postgres and pgadmin install ubuntu
Explore tagged Tumblr posts
Visit Tumblr Blog
Explore Tumblr blogs with no restrictions, modern design and the best experience.
Last Seen Tumblr Blogs


Fun Fact
1,644 Tumblr posts in 1 second.
Text
Spring Boot Microservice Project with Postgres DB Tutorial with Java Example for Beginners
Full Video Link: https://youtu.be/iw4wO9gEb50 Hi, a new #video on #springboot #microservices with #postgres #database is published on #codeonedigest #youtube channel. Complete guide for #spring boot microservices with #postgressql. Learn #programming #
In this video, we will learn, how to download, install postgres database, how to integrate Postgres database with a Spring Boot Microservice Application and perform different CRUD operations i.e. Create, Read, Update, and Delete operations on the Customer entity. Spring Boot is built on the top of the spring and contains all the features of spring. And is becoming a favorite of developers these…

View On WordPress
#database#microservices#microservices postgres#postgres#postgres and pgadmin install#postgres and pgadmin install mac os#postgres and pgadmin install ubuntu#postgres and pgadmin install windows#postgres and pgadmin install windows 10#postgres and pgadmin install windows11#postgres config file location#postgres config file max#postgres config file ubuntu#postgres config file windows#postgres configuration#postgres configuration file#postgres configuration in spring boot#postgres configuration parameters#postgres configuration settings#postgres configure replication#postgres connection command line#postgres connection in java#postgres connection to server#postgres database#postgres database configuration#postgres database setup#postgres db#postgres docker#postgres installation#postgres installation error
0 notes
Text
Ichiran@home 2021: the ultimate guide
Recently I’ve been contacted by several people who wanted to use my Japanese text segmenter Ichiran in their own projects. This is not surprising since it’s vastly superior to Mecab and similar software, and is occassionally updated with new vocabulary unlike many other segmenters. Ichiran powers ichi.moe which is a very cool webapp that helped literally dozens of people learn Japanese.
A big obstacle towards the adoption of Ichiran is the fact that it’s written in Common Lisp and people who want to use it are often unfamiliar with this language. To fix this issue, I’m now providing a way to build Ichiran as a command line utility, which could then be called as a subprocess by scripts in other languages.
This is a master post how to get Ichiran installed and how to use it for people who don’t know any Common Lisp at all. I’m providing instructions for Linux (Ubuntu) and Windows, I haven’t tested whether it works on other operating systems but it probably should.
PostgreSQL
Ichiran uses a PostgreSQL database as a source for its vocabulary and other things. On Linux install postgresql using your preferred package manager. On Windows use the official installer. You should remember the password for the postgres user, or create a new user if you know how to do it.
Download the latest release of Ichiran database. On the release page there are commands needed to restore the dump. On Windows they don't really work, instead try to create database and restore the dump using pgAdmin (which is usually installed together with Postgres). Right-click on PostgreSQL/Databases/postgres and select "Query tool...". Paste the following into Query editor and hit the Execute button.
CREATE DATABASE [database_name] WITH TEMPLATE = template0 OWNER = postgres ENCODING = 'UTF8' LC_COLLATE = 'Japanese_Japan.932' LC_CTYPE = 'Japanese_Japan.932' TABLESPACE = pg_default CONNECTION LIMIT = -1;
Then refresh the Databases folder and you should see your new database. Right-click on it then select "Restore", then choose the file that you downloaded (it wants ".backup" extension by default so choose "Format: All files" if you can't find the file).
You might get a bunch of errors when restoring the dump saying that "user ichiran doesn't exist". Just ignore them.
SBCL
Ichiran uses SBCL to run its Common Lisp code. You can download Windows binaries for SBCL 2.0.0 from the official site, and on Linux you can use the package manager, or also use binaries from the official site although they might be incompatible with your operating system.
However you really want the latest version 2.1.0, especially on Windows for uh... reasons. There's a workaround for Windows 10 though, so if you don't mind turning on that option, you can stick with SBCL 2.0.0 really.
After installing some version of SBCL (SBCL requires SBCL to compile itself), download the source code of the latest version and let's get to business.
On Linux it should be easy, just run
sh make.sh --fancy sudo sh install.sh
in the source directory.
On Windows it's somewhat harder. Install MSYS2, then run "MSYS2 MinGW 64-bit".
pacman -S mingw-w64-x86_64-toolchain make # for paths in MSYS2 replace drive prefix C:/ by /c/ and so on cd [path_to_sbcl_source] export PATH="$PATH:[directory_where_sbcl.exe_is_currently]" # check that you can run sbcl from command line now # type (sb-ext:quit) to quit sbcl sh make.sh --fancy unset SBCL_HOME INSTALL_ROOT=/c/sbcl sh install.sh
Then edit Windows environment variables so that PATH contains c:\sbcl\bin and SBCL_HOME is c:\sbcl\lib\sbcl (replace c:\sbcl here and in INSTALL_ROOT with another directory if applicable). Check that you can run a normal Windows shell (cmd) and run sbcl from it.
Quicklisp
Quicklisp is a library manager for Common Lisp. You'll need it to install the dependencies of Ichiran. Download quicklisp.lisp from the official site and run the following command:
sbcl --load /path/to/quicklisp.lisp
In SBCL shell execute the following commands:
(quicklisp-quickstart:install) (ql:add-to-init-file) (sb-ext:quit)
This will ensure quicklisp is loaded every time SBCL starts.
Ichiran
Find the directory ~/quicklisp/local-projects (%USERPROFILE%\quicklisp\local-projects on Windows) and git clone Ichiran source code into it. It is possible to place it into an arbitrary directory, but that requires configuring ASDF, while ~/quicklisp/local-projects/ should work out of the box, as should ~/common-lisp/ but I'm not sure about Windows equivalent for this one.
Ichiran wouldn't load without settings.lisp file which you might notice is absent from the repository. Instead, there's a settings.lisp.template file. Copy settings.lisp.template to settings.lisp and edit the following values in settings.lisp:
*connection* this is the main database connection. It is a list of at least 4 elements: database name, database user (usually "postgres"), database password and database host ("localhost"). It can be followed by options like :port 5434 if the database is running on a non-standard port.
*connections* is an optional parameter, if you want to switch between several databases. You can probably ignore it.
*jmdict-data* this should be a path to these files from JMdict project. They contain descriptions of parts of speech etc.
ignore all the other parameters, they're only needed for creating the database from scratch
Run sbcl. You should now be able to load Ichiran with
(ql:quickload :ichiran)
On the first run, run the following command. It should also be run after downloading a new database dump and updating Ichiran code, as it fixes various issues with the original JMdict data.
(ichiran/mnt:add-errata)
Run the test suite with
(ichiran/test:run-all-tests)
If not all tests pass, you did something wrong! If none of the tests pass, check that you configured the database connection correctly. If all tests pass, you have a working installation of Ichiran. Congratulations!
Some commands that can be used in Ichiran:
(ichiran:romanize "一覧は最高だぞ" :with-info t) this is basically a text-only equivalent of ichi.moe, everyone's favorite webapp based on Ichiran.
(ichiran/dict:simple-segment "一覧は最高だぞ") returns a list of WORD-INFO objects which contain a lot of interesting data which is available through "accessor functions". For example (mapcar 'ichiran/dict:word-info-text (ichiran/dict:simple-segment "一覧は最高だぞ") will return a list of separate words in a sentence.
(ichiran/dict:dict-segment "一覧は最高だぞ" :limit 5) like simple-segment but returns top 5 segmentations.
(ichiran/dict:word-info-from-text "一覧") gets a WORD-INFO object for a specific word.
ichiran/dict:word-info-str converts a WORD-INFO object to a human-readable string.
ichiran/dict:word-info-gloss-json converts a WORD-INFO object into a "json" "object" containing dictionary information about a word, which is not really JSON but an equivalent Lisp representation of it. But, it can be converted into a real JSON string with jsown:to-json function. Putting it all together, the following code will convert the word 一覧 into a JSON string:
(jsown:to-json (ichiran/dict:word-info-json (ichiran/dict:word-info-from-text "一覧")))
Now, if you're not familiar with Common Lisp all this stuff might seem confusing. Which is where ichiran-cli comes in, a brand new Command Line Interface to Ichiran.
ichiran-cli
ichiran-cli is just a simple command-line application that can be called by scripts just like mecab and its ilk. The main difference is that it must be built by the user, who has already did the previous steps of the Ichiran installation process. It needs to access the postgres database and the connection settings from settings.lisp are currently "baked in" during the build. It also contains a cache of some database references, so modifying the database (i.e. updating to a newer database dump) without also rebuilding ichiran-cli is highly inadvisable.
The build process is very easy. Just run sbcl and execute the following commands:
(ql:quickload :ichiran/cli) (ichiran/cli:build)
sbcl should exit at this point, and you'll have a new ichiran-cli (ichiran-cli.exe on Windows) executable in ichiran source directory. If sbcl didn't exit, try deleting the old ichiran-cli and do it again, it seems that on Linux sbcl sometimes can't overwrite this file for some reason.
Use -h option to show how to use this tool. There will be more options in the future but at the time of this post, it prints out the following:
>ichiran-cli -h Command line interface for Ichiran Usage: ichiran-cli [-h|--help] [-e|--eval] [-i|--with-info] [-f|--full] [input] Available options: -h, --help print this help text -e, --eval evaluate arbitrary expression and print the result -i, --with-info print dictionary info -f, --full full split info (as JSON) By default calls ichiran:romanize, other options change this behavior
Here's the example usage of these switches
ichiran-cli "一覧は最高だぞ" just prints out the romanization
ichiran-cli -i "一覧は最高だぞ" - equivalent of ichiran:romanize :with-info t above
ichiran-cli -f "一覧は最高だぞ" - outputs the full result of segmentation as JSON. This is the one you'll probably want to use in scripts etc.
ichiran-cli -e "(+ 1 2 3)" - execute arbitrary Common Lisp code... yup that's right. Since this is a new feature, I don't know yet which commands people really want, so this option can be used to execute any command such as those listed in the previous section.
By the way, as I mentioned before, on Windows SBCL prior to 2.1.0 doesn't parse non-ascii command line arguments correctly. Which is why I had to include a section about building a newer version of SBCL. However if you use Windows 10, there's a workaround that avoids having to build SBCL 2.1.0. Open "Language Settings", find a link to "Administrative language settings", click on "Change system locale...", and turn on "Beta: Use Unicode UTF-8 for worldwide language support". Then reboot your computer. Voila, everything will work now. At least in regards to SBCL. I can't guarantee that other command line apps which use locales will work after that.
That's it for now, hope you enjoy playing around with Ichiran in this new year. よろしくおねがいします!
6 notes
·
View notes
Text
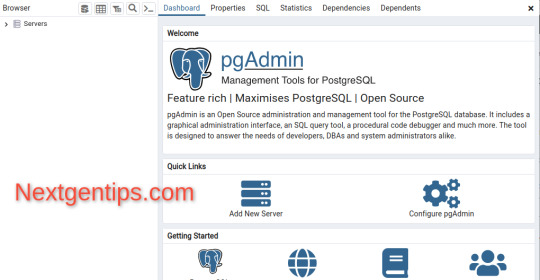
How to install pgAdmin 4 on Ubuntu 22.04
How to install pgAdmin 4 on Ubuntu 22.04
In this tutorial guide, I will be taking you through the installation of pgAdmin 4 on Ubuntu 22.04. pgAdmin 4 is a free and open-source management tool for Postgres. Its desktop runtime written in NWjs allows it to run standalone for individual users, or the web applications code may be directly deployed on a web server for use by the web browser. pgAdmin 4 is a complete rewrite of pgAdmin,…

View On WordPress
0 notes
Text
This guide will walk you through the steps used to install PostgreSQL 12 on Ubuntu 22.04/20.04/18.04/16.04 Linux system. PostgreSQL is one of the most widely adopted object-relational database management system based on POSTGRES 4.2. PostgreSQL 12 has been released for general use, fit for Production and all Development use cases. For CentOS 7/8: How To Install PostgreSQL 12 on CentOS 7 / CentOS 8 For Fedora: Installing PostgreSQL 12 on Fedora Debian: Install PostgreSQL 12 on Debian If you want to see all the new features and improvements in PostgreSQL 12, visit the PostgreSQL 12 release notes page so check the major enhancements in PostgreSQL 12. Without much wait, let’s buckle to the installation of PostgreSQL 12 on Ubuntu 22.04/20.04/18.04/16.04 Linux system. Step 1: Update system It is recommended to update your current system packages if it is a new server instance. sudo apt update sudo apt -y install vim bash-completion wget sudo apt -y upgrade A reboot is necessary after an upgrade. sudo reboot Step 2: Add PostgreSQL 12 repository We need to import GPG key and add PostgreSQL 12 repository into our Ubuntu machine. Run the following commands to accomplish this. curl -fsSL https://www.postgresql.org/media/keys/ACCC4CF8.asc|sudo gpg --dearmor -o /etc/apt/trusted.gpg.d/postgresql.gpg After importing GPG key, add repository contents to your Ubuntu 22.04/20.04/18.04/16.04 system: echo "deb http://apt.postgresql.org/pub/repos/apt/ `lsb_release -cs`-pgdg main" |sudo tee /etc/apt/sources.list.d/pgdg.list The repository added contains many different packages including third party addons. They include: postgresql-client postgresql libpq-dev postgresql-server-dev pgadmin packages Step 3: Install PostgreSQL 12 on Ubuntu 22.04|20.04|18.04|16.04 Now the repository has been added successfully, update the package list and install PostgreSQL 12 server and client packages on your Ubuntu 22.04/20.04/18.04/16.04 Linux system. sudo apt update sudo apt -y install postgresql-12 postgresql-client-12 A successful installation prints a message that is similar to one shared in the next screenshot. The PostgreSQL service is started and set to come up after every system reboot. $ systemctl status postgresql.service ● postgresql.service - PostgreSQL RDBMS Loaded: loaded (/lib/systemd/system/postgresql.service; enabled; vendor preset: enabled) Active: active (exited) since Wed 2022-05-18 15:50:22 EAT; 15min ago Main PID: 4317 (code=exited, status=0/SUCCESS) CPU: 1ms Mei 18 15:50:22 ubuntu22 systemd[1]: Starting PostgreSQL RDBMS... Mei 18 15:50:22 ubuntu22 systemd[1]: Finished PostgreSQL RDBMS. $ systemctl status [email protected] ● [email protected] - PostgreSQL Cluster 12-main Loaded: loaded (/lib/systemd/system/[email protected]; enabled-runtime; vendor preset: enabled) Active: active (running) since Wed 2022-05-18 16:04:01 EAT; 1min 59s ago Process: 6838 ExecStart=/usr/bin/pg_ctlcluster --skip-systemctl-redirect 12-main start (code=exited, status=0/SUCCESS) Main PID: 6843 (postgres) Tasks: 7 (limit: 9460) Memory: 18.2M CPU: 157ms CGroup: /system.slice/system-postgresql.slice/[email protected] ├─6843 /usr/lib/postgresql/12/bin/postgres -D /var/lib/postgresql/12/main -c config_file=/etc/postgresql/12/main/postgresql.conf ├─6845 "postgres: 12/main: checkpointer " "" "" "" "" "" "" "" "" "" "" "" "" "" "" "" "" "" "" "" "" "" "" "" "" "" "" "" "" "" "" "" "" "" "" "" "" "" "" "" "" "" "" "" "" "" "" ""> ├─6846 "postgres: 12/main: background writer " "" "" "" "" "" "" "" "" "" "" "" "" "" "" "" "" "" "" "" "" "" "" "" "" "" "" "" "" "" "" "" "" "" "" "" "" "" "" "" "" "" "" "" "" "" > ├─6847 "postgres: 12/main: walwriter " "" "" "" "" "" "" "" "" "" "" "" "" "" "" "" "" "" "" "" "" "" "" "" "" "" "" "" "" "" "" "" "" "" "" "" "" "" "" "" "" "" "" "" "" "" "" "" "">
├─6848 "postgres: 12/main: autovacuum launcher " "" "" "" "" "" "" "" "" "" "" "" "" "" "" "" "" "" "" "" "" "" "" "" "" "" "" "" "" "" "" "" "" "" "" "" "" "" "" "" "" "" "" "" "" "> ├─6849 "postgres: 12/main: stats collector " "" "" "" "" "" "" "" "" "" "" "" "" "" "" "" "" "" "" "" "" "" "" "" "" "" "" "" "" "" "" "" "" "" "" "" "" "" "" "" "" "" "" "" "" "" ""> └─6850 "postgres: 12/main: logical replication launcher " "" "" "" "" "" "" "" "" "" "" "" "" "" "" "" "" "" "" "" "" "" "" "" "" "" "" "" "" "" "" "" "" "" "" "" "" "" "" "" "" "" "> Mei 18 16:03:58 ubuntu22 systemd[1]: Starting PostgreSQL Cluster 12-main... Mei 18 16:04:01 ubuntu22 systemd[1]: Started PostgreSQL Cluster 12-main. $ systemctl is-enabled postgresql enabled Step 4: Test PostgreSQL Connection During installation, a postgres user is created automatically. This user has full superadmin access to your entire PostgreSQL instance. Before you switch to this account, your logged in system user should have sudo privileges. sudo su - postgres Let’s reset this user password to a strong Password we can remember. psql -c "alter user postgres with password 'StrongAdminPassw0rd'" Start PostgreSQL prompt by using the command: $ psql Get connection details like below. $ psql psql (12.11 (Ubuntu 12.11-1.pgdg22.04+1)) Type "help" for help. postgres=# \conninfo You are connected to database "postgres" as user "postgres" via socket in "/var/run/postgresql" at port "5432". Let’s create a test database and user to see if it’s working. postgres=# CREATE DATABASE mytestdb; CREATE DATABASE postgres=# CREATE USER mytestuser WITH ENCRYPTED PASSWORD 'MyStr0ngP@SS'; CREATE ROLE postgres=# GRANT ALL PRIVILEGES ON DATABASE mytestdb to mytestuser; GRANT List created databases: postgres=# \l List of databases Name | Owner | Encoding | Collate | Ctype | Access privileges -----------+----------+----------+---------+---------+------------------------- mytestdb | postgres | UTF8 | C.UTF-8 | C.UTF-8 | =Tc/postgres + | | | | | postgres=CTc/postgres + | | | | | mytestuser=CTc/postgres postgres | postgres | UTF8 | C.UTF-8 | C.UTF-8 | template0 | postgres | UTF8 | C.UTF-8 | C.UTF-8 | =c/postgres + | | | | | postgres=CTc/postgres template1 | postgres | UTF8 | C.UTF-8 | C.UTF-8 | =c/postgres + | | | | | postgres=CTc/postgres (4 rows) Connect to database: postgres-# \c mytestdb You are now connected to database "mytestdb" as user "postgres". Other PostgreSQL utilities installed such as createuser and createdb can be used to create database and users. postgres@ubuntu:~$ createuser myuser --password Password: postgres@ubuntu:~$ createdb mydb -O myuser postgres@ubuntu:~$ psql -l We can create and connect to a database on PostgreSQL server. Step 5: Configure remote Connection (Optional) Installation of PostgreSQL 12 on Ubuntu only accepts connections from localhost. In ideal production environments, you’ll have a central database server and remote clients connecting to it – But of course within a private network (LAN). To enable remote connections, edit PostgreSQL configuration file: sudo nano /etc/postgresql/12/main/postgresql.conf Uncomment line 59 and change the Listen address to accept connections within your networks. # Listen on all interfaces listen_addresses = '*' # Listen on specified private IP address listen_addresses = '192.168.10.11' After the change, restart postgresql service. sudo systemctl restart postgresql Confirm Listening addresses. $ sudo netstat -tunelp | grep 5432 tcp 0 0 0.0.0.0:5432 0.0.0.0:* LISTEN 111 112837 11143/postgres
tcp6 0 0 :::5432 :::* LISTEN 111 112838 11143/postgres Step 6: Install pgAdmin4 Management Tool If you want to manage your PostgreSQL database server from a web interface, then install pgAdmin4. Install pgAdmin4 on Ubuntu Enjoy using PostgreSQL 12 on Ubuntu 22.04|20.04|18.04|16.04 Linux system.
0 notes
Text
PostgreSQL is a very popular open source Object-Relational database management system (DBMS) created for reliability, efficiency and data integrity guarantee. The development work is now over 30 years and the project has earned it a strong reputation for reliability, feature robustness, and performance. In this tutorial we will explain how you can install and configure PostgreSQL 13 Database server on Ubuntu 22.04|20.04|18.04 Linux server. PostgreSQL is used by thousands of companies to power payment transactions, huge website traffic, E-commerce platforms e.t.c. It also enables you to add custom functions developed using programming languages such as Java, Python, C/C++ and many others. As of this article update the latest release of PostgreSQL is 13 which is intended for use to run workloads in Production environments. You can find information about all of the features and changes found in PostgreSQL 13 in the release notes. Step 1: Update Ubuntu system We always work on a latest release of OS to make sure there are no old dependency issues. Login to your Ubuntu server and run the following commands to update all the packages installed. sudo apt update && sudo apt -y full-upgrade [ -f /var/run/reboot-required ] && sudo reboot -f Once the system has been updated, I recommend you perform a reboot to get the new kernel running incase it was updated. sudo reboot Step 2: Add PostgreSQL 13 repository to Ubuntu 22.04|20.04|18.04 Install required dependency packages sudo apt update sudo apt install curl gpg gnupg2 software-properties-common apt-transport-https lsb-release ca-certificates Now that we have updated and rebooted our system, let’s add the APT repository required to pull the packages form the PostgreSQL repository. curl -fsSL https://www.postgresql.org/media/keys/ACCC4CF8.asc|sudo gpg --dearmor -o /etc/apt/trusted.gpg.d/postgresql.gpg After importing GPG key, add repository contents to your Ubuntu 22.04|20.04|18.04 system: echo "deb http://apt.postgresql.org/pub/repos/apt/ `lsb_release -cs`-pgdg main" |sudo tee /etc/apt/sources.list.d/pgdg.list The repository added contains many different packages including third party addons. They include: postgresql-client postgresql libpq-dev postgresql-server-dev pgadmin packages Step 3: Install PostgreSQL 13 on Ubuntu 22.04|20.04|18.04 With the repository added we can install the PostgreSQL 13 packages on our Ubuntu 22.04|20.04|18.04 Linux server. But first update the package index for the version to be available at the OS level. sudo apt update The run the commands below to install PostgreSQL 13 on Ubuntu 22.04|20.04|18.04 Linux system. sudo apt install postgresql-13 postgresql-client-13 The PostgreSQL service is started and set to come up after every system reboot. $ systemctl status [email protected] ● [email protected] - PostgreSQL Cluster 13-main Loaded: loaded (/lib/systemd/system/[email protected]; enabled-runtime; vendor preset: enabled) Active: active (running) since Wed 2022-05-18 15:50:22 EAT; 1min 55s ago Process: 4294 ExecStart=/usr/bin/pg_ctlcluster --skip-systemctl-redirect 13-main start (code=exited, status=0/SUCCESS) Main PID: 4299 (postgres) Tasks: 7 (limit: 9460) Memory: 18.2M CPU: 150ms CGroup: /system.slice/system-postgresql.slice/[email protected] ├─4299 /usr/lib/postgresql/13/bin/postgres -D /var/lib/postgresql/13/main -c config_file=/etc/postgresql/13/main/postgresql.conf ├─4301 "postgres: 13/main: checkpointer " "" "" "" "" "" "" "" "" "" "" "" "" "" "" "" "" "" "" "" "" "" "" "" "" "" "" "" "" "" "" "" "" "" "" "" "" "" "" "" "" "" "" "" "" "" "" "" "> ├─4302 "postgres: 13/main: background writer " "" "" "" "" "" "" "" "" "" "" "" "" "" "" "" "" "" "" "" "" "" "" "" "" "" "" "" "" "" "" "" "" "" "" "" "" "" "" "" "" "" "" "" "" "" ""> ├─4303 "postgres: 13/main: walwriter " ""
"" "" "" "" "" "" "" "" "" "" "" "" "" "" "" "" "" "" "" "" "" "" "" "" "" "" "" "" "" "" "" "" "" "" "" "" "" "" "" "" "" "" "" "" "" "" "" "> ├─4304 "postgres: 13/main: autovacuum launcher " "" "" "" "" "" "" "" "" "" "" "" "" "" "" "" "" "" "" "" "" "" "" "" "" "" "" "" "" "" "" "" "" "" "" "" "" "" "" "" "" "" "" "" "" "" > ├─4305 "postgres: 13/main: stats collector " "" "" "" "" "" "" "" "" "" "" "" "" "" "" "" "" "" "" "" "" "" "" "" "" "" "" "" "" "" "" "" "" "" "" "" "" "" "" "" "" "" "" "" "" "" "" "> └─4306 "postgres: 13/main: logical replication launcher " "" "" "" "" "" "" "" "" "" "" "" "" "" "" "" "" "" "" "" "" "" "" "" "" "" "" "" "" "" "" "" "" "" "" "" "" "" "" "" "" "" "" > Mei 18 15:50:19 ubuntu22 systemd[1]: Starting PostgreSQL Cluster 13-main... Mei 18 15:50:22 ubuntu22 systemd[1]: Started PostgreSQL Cluster 13-main. Step 4: Test PostgreSQL Connection During installation, a postgres user is created automatically. This user has full superadmin access to your entire PostgreSQL instance. Before you switch to this account, your logged in system user should have sudo privileges. sudo su - postgres Let’s reset this user password to a strong Password we can remember. psql -c "alter user postgres with password 'StrongAdminP@ssw0rd'" Start PostgreSQL prompt by using the command: $ psql Get connection details like below. $ psql psql (13.7 (Ubuntu 13.7-1.pgdg22.04+1)) Type "help" for help. postgres=# \conninfo You are connected to database "postgres" as user "postgres" via socket in "/var/run/postgresql" at port "5432". Let’s create a test database and user to see if it’s working. postgres=# CREATE DATABASE mytestdb; CREATE DATABASE postgres=# CREATE USER mytestuser WITH ENCRYPTED PASSWORD 'MyStr0ngP@SS'; CREATE ROLE postgres=# GRANT ALL PRIVILEGES ON DATABASE mytestdb to mytestuser; GRANT List created databases: postgres=# \l List of databases Name | Owner | Encoding | Collate | Ctype | Access privileges -----------+----------+----------+---------+---------+------------------------- mytestdb | postgres | UTF8 | C.UTF-8 | C.UTF-8 | =Tc/postgres + | | | | | postgres=CTc/postgres + | | | | | mytestuser=CTc/postgres postgres | postgres | UTF8 | C.UTF-8 | C.UTF-8 | template0 | postgres | UTF8 | C.UTF-8 | C.UTF-8 | =c/postgres + | | | | | postgres=CTc/postgres template1 | postgres | UTF8 | C.UTF-8 | C.UTF-8 | =c/postgres + | | | | | postgres=CTc/postgres (4 rows) Connect to database: postgres-# \c mytestdb You are now connected to database "mytestdb" as user "postgres". Other PostgreSQL utilities installed such as createuser and createdb can be used to create database and users. postgres@ubuntu:~$ createuser myuser --password Password: postgres@ubuntu:~$ createdb mydb -O myuser postgres@ubuntu:~$ psql -l We can create and connect to a database on PostgreSQL server. Step 5: Configure remote Connection (Optional) Installation of PostgreSQL 13 on Ubuntu only accepts connections from localhost. In ideal production environments, you’ll have a central database server and remote clients connecting to it – But of course within a private network (LAN). To enable remote connections, edit PostgreSQL configuration file: sudo nano /etc/postgresql/13/main/postgresql.conf Uncomment line 59 and change the Listen address to accept connections within your networks. # Listen on all interfaces listen_addresses = '*' # Listen on specified private IP address listen_addresses = '192.168.10.11' Also set PostgreSQL to accept remote connections from allowed hosts. $ sudo nano /etc/postgresql/13/main/pg_hba.conf # Accept from anywhere host all all 0.0.0.0/0 md5
# Accept from trusted subnet host all all 10.10.10.0/24 md5 After the change, restart postgresql service. sudo systemctl restart postgresql Confirm Listening addresses. # netstat -tunelp | grep 5432 tcp 0 0 0.0.0.0:5432 0.0.0.0:* LISTEN 111 112837 11143/postgres tcp6 0 0 :::5432 :::* LISTEN 111 112838 11143/postgres Step 6: Install pgAdmin4 Management Tool If you want to manage your PostgreSQL database server from a web interface, then install pgAdmin4. Install pgAdmin4 on Ubuntu
0 notes
Text
How to install pgAdmin 4 on Ubuntu 22.04
How to install pgAdmin 4 on Ubuntu 22.04
In this tutorial guide, I will be taking you through the installation of pgAdmin 4 version 6.9 on Ubuntu 22.04. pgAdmin 4 is a free and open-source management tool for Postgres. Its desktop runtime written in NWjs allows it to run standalone for individual users, or the web applications code may be directly deployed on a web server for use by the web browser. pgAdmin 4 is a complete rewrite of…
View On WordPress
0 notes