#postgres and pgadmin install windows
Explore tagged Tumblr posts
Visit Tumblr Blog
Explore Tumblr blogs with no restrictions, modern design and the best experience.
Last Seen Tumblr Blogs


Fun Fact
Tumblr.com is the 103rd most visited website in the world.
Video
youtube
How to Install Postgres 17 and pgAdmin in Windows
1 note
·
View note
Text
Unlocking PostgreSQL Power: Tips, Tricks, and Hands-On Tutorial
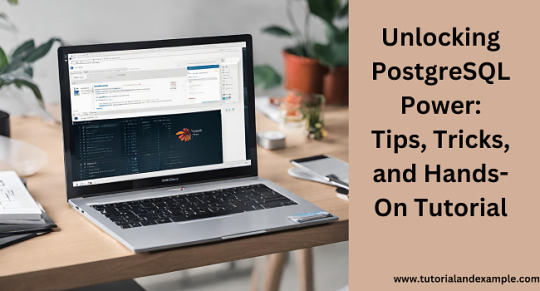
Welcome to our PostgreSQL Tutorial! PostgreSQL, often called "Postgres," is a powerful, open-source database system used by developers and businesses worldwide. Whether you’re building a small application or managing large datasets, PostgreSQL is versatile and reliable.
What is PostgreSQL?
PostgreSQL is a relational database management system (RDBMS). This means it organizes data into tables that can be linked by relationships. It supports SQL (Structured Query Language), the standard language for interacting with databases.
Why Choose PostgreSQL?
Open Source: PostgreSQL is free to use and has a strong community support.
Extensibility: It allows you to create custom functions and data types.
Performance: PostgreSQL handles large volumes of data efficiently.
ACID Compliance: Ensures data integrity with reliable transactions.
Getting Started
Installation: Download and install PostgreSQL from the official website. It supports Windows, macOS, and Linux.
Connecting to PostgreSQL: Use the psql command-line tool or GUI tools like pgAdmin to connect and manage your database.
Creating a Database: Use the command CREATE DATABASE followed by your desired database name.
Basic Operations
Inserting Data: Add records using the INSERT INTO command.
Querying Data: Retrieve data with the SELECT statement.
Updating Data: Modify existing records using UPDATE.
Deleting Data: Remove unwanted records with DELETE.
Explore More
To dive deeper into PostgreSQL and explore advanced features, check out this PostgreSQL Tutorial. Happy learning!
By following this PostgreSQL Tutorial, you'll quickly become comfortable managing and querying your databases with ease.
0 notes
Text
Spring Boot Microservice Project with Postgres DB Tutorial with Java Example for Beginners
Full Video Link: https://youtu.be/iw4wO9gEb50 Hi, a new #video on #springboot #microservices with #postgres #database is published on #codeonedigest #youtube channel. Complete guide for #spring boot microservices with #postgressql. Learn #programming #
In this video, we will learn, how to download, install postgres database, how to integrate Postgres database with a Spring Boot Microservice Application and perform different CRUD operations i.e. Create, Read, Update, and Delete operations on the Customer entity. Spring Boot is built on the top of the spring and contains all the features of spring. And is becoming a favorite of developers these…

View On WordPress
#database#microservices#microservices postgres#postgres#postgres and pgadmin install#postgres and pgadmin install mac os#postgres and pgadmin install ubuntu#postgres and pgadmin install windows#postgres and pgadmin install windows 10#postgres and pgadmin install windows11#postgres config file location#postgres config file max#postgres config file ubuntu#postgres config file windows#postgres configuration#postgres configuration file#postgres configuration in spring boot#postgres configuration parameters#postgres configuration settings#postgres configure replication#postgres connection command line#postgres connection in java#postgres connection to server#postgres database#postgres database configuration#postgres database setup#postgres db#postgres docker#postgres installation#postgres installation error
0 notes
Photo

Learn PostgreSQL - Full Course for Beginners ☞ http://on.edusavecoupon.net/dc7fc4eeca #SQL #PostgreSQL #Databases #Codequs #Morioh
#SQL#postgresql#structured query language#postgresql course#sql tutorial#learn sql#postgresql tutorial#database#postgresql tutorial for beginners#databases#postgres#ingres#relational database#postquel#windows 10#installation#pgadmin#sql beginners#sql course#sql lesson#sql video#sql video tutorial#sql video tutorial for beginners#postgres tutorial#postgressql#history of postgresql#what is postgres#what is postgresql#sql#codequs
1 note
·
View note
Text
Ichiran@home 2021: the ultimate guide
Recently I’ve been contacted by several people who wanted to use my Japanese text segmenter Ichiran in their own projects. This is not surprising since it’s vastly superior to Mecab and similar software, and is occassionally updated with new vocabulary unlike many other segmenters. Ichiran powers ichi.moe which is a very cool webapp that helped literally dozens of people learn Japanese.
A big obstacle towards the adoption of Ichiran is the fact that it’s written in Common Lisp and people who want to use it are often unfamiliar with this language. To fix this issue, I’m now providing a way to build Ichiran as a command line utility, which could then be called as a subprocess by scripts in other languages.
This is a master post how to get Ichiran installed and how to use it for people who don’t know any Common Lisp at all. I’m providing instructions for Linux (Ubuntu) and Windows, I haven’t tested whether it works on other operating systems but it probably should.
PostgreSQL
Ichiran uses a PostgreSQL database as a source for its vocabulary and other things. On Linux install postgresql using your preferred package manager. On Windows use the official installer. You should remember the password for the postgres user, or create a new user if you know how to do it.
Download the latest release of Ichiran database. On the release page there are commands needed to restore the dump. On Windows they don't really work, instead try to create database and restore the dump using pgAdmin (which is usually installed together with Postgres). Right-click on PostgreSQL/Databases/postgres and select "Query tool...". Paste the following into Query editor and hit the Execute button.
CREATE DATABASE [database_name] WITH TEMPLATE = template0 OWNER = postgres ENCODING = 'UTF8' LC_COLLATE = 'Japanese_Japan.932' LC_CTYPE = 'Japanese_Japan.932' TABLESPACE = pg_default CONNECTION LIMIT = -1;
Then refresh the Databases folder and you should see your new database. Right-click on it then select "Restore", then choose the file that you downloaded (it wants ".backup" extension by default so choose "Format: All files" if you can't find the file).
You might get a bunch of errors when restoring the dump saying that "user ichiran doesn't exist". Just ignore them.
SBCL
Ichiran uses SBCL to run its Common Lisp code. You can download Windows binaries for SBCL 2.0.0 from the official site, and on Linux you can use the package manager, or also use binaries from the official site although they might be incompatible with your operating system.
However you really want the latest version 2.1.0, especially on Windows for uh... reasons. There's a workaround for Windows 10 though, so if you don't mind turning on that option, you can stick with SBCL 2.0.0 really.
After installing some version of SBCL (SBCL requires SBCL to compile itself), download the source code of the latest version and let's get to business.
On Linux it should be easy, just run
sh make.sh --fancy sudo sh install.sh
in the source directory.
On Windows it's somewhat harder. Install MSYS2, then run "MSYS2 MinGW 64-bit".
pacman -S mingw-w64-x86_64-toolchain make # for paths in MSYS2 replace drive prefix C:/ by /c/ and so on cd [path_to_sbcl_source] export PATH="$PATH:[directory_where_sbcl.exe_is_currently]" # check that you can run sbcl from command line now # type (sb-ext:quit) to quit sbcl sh make.sh --fancy unset SBCL_HOME INSTALL_ROOT=/c/sbcl sh install.sh
Then edit Windows environment variables so that PATH contains c:\sbcl\bin and SBCL_HOME is c:\sbcl\lib\sbcl (replace c:\sbcl here and in INSTALL_ROOT with another directory if applicable). Check that you can run a normal Windows shell (cmd) and run sbcl from it.
Quicklisp
Quicklisp is a library manager for Common Lisp. You'll need it to install the dependencies of Ichiran. Download quicklisp.lisp from the official site and run the following command:
sbcl --load /path/to/quicklisp.lisp
In SBCL shell execute the following commands:
(quicklisp-quickstart:install) (ql:add-to-init-file) (sb-ext:quit)
This will ensure quicklisp is loaded every time SBCL starts.
Ichiran
Find the directory ~/quicklisp/local-projects (%USERPROFILE%\quicklisp\local-projects on Windows) and git clone Ichiran source code into it. It is possible to place it into an arbitrary directory, but that requires configuring ASDF, while ~/quicklisp/local-projects/ should work out of the box, as should ~/common-lisp/ but I'm not sure about Windows equivalent for this one.
Ichiran wouldn't load without settings.lisp file which you might notice is absent from the repository. Instead, there's a settings.lisp.template file. Copy settings.lisp.template to settings.lisp and edit the following values in settings.lisp:
*connection* this is the main database connection. It is a list of at least 4 elements: database name, database user (usually "postgres"), database password and database host ("localhost"). It can be followed by options like :port 5434 if the database is running on a non-standard port.
*connections* is an optional parameter, if you want to switch between several databases. You can probably ignore it.
*jmdict-data* this should be a path to these files from JMdict project. They contain descriptions of parts of speech etc.
ignore all the other parameters, they're only needed for creating the database from scratch
Run sbcl. You should now be able to load Ichiran with
(ql:quickload :ichiran)
On the first run, run the following command. It should also be run after downloading a new database dump and updating Ichiran code, as it fixes various issues with the original JMdict data.
(ichiran/mnt:add-errata)
Run the test suite with
(ichiran/test:run-all-tests)
If not all tests pass, you did something wrong! If none of the tests pass, check that you configured the database connection correctly. If all tests pass, you have a working installation of Ichiran. Congratulations!
Some commands that can be used in Ichiran:
(ichiran:romanize "一覧は最高だぞ" :with-info t) this is basically a text-only equivalent of ichi.moe, everyone's favorite webapp based on Ichiran.
(ichiran/dict:simple-segment "一覧は最高だぞ") returns a list of WORD-INFO objects which contain a lot of interesting data which is available through "accessor functions". For example (mapcar 'ichiran/dict:word-info-text (ichiran/dict:simple-segment "一覧は最高だぞ") will return a list of separate words in a sentence.
(ichiran/dict:dict-segment "一覧は最高だぞ" :limit 5) like simple-segment but returns top 5 segmentations.
(ichiran/dict:word-info-from-text "一覧") gets a WORD-INFO object for a specific word.
ichiran/dict:word-info-str converts a WORD-INFO object to a human-readable string.
ichiran/dict:word-info-gloss-json converts a WORD-INFO object into a "json" "object" containing dictionary information about a word, which is not really JSON but an equivalent Lisp representation of it. But, it can be converted into a real JSON string with jsown:to-json function. Putting it all together, the following code will convert the word 一覧 into a JSON string:
(jsown:to-json (ichiran/dict:word-info-json (ichiran/dict:word-info-from-text "一覧")))
Now, if you're not familiar with Common Lisp all this stuff might seem confusing. Which is where ichiran-cli comes in, a brand new Command Line Interface to Ichiran.
ichiran-cli
ichiran-cli is just a simple command-line application that can be called by scripts just like mecab and its ilk. The main difference is that it must be built by the user, who has already did the previous steps of the Ichiran installation process. It needs to access the postgres database and the connection settings from settings.lisp are currently "baked in" during the build. It also contains a cache of some database references, so modifying the database (i.e. updating to a newer database dump) without also rebuilding ichiran-cli is highly inadvisable.
The build process is very easy. Just run sbcl and execute the following commands:
(ql:quickload :ichiran/cli) (ichiran/cli:build)
sbcl should exit at this point, and you'll have a new ichiran-cli (ichiran-cli.exe on Windows) executable in ichiran source directory. If sbcl didn't exit, try deleting the old ichiran-cli and do it again, it seems that on Linux sbcl sometimes can't overwrite this file for some reason.
Use -h option to show how to use this tool. There will be more options in the future but at the time of this post, it prints out the following:
>ichiran-cli -h Command line interface for Ichiran Usage: ichiran-cli [-h|--help] [-e|--eval] [-i|--with-info] [-f|--full] [input] Available options: -h, --help print this help text -e, --eval evaluate arbitrary expression and print the result -i, --with-info print dictionary info -f, --full full split info (as JSON) By default calls ichiran:romanize, other options change this behavior
Here's the example usage of these switches
ichiran-cli "一覧は最高だぞ" just prints out the romanization
ichiran-cli -i "一覧は最高だぞ" - equivalent of ichiran:romanize :with-info t above
ichiran-cli -f "一覧は最高だぞ" - outputs the full result of segmentation as JSON. This is the one you'll probably want to use in scripts etc.
ichiran-cli -e "(+ 1 2 3)" - execute arbitrary Common Lisp code... yup that's right. Since this is a new feature, I don't know yet which commands people really want, so this option can be used to execute any command such as those listed in the previous section.
By the way, as I mentioned before, on Windows SBCL prior to 2.1.0 doesn't parse non-ascii command line arguments correctly. Which is why I had to include a section about building a newer version of SBCL. However if you use Windows 10, there's a workaround that avoids having to build SBCL 2.1.0. Open "Language Settings", find a link to "Administrative language settings", click on "Change system locale...", and turn on "Beta: Use Unicode UTF-8 for worldwide language support". Then reboot your computer. Voila, everything will work now. At least in regards to SBCL. I can't guarantee that other command line apps which use locales will work after that.
That's it for now, hope you enjoy playing around with Ichiran in this new year. よろしくおねがいします!
6 notes
·
View notes
Text
Installing postgres app

#Installing postgres app how to#
#Installing postgres app install#
#Installing postgres app download#
#Installing postgres app mac#
#Installing postgres app how to#
See Removing Existing PostgreSQL Installations on the Postgres.app website for instructions on how to do this. It’s recommended that you remove any pre-existing PostgreSQL installations before installing Postgres.app. If you do, you’ll run into problems, if both versions are trying to use the same port (5432 is the default port). The above instructions assume you don’t already have PostgreSQL running on your Mac. sudo mkdir -p /etc/paths.d &Įcho /Applications/Postgres.app/Contents/Versions/latest/bin | sudo tee /etc/paths.d/postgresapp Remove Existing Installations You can also configure your $PATH to use the included command line tools. This will connect to your default database.Īnother alternative is to use a GUI application, such as pgAdmin, DBeaver, Postico, Azure Data Studio, etc. This will connect to that database using the psql command line interface.Īlternatively, you can launch psql in a separate terminal window and type psql. To connect to a database, double click one of the database icons shown in the above screen. You can start and stop PostgreSQL using the relevant buttons on this panel.
#Installing postgres app install#
When you install Postgres.app, several databases are created by default, including one using your system username. Once you’ve done that, you should see a screen similar to the following:
Double-click the Postgres.app icon (in your Applications folder).
Drag the Postgres.app icon to your Applications folder.ĭone.
#Installing postgres app download#
Download the latest version of Postgres.app from the Postgres.app website.
Here are step-by-step instructions for installing PostgreSQL.app on your Mac. You simply download it and drag it to your Applications folder, just like with any other application.
#Installing postgres app mac#
Postgres.app is a full-featured PostgreSQL installation packaged as a standard Mac application. While you can configure PATH for this to work, there is easier solution.The easiest way to install PostgreSQL on a Mac is by installing Postgres.app. Because this package for the setup expects to find standard Postgres installation on your machine. However this won't work on your local machine. If you already deployed your app on the server with Postgres, you probably installed the psycopg2 package to talk to the database. Click the "Start" button and your server is ready to go. Now all that is left to do is to run the app. Download it, open and move the Postgres.app to Applications folder on your Mac. The most up to date version is "Postgres.app with PostgreSQL 13" as of writing this post in December 2020. You can get the dmg file from the official site. This also assumes you don't have other versions of Postgres installed. There are more than one ways how to install this database on your machine, however downloading Postgres.app is the easiest. We will start with the Postgres part that is not Django specific. So developing this feature without Postgres database would be kind of crazy.Īnyway, let's see how to setup Postgres locally. Add -set flags to the command to connect the installation to the PVC you created and enable volume permissions: helm install release-name repo-name -set persistence.existingClaim pvc-name -set volumePermissions.enabledtrue. Postgres offers powerful full-text search you can use from Django. Install the helm chart with the helm install command. In my case, what kind of forced me to have local PostgreSQL for one of my projects, was search. For example SQLite does not care about length of the text in columns. You can get yourself into a situation where your app works locally but does not start on the server, because there is a small difference in how these two databases work. While this setup is pretty easy (you get configuration for SQLite out of the box) it has some issues. With Django I would say it is pretty common to have SQLite as a developer database and then on the server have Postgres as "the real" production database.
0 notes
Text
Psequel gui windows

PSEQUEL GUI WINDOWS FOR MAC OS
PSEQUEL GUI WINDOWS INSTALL
PSEQUEL GUI WINDOWS UPDATE
PSEQUEL GUI WINDOWS UPDATE
So just type your password and press ENTER/RETURN key. My Stable Diffusion GUI update 1.3.0 is out now Includes optimizedSD code, upscaling and face restoration, seamless mode, and a ton of fixes. In the good old MySQL world, my favorite client is Sequel Pro, but its support for PostgreSQL doesn't seem to. However, they are either web-based, Java-based or don't support the features I want. I know there is a list of PostgreSQL GUI Tools. However, I found its UI is clumsy and complicated. Free Administration Centre for the PostgreSQL database. It's also one of the few clients to provide a GUI front end to the plpgsql debugger. It provides a SQL query tool, an editor for procedural languages and a CRUD interface. When you type the password, it won't be displayed on screen, but the system would accept it. Well, pgAdmin is great for its feature-richness. For many years the 'standard' freely available GUI client for Postgresql, and so is bundled in many packaged installers. If the screen prompts you to enter a password, please enter your Mac's user password to continue. No, PSequel is written from scratch in Swift 2, although PSequel's UI is highly inspired by Sequel Pro. This meant that everyone had to start pulling up Rethink docs, and learning the query syntax to update/delete/etc records, slowing down the efforts of front-end developers that otherwise don't need to know the query language.
PSEQUEL GUI WINDOWS INSTALL
Ruby -e '$(curl -fsSL )' /dev/null brew install caskroom/cask/brew-cask 2> /dev/null PSequel is a Swift based standalone OS X client application that provides a simple and straightforward PostgreSQL GUI designed to help you perform a number of basic operations using a. RethinkDB didn't have an admin GUI, like Robomongo and Psequel, that we had been accustomed to using on other projects. Press Command+Space and type Terminal and press enter/return key.App description: sequel-pro (App: Sequel Pro.app).The most popular Linux alternative is DBeaver, which is both free and Open Source.If that doesn't suit you, our users have ranked 32 alternatives to PSequel and 15 are available for Linux so hopefully you can find a suitable replacement. can we have a link to download the full server ISO not the core. i think the link MS provided is server core. it doesn't even have the GUI install interface when you install it 'Server Graphical Shell'. it's not the first time i Install Windows. OS on the hardware of other manufacturers - unlike Windows which is developed by Microsoft. there is no such options, only standard or data center.
PSEQUEL GUI WINDOWS FOR MAC OS
PSequel is not available for Linux but there are plenty of alternatives that runs on Linux with similar functionality. Just found this: PSequel, a PostgreSQL GUI Tool for Mac OS X. PSequel provides a clean and simple interface to perform common PostgreSQL tasks quickly. For all the Postgres fans, here is a nice looking tool for Mac OS X: Designed for Yosemite. PSequel – PostgreSQL GUI tool for Mac OS X. Modern, native client with intuitive GUI tools to create, access, query & edit multiple databases: MySQL, PostgreSQL, SQLite, Microsoft SQL Server.
0 notes
Text
Vsphere Web Client For Mac Download

Download Vsphere Client 5.5
How To Install Vsphere Client
Vsphere For Mac
Your browser-OS combination is not supported. Subtitle workshop for mac free download. Some features might not work correctly. A minimum of IE10, Firefox 34 or Chrome 39 are required on Windows. Download latest vSphere client installer directly from VMWare. Published by Tyler Woods on April 17, 2017 April 17, 2017. Vsphere Client Windows Download; Vsphere Client Download Mac; Vsphere Client Download External Link; Download vSphere HTML5 Web Client Fling VMware agrees that Flash is not the solution for the long-term.
Firefox for mac 10.7. Download Mozilla Firefox, a free Web browser. Firefox is created by a global non-profit dedicated to putting individuals in control online. Get Firefox for Windows, macOS, Linux, Android and iOS today!
VMware, Inc – Shareware – WindowsMac
Overview
VMware vSphere Web Client is a Shareware software in the category Desktop developed by VMware, Inc.
The latest version of VMware vSphere Web Client is currently unknown. It was initially added to our database on 05/05/2012.
VMware vSphere Web Client runs on the following operating systems: Windows/Mac. Ddo download mac. https://trublog709.tumblr.com/post/658162538187554816/download-firefox-for-mac-107-3.
Download Vsphere Client 5.5
VMware vSphere Web Client has not been rated by our users yet.
Write a review for VMware vSphere Web Client! Download brother iprint&scan for mac.
10/25/2012 Outlook Backup Assistant 7.0.0 11/01/2020 DJ Mix Pro 4.0 11/01/2020 LanTalk NET 3.7.5629 11/01/2020 Disk Redactor 2.1.353 11/01/2020 Webcam Simulator XP Edition 7.826
10/27/2020 Firefox 82.0.1 update fixes causes of crashes 10/26/2020 New version of CCleaner available 10/25/2020 Kodi 18.9 release available 10/23/2020 Oracle updates fix 400 security vulnerabilities 10/21/2020 Adobe closes critical vulnerabilities in Photoshop and Illustrator
How To Install Vsphere Client

» vmware vsphere client 官网���载
» vsphere 5.0 webclient
» vsphere web client скачаьт
» wsphere web client
» vmware web client 教程
» vsphere web client скачать установить
» vsphere web client vsphere client 違い
» vmware vsphere web client 使い方
» vsphere web client 51cto
» vmware vsphere web client 期刊
In this post, I am not going to discuss about any technical stuffs or troubleshooting. This Post is purely to easy of vSphere Admins who want to download the VMware vSphere Client. I have athered the Download link of all versions of vSphere Client starting from vSphere Client v4.1 Update 1 to the latest release vSphere Client 6.0 Update 3. Just click on the vSphere Client Image in the below table to directly download the respective vSphere Client version.
vSphere Client VersionInstaller File NameDownload Link (Click on the Image to Download)VMware vSphere Client v4.1 Update 1VMware-viclient-all-4.1.0-345043.exeVMware vSphere Client v4.1 Update 2VMware-viclient-all-4.1.0-491557.exeVMware vSphere Client v4.1 Update 3VMware-viclient-all-4.1.0-799345.exeVMware vSphere Client v5.0VMware-viclient-all-5.0.0-455964.exeVMware vSphere Client v5.0 Update 1VMware-viclient-all-5.0.0-623373.exeVMware vSphere Client v5.0 Update 2VMware-viclient-all-5.0.0-913577.exevSphere Client v5.0 Update 3VMware-viclient-all-5.0.0-1300600.exeVMware vSphere Client v5.1VMware-viclient-all-5.1.0-786111.exeVMware vSphere Client 5.1.0aVMware-viclient-all-5.1.0-860230.exeVMware vSphere Client 5.1.0bVMware-viclient-all-5.1.0-941893.exevSphere Client 5.1 Update 1VMware-viclient-all-5.1.0-1064113.exeVMware vSphere Client 5.1 Update 1bVMware-viclient-all-5.1.0-1235233.exe vSphere Client 5.1 Update 2VMware-viclient-all-5.1.0-11471691.exeVMware vSphere Client 5.5VMware-viclient-all-5.5.0-1281650.exevSphere Client 5.5 Update 1VMware-viclient-all-5.5.0-1618071.exeVMware vSphere Client 5.5 Update 2VMware-viclient-all-5.5.0-1993072.exe
vSphere Client 5.5
Update 1b
VMware-viclient-all-5.5.0-1880841.exeVMware vSphere Client 5.5 Update CVMware-viclient-all-5.5.0-1745234.exeVMware vSphere Client 5.5 Update 1aVMware-viclient-all-5.5.0-1746248.exvSphere Client 5.5 Update 3VMware-viclient-all-5.5.0-3024345.exevSphere Client 5.5 Update 3eVMware-viclient-all-5.5.0-4032365.exeVMware vSphere Client 6.0VMware-viclient-all-6.0.0-2502222.exevSphere Client 6.0 Update 1VMware-viclient-all-6.0.0-3016447.exevSphere Client 6.0 Update 2VMware-viclient-all-6.0.0-3562874.exevSphere Client 6.0 Update 2aVMware-viclient-all-6.0.0-4437566.exeVMware vSphere Client 6.0 Update 3VMware-viclient-all-6.0.0-5112508.exe
I hope this is informative for you. Thanks for reading!!. Be Social and share it in social media,if you feel worth sharing it.
vSphere 6.5 Blog posts:
What’s New with VMware vSphere 6.5? vSphere 6.5 -What’s New with vCenter 6.5? What’s New with Virtual SAN 6.5? – New Features Overview vSphere 6.5 -What’s New with vSphere 6.5 HA & DRS vSphere 6.5 – What’s is in VMware vSphere 6.5 Fault Tolerance? Download VMware vSphere 6.5 – Get your Copy to Evaluate!!! vSphere 6.5 – Deploying vCenter appliance 6.5 Deploying vCenter 6.5 External Platform Services Controller Deploying vCenter Server appliance 6.5 with External PSC vSphere 6.5 – Configuring vCenter Server 6.5 HA vSphere 6.5 – vCenter 6.5 Native HA Failover Testing vSphere 6.5 Configuration Maximums – What’s New? vSphere 6.5 – How VM’s are Secured using vSphere 6.5 Security Features? Migrate Windows vCenter Server 6.0 to vCenter Server appliance 6.5
Vsphere For Mac
vCenter Server Appliance 6.5 Posts


The Ultimate Revelation Of Reset VCSA 6.5 Root Password in 60 seconds 6 Basic Commands to Interact with VCSA 6.5 Embedded VPostgres Database 6 Tips for Configuring Firewall To Manage VCSA 6.5 Postgres Database Remotely You Can Learn From VMwareArena How to Connect VCSA 6.5 Embedded Postgres Database using pgAdmin (With GUI) -VMware Unsupported WinSCP Connection to VCSA failed – “Received too large SFTP packet” How to Backup vCenter Appliance 6.5 Embedded Postgres Database How to Monitor vCenter Server Appliance 6.5 performance using vimtop Become an Expert on vCenter Server appliance Log File Location in 120 seconds How to Backup And Restore VCSA 6.5 – The Ultimate Cheatsheet How to Join VCSA 6.5 to Active Directory Domain from Web Client How to Configure Active Directory Authentication for vCenter Server 6.5
0 notes
Text
Using external Kerberos authentication with Amazon RDS for PostgreSQL
In the first post in this series, Preparing on-premises and AWS environments for external Kerberos authentication for Amazon RDS, we built the infrastructure for a one-way forest trust between an on-premises Microsoft Active Directory (AD) domain (trust: incoming) and an AWS Managed Microsoft AD domain (trust: outgoing) provided by AWS Directory Service. In this post, we walk through how to join an Amazon RDS for PostgreSQL instance to an AWS Managed Microsoft AD and demonstrate user authentication for Amazon RDS for PostgreSQL using external Kerberos and Microsoft AD. Prerequisites Before we start, make sure that you have prepared your on-premises and AWS environments, as shown in the following architectural diagram, including one on-premises AD user joedoe@onprem and one Windows and one Linux client, which are joined to the on-premises AD domain onprem.local. Creating RDS for PostgreSQL instances and joining them to an AWS Managed Microsoft AD domain We first create RDS for PostgreSQL instances in aws-acc-1 and aws-acc-2 and join the instance to AWS Managed Microsoft AD. Log in to the Amazon RDS console from aws-acc-1. Create the DB subnet group aws-acc-1-db-subnet-group, which covers the three subnets in aws-acc-1-rds-vpc. Create the security group aws-acc-1-rds-vpc-allow-connection to allow connection from on-premises clients (in on-prem-client-vpc) to access Amazon RDS for PostgreSQL via TCP on port 5432. On the Amazon RDS console, create the RDS for PostgreSQL instance rpg-acc-1-kerberos-12-2 in the DB subnet group aws-acc-1-db-subnet-group. For VPC security group, select Choose existing. Choose the security group you created. For Database authentication options, select Password and Kerberos authentication. Choose Browse Directory. In the Choose directory section, select myaws.com. Choose Choose. You can now see ad.myaws.com in the Directory field. After successfully creating the RDS for PostgreSQL instance, we see that the instance has joined the AWS Managed Microsoft AD, and the directory status shows as kerberos-enabled. We can also verify the directory status via the AWS Command Line Interface (AWS CLI). See the following code: [joedoe@ip-10-11-1-23 ~]$ aws rds describe-db-instances > --db-instance-identifier rpg-acc-1-kerberos-12-2 > --query 'DBInstances[*].DomainMemberships' > --region ap-southeast-2 > --profile aws-acc-1 > --output table --------------------------------------------------------------------------------------------------- | DescribeDBInstances | +--------------+---------------+---------------------------------------------+--------------------+ | Domain | FQDN | IAMRoleName | Status | +--------------+---------------+---------------------------------------------+--------------------+ | d-97671c6bae| ad.myaws.com | rds-directoryservice-kerberos-access-role | kerberos-enabled | +--------------+---------------+---------------------------------------------+--------------------+ You can also create the RDS for PostgreSQL instances via the AWS CLI: aws rds create-db-instance --db-instance-identifier rpg-acc-1-kerberos-12-2 --db-instance-class db.r5.large --engine postgres --port 5432 --master-username postgres --master-user-password mysecurepassword --db-subnet-group-name aws-acc-1-db-subnet-group --vpc-security-group-ids sg-0f3e336a3baeab672 --allocated-storage 100 --domain d-97671c6bae --domain-iam-role-name rds-directoryservice-kerberos-access-role For Amazon RDS for PostgreSQL to call AWS Directory Service for you, you need an AWS Identity and Access Management (IAM) role that uses the managed IAM policy AmazonRDSDirectoryServiceAccess. When you create a DB instance on the AWS Management Console and the console user has the iam:CreateRole permission, the console creates this role automatically. For this use case, the role name is rds-directoryservice-kerberos-access-role. For instructions on creating the role manually, see Create an IAM Role for Amazon Aurora to Access the AWS Directory Service. When you create this role, choose Directory Service, and attach the AWS managed policy AmazonRDSDirectoryServiceAccess to it. For existing RDS for PostgreSQL instances, we can modify the instance to join the AWS Managed Microsoft AD from the Amazon RDS console, or the AWS CLI: aws rds modify-db-instance --db-instance-identifier rpg-acc-1-kerberos-12-2 --domain d-97671c6bae --domain-iam-role-name rds-directoryservice-kerberos-access-role --apply-immediately Repeat these steps in aws-acc-2 to create an RDS for PostgreSQL instance and join the instance to the shared AWS Managed Microsoft AD, with following details: Instance name – rpg-acc-2-kerberos-12-2 DB subnet groups – aws-acc-2-db-subnet-group Security group – aws-acc-2-rds-vpc-allow-connection Database authentication options – Password and Kerberos authentication Directory – myaws.com (d-97671c1f8c), shared by aws-acc-1 On the Amazon RDS console, make sure the RDS for PostgreSQL instance in aws-acc-2 has joined the shared AWS Managed Microsoft AD successfully. We can also verify the status via the AWS CLI: [joedoe@ip-10-11-1-23 ~]$ aws rds describe-db-instances > --db-instance-identifier rpg-acc-2-kerberos-12-2 > --query 'DBInstances[*].DomainMemberships' > --region ap-southeast-2 > --profile aws-acc-2 > --output table --------------------------------------------------------------------------------------------------- | DescribeDBInstances | +--------------+---------------+---------------------------------------------+--------------------+ | Domain | FQDN | IAMRoleName | Status | +--------------+---------------+---------------------------------------------+--------------------+ | d-97671c1f8c| ad.myaws.com | rds-directoryservice-kerberos-access-role | kerberos-enabled | +--------------+---------------+---------------------------------------------+--------------------+ In on-prem-account, log in to the Windows client and install the pgAdmin and psql Log in to the newly created RDS for PostgreSQL instance in aws-acc-1 with the primary user account. Create the DB user [email protected] and grant the rds_ad role to this user. The username in PostgreSQL is case-sensitive. Kerberos authentication requires that the domain suffix of the username be in uppercase; the case of user account name joedoe needs to match the case of User logon name (pre-Windows 2000) in the AD, as shown in the following screenshot. Log in to the newly created RDS for PostgreSQL instance in aws-acc-2 with the primary user account. Create the DB user [email protected] and grant the rds_ad role to this user. Logging in to RDS for PostgreSQL instances on a Windows platform To use external Kerberos and Microsoft AD to log in to the RDS for PostgreSQL instances on a Windows platform, we need to use a special endpoint. Instead of using the Amazon domain rds.amazonaws.com in the endpoint, use the domain name of the AWS Managed Microsoft AD. For example, to connect to the RDS for PostgreSQL instance rpg-acc-1-kerberos-12-2 created in aws-acc-1, instead of using rpg-acc-1-kerberos-12-2.cz54v71h2eg5.ap-southeast-2.rds.amazonaws.com as the endpoint, we use the special endpoint rpg-acc-1-kerberos-12-2.cz54v71h2eg5.ap-southeast-2.ad.myaws.com, where ad.myaws.com is the domain name of the AWS Managed Microsoft AD. For more information, see Connecting to PostgreSQL with Kerberos Authentication. Log in as AD user joedoe@onprem to the Windows client that is joined to the on-premises domain onprem.local. Log in to the RDS for PostgreSQL instance created in aws-acc-1 with the special instance endpoint as DB user [email protected] (no password is required for psql). Log in to the RDS for PostgreSQL instance created in aws-acc-2. This instance joined the AWS Managed Microsoft AD that is shared by aws-acc-1. The connections to the special endpoints can be established successfully without a password. We can also connect to the RDS for PostgreSQL instance with the special endpoint without a password from the pgAdmin application. See the following screenshots. The following screenshot shows that external Kerberos authentication works for the special instance endpoint in pgAdmin for Amazon RDS for PostgreSQL created in aws-acc-1 and aws-acc-2. Logging in to RDS for PostgreSQL instances on a Linux platform To use external Kerberos and Microsoft AD to log in to the RDS for PostgreSQL instances on a Linux platform, you don’t need to use the special endpoint. Both the original endpoint (ending with rds.amazonrds.com) and special endpoint (ending with ad.myaws.com) work. Install the psql client on Linux, which you created and configured in the post Preparing on-premises and AWS environments for external Kerberos authentication for Amazon RDS. Log in to the Linux client as AD user joedoe@onprem. Use the kinit command to get a Kerberos ticket from onprem.local. Log in to the RDS for PostgreSQL instance in aws-acc-1; with both the original and special endpoint, no password is required. Log in to the RDS for PostgreSQL instance in aws-acc-2; with both the original and special endpoint, no password is required. Summary In this post, we demonstrated DB user authentication for Amazon RDS for PostgreSQL using external Kerberos and Microsoft AD, based on a one-way forest trust between an on-premises AD domain and an AWS Managed Microsoft AD domain. For instructions on creating this trust environment, see Preparing on-premises and AWS environments for external Kerberos authentication for Amazon RDS. About the Author Zhen Wang is an RDS Cloud Support Engineer at Amazon Web Services.’. https://aws.amazon.com/blogs/database/using-external-kerberos-authentication-with-amazon-rds-for-postgresql/
0 notes
Text
What It Takes to Migrate Alfresco Content and Database from Community 4.2 (PostgreSQL) to Enterprise 5.2 (MySQL)
The Alfresco platform has transformed the way people interact with enterprise information. Globally, companies can respond to changing business requirements and growing competition with ease, thanks to the Alfresco platform. Now, this digital business platform becomes more robust and powerful with a newer version. Now, you can update the existing Alfresco Community 4.2 to Alfresco Enterprise 5.2 and make your business more capable than ever.
Read the blog for How to Integrate Alfresco Login API With Standalone Native Android Application
Here we show how you can perform the migration from Alfresco Community 4.2 (PostgreSQL) to Alfresco Enterprise 5.2 (MySQL):
1) Stop Alfresco 4.2 server and take a backup of PostgreSQL database in a dump file.
Steps for taking dump file:
Start only Postgres service in 4.2
Create blank file called “42dump” on desktop (without any file extension)
Get Alfresco DB properties from \Alfresco_Installation\tomcat\shared\classes\alfresco-global.properties file
Run this command: pg_dump -p 5433 -U alfresco -h localhost alfresco > “C:\Users\XXXX\Desktop\42dump”
Check dump file size
Reference: https://www.postgresql.org/docs/9.1/static/backup-dump.html
Or use pgadmin tool – https://www.pgadmin.org/download/pgadmin-4-windows/
2) Install new Alfresco Enterprise 4.2.8 with PostgreSQL database.
At Concentric, we strive to address all ECM content or database migration and customization requirements with the Alfresco platform. Feel free to contact us with your business needs and we will provide you with a customized solution.
For more steps original source here: What It Takes to Migrate Alfresco Content and Database from Community 4.2 (PostgreSQL) to Enterprise 5.2 (MySQL)
0 notes
Photo

Learn PostgreSQL - Full Course for Beginners ☞ http://on.edusavecoupon.net/dc7fc4eeca #SQL #PostgreSQL #Databases #Codequs #Morioh
#SQL#postgresql#structured query language#postgresql course#sql tutorial#learn sql#postgresql tutorial#database#postgresql tutorial for beginners#databases#postgres#ingres#relational database#postquel#windows 10#installation#pgadmin#sql beginners#sql course#sql lesson#sql video#sql video tutorial#sql video tutorial for beginners#postgres tutorial#postgressql#history of postgresql#what is postgres#what is postgresql#sql#codequs
0 notes