#postgres configuration in spring boot
Explore tagged Tumblr posts
Visit Tumblr Blog
Explore Tumblr blogs with no restrictions, modern design and the best experience.
Last Seen Tumblr Blogs


Fun Fact
12.7% of mobile users access Tumblr.
Text
Using Docker for Full Stack Development and Deployment

1. Introduction to Docker
What is Docker? Docker is an open-source platform that automates the deployment, scaling, and management of applications inside containers. A container packages your application and its dependencies, ensuring it runs consistently across different computing environments.
Containers vs Virtual Machines (VMs)
Containers are lightweight and use fewer resources than VMs because they share the host operating system’s kernel, while VMs simulate an entire operating system. Containers are more efficient and easier to deploy.
Docker containers provide faster startup times, less overhead, and portability across development, staging, and production environments.
Benefits of Docker in Full Stack Development
Portability: Docker ensures that your application runs the same way regardless of the environment (dev, test, or production).
Consistency: Developers can share Dockerfiles to create identical environments for different developers.
Scalability: Docker containers can be quickly replicated, allowing your application to scale horizontally without a lot of overhead.
Isolation: Docker containers provide isolated environments for each part of your application, ensuring that dependencies don’t conflict.
2. Setting Up Docker for Full Stack Applications
Installing Docker and Docker Compose
Docker can be installed on any system (Windows, macOS, Linux). Provide steps for installing Docker and Docker Compose (which simplifies multi-container management).
Commands:
docker --version to check the installed Docker version.
docker-compose --version to check the Docker Compose version.
Setting Up Project Structure
Organize your project into different directories (e.g., /frontend, /backend, /db).
Each service will have its own Dockerfile and configuration file for Docker Compose.
3. Creating Dockerfiles for Frontend and Backend
Dockerfile for the Frontend:
For a React/Angular app:
Dockerfile
FROM node:14 WORKDIR /app COPY package*.json ./ RUN npm install COPY . . EXPOSE 3000 CMD ["npm", "start"]
This Dockerfile installs Node.js dependencies, copies the application, exposes the appropriate port, and starts the server.
Dockerfile for the Backend:
For a Python Flask app
Dockerfile
FROM python:3.9 WORKDIR /app COPY requirements.txt . RUN pip install -r requirements.txt COPY . . EXPOSE 5000 CMD ["python", "app.py"]
For a Java Spring Boot app:
Dockerfile
FROM openjdk:11 WORKDIR /app COPY target/my-app.jar my-app.jar EXPOSE 8080 CMD ["java", "-jar", "my-app.jar"]
This Dockerfile installs the necessary dependencies, copies the code, exposes the necessary port, and runs the app.
4. Docker Compose for Multi-Container Applications
What is Docker Compose? Docker Compose is a tool for defining and running multi-container Docker applications. With a docker-compose.yml file, you can configure services, networks, and volumes.
docker-compose.yml Example:
yaml
version: "3" services: frontend: build: context: ./frontend ports: - "3000:3000" backend: build: context: ./backend ports: - "5000:5000" depends_on: - db db: image: postgres environment: POSTGRES_USER: user POSTGRES_PASSWORD: password POSTGRES_DB: mydb
This YAML file defines three services: frontend, backend, and a PostgreSQL database. It also sets up networking and environment variables.
5. Building and Running Docker Containers
Building Docker Images:
Use docker build -t <image_name> <path> to build images.
For example:
bash
docker build -t frontend ./frontend docker build -t backend ./backend
Running Containers:
You can run individual containers using docker run or use Docker Compose to start all services:
bash
docker-compose up
Use docker ps to list running containers, and docker logs <container_id> to check logs.
Stopping and Removing Containers:
Use docker stop <container_id> and docker rm <container_id> to stop and remove containers.
With Docker Compose: docker-compose down to stop and remove all services.
6. Dockerizing Databases
Running Databases in Docker:
You can easily run databases like PostgreSQL, MySQL, or MongoDB as Docker containers.
Example for PostgreSQL in docker-compose.yml:
yaml
db: image: postgres environment: POSTGRES_USER: user POSTGRES_PASSWORD: password POSTGRES_DB: mydb
Persistent Storage with Docker Volumes:
Use Docker volumes to persist database data even when containers are stopped or removed:
yaml
volumes: - db_data:/var/lib/postgresql/data
Define the volume at the bottom of the file:
yaml
volumes: db_data:
Connecting Backend to Databases:
Your backend services can access databases via Docker networking. In the backend service, refer to the database by its service name (e.g., db).
7. Continuous Integration and Deployment (CI/CD) with Docker
Setting Up a CI/CD Pipeline:
Use Docker in CI/CD pipelines to ensure consistency across environments.
Example: GitHub Actions or Jenkins pipeline using Docker to build and push images.
Example .github/workflows/docker.yml:
yaml
name: CI/CD Pipeline on: [push] jobs: build: runs-on: ubuntu-latest steps: - name: Checkout Code uses: actions/checkout@v2 - name: Build Docker Image run: docker build -t myapp . - name: Push Docker Image run: docker push myapp
Automating Deployment:
Once images are built and pushed to a Docker registry (e.g., Docker Hub, Amazon ECR), they can be pulled into your production or staging environment.
8. Scaling Applications with Docker
Docker Swarm for Orchestration:
Docker Swarm is a native clustering and orchestration tool for Docker. You can scale your services by specifying the number of replicas.
Example:
bash
docker service scale myapp=5
Kubernetes for Advanced Orchestration:
Kubernetes (K8s) is more complex but offers greater scalability and fault tolerance. It can manage Docker containers at scale.
Load Balancing and Service Discovery:
Use Docker Swarm or Kubernetes to automatically load balance traffic to different container replicas.
9. Best Practices
Optimizing Docker Images:
Use smaller base images (e.g., alpine images) to reduce image size.
Use multi-stage builds to avoid unnecessary dependencies in the final image.
Environment Variables and Secrets Management:
Store sensitive data like API keys or database credentials in Docker secrets or environment variables rather than hardcoding them.
Logging and Monitoring:
Use tools like Docker’s built-in logging drivers, or integrate with ELK stack (Elasticsearch, Logstash, Kibana) for advanced logging.
For monitoring, tools like Prometheus and Grafana can be used to track Docker container metrics.
10. Conclusion
Why Use Docker in Full Stack Development? Docker simplifies the management of complex full-stack applications by ensuring consistent environments across all stages of development. It also offers significant performance benefits and scalability options.
Recommendations:
Encourage users to integrate Docker with CI/CD pipelines for automated builds and deployment.
Mention the use of Docker for microservices architecture, enabling easy scaling and management of individual services.
WEBSITE: https://www.ficusoft.in/full-stack-developer-course-in-chennai/
0 notes
Text
Setting up a local PostgreSQL database for a Spring Boot JPA (Java Persistence API) application involves several steps. Below, I'll guide you through the process:
1. Install PostgreSQL:
Download and install PostgreSQL from the official website: PostgreSQL Downloads.
During the installation, remember the username and password you set for the PostgreSQL superuser (usually 'postgres').
2. Create a Database:
Open pgAdmin or any other PostgreSQL client you prefer.
Log in using the PostgreSQL superuser credentials.
Create a new database. You can do this through the UI or by running SQL command:sqlCopy codeCREATE DATABASE yourdatabasename;
3. Add PostgreSQL Dependency:
Open your Spring Boot project in your favorite IDE.
Add PostgreSQL JDBC driver to your pom.xml if you're using Maven, or build.gradle if you're using Gradle. For Maven, add this dependency:xmlCopy code<dependency> <groupId>org.postgresql</groupId> <artifactId>postgresql</artifactId> <version>42.2.24</version> <!-- Use the latest version --> </dependency>
4. Configure application.properties:
In your application.properties or application.yml file, configure the PostgreSQL database connection details:propertiesCopy codespring.datasource.url=jdbc:postgresql://localhost:5432/yourdatabasename spring.datasource.username=postgres spring.datasource.password=yourpassword spring.jpa.properties.hibernate.dialect=org.hibernate.dialect.PostgreSQLDialect spring.jpa.hibernate.ddl-auto=update
5. Create Entity Class:
Create your JPA entity class representing the database table. Annotate it with @Entity, and define the fields and relationships.
For example:javaCopy code@Entity public class YourEntity { @Id @GeneratedValue(strategy = GenerationType.IDENTITY) private Long id; private String name; // other fields, getters, setters }
6. Create Repository Interface:
Create a repository interface that extends JpaRepository for your entity. Spring Data JPA will automatically generate the necessary CRUD methods.
For example:javaCopy codepublic interface YourEntityRepository extends JpaRepository<YourEntity, Long> { // custom query methods if needed }
7. Use the Repository in Your Service:
Inject the repository interface into your service class and use it to perform database operations.
8. Run Your Spring Boot Application:
Run your Spring Boot application. Spring Boot will automatically create the necessary tables based on your entity classes and establish a connection to your PostgreSQL database.
That's it! Your Spring Boot JPA application is now connected to a local PostgreSQL database. Remember to handle exceptions, close connections, and follow best practices for security, especially when dealing with sensitive data and database connections
Call us on +91-84484 54549
Mail us on [email protected]
Website: Anubhav Online Trainings | UI5, Fiori, S/4HANA Trainings
youtube
0 notes
Text
Spring Boot Microservice Project with Postgres DB Tutorial with Java Example for Beginners
Full Video Link: https://youtu.be/iw4wO9gEb50 Hi, a new #video on #springboot #microservices with #postgres #database is published on #codeonedigest #youtube channel. Complete guide for #spring boot microservices with #postgressql. Learn #programming #
In this video, we will learn, how to download, install postgres database, how to integrate Postgres database with a Spring Boot Microservice Application and perform different CRUD operations i.e. Create, Read, Update, and Delete operations on the Customer entity. Spring Boot is built on the top of the spring and contains all the features of spring. And is becoming a favorite of developers these…

View On WordPress
#database#microservices#microservices postgres#postgres#postgres and pgadmin install#postgres and pgadmin install mac os#postgres and pgadmin install ubuntu#postgres and pgadmin install windows#postgres and pgadmin install windows 10#postgres and pgadmin install windows11#postgres config file location#postgres config file max#postgres config file ubuntu#postgres config file windows#postgres configuration#postgres configuration file#postgres configuration in spring boot#postgres configuration parameters#postgres configuration settings#postgres configure replication#postgres connection command line#postgres connection in java#postgres connection to server#postgres database#postgres database configuration#postgres database setup#postgres db#postgres docker#postgres installation#postgres installation error
0 notes
Text
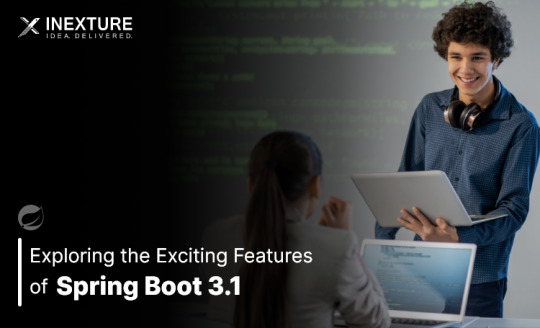
Exploring the Exciting Features of Spring Boot 3.1
Spring Boot is a popular Java framework that is used to build robust and scalable applications. With each new release, Spring Boot introduces new features and enhancements to improve the developer experience and make it easier to build production-ready applications. The latest release, Spring Boot 3.1, is no exception to this trend.
In this blog post, we will dive into the exciting new features offered in Spring Boot 3.1, as documented in the official Spring Boot 3.1 Release Notes. These new features and enhancements are designed to help developers build better applications with Spring Boot. By taking advantage of these new features, developers can build applications that are more robust, scalable, and efficient.
So, if you’re a developer looking to build applications with Spring Boot, keep reading to learn more about the exciting new features offered in Spring Boot 3.1!
Feature List:
1. Dependency Management for Apache HttpClient 4:
Spring Boot 3.0 includes dependency management for both HttpClient 4 and 5.
Spring Boot 3.1 removes dependency management for HttpClient 4 to encourage users to move to HttpClient 5.2. Servlet and Filter Registrations:
The ServletRegistrationBean and FilterRegistrationBean classes will now throw an IllegalStateException if registration fails instead of logging a warning.
To retain the old behaviour, you can call setIgnoreRegistrationFailure(true) on your registration bean.3. Git Commit ID Maven Plugin Version Property:
The property used to override the version of io.github.git-commit-id:git-commit-id-maven-plugin has been updated.
Replace git-commit-id-plugin.version with git-commit-id-maven-plugin.version in your pom.xml.4. Dependency Management for Testcontainers:
Spring Boot’s dependency management now includes Testcontainers.
You can override the version managed by Spring Boot Development using the testcontainers.version property.5. Hibernate 6.2:
Spring Boot 3.1 upgrades to Hibernate 6.2.
Refer to the Hibernate 6.2 migration guide to understand how it may affect your application.6. Jackson 2.15:
TestContainers
The Testcontainers library is a tool that helps manage services running inside Docker containers. It works with testing frameworks such as JUnit and Spock, allowing you to write a test class that starts up a container before any of the tests run. Testcontainers are particularly useful for writing integration tests that interact with a real backend service such as MySQL, MongoDB, Cassandra, and others.
Integration tests with Testcontainers take it to the next level, meaning we will run the tests against the actual versions of databases and other dependencies our application needs to work with executing the actual code paths without relying on mocked objects to cut the corners of functionality.
<dependency> <groupId>org.springframework.boot</groupId> <artifactId>spring-boot-testcontainers</artifactId> <scope>test</scope> </dependency> <dependency> <groupId>org.testcontainers</groupId> <artifactId>junit-jupiter</artifactId> <scope>test</scope> </dependency>
Add this dependency and add @Testcontainers in SpringTestApplicationTests class and run the test case
@SpringBootTest @Testcontainers class SpringTestApplicationTests { @Container GenericContainer<?> container = new GenericContainer<>("postgres:9"); @Test void myTest(){ System.out.println(container.getContainerId()+ " "+container.getContainerName()); assert (1 == 1); } }
This will start the docker container for Postgres with version 9

We can define connection details to containers using “@ServiceConnection” and “@DynamicPropertySource”.
a. ConnectionService
@SpringBootTest @Testcontainers class SpringTestApplicationTests { @Container @ServiceConnection static MongoDBContainer container = new MongoDBContainer("mongo:4.4"); }
Thanks to @ServiceConnection, the above configuration allows Mongo-related beans in the application to communicate with Mongo running inside the Testcontainers-managed Docker container. This is done by automatically defining a MongoConnectionDetails bean which is then used by the Mongo auto-configuration, overriding any connection-related configuration properties.
b. Dynamic Properties
A slightly more verbose but also more flexible alternative to service connections is @DynamicPropertySource. A static @DynamicPropertySource method allows adding dynamic property values to the Spring Environment.
@SpringBootTest @Testcontainers class SpringTestApplicationTests { @Container @ServiceConnection static MongoDBContainer container = new MongoDBContainer("mongo:4.4"); @DynamicPropertySource static void registerMongoProperties(DynamicPropertyRegistry registry) { String uri = container.getConnectionString() + "/test"; registry.add("spring.data.mongodb.uri", () -> uri); } }
c. Using Testcontainers at Development Time
Test the application at development time, first we start the Mongo database our app won’t be able to connect to it. If we use Docker, we first need to execute the docker run command that runs MongoDB and exposes it on the local port.
Fortunately, with Spring Boot 3.1 we can simplify that process. We don’t have to Mongo before starting the app. What we need to do – is to enable development mode with Testcontainers.
<dependency> <groupId>org.springframework.boot</groupId> <artifactId>spring-boot-testcontainers</artifactId> <scope>test</scope> </dependency>
Then we need to prepare the @TestConfiguration class with the definition of containers we want to start together with the app. For me, it is just a single MongoDB container as shown below:
public class MongoDBContainerDevMode { @Bean @ServiceConnection MongoDBContainer mongoDBContainer() { return new MongoDBContainer("mongo:5.0"); } }
2. Docker Compose
If you’re using Docker to containerize your application, you may have heard of Docker Compose, a tool for defining and running multi-container Docker applications. Docker Compose is a popular choice for developers as it enables them to define a set of containers and their dependencies in a single file, making it easy to manage and deploy the application.
Fortunately, Spring Boot 3.1 provides a new module called spring-boot-docker-compose that provides seamless integration with Docker Compose. This integration makes it even easier to deploy your Java Spring Boot application with Docker Compose. Maven dependency for this is given below:
The spring-boot-docker-compose module automatically looks for a Docker Compose configuration file in the current working directory during startup. By default, the module supports four file types: compose.yaml, compose.yml, docker-compose.yaml, and docker-compose.yml. However, if you have a non-standard file type, don’t worry – you can easily set the spring.docker.compose.file property to specify which configuration file you want to use.
When your application starts up, the services you’ve declared in your Docker Compose configuration file will be automatically started up using the docker compose up command. This means that you don’t have to worry about manually starting and stopping each service. Additionally, connection details beans for those services will be added to the application context so that the services can be used without any further configuration.
When the application stops, the services will then be shut down using the docker compose down command.
This module also supports custom images too. You can use any custom image as long as it behaves in the same way as the standard image. Specifically, any environment variables that the standard image supports must also be used in your custom image.
Overall, the spring-boot-docker-compose module is a powerful and user-friendly tool that simplifies the process of deploying your Spring Boot application with Docker Compose. With this module, you can focus on writing code and building your application, while the module takes care of the deployment process for you.
Conclusion
Overall, Spring Boot 3.1 brings several valuable features and improvements, making it easier for developers to build production-ready applications. Consider exploring these new features and enhancements to take advantage of the latest capabilities offered by Spring Boot.
Originally published by: Exploring the Exciting Features of Spring Boot 3.1
#Features of Spring Boot#Application with Spring boot#Spring Boot Development Company#Spring boot Application development#Spring Boot Framework#New Features of Spring Boot
0 notes
Text
Lessons learned: Spring Data Postgres application configuration
Lessons learned: Spring Data Postgres application configuration
Scenario: During development of a Spring Boot application, with a PostgreSQL backend, we randomly observe errors such as:
hikaripool-1 - connection is not available, request timed out after 30000ms
FATAL: remaining connection slots are reserved for non-replication superuser connections
Solution:
There are a few checks to perform:
Ensure that you use the correct Spring annotations to support…
View On WordPress
0 notes
Video
youtube
Spring Boot Microservice Project with Postgres DB Tutorial with Java Exa...
Hi, a new #video on #springboot #microservices with #postgres #database is published on #codeonedigest #youtube channel. Complete guide for #spring boot microservices with #postgressql. Learn #programming #coding with #codeonedigest
#springboot #postgres #microservices #postgresdb #springboot #Springbootmicroserviceswithpostgres #stepbystepspringbootmicroserviceswithpostgressql #Springboottutorial #springboot #springbootproject #springboottutorialforbeginners #springbootannotations #springbootmicroservices #springbootfullcourse #springboottutorial #springbootprojectstepbystep #postgresjava #postgresinstallation #postgrestutorial #postgrestutorialforbeginners #Springbootmicroservicespostgresdatabase #springbootmicroservices #springbootmicroservicespostgressqlexample #springbootmicroservices #springbootmicroservices #springbootpostgressql #microservicespostgres #postgressqlmicroservicesexample #postgresandpgadmininstall #postgresandpgadmininstallwindows #postgresandpgadmininstallubuntu #postgresandpgadmininstallwindows11 #postgresandpgadmininstallmacos #postgresandpgadmininstallwindows10 #postgrespasswordreset #postgrestutorial #postgresdocker #postgresinstallationerror #postgres #postgresdatabase #rdbms #postgresdatabasesetup #postgresdatabaseconfiguration #database #relationaldatabase #postgresconfiguration #postgresconfigurationfile #postgresconfigurationparameters #postgresconfigfilelocation #postgresconfigurationinspringboot #postgresconfigfilewindows #postgresconfigfilemax #postgresconfigfileubuntu #postgresconfigurereplication
#youtube#spring boot microservice#spring boot#microservice#java#java microservice#springboot microservice#microservices#postgres#postgres database#postgres db#springboot microservices postgres#postgres installation#postgres setup#postgres configuration
1 note
·
View note