#rendering is getting more fun in csp
Explore tagged Tumblr posts
Visit Tumblr Blog
Explore Tumblr blogs with no restrictions, modern design and the best experience.
Last Seen Tumblr Blogs


Fun Fact
There are dozens of funny blogs to kill time on Tumblr.
Text

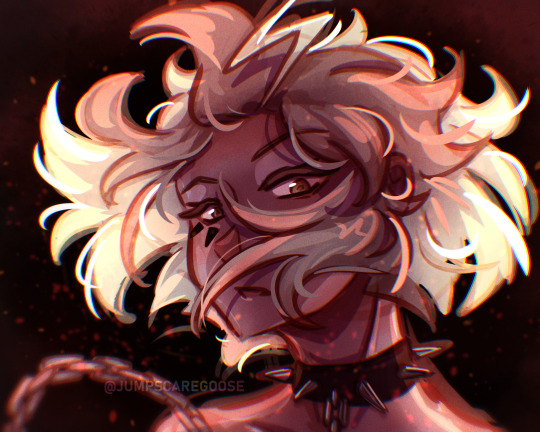
🗣️🗣️🗣️WARP TROTTERS AS PETS NOW!!!!
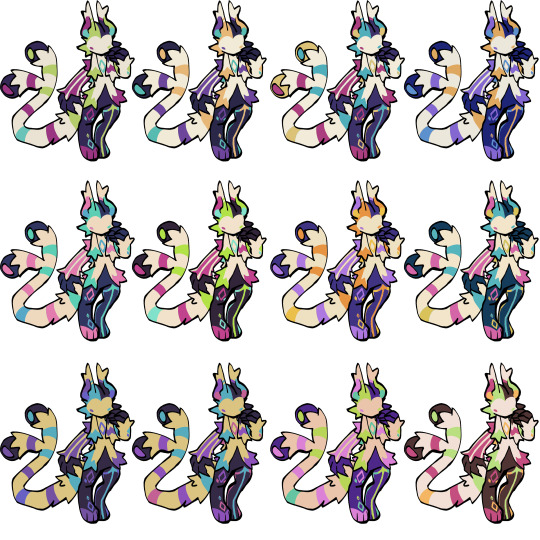
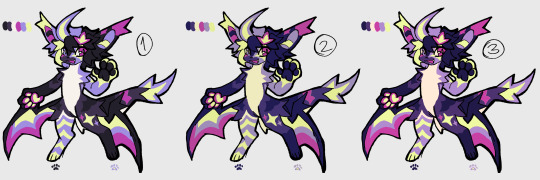
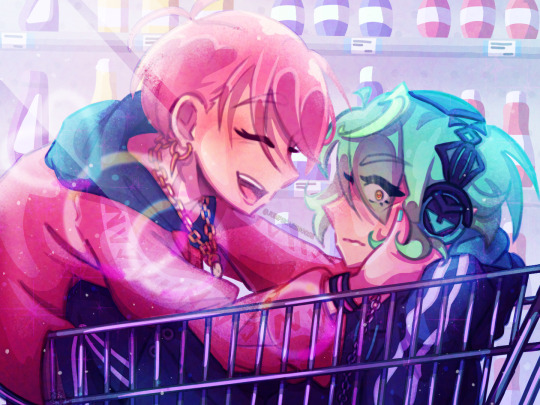
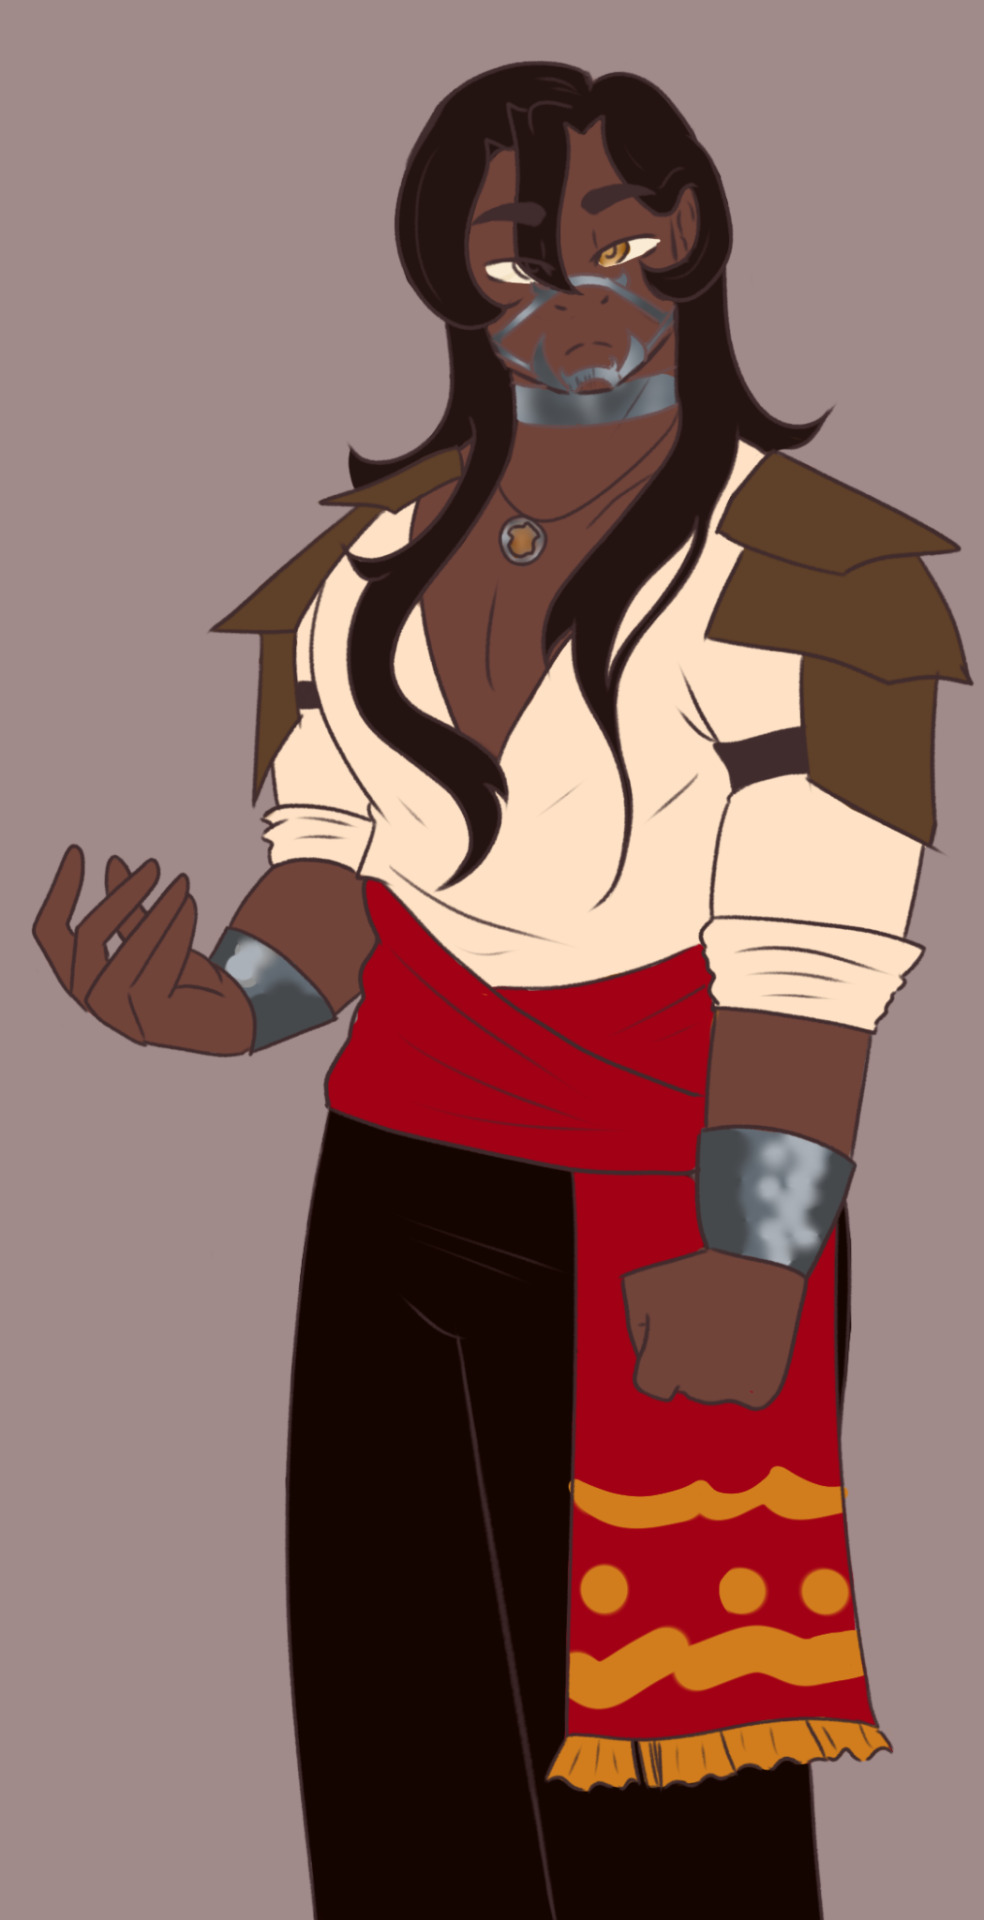
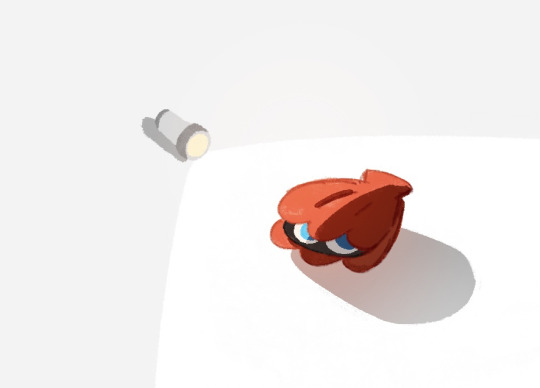
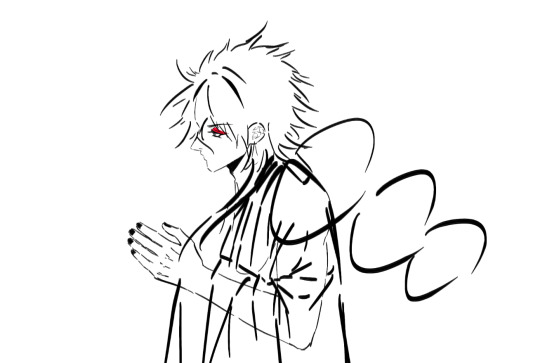
#my art#honkai star rail#hsr#hsr topaz#mihoyo doesnt get it… i need a personal warp trotter as my animal now!!!!#THATS LITERALLY MY DOG#this picture… referencing from holding my fat dog like a baby!!!#its funny to see the (leaked) animations of topaz like 1. my dog and 2. stocks!!!#rendering is getting more fun in csp#i just gotta streamline the process!!!!
193 notes
·
View notes
Note
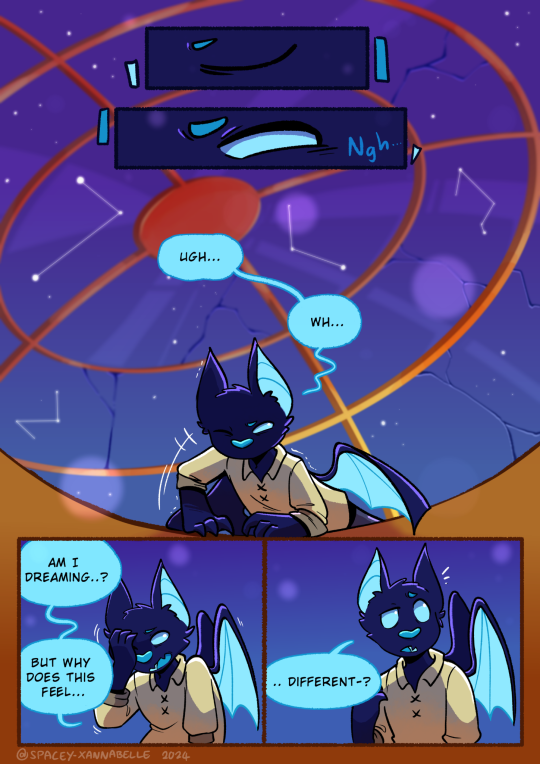
Can't help but imagine that in the Lucky Clover AU, if Frisk were to manage to sneak away and end up befriending Undyne and the skelebros whilst everyone in the Dunes is probably having a panic attack (maybe Flowey caused a distraction or something, like some scaffolding collapsing causing everyone to focus on figuring out how that happened, giving Frisk the ability to sneak away), by the time Martlet finds them they've already managed to make the Underground a bit safer for at least themself.
Doesn't stop them from being grounded though-
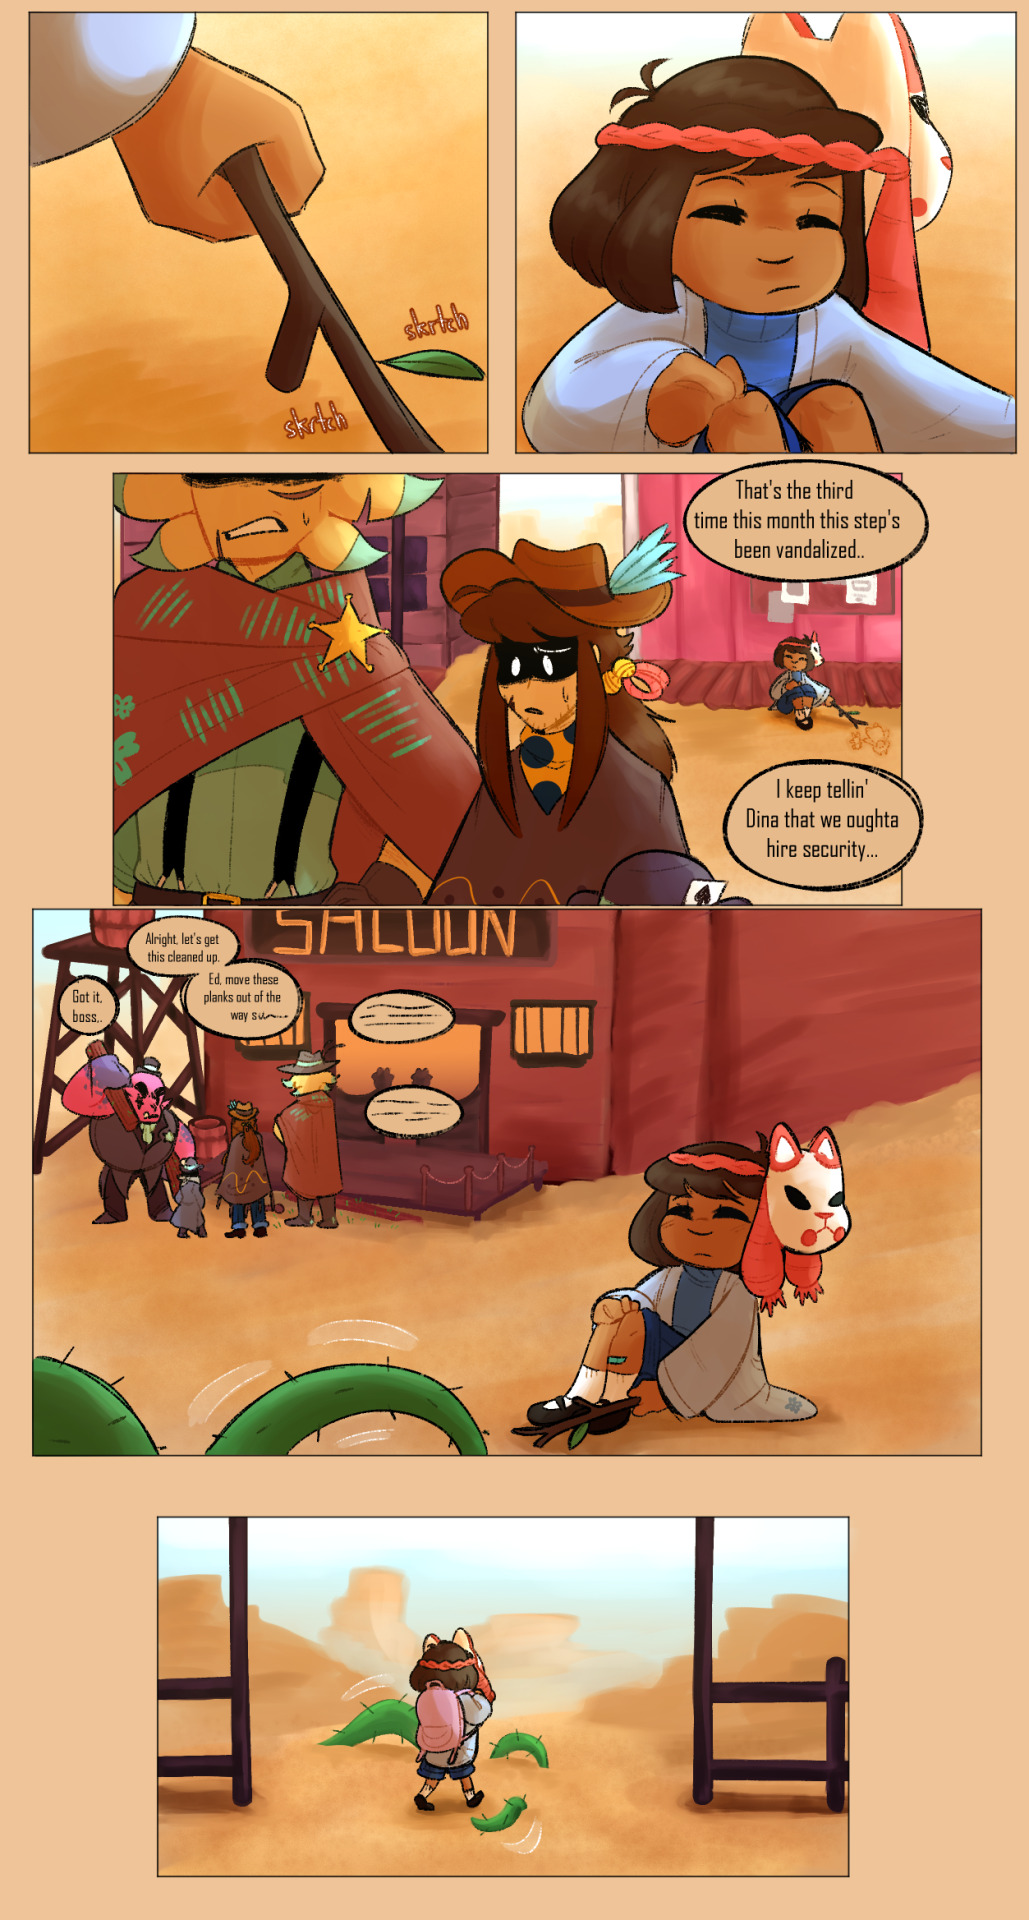


That's exactly the plot set up I had in mind for this AU!
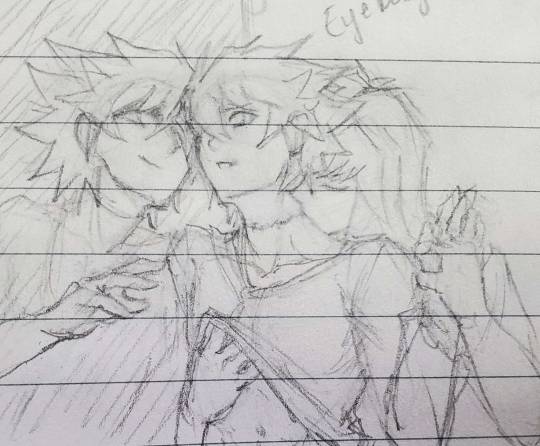
Even though Frisk is under very strict rules by Clover to not leave the Dunes without them, Frisk is constantly wandering off (perhaps influenced by a certain someone...) and exploring the other parts of the Underground. This is how Frisk eventually meets Papyrus, Sans, Undyne, Alphys, and others! And yes, Frisk is always grounded by Clover once they're eventually found and brought home. Doesn't stop them from sneaking out again, though. Clover is getting a taste of their own medicine trying to control this kid LOL.
#undertale yellow#uty#uty au#clover uty#starlo uty#ed uty#ace uty#feisty five uty#martlet uty#undertale#papyrus#sans#frisk#frisk ut#lucky clover au#the cowboy hat draws#Dear god so many tags for this fandom...#I tried rendering a bit more and adding color! I have learned I do not know how to render and color!#I really gotta up my game... this was still pretty fun though!#Even though I wish the final product came out better. But that's okay! Learning experience#Trying to get back in the groove of drawing and catching up on asks!#Also sorry for not using the fonts for the skelebros. A crime I know#CSP just doesn't like me using different fonts on the same canvas#Here to contribute to the Martlet and Papyrus best friend propaganda
355 notes
·
View notes
Text

ways they show each other love !
loads of rambles + clutter-less version below the cut
the yellow lines highlighting things is actually marking (almost) everywhere they touch since the primary theme of this piece is physical affection! the stars were just for fun
top left (kissing): pretty self explanatory! fun fact, it was the first thing i drew for this piece :)
top middle (hand on back): i was trying to sleep the other night and my brain suddenly went. drarry physical affection and that was the first thing i pictured! i kind of imagined this one as like... dracos stressed or something and harry just puts a nice comforting hand on his back
top right: the good ol pinkie hand hold,, link, ,think. yeah. no real thoughts behind this one. it fit the box and its cute
middle left (speech bubbles): one thing i see a lot (im pretty sure this is ((implied in)) canon as well, but dracos a big yapper! so its kinda showing here that harrys just listening to all hes got to say. probably my favourite one of the lot, i had fun rendering it. (looking at this post i too am a yapper)
middle (orange slices): theres this thing where you peel an orange for the people you love. you can look at it either way; draco providing food for harry, knowing his childhood food insecurity and always wanting to make sure he has something, or harry (whose love language is acts of service) giving something to draco, maybe after a long day
watermarked middle (draco constellation): just some fun symbolism i thought i might try to fit in
middle right (legs): in this theyre just chilling. dracos reading (the book didnt come across well ((i cant draw hands very well)).
right edge (flowers): these are narcissus flowers, also known as daffodils. a reference to narcissa malfoy, and also a reference i suppose to how she saved harry in the forest, because draco was alive, because harry saved him in the room of requirement
bottom left edge (flowers): these are lilies. partly to complete the circle of mothers saving sons saving the world, and partly because i wanted to fill space. (theyre fucking terrible to draw tho i do not recommend)
bottom left (hand in hair): well harrys hair is very luxurious as you can see and i imagine during cuddles draco cards his hand through it and teases out snarls and such. (i know hair pulling is something that can be seen as sexual, this isnt that and it isnt meant to be that and please dont see it as that :(
bottom watermark (stag): harrys patronus because why not
bottom middle: so this is a bit obscure but theres this post by @/iamnmbr3 that talks about a headcanon that they can share wands and its kind of special and intimate. so thats what ive depicted here. also for funsies harry has the draco constellation on his arm. not the big dipper. also i cant draw the dark mark for shit
bottom right (shoes): just a subtle way they can touch, not always big. just under the table or sitting on the sofa together, just to feel the other person there.
i knew i wanted a warm scheme and i knew i wanted orange and blue to play a big part in this. i was going to have warm colours on blue and cool colours on orange as a sort of contrast but that didnt end up working out.. the wand scene is an attempt at it except i mixed it up and made it cool on cool, its so washed out and i didnt bother to fix it

#this is my pride and joy#my art#drarry#drarry art#draco malfoy#harry potter#hp art#i will never make anything cooler than this /j#rendering this was so fun !#anyways i hope this gets more attention than that other doodle i did .. i worked hard on this one#im yapping too much its 3am time for me to eep. send post#made in csp#time taken: like 4 hours? idrk
213 notes
·
View notes
Text
Hey hey, I have a question for anyone who paints/draws using CSP, what brushes do you recommend?
I've been using the program for like 3 years but I have 1 non-default tool that i use, and i think it's time for me to switch it up a little 😅
#nics rambles#said tool is . the icecream lasso fill tool they use on drawfee. lifesaver when i do proper lineart#the only brushes i use to draw is the default pencil and the round mixing brush for colour brooo i need to get some variety#maybe it will make rendering more fun#clip studio paint#csp
3 notes
·
View notes
Note
hey so this is really random but i love the way you render your work ( i specifically saw the one of desert due cuddling by the window and i was just encapsulated by how the colours and shadows looked ) and was wondering if you have a time lapse of your process? i have been trying to achieve the vibe your art has in the way i colour and shade and i would love to learn by watching how you do your process?
i dont currently have a timelapse of that style but i'll try to record one if i use it for a smaller drawing, for now i do have some screenshots though.

i figure out the colors right after the sketch (i have the colors on top of the sketch with linear burn which gives the sketch a nice colored look, the sketch is usually a dark warm tone) and after the flats i select the sections by color and loosely fill in the shadows roughly in this pattern- the main color, shadow, darker shadow and bounce light, and in few places where it visually works, i add a streak of the darker shadow to outline the cross between the main and first shadow color (you can add another shadow layer in a few darker places if you need mor shading inside the shadow areas, colorpicking from the linear burned sketch can get great fitting colors for this as well)

then i merge the color and sketch to a new layer copy and start going over every bit one by one overpainting the shapes and cleaning the sketch, both rendering and lineart in one, but i try to still keep as much of the original sketch as i can. then i add another shadow with multiply layer and light with glow dodge, its good to figure out the multiply shadow at the start with the flat colors just to make sure you get the vibes right when its still rough. this is also where you airbrush more dark or light areas in the background, in places that could use more depth or seem too flat.
and finally i add some rimlight/highlight with a normal layer, as well as paint over any bits that may have looked off. and you're done. some things to keep in mind is to check your color values with a black and white filter layer to make sure nothing blends together too much. and to not over-render it. make regular copies of your rendering layer so that you can go back if you need to. the main brushes were CSP mechanical pencil for sketch and g pen for the rendering. of course none of these are a rule, pick out what you want and have fun :D
#asks#alot of this is probably very repetitive#im not great at explaining#hopefully it helped sfskhsdkfj
71 notes
·
View notes
Text
how i make color palettes of my ocs before i pick one, an art tutorial?
hello, whenever i made a new design for myself i found a way to make lots of color palettes and pick one! i see this method more in paintings and rendering but not much on character designs? here are some examples i used that on.
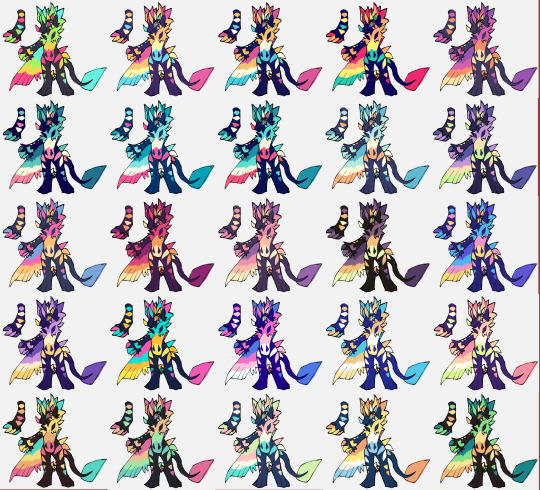
it helps me so much when i feel experimental with colors. here are what you need
a wip character design. sketchy or pixel art works better since the colors can have some anti aliasing issues
a program with gradient maps. i'm using clip studio paint but ik photoshop also has it. like i said this is used more on photos or paintings
and here's what you do!
draw your character. i'm making a new fursona for myself but anything should work.
2. decide on their markings/color placement in grayscale. i recommend doing grayscale so you can easily see the values. split your grays into however colors you want. i like doing 5-6 the most. i reccomend duplicating the color layer if you wanna try multiple palettes.
3. this part is program dependent but in csp's case go to edit > tonal correction > gradient map.
4. i made a few default 5 color gradient maps but if don't use gradients like me i reccomend making the graph like this so they become solid color. split the map into however many colors you used. i'll add a color to the red-orange one bc my character has 6 grays.
5. replace the colors by clicking below specified color. it all depends on your creativity and what you want. experiment til you like it.
6. fuck around, try stuff, put them together to see if you like any of em. i made 9 to see if i can focus on one of them and i actually ended up loving the bottom right. it really makes them shiny
7. (optional) if you like a palette you can further and play with colors while keeping the palette. you can use color balance (in the same menu as gradient map in csp) or layers to mess around, have fun!
also a color tip because people seem to compliment that a lot in my art: digital art has millions of colors! don't be afraid of using wacky tones unless you're going pantone. if you want to get something physical i recommend being open to alternative colors as they tend to be more limited. i know whoever is doing it will try their best to keep the colors close.
color theory is something i don't...care much about mostly because this is something i'm doing for fun. i'll consider it in professional work.
#artists on tumblr#digital art#ika's showtime#ikarnival#art tutorial#art tips#drawing tips#art resources#clip studio paint
420 notes
·
View notes
Text
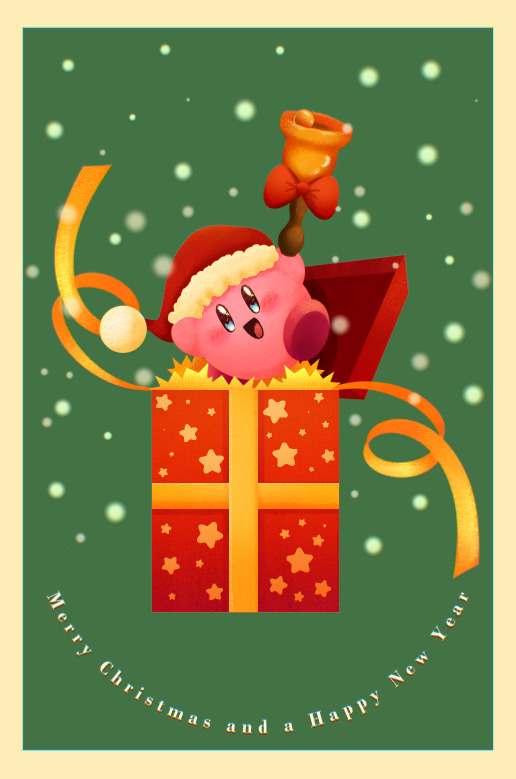
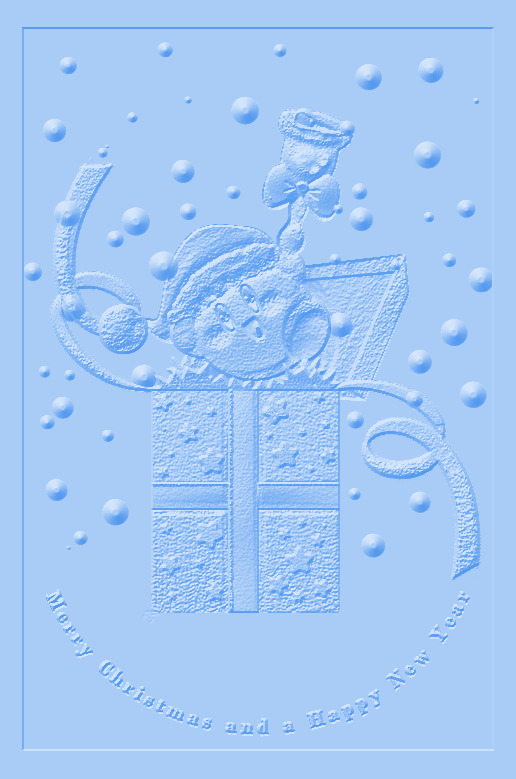
Merry Christmas and a Happy New Year!!!
Fun fact, in making this image it was surprisingly my most easiest yet visually pleasing work. I've always viewed at as a graph like this
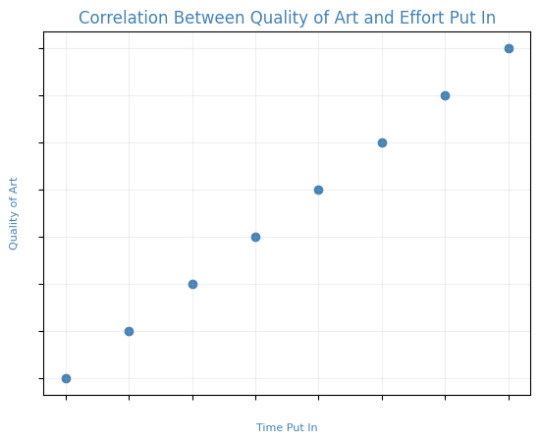
Of course, that isn't true! It's more like this
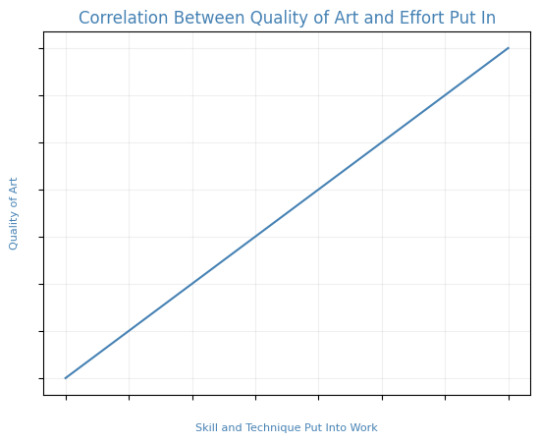
That is to say, I believe this illustration allowed me to focus on the efficient fundamentals I built!

Everything here was rendered with only three brushes. All of them the default brushes that come with CSP. Which includes Pastel, Airbrush, and Mechanical Pencil. Because it was a lineless style, that means I could be a lot more forgiving of mistakes here and there. Something doesn't look right? All I gotta do is add a little more with the GPen to the shape. Or can I just draw an outline in the color I want and fill it in with the bucket tool with a area scaling of 0.10! I have to practice more with lineless styles, it is fun! Rendering was a breeze too.
Which was a simple process of:
Create shape > Shade with Airbrush > Highlight with Airbrush > Shade with Pastel > Multiply Shading > Lower Multiply Layer Opacity > Overlay with Textured Fill > Move Textured Fill Layer > Finished!
It's a few steps, but once you get into the groove, it becomes very efficient. I'm sure there's ways I could shave off a few layers, like combining the Airbrush process into two layers instead of one but ehhh sometimes I do it, sometimes I don't. Usually, the bigger the shape the more likely I'll use more layers and the smaller the shape the less likely I'll use more layers! Of course, this process isn't a concrete ruling. Sometimes, I'll use more layers for extra things like the bell required more layers for rendering the shininess of metal! Anyways, I would like to believe I did a decent job at recreating the feel, the vibe, and or general look of an old Christmas Card that's more retro in nature. With a focus on simple shapes, a lineless rendering style, and using textured brushes to render, I think I got it down packed. I used a tiny bit of Chromatic Aberration to give it a little bit of a visual pop, and brighten up the colors. It's subtle, but it works.
Oh, and here's something cool! To get a more embossed Christmas Card feel, I used a new tool that came with Clip Studio Paint!
N O R M A L M A P !
Cool, right? I use a pirated copy of Clip Studio Paint 3.0 and it comes with a tool that allows you to create normal maps from illustrations. Which, from what Google tells me: "A normal map is a texture mapping technique used to add surface details to 3D models without altering their geometry" ...Neat!
Anyways, here's what it looks like
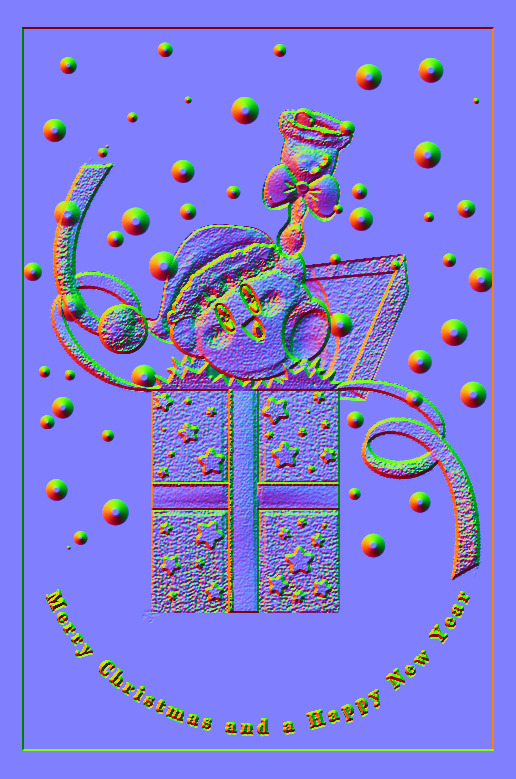
Freaky, right?
It looks like an embossed letter when you set a layer color to it too!
Anyways, I overlayed it on top of the finished illustration, set it to multiply and set the layer color to a warm yellow and it gives it not only texture but a sense of depth too! It's super cool, if you digitally paint you should try it!

With Normal Map Overlay Effect

Without Normal Map Overlay Effect
It's subtle but it's there.
Anyways, that's enough blathering from me! Merry Christmas everyone! I'll be answering some asks this week, so stay tuned!!!
59 notes
·
View notes
Text
TUT (ASKED BY @nuggetz-w-marz on the Identity V oc community ) ON HOW I DREW MARIUS’ “IN-GAME” MODEL SHEET + IN-GAME APPEARANCE


For starters, I used procreate for this! But you can use any other digital art app (ibis, csp, fresco, etc etc). This is not a 3D model but rather a mock-up of one. It’s not perfect, but it’s pretty good for my first time making something like this!
STEPS START NOW!!
#1 - FIND REFERENCES OF IN-GAME MODELS


this part is super important for getting the style right! I used multiple refs to see how the 3D models are shaded as well as regular character skeletons and how angles looked.
this pose would be how they look in the exhibition showroom— if it’s like an actual model turn around, then look at the poses used for new skins
#2- SKETCH TS OUT

i think the main issue would be making the full turnaround, i just mainly use a reflection of the front pose and a reflection of one of the side poses and edit them from there
once you have the sketch solidified, you could do the lineart if you want to— but it would be completely unnecessary in the long run
#3- FLAT COLORS

i just have a layer underneath the sketch (sketch is on multiply) and put out the flat colors for everything
#4- SHADING AND HIGHLIGHTS


these are like the early stages of my rendering process for the model sheet. One with the blending mode on “multiply” and the other on “normal” to see the colors i used.
there was a lot of airbrushing and layers used. i had like three layers EACH for shading and highlighting. the symmetry tool is also your best friend for the opposite side models and the face. I could make a whole rendering tut too if asked bc THAT needs a whole post for itself. the hair takes the longest, but the one that’s hardest to master is the clothing bc of needing to know how wrinkles work (which i don’t…)
for the skin i mainly used purples and pinks for the shading and orange and yellow for lighting. Clothing was the same but also blues, greys, and greens in the shading as well.

for the hair, i recommend shape out the strand first and then shade them like long tubes
#5 FUN PART: END RENDERING
I loved putting on the last details of the drawing and watching it come together. the rendering I did was only his glasses and his satchel…
#6 EXPORT + IN-GAME EDIT
basically export it as a transparent png for the sheet!! And then what you can do is go into the game and screen record a character’s skin animation and for a split sec it’ll be blank and screenshot it…orrrr you can use the one i have right here!! honestly go nuts.

For the shadow is a low resolution silhouette of the character and offset a bit and i used the color #0d0337 on a multiply layer at 55% opacity. For the character itself, lower the saturation until it fits the character and on another layer, put it to add/screen and use #7f774d for any lighting needed to make them fit the background. If you want to, you can even use the same color from the shadow to add more shadows on the character model
AND THATS IT!!!!
This post took way longer than i wanted it to but that’s okay!! I like helping other artists and esp when asked directly it’s pretty banger!!
30 notes
·
View notes
Note
What advice would you give beginner artists?
it's fine to want to do more stylized art, but nothing will help you improve quickly like studying from life. even if you want to draw very stylized figures, life drawing is still going to help you understand how the human body works and then you can build your stylization off of that understanding. I also recommend studying specifically things you're looking to improve--if you feel like your poses aren't dynamic, ask your model to do some quick (1-2 min) dynamic poses and work on getting the gesture down. if you're looking for anatomy, ask for longer, more static poses and really study the contours of the body. this also applies for portraiture and character art--my expressions and facial structure improved like CRAZY when i started doing portrait studies from life! (note: i know live model sessions aren't accessible for everyone. i'm a huge advocate for nude models, if you can find a studio nearby that's affordable to you that offers sessions, that's the best you're gonna get. however, there are sites that will give you photos of nude models to draw from, too, or you can even just ask friends or family to pose for you when they aren't busy, that's what i did before i started getting model sessions from my school!)
materials are not everything but sometimes a good material can make a difference. it's important to know what's worth it and what isn't for your skill level. invest in some decent-quality supplies or a good art program, but understand that you're still going to need to work to understand your materials and use them to their fullest potential. (if you're a digital artist buy csp. trust me on this. get it on sale. it will change your life. also do not fucking use photoshop)
tracing is ok. listen to me. TRACING. IS. OK. tracing is how you learn. don't trace other people's art and pass it off as your own, obviously, but there is literally no problem with tracing real-life reference photos. I routinely trace references for backgrounds and the like. there is no reason for you to kill yourself trying to make complex perspective and shit up from your head when you can very easily just overlay a photo and get what you need.
in that same vein, USE REFERENCE PHOTOS. find pics online or take pics of yourself and USE THEM to see how your poses work. it makes it SO SO SO much easier. the understanding that you need to create a pose out of nowhere will come with time but you're not going to get that skill unless you have a foundation of understanding how the real human body works, and the easiest way to get that understanding is by copying photos of real people.
last but not least, there's generally a sort of 'rulebook' that new artists are expected to go by, especially online, when it comes to digital art. when i was first learning, it was all about lineart and cell shading, two things that I didn't really like. Nowadays it seems to be all about rendering. the single most important thing i can tell you is if it sucks you don't have to do it. if you hate lineart just color your sketches. if you hate shading don't shade, or find a different way to shade that you enjoy more. if rendering is annoying or difficult for you DON'T BOTHER!! art is supposed to be fun. if part of your process is annoying or upsetting to you, cut it the fuck out. don't torture yourself just to do art the "right" way. i guarantee your art will look better when you're having fun making it anyway!
#asks#ALSO don't go in expecting to monetize your social media presence/go viral as an artist. make art for YOU and make what you want to make.#if your art has passion behind it then attention will come naturally!
330 notes
·
View notes
Text
Eggtober 6th 2023

"Splat" or "Fun with Colors": Raw Egg.
(Clip Studio Paint, Gouache Brush, Pencil brush for details and highlights. 12 colors, I think? 1 Hour.) I actually really liked the rough version I made, so you're gonna get that one at the end as well, for anyone who also likes the rough one better than the smooth one.
But first... I finally discovered a feature of CSP, so now I am unstoppable and I will NEVER AGAIN have to ask myself "How the fuck did I do that?"
Because now I have EVIDENCE. Now curious friends, followers, and my forgetful ass, can watch the full process of how I made a thing. Including what references I used so it's clear how much is iterative and how much I am drawing directly from the visual reference. Today I had to do a lot from imagination because I couldn't find an exaggerated splashy egg, but sometimes I really am just making a study and trying to do a one-to-one recreation of a reference. So now y'all get to know all my filthy little secrets. I was intending to grab footage starting with Eggtober 1, 2023 but OBS needs a version of an NVIDIA driver that will absolutely wreck my computer with BSODs because I own a junker apparently. But it turns out CSP (or at least V2, IDK if it was in V1) has a way to capture a speedpaint natively when you create the file.
Now I am unstoppable, powerful. No more taking a break from art when life gets busy and coming back to pieces I drew 10 years ago and wondering "How the hell did I manage that?" I can just check. It's over for all of you. Once I practice anatomy again and start being able to draw shapes and volumes perfectly from imagination, I will become all-powerful. I will ascend. Hell, maybe someone might even pay me if I learn to draw anything that isn't an egg or a meme. XD Radical self-confidence, baby. I can art now, and I have evidence. My horizons are infinite!
And now, hopefully, any baby artists that are just starting out can get an idea of how I do it from this and future pieces so I can pull you all up with me in a bid of apotheosis. For the EGGsthetic! (Aesthetic.)
I wonder which version of this egg @lady-quen's breadbugs will snap up?
And I wonder which one @quezify will like best? My money's on the sketchy one.
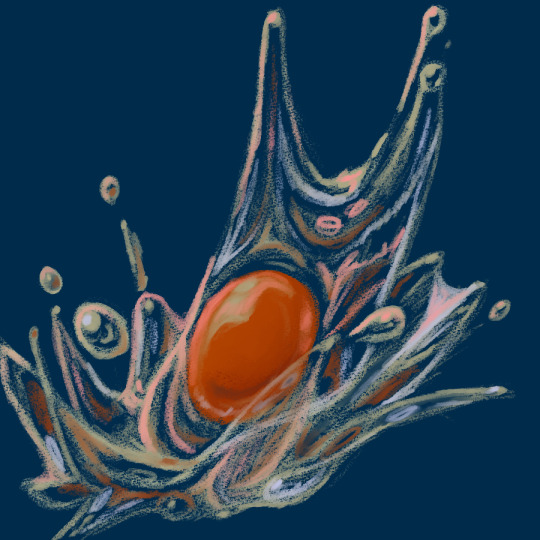
I can't tell which I like better honestly. The smooth one us much more "My aesthetic" because it matches how I render eggs but... The rough pencil-y gouache lines you get with light pressure really remind me of how the classic modern quezify eggs look, and I of course only started doing eggs because of the first Eggtober so, like. On the one hand, smooth and painterly look that goes with all but one of my previous eggs (Eggtober 1, 2023 was a study from memory of quezify's style, after all). But on the other hand... dramatic color changes! Textrure, shine! Colors that aren't in the actual references! EXPRESSIVENESS. Two different moods on the same egg art and I really dig both of them honestly.
164 notes
·
View notes
Text
As promised, here's the process video for my YGO Rare Pairs Mini Bang piece. I feel like this event always gets me to push myself beyond my limits (or maybe it's Tealshipping ;-P). A lot of attention and care went into this piece, so I want to talk about it a bit.
(Extensive yapping under cut)
As with many of my works, it started with a song. Pretty much the entire aesthetic direction of this piece was inspired by it, specifically this lyrics video.
youtube
I started with a thumbnail with pencil on paper because I'm astonishingly near-sighted and can only determine a good composition at a very specific size.
Fun fact: This thumbnail was very likely jotted down on company time :D
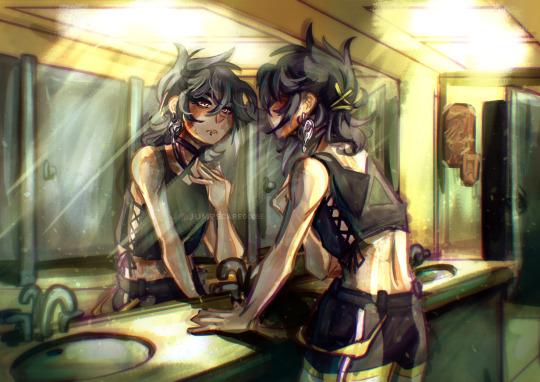
Then I traced it onto CSP and started with the values sketch. Since the song/lyrics video provided a very clear vision, I worked out the light sources pretty quickly. Some things I kept in mind:
The elements in this piece should suggest that we are looking at this scene through Johan's eyes. That's why Ryo's eyes are closed, and Johan's seeing a different version of "himself" in the mirror.
Because of this, the lighting scenarios for the outside world and the mirror world are completely different: the outside world is hazy, sensual, the mirror world is stark and eerie. "Yami" Johan has sharper features than "normal" Johan, and he's cast in colder light. The "real" world, on the other hand, would have warmer tones. (I feel like I didn't push this enough tbh).
The main light source comes from windows off-screen. I was very particular about the way it hits Johan's face and cast most of it in shadow. In contrast, l wanted most of Ryo to be in the light. It's kinda unrealistic, but ¯\_(ツ)_/¯
The light from the windows also helps illuminate the background. Specifically it reveals the one piece of furniture necessary to deduce the rest of the story ( ͈ര ̫ര ͈) ⊹`𓈒
There is a rim light from a lamp hidden behind Ryo. This helps sets the characters apart from the dark background and suggest more depth, especially in the areas of darkest shadow.
The process I currently use is one I adapted from kuroshiro's, with a few tweaks. First, I separated the piece into parts, and coloured them on separate layers with their base colours. Then, I added new clipped layers to each part, set to Multiply or Overlay as necessary, and rendered on those layers. This workflow helps me think clearly about what I need to do next, and easily come back to fix mistakes later on. It also allows me to pause at certain points and play with different lighting/colour schemes, just to make sure I like the direction I'm going in. It's a labour-intensive way of working, with a lot of cognitive power expended on pre-planning and layer management, but it's very effective if you like to problem-solve on the fly.
This scar on Johan's neck has a lot of symbolic significance in the story of this piece (read the accompanying fic to find out why), and so does Ryo kissing it. I wanted to make sure the way I posed the characters + arranged the lighting would give it that prominence in the composition. I based it on ref photos of real electrocution wounds. (And that makes the second time I've put marks on Johan's skin for this event lol).
Occasionally, I'd screencap the image and save it on Discord, so that I could look back at it the next day and immediately notice anything major I needed to fix.
Fun fact: In my vision, the light-cast-from-window thing was mandatory, but I'd never drawn anything like that before. Reference photos were helpful for inspo, but I needed to observe how it works directly. So (after much procrastination) I decided to turn off the lights in my room and stood for a good half an hour watching the way the light hit my wall in the dark, brainstorming how to recreate this on CSP.
(The most painful part of this piece might be looking up hotel room interior refs and trying to design a bg that looks legit but not with the muted color schemes that seem to dominate luxury hotels use nowadays).
The mirror frame was one of the last pieces to be added, and then I exported the image and imported it onto a different CSP canvas. I added a layer on top the image to paint over any remaining mistakes . I also added some special effects (such as air-brushing Johan's breath). Lastly, I signed the piece.
Fun fact: The "pressed against the mirror" thing was another big challenge, for which ref photos weren't gonna be enough help because I had such a specific idea with the pose + lighting. One day, while I was wandering in a new bookstore and about to leave, the employee told me "We also have a secret room, would you like to discover it?" and she DEADASS pulled open a bookshelf to reveal a hidden chamber??? And inside were obvs more bookshelves but most importantly there was a large mirror on the wall EXACTLY like I needed. So I spent a good while in there taking reference photos using myself as a model hehehe. Thinking back on this experience now, I become more firmly convinced that the universe arranged things so that I could bring this Tealshipping image to the world. *^w^b
Overall, this piece took me literal months to complete (most of which was spent agonizing over whether I could pull off all of the aforementioned goals). I'm noticing some pretty big mistakes now that I'm looking back at it lol but it felt pretty rewarding to finish it at last. Do you think I managed to achieve my intentions?
#i forgot i said i was gonna do this lol#art by neeko#art process#yugioh gx#yugioh#jesse anderson#tealshipping#johan andersen#ryo marufuji#zane truesdale#yubel johan#work in process#fanart#ygo gx#yugioh fanart
10 notes
·
View notes
Text

that's a wrap on art posts for 2024!
like what you see? all the art I posted this year is visible on my art tag!
wanted to try something different after last year's formatting disaster, so this is less of a summary and more of an everything-I-made-and-liked collage. as in that's what it is that's what you're looking at
this was a big year for me (I started university and lived away from my parents for the first time, yayyy) and I think you can see that in how my art style evolved in the past 12 months. I'm really happy with where it is now!
last year I picked one piece from each month to talk about, so I'll be doing that again for this year below the cut
january

this is the still version of an after effects animation I did for a design class in my last year of high school. I initially wanted to post this as a gif, but I knew nothing about how gifs worked at the time and it came out both massive and heavily artifacted. I can't even post the gif on tumblr, but the animated version is up in an mp4 format (that does have more colour correction and generally looks better)
february
this is a weird pick to represent february (it wasn't even on the collage image) but this... thing does represent that month to me lol. this doodle took me all of 20 minutes and represents the most important battle of 2024... shaman king flowers stream vs frost's microwave
march
kentareo happened (in earnest, they've been here since the end of january)
april
I don't like anything I drew in april enough to put here
may

march-may was my flop era this year and I blame these two. at the start of the year I was using a LOT of heavy colour overlays to hide my inability to colour good and those really showed their weaknesses when it comes to pieces with strong complementary colour palettes. this one's nice though, I hated drawing kenta's shoes
june
big month for tss news! I really love the colours I got with my tss art from june, you can tell the overlay technique can work when you're not shackled by the kentareo colour palette
july

(wow this is really the same pose again. I promise I drew more things in between)
my first month out of high school! had a lot of fun going into the outfit details with this one
august
the most important change as far as this list goes- I switched programs to clip studio paint! I'd used adobe fresco for almost all of my digital art career, but I got a pc in august and finally made the switch. it took a while to adjust, mostly because my fresco process had emerged basically via natural selection under the program (and hardware) limitations I was working under. a lot of things (like the heavy texture) I had to relearn in csp with more intention (the august piece is a bit smooth, isn't it?)
september
I moved into uni and spent most of the month adjusting to the major life change. I spent most of my drawing time on this piece, trying to figure out techniques and download brushes to get the kind of texture I wanted. this one took absolutely ages
october
clip studio finally clicked for me. I figured out how to speed up the parts of my workflow that sucked (flat colours) and embraced a more paint-heavy, brushstrokey rendering style. the speed increases also meant I suddenly had the energy for backgrounds!
november
I drew the most this month out of any in the year. I also stopped needing the overlays to make my colours look nice, and so the palettes in my art got more diverse. this piece I remember drawing in about an hour at midnight when I had to wake up at 6:45 the next morning for work, and being so happy I finally captured this specific glowing hair effect
december
I drew so many full background pieces this month, but I want to shout out this non-background one for the shattering effect I got with the selection tool
and that's the end! many more things coming in the new year (some I've already drawn, actually)
#goose draws#artists on tumblr#digital art#one year later and I still can't tag these#this is my once annual art yapping post okay
8 notes
·
View notes
Text
Oh wow! I wasn't expecting you all to like the mcd sona so much!!! But I'm so happy you do!! Thank you to everyone for the compliments and have a garroth in return!

(I just got my laptop back so I'm relearning how to render on csp bare with me lmfao)
Also!! Some of you showed interest in me making a minecraft roleplay of my own!!!!! I'm posting about it day to day on tik tok but!! If yall want to hear about it here I'll make posts!!
So under the cut has some info on that in the mean time! To see if anyone has any intrest ^^
I do not know what to call it rn so it has the temporary name of 'Villiage Tributes' which I hate but I suck at titles lmfaoo
Character design stuff and their info is at the bottom for now I'll talk about what I know I want video formatting and general universe lore wise ^^.
Video Format:
-whole the main focus will be on the storytelling there will be some just general playing minecraft aspects! Like the getting materials and building, because I liked a small amount of those ya know! And no one includes them at all anymore. :(
-audience feedback will be a HUGE part! Mainly in things like end pairings and junk so long as it doesn't compromise the writing ^^
-while the main medium will be well-minecraft lolol, I would want to have some scenes/ Intros be done with art/animatics!!! To make up for some parts where minecraft may lack the proper ommf lmfao (like when a important character in introduced the first scene will be drawn to better show off character designs and junk!
Universe Lore:
-it will be kind of a skyrim kingdom build- where there is a major central city and leader, and a bunch of regional lords as well, maybe like a council thing? Oh?
-there are currently 3 major love interests! (For the mc) they will get individual posts but here are just the uh, biggest tropes? With them?
-Guard x Noble (come on i- how can I not?? Mcd or not it's necessary for medival fantasy come ON)
-Flirt Hopeless romantic x oblivious (it's cute trust me)
-Villian x hero (i- come on come ON)
Also!!! There's a possibly poly options!!!! (Not with the villian so sorry lads)
-this is taking place directly after a giant Civil War for the rights of Animal and Magic Folk! So the world we enter in is currently recovering and rebuilding and has gone through MASSIVE social and legal changes!
-we won't be originally starting off in a village! We will be starting in something more of a camp/ settlement? And ontop of everything we will be going through the process of getting it legally recognized as a village!!
Character designs and some info!
Mc
Yeah, I know, I never promised I wouldn't be cringe. Most of
Name: Mello
Pronouns: Any/ all
Powers: under construction
Most of the backstory is top secret for now lol.
Fun fact:
-Stims when upset by frantically tapping a finger against her palm
Love intrest 1:
(He is getting a ref remake because I did this on my phone and on a day where I just could- NOT draw for the life of me!)
So! This is getting way to long- so I will make follow up posts if yall want so!! Let me know! I'd LOVE to chat about it! There is so much work I'm doing all the time and I have so much lore
#art#oc art#digital art#mcd garroth#mcd art#mcd#aphmau mcd#minecraft diaries#minecraft#roleplay#roleplay series#minecraft series
22 notes
·
View notes
Note
What art program and brushes do you use? tips on lighting? your illustrations radiate warmth 🌻💛
Thank you!! 🌻💛
This post got a little long, but I've answered each question so if you're curious, it's under here!
Art program?
I use Clip Studio Paint EX and Procreate! I mostly use CSP for my animations and Procreate for my illustrations lately, but I've used CSP for a lot of my illustrations too.
Brushes?
For CSP: I mostly use variations of the default "Design Pencil", each tweaked to fit different needs. Sometimes I use brushes I made myself, but these three are my main ones.
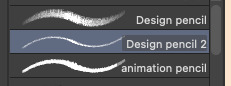
For Procreate: I use the HB Pencil for my lines and Tinderbox for my colors (both are default brushes).

Lighting tips?
This is a pretty big question! I could spend hours talking about this, but I tried to put together some very basic tips.
Figuring out where shadows go:
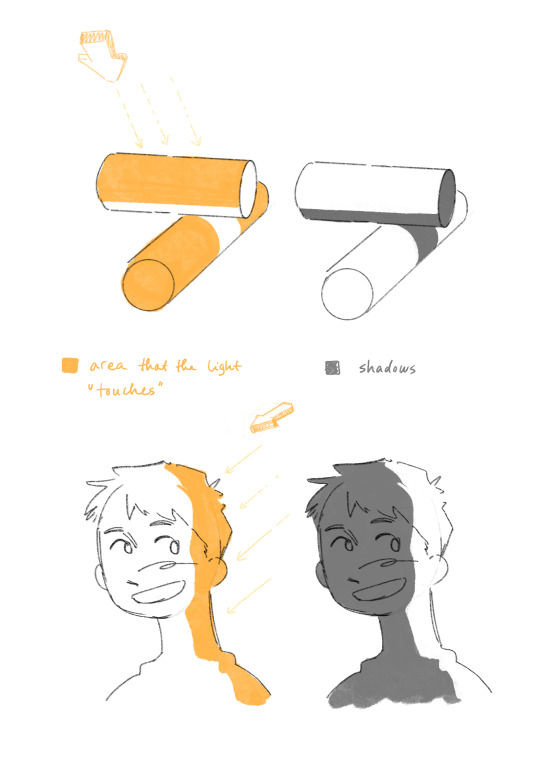
Light generally comes in a straight line from the light source, and everything it hits or touches is the illuminated area.
Everything it doesn't touch, either because it's an area at an angle it can't reach, or because something is in the way, is the shadows!
Thinking about where the light source is, and where it can't reach or what obstacles are in its way are helpful things to think about when figuring out shadows.
Reflected light:
This is a little more specific, but once you figured out basic lights and shadows, reflected light is another element that's useful to know.
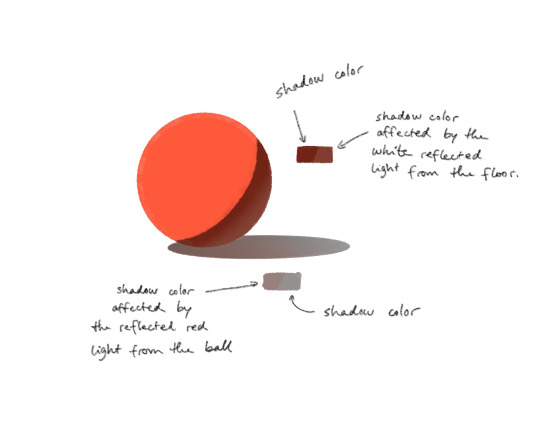
Every object reflects a bit of the light it receives, which affects the colors of the other surrounding objects. The reflected light is of the color of the object it's reflected from.
Rendering details in light and shadow:
You'd be surprised at how much you can get away with not rendering the details that are in the shadow, as long as you render the ones that are in the light.

In this Trigun fanart piece I've skipped most of the details that are hidden in the harsh shadows, but kept a lot of the details on Vash's boots for example.
Unless the focus of the piece is on something in the shadows specifically, you can simplify a lot of the stuff that's not in the light!
🌻
If all of this confuses you, that's alright! Learning takes time, and small steps are still steps forward!
Rules are also there to be broken depending on your goal for your art, so you don't even have to follow them if you don't need them. I break these all the time too.
I hope these tips can be helpful in any way! Happy fun lighting!
21 notes
·
View notes
Text
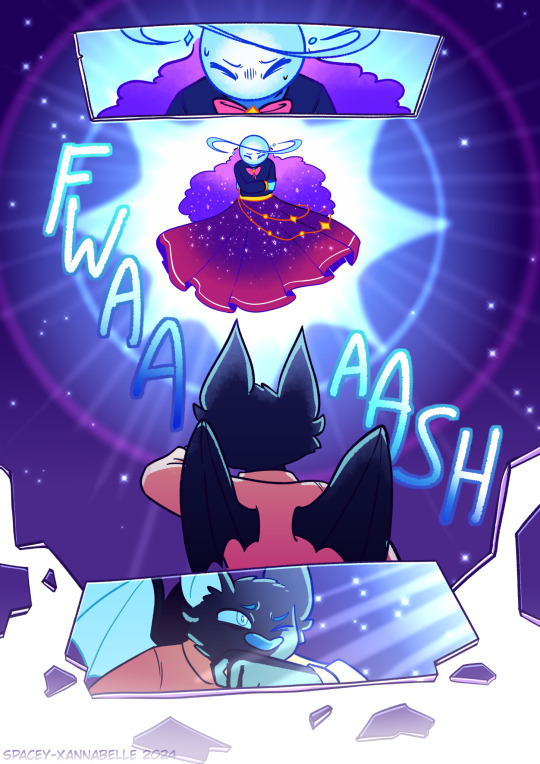
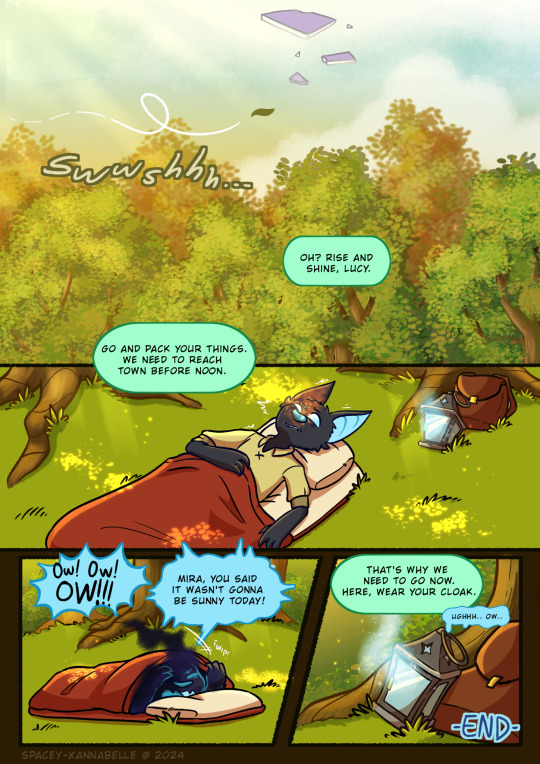
Fateful Encounter...
Last month, at around April 10th, I decided to revisit an old project I started months prior which was to polish up a test sketch of a comic page about Lucy encountering Lumi in the dreamspace. And after slowly making progress on this, I'm finally finished with this!
I'm gonna leave some artist notes under the read more, but overall I'm super proud of how this turned out!! This is pretty much my first serious attempt at making comics in general so this has been a very interesting learning experience!
Artist notes: So this is what the original sketch for this whole thing was. It was just me scribbling out a scene I had in my head for Startrails that I wanted to put on paper:
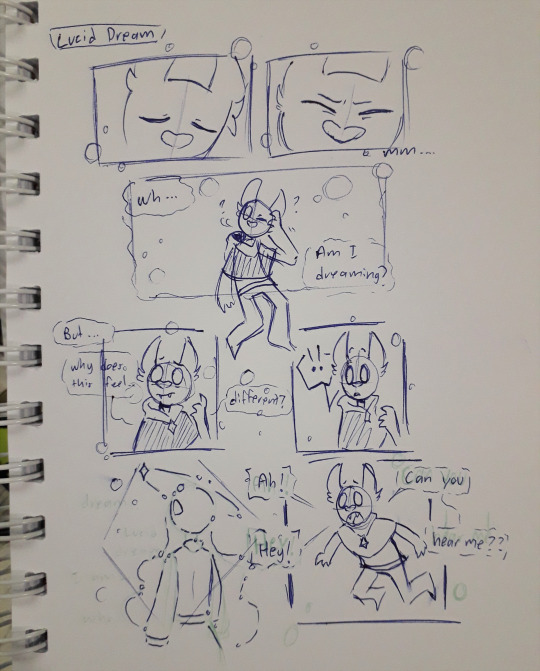
This I'd say was made around 2020-2021 ish. At the time, I didn't really do much with it. Until several months ago, I thought of trying to redraw this page and expand upon it.
But my first attempt at doing this didn't quite lead anywhere. I barely got through the thumbnailing process and just gave up bc I lost motivation (and life/work stuff was Happening so yea I had to put this aside as I figured stuff out). Here's the first draft of the thumbnails:
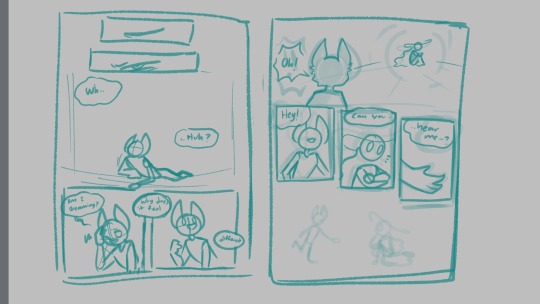
It was just two pages at the time and was pretty simple. I left this project sitting in my files for a while until I one day just, started binging videos from Thestarfishface on YouTube, primarily her webcomic guide videos. And I decided I'd give this project another go.
It was here where I began making a second draft of the thumbnails and this was what I had to work with:
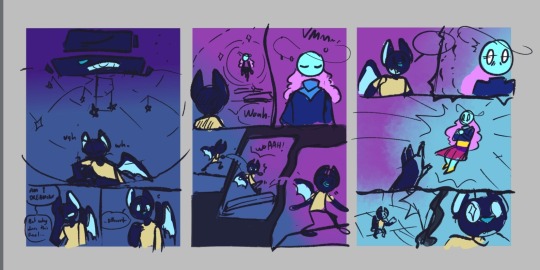
I wanted to experiment with the panels and get funky with the compositions this time around. The 2 page draft expanded to a 3 page thing. But I thought it would've been better if I added one more page at the end with Lucy waking up as a conclusion to wrap this whole thing together.
And in the middle of working on page 3, my friend had suggested to do a an impact frame page, which I hadn't considered during the thumbnailing, so 4 pages became 5. And this was the result!
I posted the pages as I finished them onto my deviantart so that's where a lot of my thoughts were journaled as I went along dfjsdh. To summarize my ramblings there, this project was a very fun (and a bit frustrating) learning experience! I'm hoping to keep practicing and improving my workflow, and hopefully one day make Startrails a full fledged webcomic :')
Additional ramblings:
The structure that Lucy finds Lumi in is inspired by an orrery.
For page 5, I initially didn't plan for much dialogue but as I drew it, it felt just a liiiitle bit empty, so I kinda just threw in some dialogue for Mira. But bc I was already in the inking process (and I just wanted to have this project completed), I didn't redo the page to even include Mira in it. So Mira's just out of frame sdfjskdh. If I had more time and energy to keep this up, I'd have made a revision of the page so I could include her.
This experience has taught me that I could seriously work on my rendering process a bit more, and that my layer management is just atrocious sdkfjksdfh
This has also taught me that while Medibang has the tools needed for me to draw these pages just fine, it also lacks some stuff that I personally need if I were to do a longer project like this. So I'll be experimenting with CSP next!
The dialogue throughout this whole thing wasn't all that planned out- I really just stuck close to what the initial doodle had which probably wasn't the best idea bc I just have like, 2 pages of Lucy's awkward sounding dialogue aaaa. I might do something a bit more dialogue heavy to help improve this skill next time.
Anyway, thank you for reading through my 1 am ramblings on this little project of mine shdkjhks
#artists on tumblr#Art#Digital art#comic art#original characters#OC lobby#OC art#Xan draws#Lucy#Lumi#Mira#Kinda dfjfkh#Startrails
29 notes
·
View notes
Text
【Magi】 Judar 🖤❤️🐈⬛
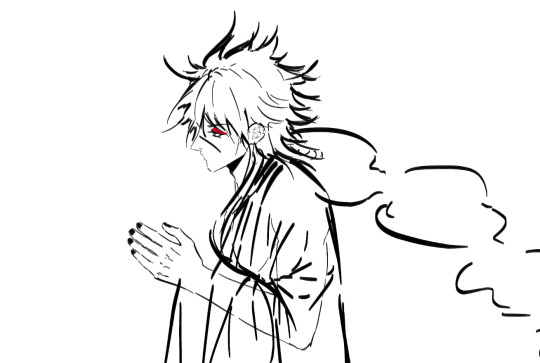

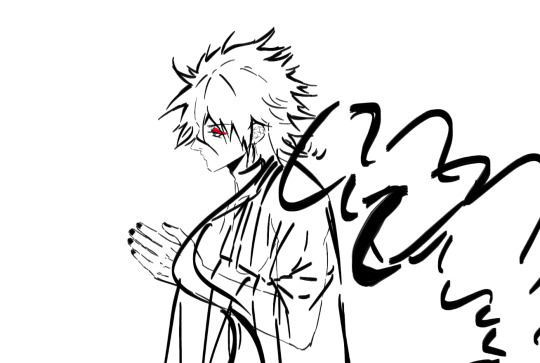

Scrap Versions
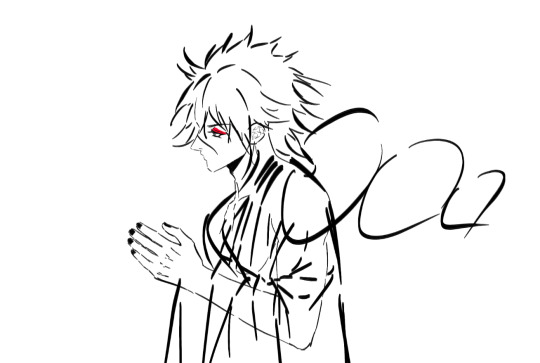

Redraw of my JuAli doodle from 2024 ❤️🖤💛
I got some time today so I quickly redrew Judar's hair ^^
I'm getting more used to drawing the shape of his hair
I like the clearer shapes now! My fave is the 4th one, then the 3rd one
Scrapped the 5th and 6th ones cuz they don't have very clear shapes to me.
Hand is tentative though I'll probably redraw that
I'm very amazed by how people draw silhouettes and even quickly render using the lasso tool...
I tried the lasso tool method out for making silhouettes because I was bothered that I couldn't get the shapes I wanted at first, so I quickly lasso'ed the shapes of his hair spikes and kept repeating.
This gets made even easier when you have "Add to selection" turned on on CSP (or any similar function)
Admittedly I'm MUCH better at sketching with lines (which is how I always sketch), than blocking out silhouettes with a big brush and erasing from it to make shapes.
Because the 2nd was done with lasso tool, it has some jagged edges (though Ig you could turn Anti-aliasing higher) and has some unbalanced spikes, but it actually helped me get the shapes I wanted much faster for me.
Making silhouettes with lasso tool is fun... I then put the lasso tool version on low opacity, and re-sketched over it (3rd and 4th image)
I was wondering whether to post on side or main but it'll probably get buried under my reblogs and ramble posts since I don't have a solid art tag there
And Tumblr's search function is so finnicky that some of the tags don't work when you search them, so I'll put it here
Once I get the chance to draw Alibaba and refine the rest of it, I'll put it under tags
I love the improvement from my late 2024 - early 2025 style where I've shifted into drawing more thickly lined eyes ^^
I feel like it fits my art style much more.
#jdal#jdali#judaari#my art#wip#doodle#stepswordsen art#I always get the feeling of “I should only post when it's refined or at satisfactory enough levels” with posting art#I'm not a huge fan of posting WIPs tbh and feel like I should only post if it's “post-worthy”#But I started getting more comfortable with it ever since I saw many artists post their WIP sketches or screenshots too
3 notes
·
View notes