#stencils painting
Text


pt I selected works from my drawing final, inspired by transmission towers
#myart#roro.txt#art#transmission towers#traditional art#those are pictures so i'm sorry for the quality and weird lighting#photos*#the technique used is as follows: glue on paper. then I make cutouts and use them as stencils#with paint
4K notes
·
View notes
Text


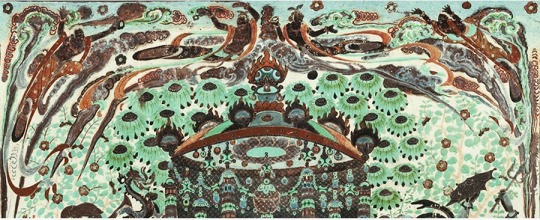

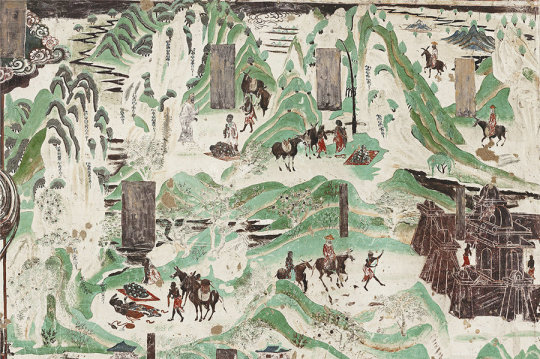

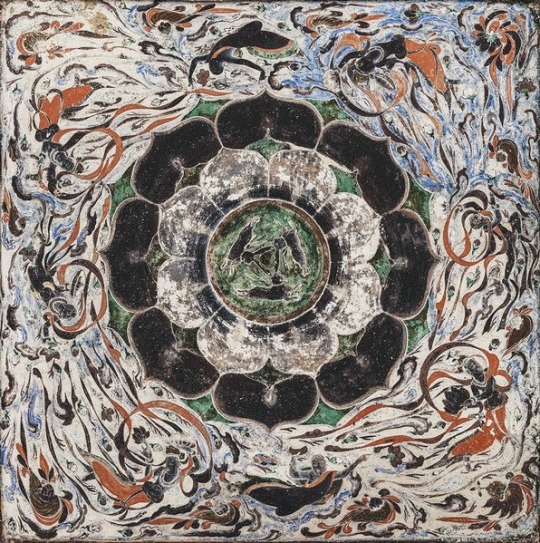
Incredible art from the Northern Wei Dynasty, Mogao Caves, 4th century
My brief experience seeing Wei Dynasty art in North China taught me it's some of the most refined in Chinese history
[Photo/Chinaculture.org]
654 notes
·
View notes
Text

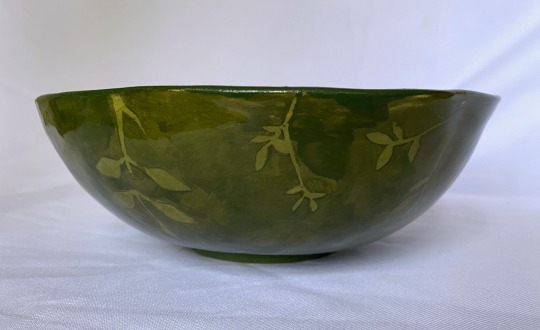
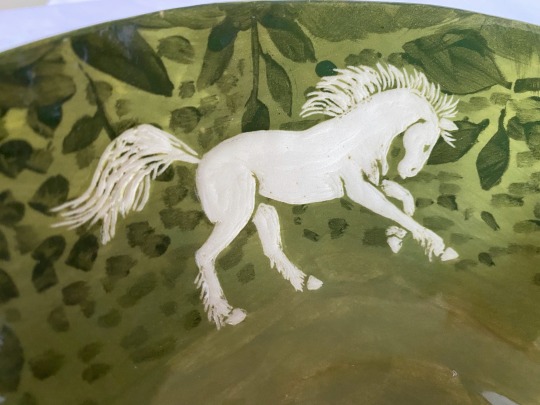
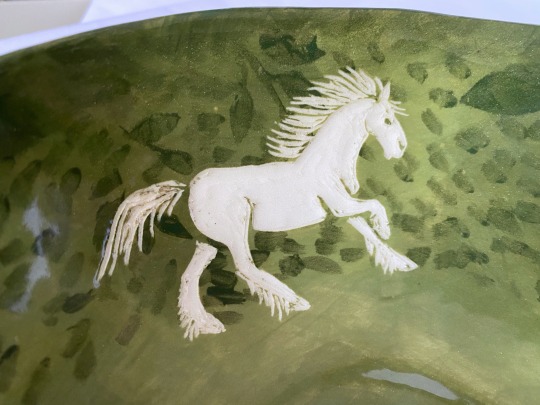
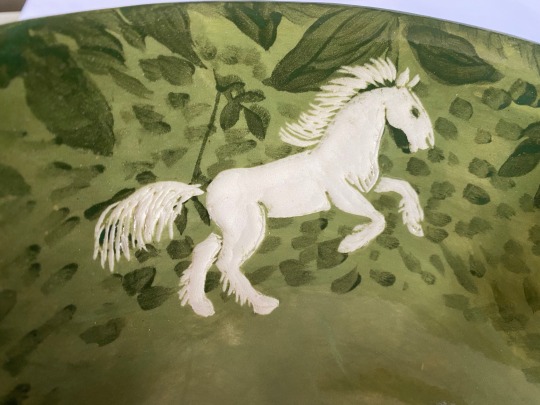
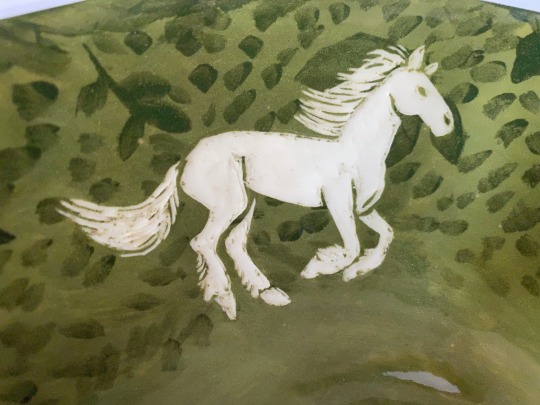
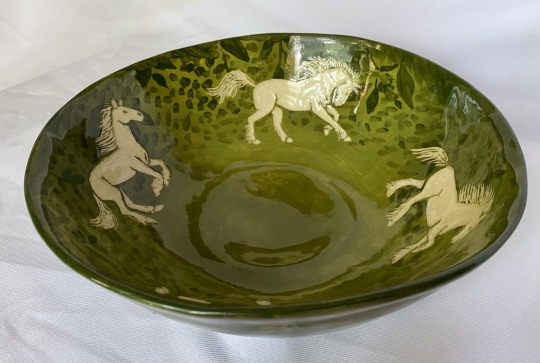
sold
the four white horses always make me think of the Princess Bride
it’s difficult to capture the colour of this one. it’s a little too yellow in some pictures. the leaves were partially free hand and partially stenciled. the bowl’s a little wonky but not bad for my first large slab-built bowl!
carving the inside of bowls is such a pain though. I always tell myself I won’t do it again but then I do
#pottery#ceramics#sgraffito#ceramic#carving#ceramic art#underglaze painting#before and after#horses#horse art#white horse#galloping#horseblr#leafy#stencil art#glazeware
684 notes
·
View notes
Text
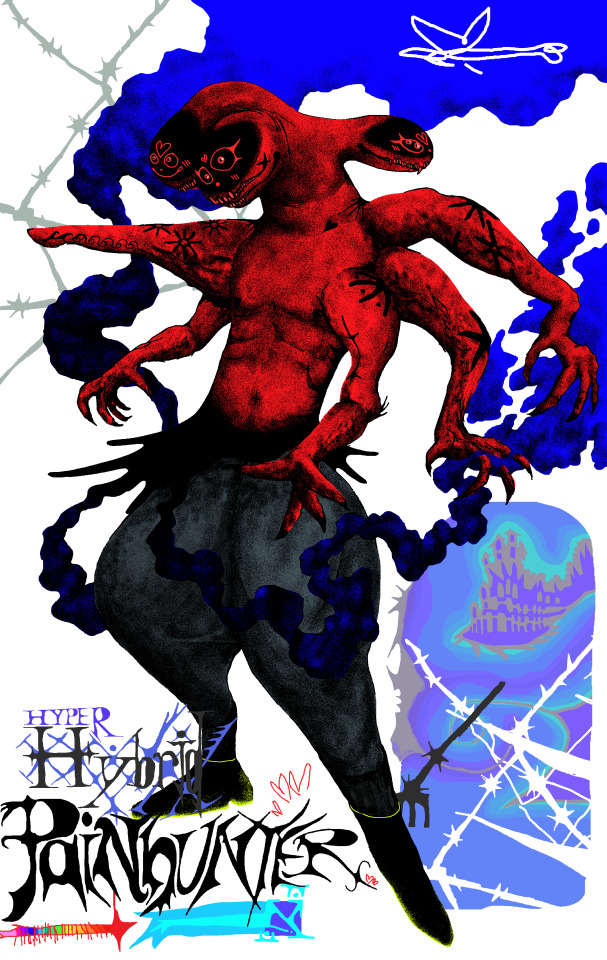
hybrid lover dragonfly
#art#i dident even know i could do stuff like this!!#i did what i keep seeing studio art instagram guys do with masking off parts and spraypainting#but with ms paint spraycan and a fun scrappy stencil process
432 notes
·
View notes
Photo

The Not So Big House - A Blueprint for the Way We Really Live, 1998
#vintage#vintage interior#1990s#90s#interior design#home decor#porch#screen porch#stencil#handpainted#floor#wicker#furniture#flowers#sponge paint#country#casual#style#home#architecture
726 notes
·
View notes
Text
stencils
ah i did the stencils on tuesday and i forgot to post about it! i have been Out Of Sorts lately and also i remembered how to post on instagram so i put it there and then forgot i had not put it here.
BEHOLD
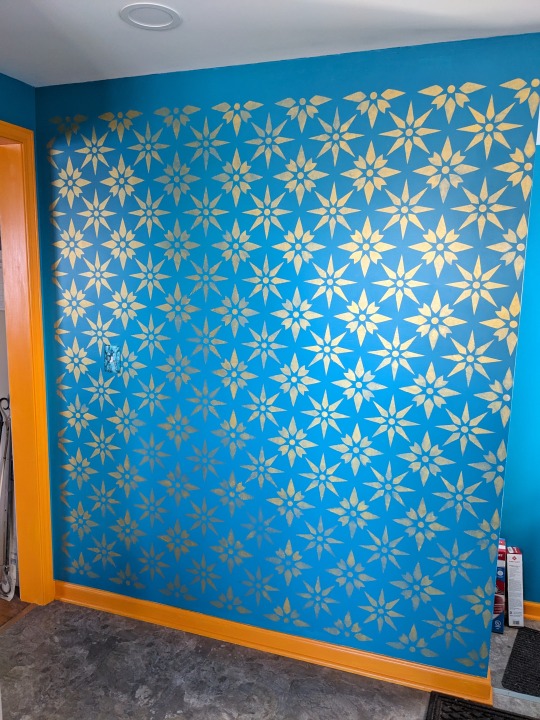
[image description: a teal wall with yellow-orange trim, stenciled with a tiled pattern of metallic gold stars over the entire surface]
I bought this stencil and some metallic gold "stencil creme" paint, and a stencil brush, and just spent an entire day doing it.
Yeah I should've started at the top left and worked over, but I started at the middle right and worked out instead. i might go back and add points to the top border and circles to the left border. Not sure. Not urgent either way.
The directions they give you on the website mention that a dry brush is critical to stenciling success, and this is a thing I did already know; i have stenciled mostly t-shirts in my time, with dumb bullshit stencils I cut out of manila folders. But they tell you to load up the brush and then take most of the paint off the brush with paper towels, and let me tell you my stencil creme pot barely covered this wall and would not have if I'd put most of the paint onto perfectly good paper towels. So what I did instead is, I went to the grocery store and I got a cannoli, and then I washed out the container it came in, and then I cut the container at the hinges and made myself two paint trays, and one of them I used as a pallette to mix the paints for the outlet covers, and the other half I used as a roller tray to paint the windowsill, then rinsed and used for this. I had that plastic tray nice and dry and I loaded up the brush and then worked that brush around on the plastic, and it was good and dry and then when I came back I could pick up the paint I'd offloaded onto that plastic, and use almost all of it. And later in the process I added a few drops of water to that pallette, and I was able to thin the paint just a tiny bit, just enough to get it to flow a little better but not so much it went under the edges of the stencil.

[image description: a white-stained clear plastic tray with a pot of gold paint sitting in it, a stencil brush propped on the edge, faint traces and blobs of gold paint swirled around it.] when I added a few drops of water they'd collect in the fluted bits around the edges, so if I wanted them I could go swipe the brush there, and if I didn't they stayed out of the way.
I could have been more exacting and precise in my stencil placement, but I knew I had to just do it, so I just did it. Used a level, discovered that the level disagreed with the ceiling and the floor, remembered that this house like all houses is in fact handmade, and so my imperfections would just have to harmonize with the imperfections built in by the builders and the 75 years of settling and whatnot. So I was Zen about it and it worked out.

[image description: a wide shot of the kitchen showing gray cabinets and unadorned blue wall: the stencil is spotless, taped up with blue painter's tape, a stepladder beneath it with a yellow level sitting on it.]
I used painter's tape. The tutorials say you can spray the back of the stencil with spray adhesive to keep it tight against the wall and reduce bleed at the edges. I own spray adhesive, and I know it's sticky as hell and gets on everything. No thanks, I figured I didn't need it, and I don't regret that, I had no problems. I have, as it happens, stenciled a lot of things in my life.
I should make some more stupid stenciled t-shirts, they've been fun.
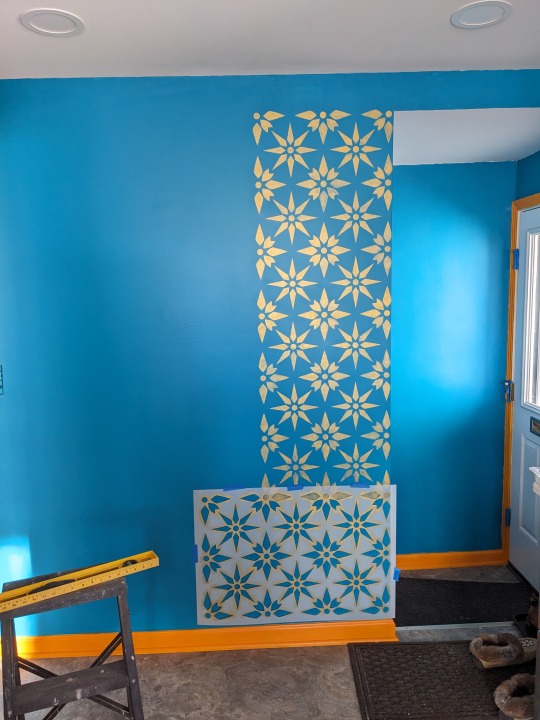
[image source: two repeats of the stencil have been applied to the wall, and now the plastic stencil template is taped sideways at the bottom of the wall.]
It's a well-designed stencil, and the way you lined it up is that some of the elements are designed to repeat so you just plop them over the previous version. I hadn't premeditated or measured this, but it turned out the last repeat, I could just turn it sideways and it tiled beautifully that way too. No problems. Worked great. The stencil creme paint dried fast enough that there was no problem overlaying it like this either, though I did make a point of doing the ones I was going to overlap first so they'd have the longest to dry. I doubt that mattered.
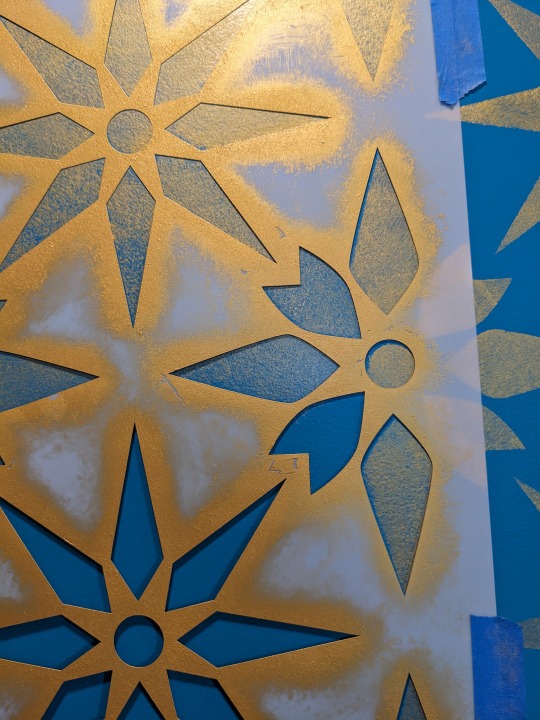
[image description: the stencil template laid over the edge of a previous repeat, showing a blue edge where the previous repeat doesn't quite align with the new placement.]
This is where me not doing math was maybe a problem. I was not perfectionist about this, I just sometimes accepted that the template had shifted slightly on the previous repeat, and while it lined up perfectly in one spot, it would not quite line up in another. I gambled that this would not matter, and in fact took this photo to check. After I removed the template this time, I went back to photograph this spot to see how the misalignment looked, and... couldn't find it. Could not tell, even though I knew where it had been. So obviously it did not matter. (In these cases, I did not touch up the edges of the misaligned bits, I left them as they'd originally been stenciled. The other elements were not far enough off the anticipated alignment for it to be noticeable. A touch-up would have been more noticeable, an element becoming oversized or slightly misshapen or having a visible edge of layered pigment in it.)
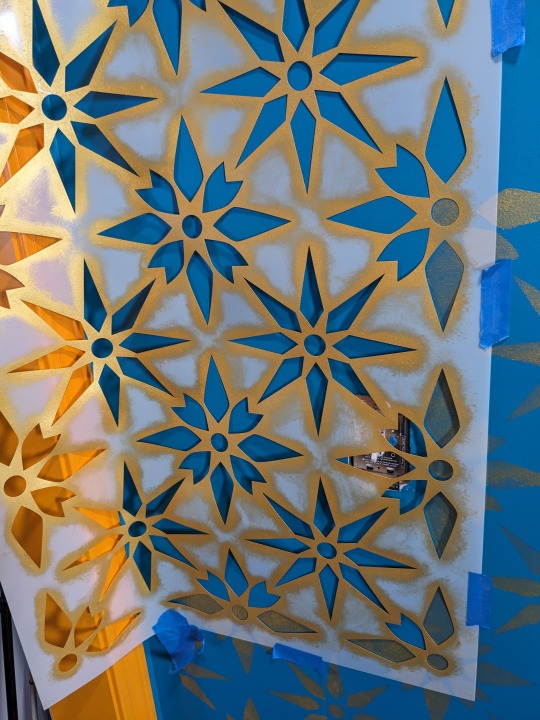
[image description: the stencil template crammed against the edge of the wall, bent and roughly taped in place, and the light switch, plate removed, poking through one of the holes at the right.]
This was the trickiest bit. I just held one hand against wherever I was working, flattening that bit of the stencil to the wall as I worked, and then I'd let go and put my hand on the next bit, and maybe they weren't perfectly in alignment with the previous bits but as long as the stencil was touching the wall well right where I was working, it was a good enough result. The light switch was a bit of a problem and i should properly have removed it but I wasn't about to do that so I didn't. I did the inward-facing points of the leftmost stars, and then did not try to do the upward-downward points or the circles, because it was too hard to get the stencil flat right there. I could go back and add them now, and I might yet, using the very edge of the template, We'll see if I do. It looks fine as it is.
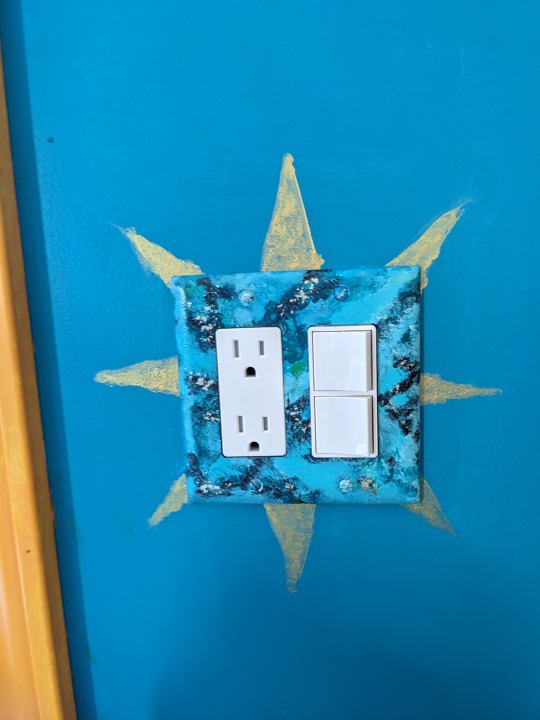
[image description: a plain blue wall with a double outlet plate in it, and the points of the eight-pointed star are around it, protruding from behind the lightswitch plate.]
I had always intended to stencil an element behind the light switch plates on the plain walls, because I felt they don't stand out enough against the teal. I did one, and then realized it was impossible to center it and hard not to get paint on other bits of the walls, since the stencil template is so huge and was covered in paint from doing the whole wall. I realized then that it's just points and I could freehand those. So I did, this is me freehand faux-stenciling the star around this outlet plate, LOL.
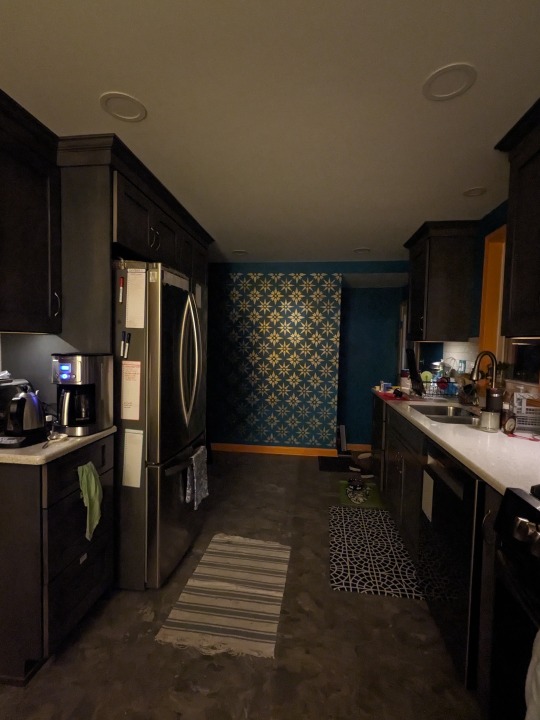
[image description: the darkened kitchen early in the morning, under-cabinet lights on but the room dim, and in the distance the wall is shining]
anyway so the next morning i went out and was sitting at the window and turned around and was like "this looks amazing" so I am well pleased with how it turned out, really and truly.
126 notes
·
View notes
Text
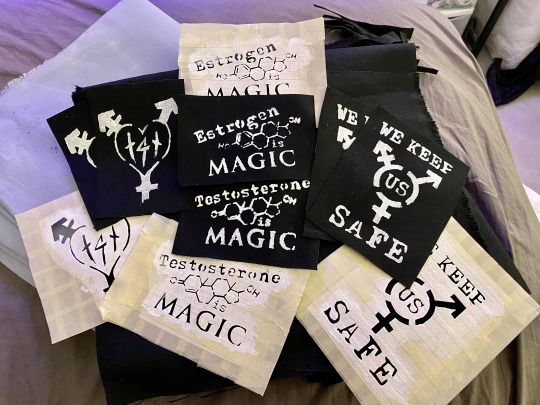
learning how to make patches!
#patches#stencil#punk#trans#transgender#trans pride#t4t#trans positivity#trans artist#punk aesthetic#punkart#patch#paint#lgbt#lgbt art#lgbtq#testosterone#estrogen#trans4trans#trans love
829 notes
·
View notes
Text

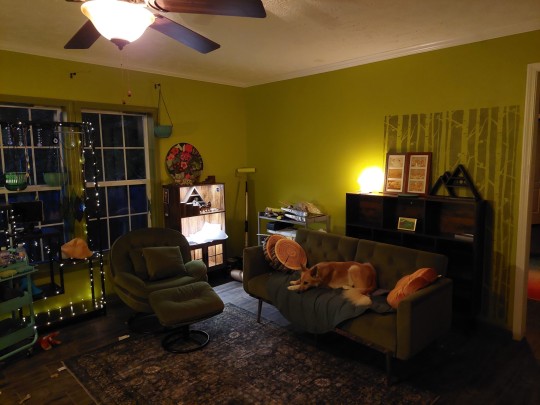
finally got the loveseat in!!! it really looks like a living room now... thank you Glimmer for posing on it for me so I could take this very aesthetic picture
however, as soon as I sat down... the infomercial began....
#piphome#glimmer glamor#the paint cart and rollers are in the corner bc i still need to finish the stencils on the walls lol.
88 notes
·
View notes
Text
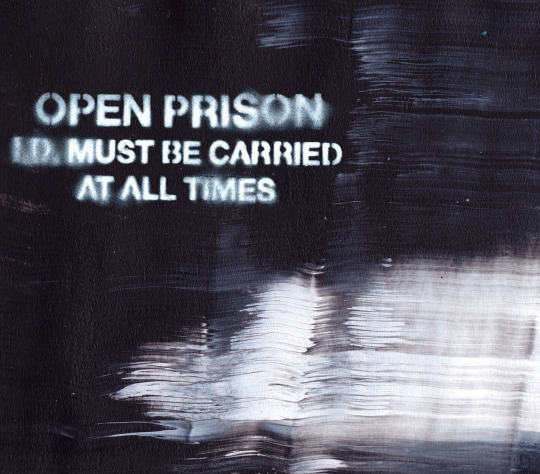
open prison
102 notes
·
View notes
Text

Unidentified artist, “Girl with doves,” watercolour and ink on velvet, United States, ca. 1830–1840
American Folk Art Museum, New York
93 notes
·
View notes
Text
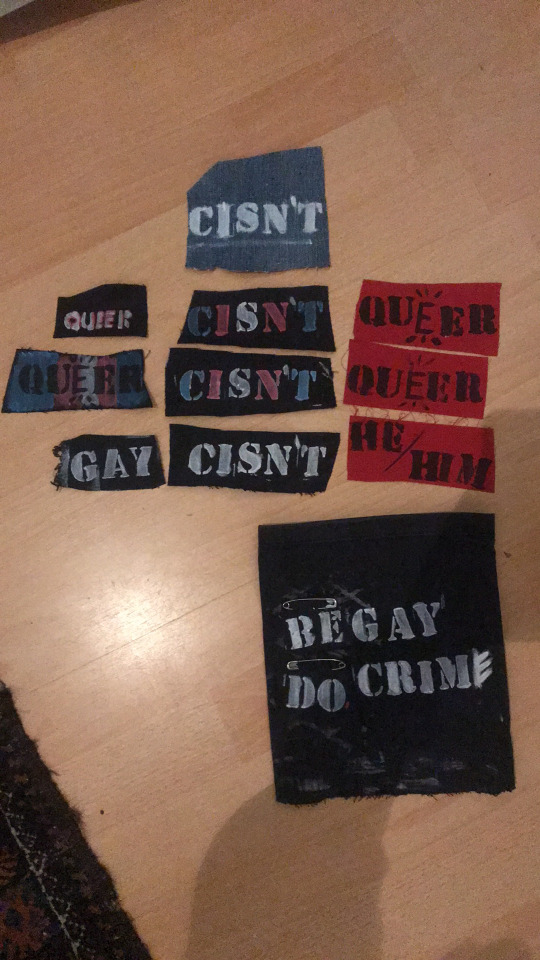
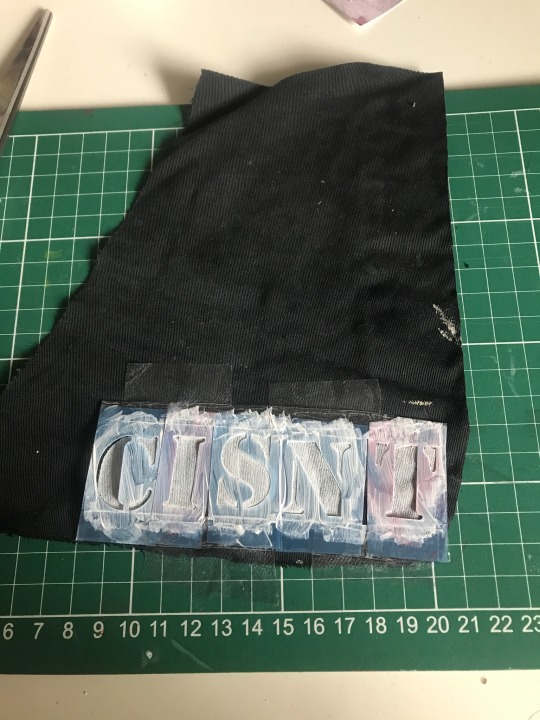
New load of patches!
Partially for a pouch I’m making for the wonderful @divinely-devious
WIP pics:


#things i made#patches#stencil#stencilling#punk diy#diy clothing#crafts#painting#pride#transgender#trans#be gay do crime#queer#gay
158 notes
·
View notes
Text
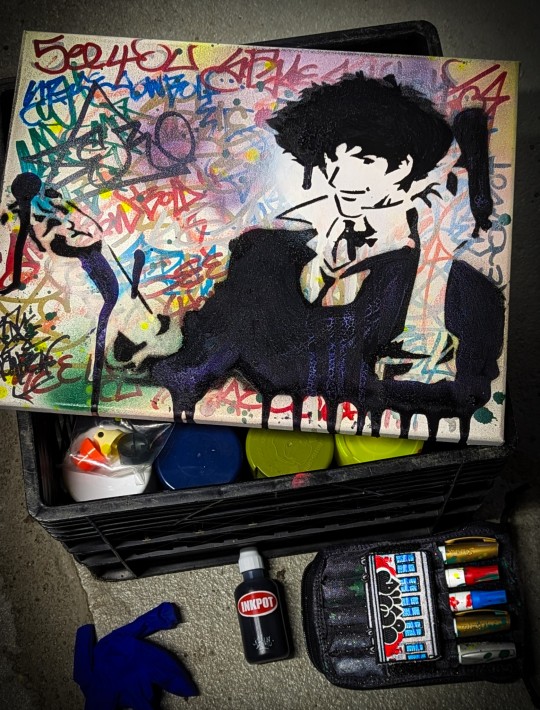
see you space cowboy...
#graffittiart#graffti#cowboy bebop#spike spiegel#anime#anime art#painting#adult swim#toonami#stencil#stencil art
93 notes
·
View notes
Text
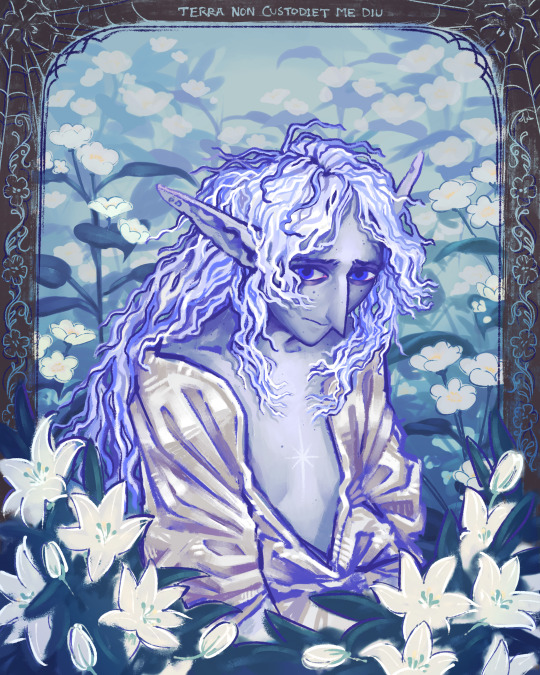
the earth wont keep me long
#my art#dnd#oc#dnd oc#this one came a long way! have fun watching me change my mind 5 times per minute#oh and the plant brushes used for the background are from devin elle kurtz's grass and fields brushpack#i hate using stamp brushes but this pack is the exception. this is the one. it is so so easy to just use as a stencil to paint over#also also. narrative context is that this is my favorite pc who died but got dug up and brought back centuries later#if u remember the piece about the 5 dressing rooms before a wedding. this is the same pc from that only all grown up and also dead#see if u can tell which one it is from that group :)
198 notes
·
View notes
Text

darkraiiiiii
#art#i was brewing up a complicated picture in my head too many factors intermingling and i put a requirement on myself that i would need to#feel a certain mood to create said picture cuz only then would it feel good and true but it was an impossible to achieve mood#and it made me miserable for a week i went to bed as soon as possible everyday to skip to the next one but today i woke up at 2am#and thought well maybe i should just draw something simple that i like it doesnt have to be high concept#so its just darkrai!!!! cuz its such a cooly! and its made out of shapes ive enjoyed drawing recently#smoking fire plumelike stuff u kno...#and i got to try out the spraypaint thing again cuz there was stuff i realized i coulda done better after the red 3 head hybrid pic#so i wanted to do it again. do u like these- with the spraypaint rendering? i will make more of them no matter what u say#but im about to go to bed now. i started the pic at 11am and finished at 8pm so 9hrs spent?! well the stenciling takes a long while in pain#i did the spraying in ms paint again and then composited it in paint net like usually.#also im typing much because the combination of coffee (which i try to make special and rare for me so it hits more cutely)#+ the euphoria that drawing gives me makes me talkative. but now.- ! im tired !! goodnight#pokemon#darkrai
177 notes
·
View notes
Text

༺2005༻
#web finds#webfinds#web find#webfind#flickr#soad#system of a down#byob#2005#numetal#metal#nu metal#alternative#alt#rock#2000's#00's#2000s#00s#y2k#mezmerize#graffiti#stencil#spray paint#spraypaint#stencils#stenciling
36 notes
·
View notes
Text
archway stencils
i keep forgetting to post about this. I did my archway stencils this past week!

[image description: looking through an orange archway, stenciled with turquoise stars in an alternating pattern, to see the deep teal wall stenciled with larger gold stars I did earlier]
progress shots and discussion under cut!

[image: the stencil, with a central eight-pointed star, and then the partial alternating star in the corners; the stencil is mounted diagonally so that the main star is centered on the archway trim, and there's a corner above and below]
I futzed around a little and this was the direction that worked. I'd thought about just doing that central element and repeating it freehand, but this was easier to line up..... but then to finish it, i would have to do TWO additional passes with the stencil, one on each side.

[image description: the archway in the background with the central element alternating with just the middle of the second element, as left behind by one pass of the stencil; I'm going to have to go back and fill in the sides of the second element. But in the foreground, I am holding my cat, because she insisted.]
I had Help. she wanted me to do this instead of paint. The whole time. She was incredibly persistent.

[image: the archway with one of my secondary passes complete, and the stencil stuck on diagonally showing how I have to separately fill in the left and right of each of the edge elements.]
I had experimented with just plopping the central element over this corner thing, and using that to fill in all the rest at once, but you see how the central element has long diamond-shaped "petals", but the other one has the shorter inward-pointing "petals" in the middle, and then longer petals on the sides? Yeah the longer petals are not shaped like the central element's, even though they look similar-- they are wider throughout. So to blend them with the half-petal deposited by the first pass of the stencil, it looks wonky as hell. And it does look better having a fully different element for every other star, instead of a blended sort-of-weird half-different one. So the long hard way it is; I went all the way down doing the left half then went to the other doorway and did the left half and then came back and did the right half, in totally separate passes, because you can see you have to tape the stencil down over the existing element, and if it were at all damp you're ripping paint off when you do that.
This stencil company does make specific border stencils for some of their designs, and I sort of thought this one was intended for that kind of use, but clearly it's not. I mean it worked fine so I'm not actually annoyed, but I did have to think about it a lot.
Some process notes: I did not use specialty stencil creme for this, I used my sample pot of a slightly lighter shade of the paint I used for the walls. it was semi-gloss because that's what they had for sample pots, and that worked out fine. I put it into the same plastic half-a-cannoli-box tray as before, and used the smaller stencil brush, and I did not really have to add drops of water, as the paint was less thick, but I had almost zero problem with bleeding-- all my problems were that I had to overlap the stencil while still damp and would sometimes get paint on the back of the stencil that then smudged onto bits I didn't want paint on. Paint also built up on the stencil really horribly because I was using it more intensively-- doing the whole wall it was kind of spread out over the huge stencil, but this was a single element. Being able to see through the stencil helped in positioning, so what I eventually wound up doing was that I would position the stencil, tape it down, wipe it clean with a rag, adjust the position, use it, move it to the next location, wipe it clean with a rag, repeat.
It was so hard to get the second element lined up-- you see how the "petal" is done in two pieces? well it never quite lined up and there was always a gap-- that eventually I pulled a plastic milk jug out of the recycling, traced the stencil on it, and cut out a stencil that was *just* a full copy of that half-petal mirrored so I could see if the stencil wasn't going to line up cleanly, I could just focus on lining up one of the petals, and leave the other blank and come back and add it with the standalone whole-petal homemade stencil. Good thing I'm a dab hand with an exacto.
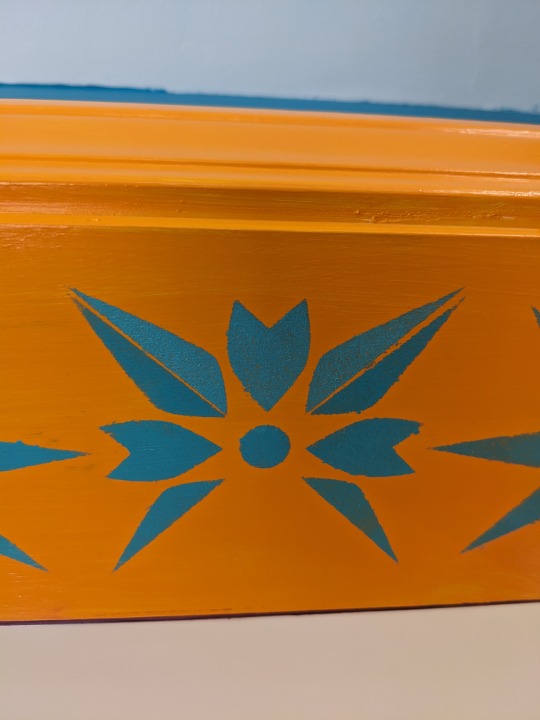
[image description: a star stencil 3/4 complete, but the diagonal petals have gaps in the middle of them] Here's a problem example, and I was getting this on about half of them.

[image description: a piece of flat white plastic, an exacto knife, a cutting board, and a stencil element cut out of the white plastic.]
So instead I would rotate the stencil so one of the petals was good, and leave the other one off entirely to come back and do later.

[image description: looking from the living room through the stenciled archway to the kitchen, and this face of the archway is painted purple, and the wall is repainted to a consistent sunny yellow.]
I know that the most hinged thing to do would have been to just do all the trim orange, and then the wall yellow, and let it be, but I could not resist being fussy and doing the living-room-facing trim back in the living-room-trim purple color. I fortunately was able to find the original pots of paint from when we painted the living room, and it was still good!!!! (mixed in august of '07! amazing) so I repainted the living room wall where it was primer-white after the reconstruction. Looks pretty seamless now! But I have one more light switch faceplate to paint, it looks like. Hmmmmm what color.
The last thing I have left to do is the corner above the front door, where this newly-repainted yellow wall intersects with the wall above the front door that I decided should be kitchen-teal.
I could just do the corner as a flat normal transition. But I want to try to do something fancy, some kind of like pixel-dissolve or like, the stencil bits sticking into the other color, or something.
For now I've painted a cereal box and stuck it up there and I am going to put stenciled attempts on cardboard up there to see what they look like before I commit.

[image description: the corner above the front door of the house. the wall below is the kitchen wall and is teal. the wall above the archway is yellow because it's the living room. the wall above the door is not fully painted but is mostly kitchen teal. the corner is a cardboard cereal box painted yellow on one side and teal on the other, cut to fit.] it is an awkward junction! The most hinged thing would be to keep it simple-- would have been to just do all the trim orange and then the upper wall yellow and just make sure the corner was sharp and clean.
But I'm not that hinged, so I might as well do something that calls attention to it, LOL.
56 notes
·
View notes