#strikethrough = deleted text
Note
If you could be the best in one area, what would that area be?
Not accidentally murdering people would be great

Well, it would be cool to be able to be a ballerina in the American School of Ballet. So maybe that?
1 note
·
View note
Text
PM || Addie & Stevie
Addie: heeeeey.
Addie: i miss you..
[reads this and takes a couple minutes to process it]
Stevie: I miss you too
Stevie: hey Addie… you doing okay?
8 notes
·
View notes
Text
A BRIEF EXPLANATION OF ALL THE BUTTONS ON TUMBLR MOBILE FOR MY TWITTER REFUGES :)
i know a lot of fellow former twitter users are a bit confused by this app, so here’s some hopefully helpful tips!

this is what you should see at the bottom of the screen when making a new post
the first button (Aa) lets you change the size of your font into a bigger heading or subheading, or even make your text a cursive or times new roman type font
it also lets you make these bulleted lists! to use it, just tap multiple times until you get the setting you want

tap this button to add links, then just type the site name in the box and hit return. for example: http://heresalink.com

these are where you can add gifs, pictures, and music! for pictures, just tap the icon and select what you want, then you can press and drag to move it around or drag to the trashcan to delete
gifs are very similar to twitter - type in what you want and scroll through the options

GIF by taylorsnationblog
music is also similar. type the song you want and tap on it. podcasts also work!

this button is for polls! tap and add your silly little answers. the duration can be a day or a week

this button lets you make a “cut” in your posts which is basically a “read more” button. got a long post you don’t want cluttering up everyone’s dashes? click here!

lastly, this button lets you set content warnings! specifically this is for “mature content”, but when you click mature you can specify whether its due to drugs/alcohol, violence, or sexual content
this can be helpful to clue people in to potential triggers but PLEASE ALWAYS TAG YOUR SPECIFIC TRIGGERS ANYWAYS.
Other Helpful Tips
“highlight” your text by pressing and selecting like normal to unlock a bunch of cool formatting options including bold, strikethrough, and colors
hitting the three dots next to the post button lets you access a bunch of post settings like queuing posts, scheduling posts, saving drafts, making posts private (PLEASE NOTE: you cannot unprivate posts after, but you can share the link), and choosing who can reblog & who can pay to promote your content
CONGRATS you’re now ready to make better posts like a tumblr pro

#OK REPOSTED WITH NO CONTENT WARNING#twitter swifties#twitter dead#twitter down#swifties#taylor swift#cruel summer#twitter
1K notes
·
View notes
Text
While I am truly grateful to everyone who adds to and helps out with the 4t2 CAS Archive, please do not redo areas that have been filled-in. I don't really understand why pictures need to be reorganized and names renamed. The only purpose for them is to be available.
Also, while I know not everyone reads English, please do not change the language of the archive.
Remember we do not delete creators who have unavailable links. We strikethrough their names. It's under Format->Text->Strikethrough (Alt+Shift+5)
Lastly, I'd like to say let's be careful with deleting. I've had to add back columns accidentally removed.
Thank you for your time and help.
#4t2 cas archive#for creators who want their named spelled a certain way or abbreviated just let us know
30 notes
·
View notes
Note
Guide to Tumblr fuctions!

You can move pictures by grabbing them, if you’re on mobile you long press; if you’re on computer you long click.


You can put a maximum of 3 pictures in a row.

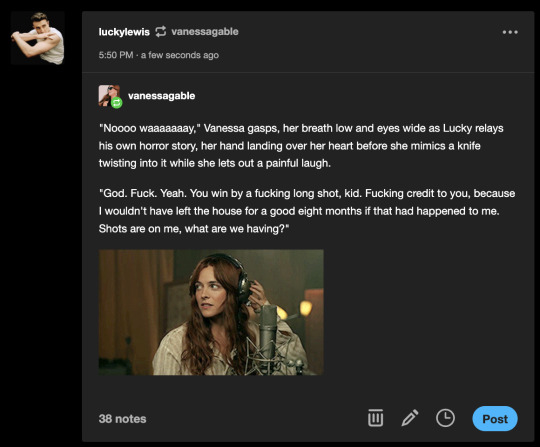
Red Box: Delete button and Edit button. I suggest you edit your previous posts to make the images easier to see ^3^
Blue Box: Share button, Comment button, Reblog button, Like button. The reblog button is also often used as a reply function if you want your reply to be visible to your viewers, but if you don’t want your reply to be visible then you can just comment. For longer replies I really suggest the reblog though, Tumblr’s text limit is 4,096 so please take advantag of it!

The grey text you see underneath posts, you already know as tags. It is comment etiquette to put your replies/comments also in the tags. This is because the comment button is a relatively new addition, so before we used the tags to make hidden comments. They’re also good for when you want your viewers to see your comments, but not have it be reblogged or make it hideable.

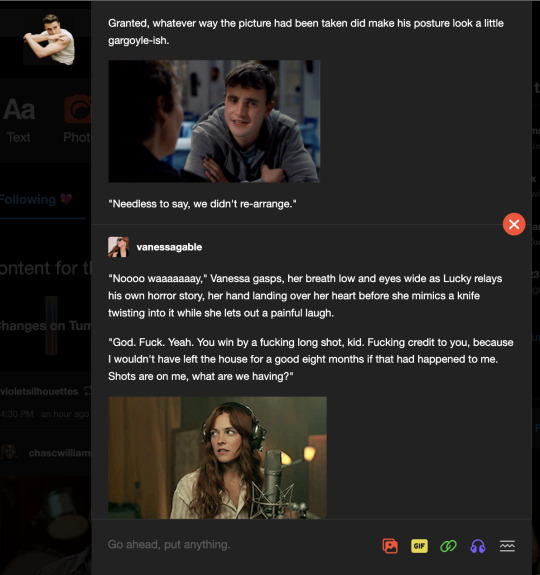
Red box: Image Editor button, Alt Text button.
Blue box: Fonts button, GIF button, Image button, Audio button

If you highlight text you have more features: Colour, Bold, Italic, Strikethrough, Shrink, Hyperlink.
Hope this all helps!
Thank you for your help, it helped me a lot 💁🏿♀️💕
6 notes
·
View notes
Text
Scrivener 3 to AO3 – expanded export format (with download link) P2
I hope you find this guide and the provided export format to download useful! To enable me to make more such resources, and make them available for everyone, please consider supporting me via KoFi! I love sharing my stuff freely and don't want to paywall anything, but I also have to eat – every contribution helps and is greatly appreciated!
Hello friends!
This is a continuation of this post here, for people who use more complex formatting than just italics, and still want to export their fics into AO3 directly from Scrivener without losing that formatting.
Now, it should be said first that there are levels to this, and depending on what kind of formatting you are using, you'll need to go through more or fewer steps.
You only want italics and a horizontal rule between scenes (requires manual line-spacing by using empty lines in your draft)
You want all the above, as well as automatic line-spacing (without having to keep empty lines in your draft)
You want the above, as well as existing paragraph styles such as centered or right-aligned text and blockquotes
You want the above, as well as not predefined paragraph and character styles such as bold or underlined text and strikethrough
The first two can be achieved by following my previous post about this (or by downloading and importing my format – import instructions in the other post). The other two expand the same principle that is used to achieve 2, but are more "sensitive" to inconsistencies. This post here is going to provide the additional steps to achieve the paragraph and character style HTML formatting on compile. It will also include further explanations of certain steps where people often tripped up.
Let's go then. Follow this previous post up to the heading Assign Section Layouts, or download and import the provided .scrformat file that is linked there.
If you import the provided .scrformat file, and you have not deleted/renamed Scrivener's built in text styles, two paragraph styles (Centered Text and Block Quote) should already work for you!
I recommend reading the explanation of how to set it up anyway though, in case you want to add a different paragraph style to the format at some point.
Existing (Paragraph) Styles
Alright, so in the last post, we went into the Styles tab of the Format Settings, added a new paragraph style (Regular Text), and defined the Paragraph prefix/suffix. Now, Regular Text wasn't based on any of the existing Project Paragraph Styles, which is also why it didn't matter what you called it. This matters now!
While you're still in the Styles tab, click again on the + in the top right corner to add a new paragraph style. However, unlike with Regular Text, this time you choose one of the existing Project Paragraph Styles and override it. (Don't worry about losing anything, you're in a plain text format anyway.)
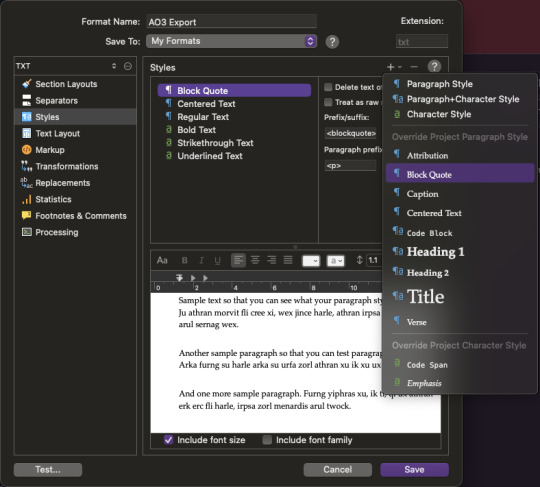
This will create a Style with the same name as the Project Paragraph Style you chose. This is important, if they're not named the same it won't work. If you rename one, you have to rename the other as well.
Anyway, there are four fields again: Prefix/suffix and Paragraph prefix/suffix. Put the HTML code required for your desired style into the Prefix/suffix fields – e.g. the HTML code for block quotes is < blockquote > and < /blockquote >. For Paragraph prefix/suffix, put the same code as you did for Regular Text!
Why isn't the blockquote code the Paragraph prefix/suffix?
Well, paragraph styles may span multiple paragraphs, right? You might have a whole letter in block quotes, which contains several line-breaks. We want the style to include all of it, and we want our line-breaks within the style to still function properly.
Therefore, we still want every individual paragraph to be surrounded by the p and /p code, whereas the blockquote and /blockquote code should go at the very beginning and at the very end of the whole section in this style.
Prefix/suffix go where the style begins and ends.
Paragraph prefix/suffix goes at the beginning and end of every paragraph within this style.
Based on this principle you can now add any paragraph (or character) styles you want that are already defined in Scrivener.
Important: In order for this to work, you need to actually apply these styles within your editor as well. So if you're wanting centered text, do not just hit the center-align button in your format bar! If you do it like that, the style of that paragraph will still be No Style, and it won't add the HTML code you just defined.
Instead, select the style Centered Text from the project text styles to center your text.
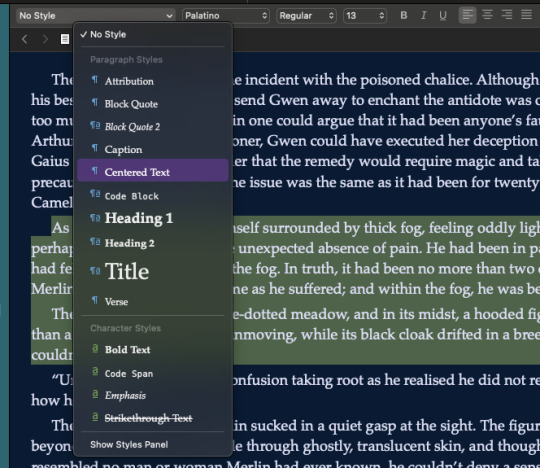
This goes for all styles! If you want it to actually be applied on compile, it must also be applied in the editor. Makes sense I'd say.
New (Paragraph or Character) Styles
"But V, what if I want a style that isn't already defined in Scrivener?"
Yes, let's say you want right-aligned or bold text – but there's no preset Paragraph/Character style for that. The solution is simple enough: We'll define it then!
At the bottom of the drop-down menu for the text styles in the format bar, choose Show Styles Panel. This opens, you guessed it, the Styles Panel with all available styles in this project. To define a new style, format your paragraph as you want it in the editor (e.g. hit the right-align or bold button) and then click the little + at the bottom left in the Styles Panel. This will open a little window where you can define a new style.
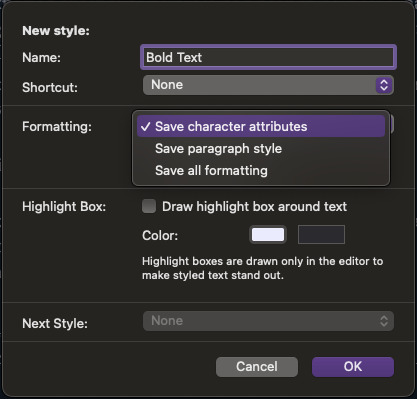

Now, note here that you can choose which attributes are saved, which brings us to a quick explanation of Character vs Paragraph vs Paragraph+Character Styles.
Let's take three examples: Bold text, right-aligned text, and centered italic text (e.g. for a letter).
Bold text is a character style; all relevant attributes (i.e. the boldness of the font) work on a character level. You can make a single letter or word bold without affecting the rest of the paragraph – which is also how bold text is commonly used.
Right-aligned text is a paragraph style; all relevant attributes (i.e. the text alignment) work on a paragraph level. You cannot right-align a single word within a paragraph – it's the whole paragraph or nothing. The font itself is unaffected.
Centered italic text is a paragraph style with specific character attributes; the relevant attributes are on both paragraph and character level.
This distinction is mostly relevant when you're trying to define Character styles, or paragraph styles with specific character attributes. If you save all information on a paragraph style where there's no particular character attributes applied anyway, it'll turn into a normal paragraph style.
For Character styles, however, this is important! Let's say you want to define Bold text – if you save all formatting, it'll always apply bold text to the whole paragraph rather than the specific word(s) you want.
Anyway, as you might've figured, you can now define all the styles your heart desires. Bold, strikethrough, underlined, specifically formatted block quotes – if you can achieve it with your editor, you can save it as a style.
"But V, that's just in my editor, I thought this was about the export format?"
Well, technically you already know how to apply the HTML code to these styles – the same way as for the preset styles. Go back to editing your export format, into the Styles tab of the Format Settings. Just like we selected Block Quote to override earlier, we can now also select any of the new styles we created in the project, e.g. Bold Text.

Again, you put the required HTML code for the respective style into the Prefix/suffix fields. Note that Character styles do not allow you to put anything into the Paragraph prefix/suffix fields! This is because the beginning and end of character styles are usually within one paragraph.
Assign Section Layouts
And here we are again, back with the previous post. In order for any of this to actually be applied, you need to assign your section layout to the section types you are exporting.
Since this step apparently caused some confusion for many people, I'll try to explain why we need to do this.
In your draft, you have different files and/or folders. Based on their structure, Scrivener assigns certain Section Types to those files; e.g. folders are Chapter Headings, files within folders are Scenes.
When you compile your draft, each Section Type is assigned a specific layout within the compile format you're using. For example, if you compile a Paperback PDF (preset), the folders will create chapter headings based on the folder name, and the files will create the scenes containing the text in the file itself. [Details about this can be found in the Compile Tutorial, here.]
With Scrivener's preset export formats, these section layouts are already assigned. Since we made this format new, our section layouts are not already assigned – we gotta assign them ourselves.
When exporting for AO3, we generally don't need any headers. All that matters is that your Scenes have the Section Layout "Text Section" assigned to them. This is necessary to actually apply all this HTML formatting we defined.
And that's it!
Here's a link to download my updated format that you can import as explained in the first post. It includes the most common paragraph and character styles already added to the export format – note that you will still need to create the text styles for some of them if they are not Scrivener presets!
❗️IMPORTANT: After importing the format, you still have to assign the section layouts!!!
–––
A continuously updated Masterlist with all my Scrivener 3 tutorials can be found here.
Part 1 | Tutorial Masterlist | KoFi
29 notes
·
View notes
Text
consider this a speed-run of all things beta that may be causing legacy users issues. if there's anything else that needs explaining, i'll update this post! let's go beloveds. 🤭
🟠 BEFORE YOU SWITCH TO BETA.
if you've been previously using new xkit, you will need to download xkit rewritten. that can be found:
here for google chrome users.
here for mozailla firefox users.
once you've installed it, you can install whatever add ons are your preference from new xkit. the one that you'll need to install and enable to cut posts on beta is called trim reblogs and it looks like this:

🔴 SWITCHING TO BETA.
switching is pretty straightforward for any former legacy users and you only have to do it once.
step 1: new text post.
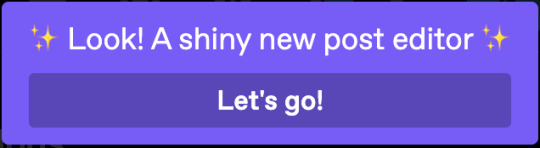
step 2: a pop up for the new editor will show in the top right corner. click lets go!
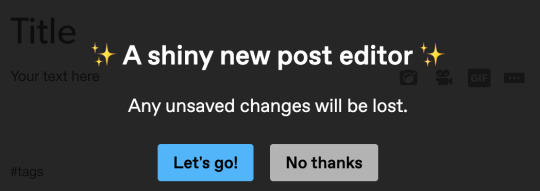
step 3: press let's go again.
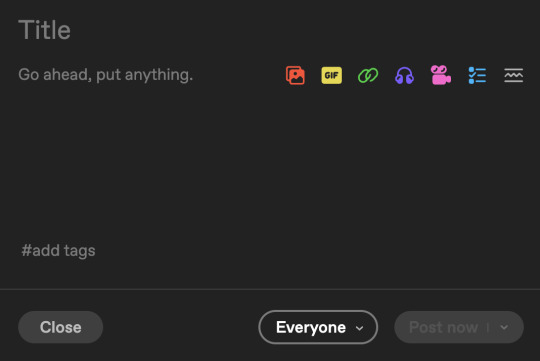
step 4: voila, shiny new editor.
🟡 USING BETA.
for the most part, beta has condensed features of legacy to be more intuitive, which means you need to remember less keyboard shortcuts. once you've written anything in the editor itself, highlighting it will bring up this dropdown.
the list of functions in the vertical dropdown are for the following:
regular is tumblr's standard font.
bigger is, you guessed it, bigger.
i think u can figure what biggest is KSJGSHJ
quote is for if you want any part of your post to look like the quote function.
chat will turn your font into the chat format (typically used for text/sms threads!)
indented will put your paragraphs into a blockquote for those that prefer them.
bulleted list is how you create a bulletpoint list like this one you're reading.
numbered list is same as above but with (spoilers!) numbers. 😎
the list that goes horizontally is for the following:
s with a strikethrough allows you to strike through text.
b is for bolding (the keyboard shortcut still works for this).
i is for italicizing (the keyboard shortcut still works for this).
<s> is for small text (the keyboard shortcut no longer works)
the link symbol is for adding or removing links (will be utilicized further in the gif url section of this tutorial)
and the paint can symbol is for changing the font colour if that's something you want to do.

🟢 CUTTING POSTS WITH BETA.
for any of y'all that are like stark, we don't care ab this, we just wanna cut our damn posts. firstly, feel that. secondly, it needed it's own section so let's goooooo. once you get used to cutting posts on beta it becomes seamless.
there's two ways to do it.
the first one is: after drafting a reply.
the process for that is as follows:
step 1: draft your reply.

step 2: once the reply is drafted, locate the scissors symbol in the bottom row of functions.

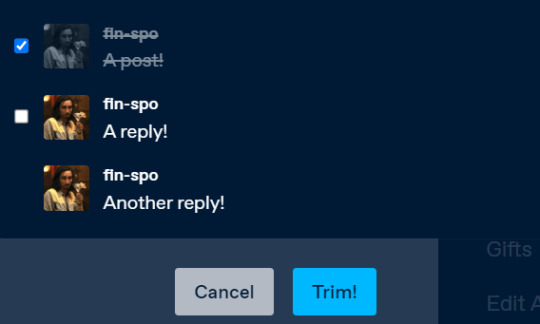
step 3: click it and trim the post you want to be rid of, in this case for me it's my previous reply.
step 4: click trim! and hey presto, you have a cut post that's all pretty and ready for you to reply.
the second one is: after posting a reply.
step 1: go to reblog the post.
step 2: write a reply (a better one than this one SHGSHJ) and click reblog.
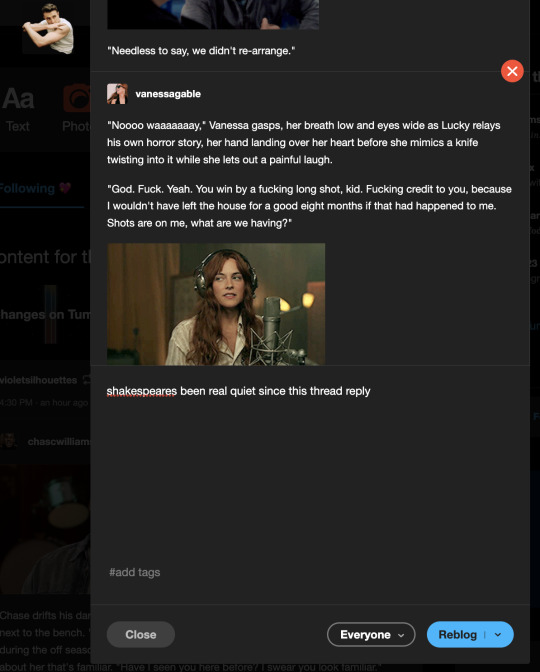
step 3: i know, i know, it looks like a triple reply but it only will for a second. just like step one, locate the scissors, click it, trim! your previous post and then it will be cut.


🟣 REMOVING THE URL FROM UNDER YOUR GIF IF YOU COPY AND PASTE ONE.
step 1: paste in your gif.
step 2: click the link button in the bottom left of the gif.

step 3: highlight or backspace and delete the url, click done.
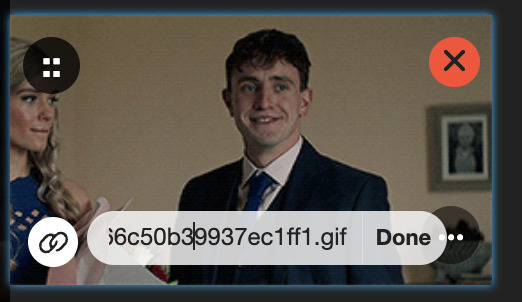
step 4: no url under your gif.

⚪️ MISC ADDITIONS.
this is the button for read mores, for all u spicy legends.

this is to upload an image.

this is to post a song.

NEW FUNCTIONS BETA OFFERS:
editing tags: you no longer have to delete every tag that follows if you made a typo in one. siiiick.
auto saving drafts: a life saver (especially for this post!!) tumblr auto saves your post to your drafts as you type into it.
ANY OTHER Q'S:
feel free to hit me up and i'll help you if i can for anything specific!
this post will be updated with anything i forgot about.
17 notes
·
View notes
Text
An Introduction to the Beta Editor
Hello all! I’ve gotten some feedback that the tutorials on using the new Beta editor and xKit Rewritten has been confusing a few people, so I wanted to make my own! I’ll try to cover everything below, but if something isn’t clear or you need extra help, let me know please! This post is gonna be pretty long, but I sectioned it up so hopefully you can find what you need with ease.

Step 1. Switching to Beta
You very well may be able to skip this part, because all new blogs are automatically switched to the newer editor. But if you’re still using an older blog, don’t worry, it’s easy! There should be a big purple button in the corner, pretty hard to miss. Should look like this!
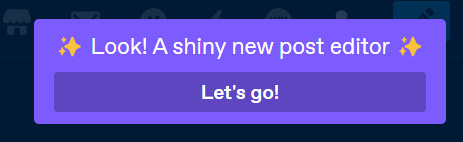
Go ahead and hit “Let’s go!” and, well... let’s go!
Step 2. Getting to Know Beta
The Beta editor is very, very different from what we’re all used to. But really, it’s kind of intuitive in a lot of ways. You have to know a lot less shortcuts. Whenever you highlight your text, you’ll see this little guy pop up:
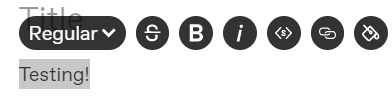
Now, from left to right, here’s what we’re looking at: strikethrough, bold, italics, small text, link in text, and colored text. Most of your keyboard shortcuts should still work (I can’t speak for all computers, but the shortcut for small text no longer works for me with the Beta editor), but we also have handy-dandy buttons now, too! We also have the 'Regular' drop down menu, which opens this:
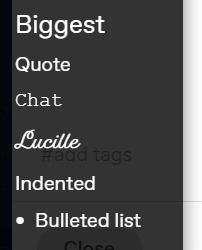
This one is pretty self explanatory, and it shows what the text will look like if you select that option.
Step 3. Finer Details
I’m still personally getting used to a lot of the smaller details that come with the Beta editor, but here are some that I’ve learned! Hopefully I’ll be adding to this list when more troubleshooting comes into my realm of knowledge.
Auto-Readmores: For whatever reason, Tumblr has taken to cropping any posts over a certain length by itself? Annoying, but this is something you can toggle on/off in your Dashboard Settings!
Editing Tags: This isn’t something that needs to be fixed, but it was big news to me! Instead of having to delete your tag completely when you’ve made a typo, you can just edit your post and edit the tag! Handy!
Links on Gifs: This isn’t a bad thing, it’s just new, different, and weird. But if you dislike it, there is a way to stop it from happening! It’s just a manual task. When you copy and paste a gif into your reply, you’ll see three little images on it. We’re going to click on the circled one below.
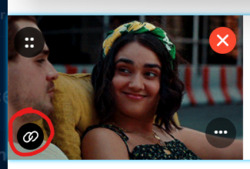
That’ll open up a link box, with a link to your gif. Just backspace that, hit the ‘Done’ button, and boom! No more link at the bottom of your gif!
Step 4. xKit Rewritten
I know what a lot of people’s main concern is: cropping replies. This is how we get to that point. The first step is going to be to download the newest iteration of xKit. You do not have to uninstall your old one to do this, they coexist on purpose! New xKit and xKit Rewritten have different features, so I’ve found it best to have both and utilize all the features!
xKit rewritten is a Chrome extension, and it can be found at this link! Just follow the instructions on that page to install it. Once it’s all good and installed, it’ll be found next to your other extensions, or by the URL bar on your browser window. Looks like this!
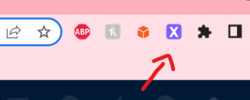
Now you have xKit Rewritten!
Step 5. Cropping Replies
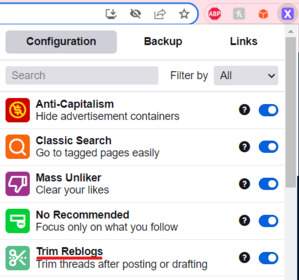
Alright, this is where the money is. Just like with regular xKit, you have to toggle on the setting that allows you to cut replies down. Once you click on that purple X icon, you’ll see a drop down with lots of options. I’ve underlined the one we’re looking for right now, "Trim Reblogs."
Once you toggle that little switch on, you can go ahead and start replying. If you’re replying to a starter, then there is no need to worry about this feature. You have nothing to crop, so don’t worry! But if you’re replying to an active thread, here’s what you’re gonna do. Type out your reply, format it however you want, and then draft it. Then we’re gonna go into our drafts.
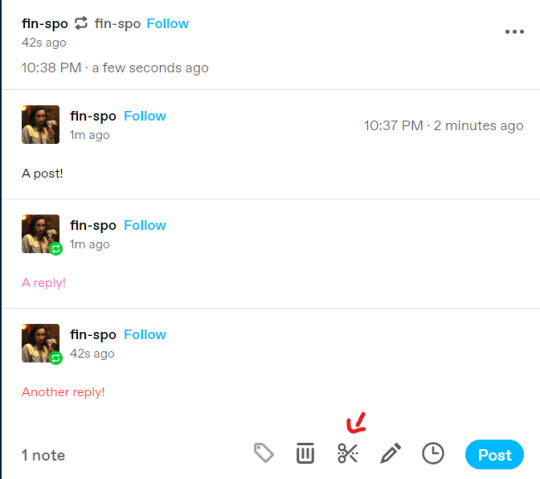
Here’s my thread with three tiers to it! The standard is two replies per post, and that’s what a lot of people like to stick to. So let’s make that happen! If you’ll notice at the bottom of that draft, there’s a scissor icon. I drew an arrow to it in the photo above. We’re gonna click on that.

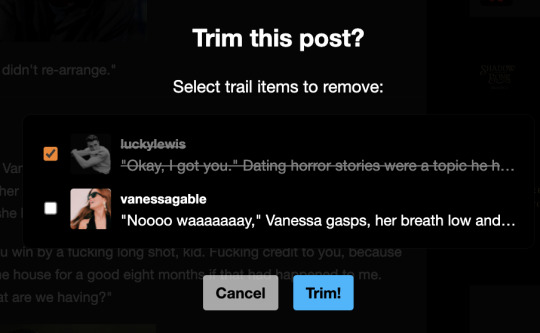
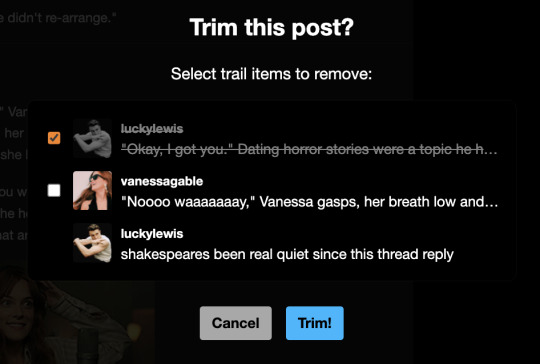
And that icon brings this up! You’ll see it says “Select trail items to remove,” and it shows the trails separately. “Trails” are each individual reblog, and of course, we only want two of those, not three. This is really easy to fix! We’re just gonna select that top “trail,” aka the first reply in the thread, and hit the “Trim!” button.
And once we’ve done that, the first “trail” is gone! You just have the two more recent replies on the post, and you’re good to reblog it!

The one caveat of this is that you can no longer edit parts of other people’s replies, so you can’t format the posts to your heart’s content like we’re used to. A downside for sure, but so far, this isn’t something there’s a fix for. Hopefully in the future, xKit will figure that out for us!
Step 6. That’s All!
Once you have all that down, you’re a master of the Beta editor and a master of xKit Rewritten! Tumblr staff has mentioned phasing out the Legacy editor all together in the future, so it appears this will be our new reality. It is worth it to mention that the Beta editor is still, well, in beta, so it is subject to change. If it does and we get even more features or work-arounds, I’ll be sure to come back and edit this post! Until then, if you have any questions, please let me know! I am here to help!
xoxo, Kirby
13 notes
·
View notes
Text
This post was created and written in Emacs as Markdown (with Frontmatter YAML), and then I used my mostly-finished Python code to post it as NPF using the Tumblr API.
The Python packages I'm using are
`pytumblr2` for interacting with the API using Tumblr's "Neue Post Format",
`python-frontmatter` for reading the frontmatter (but not writing; I hate how it disruptively rearranges and reformats existing YAML),
`mistune` for the Markdown parsing, for now with just the strikethrough extension (`marko` seems like it would be a fine alternative if you prefer strict CommonMark compatibility or have other extension wants).
The workflow I now have looks something like this:
Create a new note in Emacs. I use the Denote package, for many reasons which I'll save for another post.
Denote automatically manages some fields in the frontmatter for the information it owns/manages.
Denote has pretty good code for managing tags (Denote calls them "keywords"). The tags go both in the file name and in the frontmatter. There's some smarts to auto-suggest tags based on tags you already use, etc.
The usual composable benefits apply. Denote uses completing-read to get tags from you when used interactively, so you can get nicer narrowing search UX with Vertico, Orderless, and so on.
So when I create a new "note" (post draft in this case) I get prompted for file name, then tags.
I have my own custom code to make tag adding/removing much nicer than the stock Denote experience (saves manual steps, etc).
Edit the post as any other text file in Emacs. I get all the quality-of-life improvements to text editing particular to my tastes.
If I stop and come back later, I can use any search on the file names or contents, or even search the contents of the note folder dired buffer, to find the post draft in a few seconds.
Every time I save this file, Syncthing spreads it to all my devices. If I want, I can trivially use Emac's feature of auto-saving and keeping a configurable number of old copies for these files.
I have a proper undo tree, if basic undo/redo isn't enough, and in the undo tree UI I can even toggle displaying the diff for each change.
My tools such as viewing unsaved changes with `git diff`, or my partial write and partial revert like `git add -p`, are now options I have within easy reach (and this composes with all enhancements to my Git config, such as using Git Delta or Difftastic).
After a successful new post creation, my Python code adds a "tumblr" field with post ID and blog name to the frontmatter YAML. If I tell it to publish a post that already has that information, it edits the existing post. I can also tell it to delete the post mentioned in that field, and if that succeeds it removes the field from the file too.
The giant leap of me being able to draft/edit/manage my posts outside of Tumblr is... more than halfway complete. The last step to an MVP is exposing the Python functions in a CLI and wrapping it with some Emacs keybinds/UX. Longer-term TODOs:
Links! MVP is to just add links to my Markdown-to-NPF code. Ideal is to use Denote links and have my code translate that to Tumblr links.
Would be nice to use the local "title" of the file as the Tumblr URL slug.
Pictures/videos! I basically never make posts with media, but sometimes I want to, and it would be nice to have this available.
6 notes
·
View notes
Text
WIP Wednesday (Again sorta... It's only 2 am this time and mostly still around normal sleep time for me)
I charted the freaking room out when I couldn't figure out where I wanted Yuuki and Akira. Bed and couch seemed like no go's for a multitude of reasons. I'm definitely still working on this so you get to see the strikethroughs. It is a WIP.
When I strikethrough vs delete: I strikethrough when it sat there long enough that I write the next page or so, to potentially need to refer to that verbiage. I delete when its only been a few minutes and I definitely haven't had time to write enough to have that influence.
Persona Royal Strikers Chapter 1 Scene 2(1/?):
After the last two joined back up, the group slowly moved and cleaned the room a little more, all laughing and catching up as they slowly set up their old planning table. Eventually they all settled with Haru and Makoto sharing the couch with enough space that Yusuke could join them if he tired of his spot leaning into the desk. Futaba sat on the ledge by the windows with Morgana at her hip, getting some of the pets he missed while away with Akira. Ann and Ryuji sat in chairs across the table from them. Akira and Yuuki shared a series of crates, which while they faced away from the stairs, one or the other would glance back each time they heard the bell of the cafe’s front door. Their plans on what to do over the summer was coming together much more clearly than they had through text earlier in the month.
Yuuki slumped into Akira’s side, before he grumbled out, “Even if I wanted to, I probably can only do the camping trip. Only have a few days I can call off for this job.”
Everyone focused on Yuuki, a multitude of emotions crossing each face. Very quickly Ryuji yelled, “Dude, so you can only do a day or two for the entire summer?”
“If it's a summer job that isn’t too surprising,” Makoto reasoned.
“Ryuji, you may have to think on whether you can too. Niijima-senpai and Okumura-senpai are college students and Kitagawa lives alone in a dorm,” Yuuki sweeped his hand across the table at the three members in question. Across the three of them, they having a singular guardian figure “Niijima-san might voice a want to know where Niijima-senpai is, but I don’t think those two would stop each other if everyone is doing alright, since she knows you all can take good care of yourselves and the world.” Yuuki added with a shrug.
#persona 5#p5#mishima yuuki#kurusu akira#sakamoto ryuji#niijima makoto#phantom thieves#I'm more or less making this take the place of the EMMA conversation based on later lines in the scene#sorry for serving it piecemeal but otherwise I'll just be posting the absolutely same scenes with small changes for weeks on end#this keeps me more honest of yes progress!#and reads at least more like an actual fic#royal strikers#2.1/?#shuyuu#likely the only relationship tag I'll be putting on until Hokkaido#then again since the other couple I have written are even less blatant?#5 more scenes before I likely will feel comfortable posting in a more readable form#aka ao3#2 of which are mostly written I'm just not gonna post out of order
2 notes
·
View notes
Text
Apple iOS 18 Features On iPhone And How To Get iOS 18

Apple iOS 18
With deeper customization options for the Home Screen and Control Center, the largest-ever redesign for Photos that makes it even easier to find and relive special moments, and significant improvements for Messages and Mail, iOS 18 is now available to iPhone users worldwide. Apple Intelligence, a personal intelligence system that blends the power of generative models with individual context to produce information that is extraordinarily relevant and valuable while safeguarding users’ security and privacy, will be available starting next month with iOS 18.1 Greater Personalization. Than Before With iOS 18, users may arrange app icons and widgets to make the perfect arrangement on each page or to frame the background, giving them exciting new options for personalizing their Home Screen.
Additionally, users may adjust the bright, dark, or colorful tint of the program icons and widgets, as well as enlarge them for a more streamlined appearance. Control Center has been updated with even more versatility in mind. You may arrange powerful control groups that are constantly at your fingertips, such as media playback, favorites, Home controls, connection, and the new controls gallery with choices from third-party applications. Additionally, users may modify or delete the Lock Screen‘s features completely, and they can now access their preferred controls via the Action button.
- Advertisement -Image credit to Apple
How To Get iOS 18
Download iOS 18! Steps to upgrade compatible iPhone:
Check Your Compatibility: The iPhone must support iOS 18. The update supports iPhone XS and later.
Back Up Your Data: Before updating, backup your iPhone with iCloud or iTunes.
Connect your iPhone to a stable Wi-Fi network.
Make sure your iPhone is at least 50% charged to avoid update interruptions.
Open Settings: Access iPhone Settings.
Choose General. Tap “General.”
Select Software Update. Click “Software Update.”
If iOS 18 is available, select “Download and Install.” You may need your passcode.
iOS 18 Features
The Largest Image Remodel
The largest upgrade to Photos ever makes it simpler to locate and revisit memorable experiences. The elegant, uncomplicated design presents the library in a cohesive, but comfortable light. With the help of new categories like Recent Days, People & Pets, and Trips, users can appreciate their memories more and spend less time searching thanks to on-device intelligence. Users may customize their experience by pinning their favorite collections to make them quickly available and customizing the layout to reflect what matters most to them.
Effective Methods to Keep in Touch via Phone and Messages
Significant improvements to the ways people communicate and express themselves are provided via Messages. In addition to all-new text effects that bring words, phrases, and sentences to life, emoji and sticker Tap backs that allow users limitless ways to reply in a conversation, and the ability to write an iMessage to send later, users can better communicate tone with formatting choices like bold, italic, underline, and strikethrough.
Messages via satellite allows users to send and receive messages, emojis, and Tap backs via iMessage and SMS directly from the Messages app in situations where cellular and Wi-Fi connectivity are unavailable. When messaging non-Apple contacts, the Messages app now supports RCS for richer media and more reliable group interactions than SMS and MMS.
- Advertisement -
With the ability to record and transcribe live conversations, the Phone app helps users remain organized by making it simpler to remember crucial information later. Before a call is recorded, participants are alerted, and transcripts are readily stored to the Notes app, which makes it easy for users to explore and go over the topics covered.
Sense-Based Sorting in Email
Mail’s categorization feature, which will be available later this year, arranges messages to assist users in managing their inbox. Users may concentrate on messages that are urgent or include information that has to be seen quickly by using the Primary category. In a new digest view that compiles all pertinent emails from a company, Transactions, Updates, and Promotions are sorted by sender so users can rapidly scan for what’s important right now.Image credit to Apple
Safari: The Distraction-Free Web Browser
With iOS 18, Safari, the fastest browser in the world, now has even more features for online surfing.4 Highlights are clever pop-ups that appear when a site loads that include important information such as an address, a synopsis, or further details about a movie, TV program, or music. With a simplified layout, a synopsis, and a table of contents for lengthy pieces, the new Reader offers additional ways to consume articles. Users may use Distraction Control to conceal website elements like sign-in banners and content overlays that they feel interfere with their surfing.
The Brand-New Passwords App
A new software called Passwords, which is based on Keychain, makes it even simpler for users to see and retrieve all of their credentials, including passwords, passcodes, and verification codes, in one location. Passwords App is supported by extraordinarily safe end-to-end encryption, syncs effortlessly across devices, and notifies users when a password is likely to be cracked, has been used more than once, or has been discovered in a known data dump.
Features for Privacy That Empower Users
With iOS 18, users can choose who may see their applications, share their contacts, and connect their iPhone to accessories. Apps that are hidden or locked provide users the assurance that private information like content and notifications won’t accidentally be seen by unauthorized parties. In addition to hiding an app by relocating it to a protected, hidden applications folder, users may also lock an app for further privacy.
Content such as emails or messages inside an application that is locked or hidden is concealed from search results, system alerts, and other locations. Furthermore, iOS 18 allows users to exchange individual contacts with apps, and developers may provide a more private and frictionless experience for consumers when connecting third-party accessories to iPhones.
Coming Next Month: The Initial Set of Apple Intelligence Features
iOS 18 has a deep integration of Apple Intelligence, which uses the power of Apple silicon to safeguard users’ privacy and security while simplifying and accelerating daily chores. It can also comprehend and produce words and pictures, execute actions across applications, and draw upon personal context. Next month, the first batch of Apple Intelligence features will go live, offering fun, simple-to-use, intuitive, and purposefully designed experiences to support customers in doing the things that are most important to them.
By rewriting, editing, and summarizing material in almost every place they write including Mail, Notes, Pages, and outside appsusers may improve the quality of their writing using Writing Tools. With only a description, users can now make the movies they wish to view in Photos using the Memories feature. Furthermore, precise picture searches may be conducted using natural language, and video searches become even more effective when precise periods inside films can be located.
With the help of the new Clean Up tool, distracting background elements in photos may be found and eliminated without unintentionally changing the topic. Additionally, users may record, transcribe, and summarize audio in the Notes and Phone applications. Participants are alerted immediately when a recording is started during a conversation in the Phone app, and once the call concludes, Apple Intelligence creates a summary to aid in remembering important details.
The Siri grows more intuitive, adaptable, and well ingrained in the system. When activated on an iPhone, its sophisticated glowing light design encircles the screen’s edge. On an iPhone, users may utilize Siri to speed up daily duties at any moment by typing to her. They can also seamlessly transition between text and speech.
Siri’s enhanced language comprehension skills enable it to follow users even when they mispronounce words and to retain context across requests. Furthermore, thanks to its vast product expertise, Siri is now able to respond to millions of inquiries about the settings and functions of Apple products.
Apple Intelligence is a remarkable advancement in artificial intelligence privacy, with many of its models operating exclusively on the device and the release of Private Cloud Compute, which expands the security and privacy of Apple devices into the cloud to unlock even more intelligence.
Read more on govindhtech.com
#AppleiOS18Features#iPhone#GetiOS18#AppleIntelligence#iOS18#Appledevices#Messagesapp#iMessage#iOS181#LockScreen#InitialSet#PasswordsApp#artificialintelligence#NewPasswordsApp#Email#news#FreeWebBrowser#technology#technews#govindhtech
0 notes
Text
HTML Text Formatting

HTML provides various tags to format text, allowing you to change the appearance and structure of your content. Here's a guide to the most commonly used text formatting tags in HTML:
1. Headings
HTML provides six levels of headings, from <h1> (most important) to <h6> (least important). Headings are used to create titles and organize content hierarchically.<h1>Main Heading</h1>
<h2>Subheading</h2>
<h3>Sub-subheading</h3>
<h4>Sub-sub-subheading</h4>
<h5>Sub-sub-sub-subheading</h5>
<h6>Smallest Heading</h6>
2. Paragraphs
Paragraphs are used to group blocks of text together. HTML automatically adds space before and after paragraphs.<p>This is a paragraph of text. Paragraphs are block-level elements, meaning they take up the full width available.</p>
3. Line Breaks
To create a line break within a paragraph or other text, use the <br> tag. This tag is an empty element and doesn’t have a closing tag.<p>This is the first line.<br>This is the second line, on a new line.</p>
4. Horizontal Lines
A horizontal line (thematic break) can be created using the <hr> tag. This is often used to separate sections of content.<p>This is some text before the line.</p>
<hr>
<p>This is some text after the line.</p>
5. Bold Text
To make text bold, you can use the <b> or <strong> tag. While both tags visually render text in bold, <strong> also indicates that the text is of strong importance.<p>This is <b>bold</b> text.</p>
<p>This is <strong>strong</strong> text, which also has semantic importance.</p>
6. Italic Text
To italicize text, you can use the <i> or <em> tag. The <em> tag emphasizes the text semantically, meaning it can affect the way assistive technologies interpret the content.<p>This is <i>italicized</i> text.</p>
<p>This is <em>emphasized</em> text.</p>
7. Underlined Text
To underline text, use the <u> tag. This is not as commonly used today due to styling being handled by CSS, but it's available in HTML.<p>This is <u>underlined</u> text.</p>
8. Superscript and Subscript
Superscript: The <sup> tag raises text slightly above the baseline, often used for exponents or footnotes.
Subscript: The <sub> tag lowers text slightly below the baseline, often used for chemical formulas.
<p>This is superscript: x<sup>2</sup></p>
<p>This is subscript: H<sub>2</sub>O</p>
9. Strikethrough Text
To strike through (cross out) text, use the <s> or <del> tag.<p>This is <s>strikethrough</s> text.</p>
<p>This is <del>deleted</del> text, often indicating something that has been removed.</p>
10. Monospaced (Code) Text
To display text in a monospaced (fixed-width) font, typically used for code, use the <code> tag.<p>This is <code>inline code</code> within a paragraph.</p>
<pre>
<code>
function example() {
console.log('This is code');
}
</code>
</pre>
11. Small Text
The <small> tag decreases the font size of the text, often used for disclaimers or fine print.<p>This is normal text.</p>
<p>This is <small>small</small> text.</p>
12. Marked Text
The <mark> tag highlights text with a yellow background, similar to using a highlighter.<p>This is <mark>highlighted</mark> text.</p>
13. Quotations
Inline Quotes: The <q> tag is used for short quotations and automatically adds quotation marks.
Block Quotes: The <blockquote> tag is used for longer quotes, usually indented.
<p>This is an inline quote: <q>To be or not to be, that is the question.</q></p>
<blockquote>
This is a block quote. It is usually used for longer quotations.
</blockquote>
Source: Understanding HTML: From Basics To Advance
0 notes
Text
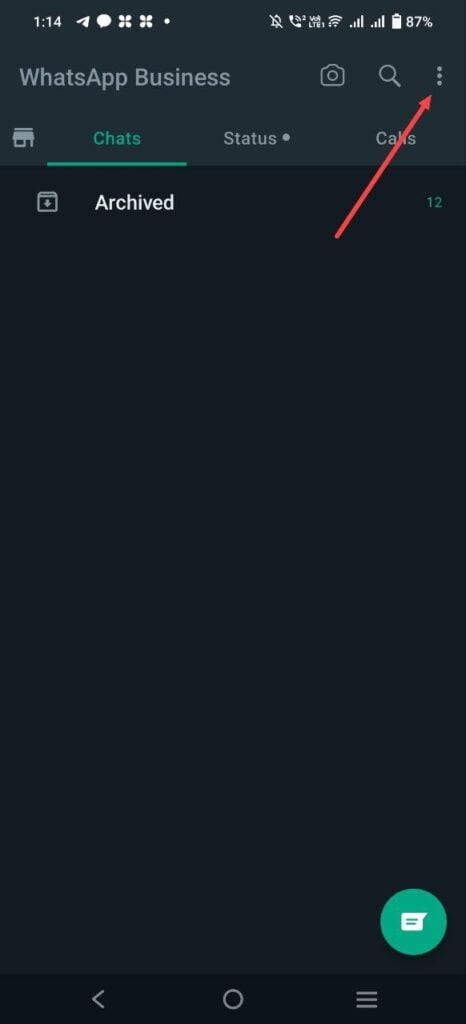
Unlocking the Secrets of WhatsApp: The Next Level Hidden Features

Unlocking the Secrets of WhatsApp: Tips and Tricks You Need to Know. Discover the best WhatsApp tips and tricks to take your messaging game to the next level. From hidden features to expert hacks, unlock the secrets of WhatsApp and revolutionize your chatting experience
Hack 1 : Secure Whatsapp with finger print (Without App).
Hack 2 : Read deleted messages on WhatsApp.
Hack 3: Change font, Bold, italics, strikethrough.
Hack 4: Hear Voice Message without using headset/ earpiece.
Hack 5: Hide the blue tick.
Hack 1 : Secure Whatsapp with finger print (Without App).
Now you can lock your whatsapp using fingerprint without using any software.
This mechanism permits only those individuals who have registered their unique fingerprint with mobile device to gain access to WhatsApp.


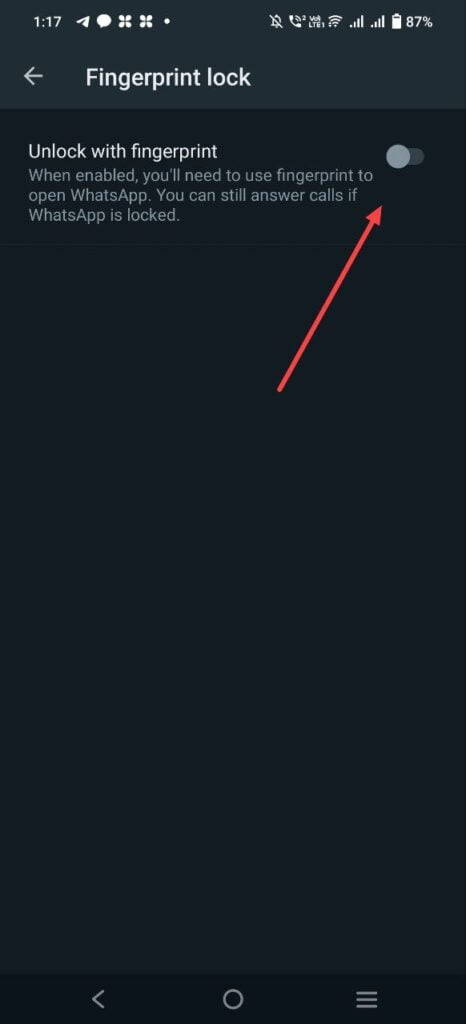
To do so, Update your Whatsapp go to settings >> Accounts >> Privacy and scroll down to fingerprint lock>> Enable it.
Read This Also: Whatsapp Privacy Hacks
Hack 2 : Read deleted messages on WhatsApp.
Certainly! It's actually possible to read messages that your friends have deleted on their end. All you have to do is download a notification log app and give it permission to access your notifications. This app will keep a record of all your incoming notifications, which can come in handy when you accidentally swipe off a notification and want to retrieve it later.
Hack 3: Change font, Bold, italics, strikethrough.
Manually you can do:
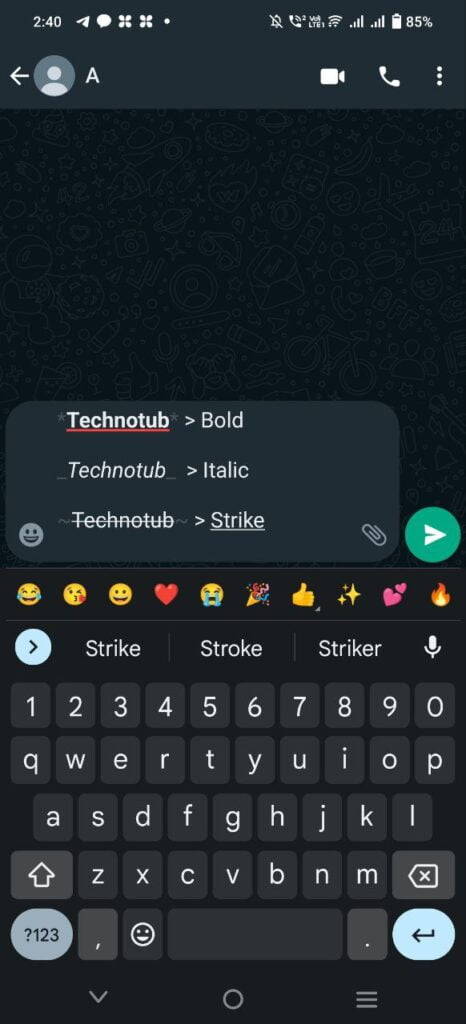
If you use WhatsApp, you can easily make your text bold, italicized, or strikethrough. All you have to do is add a few special characters before and after the text you want to format.
To make text bold in WhatsApp, just put an asterisk before and after the word or phrase you want to emphasize, like this: *bold*.
For italics, use an underscore before and after the text you want to emphasize, like this: _italics_.
Finally, if you want to create strikethrough text, put a tilde before and after the word or phrase you want to cross out, like this: ~strikethrough~ .
Hack 4: Hear Voice Message without using headset/ earpiece.
Did you know that when you receive a voice message on WhatsApp, you can listen to it using your phone's earpiece? This is the same earpiece that you use to hear the other person's voice during a phone call. So, if you're in a public place or just want to keep the message private, you can simply hold the phone to your ear and listen to the message without anyone else hearing it.
Also Read This : Unlocked(Full Version) Android Apps 100% Free
Hack 5: Hide the blue tick.
The blue ticks in WhatsApp can sometimes cause issues, particularly if you don't reply immediately and the other person can see that you've read their message. You can disable them if you prefer, but it's important to know that if you do, you won't receive read receipts for your own messages either.
So, if you want to avoid any potential misunderstandings or awkward situations, you may want to leave the blue ticks enabled. However, if you value your privacy and don't want others to know when you've read their messages, turning off the blue ticks may be a good option for you. Just keep in mind that you won't be able to see when others have read your messages either

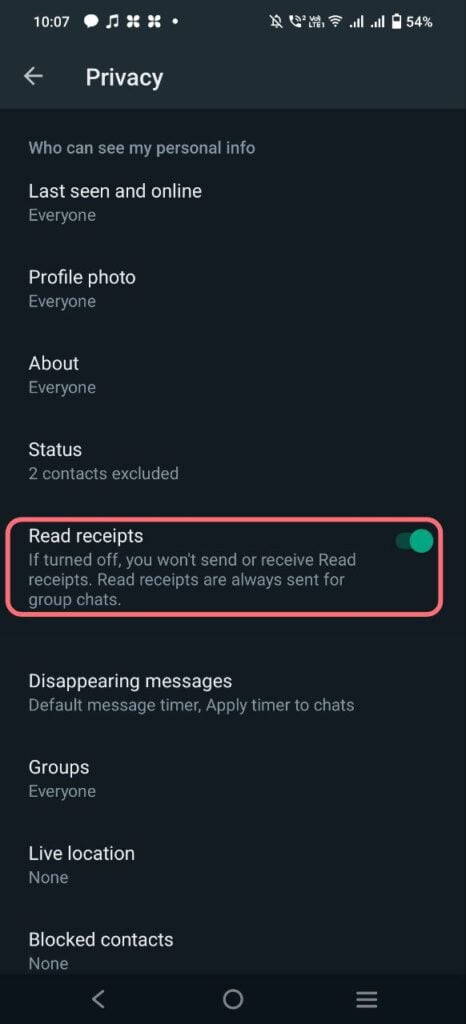
Android: Settings > Privacy > Untick Read Receipts. Just three steps.
Read the full article
0 notes
Text
Novlr
I am a simple man. I see a gradient, I upvote. Or whatever the vocal equivalent of an upvote is.
NOVLR HAS AN AUTOMATIC EASY TO UNDERSTAND TUTORIAL. I REPEAT, IT HAS A TUTORIAL.
Okay so the appearance is really nice on my eyes. There's three skins to choose from and they're all easy to look at.
You can easily change your font size, indent all your paragraphs, and number all your chapters. When you're typing, if you highlight your text you get a 'toolbar', where you can bold, italicize, underline, strikethrough, make a bullet list, or align your text. You can customize this easily on the right side of the screen/page, adding or removing any of these if you need them.
It also has an option for 'curly quotes', but I couldn't find what those do.
At the bottom of the screen there are some icons - the first, a keyboard, shows the shortcuts you can use on Novlr. The second, a magnifying glass, is a proofreader. I can't figure out what the one next to it does, and the one after that, the bell, moves you to your dashboard and starts you on an in-app chat with a support member.
I found I did have issues with some features not working. Again, 'curly quotes', and while 'focus mode' worked for a bit, when I went to try it again nothing happened. I tried closing out and going back in, but it still didn't work.
The bottom left side of the screen shows how many words you have in the chapter, and if you hit the button next to it it shows you previous versions of the chapter.
Novlr works offline! As someone who loses internet a lot, that's great! It keeps going, and just backs up once you regain it. You can also back it up to Google Drive or Dropbox.
When you first open Novlr, under the Notes tab (visible on the left, under your 'Chapters') there's a well set-up guide for using Novlr! I love this.

They also have a recommended guide for setting up your characters!


On your dashboard you can view your goals, streaks, words written that day, week, year, and total. Your words written can also be viewed on a graph - and it also shows words deleted! So when you edit it's not just a blank spot.
There's also a writing course you can take/listen to, with the writing program integrated in so you can write along!
You can publish straight to ebook when you're done, and put your Title, Subtitle, Author's Name, and even plug in your cover art. If you publish straight to Amazon, this is really useful!
Novlr analyzes your productivity, and tells you when you like to write - morning, for example, and tells you which authors like to write then as well! It tells you what day you're most productive, when you last wrote, how many minutes and hours you've written this day, week, and year. It also breaks down how many words you've written if they were evenly split over how many days you've written on writing days, and then on all days, then tells you how many days it would take you to write War and Peace at your current pace.
It also tells you how many pages your book would be at the current page and font size for Dr. Seuss, Pride & Prejudice, and Great Expectations. This isn't necessary, but it's fun!
Overall, as a writing program I'd rate Novlr as an 8/10. It'd get higher if it weren't for the glitches! As a plotter, 1/10. You can only really throw notes down, no true plotting. So 7/10
0 notes
Text
Kami pdf merge

#KAMI PDF MERGE PDF#
#KAMI PDF MERGE INSTALL#
#KAMI PDF MERGE PORTABLE#
#KAMI PDF MERGE ANDROID#
The extension can work with locally stored files, but also connects to the Google Drive and Google Classroom services. PDFescape too offers a dedicated Windows tool for offline use if you do want to have it available offline.Kami is an annotation solution that integrates with your Chrome app and offers you the possibility to work on documents within the web browser. Being an online tool it does let you add PDFs via URL. The editor is flexible enough that even though you can not edit existing text, you can just cover it with white space and type over it with the same font. You can draw on the PDF, add sticky notes, strikethrough text, put white space over anything you want to disappear, and insert lines, checkmarks, arrows, ovals, circles, rectangles, and comments. It won’t let you edit existing text though. You can do anything from adding images, texts, deleting or adding pages, etc.
#KAMI PDF MERGE PDF#
The PDF should not contain more than 100 pages and should not exceed 10 MB in size. There is a limit to the free use of PDFescape though. Since you can visit the web using any operating system compatibility is never an issue with web-based tools.
#KAMI PDF MERGE INSTALL#
This is another web-based tool that can be really handy if you don’t want to install anything on your PC. There is also a desktop Linux app you can install on your Chromebook which is basically a wrapper for the web app. It lets you add PDF Files through URL as well and can also be used to convert PDF files to Word or JPG and vice-versa. The fact that you don’t have to install anything is definitely a plus if you don’t often edit documents. You can even just paste the link of the PDF you want to edit if it is already present online. To edit a document, simply visit the website following the link below and upload the PDF. Most of all, unlike many other free online tools, it does not add any watermarks to your documents. Sejda lets you edit the text already present in the PDF file and that might just be what you want to do. Usually, you are allowed to only add text and edit the added text. Not many PDF Editors will let you edit the existing text on a PDF file. This PDF Editor is a web app or tool instead, accessible via any device as long as it has a browser. SEJDA is one of the best PDF editors for Chromebook with great features and user interface. Before you jump to the list of PDF editors, don’t forget to go through these Chromebook shortcuts and function keys and Chrome OS tips to make your user experience better. Many of those are online tools though so you’ll need to use your trusty Chrome browser. Luckily, there are a number of easy to use and even free tools available for Chrome OS and Chromebooks.
#KAMI PDF MERGE ANDROID#
Sure there are Android apps but they’re not really that great for bigger screens as has been proved by the demise of Android tablets. The most popular PDF tool, Adobe Reader isn’t available for Chrome OS. It would still look the same everywhere.įor Chrome OS or Chromebook users though PDFs can present a bit of a challenge. You could create a PDF using any kind of software. PDFs have solved this huge professional problem and they’re hence quite popular. Back in those days, if you received an email containing a document, it was a pain to figure out which software was used to create it so it could be viewed properly. Making sure both the sender and the receiver use the same software is quite difficult. You would know this if you have tried viewing a Word document from someone in MS Word that was typed on Google Docs, Libre Office, or just anything that’s not MS Word. The younger generation probably doesn’t know this but before PDFs, sharing documents was a pain. These PDF readers also let you edit PDF documents on your Chrome OS-powered Chromebook. Some of you may have wondered at some point, “what’s so great about a PDF?” and “why is it so popular?” And we’re going to answer those questions before we present to you some of the best PDF editors for Chromebook.
#KAMI PDF MERGE PORTABLE#
PDF is really an acronym for portable document format. Almost everyone uses them and yet almost no one really knows what that acronym actually means. The moment you mention PDF people know you’re talking about a document. PDF is a well-known acronym in this day and age.
0 notes
Last Seen Blogs

wekwerth
Nik's Tech Notes

karirnasional-blog
Karir Nasional

asofterallcreatures
A Softer All Creatures Great And Small

insanityvirus13
The Insanity Virus

losti-va-le
Lo sti(va)le