#ultimate ancient gear golem
Text


GX Pop-up Cafe celebrating the 20th anniversary of GX on October 6th, featuring new official artwork
Dishes
Drawbread (Golden Egg, Croquette, Yakisoba, Pizza)
Judai's Gotcha! Fried Shrimp Pasta
Underground Duel Ramen
Shou vs. Kenzan! Aniki Donburi
Wicked Canon Curry
Desserts
Manjoume Black Sundae
Manjoume White Sundae
Obelisk Blue Queen, Asuka's Panna Cotta
Time Capsule Pudding
Fubuki 10join Banana Cake
Keep Running Forward! New Journey Tiramisu
Drinks
Elemental Hero Neos (strawberry syrup, yogurt drink)
Ojama King (black sesame milk, strawberry flakes)
Cyber End Dragon (calpis soda, blood orange syrup, blue curacao syrup)
Red-Eyes Darkness Metal Dragon (cola, cranberry syrup, mixed berries)
Cyber Blader (cranberry juice, mint)
Super Vehicroid Jumbo Drill (cafe latte, banana syrup, chocolate)
Ultimate Tyranno (black tea, lemon syrup)
Water Dragon (mojito syrup, sprite, blue pine jelly)
Maiden in Love (yogurt drink)
Ancient Gear Golem (grenadine syrup, curacao syrup, black lemon jelly, club soda)
Destiny Hero Plasma (cassis syrup, berry jelly, club soda)
Rainbow Dragon (ramune syrup, calpis soda)
Fossil Warrior Skull King (brown sugar syrup, soymilk)
Volcanic Doomfire (grenadine syrup, blackcurrant syrup, oolong tea, berries)
Yubel, the Ultimate Nightmare (curacao syrup, grape jelly, calpis soda, pineapple)
27 notes
·
View notes
Text
Mysteries of the Dwemer pt. 2: Gyroscopic Dynamos Don't Run on Nothing
The spherical animunculi and other golems are often the first thing that mortals imagine when thinking of the Dwemer. Indeed, their machines and labyrinthine complexes are the only thing they may now be remembered by. It is therefore natural that most questions of the Dwemer are practical questions of their engineering. I could regale you with long explanations of how each of their myriad machines work, but instead I will tell of the obvious centers of their technology: steam and sound.
All Dwemer technology is ultimately powered by steam. Furnaces boiling water to drive pistons and turn gears from the top to the bottom of their complexes. Without a running steam engine, the largest of their centurions is nothing but a statue. I shan't get into the specifics of how the system works. A few craftsmen on Stros M'kai have recently reproduced it for themselves. Instead, I will warn you that you are not capable of using this technology.
Suppose these redguard craftsmen begin building steam machines for whoever will buy them. Who would use them? For what purpose? They cannot carry freight for they are far too expensive to produce for wagons, and either too heavy to float or too small to produce thrust in your ships. They cannot power animunculi or lights like within the dwemer ruins, as these are still mysteries to you. Even if a farmer could afford such a technological marvel to run their mill, what will they do when it breaks? You have no use for technologies as this. The Dwemer were further developed than the Third Aldmeri Dominion is, even now, when they created the tools they are so well known for.
This advancement is not simply because of a difference in skill. It is rooted in a lucky discovery in the early history of the Dwemer. Like the ancient races of men, the Dwemer were skilled in the manipulation of sound. Nords have their shouts, Redguards have sword-singing, and the Dwemer learned tonal architecture. This underpins much of their technological achievement.
If you have heard of "the music of the spheres", imagine tonal architecture as playing spherical conductor for a moment. Reshaping reality as you wish, so long as you understand what you're doing. Once the Dwemer found this power, it was quickly adopted as a major pillar of their engineering. Even by the time of the Battle of Red Mountain, the crown still had a chief tonal architect in its court. It was as versatile as it was powerful.
You must understand this: holding a power as strong as reshaping reality has far-reaching consequences for both a culture and its products. Let us briefly discuss Dwemer metalworking. Your scholars have repeatedly stressed that Dwemer metal is something different from brass. Though it appears the same in many aspects, brass lacks the strength and durability of Dwemer metal. I ask you: for a craftsman that can manipulate reality, how hard would it be to make brass far stronger and more durable than it should be? How hard would it be to ensure a blade stays sharp forever? To ensure the spinning dynamos in your golems never stop moving?
Tonal architecture was the root cause of the Dwemer's swift advancement and of their downfall.
#imagine the first one to sing to his metal and realize it worked better#knowledge of the obscure is often indistinguishable from insanity#dwemer#the elder scrolls
5 notes
·
View notes
Text
Anyway, let's do Level 12 Fusions.
For Yuri, since he already has Predapower with 3600 ATK, most likely the Level 12 will use Greedy Venom as basis, which will give it 3800 ATK. Using Predapower instead will give us 4400 (2800+800= 3600, so 3600+800 = 4400), which will be the same Ultimate Ancient Gear Golem, which, while higher than Z-ARC, would make sense in context, especially since its overall stat total will be lower.
For ARC-V era Level 10 monsters that can get Level 12 variants, we have:
**Goyo Emperor
**Earthbound Servant Geo Grasha
**Chaos Ancient Gear Giant
Not counting Edo's Deck, as legacy characters' ARC-V Decks are not counted in favour of their original ones, despite Edo being the cover character of Booster Sp: Destiny Soldiers.
Invoked Elysium, from this era, but not an animé card, is also likely, much more so than the others. Invoked cards were from Yuri's set, Booster SP: Fusion Enforces, so chances are Level 12, and Level 11 Invoked will happen sooner than later, especially since OCG Stories is covering Aleister's early years as of this post.
All three mentioned above were introduced in Season 2, except Chaos Ancient Gear Giant which was briefly shown in Season 1 flashbacks. Since most of those non-legacy Decks have a Level 12 card in them, these can get theirs too, though Geo Grasha already has Red Nova indirectly.
****
Sora, and Dennis simply cannot get a lot of support, because they have too much cards remaining from the animé/manga. Unless those are gradually covered, new higher Level Fusion support will be very, very limited.
Serena is also unlikely get further higher Level monster, except maybe a Level 11 Fusion Parasite version of Leo Dancer, and its subsequent purified form. Other Bracelet Girls do not have monsters above Level 8, so Serena has to wait for Rin, and Yuzu.
Tyler Sisters are eventually going to get new support, as it has been the case for most previous Duelist Pack legacy themes. However, they will likely be delayed, as there isn't much of a logical step beyond Augusta, and Pet Liger, outside of Fusing the two together, and Rush Duels will likely eventually have their own version of Amazoness.
Battle Beast is likely to get a Level 12 Gladiator Beast eventually, but the archetype generally preferred mid-Level Fusion Monsters. So this one will likely take some time.
****
For honourable mentions:
**Shaddolls, and Gem-Knights cannot go above Level 11, but they can go to Level 11 due to their association with Tierra, and Zefraath, though it is unclear how this would work, or how this would affect the associated archetypes.
***Though Gem-Knights are Masumi's Deck, due to their prominent role in Duel Terminal's storyline, they can get support whenever.
**Kachidoki will probably have his Shura retrain earlier than expected, which might mean another Shura retrain might end up happening later down the line, once more of Ryozanpaku School cards are printed.
****
Other notes:
**Roget's Howitzer might eventually get an upgrade, and Roget's Deck might match the Synchro Fusions of his subordinates. This is unlikely to reach to Level 12, but it might feature more Level 10 Ancient Gear monsters.
**Sora is unlikely to reach Level 12 before Level 10, so he might get a Nightmary analogue for his animé Deck, before his remaining manga monsters are covered.
Edit: It is Ultimate Ancient Gear Golem, Japanese name is the Antique Gear Ultimate Golem. Corrected from Ancient Gear Ultimate Golem to Ultimate Ancient Gear Golem.
0 notes
Text

Meme hecho por mí.
Los Ultimate Ancient Gear Golem no cuenta porque es un deck diferente, Clear Wing lo obtuvo después de absorber a Yugo (Y nunca lo uso sin Starve Venom) y Greedy Venom es Starve Venom mejorado.
#Yugioh Arc-V#YGO Arc V#Yuri (Arc V)#Starve Venom Fusion Dragon#Starving Venom Fusion Dragon#Yu-Gi-Oh#Meme
0 notes
Text
Ancient Gear Golem TLM-EN006 Ultimate Rare Unl Edition Yugioh Card
COLLECTIBLES: Seller: alexjkw-2008 (99.9% positive feedback)
Location: GB
Condition: Used
Price: 373.55 USD
Buy It Now https://www.ebay.com/itm/285222715445?hash=item4268994035%3Ag%3AHZAAAOSwUu9kLpol&mkevt=1&mkcid=1&mkrid=711-53200-19255-0&campid=5338779482&customid=&toolid=10049&utm_source=dlvr.it&utm_medium=tumblr
0 notes
Text
Over the Nexus Deck Profile: Ancient Gear

Ancient Gears are a classic GX archetype, and they exemplify what such an archetype is usually like; it was played in the anime, but in the TCG most or all of the cards were unplayably bad, with decks based around said archetype centering around only the best monsters within it, and filling the rest of the space with staples. For Ancient Gears, their deck revolves around their field spell, Geartown. Geartown, however, is not like other archetypal field spells; rather than wanting to keep it on the field for as long as possible, Ancient Gears want that field spell destroyed to activate its secondary effect: If it is destroyed, Geartown lets you summon an Ancient Gear monster from your hand, deck, or graveyard, and that monster is typically Ancient Gear Gadjiltron Dragon. With 3000 attack and the ability to ignore backrow when it attacks, Gadjiltron Dragon is an incredibly powerful monster to summon for such a cheap condition. Geartown benefits significantly from an old ruling; if you set a field spell face down when you have one active already, the old one is destroyed. In short, by setting another field spell, we can easily destroy Geartown and summon Gadjiltron Dragon for free. This deck also capitalizes on how the NPC decks in Over the Nexus usually don't play Chimeratech Fortress Dragon, allowing it to play Cyber Dragon, once one of a Machine deck's greatest assets, without fear. And because this is a Machine deck, we have ready access to Machina Fortress, paired with Machina Gearframe, which works especially well in this deck given the large amount of high level Machines we can discard. And if all THAT wasn't enough, playing a field spell means we have access to Malefic Cyber End Dragon, possibly the biggest "free" special summon available. In short, this deck excels at summoning huge Machine monsters rapidly and winning through sheer offensive force. Class is in session, don't be a slacker!
MONSTERS (19):
Ancient Gear Beast x3
Ancient Gear Gadjiltron Dragon x2
Ancient Gear Golem x2
Cyber Dragon x3
Machina Fortress x3
Machina Gearframe x3
Malefic Cyber End Dragon x3
SPELLS (16):
Dark Hole x1
Future Fusion x1
Geartown x3
Limiter Removal x1
Monster Reborn x1
Overload Fusion x1
Pot of Duality x3
Power Bond x2
Terraforming x3
TRAPS (5):
Solemn Judgment x1
Solemn Warning x2
Starlight Road x1
Torrential Tribute x1
EXTRA DECK:
Chimeratech Fortress Dragon x3
Chimeratech Overdragon x1
Cyber End Dragon x3
Cyber Twin Dragon x1
Ultimate Ancient Gear Golem x2
Ancient Fairy Dragon x1
Black Rose Dragon x1
Red Dragon Archfiend x1
Scrap Dragon x1
Stardust Dragon x1
#yu-gi-oh!#world championship 2011: over the nexus#ancient gear#machina#cyber dragon (archetype)#ancient gear gadjiltron dragon#geartown#ancient gear golem#ultimate ancient gear golem#malefic cyber end dragon#machina fortress#cyber dragon#chimeratech fortress dragon#if this deck looks familiar it's because i modeled it off a deck played by cimo in the history of jank#this version is more fusion oriented and plays more high-risk cards like power bond for fun#if you're using this for pvp don't play the cyber dragons because they can and will be used against you
1 note
·
View note
Photo

Ancient Gear Frame
————————————————
You can discard 1 card; add from your Deck to your hand, 1 "Ancient Gear Golem" or 1 Spell/Trap that specifically lists the card "Ancient Gear Golem" in its text. You can only use this effect of "Ancient Gear Frame" once per turn. If this card attacks, your opponent cannot activate any Spell/Trap Cards until the end of the Damage Step. If this face-up card in its owner's control leaves the field because of an opponent's card effect: You can Special Summon up to 3 "Ancient Gear Golem" and/or "Ancient Gear Golem - Ultimate Pound" from your hand, ignoring their Summoning conditions.
————————————————
Can Be Found In: Legendary Duelists: Ancient Millennium (LED2-EN030)
Ancient Gear might seem a slow archetype at first, yet could have some of the most assured OTK setups in the game. Despite their lead monster "Ancient Gear Golem" having a severe summon restriction, Ancient Gear is able to solve it by workarounds and using it on their Fusion Summons. With incredible stats, the ability to shut down most counters during battle, and massive damage input, Ancient Gear even gained some reputation in other themes thanks to their involvement with other archetypes like Gadgets or Malefic.
"Ancient Gear Frame" is a monster with the task of managing most possibilities involving "Ancient Gear Golem", the archetype's most iconic monster. Like the majority of Ancient Gears, "Gear Frame" attacks cannot be responded by Spells or Traps until the end of the Damage Step. The true role of "Gear Frame" however comes by discarding a card, as in return we can add from our Deck to the hand either "Ancient Gear Golem" or a Spell or Trap that mentions said monster. While that already has some valuable purposes "Gear Frame" has a backup ability in case is destroyed by an opponent's effect, as will let us summon from our hand three "Ancient Gear Golem" or its counterpart "Ancient Gear Golem - Ultimate Pound" by ignoring their restrictions. Despite its popularity in various series "Ancient Gear Golem" wasn't a staple choice for many builds involving the archetype, but now with the assistance provided by "Gear Frame" and the many routes we can take with its effects makes it not only an potential OTK enabler but also a strong comeback mechanic if something goes wrong.
While completely focus on assisting "Ancient Gear Golem", "Gear Frame" has support of its own to be on the field when needed. While the summon of "Ancient Gear Wyvern" will suffice to obtain "Gear Frame" to our hand, instead we can search for "Ancient Gear Box" as will trigger its own searching effect and further increase our hand. Some Ancient Gear cards focuses more on summoning their strongest monsters but are as helpful to obtain "Gear Frame", like the Field Spell "Geartown" once destroyed or "Ancient Gear Catapult" destroying our own cards to summon Ancient Gears in return. Options will increase further if we investigate outside this archetype, ranging from the searching effects of "Gear Gigant X" and "Geargiauger" (Which can aim for "Box" instead) to one of many summoning methods involving Level 4 monsters. And while in most circumstances our Deck will completely invest on "Ancient Gear Golem", cards like "Iron Call" and "Call of the Haunted" among others will revive "Gear Frame" for any task needed.
Despite "Ancient Gear Frame" having a limited card pool to work with its effects, is still capable of aiming some of the most devastating winning conditions Ancient Gears can offer. "Ancient Gear Golem" might not be that easy to summon unless by cards ignoring its demerit, but adding it to our hand will be vital to summon Fusion Monsters with incredible OTK potential like "Ancient Gear Megaton Golem" and "Ultimate Ancient Gear Golem". This is further encouraged as "Gear Frame" can also look for the Spell "Ancient Gear Fusion", allowing us to use materials from our Deck if "Ancient Gear Golem" or "Ancient Gear Golem - Ultimate Golem" are on the field. While the archetype tries to win right away from early game they can take a more defensive approach, as "Cross-Dimensional Duel" either temporarily banishes an Ancient Gear to return with double its ATK, or protects either Effect Monster version of "Golem" from a destructive source. But when comes to a backup plan "Gear Frame" itself offer us one, as once destroyed by an opponent's effect will swarm the board with three "Golem" monsters from our hand. While this last effect might rarely happen, try to respond heavy removal effects with cards like "Call of the Haunted" so "Gear Frame" is destroyed and bring all our "Golem" to the field. But no matter if we are preparing Fusion Summons or a more defensive approach gathering both version of "Golem" to our hand, if we manage to follow with either "Power Bond" or "Limiter Removal" we will have our victory more than assured. Don't ignore the fact that discarding a card to search another can prepare our Graveyard in the process, piling materials to work on effects like "Overloard Fusion" later on.
As any searching effect in the game "Ancient Gear Frame" has a very important position in its archetype, specially for the two forms of "Golem" and their high OTK potential along the right support. By searching for "Ancient Gear Golem" or key cards like "Ancient Gear Fusion", "Gear Frame" adds speed to the fastest victory condition the archetype can aim for. While "Gear Frame" is able to summon any "Golem" from the hand and can avoid some threats during battle, these are effects we shouldn't depend on and solely focus on its searching ability. But while "Gear Frame" will become a staple choice in any Deck involving "Golem", given that has very few cards to search for including unable to obtain "Ancient Gear Golem - Ultimate Pound" which is as important makes it not that much of a need for the overall archetype. While Ancient Gears don't need to completely focus on "Ancient Gear Golem" alone, cards like "Gear Frame" encourages to do so no matter if you're a fan of the monster or not.
Personal Rating: A-
+ Discards a card to search for "Ancient Gear Golem" or any effect related to it
+ The opponent cannot activate Spells or Traps in response of its attacks
+ If destroyed by an opponent's effect will summon three "Ancient Gear Golem" or "Ancient Gear Golem - Ultimate Pound" from the hand
+ Great support for OTK setups
- Requires a Deck focused on "Ancient Gear Golem"
- Very few cards to search with its effect
- We will only depend on its searching effect as its other abilities will rarely have vital uses
#yugioh#Yu-Gi-Oh#Yu-Gi-Oh!#yu gi oh#ygo#ancient gear frame#ancient gear#frame#gear frame#ancient gear golem#golem#ancient gear golem - ultimate pound#ultimate pound#ancient gear golem ultimate pound#antique gearframe#gearframe#antique gear#antique gear golem#Antique Gear Golem - Ultimate Pound#Antique Gear Golem Ultimate Pound
25 notes
·
View notes
Photo

Ancient Gear Golem - Ultimate Pound
#Ancient Gear Golem - Ultimate Pound#yugioh#ygo#Ancient Gear#Ancient Gear Golem#yugioh tcg#ygo tcg#Machine#EARTH
229 notes
·
View notes
Photo
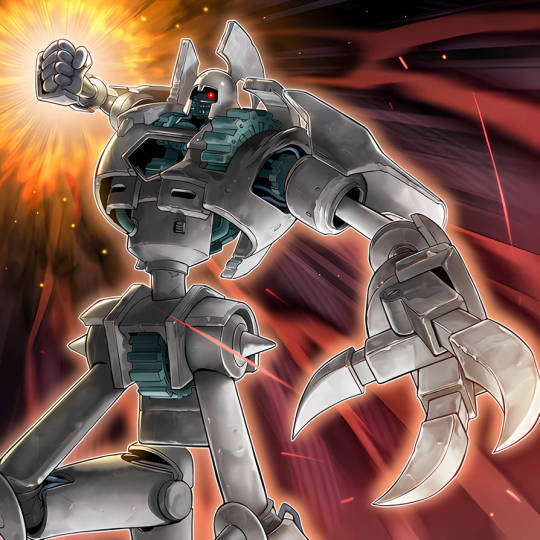
ANCIENT GEAR GOLEM - ULTIMATE POUND
Cannot be Special Summoned. If this card attacks a Defense Position monster, inflict piercing battle damage. Up to twice per turn, when this attacking card destroys a monster by battle: You can discard 1 Machine monster; this card can attack again in a row. If this card on the field is destroyed by battle or card effect: You can add 1 "Fusion" from your Deck to your hand, and if you do, add 1 other "Ancient Gear" monster from your GY to your hand.
#archetype – ancient gear#monster card#effect#level 8#earth attribute#machine type#[ 3000 atk / 3000 def ]#support: machine
7 notes
·
View notes
Text

TCG: Legendary Duelists - Season 1
Complete listing:
Red-Eyes B. Dragon
Black Dragon’s Chick
Red-Eyes Darkness Dragon
Red-Eyes Darkness Metal Dragon (text update, see below)
Red-Eyes Wyvern
Malefic Red-Eyes B. Dragon
The Black Stone of Legend
Black Metal Dragon
Red-Eyes Retro Dragon
Red-Eyes Baby Dragon
Gearfried the Red-Eyes Iron Knight
B. Skull Dragon
Meteor B. Dragon
Red-Eyes Slash Dragon
Red-Eyes Flare Metal Dragon
Inferno Fire Blast
Red-Eyes Fusion
Cards of the Red Stone
Red-Eyes Insight
Return of the Red-Eyes
Red-Eyes Fang with Chain
Amazoness Princess
Amazoness Baby Tiger
Amazoness Call
Amazoness Onslaught
The Legendary Fisherman II
Citadel Whale
Rage of Kairyu-Shin
A Legendary Ocean
Sea Stealth Attack
Cyberdark Horn
Cyberdark Edge
Cyberdark Keel
Cyberdark Cannon
Cyberdark Claw
Cyberdark Dragon
Cyberdarkness Dragon
Cyberdark Impact!
Cyberdark Inferno
Mixeroid
Super Vehicroid – Mobile Base
Vehicroid Connection Zone
Megaroid City
Emergeroid Call
Millennium-Eyes Illusionist
Illusionist Faceless Magician
Relinquished
Black Illusion Ritual
Relinquished Fusion
Thousand-Eyes Restrict
Millennium-Eyes Restrict
Toon Alligator
Manga Ryu-Ran
Toon Mermaid
Toon Summoned Skull
Blue-Eyes Toon Dragon
Toon Dark Magician Girl
Toon Masked Sorcerer
Toon Gemini Elf
Toon Cannon Soldier
Toon Goblin Attack Force
Toon Cyber Dragon
Toon Ancient Gear Golem
Toon Barrel Dragon
Toon Buster Blader
Red-Eyes Toon Dragon
Toon Dark Magician
Toon World
Toon Table of Contents
Toon Defense
Parasite Paranoid
Metamorphosed Insect Queen
Cocoon of Ultra Evolution
Corrosive Scales
Barrel Dragon
Desperado Barrel Dragon
Heavy Metal Raiders
Time Machine
Proton Blast
Ancient Gear Golem
Ancient Gear Gadget
Ancient Gear Reactor Dragon
Ancient Gear Hydra
Ancient Gear Wyvern
Ancient Gear Golem – Ultimate Pound
Ancient Gear Frame
Ultimate Ancient Gear Golem
Ancient Gear Megaton Golem
Ancient Gear Catapult
Ancient Gear Fusion
Cross-Dimensional Duel
Crystal Beast Ruby Carbuncle
Crystal Beast Amethyst Cat
Crystal Beast Emerald Tortoise
Crystal Beast Topaz Tiger
Crystal Beast Cobalt Turtle
Crystal Beast Sapphire Pegasus
Rainbow Dragon
Rainbow Dark Dragon
Rainbow Overdragon
Crystal Beacon
Ancient City – Rainbow Ruins
Rare Value
Crystal Blessing
Crystal Abundance
Crystal Release
Crystal Tree
Advanced Dark
Rainbow Refraction
Rainbow Bridge
Crystal Bond
Counter Gem
Rainbow Path
Rainbow Gravity
Crystal Conclave
Ultimate Crystal Magic
Curse of Dragon, the Cursed Dragon
Machina Resavenger
Fury of Kairyu-Shin
Malffy Rabby
16 notes
·
View notes
Text
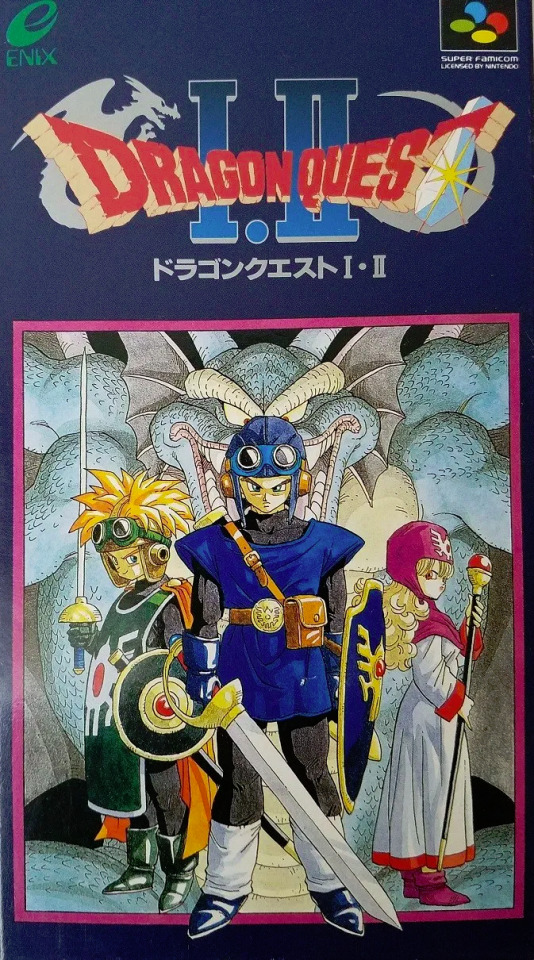
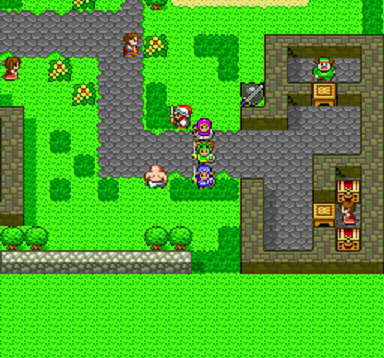
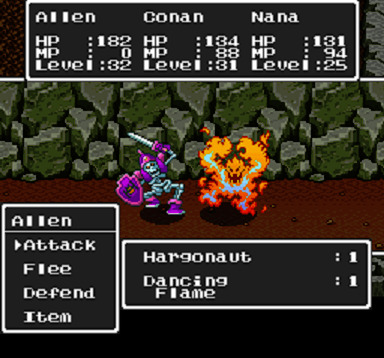
Dragon Quest I & II review
Dragon Quest: the definitive Japanese role playing game series, the one that started it all, kept improving upon that foundation, and has kept sight of just what made it a success, and stuck to it, for almost 35 years. In Japan, anyway. While the series certainly put in a good effort, managing to release the first four NES games overseas, under the title of Dragon Warrior, it was just too little, too late, in each case. The first game only got localized in 1989, 3 years after its original Famicom release. By then, the third game was already out in Japan, and the original Final Fantasy, an undeniably more advanced game than Dragon Quest I, would be localized less than a year later. Despite acclaimed offerings in later gens, like Dragon Quest VIII, and the DS remakes of Dragon Quest IV, V, and VI, the series has just failed to make an impact in the West despite its importance, and while it’s currently probably the most popular it’s ever been, thanks to the release of the even more acclaimed Dragon Quest XI, and the Hero’s inclusion in Super Smash Bros. Ultimate, it’s still a far cry from its status in its home country, and thus, out of curiosity, I decided to start going through the series myself, starting with the SNES remake of the first two games. Note that this version was never actually released outside of Japan, and thus requires a fan translation to play in English. Almost every other release, including a similar remake on the Gameboy Color, and a collection including the third game on the Switch, were officially localized, and so may be better options. Either way, let’s start on it all.
Dragon Quest I:

Story:
The story of Dragon Quest I takes place on the continent of Alefgard, ruled by King Lorik of Tantegel and protected by the Sphere of Light, a magical object originally bestowed upon Erdrick, a legendary hero who once saved the land in ancient times. Alefgard’s peace is shattered, however, by an invasion by the Dragonlord, an evil sorcerer residing within Charlock Castle, who caused a mass appearance of monsters throughout the realm, stole the Sphere of Light, and kidnapped Princess Gwaelin, Lorik’s daughter. Just when it seemed Alefgard would be permanently shrouded in darkness, however, a descendant of Erdrick appeared, and with the assistance of Lorik, sets out to defeat the Dragonlord and save the realm as his ancestor did.
That’s pretty much the extent of Dragon Quest I’s story. There’s really not a plot so much as just a premise. The towns have no story going on in them, no substantial events happen as you progress through the game, even saving Gwaelin is more for the sake of gameplay than anything else, something I’ll get to later. That said, it was 1986, and the game even having as much dialogue throughout as it does throughout was extremely uncommon in those days. It also had a few neat twists throughout, like rescuing Gwaelin happening partway through the game rather than being the ultimate goal, similar to Final Fantasy, the Dragonlord making the Hero a deceptive offer of alliance instead attacking on sight, and the Hero speaking, after spending the whole game silent, to decline the king’s offer to rule the land, deciding that if he is to rule a kingdom, he wishes it to be one he makes himself. The original NES translation, and the revised translation for the mobile version, also have pseudo-Elizabethan dialogue that, while incredibly cheesy, gives the game a lot of charm. Overall, there’s really not much to find in Dragon Quest I’s story, and is quite possibly the most basic JRPG story there is, but it deserves appreciation for what it did at the time, especially considering that Yuji Hori, the designer, also made The Portopia Serial Murder Case three years prior, an adventure game that helped influence visual novels as a genre. It may not be impressive now, but it was significant all the same.

Gameplay:
As you might suspect, the gameplay of DQ1 isn’t much more advanced than its story. You control the Hero, and, unlike almost all other RPGs, only the Hero, exploring Alefgard, visiting towns, fighting enemies on the world map and within dungeons, gathering equipment, and collecting various plot items necessary to create the path to the Dragonlord’s castle. Combat simply consists of physically attacking, using magic, namely healing, attack, and status effect spells, defending, and running away. Monsters are only ever encountered one at a time, and there’s only four bosses scattered throughout the game, with only the two phase Dragonlord being outright mandatory. Equipment comes in the form of weapons, shields, and armor, plus a few accessories that can be equipped, and consumable items such as herbs to restore HP, torches to light up dungeons, and keys to open locked doors are also available. The Hero naturally learns spells as he levels up, and besides the aforementioned combat spells, he learns utility spells as well, such as Glow, which lights up dungeons without needing a torch, Repel, which keeps weaker random encounters from appearing, and Return, which automatically teleports you back to Tantegel Castle.

While you can get some information talking to NPCs, generally, you’re left to figure out just what to do next on your own. Most of the time, the answer is grinding. It’s not an exaggeration to say that most of the game is made up of grinding. With only four dungeons in the game, one of them being completely optional and only containing some items, and another being little more than a passage way outside of containing Gwaelin and the first boss, and only six towns, with nearly nothing to do within except buying items and resting at inns, the game would be absurdly short on its own. That said, while justified, it’s not the most forgiving time. While equipment is obviously quite helpful, the limited availability and high price of each piece means that, invariably, you’ll have to go out onto the overworld and grind for lengthy periods of time, either to accumulate levels to make you strong enough to safely make the trip to your destination, or earning gold for items that’ll fulfill the same purpose. Trying to go anywhere underleveled almost always results in a swift death, not helped by how difficult it can be at times to discern just where you’re meant to be next, and Tantegel being the only available save point doesn’t help. Not even the start of the game takes any mercy, with you only being given a torch, a medicinal herb, if you look around, and a fairly piddly amount of money, which really stings when you start absolutely no equipment. You either have to forsake proper armor in order to buy the second best weapon, or buy armor, and be stuck with a bamboo spear that’s barely better than your bare fists. Grinding out for the rest of the equipment either way isn’t especially dangerous, but it sets the tone for the rest of the game quite well.

That said, as restrictive and unforgiving as the game is in a lot of ways, it’s surprisingly relaxed in other ways. The lack of story, and sheer strength of the random encounters, means there’s surprisingly few physical roadblocks, other than doors that need magical keys, which mostly show up in dungeons anyway, and the path to the Dragonlord’s castle that requires the Rainbow Drop, the culmination of the fetch quests throughout the game, to be traversed. Otherwise, assuming you’re strong enough, you’re free to go wherever you wish. Additionally, assuming you know what you’re doing, important parts of the game, such as rescuing Gwaelin, which requires fighting the Green Dragon, and opening up Cantlin, which requires fighting the Golem, are completely optional; their main purposes are to help locate a key item on a nondescript part of the world map, and if you know where to find it, you can simply collect it on your own and save yourself the trouble, something most later RPGs would usually bar you from. The game will even alter the ending a bit if you don’t mess with rescuing Gwaelin, or don’t return her before the end of the game, showing it was very much intentional. This helps give the game a very casual feeling pace; since there’s not that much to see or do, there’s not much reason to try to rush. You can afford to take it slow and steady, which helps make the grinding a bit more tolerable than if it were keeping you from some detailed plot event. There’s not even a way to actually game over, as death simply sends you back to Tantegel, at the cost of losing half your money. Punishing if you got caught off guard during a grind session, not so much if you were simply exploring after gearing up.
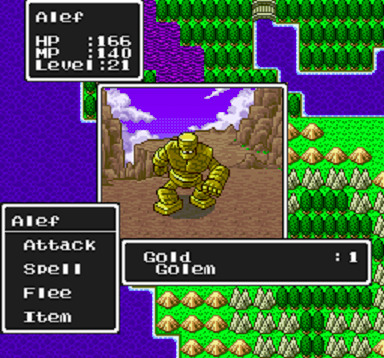
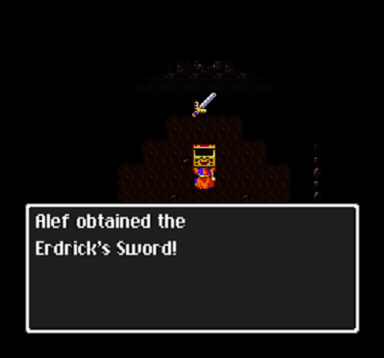
There’s also a good amount of surprisingly thoughtful gameplay elements throughout. For example, the Golem boss is normally a very difficult opponent, but there exists a flute that can put it to sleep when used in battle, making it much, much easier. Despite this, however, you can still beat the Golem without the flute, if you’re strong enough, so it’s more just a way of letting you beat it at lower levels. There’s also the infamous Metal Slimes and Gold Golems, who can be encountered in specific parts of the world map, and reward massive amounts of experience or gold, respectively, if you can manage to defeat them. While more than a bit luck based in the case of the Metal Slime, as they take minimal damage from physical attacks, are immune to magic, and will gladly flee at any opportunity, they’re still massive boons if you can defeat them, and save you a good amount of grinding. There’s also an example as far as equipment goes: the second best weapon and armor, the Flame Sword and the Magic Armor are prohibitively expensive, and trying to get enough to afford them could make you do more grinding than you’d need to beat the game anyway, but the best in those categories can simply be found for free, with Erdrick’s Armor being guarded by the third boss, the Knight Aberrant, and Erdrick’s Sword being found in the depths of the Dragonlord’s Castle. While acquiring them is obviously a bit more difficult by skipping buying the sword and armor, and the best shield, the Silver Shield, needs to be bought regardless, it’s still very possible, and can save you a good bit of work, especially with the armor’s ability to heal you with every step you take.

The experience is also streamlined a good deal by the changes this remake, and all the remakes afterwards, make, most notably reducing the amount of experience needed to level up, and increasing the amount of gold dropped by enemies to make grinding slightly faster. Additionally, compared to having to go into the menu for actions such as talking and opening doors, a general purpose button has been added that do such things automatically, and stat boosting seeds have been added across the game, allowing you to strengthen yourself a bit more than usual. Overall, saying Dragon Quest I’s gameplay is primitive by today’s standards would be an understatement, and yet it’s held up oddly well despite that. The grinding is simply emblematic of NES RPGs as a whole, and because of its simple gameplay, it’s nowhere near as cryptic, overly convoluted, or frustrating as many others that would come afterwards, such as the original Mother, Final Fantasy II, or its own sequel. That said, it’s so simple and repetitive that it’s unlikely to do much for you if you don’t have a taste for older games, and most of those games with much more visible flaws are often much more entertaining experiences.
Graphics:
As this remake uses the engine for Dragon Quest V, it looks quite similar, comparable to the SNES versions of Final Fantasy IV and V. Generally, the graphics are decent, but unremarkable, especially with the overworld sprites. Dragon Quest famously features art and designs by Akira Toriyama, the creator of Dragon Ball, but while the art and designs themselves look great, they aren’t translated into the game the best. While it’s certainly an improvement over the NES version, the overworld sprites are still small and simplistic enough that they don’t look that great, and the rest of the characters and environments aren’t anything special either.

That said, the enemies are a whole other story. Toriyama created possibly the most adorable bestiary of enemies ever, from the famous smiling, tear drop shaped slimes, to bats with equally goofy smiles, ghosts wearing witch hats, and even the Dragonlord looks pretty goofy at first. It’s hard to be intimidated by most of the enemies, but it gives them a lot of charm, and the more serious looking enemies, like the golems and dragons work quite well. Their sprites in battle are a huge improvement over the overworld sprites as well, and are easily the highlight of the game’s visuals.


Music:
Dragon Quest I’s soundtrack, as with the rest of the series, was composed by Koichi Sugiyama, and while the amount of tracks is quite small, it’s still a very catchy and classic soundtrack, especially in this version. Tracks like the Tantegel Castle theme, the overworld theme, and the battle theme have been significantly extended from their original versions, making them much less repetitive, and the music in general is updated very, very well. My favorite change is to the cave theme, which, in the NES version, would simply slow down and lower the pitch the lower you go in each dungeon. In this version, while not every floor has its own version of the theme anymore, the different versions are much more significantly different from each other, with the third version being downright sinister, and the exclusive version for the Dragonlord’s lair being near unrecognizable. It’s very much worth checking out.
Dragon Quest II: Luminaries of the Legendary Line

Here we have the awkward middle point between Dragon Quest I, the game that started up the JRPG genre, and Dragon Quest III, the game that would definitively refine it. It’s not that Dragon Quest II was a bad effort, as it is in many ways a much more advanced game than DQ1, and holds up surprisingly well in most aspects, considering it had a mere six months to be developed, but at the same time, the greater complexity means it doesn’t have the simple appeal of DQ1, and the improvements are still well behind what DQ3 did, and that’s not even considering the problems within DQ2 itself. Unsurprisingly, it’s easily the least popular of the original trilogy, and one of the most obscure of the main games. Still, I tried to give it a fair chance, so let’s get into it now.
Story:
After defeating the Dragonlord, the Hero set out with Princess Gwaelin to discover lands away from Alefgard, eventually resulting in the founding of three different kingdoms, spread out between the landmass of Torland: Middenhall, Cannock, and Moonbroke, all ruled by descendants of the Hero. After 100 years of peace, however, Moonbroke Castle is attacked and destroyed by the forces of Hargon, an evil sorcerer and cultist seeking to destroy the world by summoning Malroth, the god of destruction. Though the king of Moonbrooke is killed in the attack, the princess of Moonbrooke escapes, as well as a lone soldier, who travels to Middenhall Castle and informs the king of Hargon’s attack and ambitions before succumbing to his wounds. As the king of Middenhall is too old to stop Hargon himself, he instead tasks his young son to join up with his cousins, the prince of Cannock and princess of Moonbrooke, so that they may fight Hargon together. Thus, the prince of Middenhall ventures out, to live up to the legacy of both Erdrick and the Hero.
It’s really not much more plot than the original, and while the game is a good deal longer and has more mandatory locations, it still doesn’t really have anything that could be called a defined plot, so much as just going through towns and dungeons for whatever plot item will let you into the next area. It does have the “twist” of Malroth ending up as the final boss instead of Hargon, but Malroth’s existence is only mentioned offhandedly in the opening before said event, so it’s ultimately just another thing that’s hard to appreciate past the era the game first came out. There’s really not much more to say, so let’s just move on.

Gameplay:
The gameplay of Dragon Quest II is very similar to its predecessor. You go out onto the world map, grinding for EXP and gold, going between towns and traversing dungeons as needed. The big toss up is the party system. Instead of only having one party member, you gain a total of three early in the game: the prince of Middenhall, who I shall refer to as the Hero, the prince of Cannock, who shall be referred to as the Prince, and the princess of Moonbrooke, who shall be referred to as the Princess. Each character has different attributes; the Hero has access to every piece of the equipment in the game, with the best equipment in the game being exclusive to him, such as the Thunderbolt Blade and Erdrick’s equipment. He also has the best physical stats, such as HP and strength, and is in general an extremely effective physical attacker and tank, with the trade off of not having any access to magic, being the only hero in the series with this drawback. The Prince is a generalist, with a variety of magic, mostly supportive, and being capable of equipping most of the equipment in the game, making him an effective support character in each role. Lastly, the Princess has terrible physical stats, and has access to the least equipment, but learns much more potent spells, in particular having access to the best healing and attack spells in the game. It’s basic, but an effective change up from the first game.
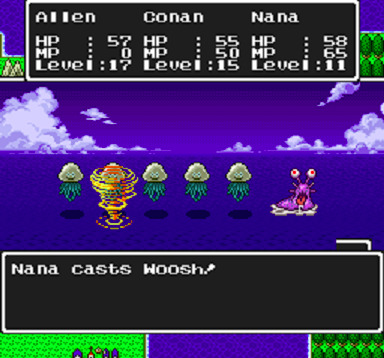
To compensate for having more party members, enemies are now capable of appearing in groups, with certain formations resulting in as many as 7 enemies in one battle, though only specific types of enemies can achieve this, as bigger and tougher enemies seem to occupy more slots. Enemies also have access to a wider variety of magic and abilities, including being capable of summoning reinforcements mid battle. Status effects, such as poison, are more prominent, and with spells to cure them being among the new additions, along with defense buffs and debuffs, encounters have become a lot more tactical, with you often having to weigh your options to get through effectively. It makes the very prevalent grinding much more interesting, if much more difficult, and difficult is the word of the day, as this game is infamously brutal. Dungeons are much more prevalent, and much more complex, with the layout of some of them reaching spiteful levels of confusing. The limited inventory slots, previously a minor deal, since you could stack most of the important items available, quickly turn into a complicated juggling game, as item stacking has been removed, and key items are much more numerous, limiting the amount of healing you can carry around rather severely. Enemies show up in large groups so frequently that trying to take them out without group wide magic usually gets you smacked around a good deal, and tougher than average enemies will gladly show up in groups as well. The game is even less linear than the original past a point, which can easily lead you to areas you’re in no way supposed to access so early, and worst of all, the game is just plain unbalanced thanks to the rushed development, with the endgame land of Rhone containing enemies terrifyingly, and jarringly, powerful compared to even the dungeon before, being capable of demolishing you with little effort if you aren’t prepared. While the difficulty is more balanced in versions past the NES, with the Prince being given better stats and being able to equip better weapons, after being infamously weak and only being able to use a few weak, early game weapons in the NES version, to attack and the defense affecting spells having more of an effect, in addition to the rebalanced EXP and gold drops that were also in the original. You also have access to the bank, which allows you to store gold and items, and while its use in the first game is questionable, it becomes a lifesaver in this, simplifying the inventory management puzzle the game would be otherwise. It also makes a small, but important change to the final boss, namely removing the ability for it to use Fullheal, which, in the NES version, more or less made defeating it entirely luck based. Despite all this, however, Dragon Quest II is still a grueling experience, and the difficulty is certainly one of the big reasons why Dragon Quest II is obscure compared to other games in the series.

As for other new features and improvements, helmets have been added as an equipment option, though they’re very underutilized, with only 3 being available in the game, 2 of them exclusive to the Hero. Cursed equipment has been expanded past the few accessories in the original that only existed to inconvenience you. Here, they confer the biggest stat bonuses out of all the equipment in the game, on paper, but carry the risking of occasionally paralyzing the user in battle. Enemies are now capable of dropping items, from basic items like herbs, to equipment that could be sold for a decent amount, or even save you having to purchase them in the future, to items that can’t even be found elsewhere, such as the aforementioned cursed equipment, the infamous mad cap, the only helmet the Prince and Princess can equip, which cuts the amount MP needed to cast spells, and the dragon potion, which allows you to save your game anywhere you wish. Speaking of which, instead of only being able to save at the starting castle, many other towns and castles allow you to save your game, not only saving you a significant trek to Middenhall Castle, but allowing you to warp back to them with the Evac spell, which can save a lot of travel time. Most notably, the world map is much larger than the original game, including several different continents and smaller islands, accessible via a boat acquired fairly early in the game, marking the first appearance of transportation in the series. Alefgard is even visitable in a cool instance of continuity, though unfortunately, it’s quite underwhelming, as it is much, much smaller than in the first game, and only four locations that can be visited, with the only significant ones being Tantegel, which has fused with the town of Breconnary, and the remains of Charlock Castle, inhabited by the grandson of the Dragonlord, who, instead of battling the party, offers critical advice instead, in a fairly cool twist for the time.

While the game is certainly bigger and longer than the first game, most of it consists of just sailing around the overly large seas, with most of the locations being visitable as soon as you get the ship, barring the strength of the encounters. While it does give the game a much more open feel, most of what you do is just desperately scrounging for key items, many of which only have use towards the end of the game, and are often found in small, obscure locations. There’s little sense of progression, and very few dungeons manage to feel memorable or significant in any way, not helped the inexplicable lack of any bosses outside of the final dungeon. Sure, there’s a few scripted encounters, but only with enemies that are common within the area, or otherwise nowhere near dangerous enough to justifiably call bosses. While there are a few “quests” you have to do to progress at points, they’re all very short and simple, consisting of things like fighting a rather unthreatening enemy in an arena for the amusement of a king, or traversing a dungeon to grab the Wind Mantle, allowing you to cross to a different part of the continent, with said item never being used again afterwards. This all combines to make most of the game oddly dull, in my opinion, with the difficulty pretty much being the only thing that makes it stand out. As mentioned above, though, the endgame absolutely makes its mark, with the maddeningly confusing Road to Rhone being one of the most infamous dungeons in JRPGs, and the final dungeon, while being extremely simple to navigate, makes up for the lack of bosses elsewhere by having five of them spread out across it. Overall, while Dragon Quest II’s gameplay is technically much more refined than Dragon Quest I, it’s not necessarily much more enjoyable, and most of the time simply dances between repetitive and frustrating.

Graphics:
The visuals of Dragon Quest II are, sensibly, about equal to the first game. The character designs do shine through a bit better with the party, and the battle sprites are once again great. Similarly to Final Fantasy II, though, the game does contain some of the weirder enemies to be in the series, such as baboons, giant Venus flytraps, and flying Medusa heads, though at the least, it introduced bubble slimes and liquid metal slimes. It also includes a few neat effects like parallax scrolling in dungeons that take place in high towers.


Music:
Once again, the soundtrack is absolutely great, with the highlights being the upbeat town theme, the calm castle theme, the intimidating final boss theme, and especially the world map themes, of which there are two, the melancholic A Lonely Youth, for the earliest part of the games, before you acquire your full party, and the extremely cheerful Traveling With Friends, for once you’ve assembled your party. Even if you have no interest in playing the games, the soundtracks are definitely worth a listen.
Conclusion:
Overall, I would have to give Dragon Quest I&II a pretty firm not recommended. While they’re not completely unenjoyable, and can be a decent time if you enjoy older RPGs, or are curious about the roots of Dragon Quest, Dragon Quest III and IV are much better options in both regards, not to mention others like Final Fantasy I and III, and the original Mother, as far as NES RPGs go. Still, I’d be a liar if I said I didn’t have fun with them both, in varying amounts, and the remakes certainly make them much easier to digest. Either way, that’s about enough for now. Till next time.
-Scout
5 notes
·
View notes
Text
I TOLD YOU SO! (The Golem Thief)
So our party is in a 3.5 edition Homebrew Campaign where the party must go to 6 temples to collect artifacts of great power to stop an ancient evil blah blah you’ve heard it before and are travelling to the Dwarven Capital city of Angerhammer. The Party consists of 4 players: Mason a Lizardfolk Rogue/Dragonfire Adept, Ru Yijong a Sorcerer/FIghter, and Quinlan a blind Cleric, and the 4th player who was waiting to join (the Human Druid died in the last dungeon so his character is in the wind waiting to join).
DM: As you travel along the road through the forest leading into the mountains to Angerhammer you see a large fig figure in what appears to be Platemail standing on the side of the road.
Mason: I ignore him and ride on past (The party follows suit)
DM: As you ride past him the figure speaks up in a slow, monotonous, and robotic voice and asks “Will you require assistance getting up the mountain travellers?”
Mason: OOC: This thing isn’t human is it?
Ru: Can I roll to see if I know what it is
DM: You can.
Ru: (Rolls Knowledge Arcane & Knowledge Nature) 17 and 20!
DM: The creature is a Tin Golem and is considered more of a practice golem and used for mundane tasks or labor work as they are somewhat intelligent and able to use tools and weapon. (Ru passes this knowledge along)
Mason: So where is its master? I don’t trust a Golem that just offers “Assistance”
(The party debates taking the Golems help but ultimately refuses and travels on)
DM: As you reach the foothills of the mountains you can clearly see that the path up the Mountain is treacherous and you will have to walk your horses up the path and unload all the gear from them for it to be safe.
Ru: So this is what the Golem meant by assistance. How are we gonna get up there with all the loot we got.
Mason: Well we just have to carry it and be careful
Quinlan: Oh yes! Let’s have the blind man carry stuff up a treacherous mountain! Great plan!
Mason: You got a better one?
Quinlan: Ya get the Golem to help
Ru: It did offer to help
Mason: I’m telling you if we get that golem to help something bad will happen I know it! Since we started this journey we have fought Zombies, Ghouls, Slimes, a Giant Troll, Vampires, Crazed Cultists, and Assassins, and I do not trust Golems left on the side of the road! If you wanna go get the golem go ahead but when something happens I’m gonna say “I told you so!” and never let you live it down!
(The party talks it over and decides to use the Golem’s help since they figure it won’t be their broken bodies at the bottom of the mountain if it falls)
After fighting a Pack of Gnolls and Quinlan raises a few as Skeletons the party settles down for the night and they set the skeletons to act as guards. Morning comes and this happened
DM: You all wake up and start your morning routine.
Mason: Where’s the golem?
DM: it’s gone
Mason: I make a Spot check to see if our stuff is gone
DM You don’t have to roll all your stuff is gone except the horses
Mason: I KNEW IT! I TOLD YOU SO! NOW WE ARE STRANDED IN THE MOUNTAINS WITH NO GEAR OR FOOD!
(To be continued)
327 notes
·
View notes
Text
Third batch of reprint reveals for Tournament Pack 2024 Vol.1 are:
**Wightprince
**Minerva, Lightsworn Maiden
**Ancient Gear Golem - Ultimate Pound
**Shinobi Insect Hagukuremino
****
Hagukuremino was introduced for Battlewasps, but this reprint is likely for some other Insect support.
Others are for cards that have already been revealed.
Final batch of reprints will be revealed on 25th December, 2023.
0 notes
Text
Pillars of Card Design #3 | Card Protection
Are your boss monsters too strong? Or worse, do they never seem to stick? How are you protecting your cards, and how are you getting around those of your opponents?
In this article, we’ll explore different kinds of protection effects, and what exactly warrants a hard-to-kill boss monster.
It is a general principle of Yu-Gi-Oh!, like any card game, that you not only want to play more cards than your opponent, but that you want those cards to stay, or otherwise have a lasting impact. So, it might be reasonable to include protective clauses and effects on those cards, particularly the more powerful, and therefore more risky ones. However, this can quickly become a detriment to the creativity of your design, taking up text space or ultimately making the card or cards unplayable overpowered.
So what constitutes protection? There are several different clauses and effects that can “protect” a card from any number of things. Some of the more common (for better or worse) examples include:
This card’s Summon cannot be negated.
This card’s activation and effects cannot be negated.
Cards and effects cannot be activated in response to this card’s Summon.
Cards and effects cannot be activated in response to this card’s activation or effects.
Cannot be destroyed by battle.
Cannot be destroyed by card effects.
Cannot be destroyed by your opponent’s cards (by battle or card effect).
Unaffected by other cards’ effects.
Cannot be targeted for attacks.
Cannot be targeted by your opponent’s cards or effects.
Cannot be targeted by, and is unaffected by, other cards and effects.
Altogether, a card with these effects would be an unstoppable force. Naturally, no card should ever have all of this protection tacked onto it. But how much is too much? What does that even mean?
If a card, even a so-called Boss Monster has too much protection, and is too hard to remove, it can become obscenely overpowered very quickly, regardless of what its stats or other effects might be. Although there is no set standard in measuring how much protection a particular card deserves, we can glean some context clues based on the kinds of cards that do have lots of protection.

[Picture of “Infinitrack Fortress Megaclops,” a Link-3 EARTH Machine Link monster with 4000 ATK.]
In general, determining the amount of protection a card should have relates to how much work it takes to play that card, just as much as what it does. “Infinitrack Fortress Megaclops” requires 3 Xyz monster to be summoned. At the time this was printed, the game existed under Master Rule 4, and so Xyz monsters could only be summoned to the Extra Monster Zone, or to a Zone(s) a Link monster(s) pointed to. For that time, this card took a considerable amount of effort to summon, needing not only the 3 materials, but also, at one point or another, at least one Link monster to provide the space to summon those Xyz monsters. Therefore, “Megaclops” earns the protection of being unaffected by monster effects, and battle protection, with the exception of Xyz monsters in both cases. For the amount of effort it takes to summon it, this card earned two protective effects, however, even both of those are not final. They both have the shared exception of Xyz monsters, and the first effect only protects it from monster effects, rather than all card effects.
Let’s look at some other monsters that are easier to summon, and explain why, for different reasons, they both can earn the same protection.


[Pictures of “Ancient Gear Howitzer,” a Level 8 EARTH Machine Fusion monster with 1000 ATK and 1800 DEF, and “Lyrilusc - Independent Nightingale,” a Level 1 WIND Winged Beast Fusion monster with 1000 ATK and 0 DEF.]
Both of the above monsters have the same level of printed effect protection: “Unaffected by other cards’ effects.” This is a well-regarded powerful protective effect, limiting its ability to be removed exclusively to battle with monsters that have a higher ATK. So, what did these two cards do to deserve this boon?
For “Ancient Gear Howitzer,” the answer is twofold. First, it has low bases ATK and DEF. No matter what position it is summoned in, “Howitzer” is a fairly easy target to be destroyed by battle. Secondly, its effects are not game-ending. It isn’t a boss monster. In fact, for “Ancient Gear” decks, it’s often an easy first-turn ending board, as it can inflict that first bit of damage without the Battle Phase, and serves as a threat to a more powerful monster when it does get destroyed. However, that effect combined with the protection is only balanced due to the limited strength of its targets; “Ancient Gear Golem” or “Ancient Gear Golem - Ultimate Pound” are the biggest things one is likely to get with its float effect, and they are not overpowered in this day and age, either.
“Lyrilusc - Independent Nightingale” also has a twofold explanation. Like “Megaclops”, this card has a not-insignificant summon requirement. It, like “Lyrilusc - Assembled Nightingale” is not difficult to summon, but to summon it and make use of its full effect requires a lot of materials--enough that one would have to put in significant setup to reach. “Independent Nightingale” also requires that you either be maintaining that position after its material has been summoned, or perform its Fusion Summon on the same turn as that Xyz Summon, in addition to having another Lyrilusc monster available for material. Achieving that with maximum effort still yields a powerful card, but a niche one. This boss monster’s last effect can burn the opponent for a lot, but that is the most that it can do. If the opponent has a bigger monster, they can sweep “Independent Nightingale” up next turn, leaving its owner with no recovery options.
So what does this tell us about the custom cards we design, boss monster or not? As we said above, there is no set standard; there will always be exceptions to every rule, and as a TCG, Yu-Gi-Oh! handles those exceptions accordingly when they become problematic to the health of the game. As custom card designers, though, we can errata our cards on a whim, changing them to be more fair as soon as their unfairness becomes apparent. Taking that into account, there are a few design principles we can consider when deciding how much protection to give a particular card, and from what.
Should be proportionate to the effort it takes to play. This can be a combination of the number of materials; the difficulty of those materials to play; additional costs (such as the requirement of a fusion or ritual spell, and its conditions and costs); the board presence being sacrificed; any “float” effects the monster has (by itself or by way of other cards). This is especially important as you test your designs--you might find that your boss monster that you expected to never hit the field is able to be summoned the majority of the time. Maybe, in that case, you can sacrifice some protection in exchange for more ways to replay them, like playing more than one copy.
Should not be all-encompassing. “Unaffected by other cards’ effects” and “Cannot be destroyed by battle” should not be paired together, unless both have an exception of particular timing or card type that can get through it.
Should be realistic or in-theme with what the card and deck does or expects the opponent to be doing. This can sometimes be better understood as “Protection effects should not cover inherent and primary weaknesses of the deck, but should highlight those and force the opponent down those avenues only.”
We’ll look at some other card protection in the next article, where we will specifically go over targeting in both protective and removal effects.
#yugioh#ygo#article#custom#card#design#duelingbook#industrial illusions#card effect#protection#removal#unaffected#destroyed
1 note
·
View note
Text
Yugioh Ancient Gear Golem TLM 1st Editon Ultimate Rare PSA 9 GER
COLLECTIBLES: Seller: tobiaplet (100.0% positive feedback)
Location: DE
Condition: Gebraucht
Price: 974.79 USD
Shipping cost: 17.32 USD
Buy It Now https://www.ebay.com/itm/166006794164?hash=item26a6c6a7b4%3Ag%3AKSwAAOSwbItkJaEE&mkevt=1&mkcid=1&mkrid=711-53200-19255-0&campid=5338779482&customid=&toolid=10049&utm_source=dlvr.it&utm_medium=tumblr
0 notes
Photo

When I heard these got a homo reprint , I was all over them ! Ancient gear golem ultimate pound! Thank you for visiting ! #retrogaminglife #vintagegaming #retro #retrocollective #retrogaming #videogames #love #instagood #photooftheday #retrogamingdaily #yugioh #ancientgeargolem https://www.instagram.com/p/B3DuzSWHsku/?igshid=1kww36idq0uyb
#retrogaminglife#vintagegaming#retro#retrocollective#retrogaming#videogames#love#instagood#photooftheday#retrogamingdaily#yugioh#ancientgeargolem
5 notes
·
View notes
Last Seen Blogs

blog-oussema-m-z-blog
Ousséma M'z

lightfingeredladies
The Cannon Broad

sweetsapphicpeach
☀️🍑🍯💛

happydiplomatmongerfreak
Untitled

c20vintagefashion
C20 Vintage