#unimesh
Text

I remember reading something about importing clothing meshes to Milkshape using something other than the Unimesh importer, to prevent problems with normals. But I can't find the information anywhere. Help?
Btw this is DavinaOjeda's Mr. Handy servo default, I'm trying to make it custom.
Edit: After some trial and error, I figured out how to get rid of the wonky normals with Blender. I had to redo all the bone assignments though.
16 notes
·
View notes
Text
Tutorial 3D model to sims2
(first part )
Now that I'm learning how to convert Sims2 clothes from 3D models, I'm going to write how I do it in case anyone is interested.
First of all you should know that this is my way of doing it, I don't know if it is the most correct, if someone knows other things they can contribute them here 🤗
You must keep in mind that you have to be very patient, not everything turns out well the first time, nothing happens, you try as many times as you want until you get the result that you like the most. 😉
It is just a game, it is not real life nor is it a job nor is it an obligation, therefore you should not get frustrated, just have fun ☺️
We start 🕞
You will need :
-- a page to download free 3D models, there are many, you just have to search on Google or your usual search engine.
-- blender and milkshape
-- simpe
-- adobe photoshop or similar
-- bodyshop
We download a 3D model that we like, and we put it in a work folder that we are going to use 📂
Preferably we are interested in OBJ files, but the 3D models are not always in this format, if they are in DAE they are also useful for us
If you don't know what format you downloaded your 3D model in, right click, properties on the file and it will tell you what type of file it is.
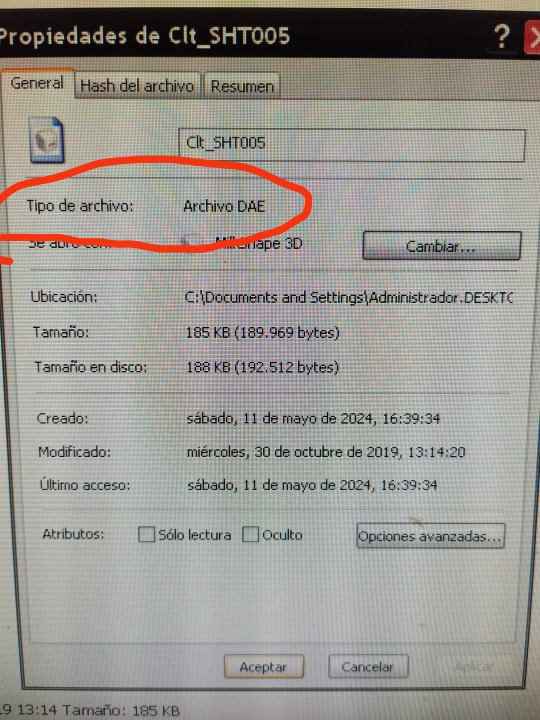
If your file type is OBJ, you will go directly to the Milkshape phase, which I will explain later, if your file type is DAE... follow these steps:
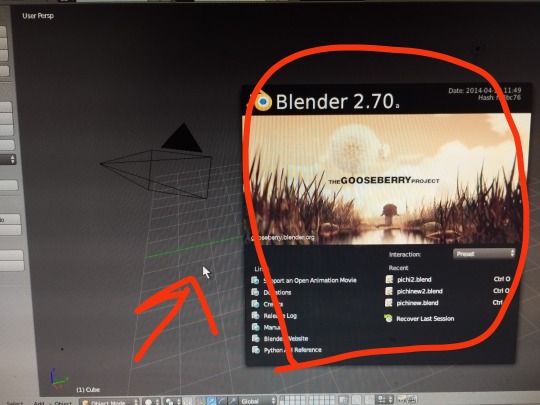
open Blender
click on any point to remove that screen
You will get a white cube that we have to eliminate
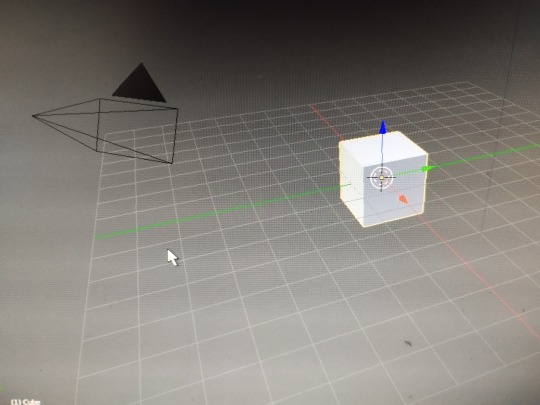
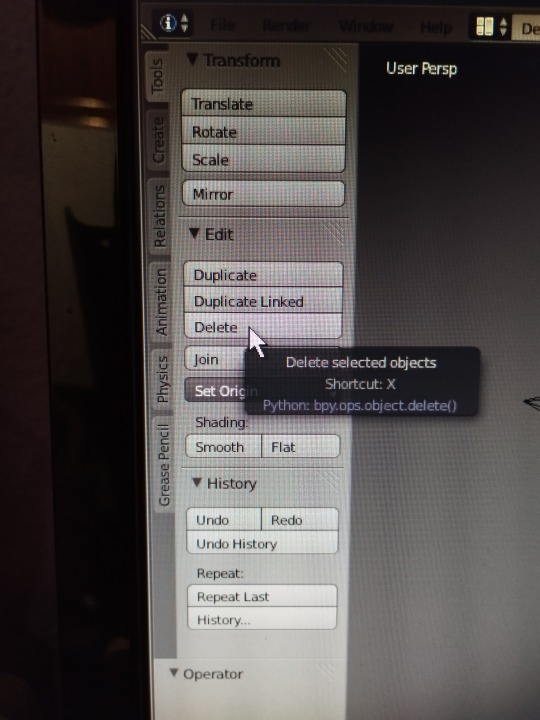
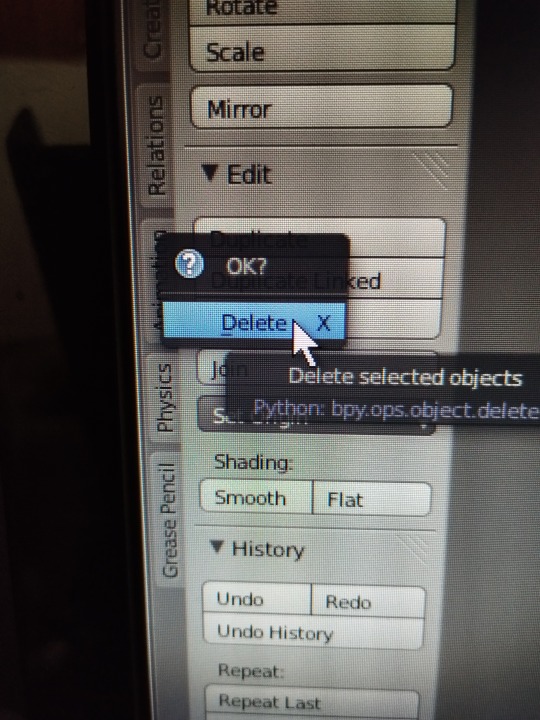
now we can start
We import our 3D model with DAE format
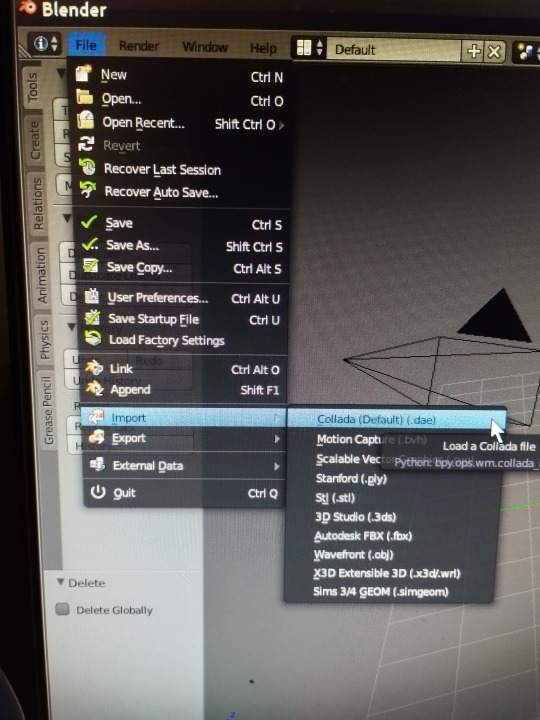
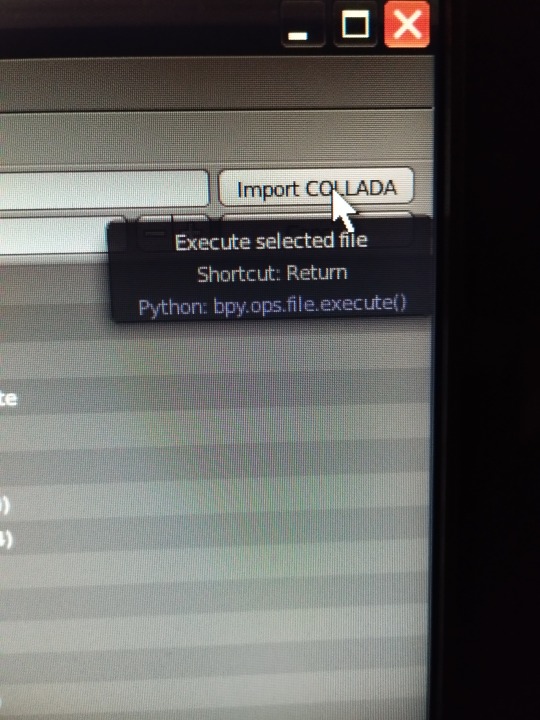
We look for our file in the folder where we have saved it, when we have found it we click on import (up to the right)
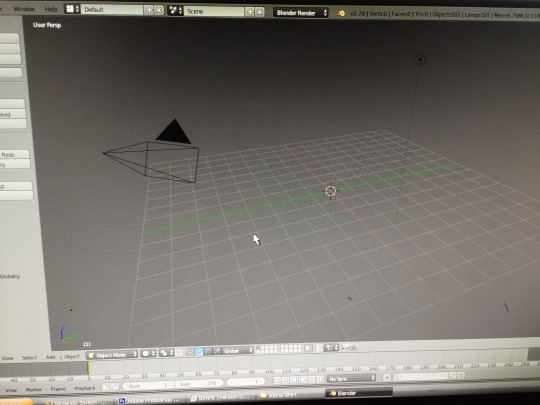
We zoom in on our model by clicking the mouse wheel to increase its size and see it well if you want.
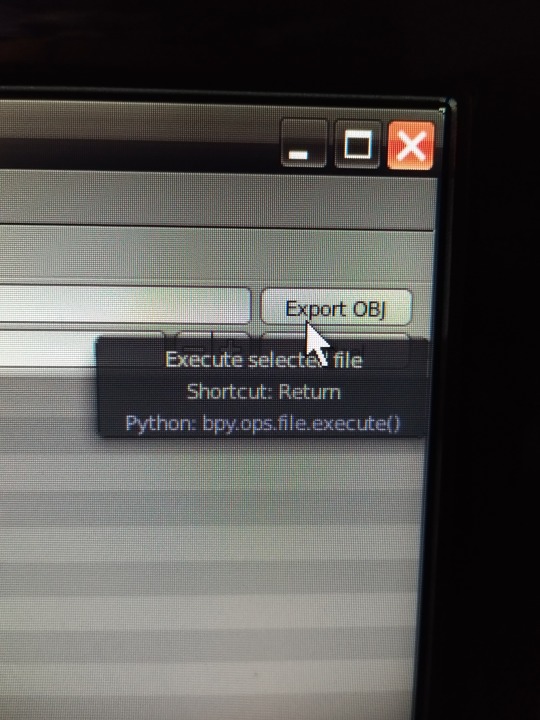
and we export it as an OBJ file, which is what we really need, you don't have to do anything, blender transforms it, you just click on file export wavefront obj

Choose which folder you want to save it in and give it a name, then click export OBJ (top right)
Close Blender, it is not necessary to save the changes when it asks you, so exit without saving if you want
Open Milkshape :
(If your file was OBJ from the beginning, you skip the entire Blender process and start here directly)
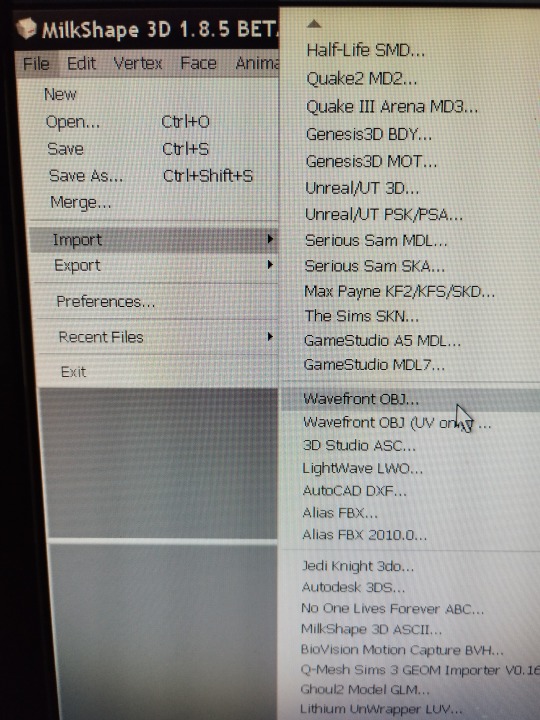
we import our 3D model obj file
Normally it sells completely black, I explain how I change it, I eliminate the material that is assigned,
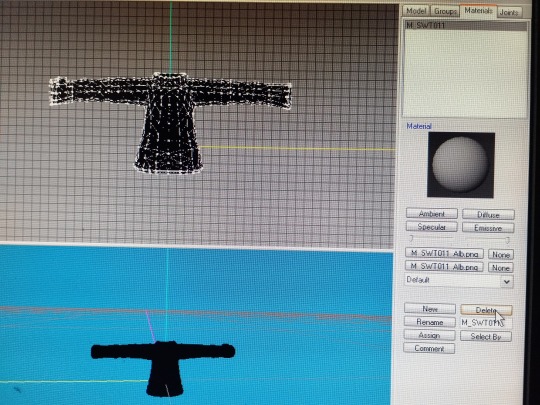
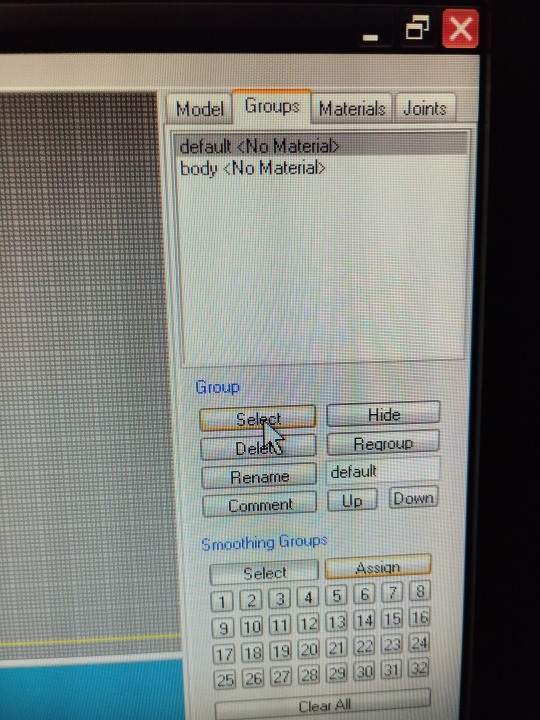
I select my clothes, (group, select)

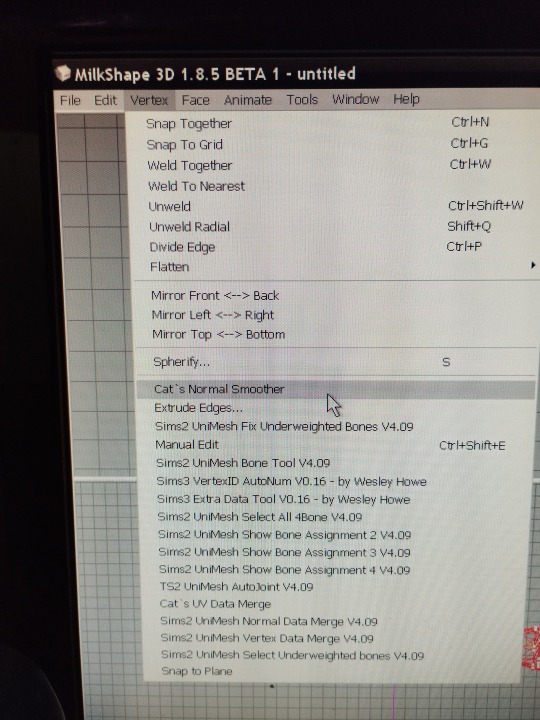
and I hit vertex, cat's normal smoother… and now we have it white
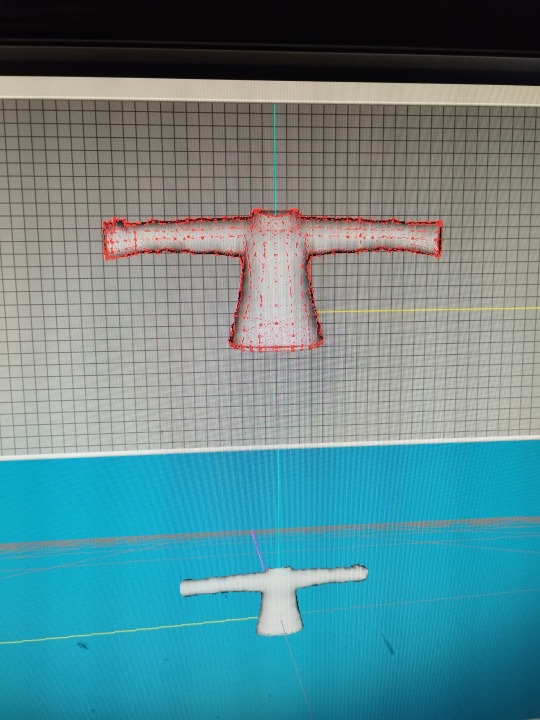
Now comes the most entertaining part, for this you will need your patience, normally the 3D model will not have the right size for the Sims 2 body, so you will have to modify it to adjust it
First, import a base body, of the age you want (adult child, etc.), the one you need according to the clothes you are making.
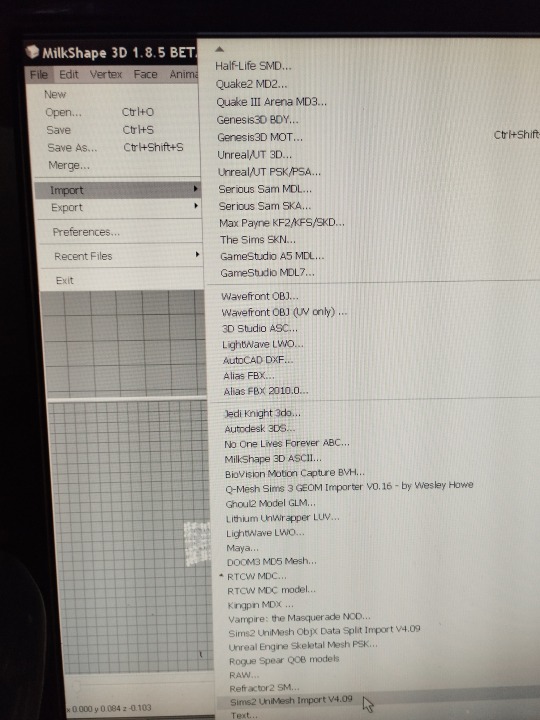
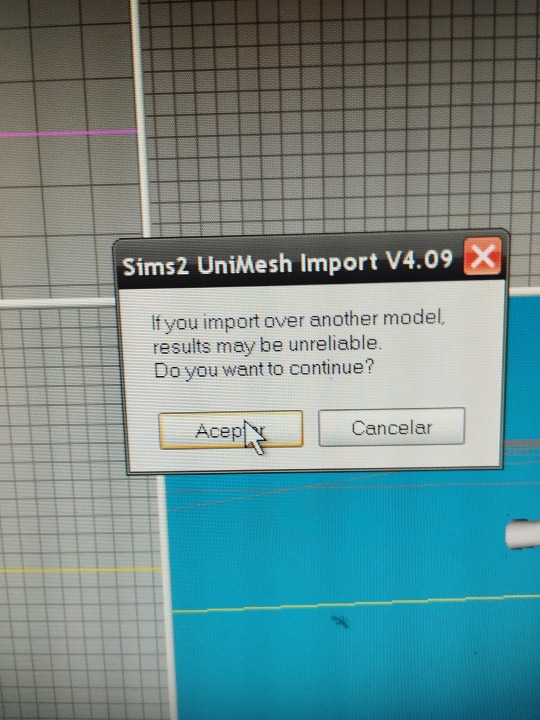
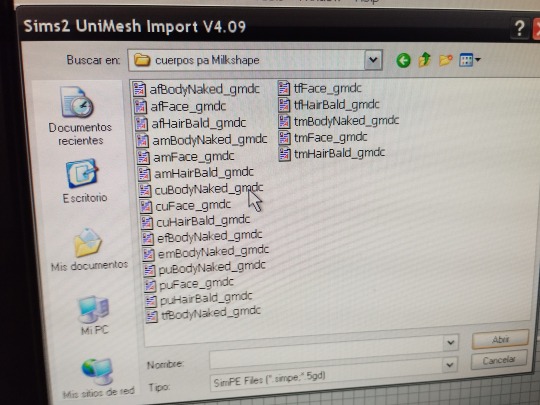
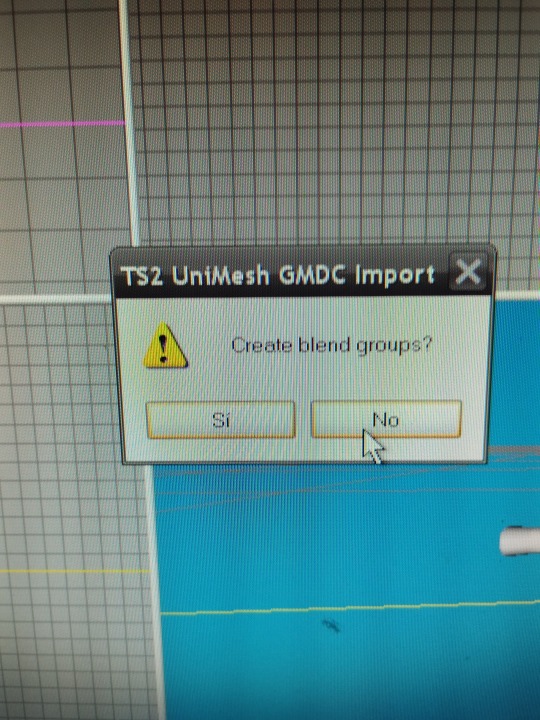
file, import ,sims2 unimesh import v4.09 , say acept, say noi
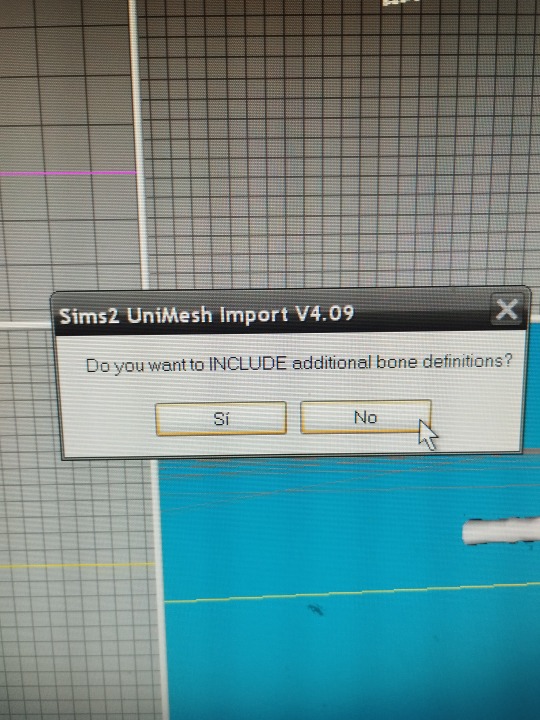
you choose your base body and say no
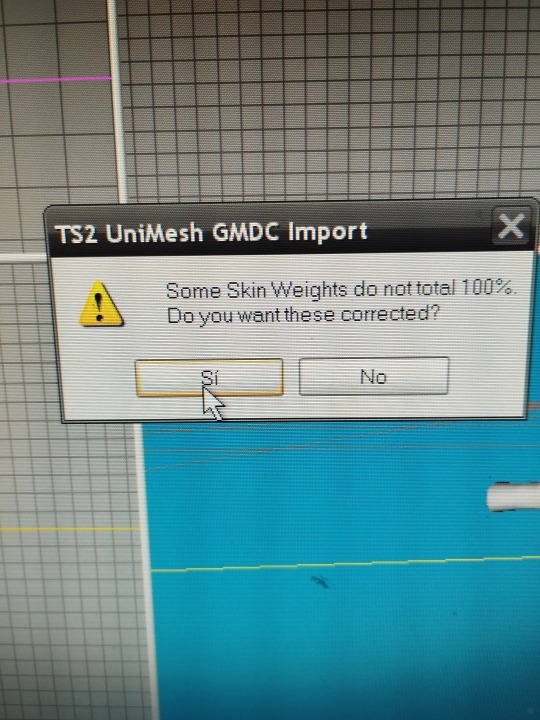
and say yes
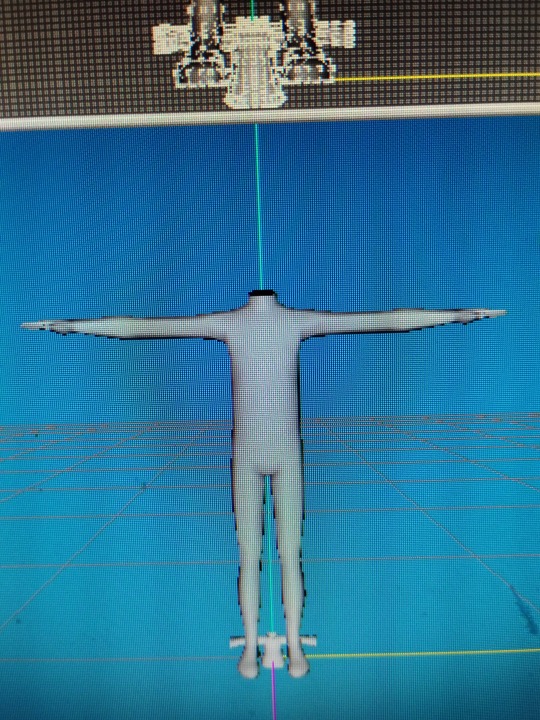
now you have the sims 2 body and you can see the size difference in my case 😅
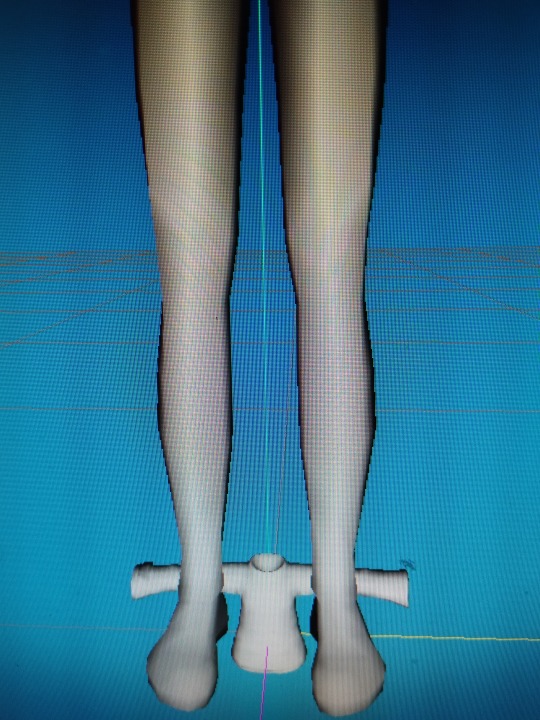
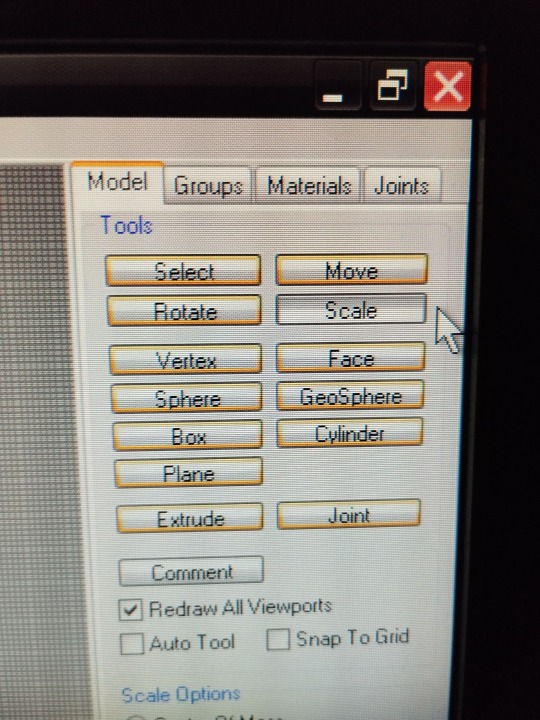
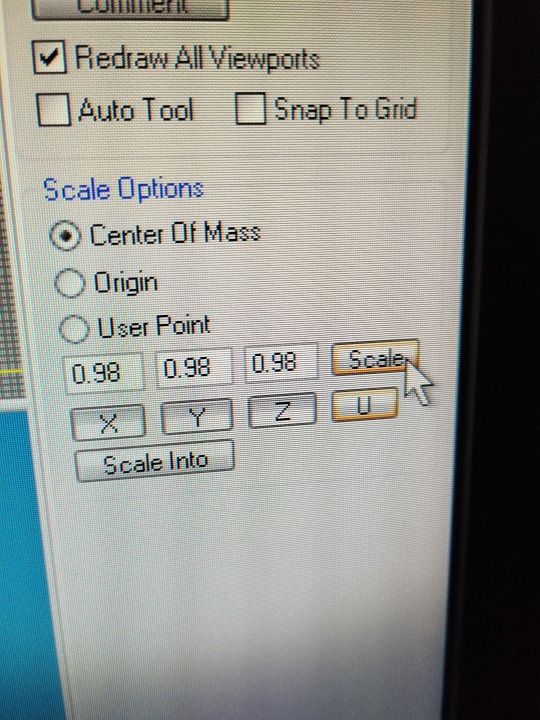
It's time to have fun, we select our clothes, (group select), and change their size until we find the one we want, (model scale)
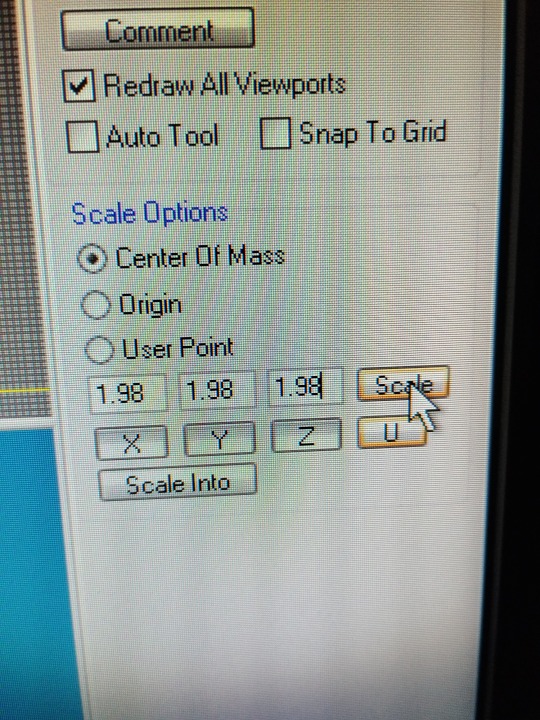
We must change the numbers of X Y Z,
If we write 1.98 in X, 1.98 in Y, 1.98 in Z, we point to U and click on scale (the scale button below where the letters x y z ) our clothes will grow
If we write 0.98 in the three x y z, doing the same, our clothes will shrink
to be continue ...
#sims2#devotedlyghostlyenemy#sims2tutorial#sims2cc#sims 2#s2cc#sims 2 tutorial#3Dmodel sims2tutorial
13 notes
·
View notes
Text
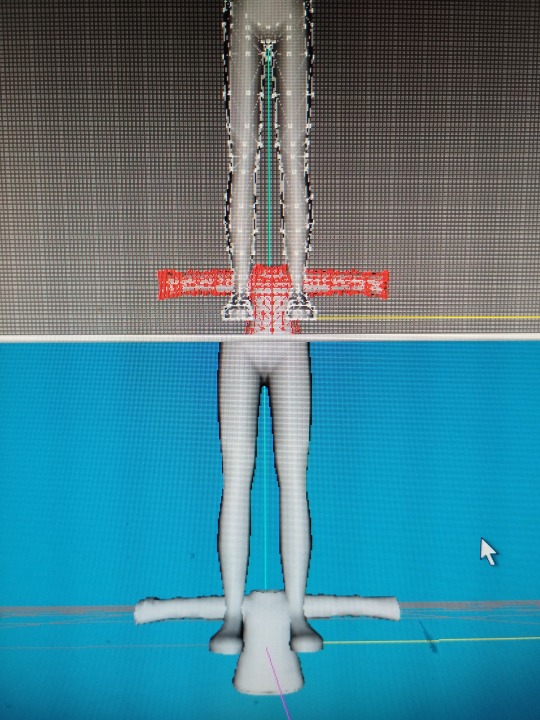
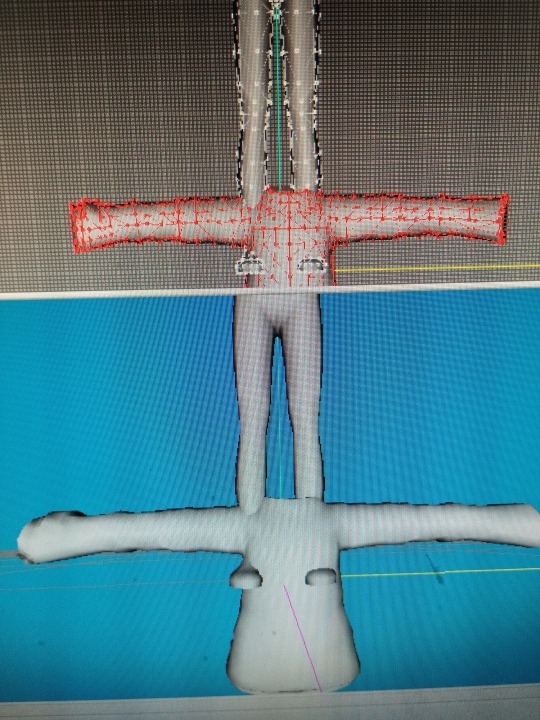
I've "Snap Together"/Ctrl+N on each pair of vertices where the leg group & foot group meet.
I've used the Sim Unimesh BoneTool after each snap together (Apply to All, Commit All)
I've selected these same vertices and used "Align Normals."
Things look good in Milkshape but not in Bodyshop.
Am I missing a step or something? (This happens when the the two parts are different groups or all the same group.)
13 notes
·
View notes
Note
Could uou tell me what tools do you use to create mashups into full body? did you follow the instructions on inseminator? to install besides Milkshape, and how to put those tools in your PC? Is it the same to put CEP on TS2 folder? thanks!
Unfortunately telling you what to use isn’t the magic key to making mashups and learning meshing. I started by following many, many tutorials.
The first three I recommend are on modthesims and start you on the very basics, including how to use and set up the tools you’ll need to mesh. Within the tutorials at the start is a list of all these programs and tools, with links.
Tutorial: Unimesh 1 - New Mesh Basics
Tutorial: Unimesh 2 - Editing and UV Mapping
Tutorial: Unimesh 3 - Frankensteining (mashups)
I also recommend visiting various different meshing projects to fully understand the new mesh process before jumping right into mashups. For example I started off by doing shoeswaps.
MDP’s YouTube tutorial on Shoeswaps was incredibly informative and I could follow along, replay as many times as I needed until I got it right. It helped me learn a big chunk of the method you need to follow and remember for meshing.
And finally, a large resource list of all known tutorials for basically everything meshing, here on Tumblr.
Sims 2 Tutorials - Meshing
It’s worth mentioning that the Sims 2 Community here on tumblr is incredibly knowledgeable and willing to help. If you run into issues, just can’t wrap your head around something or find a problem that you cannot fix, feel free to ask one of your favourite creators. Chances are they’ll be more than happy to help and give advice and tips. I’ve learned a huge amount from many fellow simmers, never be afraid to ask!
Good luck!
8 notes
·
View notes
Video
undefined
tumblr
CC struggle - help needed. Edit: solved! (see comments)
I’m having trouble with white lines appearing along the seams of both those pairs of pants. They’re more or less visible depending on camera angle and distance. Since they kind of look like transparency lines, I tried selecting each of the vertices along those seams and “Unimesh vertex data merge” in Milkshape, just in case there were microscopic gaps in the mesh, but it didn’t change anything.

Does anyone know what this is/how to fix it?
The pants are from here and here.
11 notes
·
View notes
Note
hii! could you please try to help me with the problem i have with milkshape? i want to make a shoe swap for this one dress and i installed all required programs and made sure i have the needed plugins from here https://modthesims.info/showthread.php?t=122399. i followed mdp's tutorial and extracted the mesh in simpe, then opened milkshape and clicked file -> import -> sims2 unimesh thing but it doesn't recognise the file i just extracted. if i choose "all files" instead of "objx files" and try to import the .5gd file i get an error message "err: invalid file type selected".
hi anon, when you "extracted the mesh in simpe", did you export from the Resource List section or Plugin View section?
If you DM me with screenshots, I can better help you :)
5 notes
·
View notes
Text
for a person who likes pretty sim shoes i hate Sims2 UniMesh Vertex Data Merge V4.09 too much
1 note
·
View note
Photo
Reality Victoria 4
Daz Studio - 3Delight
Get 4K digital download and various prints on my ArtStation, DeviantArt, Gumroad, Redbubble, Fine Art America, Displate and Society6 account
Links on my profile page
Assets :
https://www.daz3d.com/v4-elite-texture-lana
https://www.daz3d.com/victoria-4-2-base
https://www.daz3d.com/gregoria-hair
https://www.daz3d.com/basicwear-for-v4-unimesh
#genesis #female #woman #gregoria #hair #victoria #elite #lana #basicwear #unimesh #smile #blonde #studio #simple #grey #eye #young #digital3d #character #4k #buy #hd #sell #forsell #2160p #astuceman #dazstudio #prints #printsforsale #3delight
#genesis#female#woman#gregoria#hair#victoria#elite#lana#basicwear#unimesh#smile#blonde#studio#simple#grey#eye#young#digital3d#character#4k#buy#hd#sell#forsell#2160p#astuceman#dazstudio#prints#printsforsale#3delight
0 notes
Text
How to add correct drop shadows to objects - Part 1
Lack of shadows on objects are a bit of a personal pet peeve, and I often add them to objects that don't have them (or have faulty ones) for my own usage. They add just that little extra bit of realism. I thought it might be useful for others to have a little guide for them, because the object creation tutorials I've seen don't go into a lot of detail.
This is a pretty basic tutorial, but I'm going to assume you have basic knowledge of Photoshop, Gimp or Paint Shop Pro, have poked through the innards of an object .package before (so you know what a GMDC is), and rummaged around a bit in Milkshape so you know the basic controls. What you need is, of course, an object in need of a shadow. If you never messed with Sims meshes before, you will need to put the Unimesh plugins" in your Milkshape folder to be able to import and export GMDCs.
So let's begin!
For this tutorial, I'm going to give this mirror from the long-dead site Habitat43 a wall shadow. (You can get it here - it's called B43_ornamental_wallmirror.package.) This is what it looks like:

It's pretty and all, but I think it lacks a bit of depth. The creator of this object deleted the shadow plane from the mesh, but all the resources (the references in the SHPE file, the texture, et cetera) are still there in the .package file. Fixing this is almost the same as fixing the shadow for your own new object, which is why I chose this as an example.
1. First of all, open the object in SimPE and extract the mesh (the GMDC file - in this case the object is a mirror and thus has two meshes. Skip the 'boundingbox' one). Also export the texture file - this object has two: The shadow itself, which is a small black and white image, and the texture for the mirror itself. You can ignore the shadow for now.

2. Import the mesh you just extracted into Milkshape. I have three windows in Milkshape: Two on the left and one main window. Go to Window > Viewports > 3 Windows (2 left, 1 right) to get this view as well. I've set the top-left projection to 'right' and the bottom-left projection to 'front'.
The creator of this object didn't add a plane for the shadow, so we're going to add it ourselves. Go to Model > Plane and set the HDivs and VDivs to '1'.

Go to the bottom-left window and draw the plane around the mirror frame. Then, select 'Move' in the 'Model' tab and drag the plane in the top-left window to just behind the frame. You'll end up with this:


3. Now, I looked into the SHPE file in the package, and noticed that the correct file for this shadow should be 'southwallshadow'. Go to the 'Groups' tab and rename 'Plane01' to 'southwallshadow'. Open the Comment and paste this into it:
ModelName: southwallshadow
Opacity: -1
It's important that the ModelName/Group name is the same as the name in the SHPE file, or else it won't show up.
4. Now to create the shadow image. Hide all groups except the one named 'frame'. Go to the bottom-left window and [i]deselect[/i] 'Show Axis' and 'Show Grid', and set the view to 'Flat Shaded'. It will look like this:

Make a screenshot of your screen using the Printscreen button/Fraps/Gadwin whichever and paste it into your image editing program (I use Photoshop). Don't close Milkshape just yet!
5. Crop the image to the frame shape. Now, what we want is make the background black and the shape white, as the white part is what will show up as the shadow. Set the image colours to 'Negative' (Adjustments > Negative), making the black frame part white. Then, go to Adjustments > Replace Color and select the grey background with the pipet. Put the 'Lightness' to -100:

Next, go to Blur and use Gaussian Blur on it. I used a strength of 4. The original size of the shadow image was 64x64, but I want to make it 128x128 because of the frame detail. Simply create a new image of 128 by 128 pixels, then copy the image you just made, and paste it in there as a new layer. Go to Transformation > Scale and resize it so it fits.

This would be a pitch black hole of a shadow, so fill the background with black and lower the opacity of the frame layer to 50% or 60%. I thought the shadow was still a bit sharp, so I used Gaussian Blur again (with a strength of 1.7 this time). Save this as a .png.

6. Back to Milkshape! Go the the Materials tab and add two new textures (just click 'New'). Select the frame texture you extracted earlier for the first, and the shadow for the second. Unhide the shadow layer you hid earlier. Select the 'frame' group and assign the frame texture, then do the same to the shadow texture and the shadow plane. It should look like this:

Continue here
41 notes
·
View notes
Text
TS2 Shoeswap Tutorial
I get a ton of requests for shoeswaps and I thought I might just show you all my process to help you learn how to do it yourself.
For video (where I ramble on for almost an hour), here is a link: https://youtu.be/gjZgcrODyaQ
Below the cut is picture form (LOTS AND LOTS OF PICTURES):
Preface: First you will need all the usual subjects: Milkshape, SimPE, Sims 2 Clean Installer, the Compressorizer, WinRar/Zip, and a skintone already extracted through Bodyshop. This tutorial will be using two custom meshes.

1. First get organized. Download your meshes. I have three folders here. One is the dress we want to shoeswap. Two is my folder of shoes. Three is the folder in which I will save all my files for this project. We will call it the Project Folder.

2. First, we want to open simPE. Some quick shortcuts here: 1=Create New Project; 2=Open a File; 3=Save; 4=Save As; 5=Close. These little buggers make things go a whole lot faster and you will get acquainted with them a lot through this process.

3. So let’s open the mesh we want to change them shoes.

4. Under the Resource Tree click on the Geometric Data Container (GMDC) then right click on the file under the Resource List. Click Extract. Save this in our Project Folder. Close file and Create New Project to clear the file from simPE. DO NOT EXIT SIMPE! We will need it from the remainder of the process.
(Note: If you want to shoeswap a game mesh, like the Bella dress or something, then you would do Step 14 and 15 then Step 4.)
5. Open Milkshape. If this is your first time, go to File->Preferences.

Make sure yours looks like mine.

Next, File->Import->Sims2 UniMesh Import V4.09. Navigate to our Project Folder and select the file we just extracted from simPE.

(Side note: I am keeping the morphs in this project because the shoes are a separate group from the rest of the dress so no reason to not keep them. If this is not the case, you can delete the morphs. Or if you want are not ready to tackle morphs quite yet, just hit no. I will hit yes though.)

Project loads and you will notice in the groups tab three groups (two with morphs). The last body group is the legs and shoes. Keeping your shoes in a separate group is ideal for any mesh for this specific reason...to shoeswap.

6. Repeat step 5, but bring in the shoes we want to replace with.


Choose these options for Step 6. It is MOST IMPORTANT that you choose NO for including additional bone definitions because if you hit yes, you will have to start the project over.

7. Investigate which vertices you want to keep and which ones you want to delete. Above I illustrate which vertices I am deleting for which group. You do this by going to the Model tab, clicking Select and clicking/dragging over the vertices you want to select. Select them and hit Delete on your keyboard to delete them.

8. Once that is done, you will notice gaps in the skin. We can fix that!

First let’s right click on the 3D model window and click Wireframe Overlay. This will help identify vertices a little bit easier moving on.

So select the left leg vertices in the front view quadrant of Milkshape. Right click and Frame Selection. This will zoom in on the selection to make it easier to see which vertices we are selecting. So click and drag to make sure you are getting both vertices of the mesh and new shoes.

9. Click Vertex->Sims2 UniMesh Vertex Data Merge V4.09 and then Vertex->Sims2 UniMesh Normal Data Merge V4.09. Repeat for each vertices for both legs.

This is our result. Next let’s check out the skin textures to make sure everything is aligned. Generally you would do this before and after combining groups but for the purpose of this tutorial I am going to show the texture with the groups already combined just so you know what it should look like.

10. Select “body” and “bottom” hit Regroup, underneath type “body” and hit Rename. (Note: if the mesh you are working on IS a bottom then you would type bottom or whatever the group mesh for the shoes is called for the original mesh.)

Click Comment, delete everything in the comments except what I show here. Make sure that the ModelName matches the group name. This is the number one missed step in all meshing. Hit OK when done.

11. Go to the Materials tab, click New->the first <none> and select a skin texture. This is something I would have pre-extracted through Bodyshop or simPE. Hit Assign. If your texture does not show, your Milkshape might be like mine with the default set on Smooth Shaded, so right click on the 3D Model Quadrant and select Textured.

Next go to Window->Texture Coordinate Editor.

Everything should be aligned well enough. If not, you can select the vertices and move them into location. Now let’s combine groups.

12. Once we are satisfied with our mesh, File->Export->Sims2 UniMesh Exporter V4.09.

I always name it the same thing as the mesh file that way I can just select it and CRTL+C to copy it and paste it for many processes beyond Milkshape. So name it something and hit Save.

13. So copy the mesh and a recolor of the CC we are shoeswapping into your Downloads folder in your game. Then load Bodyshop.

14. Once Bodyshop is loaded, Create Parts then Start New Project.

Then Create Clothing.

And navigate to the mesh we are shoeswapping. Select it then Export.

Name the project something easy to remember.

Import it back to game.

Click check mark when done then exit Bodyshop.

15. Back to simPE. Tools->PJSE->Body Mesh Tool->Extracting Stage.


Click browse, find the file we just exported from Bodyshop in the SavedSims folder. And hit OK.

16. Go to Tools->Object Tools->Fix Integrity.

Under ModelName name it. I just CRTL+V the name of the mesh as I saved it from Milkshape. Hit Update and OK.

17. Immediately Save As and DO NAME IT THE MESH NAME HERE! Remember that ()-+=[]{},.’”?` with random letters and numbers (like how Bodyshop names items) is bad for the game. The only special character that is fine is underscore. Also name it with your username that way people know who made it (especially for WCIFs). Letting people know what age group it is for is also helpful.

18. After the file is saved, select the GMDC, right click on it and Replace.

Select the mesh we made in Milkshape and hit Open.

Hit Yes to Resource Changed, Save, Close, and Create New Project. (Remember that 1,2,3,4,5 from the top?)

19. Let’s Open and navigate to SavedSims folder and to the “dress” package we exported from Bodyshop earlier. Open it.

20. Click on the 3D ID Referencing File and wait for simPE to load files if this is the first time you have loaded simPE.

Go to PJSE->Body Mesh Tool->Linking Stage.

Click OK.

Select our mesh and hit Open.

Click OK. And let’s replace the shoe textures.

21. Click the Texture Image (TXTR) and then the “body” file. Right click on the image and Build DXT.

Hit open, select our shoe texture, make sure Format is to DXT3Format, Sharpen to None and hit Build.

Hit Commit and OK. Save, Close, and Create New Project to clear your package from simPE. Still keep simPE up if we need to use it.

22. Load Bodyshop. Repeat Step 14, but this time select our shoeswapped mesh and name it something different and easy to remember. You type (or CTRL+V if you copied the name of your mesh earlier) in the Tooltip area so when someone hovers over your item, it will show what it is named. This also comes in handy for renaming files in Sims 2 Clean Installer.
This next part can be done in preparation for the shoeswapping or you can wait to do it now as I am showing in this tutorial.

23. So this is extracting texture files. It is very easy, just open the texture recolor of the CC we are shoeswapping, go to the TXTR select the dress or whatever item of clothing. Then hit export and save it somewhere you can find it like in our Project Folder.

24. So open your photo-editing software. I use Photoshop. I am going to leave the shoe black, but we still need to add all the colors we want for the dress. So File->Open->navigate to the Projects folder and find whatever you named it in Step 22. Click the dress texture and Open.

25. Open the texture(s) you extracted in Step 23 and move them to fit on the texture file, merge textures or flatten then File->Save.

26. In Bodyshop we Create Parts->Load Saved Project.

Click whatever you named the project and Load Selected Project.

27. Remember to select the clothing categories you want for the outfit. (You can change separates HERE.) Refresh to make sure you have the correct color and name it then Import to Game. Repeat for each color/texture.
Once finished you can exit Bodyshop.

28. Load Sims 2 Pack Clean Installer. Choose directory, click on SavedSims.

It will pull up on the recolors and mesh you just made. Time to rename our files by right clicking on the Clothing Type and hitting Rename Package.

If you named the file in the tooltip as I suggested in Step 23 then all you have to do is right click on the name, hit copy.


Then right click in the space below and hit Paste. Item renamed. Repeat this for all clothing textures. Then exit out of Sims 2 Pack Clean Installer.

29. Delete the “dress” file we exported long ago in simPE. We don’t need it anymore. It should be named differently from all your other files so easy to locate.

30. I go ahead and make the Folder and WinRar file for more CC here. Select the files for SavedSims folder and put them in the folder.

31. Open The Compressorizer->Add Files to List, select the folder with our shoeswapped files. Hit Go and watch it eat the bytes away.

32. Put the folder of our shoeswap in the Downloads folder for testing in game.

33. Launch game. Go inside neighborhood, house, and dress a sim up in the shoeswapped outfit and test to see if there are any mistakes. Test the morphs too while you are there (if you kept them). When satisfied, take photos of the shoeswap and swatches then exit game.

34. Move folder of our CC into WinRar file and upload to a file hosting site. Put it up for download and share your new shoeswap because sharing is fun and nice.
Tutorial out!
169 notes
·
View notes
Note
Hi, I really need your help. I'm trying to do my own clothes for Sims 3 but I can't do that because when I open Milkshape 3D 1.8.4. version there's no option for TSRW (my version is 2.2.104), when i try to import or export. I've watched tutorials for creating sims clothes but nobody showed how to make Milkshape 3D and TSRW work together. Please I'm desperate and need your help. (And sorry if my english is bad i'm from Slovakia)
Hello, @onlyhuman45!
Don't worry about your English, it's really good :)
I have good news, your problem can be easily solved!
You have to install plugins for Milkshape for the TSRW import and export to work. These have to be copied from the TSR Workshop folder to the Milkshape folder.
In case you installed TSR Workshop to the standard location, you will find the plugins at this path:
C:\Program Files (x86)\The Sims Resource\TSR Workshop\Extras\Milkshape Plugins
There are two files in the Milkshape plugins folder:
msTSRWorkshopExport.dll
msTSRWorkshopImport.dll
Just copy these two files and paste them into your Milikshape installation folder:
C:\Program Files (x86)\MilkShape 3D 1.8.4
The next time you start Milkshape, the import/export options should show up!
Also good to know:
There are other useful plugins for Milkshape I highly recommend, such as:
Q-Mesh Plugins (allows the import and export of sims 3 GEOMs)
Align Normals Tool and Extended Manual Edit (I use the first one on every mesh, it smoothes any hard edges. The second is useful to get precise info on your vertices and tweak values manually, advanced but it does not hurt to have it installed)
Unimesh Plugins and BoneTool (designed for TS2, but most of them are super useful for ts3 meshes too! One of the most important plugins for seam fixing is included here! Essential!)
Cat’s UV Data Merge, UV flip, and mesh mirror (for UV-Editing in Milkshape, I prefer to do all editing in Blender, but it does not hurt to have them anyway)
I recommend installing all of them, even if you might not use all of their features, but they are good to have!
They are all installed the same way as the TSRW import/export plugins, just paste the files directly into the Milkshape folder.
41 notes
·
View notes
Text
Edit: Solved! Thanks, MDP!
I'm still having issues with Milkshape on this laptop. When I import with Unimesh, Milkshape creates backfaces. There must be some setting I missed. I looked at a few guides for setting it up (it's been a while) and I can't find anything that fixes it. I don't really have the space to have both laptops open, to compare settings.
Any suggestions?
Example of backfaces:

10 notes
·
View notes
Text
extract ambodynaked gmdc from game
import unimesh into milkshape (no for blend group, yes for weights)
rename group to group_base (save)
export as wso
run that through meshtoolkit
delete the group from the milkshape file (don’t close so skeleton is still there from ambodynaked), import the morphed wso
delete the group_base, keep group_fat as my new group “body” (save)
select “body”, duplicate selection, hand shape fat morph (save)
select “body”, duplicate selection, hand shape preg morph (save)
rename groups, add comments, verify they are correct (save)
export as wso
export as unimesh
file, new
import unimesh just exported (yes for blend groups)

Why does my fat morph keep disappearing?
2 notes
·
View notes
Text
Womrat cage update - 2
So, in two days I came from this:

and this:

to this:

The cage finally makes one piece, the womrat and all the pieces are finally fully animated:


Some fine tuning is obviously still necessary as some pieces refuse to align properly and the womrat himself is still too low in the cage. Also for some reason as soon as the animation cycle with the feed trap starts, it teleports way too high despite all the coordinates and bones being aligned properly. But it animates.
To achieve these results I had to:
1. Open the extracted from SimPE unimesh in Milkshape.
2. Delete the surface group, select all and lower everything to the ground level.
3. Check that the skeleton was lowered too and adjust it when necessary. To move it properly without distortion be sure to select root_trans bone as kindly suggested by @deedee-sims. I also moved the root-rot and containedpetmammalcage joints as they were on the same level. As I just lowered the mesh, I simply had to make sure all three were at 0 point.
4. With the help from @balkopat we found out that you should avoid exporting modified unimesh along with the CRES file you could import to see all the bones’ names. DO NOT DO THAT! It will result in your mesh loosing its bone asignments and you’ll have to start over like me. Instead, you can open the unimesh and cres files of the original maxis object in Milkshape and then open the object you are working on in another Milkshape, but without the cres file this time.
5. Change the coordinates of bones in cres file. As I’m not very familiar with meshing, I find it to be quite challenging as I can’t check the bones’ coordinates. I found some information in the comment section of each joint but it didn’t do good to my object. Instead I have to use @pforestsims method for finding slots placement with cylinders described here. It’s still not an easiest task but it brought me to where I am now with aligning.
I think I’ll make a break from this cage as I’ve been working on it all day long for two days, send help 🤪
Any suggestions on improving bones’ alignements are welcome!
13 notes
·
View notes
Text
The Sims 4 to The Sims 2 Hair Conversion Tutorial

This tutorial is written under the impression that you already know how to do a lot of basic things in Milkshape.... or have the program installed at least.
Download Sims 2 Body Bases
Download Sims 2 Mesh References
Watch the video I made if you need anymore clarification :)
PRE-MILKSHAPE
With the Sims 4 mesh you've selected, go to the meshes category and click export mesh.

While the mesh is exporting, you can extract one of the textures under the texture category.
Opening your mesh in blender, click the eye icon next to all the mesh groups and deselect them all.

Click through the mesh groups and find the one that's the whole mesh and not a "hat chop"

Then click the triangle next to the mesh group to highlight it and go to FILE < EXPORT < Wavefront (.obj) & select the options in the image below

MILKSHAPE
Import your sims 2 base head and scalp mesh (FILE < IMPORT < Sims 2 Unimesh Import)
When asked to "Create Blend Groups?" Select No.
When asked "Some skin weights do not equal 100%? Do you want these corrected?" Select Yes.
(FROM RENTED-SPACE'S TUTORIAL ---> TIP: if you're greeted by a blue blob mess, go to File-> Preferences -> Misc -> Joint Size: 0.011000).
Import the obj file you just got from blender (FILE < IMPORT < Wavefront OBJ)
Double click the mesh you imported, then right click one of the POV windows and select "Frame Selection." (Do this for all your windows
honestly).
BEFORE APPLYING THE TEXTURE, YOU HAVE TO RESIZE IT TO BE 1024X1024 (or another size that Sims 2 takes, but 1024x1024 is the most common)
Go to Materials. There should already be one there.
Select it, then select your (resized) texture.
Also right click and select "Textured" under the first set of selections if your Texture isn't showing up).
Your mesh will/probably does look messed up.
Click WINDOW < TEXTURE COORDINATOR EDITOR.
Click the dropdown and go to the name of your group.
Go to scale and set the x-factor by 2 and then click the S next to it. (If it still doesn't look right, click move and move it around
a little if you need to).

Exit out of the Texture Coordinator window.
Move and scale your mesh to fit it over the scalp.
When I scale my meshes, the numbers I always use are .99 and 1.01
You can press space bar to have a fullscreen of the window you currently have selected.
Go to joints, with your mesh still selected, and click "Draw Vertices With Bone Colors". Your Face and scalp should turn purple,
but your unassigned mesh will be white (or brighter if you still have the texture on it).
Scroll all the way up the joints list until you reach "Head", then select it and click assign.
All your groups should be purple now.

Delete the Face group.
Click Comment under the hair group and copy the text in the window. Orrrrrr just copy this from right here.
ModelName: hair_alpha5
Opacity: 5
HasTangentArray:
NumSkinWgts: 3
Change the name of Default to hair_alpha5.
Open the comments of Hair_alpha5 and paste the text from hair and change the modelname to hair_alpha5, the opacity to 5 and the
NumSkinWgts to 3 (or paste the text above :))

Import your sims 2 base head and scalp mesh (FILE < EXPORT < Sims 2 Unimesh Export)
SIMPE STUFF
Open the Adult Hair Mesh File from my Mesh Ref package.
Select all the groups in the file, clone, delete, and save.
Go to OBJECT TOOLS < FIX INTERGRITY and rename it to whatever you want.

(idr why i named the line this)
Select the GMDC Group.
Copy the renamed group name.
Right click the GMDC group and click replace.
Go to the Unimesh File you made and select it.
Right click the GMDC group and click replace.

Another pop-up will appear saying so and so was replaced, refresh and make changes? Click yes.

Replace the new name in the file line with the one you copied.
Once that's done, click "Fix TGI" and then commit.
Go in bodyshop and make your recolor file. I reccomend using another sims 4 conversion since they usually have 2 groups already.
Open the recolor file.
Replace the textures with the one you made.
Then click on the "Instance" tab to re-arrange the files in a number order. The number order correlates to the age states for your hair
YA/ADULT/ELDER uses the same mesh and are usually 0x00000004, 0x00000005, and 0x00000006.

Once you know the corresponding 3D ID Reference, highlight it then click "Tools -> PJSE -> Body Mesh Tool -> Linking Stage" and pick the corresponding age mesh.


Do it for all of those.
Then save!
Open Bodyshop and look under Custom Hair, and your mesh should be there :)
I hope this tutorial is helpful, if you need anymore help feel free to contact me.

Thanks to Rented-Space’s tutorial which I copied a lot of the SIMPE stuff from.
#ts2#ts2cc#tutorial#i feel like these pictures could be confusing sorry im not good with picture turtoials#*tutorials
320 notes
·
View notes
Photo

Hi! Here's something, this is the tie from the tour guide's outfit made into an accessory. (I hope I didn’t make a duplicate, I tried searching but no luck but hey, I learned about the unimesh bone tool - so that’s a plus in doing this!) =)
Sailor Tie (Tour Guide Tie) | SimFileShare - MEGA
→ Glasses, 12 recolors, TF-EF, Layerable & Polycount: 128 (Compressed)
Note: I made a few recolors though I fail to remember which ones exactly. I think I made about 5 and the rest belongs to Maxis. Meshes are different but merged. Anyways, enjoy!
Credits: Skellington7d’s tour guide top & EAxis. (Thank you, DeeDee!)
137 notes
·
View notes
Last Seen Blogs

azazeldiascro
Untitled

mars-probe
Area-512 GIF Art Network 👽

thecoffeeisblack
The Coffee Is Black

tgzhie
Sans titre

black--betty
a WRECKING BALL in a summer dress