#virtualbox ose
Explore tagged Tumblr posts
Visit Tumblr Blog
Explore Tumblr blogs with no restrictions, modern design and the best experience.
Last Seen Tumblr Blogs


Fun Fact
If you dial 1-866-584-6757, you can leave an audio post for your followers.
Text

A Linux laptop with a Windows virtual machine on a second monitor goes the hardest when it comes to setups, and you can't change my mind.
4 notes
·
View notes
Text

#lol#memebigboy#jacksfilms#internet archive#trying to install old mac os on virtualbox#and the zip folder came with 0 iso files#and no other program can open it#so there go 5 gigs
0 notes
Text
hi chat. welcome to the first installment of: am i cooked or just paranoid
so im decently new to being actually silly and experimental with tech past just like. occasionally block coding on scratch or writing really simple python scripts or building a simple html and css website for a class. because i have recently graduated and now have a small window of actual free time and can be self indulgent in my hobbies for the first time in years.
anyway. now that ive explained why i may be acting nonsensically, i was playing with a vm of windows xp through virtualbox. vbox users may know that, from version 7 and on, they dont fully support older os's like xp and 95 anymore, so the drag n drop feature doesnt work and, at least i, cant figure out how to get that guest addition thing to work for it.
so because of this you may also know that, when trying to drag n drop, if it fails youll immediately get a pop-up saying the drag n drop failed. awhile after giving up trying to utilize this feature, i forgot to turn off the function and left it on bidirectional. and i got the pop up of the drag n drop, from guest to host, failing. but i was completely full screen in the vm and had been fullscreened into it just only using the vm for some time, and i hadnt been dragging any files at the time . am i stupid for using the web on windows xp vm ?(i was using mypal not explorer, and did have the firewall enabled n whatnot) i thought it wouldnt be a big deal cus vms are relatively secure and i didnt care if something happened to it cus i could just delete it and make a new one but. yea idk
tldr uhhh im paranoid or something malicious happened on my internet connected windows xp vm. idk
#advice welcome but i might just delete this later cus im not too distressed mainly just curious#i just wonder if it was a random bug or if someone was actually so close to breaking out of my vm and infecting my real pc lol 😭 cus i know#thats not easy and not something just anyone could do#im not really distressed cus im the type of person if my entire os is destroyed im just like aww shucks. clean install!#and i go about my day#i also dont do any banking or anything on my computer so there isnt a crazy amount of personal info there#dagger.txt#virtualbox#virtual machines#windows xp
0 notes
Text
La Evolución de las Máquinas Virtuales: Del Concepto a la Columna Vertebral de la Ciberseguridad Moderna
En el mundo dinámico de la tecnología de la información, pocas innovaciones han tenido un impacto tan transformador como las máquinas virtuales (VM). Desde sus humildes inicios en los laboratorios de investigación hasta convertirse en un pilar fundamental de la infraestructura de TI y la ciberseguridad, las máquinas virtuales han revolucionado la forma en que las organizaciones gestionan y…
#Ciberseguridad#Hyper-V#KVM#Máquinas Virtuales#Parallels Desktop#Parrot OS#ProtegeTusDatos#VirtualBox#VM#VMware Station
0 notes
Text
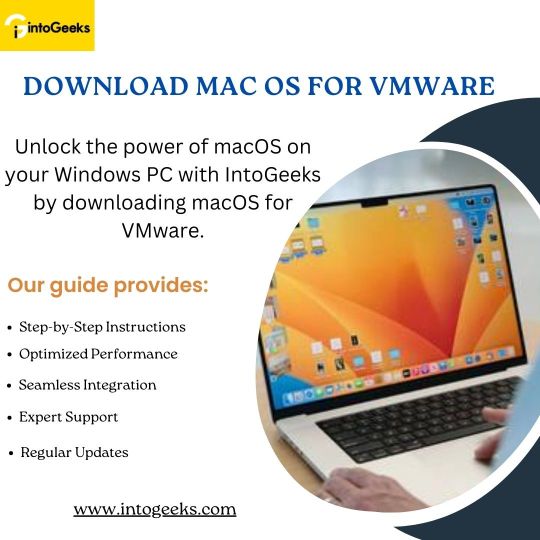
Download macOS for VMware - IntoGeeks
Unlock the potential of macOS on your Windows PC with IntoGeeks by downloading macOS for VMware. Our comprehensive guide provides detailed, step-by-step instructions to ensure a smooth download and installation process. Experience the sleek interface and powerful features of macOS Ventura without leaving your Windows environment.
With IntoGeeks, you can optimize the performance of your macOS virtual machine and run macOS applications seamlessly alongside your Windows programs. Our guide also offers tips to enhance integration and ensure smooth operation. Additionally, you'll have access to a community of tech enthusiasts and professionals for support and advice.
Stay up-to-date with the latest macOS versions and VMware enhancements with our regular updates. Visit IntoGeeks today and start your macOS on VMware journey, transforming your Windows PC into a versatile powerhouse.
0 notes
Text
fun fact:
if you run Windows XP in a VirtualBox VM, the in-OS volume control mute option doesn't work. And also the "audio output" option is flakey, and sometimes won't work.
ALSO, Bonzi Buddy will randomly say things if your computer is idle for too long. So I'm sitting here and suddenly I hear a terrible synthesized voice read me some jokes

Bonzi Buddy cannot be silenced. He cannot be stopped. He is coming for you.
826 notes
·
View notes
Text

rambling about templeOS! :) the "divine operating system"
preacher: the few people who have been following this blog since the start might've caught on to a few mentions of the "templeOS god word app" which the "APRIL" project hinges on. i figured the subject deserved a brief explanation on the blog, for those who might not be "in the know"
-
templeOS is a operating system designed "in accord with specific instructions from god", according to its late creator terry a. davis. it was initially released in 2005 but the latest update was as recently as 2017. terry davis died the following year on august 11th after being hit by train. (this is partly the reason for my ongoing obsession with temple, because august 11th has been a spiritually significant date for me since always, but that's besides the point)
templeOS was created entirely by davis, down to the fact that he had developed an entirely new coding language for the purpose – HolyC, a middle ground between C and C++, and named in reference to the vatican's holy see. needless to say developing a whole operating system singlehandedly is an incredible feat, and devising entirely new language doubly so.
templeOS has no internet support, but it has games! in what is perhaps my favorite feature of the OS, the games are divided into "fun games" and "unfun games" 😭


unfortunately most of them (regardless of fun/unfun designation) are borderline unplayable, at least on the emulator. some examples of the games include: keepaway, which is a basketball game, a complete flight simulator, and "after egypt" –a game in which you travel to a burning bush in order to use a "high-speed stopwatch", meant to act as an oracle, generating pseudo-random text. this is to my knowledge running on the same code as the god word app.
god word can be accessed independently outside of "after egypt" as well, without even opening an app – just by pressing f7 anywhere you can generate strings of words. it is meant to be a tool to communicate with god directly. the system also features a similar app which instead generates quotes from the king james bible, as well as a random line generator which i think is supposed to be a way or receiving visual input from god as well.
-
all in all completely incredible and one of my favorite things to have ever existed. i became obsessed with this last year since i first became interested in hardware vs software sentience, and i've been running it on virtualbox ever since. obviously most of the features don't work very well on the emulator (esp that i'm on mac so the keyboard maps really annoyingly) but sometimes i'll just launch it to play around with god word – this is kind of the entire premise of "APRIL". i wanted god word to hang out with me and be able to get the words out of it with only verbal input.
im going to attach some links in a reblog for people who want to read more or want to play with templeOS on their own.

#preacher#templeOS#templeos#terry a davis#terry davis#divine machinery#divine technology#tech#technology#computing#programming#coding#computers#machine#machines#techcore#webcore#machine dreams#angels#old computers#mechanical divinity#angel technology#templeos stuff
22 notes
·
View notes
Text

Tools of the Trade for Learning Cybersecurity
I created this post for the Studyblr Masterpost Jam, check out the tag for more cool masterposts from folks in the studyblr community!
Cybersecurity professionals use a lot of different tools to get the job done. There are plenty of fancy and expensive tools that enterprise security teams use, but luckily there are also lots of brilliant people writing free and open-source software. In this post, I'm going to list some popular free tools that you can download right now to practice and learn with.
In my opinion, one of the most important tools you can learn how to use is a virtual machine. If you're not already familiar with Linux, this is a great way to learn. VMs are helpful for separating all your security tools from your everyday OS, isolating potentially malicious files, and just generally experimenting. You'll need to use something like VirtualBox or VMWare Workstation (Workstation Pro is now free for personal use, but they make you jump through hoops to download it).
Below is a list of some popular cybersecurity-focused Linux distributions that come with lots of tools pre-installed:
Kali is a popular distro that comes loaded with tools for penetration testing
REMnux is a distro built for malware analysis
honorable mention for FLARE-VM, which is not a VM on its own, but a set of scripts for setting up a malware analysis workstation & installing tools on a Windows VM.
SANS maintains several different distros that are used in their courses. You'll need to create an account to download them, but they're all free:
Slingshot is built for penetration testing
SIFT Workstation is a distro that comes with lots of tools for digital forensics
These distros can be kind of overwhelming if you don't know how to use most of the pre-installed software yet, so just starting with a regular Linux distribution and installing tools as you want to learn them is another good choice for learning.
Free Software
Wireshark: sniff packets and explore network protocols
Ghidra and the free version of IDA Pro are the top picks for reverse engineering
for digital forensics, check out Eric Zimmerman's tools - there are many different ones for exploring & analyzing different forensic artifacts
pwntools is a super useful Python library for solving binary exploitation CTF challenges
CyberChef is a tool that makes it easy to manipulate data - encryption & decryption, encoding & decoding, formatting, conversions… CyberChef gives you a lot to work with (and there's a web version - no installation required!).
Burp Suite is a handy tool for web security testing that has a free community edition
Metasploit is a popular penetration testing framework, check out Metasploitable if you want a target to practice with
SANS also has a list of free tools that's worth checking out.
Programming Languages
Knowing how to write code isn't a hard requirement for learning cybersecurity, but it's incredibly useful. Any programming language will do, especially since learning one will make it easy to pick up others, but these are some common ones that security folks use:
Python is quick to write, easy to learn, and since it's so popular, there are lots of helpful libraries out there.
PowerShell is useful for automating things in the Windows world. It's built on .NET, so you can practically dip into writing C# if you need a bit more power.
Go is a relatively new language, but it's popular and there are some security tools written in it.
Rust is another new-ish language that's designed for memory safety and it has a wonderful community. There's a bit of a steep learning curve, but learning Rust makes you understand how memory bugs work and I think that's neat.
If you want to get into reverse engineering or malware analysis, you'll want to have a good grasp of C and C++.
Other Tools for Cybersecurity
There are lots of things you'll need that aren't specific to cybersecurity, like:
a good system for taking notes, whether that's pen & paper or software-based. I recommend using something that lets you work in plain text or close to it.
general command line familiarity + basic knowledge of CLI text editors (nano is great, but what if you have to work with a system that only has vi?)
familiarity with git and docker will be helpful
There are countless scripts and programs out there, but the most important thing is understanding what your tools do and how they work. There is no magic "hack this system" or "solve this forensics case" button. Tools are great for speeding up the process, but you have to know what the process is. Definitely take some time to learn how to use them, but don't base your entire understanding of security on code that someone else wrote. That's how you end up as a "script kiddie", and your skills and knowledge will be limited.
Feel free to send me an ask if you have questions about any specific tool or something you found that I haven't listed. I have approximate knowledge of many things, and if I don't have an answer I can at least help point you in the right direction.
#studyblrmasterpostjam#studyblr#masterpost#cybersecurity#late post bc I was busy yesterday oops lol#also this post is nearly a thousand words#apparently I am incapable of being succinct lmao
22 notes
·
View notes
Note
howd u get photoshop 6 running on ur computer? ive been trying to install it for a while but it seems to not ;like newer versions of windows...idk what os ur using but did u have to do anything fancy to install it
im using it on a virtual machine (the software is called virtualbox) running Windows 2000
21 notes
·
View notes
Text
How to Install Ubuntu 24.04 on VirtualBox - Ubuntu 24.04 As Host

If you're looking to explore Ubuntu 24.04 without messing up your main system, installing it on VirtualBox is the perfect way to go! Here's a step-by-step guide to get you started.
Step-by-Step Guide:
Download VirtualBox: Head over to the VirtualBox website and download the latest version for your operating system.
Download Ubuntu 24.04 ISO: Grab the Ubuntu 24.04 ISO file from the official Ubuntu website.
Install VirtualBox:
Follow the installation instructions for your OS.
Open VirtualBox once installed.
Create a New Virtual Machine:
Click on “New”.
Name your VM (e.g., Ubuntu 24.04).
Choose “Linux” as the type and “Ubuntu (64-bit)” as the version.
Allocate RAM (at least 2048 MB recommended).
Attach the Ubuntu ISO:
Select your newly created VM and click “Settings”.
Go to “Storage”.
Under “Controller: IDE”, click the empty disk icon and select “Choose a disk file”.
Find and select the Ubuntu 24.04 ISO you downloaded.
Start the Virtual Machine:
Click “Start” to boot from the ISO.
Follow the on-screen instructions to install Ubuntu.
Complete the Installation:
Select your language and keyboard layout.
Choose “Install Ubuntu”.
Follow the prompts to set up your system (create a user, set a password, etc.).
Once installation is complete, restart the VM.
Remove the ISO and Boot from Virtual Disk:
Go back to “Settings” -> “Storage” and remove the ISO from the virtual drive.
Restart your VM again, and it should boot into your new Ubuntu 24.04 installation!
For a visual guide, check out this helpful video tutorial: How to Install Ubuntu 24.04 on VirtualBox 🎥
youtube
Happy virtualizing! 🚀
#Install Ubuntu 24.04 on Virtualbox#Ubuntu 24.04#How to Install Ubuntu 24.04#Linux#Ubuntu#Fedora 40#GNOME 46#Youtube
15 notes
·
View notes
Text
Linux Life Episode 86
Hello everyone back to my Linux Life blog. I admit it has been a while since I wrote anything here . I have continued to use EndeavourOS on my Ryzen 7 Dell laptop. If I any major incidents had came up I would have made an entry.
However nothing really exciting has transpired. I update daily and OK have had a few minor issues but nothing that couldn't be sorted easily so not worth typing up a full blog just for running a yay command which sorted things out.
However given it's March, which some You-tubers and content creators have been running with the hashtag of #Marchintosh in which they look at old Mac stuff.
So I decided to run some older versions of Mac OS using VMWare Workstation which is now free for Windows, Mac and Linux.
For those not up with the technology of Virtual Machines basically the computer creates a sandbox container which pretends to be a certain machine so you can run things like Linux and MacOS using a software created environment.
VMWare Workstation and Oracle Virtualbox are Type 2 Hypervisors as they are known which create the whole environment using software machines which you can configure. All drivers are software based.
Microsoft Hyper-V, Xen and others such as QEMU are Type 1 Hypervisors which as well as having the various environments have software drivers some can use what they call "bare metal" which means it can see and use your actual GPU meaning you can take advantage of video acceleration. It also can give bare metal access to keyboards and mice. These take a lot more setup but work slightly quicker than Type 2 once they are done.
Type 1 systems like Qemu and Bochs may also allow access to different CPU types such as SPARC, PowerPC so you can run alternative OS like Solaris, IRIX and others.
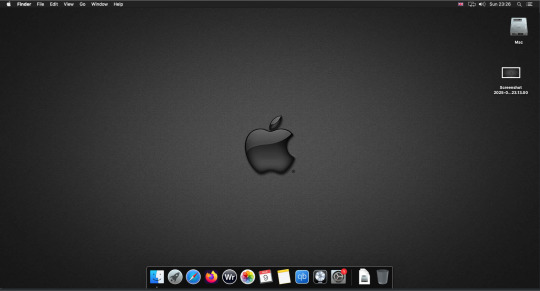
Right now i have explained that back to the #Marchintosh project I was using VMWare Workstation and I decided to install 2 versions of Mac OS.
First I installed Mac OS Catalina (Mac OS X 10.15) now luckily a lot of the leg work had been taken out for me as someone had already created a VMDK file (aka virtual Hard drive) of Catalina with AMD drivers to download. Google is your friend I am not putting up links.
So first you have to unlock VMWare as by default the Windows and Linux versions don't list Mac OS. You do this by downloading a WMWare unlocker and then running it. It will make patch various files to allow it to now run MacOS.
So upon creating the VM and selecting Mac OS 10.15 from options you have to first setup to install the OS later and then when it asks to use a HD point it towards the Catalina AMD VDMK previously downloaded (keep existing format). Set CPUs to 2 and Cores to 4 as I can. Memory set to 8GB, Set networking to NAT and everything else as standard. Selecting Finish.
Now before powering on the VM as I have an AMD Ryzen system I had to edit the VM's VMX file using a text editor.
cpuid.0.eax = “0000:0000:0000:0000:0000:0000:0000:1011” cpuid.0.ebx = “0111:0101:0110:1110:0110:0101:0100:0111” cpuid.0.ecx = “0110:1100:0110:0101:0111:0100:0110:1110” cpuid.0.edx = “0100:1001:0110:0101:0110:1110:0110:1001” cpuid.1.eax = “0000:0000:0000:0001:0000:0110:0111:0001” cpuid.1.ebx = “0000:0010:0000:0001:0000:1000:0000:0000” cpuid.1.ecx = “1000:0010:1001:1000:0010:0010:0000:0011” cpuid.1.edx = “0000:0111:1000:1011:1111:1011:1111:1111” smbios.reflectHost = "TRUE" hw.model = "iMac19,1" board-id = "Mac-AA95B1DDAB278B95"
This is to stop the VM from locking up as it will try and run an Intel CPU setup and freeze. This is the prevention of this happening by making it think its a iMac 19,1 in this case.
Now you need to create a harddrive in the VM settings to install the OS on by editing the settings in VMWare and adding a hard drive in my case 100GB set as one file. Make sure it is set to SATA 0:2 using the Advanced button.
Now power on the VM and it will boot to a menu with four options. Select Disk Utility and format the VMware drive to APFS. Exit Disk Utility and now select Restore OS and it will install. Select newly formatted drive and Agree to license.
It will install and restart more than once but eventually it will succeed. Setup language, Don't import Mac, skip location services, skip Apple ID, create account and setup icon and password. don't send Metrics, skip accessibility.
Eventually you will get a main screen with a dock. Now you can install anything that doesn't use video acceleration. So no games or Final Cut Pro but can be used a media player for Youtube and Logic Pro and Word processing.
There is a way of getting iCloud and Apple ID working but as I don't use it I never did bother. Updates to the system are at your own risk as it can wreck the VM.
Once installed you can power down VM using the Apple menu and remove the Catalina VMDK hard drive from the settings. It provide all the fixed kexts so keyboards, mice and sound should work.
If you want video resolution you can install VMware Tools and the tools to select are the ones from the unlocker tools.
Quite a lot huh? Intel has a similar setup but you can use the ISOs and only need to set SMC.version="0" in the VMX.

For Sonoma (Mac OS 14) you need to download OpenCore which is a very complicated bootloader created by very smart indivials normally used to create Hackintosh setups.
It's incredibly complex and has various guides the most comprehensive being the Dortania Opencore guide which is extensive and extremely long.
Explore so at your own risk. As Sonoma is newer version the only way to get it running on AMD laptops or Desktops in VMWare is to use Opencore. Intel can do fixes to the VMX to get it work.
This one is similar to the previous I had to download an ISO of Sonoma. Google is your friend but here is a good one on github somewhere (hint hint). In my case I downloaded Sonoma version 14.7_21H124 (catchy I know).
I also had to download a VDMK of Opencore that allowed 4 cores to be used. I found this on AMD-OSX as can you.
The reason I chose this ISO as you can download Sequioa one. I tried Sequioa but could not get sound working.
So for this one create VM , Select Mac OS 14, install operating system later. Existing OS select Opencore VDMK (keep existing format), set CPU to 1 and cores to 4. Set Netwoking as Bridged everything else as normal. Finish
Now edit settings on VM. On CD-Rom change to image and point to downloaded Sonoma ISO. Add Second hard drive to write to once again I selected 100GB one file. Make sure it is set to SATA 0:2 using the Advanced button. Make sure Opencore is set to SATA 0:0 also using same button.
Now Power the VM. It will boot to a menu with four options. Select Disk Utility and format the VMware drive to APFS. Exit Disk Utility and now select Install OS and it will install. Select newly formatted drive and Agree to license.
The System will install and may restart several times if you get a halt then Restart Guest using the VMware buttons. It will continue until installed.
Setup as done in Catalina turning off all services and creating account. Upon starting of Mac you will have a white background.
Go to System Settings and Screen Saver and turn off Show as Wallpaper.
Now Sonoma is a lot more miserable about installing programs from the Internet and you will spend a lot of time in the System setting Privacy and Security to allow things.
I installed OpenCore Auxilary Tools and managed to install it after the security nonsense. I then turned on Hard Drives in Finder by selecting Settings.
Now open OPENCORE and open EFI folder then OC folder. Start OCAT and drag config.plist from folder to it. In my case to get sound I had to use VoodooHDA but yours may vary.
The VoodooHDA was in the Kernel tab of OCAT I enabled it and disabled AppleALC. Save and exit. Reboot VM and et voila I had sound.
Your mileage may vary and you may need different kexts depending on soundcard or MAC OS version.
Install VMTools to get better Screen resolution. Set Wallpaper to static rather than dynamic to get better speed.
Close VM edit settings and remove CD iso by unticking connected unless you have a CD drive I don't. DO NOT remove Opencore as it needs that to boot.
And we are done. What a nightmare but fascinating to me. If you got this far you deserve a medal. So ends my #Marchintosh entry.
Until next time good luck and take care
2 notes
·
View notes
Text

Family Guy - Back to the Multiverse (2012) - PC - Mídia digital - R$ 39,99 - fazer PIX na chave - [email protected] - após, enviar comprovante para o MESMO E-MAIL
NÃO HÁ CUSTO DE FRETE, O JOGO SERÁ ENVIADO POR DOWNLOAD - NECESSÁRIO TER CONTA NO GOOGLE
Jogo RARO, não está a venda em nenhuma plataforma/loja virtual como Steam, Epic, Ubisoft ou EA
JOGO ESTA EM INGLÊS APENAS
Só roda em DOS (Windows 95/98/ME/XP), porém há possibilidade de usar o APP Oracle VM VirtualBox, e instalar Windows mais antigos, DENTRO do seu Windows mais moderno (Windows 7/8/10/11), possibilitado rodas aplicativos do DOS dentro destes subsistemas.
Caso prefira, podemos enviar a versão (em mídia digital) de Xbox 360, que roda no PC, via emulador (damos suporte)
Requisitos para rodar o jogo
Mínimo
Operating system (OS) XP, Vista, 7
Processor (CPU) Intel Core 2 Duo E2180 2.0 GHz / AMD Athlon 64 X2 4000+
System memory (RAM) 2 GB
Hard disk drive (HDD) 6 GB
Video card (GPU) Nvidia GeForce 7900 GS / ATI Radeon HD 3450 / 256 MB of VRAM
DirectX 9.0c compatible
1 - É necessário ter uma conta no Google para receber o jogo
2 - O jogo foi testado e está funcionando corretamente
3 - Acompanha instruções para rodar o jogo (mas não damos suporte a configurações de jogo e controles)
3 - Por se tratar de um jogo em mídia digital (download), o cancelamento da compra só será aceito ANTES do envio do mesmo. Após, nos reservamos o direito de negar, uma vez que o jogo foi entregue (via link de download)
A COMPRA E PAGAMENTO, SIGNIFICA QUE LEU E COMCORDA COM NOSSOS TERMOS
3 notes
·
View notes
Text
i already liked mint (hence using it on virtualbox and my hdd) but I'm really liking it as my main os :) I've very much made myself at home
5 notes
·
View notes
Text


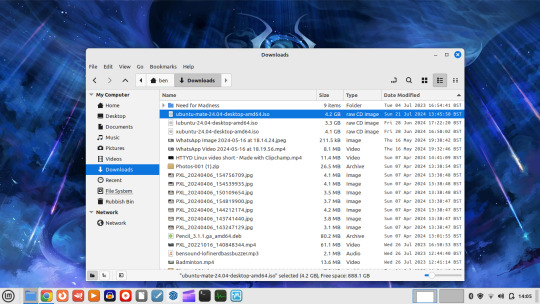

21.07.24
I booted up my Linux Mint laptop and updated the software and system.
I changed the panel (equivalent to Windows taskbar) theme to light, to make it easier to see on the 1366x768 LCD display.
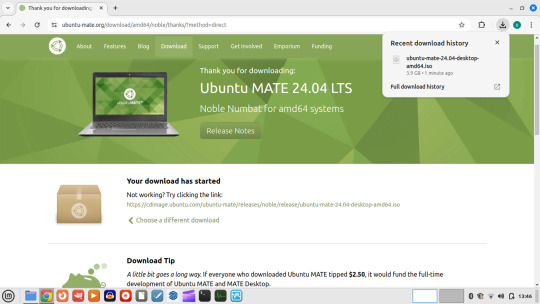
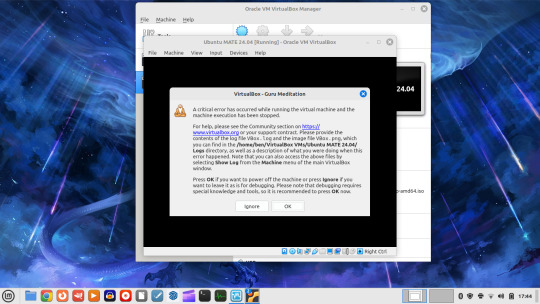
I downloaded Ubuntu MATE 24.04 from:
https://ubuntu-mate.org/
I tried to test run it in VirtualBox. However upon launching the virtual OS, an system memory error was issued by VirtualBox due to limited old memory on the laptop.
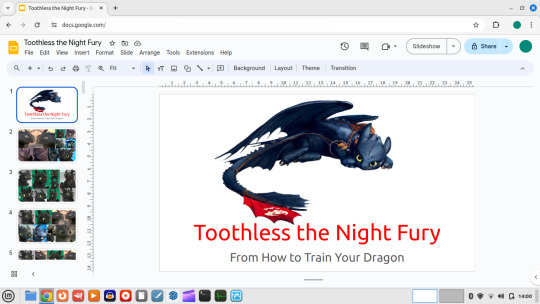
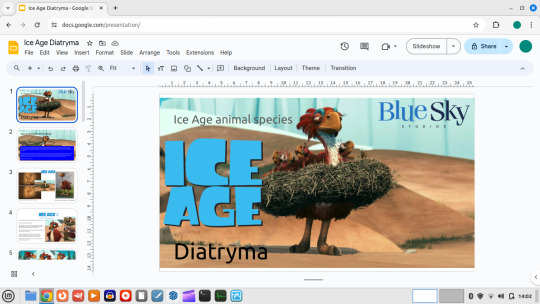
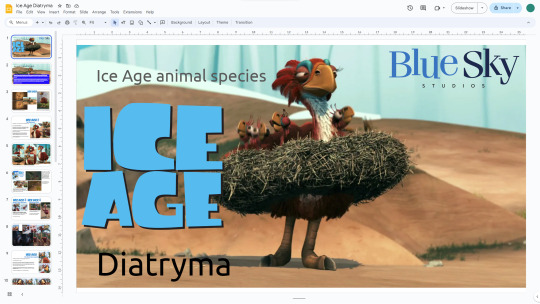
I tried opening my Google Slide docs through Chrome. They looked great, I changed some of the fonts from proprietary to universal fonts in docs so it is more compactable.
The Slide presentations definitely look better on the big screen, as shown under the laptop screens!
An interesting play around with the laptop today!
3 notes
·
View notes
Note
Hey, I've been actively trying to get the website back do you have the Mac OS x version? Of FAMPS?
Unfortunately no I do not have the Mac OS X version of famps but I do plan to download virtualbox and download a Mac OS X operating system on my windows 10 laptop when I get it and download the software I may upload it to my YouTube channel and a game plan but like it said in the Lost media wiki features are limited due to the determination of the website :( but that doesn't stop me from loving them ♥️🌐
3 notes
·
View notes
Text
Boring Blog Episode 2
Hello ladies and gentlemen. So this unexciting blog continues my never ending waffling about computers that no-one really gives a flying fuck about.
So as I mentioned last issue. I bought a new Dell Inspiron 3525 laptop before Christmas. I ran Linux on it for two weeks and then I returned it to windows 11 which its where it is currently.
A friend asked me was I annoyed at Windows yet and to be honest I really don’t have any major issues. Do I miss Linux well lets just admit I can’t say I miss at all.
So what nonsense have I been messing with. Well as the Macintosh 128k was 40 I was going to do something Mac based. So I could have downloaded Basilisk II/Sheepshaver but nope. Mini Vmac would be appropriate given the Mac in question, once again no.
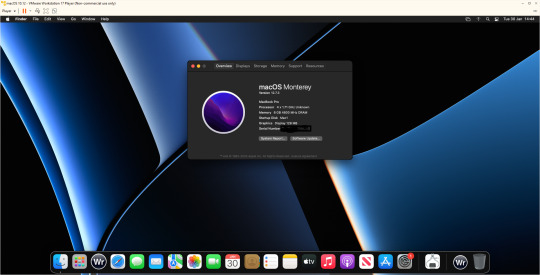
I was playing with VirtualBox trying to get it to run Mac OS 12.0 (Monterey) I was following various guides and after 5 hours of playing about I still couldn’t get it beyond the EFI boot kept failing.
I had tried many different fixes and it really wasn’t working. I then moved to VMWare Player. Originally I went to version 15 but upon changing the vmx file to apply the fix it crashed the player and refused to let it go on.
I found WMware Player could be updated to version 17 which I did and the fix allowed the installer to work. It then took forever to install. Then I let it upgrade to 12.7.3 which took another 2 hours.
This was a project I intended to be an hour ended up being over 9 hours playing with various virtual machines.
Now I have managed to install WriteRoom 3.21 on it also now considering this is a Ryzen 7 5700U system. It runs Monterey about the speed of a Pentium. You can literally type and watch the delay as the buffer updates.
So 9 hours for the slowest VM in history. That’s with it set at 8GB Ram and using 4 processor cores. Ridiculous.
Also while I was playing with emulators. I have been playing with PCSX2 (Playstation 2) emulator and have been playing most of the Burnout franchise.
It works fine but when I tried using EPSXE (PlayStation 1) what a nightmare as half of the plug-ins just refused to work.
I did try Xemu(Xbox emulator) I did try running Project Gotham 3 Racing but it wouldn’t even get above 15 frames per second making the game unplayable.
Given this is a Ryzen 7 I was thinking what the hell does it need to get it working better. My suspicion is the Vega 8 graphics card is just not up to snuff. Once again potato graphics cards used in laptops.
I was going to try Xenia (XBOX 360 emu) but given how bad the Xbox emu was I thought against it.
So one day I will get a decent desktop and run a decent video card but I am sure that’s going to be a cold day in hell before that.
Any way that’s enough waffle for now until next time … Take care
3 notes
·
View notes