#visual studio code guide
Explore tagged Tumblr posts
Visit Tumblr Blog
Explore Tumblr blogs with no restrictions, modern design and the best experience.
Last Seen Tumblr Blogs


Fun Fact
Hackers stole 65M passwords from Tumblr in 2013.
Text
Mini React.js Tips #1 | Resources ✨
I thought why not share my React.js (JavaScript library) notes I made when I was studying! I will start from the very beginning with the basics and random notes I made along the way~!
Up first is what you'll need to know to start any basic simple React (+ Vite) project~! 💻
What you'll need:
node.js installed >> click
coding editor - I love Visual Studio Code >> click
basic knowledge of how to use the Terminal

What does the default React project look like?

Step-by-Step Guide
[ 1 ] Create a New Folder: The new folder on your computer e.g. in Desktop, Documents, wherever that will serve as the home for your entire React project.
[ 2 ] Open in your coding editor (will be using VSCode here): Launch Visual Studio Code and navigate to the newly created folder. I normally 'right-click > show more options > Open with Code' on the folder in the File Explorer (Windows).
[ 3 ] Access the Terminal: Open the integrated terminal in your coding editor. On VSCode, it's at the very top, and click 'New Terminal' and it should pop up at the bottom of the editor.


[ 4 ] Create the actual React project: Type the following command to initialize a new React project using Vite, a powerful build tool:
npm create vite@latest
[ 5 ] Name Your Project: Provide a name for your project when prompted.

[ 6 ] Select 'React' as the Framework: Navigate through the options using the arrow keys on your keyboard and choose 'React'.

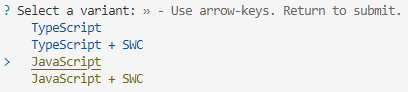
[ 7 ] Choose JavaScript Variant: Opt for the 'JavaScript' variant when prompted. This is the programming language you'll be using for your React application.
[ 8 ] Navigate to Project Folder: Move into the newly created project folder using the following command:
cd [your project name]
[ 9 ] Install Dependencies: Execute the command below to install the necessary dependencies for your React project (it might take a while):
npm install

[ 10 ] Run the Development Server: Start your development server with the command (the 'Local' link):
npm run dev

[ 11 ] Preview Your Project: Open the link provided in your terminal in your web browser. You're now ready to witness your React project in action!
Congratulations! You've successfully created your first React default project! You can look around the project structure like the folders and files already created for you!
BroCode's 'React Full Course for Free' 2024 >> click
React Official Website >> click
Stay tuned for the other posts I will make on this series #mini react tips~!
#mini react tips#my resources#resources#codeblr#coding#progblr#programming#studyblr#studying#javascript#react.js#reactjs#coding tips#coding resources
116 notes
·
View notes
Note
How do you organize BoS in Twine? Is it just a single story or is there multiple, like one is just night 1 and another story is night 1 + 2 and so forth.
Oh wow. Sometimes I feel like readers and I are psychically linked. I had to cut writing short this morning to go through and organize my file because the Night VI branches were getting a bit out of hand.

This is how they're supposed to be labeled. My episode titles are formatted as [Chapter]_[routePassage]_[Title]. So n5_z1_wake would be Night 5, Zealot Passage 1, Wake, the title mostly being a label for my own quick reference. As I'm working with major differences between the MFM and MMF routes + Weaver Alignment in Night VI, they look more like this: n6_mfm_za40_follow, which is Night 5, Bound mode, Weaver-Aligned Zealot Passage 40, Follow.
This is hardly an ideal way to do this. In fact, I think most Twine authors do their stories in a coding environment. As I'm more visually inclined and like seeing the interconnectedness of the passages, that's challenging for me. If you're looking for a more proper way to go things I recommend this guide.
As of right now this method, when properly labeled, works fine for me. I also have a separate Scrivener file where I take notes on each route, that way I don't lose my place/forget who knows what. If/when using the visual environment becomes unwieldy, I'll probably switch to using Visual Studio to code. As I write, I am also working my way through Harvard's free CS50 course and I become more comfortable with coding each month.
14 notes
·
View notes
Text
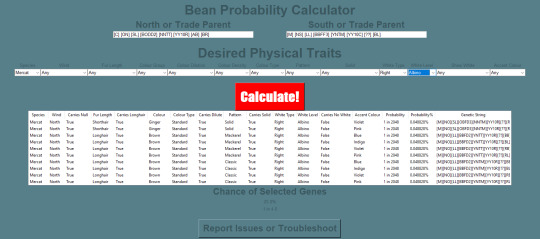
Pixel Cat's End Bean Calculator
As a few of you may be aware (also I have pinged those who expressed interest in the first post btw) I have created a calculator that takes the genetic strings of two not-cats, along with some filters, and returns EVERY. POSSIBLE. BEAN. along with its corresponding probability! It also displays the total probability of matching all input traits.
The link to the file is here. (Current version: 1.0)
In order to use it, you will need a python interpreter (there are plenty of guides for that online, it shouldn't be hard to do) along with a program to run it in. I chose and recommend Visual Studio Code. Again, there are plenty of guides for python and VS Code.
At the top of the file, there are some settings that you can change, including fonts and colours, with the formats needed for those settings next to them. You can change those whenever, but be warned that changing font size may result in the window being weirdly sized.

Basically, to use it, you just run the code, input the full genetic strings (if growth or accent are unknown, put [??] in its place) of a North/Trade cat and a South/Trade cat in their respective fields, select the traits you want to see, and click the Big Red Button™. From there, you can see every possible bean, its chance, and at the bottom will be the chance of a bean matching your selected traits.
Note that for recessives (for example longhair), carrying the trait and not carrying it are two separate fields (short and short (carries long)). If you want the overall chance for shorthair, you would add the chances for short and short (carries long).
There is a button at the bottom for if there are any bugs that you have found, along with some troubleshooting steps to fix them.
If you have any more questions, feel free to ask!


Those who expressed interest earlier: @fr-thrice @tvthetv
5 notes
·
View notes
Note
Greetings moose-mousse, it is a bit niche/weird (but let's see how far it goes) but may I ask for some suggestions / advice concerning making pseudo-code / fake code scripts / programs to put onto scenes to film? Because I work towards portraying sidestream programming environments of the past (yet customized into my own 16^12 worldbuilding stuff) to show for films I look forth to produce this summer and idk where to pull fitting samples, code style guides & whatnot to put on various screens.
A great start. Wireshark. It is a packet sniffer. Especially on wireless networks in looks great as background busywork. Do it to a public network and you will get plenty of noise to look technical. Basically in wireless networks, everyone is just screaming things. Only the intended target really reacts, and things are encrypted and all sorts of safety is in place, but the fact of the matter is still that everyone is screaming. So you can just have wireshark show you everything that is happening, and it gives a nice constant feed of technically valid but essentially nonsense to look at. Customize the look a bit and you are great. Note that this is both legal and fine. This is stuff it is ok to yell about in public The other is of course a command console. For that I would recommend installing Python, and then simply make a infinite loop that prints technical nonsense. If you need sample text then install anything by writing "pip install ______", copy the text and print it in your own python thing. Creates infinite nonsense text that looks real (because... it is a copy of something real.) Both of these should take less than an hour to set up, and will create great looking backgrounds on screens for "someone doing something technical"
If you want code just staying still on the screen, then basically install visual studio code, find an open source project on github and open a file. Open files of a few different types and visual studio code will automatically recommend you extension that will color the text to look like proper code.
8 notes
·
View notes
Text
How to Build Software Projects for Beginners

Building software projects is one of the best ways to learn programming and gain practical experience. Whether you want to enhance your resume or simply enjoy coding, starting your own project can be incredibly rewarding. Here’s a step-by-step guide to help you get started.
1. Choose Your Project Idea
Select a project that interests you and is appropriate for your skill level. Here are some ideas:
To-do list application
Personal blog or portfolio website
Weather app using a public API
Simple game (like Tic-Tac-Toe)
2. Define the Scope
Outline what features you want in your project. Start small and focus on the minimum viable product (MVP) — the simplest version of your idea that is still functional. You can always add more features later!
3. Choose the Right Tools and Technologies
Based on your project, choose the appropriate programming languages, frameworks, and tools:
Web Development: HTML, CSS, JavaScript, React, or Django
Mobile Development: Flutter, React Native, or native languages (Java/Kotlin for Android, Swift for iOS)
Game Development: Unity (C#), Godot (GDScript), or Pygame (Python)
4. Set Up Your Development Environment
Install the necessary software and tools:
Code editor (e.g., Visual Studio Code, Atom, or Sublime Text)
Version control (e.g., Git and GitHub for collaboration and backup)
Frameworks and libraries (install via package managers like npm, pip, or gems)
5. Break Down the Project into Tasks
Divide your project into smaller, manageable tasks. Create a to-do list or use project management tools like Trello or Asana to keep track of your progress.
6. Start Coding!
Begin with the core functionality of your project. Don’t worry about perfection at this stage. Focus on getting your code to work, and remember to:
Write clean, readable code
Test your code frequently
Commit your changes regularly using Git
7. Test and Debug
Once you have a working version, thoroughly test it. Look for bugs and fix any issues you encounter. Testing ensures your software functions correctly and provides a better user experience.
8. Seek Feedback
Share your project with friends, family, or online communities. Feedback can provide valuable insights and suggestions for improvement. Consider platforms like GitHub to showcase your work and get input from other developers.
9. Iterate and Improve
Based on feedback, make improvements and add new features. Software development is an iterative process, so don’t hesitate to refine your project continuously.
10. Document Your Work
Write documentation for your project. Include instructions on how to set it up, use it, and contribute. Good documentation helps others understand your project and can attract potential collaborators.
Conclusion
Building software projects is a fantastic way to learn and grow as a developer. Follow these steps, stay persistent, and enjoy the process. Remember, every project is a learning experience that will enhance your skills and confidence!
3 notes
·
View notes
Text
A Beginner’s Guide to the World of Anime: From Studio Ghibli to Shonen Showdowns
So, you’ve stumbled into the wild, colorful, sometimes bizarre universe of anime. Maybe a friend recommended Attack on Titan, or you’ve seen TikToks of cosplayers yelling “Bankai!” in public. Maybe you're just curious: What’s the big deal with these Japanese cartoons anyway? Well, welcome, traveler. You're in for a ride — one that includes giant mechs, quiet slice-of-life moments, tear-jerking character arcs, and yes… a lot of ramen scenes.
This guide will walk you through what anime actually is, the different genres, iconic studios and creators, where to start watching, and a bit of fandom etiquette (yep, that’s a thing). Buckle up.
What Is Anime, Really?
Technically, anime is just the Japanese word for animation. But internationally, it refers specifically to Japanese animated TV shows and movies — a style known for its distinctive art, expressive characters, and storytelling depth.
Unlike Western cartoons, anime isn't just for kids. There’s anime for toddlers, for teens, for adults, for people going through heartbreaks, mid-life crises, or just craving action and absurd comedy (yes, One Punch Man, we see you).
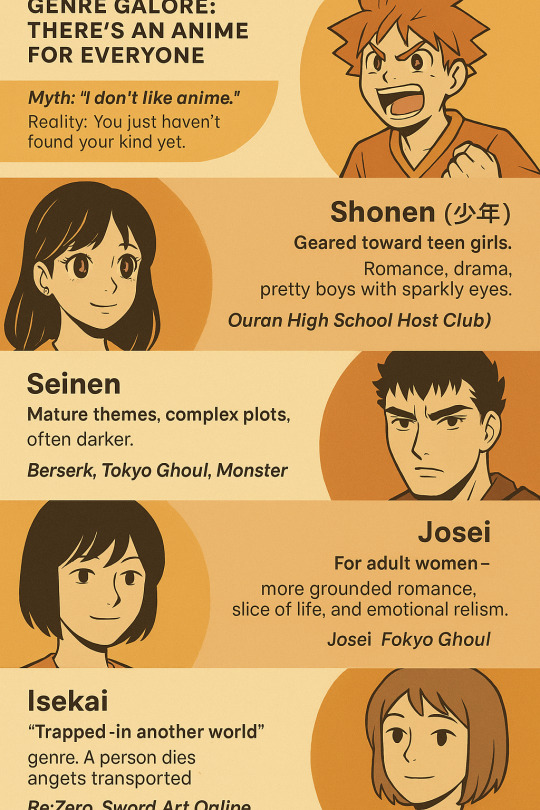
Genre Galore: There’s an Anime for Everyone
One of the biggest myths? “I don’t like anime.” Reality: You just haven’t found your kind yet.
Let’s break down a few major genres — and keep in mind, these are broad strokes. Many series blur the lines:
Shonen (少年): Aimed at teen boys, filled with action, growth, and friendship. Think Naruto, My Hero Academia, One Piece. Expect power-ups. Lots of yelling.
Shojo (少女): Geared toward teen girls. Romance, drama, pretty boys with sparkly eyes (hello, Ouran High School Host Club).
Seinen: Mature themes, complex plots, often darker. Berserk, Tokyo Ghoul, Monster.
Josei: For adult women — more grounded romance, slice of life, and emotional realism.
Isekai: “Trapped in another world” genre. A person dies (or gets transported) and ends up in a fantasy realm. Re:Zero, Sword Art Online, No Game No Life.
Slice of Life: Chill, relatable, daily life — like March Comes in Like a Lion or My Roommate is a Cat.
Mecha: Robots. Big ones. Evangelion, Gundam, Code Geass.
Sports: Yep, even volleyball can be intense when animated (Haikyuu!! supremacy).
There’s also horror, historical, comedy, fantasy, supernatural, music, and… well, niche upon niche. Ever seen an anime about anthropomorphic cells inside the human body (Cells at Work)? Now you have.
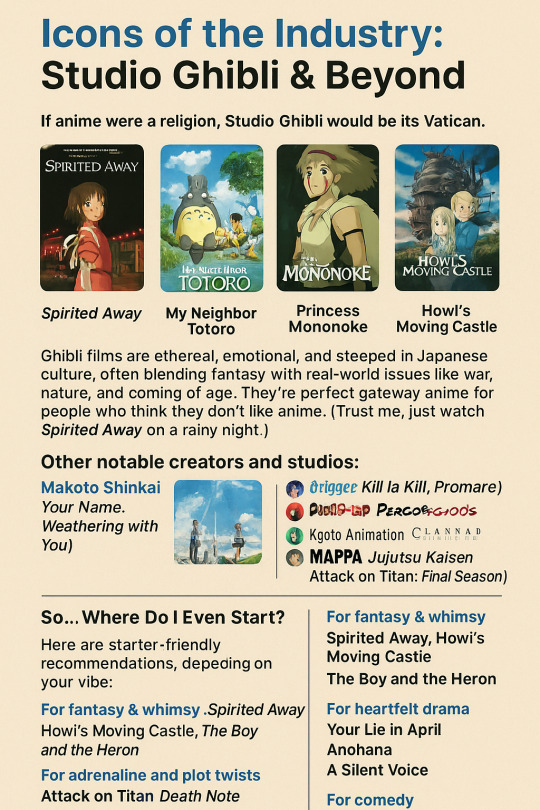
Icons of the Industry: Studio Ghibli & Beyond
If anime were a religion, Studio Ghibli would be its Vatican.
Founded by Hayao Miyazaki, Ghibli gave us legendary titles like:
Spirited Away (Academy Award winner!)
My Neighbor Totoro
Princess Mononoke
Howl’s Moving Castle
Ghibli films are ethereal, emotional, and steeped in Japanese culture, often blending fantasy with real-world issues like war, nature, and coming of age. They’re perfect gateway anime for people who think they don’t like anime. (Trust me, just watch Spirited Away on a rainy night.)
Other notable creators and studios:
Makoto Shinkai (Your Name, Weathering with You): Visually breathtaking modern love stories.
Trigger (Kill la Kill, Promare): Over-the-top, frenetic, rebellious style.
Kyoto Animation (Clannad, Violet Evergarden): Gorgeous slice-of-life and emotional narratives.
MAPPA (Jujutsu Kaisen, Attack on Titan: Final Season): Action-packed and high production value.
So… Where Do I Even Start?
Here are starter-friendly recommendations, depending on your vibe:
For fantasy & whimsy: Spirited Away, Howl’s Moving Castle, The Boy and the Heron
For adrenaline and plot twists: Attack on Titan, Death Note, Demon Slayer
For heartfelt drama: Your Lie in April, Anohana, A Silent Voice
For comedy: One Punch Man, KonoSuba, Gintama (chaotic but genius)
For chill vibes: Barakamon, Laid-Back Camp, Natsume’s Book of Friends
Warning: Some of these WILL emotionally wreck you. Not sorry.
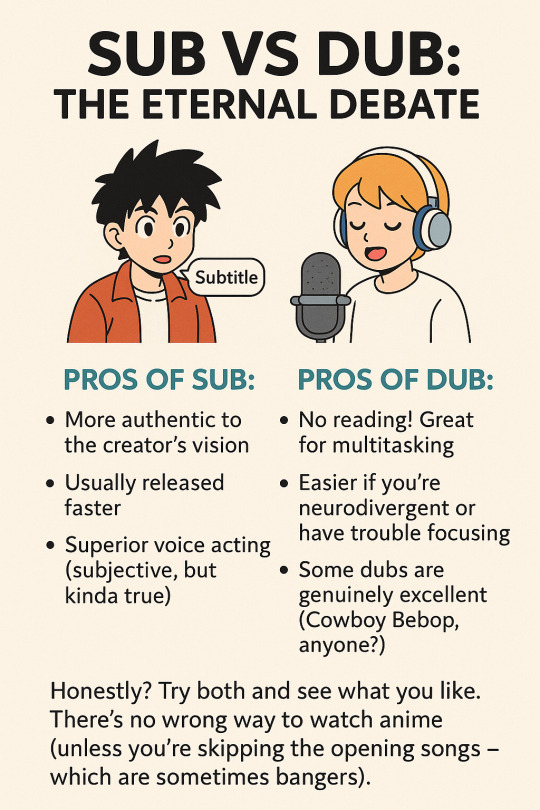
Sub vs Dub: The Eternal Debate
Ah yes, the war. Sub = original Japanese voice acting with subtitles. Dub = voiceover in your language (usually English).
Pros of sub:
More authentic to the creator’s vision
Usually released faster
Superior voice acting (subjective, but kinda true)
Pros of dub:
No reading! Great for multitasking
Easier if you're neurodivergent or have trouble focusing
Some dubs are genuinely excellent (Cowboy Bebop, anyone?)
Honestly? Try both and see what you like. There’s no wrong way to watch anime (unless you’re skipping the opening songs — which are sometimes bangers).
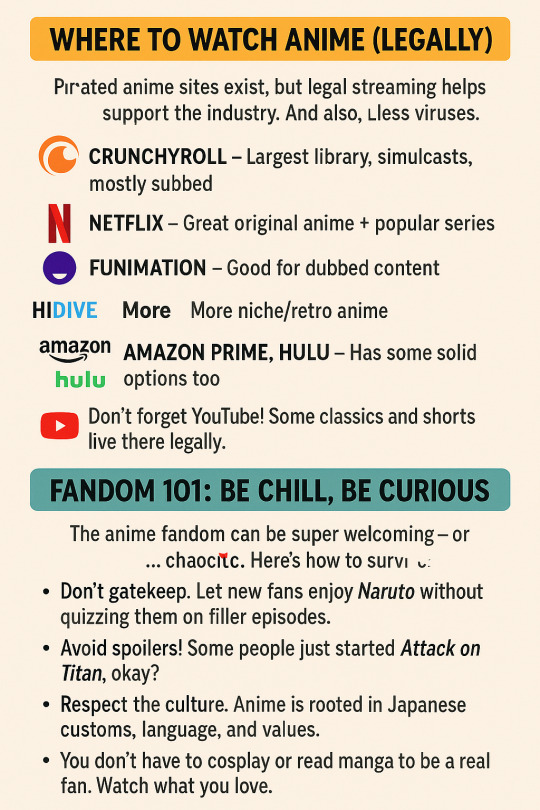
Where to Watch Anime (Legally!)
Sure, pirated anime sites exist, but legal streaming helps support the industry. And also, less viruses.
Crunchyroll – Largest library, simulcasts, mostly subbed
Netflix – Great original anime + popular series
Funimation – Good for dubbed content
HiDive – More niche/retro anime
Amazon Prime, Hulu – Has some solid options too
Don’t forget YouTube! Some classics and shorts live there legally.
Fandom 101: Be Chill, Be Curious
The anime fandom can be super welcoming — or… chaotic. Here’s how to survive:
Don’t gatekeep. Let new fans enjoy Naruto without quizzing them on filler episodes.
Avoid spoilers! Some people just started Attack on Titan, okay?
Respect the culture. Anime is rooted in Japanese customs, language, and values.
You don’t have to cosplay or read manga to be a real fan. Watch what you love.
Also, beware the rabbit hole. One moment you’re watching a light-hearted sports anime, the next you’re learning Japanese and buying figurines you don’t have shelf space for.
TL;DR: Anime Isn’t Just a Genre — It’s a Multiverse
Anime is not a phase. It’s a storytelling medium with infinite styles, voices, and messages. Whether you're into action, romance, existential dread, or magical girls with absurdly complex transformation sequences — anime's got something for you.
So go ahead. Watch that first episode. Let yourself laugh at the absurd, cry with the characters, and fall in love with a 2D protagonist (no judgment).
Welcome to the fandom. We saved you a seat.
https://animealchemy123.blogspot.com/2025/07/a-beginners-guide-to-world-of-anime.html
2 notes
·
View notes
Note
Hey Kristi! how are you doing today? uwu.
I hope you have enough water thoughout your day.
How did you get into the IF world, and how did you learn how to code (or pseudocode)? What engine are you implementing on your game?
I love your story, and as a person who wants to tell a story, i am struggling with that. (I only speak python for god's sake i'm a poor it student)
Also, a recommendation for fans out there wanting to make a game independently?
When can we hold Blane for a sec really he needs a hug
<3
hi! so, all my advice i've tagged on my blog, but the best post i have for coding and this particular scenario is probably this one.
however, i've said it before and i'll say it again: i'm probably not the person you should go to for coding. i learned (a word i use loosely) everything in the span of two months and promptly forgot it all. ask me anything now and i'll be stumbling through an explanation that might not even be correct so. take all of my coding advice with a grain of salt.
but to answer your question, i use twine (sugarcube) to code my story. for ease of writing, i open my code in visual studio code with the twee extension that colour codes everything to make it easier on the eyes.
in general, my best advice for learning to code is to just go nuts. start with a template, play around with it, look at blogs that are better coders than i am and see if they can answer the questions you have. google things, search up css guides (w3schools was extremely useful for me) and eventually, you'll start to learn the patterns enough to put together what you want. it's very vague, i know, but this is genuinely how i learned and what worked best for me.
good luck !!
51 notes
·
View notes
Text
Web to Mobile: Building Seamless Apps with .NET"
.NET is a effective, flexible, and open-supply developer platform created with the aid of Microsoft. It enables the creation of a huge range of applications—from computing device to cellular, net, cloud, gaming, and IoT. Over the years, .NET has evolved substantially and has become one of the maximum extensively used frameworks inside the software improvement enterprise.
Dot Net Programming Language

A Brief History of .NET
The .NET Framework become first delivered through Microsoft in the early 2000s. The original cause turned into to offer a steady item-oriented programming surroundings regardless of whether code became stored and finished locally, remotely, or via the internet.
Over time, Microsoft developed .NET right into a cross-platform, open-supply framework. In 2016, Microsoft launched .NET Core, a modular, high-performance, cross-platform implementation of .NET. In 2020, the company unified all its .NET technologies beneath one umbrella with the discharge of .NET five, and later persisted with .NET 6, .NET 7, and past.
Today, the unified platform is actually called .NET, and it allows builders to build apps for Windows, macOS, Linux, iOS, Android, and greater using a single codebase.
Key Features of .NET
1. Cross-Platform Development
One of the maximum tremendous features of present day .NET (publish .NET Core) is its ability to run on a couple of platforms. Developers can construct and deploy apps on Windows, Linux, and macOS with out enhancing their codebases.
2. Multiple Language Support
.NET supports numerous programming languages, together with:
C# – the maximum extensively used language in .NET development
F# – a purposeful-first programming language
Visual Basic – an smooth-to-analyze language, regularly used in legacy programs
This multilingual capability allows developers to pick out the nice language for their precise use cases.
3. Extensive Library and Framework Support
.NET offers a comprehensive base magnificence library (BCL) and framework libraries that aid the whole lot from record studying/writing to XML manipulation, statistics get entry to, cryptography, and extra.
Four. ASP.NET for Web Development
ASP.NET is a part of the .NET platform specially designed for net improvement. ASP.NET Core, the cross-platform model, permits builders to build scalable internet APIs, dynamic web sites, and actual-time packages the usage of technology like SignalR.
5. Rich Development Environment
.NET integrates seamlessly with Visual Studio, one of the most function-wealthy integrated development environments (IDEs) available. Visual Studio offers capabilities together with IntelliSense, debugging tools, challenge templates, and code refactoring.
6. Performance and Scalability
.NET is thought for high performance and scalability, especially with its guide for asynchronous programming using async/wait for and its Just-In-Time (JIT) compilation.
7. Secure and Reliable
.NET presents sturdy safety features, including code get entry to security, role-based protection, and cryptography training. It also handles reminiscence management thru rubbish series, minimizing reminiscence leaks.
Common Applications Built with .NET
1. Web Applications
With ASP.NET Core, builders can create cutting-edge, scalable internet programs and RESTful APIs. Razor Pages and Blazor are technology within ASP.NET Core that help server-facet and purchaser-facet rendering.
2. Desktop Applications
Using Windows Forms or Windows Presentation Foundation (WPF), builders can build conventional computing device applications. .NET MAUI (Multi-platform App UI) now extends this functionality to move-platform computer and cellular programs.
3. Mobile Applications
Through Xamarin (now incorporated into .NET MAUI), developers can create native mobile applications for Android and iOS the usage of C#.
4. Cloud-Based Applications
.NET is nicely-acceptable for cloud development, in particular with Microsoft Azure. Developers can build cloud-local apps, serverless capabilities, and containerized microservices the usage of Docker and Kubernetes.
5. IoT Applications
.NET helps Internet of Things (IoT) development, allowing builders to construct applications that engage with sensors and gadgets.
6. Games
With the Unity sport engine, which helps C#, developers can use .NET languages to create 2D, three-D, AR, and VR games.
Components of .NET
1. .NET SDK
The Software Development Kit includes everything had to build and run .NET packages: compilers, libraries, and command-line tools.
2. CLR (Common Language Runtime)
It handles reminiscence control, exception managing, and rubbish collection.
Three. BCL (Base Class Library)
The BCL offers center functionalities including collections, record I/O, records kinds, and extra.
4. NuGet
NuGet is the package manager for .NET. It lets in builders to install, manage, and share libraries without problems.
Modern .NET Versions
.NET five (2020): Unified the .NET platform (Core + Framework)
.NET 7 (2022): Further overall performance enhancements and more desirable APIs
.NET 8 (2023): Continued attention on cloud-native, cellular, and web improvement
Advantages of Using .NET
Cross-platform assist – construct as soon as, run everywhere
Large developer network – widespread sources, libraries, and frameworks
Robust tooling – especially with Visual Studio and JetBrains Rider
Active improvement – backed by using Microsoft and open-source community
Challenges and Considerations
Learning curve – particularly for beginners due to its giant atmosphere
Legacy framework – older .NET Framework tasks aren't like minded with .NET Core or more recent variations without migration
Platform differences – sure APIs or libraries might also behave in a different way throughout operating systems
Getting Started with .NET
To begin growing with .NET:
Install the .NET SDK from the legitimate .NET internet site.
Create a new project: Use the dotnet new command or Visual Studio templates.
Write code: Develop your logic the usage of C#, F#, or VB.NET.
#btech students#bca students#online programming courses#offline institute programming courses#regular colleges university#Dot Net Programming Language
2 notes
·
View notes
Note
I'm a wittle shy but I has a question about programming :3.I love the process of coding and making things with it but ughhhh I just don't know what to make. Should I take a course on computer science like CS50 to get a better idea of the process (I've been coding for almost 2 years but have been very inactive this last year) or should I just wing it and try to make just something, and maybe learn a new language like C? Thankies :3
WING IT!
My best advice is lowkey just steal ideas from others. The thing that kinda domino-affected me into this whole programming thing was an emulator of Flipnote studio.
Find the things that you enjoy making and make those, be it video games, websites, applications, emulators, simulators, engines, programming languages, visual novels, text interface games, hacking.
And google is your best friend, anything you can think of has been made before and someone's probably put their code or a guide out there.
And I would reccomend learning C because it's so so so so so easy. People say C is scary, it's really not. Once you've learned Pointers that's it, you've learned the hardest part (and they are so easy). AND C has a library for everything you can think of, since it's been around forever.
That's pretty much it, dive straight into something fun. And if something gets to difficult it's never bad to take a break or focus on something else. Dont burn yourself out like I did once.
51 notes
·
View notes
Text
Top 5 Game Development Tools for Mobile Creators

Mobile gaming has exploded into a multi-billion dollar industry, with millions of players worldwide spending hours immersed in games on their smartphones and tablets. If you've ever dreamed of creating your own mobile game, you're in luck – today's game development tools make it easier than ever to bring your ideas to life. Whether you're a complete beginner or an experienced developer looking to expand into mobile game development, choosing the right tools can make or break your project.
In this comprehensive guide, we'll explore the top 5 game development tools that are revolutionizing how creators build mobile games. These platforms offer everything from drag-and-drop simplicity to powerful programming environments, ensuring there's something perfect for every skill level and project type.
Why Mobile Game Development Tools Matter
Before diving into our top picks, let's understand why selecting the right mobile game development platform is crucial. The mobile gaming market is incredibly competitive, with thousands of new games launching daily across iOS and Android app stores. To succeed, you need tools that offer rapid prototyping, cross-platform deployment, and the flexibility to create engaging, performance-optimized games.
The right development tool can save you months of coding, reduce development costs, and help you focus on what matters most – creating an amazing player experience. Let's explore the tools that are making mobile game development accessible to creators worldwide.
1. Unity: The Industry Standard for Mobile Game Development
Unity consistently ranks as the most popular choice among mobile game developers, and for good reason. This powerhouse platform has been behind countless successful mobile games, from simple puzzle games to complex 3D adventures.
What makes Unity exceptional for mobile game development:
Unity's visual scripting system allows beginners to create games without extensive programming knowledge, while its robust C# scripting environment satisfies experienced developers. The platform excels at cross-platform deployment, meaning you can build once and deploy to both iOS and Android with minimal additional work.
The Unity Asset Store is a game-changer, offering thousands of pre-built assets, scripts, and tools that can accelerate your development process. From character models to sound effects, you'll find resources that can transform your game ideas into reality quickly and efficiently.
Performance optimization for mobile devices is where Unity truly shines. The platform includes built-in profiling tools and mobile-specific optimization features that ensure your games run smoothly across different device specifications and operating systems.
2. Unreal Engine: Premium Mobile Game Development Power
Epic Games' Unreal Engine brings console-quality game development capabilities to mobile platforms. While traditionally associated with high-end PC and console games, Unreal Engine has evolved into a formidable mobile game development solution.
Why Unreal Engine excels in mobile game development:
The Blueprint visual scripting system democratizes game development by allowing creators to build complex game logic without writing traditional code. This feature is particularly valuable for mobile game development, where rapid iteration and prototyping are essential.
Unreal Engine's rendering capabilities are second to none, enabling developers to create visually stunning mobile games that push the boundaries of what's possible on smartphones and tablets. The engine's advanced lighting and shader systems can make your mobile games look absolutely breathtaking.
The platform's mobile optimization tools help developers balance visual fidelity with performance, ensuring games run smoothly across a wide range of mobile devices while maintaining impressive graphics quality.
3. GameMaker Studio: Perfect for 2D Mobile Game Development
YoYo Games' GameMaker Studio has carved out a special niche in mobile game development, particularly for 2D games. This platform strikes an excellent balance between ease of use and powerful functionality.
GameMaker Studio's mobile game development advantages:
The GML (GameMaker Language) scripting system is designed specifically for game development, making it intuitive for creators to implement game mechanics, character behaviors, and interactive elements. The visual scripting options also make it accessible to non-programmers.
GameMaker Studio excels at 2D mobile game development, offering specialized tools for sprite animation, tile-based level design, and physics systems optimized for mobile platforms. Many successful indie mobile games have been built using this platform.
The rapid prototyping capabilities allow developers to quickly test game concepts and iterate based on player feedback. This agility is crucial in mobile game development, where market trends can shift rapidly.
4. Construct 3: Browser-Based Mobile Game Development Revolution
Scirra's Construct 3 represents a new generation of mobile game development tools that run entirely in web browsers. This innovative approach eliminates installation requirements and makes game development accessible from any device with an internet connection.
What sets Construct 3 apart for mobile game development:
The event-based visual scripting system is incredibly intuitive, allowing creators to build complex game logic through simple drag-and-drop actions. This approach is perfect for mobile game development, where gameplay mechanics often focus on touch interactions and gesture controls.
Construct 3's mobile optimization features include automatic scaling, touch control integration, and performance profiling specifically designed for mobile devices. The platform handles many technical aspects automatically, letting developers focus on creativity and gameplay.
The cloud-based development environment means you can work on your mobile games from anywhere, collaborating with team members in real-time and accessing your projects across different devices seamlessly.
5. Godot: Open-Source Mobile Game Development Excellence
The Godot Engine has gained tremendous popularity in the mobile game development community due to its completely free, open-source nature and powerful feature set that rivals commercial alternatives.
Why Godot is transforming mobile game development:
Godot's node-based scene system provides an intuitive way to organize game objects and logic, making it easier to manage complex mobile game projects. The visual scripting options complement traditional coding approaches, offering flexibility for different development styles.
The engine's lightweight nature makes it particularly well-suited for mobile game development, producing games with smaller file sizes and better performance on mobile devices compared to some heavier alternatives.
GDScript, Godot's Python-like scripting language, is specifically designed for game development and is remarkably easy to learn. This makes mobile game development more accessible to newcomers while still providing the power experienced developers need.
Choosing Your Mobile Game Development Tool
Selecting the right tool for your mobile game development journey depends on several factors: your programming experience, project scope, target platforms, and budget. Unity and Unreal Engine offer the most comprehensive feature sets but have steeper learning curves. GameMaker Studio and Construct 3 provide excellent starting points for beginners, while Godot offers a perfect balance of power and accessibility without any licensing costs.
The mobile gaming industry continues to evolve rapidly, with new technologies like augmented reality and cloud gaming creating exciting opportunities for innovative developers. Regardless of which tool you choose, the key to successful mobile game development lies in understanding your audience, creating engaging gameplay experiences, and leveraging these powerful platforms to bring your creative visions to life.
Start Your Mobile Game Development Journey Today
The mobile game development landscape has never been more accessible or exciting. These five tools provide everything you need to transform your game ideas into reality, whether you're building the next viral puzzle game or an epic mobile adventure. Choose the platform that best matches your skills and vision, and start creating the mobile games that players around the world are waiting to discover.
Remember, every successful mobile game developer started with their first project. With these powerful tools at your disposal, your mobile game development success story begins today.
#vr games#game#unity game development#blockchain#metaverse#nft#multiplayer games#gaming#mobile game development
1 note
·
View note
Text
7 extensions of VS-Code to boost productivity.
Boosting your productivity as a beginner programmer is essential. Visual Studio Code (VS Code) offers many extensions to streamline your workflow. Here are some of the best VS Code extensions to help you write cleaner code, debug efficiently, and manage projects effectively.
1. Prettier - Code Formatter
Function: Automatically formats your code to make it clean and consistent.
Usage: Saves time on manual formatting and ensures your code adheres to style guides.
Install: Search for "Prettier - Code formatter" in the extensions marketplace and install it
2. ESLint
Function: Identifies and fixes linting errors in your JavaScript and TypeScript code.
Usage: Helps catch common errors and enforce coding standards.
Install: Search for "ESLint" in the extensions marketplace and install it.
3. GitLens — Git supercharged
Function: Enhances the Git capabilities in VS Code by providing insights into code authorship and history.
Usage: This makes it easier to understand the history and evolution of your codebase.
Install: Search for "GitLens" in the extensions marketplace and install it.

4. Code Spell Checker
Function: Checks your code for spelling errors.
Usage: Helps catch typos and improve code readability.
Install: Search for "Code Spell Checker" in the extensions marketplace and install it.
5. Path Intellisense
Function: Autocompletes file paths in your code.
Usage: Saves time and reduces errors when working with file paths.
Install: Search for "Path Intellisense" in the extensions marketplace and install it.
6. Bracket Pair Colorizer 2
Function: Colorizes matching brackets to make it easier to identify block structures.
Usage: Improves readability of your code, especially for nested blocks.
Install: Search for "Bracket Pair Colorizer 2" in the extensions marketplace and install it.
7. Pets
Function: Adds a fun, interactive pet to your VS Code workspace.
Usage: Provides a cute, engaging way to take short breaks and reduce stress.
Install: Search for "Pets" in the extensions marketplace and install it.
7 notes
·
View notes
Text
JavaScript Tutorial: A Beginner's Guide to the World of Web Development
Welcome to the exciting world of JavaScript! If you're looking to dive into web development, understanding JavaScript is essential. This versatile programming language powers the interactive elements of websites and is a key component of modern web applications. In this tutorial, we'll cover the basics of JavaScript, its syntax, and some practical examples to get you started.
What is JavaScript?
JavaScript is a high-level, dynamic, and interpreted programming language that is primarily used for enhancing the interactivity of web pages. It allows developers to create rich user experiences by manipulating HTML and CSS, responding to user events, and communicating with servers.
Why Learn JavaScript?
Ubiquity: JavaScript is supported by all modern web browsers, making it a universal language for web development.
Versatility: Beyond the browser, JavaScript can be used on the server-side (with Node.js), in mobile app development (with frameworks like React Native), and even in game development.
Community and Resources: With a vast community and numerous resources available, learning JavaScript is more accessible than ever.
Getting Started with JavaScript
Setting Up Your Environment
To start coding in JavaScript, you don't need any special software. All you need is a web browser and a text editor. Here’s how to set it up:
Choose a Text Editor: Popular options include Visual Studio Code, Sublime Text, and Atom.
Open Your Browser: You can use any modern browser like Chrome, Firefox, or Edge.
2 notes
·
View notes
Text
Empower Your Practice Online with the Healers Webflow Template
Building trust and attracting new clients starts with a modern, user-friendly website. The Healers template on Webflow is purpose-built for physiotherapists, chiropractors, massage therapists, and wellness professionals looking to elevate their digital presence.

👩⚕️ Who Is the Healers Webflow Template For?
Tailored for wellness professionals ready to scale their practice:
Physiotherapists & Chiropractors 🧠: Highlight treatment services and success stories.
Massage Therapists & Acupuncturists 💆♀️: Display session details and client testimonials.
Wellness Coaches & Holistic Healers 🌸: Share philosophies, programs, and self-care guides.
Medical Clinics & Wellness Studios 🏥: Showcase team bios, appointment scheduling, and facilities.
✅ Key Features of Healers Webflow Template
Professionally designed, conversion-optimized tools to grow your practice:
Clean, Responsive Design — Looks stunning across mobile, tablet, and desktop devices.
CMS-Driven Pages — Easily manage services, blog posts, team profiles, and testimonials.
Custom Appointment Forms — Allow clients to request sessions or consultations seamlessly.
Pre-Styled Hero & CTA Sections — Encourage immediate action with visually powerful layouts.
Service Showcase Blocks — Highlight core offerings with icons, descriptions, and links.
Testimonial & Review Modules — Build trust through real client feedback.
SEO-Friendly Setup — Built with best practices to improve your site’s visibility.
Fast Loading & Optimized Media — Enhance performance with WebP images and lazy loading.
Integrated Blog Section — Educate, inspire, and attract clients through value-rich content.
Detailed Documentation & Support — Get help anytime with clear guides and responsive support.
🌟 Why Choose Healers on Webflow?
Standout reasons to make it your go-to wellness website builder:
No-Code Customization: Tweak colors, fonts, and layouts visually without coding.
Client-Centered UX: Built with user experience in mind — simple, intuitive, and calming.
Efficient Site Structure: Fast navigation between services, team bios, and contact info.
Scalable Design: Start with the basics, grow into a full-scale wellness hub.
Built-In Security & Hosting: Enjoy SSL protection, backups, and global CDN via Webflow.
💡 Tips to Maximize Your Healers Template
Boost visibility, engagement, and trust with these practical tips:
Update Blog Regularly: Share wellness tips, case studies, and event updates to stay relevant.
Feature Client Reviews: Let happy clients speak for your quality of care.
Use Video Backgrounds: Introduce your clinic or a quick breathing technique on the homepage.
Add FAQs: Address common concerns and reduce booking hesitations.
Integrate Calendars: Connect scheduling tools like Calendly or embed Google Calendar.
📌 Final Thoughts
If you’re ready to make a lasting impression online, the Healers Webflow Template delivers both beauty and performance. Its thoughtful design, conversion-ready features, and user-friendly CMS make it the ideal choice for modern health and wellness professionals. Whether you’re just starting out or revamping an existing website, Healers will help you connect, convert, and care — online.
🔗 Explore the Healers Webflow Template Check out the live demo, features, and pricing here: Healers Webflow Template by TNCFlow
#webflow#webflowtemplates#websitetemplate#template#web design#ui ux design#webflowdesign#businesswebsite#web development#physiotherapy#helth and fitness#helthylife#medicine
1 note
·
View note
Text
Game Development Classes

In today's fast-paced digital world, the gaming industry is booming, offering immense career opportunities for creative and technical minds. If you're passionate about gaming and want to turn your hobby into a career, Image Creative Education in HSR Layout, Bengaluru is your gateway to success. Our Game Development Classes are designed to equip you with the skills and knowledge needed to thrive in this exciting and dynamic field.
Why Choose Game Development?
Game development is more than just creating fun and engaging games. It’s about storytelling, innovation, and using cutting-edge technology to create interactive experiences. Whether you want to design characters, develop immersive environments, or program complex gameplay mechanics, game development offers a range of career paths. With the demand for game developers skyrocketing, now is the perfect time to enter this thriving industry.
What We Offer at Image Creative Education
At Image Creative Education, we provide comprehensive Game Development Classes tailored to both beginners and experienced individuals. Our expert instructors guide you through every aspect of game development, from concept creation to final production. You’ll learn key skills such as:
Game design principles: Understand the fundamentals of designing compelling games.
Programming: Learn coding languages like C++ and Unity to bring your game ideas to life.
Graphics and animation: Create stunning visuals and animations using industry-standard software.
Level design: Master the art of creating immersive game worlds and environments.
Game testing and debugging: Ensure your games are polished and ready for players.
Why Choose Image Creative Education?
Located in the bustling HSR Layout of Bengaluru, Image Creative Education stands out as a leader in creative education. With a state-of-the-art facility, experienced faculty, and a curriculum aligned with industry trends, we ensure that our students are fully prepared to meet the challenges of the game development industry.
Our Game Development Classes offer hands-on experience, allowing you to work on real-world projects and build a strong portfolio that will impress potential employers. Plus, our strong industry connections give you access to internship and job opportunities in leading gaming companies.
Join the Future of Gaming
Whether you dream of working for top gaming studios or creating your own indie games, Image Creative Education in HSR Layout, Bengaluru, will give you the tools to succeed. Our Game Development Classes are designed to foster creativity, technical expertise, and problem-solving skills that are essential in today’s competitive gaming industry.
Take the first step toward a rewarding career in game development. Enroll today at Image Creative Education and become part of the next generation of game developers.
#GameDevelopment#GameDesign#GameDevClasses#LearnGameDevelopment#BengaluruGaming#CreativeEducation#HSRLayout#IndieGameDev#GameProgramming#TechEducation#GameDevelopers#BengaluruTech#FutureOfGaming#GameArt#GamingCommunity
2 notes
·
View notes
Text
Audio and Music Application Development

The rise of digital technology has transformed the way we create, consume, and interact with music and audio. Developing audio and music applications requires a blend of creativity, technical skills, and an understanding of audio processing. In this post, we’ll explore the fundamentals of audio application development and the tools available to bring your ideas to life.
What is Audio and Music Application Development?
Audio and music application development involves creating software that allows users to play, record, edit, or manipulate sound. These applications can range from simple music players to complex digital audio workstations (DAWs) and audio editing tools.
Common Use Cases for Audio Applications
Music streaming services (e.g., Spotify, Apple Music)
Audio recording and editing software (e.g., Audacity, GarageBand)
Sound synthesis and production tools (e.g., Ableton Live, FL Studio)
Podcasting and audio broadcasting applications
Interactive audio experiences in games and VR
Popular Programming Languages and Frameworks
C++: Widely used for performance-critical audio applications (e.g., JUCE framework).
JavaScript: For web-based audio applications using the Web Audio API.
Python: Useful for scripting and prototyping audio applications (e.g., Pydub, Librosa).
Swift: For developing audio applications on iOS (e.g., AVFoundation).
Objective-C: Also used for iOS audio applications.
Core Concepts in Audio Development
Digital Audio Basics: Understanding sample rates, bit depth, and audio formats (WAV, MP3, AAC).
Audio Processing: Techniques for filtering, equalization, and effects (reverb, compression).
Signal Flow: The path audio signals take through the system.
Synthesis: Generating sound through algorithms (additive, subtractive, FM synthesis).
Building a Simple Audio Player with JavaScript
Here's a basic example of an audio player using the Web Audio API:<audio id="audioPlayer" controls> <source src="your-audio-file.mp3" type="audio/mpeg"> Your browser does not support the audio element. </audio> <script> const audio = document.getElementById('audioPlayer'); audio.play(); // Play the audio </script>
Essential Libraries and Tools
JUCE: A popular C++ framework for developing audio applications and plugins.
Web Audio API: A powerful API for controlling audio on the web.
Max/MSP: A visual programming language for music and audio.
Pure Data (Pd): An open-source visual programming environment for audio processing.
SuperCollider: A platform for audio synthesis and algorithmic composition.
Best Practices for Audio Development
Optimize audio file sizes for faster loading and performance.
Implement user-friendly controls for audio playback.
Provide visual feedback (e.g., waveforms) to enhance user interaction.
Test your application on multiple devices for audio consistency.
Document your code and maintain a clear structure for scalability.
Conclusion
Developing audio and music applications offers a creative outlet and the chance to build tools that enhance how users experience sound. Whether you're interested in creating a simple audio player, a complex DAW, or an interactive music app, mastering the fundamentals of audio programming will set you on the path to success. Start experimenting, learn from existing tools, and let your passion for sound guide your development journey!
2 notes
·
View notes
Text
Learn HTML and CSS: A Comprehensive Guide for Beginners
Introduction to HTML and CSS
HTML (HyperText Markup Language) and CSS (Cascading Style Sheets) are the core technologies for creating web pages. HTML provides the structure of the page, while CSS defines its style and layout. This guide aims to equip beginners with the essential knowledge to start building and designing web pages.
Why Learn HTML and CSS?
HTML and CSS are fundamental skills for web development. Whether you're looking to create personal websites, start a career in web development, or enhance your current skill set, understanding these technologies is crucial. They form the basis for more advanced languages and frameworks like JavaScript, React, and Angular.
Getting Started with HTML and CSS
To get started, you need a text editor and a web browser. Popular text editors include Visual Studio Code, Sublime Text, and Atom. Browsers like Google Chrome, Firefox, and Safari are excellent for viewing and testing your web pages.
Basic HTML Structure
HTML documents have a basic structure composed of various elements and tags. Here’s a simple example:
html
Copy code
<!DOCTYPE html>
<html>
<head>
<title>My First Web Page</title>
<link rel="stylesheet" type="text/css" href="styles.css">
</head>
<body>
<h1>Welcome to My Web Page</h1>
<p>This is a paragraph of text on my web page.</p>
</body>
</html>
: Declares the document type and HTML version.
: The root element of an HTML page.
: Contains meta-information about the document.
: Connects the HTML to an external CSS file.
: Contains the content of the web page.
Essential HTML Tags
HTML uses various tags to define different parts of a web page:
to : Headings of different levels.
: Paragraph of text.
: Anchor tag for hyperlinks.
: Embeds images.
: Defines divisions or sections.
: Inline container for text.
Creating Your First HTML Page
Follow these steps to create a simple HTML page:
Open your text editor.
Write the basic HTML structure as shown above.
Add a heading with the tag.
Add a paragraph with the tag.
Save the file with a .html extension (e.g., index.html).
Open the file in your web browser to view your web page.
Introduction to CSS
CSS is used to style and layout HTML elements. It can be included within the HTML file using the <style> tag or in a separate .css file linked with the <link> tag.
Basic CSS Syntax
CSS consists of selectors and declarations. Here’s an example:
css
Copy code
h1 {
color: blue;
font-size: 24px;
}
Selector (h1): Specifies the HTML element to be styled.
Declaration Block: Contains one or more declarations, each consisting of a property and a value.
Styling HTML with CSS
To style your HTML elements, you can use different selectors:
Element Selector: Styles all instances of an element.
Class Selector: Styles elements with a specific class.
ID Selector: Styles a single element with a specific ID.
Example:
html
Copy code
<!DOCTYPE html>
<html>
<head>
<title>Styled Page</title>
<link rel="stylesheet" type="text/css" href="styles.css">
</head>
<body>
<h1 class="main-heading">Hello, World!</h1>
<p id="intro">This is an introduction paragraph.</p>
</body>
</html>
In the styles.css file:
css
Copy code
.main-heading {
color: green;
text-align: center;
}
#intro {
font-size: 18px;
color: grey;
}
CSS Layout Techniques
CSS provides several layout techniques to design complex web pages:
Box Model: Defines the structure of an element’s content, padding, border, and margin.
Flexbox: A layout model for arranging items within a container, making it easier to design flexible responsive layouts.
Grid Layout: A two-dimensional layout system for more complex layouts.
Example of Flexbox:
css
Copy code
.container {
display: flex;
justify-content: space-around;
}
.item {
width: 100px;
height: 100px;
background-color: lightblue;
}
Best Practices for Writing HTML and CSS
Semantic HTML: Use HTML tags that describe their meaning clearly (e.g., , , ).
Clean Code: Indent nested elements and use comments for better readability.
Validation: Use tools like the W3C Markup Validation Service to ensure your HTML and CSS are error-free and standards-compliant.
Accessibility: Make sure your website is accessible to all users, including those with disabilities, by using proper HTML tags and attributes.
Free Resources to Learn HTML and CSS
W3Schools: Comprehensive tutorials and references.
MDN Web Docs: Detailed documentation and guides for HTML, CSS, and JavaScript.
Codecademy: Interactive courses on web development.
FreeCodeCamp: Extensive curriculum covering HTML, CSS, and more.
Khan Academy: Lessons on computer programming and web development.
FAQs about Learning HTML and CSS
Q: What is HTML and CSS? A: HTML (HyperText Markup Language) structures web pages, while CSS (Cascading Style Sheets) styles and layouts the web pages.
Q: Why should I learn HTML and CSS? A: Learning HTML and CSS is essential for creating websites, understanding web development frameworks, and progressing to more advanced programming languages.
Q: Do I need prior experience to learn HTML and CSS? A: No prior experience is required. HTML and CSS are beginner-friendly and easy to learn.
Q: How long does it take to learn HTML and CSS? A: The time varies depending on your learning pace. With consistent practice, you can grasp the basics in a few weeks.
Q: Can I create a website using only HTML and CSS? A: Yes, you can create a basic website. For more complex functionality, you'll need to learn JavaScript.
Q: What tools do I need to start learning HTML and CSS? A: You need a text editor (e.g., Visual Studio Code, Sublime Text) and a web browser (e.g., Google Chrome, Firefox).
Q: Are there free resources available to learn HTML and CSS? A: Yes, there are many free resources available online, including W3Schools, MDN Web Docs, Codecademy, FreeCodeCamp, and Khan Academy.
#how to learn html and css#html & css course#html & css tutorial#html and css#html course#html css tutorial#html learn#html learn website#learn html#learn html and css#html and css course#html and css full course#html and css online course#how to learn html and css for beginners
4 notes
·
View notes