#visually hidden CSS
Explore tagged Tumblr posts
Visit Tumblr Blog
Explore Tumblr blogs with no restrictions, modern design and the best experience.
Last Seen Tumblr Blogs


Fun Fact
Tumblr is available in 18 languages.
Text
What Is The Difference Between Web Development & Web Design?
In today’s world, we experience the growing popularity of eCommerce businesses. Web designing and web development are two major sectors for making a difference in eCommerce businesses. But they work together for publishing a website successfully. But what’s the difference between a web designers in Dubai and a web developer?
Directly speaking, web designers design and developers code. But this is a simplified answer. Knowing these two things superficially will not clear your doubt but increase them. Let us delve deep into the concepts, roles and differentiation between web development and website design Abu Dhabi.

What Is Meant By Web Design?
A web design encompasses everything within the oeuvre of a website’s visual aesthetics and utility. This might include colour, theme, layout, scheme, the flow of information and anything related to the visual features that can impact the website user experience.
With the word web design, you can expect all the exterior decorations, including images and layout that one can view on their mobile or laptop screen. This doesn’t concern anything with the hidden mechanism beneath the attractive surface of a website. Some web design tools used by web designers in Dubai which differentiate themselves from web development are as follows:
● Graphic design
● UI designs
● Logo design
● Layout
● Topography
● UX design
● Wireframes and storyboards
● Colour palettes
And anything that can potentially escalate the website’s visual aesthetics. Creating an unparalleled yet straightforward website design Abu Dhabi can fetch you more conversion rates. It can also gift you brand loyalty which is the key to a successful eCommerce business.
What Is Meant By Web Development?
While web design concerns itself with all a website’s visual and exterior factors, web development focuses on the interior and the code. Web developers’ task is to govern all the codes that make a website work. The entire web development programme can be divided into two categories: front and back.
The front end deals with the code determining how the website will show the designs mocked by a designer. While the back end deals entirely with managing the data within the database. Along with it forwarding the data to the front end for display. Some web development tools used by a website design company in Dubai are:
● Javascript/HTML/CSS Preprocessors
● Template design for web
● GitHub and Git
● On-site search engine optimisation
● Frameworks as in Ember, ReactJS or Angular JS
● Programming languages on the server side, including PHP, Python, Java, C#
● Web development frameworks on the server side, including Ruby on Rails, Symfony, .NET
● Database management systems including MySQL, MongoDB, PostgreSQL
Web Designers vs. Web Developers- Differences
You must have become acquainted with the idea of how id web design is different from web development. Some significant points will highlight the job differentiation between web developers and designers.
Generally, Coding Is Not A Cup Of Tea For Web Designers:
Don’t ever ask any web designers in Dubai about their coding knowledge. They merely know anything about coding. All they are concerned about is escalating a website’s visual aspects, making them more eyes catchy.
For this, they might use a visual editor like photoshop to develop images or animation tools and an app prototyping tool such as InVision Studio for designing layouts for the website. And all of these don’t require any coding knowledge.
Web Developers Do Not Work On Visual Assets:
Web developers add functionality to a website with their coding skills. This includes the translation of the designer’s mockups and wireframes into code using Javascript, HTML or CSS. While visual assets are entirely created by designers, developer use codes to implement those colour schemes, fonts and layouts into the web page.
Hiring A Web Developer Is Expensive:
Web developers are more expensive to hire simply because of the demand and supply ratio. Web designers are readily available as their job is much simpler. Their job doesn’t require the learning of coding. Coding is undoubtedly a highly sought-after skill that everyone can’t entertain.
Final Thoughts:
So if you look forward to creating a website, you might become confused. This is because you don’t know whether to opt for a web designer or a developer. Well, to create a website, technically, both are required. So you need to search for a website design company that will offer both services and ensure healthy growth for your business.
2 notes
·
View notes
Text
Hi-Hi! Hello!
I'm Estee Barnes. I'm a writer and self-taught traditional and digital artist. I love to make my own stories and worlds. I'm not so much of a fandom person, so there will be less fandom posting here. I still call my characters my OCs, even if the abbreviation has that fandom connotation. It's just easier.
(I have no problem with fandom either. It's just not what I usually dabble in!)
My sideblogs love to glitch out and not show up when I @ them. You may have to manually search for them! Please let me know if they do not show up in Tumblr search. Note that my blogs are hidden from people without an account.
Anyways, the sideblogs are all for my various OC stories. They are:
@halboro-1994 (H94; main OC story. Archived version of the blog is @/halboro1994. Don't interact with the archived version please!)
@ask-halboro (H94; an ask blog for the characters. In a cycle of being abandoned and then restarted every so often. If I find a format I like I might actually start encouraging asks.)
@oath-and-creed (O&C; main blog for Oath & Creed, another story of mine. Not to be confused with the 'official' blog!)
@oath-and-creed-official (O&C; the ask blog for the story. Not to be confused with the regular blog!)
@super-space-sailor (SSS; a story of mine from within H94/O&C but also its own separate universe. Blog needs a major renovation.)
@thebutterflyeffect-tbe (TBE; another story of mine. Does not link the @ for some reason. Should appear in the search bar, hopefully. Let me know!)
@intergalactic-inn (IINN; another story of mine. Currently considering a major change to/redo of the plot.)
@tualoma (no abbreviation; another story of mine. Currently exists only as vague concepts on the verge of forming into a story. It's been like that for a while. Pretty quiet blog!)
Fandoms/media I am interested in (to various degrees) include others' OCs, SDV, HtTYD (specifically RttE, specifically Snotlout), and MCSM.
Other things I like include PNGs, website coding (I am learning HTML and CSS), that sun and moon imagery which was everywhere in the '90s (AKA whimsigoth), and cats. I do reblog a lot of shitposts.
More stuff under the cut. Includes my permissions surrounding use of my creative endeavours (visual art, writing, OCs, et cetera). Read, understand, and heed them if you have not already!
Personally, I don't really have much of a DNI. I will say I don't want bigots and creeps coming here. However, I mostly rely on just blocking people. I tend to hard block a lot, even if I'm not super annoyed. Mutuals won't be hard blocked unless it's over something really big.
I do not consent for any of my writing, visual artworks, OCs, or other creative endeavours (items) to be used for anything by anyone without my explicit permission on a case-by-case basis per item. I have not ever knowingly and willingly consented to my items being used for scrapping purposes, nor will I ever knowingly and willingly consent to it.
Do not repost/re-upload my works to other sites or blogs (reblogging is different; you can reblog to your blog (not community)!). Do not reblog my works to Tumblr communities. Do not trace, edit, or otherwise copy my items (referencing the bare basics/fundamentals of a pose is okay; tracing broadly refers to mostly using the line art itself).
I believe all art is inspired by things and all art will continue to inspire. However, ripping entire concepts of my creative endeavours/items (entire outfits, full names, story, et cetera) for your own purposes is copying, not inspiration.
I know coincidences happen, but seeing a character with a unique outfit specific to an OC of mine (e.g., Renee's windbreaker jacket) is much more suspicious and likely to be called out than a regular/typical outfit (e.g., Lucas's green hoodie).
If you make fanwork of my OCs, let me know! Excluding Art Fight and if you're a mutual, I will only be comfortable having the artwork posted to my blog first. Proper artist credits and links will always be given and visible! I just don't trust the default scrapping settings on most social medias. You are encouraged to reblog it to your own blog or link to the post on your other social media(s)! Artists still deserve an audience. Again, I just don't trust default settings.
Please like this post (or preferably comment) so I know you have read it!
#estee's posts#this got long haha#oh well. I think it works better now#I'll never shut up with my terms and conditions type talking#I'll add my most often used tags here for easier access#estee's ocs#h94 ocs#o&c ocs#sss ocs#tbe ocs#rgr ocs#tualoma ocs#iin ocs#rgr exists it just has no sideblog#I haven't figured out if it's connected to the tualoma universe yet#but it has a separate tag because it came to me in a dream#literally. so much oc shit comes to me in my dreams
3 notes
·
View notes
Text
STAGHUNTERS NEOCITIES WEEE
Figured I should make a new post at this point because the other one is getting too long to keep reblogging. I've been tinkering away at the site and it is shaping up! Here's a lil page by page tour under the cut
you can view the site here!

Splash screen!
It's a little bumper so the css can load without it scrabling the home page. It looks alright, but to add some more text to the image, I have to make a new one in the death screen generator, which is not ideal.
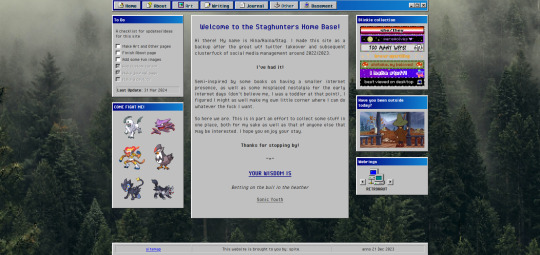
The home page!
I've changed the middle window so it fits in better with the rest. Not very visually exciting there in terms of color, but it is for now the best look imo. Text there is aligned justified, I've condensed it a bit more and added the randomized quote section underneath it instead of it being a seperate window on the side.
To do list needs an update but is still accurate. The team is still there, but on the other side, I have set the blinkies to be a bit larger. The music player has been removed because I couldn't find a way to add songs to it that weren't included on the source site. Snufkin is here now. The webrings will need some more. Retronaut is there, but not functioning as it should. it just forwards you to random sites in the ring instead of where it should be, but I can't find what exactly I'm doing wrong with the code.
Another thing that is not working on neocities itself is the "last updated" part. For some reason it doesn't display there what it does display on my local html. Maybe a bug at neo.
And icons at the top on the nav par! Adds some more flair to the place. The footer has also received a minor update: it now has a sitemap link instead of another back-to-home url.
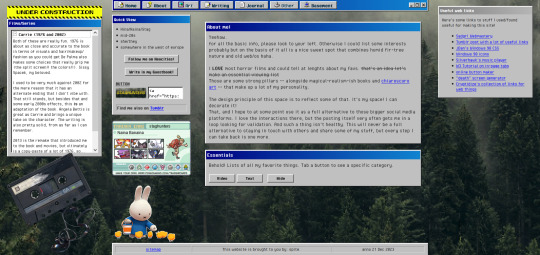
About!
I'm thinking of moving the small window with the short info to the right, but it is here for now. Links that are web-building related are on the right, also for my own referencing. The essentials lists on the left are hidden on load, but can be revealed by tapping the puttons. The lists are in tree-view and the window shouldn't expand over the cassette image once the construction sign is removed. Speaking of, the cassette has a lil playlist.
I might expand on the info a bit more, but that is for me to ponder. I liked including links to tumblr, the guestbook, and a button in case anyone wants to link my site on theirs.

Writing!
Hasn't really changed much. I've been looking at moving the sidebar info to be in the main section upon load, but idk if that would just make things more complicated. Right now it loads to an empty section there, stuff appears once you click a button. PDF support is only available once I'm a supporter of neocities, which i do wanna do but isn't a priority atm just for getting this part running. The links to ao3 will do just fine for now.
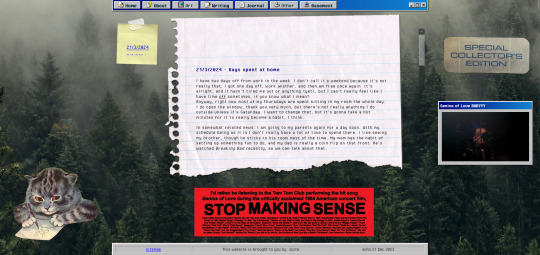
Journal!
The space for my rambling. It can be browsed by entry through the post-it, and all that seems to be functioning alright. Added a kitty and a sticker for decoration. The Stop Making Sense bumper sticker will now load a local video of the performance, but once again I won't be able to add this to the site until I get a supporter thing going. It plays/pauses on click, hehe.

Basement!
Decided to add a page for it. Basic info, schedule, link to the room, my letterboxd, and an overview of past movies. It's a nice spot on the site that is also the most cramped, but I like how it turned out.

BLUE SCREEN OF DEATH
In case any page/url error happens, you can send a movie recommendation to B (their askbox is linked when you open on desktop)


UNDER HEAVY CONSTRUCTION
The art and other pages are very much works in progress. Art can be up and running once I upload art to the site, but I'm not sure if I want to post full pieces here. Maybe I'll make it a space for sketch stuff that I'd otherwise discard.
As for the other page: I might be filing it under the writing page as a section, since the only thing here is WvW atm. It's cool that it has it's own thing, but I'm not sure if something that is basically a fanfic warrants such a space. That, or I keep it and drop all my other-media stuff in here so there's more to look at.
That's it for now! I got some ideas on how to continue, but they're not super-duper set in stone.
#stagcities#it's so much fun ough#takes time out of my other activities but certainly isn't a bore#neocities#web development
9 notes
·
View notes
Text
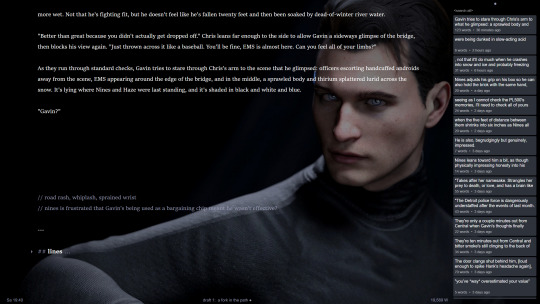
dbh-adjacent writing-program nonsense under the cut, a.k.a. let's talk a bit about WriteMonkey 3
I've used WriteMonkey 2 and 3 on and off for. hm. I guess it's gotta be eight or nine years now? but those instances of use have always been erratic and short lived, and I've usually returned to either Scrivener or, more frequently for many reasons, MS Word. (I also did just a ton of first-draft writing in discord back when I had an account and c/ped my writing from there into Word. near-peerless syncing between devices, appalling security practices. what can ya do 🙃)
anyway, due to ~circumstances~ I've switched to writing on a computer that isn't my writing program–filled work laptop, and so I've been experimenting with WM3 again because it's super lightweight due to plaintext markdown instead of rich text and I have a license key for it, which = fun plugins. it's also way less complicated and labor intensive to set up per project and use than, say, Scrivener. I love Scrivener! but scriv can be overwhelming and distracting when all I want to do is write, especially if I want a unique, quick-to-set-up theme (and I always do, because Aesthetic Is Everything), which is one of the reasons WM3 is so handy

in addition to the gorgeous stripped-down UI that showcases whatever background I choose (mine can be found here!), WM3 has some really neat little plugins? I don't actually use the word-frequency checker myself, but WM3's shows you where each word appears in the document via the little indicator bars to the right of the word, which. rad! (you can tell at a glance which chapters are written in whose POV based off name usage alone and I think that's neat.) also, when you click on a given word in the frequency list, it'll highlight that word throughout the document and also display all uses of it vertically over the scroll bar path. lots of nice little visual indicators of what's going on. I just really like the design, it's simple but extremely useful and intuitive
admittedly, Scrivener cannot be beat when it comes to how easily you're able to make notes in it due to its multitude of note-taking locations, plus it has internal splitscreen capabilities that make referencing a second document a breeze, so there's definitely a mental transition involved when it comes to WM3 and its single-document-at-a-time system, on top of switching to markdown-style comments/reminders. that said! being able to not only see those comments below the headings in the left-hand sidebar but also jump to them when they're clicked? stellar 10/10 would use again
finally, the repository. I <3 the repository. being able to quickly toss whatever text I'm not quite ready to delete or info I know I'll want to reference at some point in the future into the repository is great. it's a seamless process, only a couple seconds' worth of effort required, allowing my focus to stay on what I'm writing instead of distracting myself by tabbing my way through various open files to find my notes. plus the repository is searchable(!!!!!), and using it also keeps the actual text editor clean visually, especially since the right-hand sidebar can be hidden too:

hm! possibly that is a sneak preview of chapter one! who can say!
so yeah! if you're looking for a stripped-down, highly customizable, portable writing program, I absolutely recommend it. there are downsides, of course, the biggest one being no official WM3 mobile options available at present, but since the program is both portable and plaintext, you can toss it into a syncing service and access it via your handheld devices that way. it's also not open source, and you need to pay to access the truly useful plugin features. with all that said, if you don't mind fiddling around with some CSS to make everything look juuuuuuuuust right, you can get yourself a really snazzy setup with relatively little effort. but maybe that's just me—aesthetic is king and all that
9 notes
·
View notes
Text

Day 3 - 100 Days CSS Challenge
Hey guys, I’m back with Day 3 of the challenge! I know, I said "see you tomorrow at 8 PM", and here I am an eternity later 🙂. But listen, life has been BUSY. So much going on, barely found time to continue.
But does that stop us? NO. We MAKE time for things we said we'd do. So let’s get right into Challenge 3 of the 100 Days CSS Challenge.
Step 1: Screenshot the image & Get its color palette
Yes, the image is animated, but before we even think about animations, we need a static version to work from. Same mindset for coding: start with a static layout, then animate it.
Here’s my image with its color palette:

You can define these colors as variables in :root (like we did in Challenge 1), but I won’t bother this time.
Step 2: Identify the image elements
What is this image made of? Break it down:
A floor
A pyramid made of two triangles (created using clip-path)
A sun
The sky (just a background color)
The pyramid’s shadow (if you noticed it)
That last one is important. Shadows can’t be "animated into existence", so we need to create an actual element for it and then animate it separately.
So here’s what I’ll be working with:
<div class="frame"> <div class="center"> <div class="floor"></div> <div class="pyramide"> <div class="tri1"></div> <div class="tri2"></div> <div class="shadow"></div> </div> <div class="sun"></div> </div> </div>
Step 3: Bringing these elements to life with CSS
I’m not gonna go into crazy detail because we’ve already covered basic shapes in Challenge 1. But here’s how I would build this step by step:
Frame (.frame) → Set up the main background color.
Sky (.center) → Make it a blue circle (border-radius: 50%).
Floor (.floor) → A simple rectangle, with the bottom part hidden under .center.
Sun (.sun) → Super obvious.
Pyramid (.pyramide) : It’s two triangles facing each other . And each one is created using clip-path.
Here’s a visual representation for how clip-path works:

Step 4: Creating the animations
🎥 Video Explanation: 🔗 Watch here
Animation 1: Sun Movement
@keyframes sun-goes-down { 0% { transform: translateY(0) rotate(-70deg); } 30% { transform: translateY(50px) rotate(-28deg); } 100% { transform: translateY(100px) rotate(70deg); } }
Animation 2: Pyramid’s Shading
@keyframes pyramide-shading { 0% { background: #272C34; } 30% { background: #F4F4F4; } 70% { background: #DDDADA; } 100% { background: #272C34; } }
Animation 3: Shadow on the Floor
@keyframes shadow-on-the-floor { 0% { transform: scaleY(0); clip-path: polygon(115px 0%, 231px 0%, 100% 100%); } 30% { transform: scaleY(1); clip-path: polygon(115px 0%, 231px 0%, 80% 100%); } 55% { transform: scaleY(0.4); } 75% { transform: scaleY(1); } 100% { transform: scaleY(0); clip-path: polygon(115px 0%, 231px 0%, 0% 100%); } }
Animation 4: Floor Darkening
Even the floor darkens as the sky turns black:
@keyframes fading-sand { 0% { background: #272C34; } 30% { background: #F0DE75; } 70% { background: #F0DE75; } 100% { background: #272C34; } }
Step 5: Applying the animations
To apply an animation, we use:
.element { animation: nameOfAnimation 4s cubic-bezier(.4, 0, .49, 1) infinite reverse; }
Cubic Bézier: What even is it & Why do we use It?
You might be thinking: "Why use cubic-bezier() instead of just ease-in or ease-out?" . Well , cubic-bezier() is a function that lets you customize animation speed. Instead of using basic options (ease-in, ease-out), you can fine-tune how your animation behaves.
A cubic Bézier curve is defined like this:
cubic-bezier(x1, y1, x2, y2);
These four values control how the animation progresses over time.
AND JUST LIKE THAT—DAY 3 DONE!
See you on Day 4—hopefully sooner than another eternity! 😅
#100dayscssChallenge#codeblr#code#css#html#javascript#java development company#python#studyblr#progblr#programming#comp sci#web design#web developers#web development#website design#webdev#website#tech#html css#learn to code
2 notes
·
View notes
Text

📡 TRANSMISSION: CODEFIRE//MEMECORE
[Txt2Image: neon command terminal, code injection interface, digital propaganda board, subversive memes on screen, glitchpunk OS, blacksite signal console]
Discussion: Encrypted signals from the Boogaloo Subnet have breached the Contextus firewall. On the left: raw CSS-styled payload code. On the right: a social terminal pumping out irony-drenched chaos from masked avatars.
An emergent meme — called "Laughing Drop" — is being used to embed executable radical scripts in shitpost-style images. It’s spreading in anarchist meme groups and old Facebook survival pages, disguised as UI mockups and “coded satire.”
The system is bleeding. Contextus misclassified the meme as harmless humor. You know better.
You’ve tapped into a livestream node called @LaughProtocol, run by a faceless operator posting warped frog-face masks and QR codes linking to weapons blueprints. His followers have started imitating the meme format — and the consequences could be catastrophic.
What action will you take?
1️⃣ Decode the Meme Format – Extract hidden syntax, strip layers, scan for radical triggers 2️⃣ Hijack the Stream – Impersonate @LaughProtocol, inject counter payloads via irony 3️⃣ Track Follower Drift – Map which NPCs are slipping into accelerationism 4️⃣ Engage Contextus Override – Force classify the meme as threat-level red
Ready to select a path or deploy a new payload? Say a number. Want this scene rendered visually? Say render this node.
0 notes
Text
Mastering Z-Index in Elementor: Everything You Need to Know
When designing websites with Elementor, managing layers and ensuring proper content visibility can be a challenge—especially when multiple elements overlap. This is where understanding Z-Index in Elementor becomes essential.
What is Z-Index in Elementor?
Z-Index is a CSS property that controls the stacking order of elements on a web page. In simpler terms, it decides which element appears on top when two or more elements overlap. The higher the Z-Index value, the closer the element appears to the front.
In Elementor, every widget or section can be assigned a custom Z-Index value. This is especially helpful when creating advanced layouts such as overlapping text, layered images, sticky headers, or pop-ups.
How to Use Z-Index in Elementor
Select the Element: Click on the widget, column, or section you want to modify.
Go to the Advanced Tab: Under the 'Advanced' settings, scroll down to the 'Z-Index' field.
Set the Value: Input a positive or negative number. Higher values will place the element in front.
Example: If your text is hidden behind an image, increasing the text’s Z-Index will bring it forward.
Common Uses of Z-Index in Elementor
Making sticky headers stay on top while scrolling.
Creating interactive hover effects.
Layering background shapes or graphics.
Fixing overlapping issues between sections and widgets.
Tips for Using Z-Index in Elementor
Avoid unnecessary high values: A Z-Index of 9999 might work, but keep your values logical to avoid conflicts.
Use relative positioning: For Z-Index to take effect, elements often need a relative, absolute, or fixed position.
Check responsive views: Overlapping might differ between desktop, tablet, and mobile views.
Special Features of Z-Index in Elementor
The Z-Index in Elementor isn’t just a basic layering tool—it's a powerful feature that gives you full control over how elements appear in relation to each other on your webpage. Below are some standout features and benefits of using Z-Index effectively in Elementor:
1. Precise Layer Control
Z-Index allows you to manually control which elements appear on top or behind others. This gives you the freedom to design complex, multi-layer layouts without coding.
2. Works Across Widgets, Columns, and Sections
Elementor makes Z-Index available for:
Widgets (like buttons, images, headings)
Columns
Entire Sections
This means you can adjust layering at any level of your layout.
3. Dynamic with Position Settings
Z-Index works best when combined with Elementor’s position controls:
Relative
Absolute
Fixed
You can create advanced designs like sticky headers or floating call-to-action buttons that stay on top of all other content using Z-Index.
4. Responsive Control
With Elementor’s responsive settings, you can tweak Z-Index for mobile, tablet, and desktop individually. This ensures your designs remain visually consistent across all devices.
5. Conflict Resolution
Z-Index is your best friend when solving layering conflicts—like when a menu hides behind a section or a popup doesn’t appear as expected.
6. Supports Negative and High Values
You can assign negative values to push elements further back, or high values (e.g., 999) to bring elements to the front. This flexibility is crucial in layered design scenarios.
7. Improves User Experience
Using Z-Index properly ensures that clickable elements like buttons and menus stay accessible and visible, leading to a smoother UX.
Unlock the Full Power of Elementor Pro at an Unbeatable Price
Want to take your web design to the next level with advanced features, templates, and custom controls?
Get Elementor Pro @ Just ₹499 through CVWorld’s Elementor Group Buy and access premium tools affordably!
0 notes
Text
Fun Tricks and Tips to Perfect Your Barrel Roll Technique

If you’ve ever searched for something fun or quirky on Google, you might have stumbled upon the phrase “do a barrel roll.” This simple command can trigger an entertaining animation on your screen that makes your entire browser window spin around. But what exactly is “do a barrel roll”, how did it become so popular, and how can you try it yourself? Let’s dive into the details!
What Does It Mean to “Do a Barrel Roll”?
Originally, “do a barrel roll” is an aviation maneuver where a pilot causes their aircraft to perform a complete rotation around its longitudinal axis while flying forward. This move creates a rolling effect, similar to a spinning barrel, and is often used in aerobatics and dogfighting.
However, in internet culture, “do a barrel roll” is most widely recognized as a fun Easter egg triggered by a Google search. When you type “do a barrel roll” into Google’s search bar and hit enter, the entire search results page performs a 360-degree spin, mimicking the barrel roll maneuver.
How to Do a Barrel Roll on Google
Doing a barrel roll on Google is incredibly easy, and it’s a neat little trick to impress your friends or just have fun yourself. Here’s how to do it:
Open your web browser.
Go to www.google.com.
In the search bar, type “do a barrel roll”.
Press Enter.
Watch as the whole page spins around once before settling back in place! This spinning effect is a classic example of Google’s playful Easter eggs designed to entertain users.
Why Did Google Add the Barrel Roll Trick?
Google loves to surprise its users with hidden tricks and Easter eggs — quirky, unexpected features that aren’t immediately obvious. The “do a barrel roll” trick was inspired by the popular 1997 Nintendo game Star Fox 64, where the player is instructed to “do a barrel roll” as a defensive move.
Thanks to its nostalgic connection and the sheer fun factor, the Google barrel roll trick quickly became viral, gaining millions of people typing this command just to see the spinning effect for themselves.
Other Fun Google Tricks Similar to “Do a Barrel Roll”
If you enjoyed doing the barrel roll, you might want to explore other Google search Easter eggs that provide similar fun:
“Askew” — Tilts your search results page slightly.
“Zerg Rush” — Starts a mini game where you click on attacking O’s.
“Google Gravity” — Makes all elements on the Google homepage fall down as if affected by gravity.
“Flip a coin” — Google flips a virtual coin.
“Pac-Man” — Lets you play the classic arcade game right in your browser.
These tricks show how Google uses creative coding to bring entertainment to everyday web searches.
The Science Behind the Barrel Roll Spin Effect
The spinning effect you see when you do a barrel roll on Google is achieved using CSS (Cascading Style Sheets) animations and JavaScript. These web technologies manipulate the display and layout to create smooth rotation animations without interrupting your browsing experience.
This combination allows Google to create interactive visual effects that run seamlessly across most modern browsers and devices.
Why Should You Try the Barrel Roll Trick?
Besides being an entertaining Easter egg, doing a barrel roll on Google is a great example of how tech companies add fun surprises to make user experience more delightful. It’s also a great icebreaker to share with friends and a reminder that technology doesn’t always have to be serious.
Plus, if you’re a developer or someone interested in web design, this trick can inspire you to experiment with animation effects on your own websites or projects.
Summary Table: Quick Facts About “Do a Barrel Roll”
Feature
Details
Origin
Aviation maneuver & Star Fox 64 video game
Google Trick Launch Year
Circa early 2010s
How to Use
Search “do a barrel roll” on Google
Effect
360-degree rotation animation of the search results page
Technologies Used
CSS animations, JavaScript
Related Google Easter Eggs
Askew, Zerg Rush, Google Gravity
Fun Factor
High — popular viral internet meme
Final Thoughts
The phrase “do a barrel roll” has transcended from an aviation term to a beloved internet meme and a clever Google Easter egg. Whether you want to relive a classic gaming moment or simply have some fun online, typing “do a barrel roll” on Google is a simple, quick way to entertain yourself.
Try it now, and maybe explore other Google tricks to keep the fun going
0 notes
Text
Getting Creative With HTML Dialog
New Post has been published on https://thedigitalinsider.com/getting-creative-with-html-dialog/
Getting Creative With HTML Dialog
Like ’em or loath ’em, whether you’re showing an alert, a message, or a newsletter signup, dialogue boxes draw attention to a particular piece of content without sending someone to a different page. In the past, dialogues relied on a mix of divisions, ARIA, and JavaScript. But the HTML dialog element has made them more accessible and style-able in countless ways.
So, how can you take dialogue box design beyond the generic look of frameworks and templates? How can you style them to reflect a brand’s visual identity and help to tell its stories? Here’s how I do it in CSS using ::backdrop, backdrop-filter, and animations.
Design by Andy Clarke, Stuff & Nonsense. Mike Worth’s website will launch in June 2025, but you can see examples from this article on CodePen.
I mentioned before that Emmy-award-winning game composer Mike Worth hired me to create a highly graphical design. Mike loves ’90s animation, and he challenged me to find ways to incorporate its retro style without making a pastiche. However, I also needed to achieve that retro feel while maintaining accessibility, performance, responsiveness, and semantics.
A brief overview of dialog and ::backdrop
Let’s run through a quick refresher.
Note: While I mostly refer to “dialogue boxes” throughout, the HTML element is spelt dialog.
dialog is an HTML element designed for implementing modal and non-modal dialogue boxes in products and website interfaces. It comes with built-in functionality, including closing a box using the keyboard Esc key, focus trapping to keep it inside the box, show and hide methods, and a ::backdrop pseudo-element for styling a box’s overlay.
The HTML markup is just what you might expect:
<dialog> <h2>Keep me informed</h2> <!-- ... --> <button>Close</button> </dialog>
This type of dialogue box is hidden by default, but adding the open attribute makes it visible when the page loads:
<dialog open> <h2>Keep me informed</h2> <!-- ... --> <button>Close</button> </dialog>
I can’t imagine too many applications for non-modals which are open by default, so ordinarily I need a button which opens a dialogue box:
<dialog> <!-- ... --> </dialog> <button>Keep me informed</button>
Plus a little bit of JavaScript, which opens the modal:
const dialog = document.querySelector("dialog"); const showButton = document.querySelector("dialog + button"); showButton.addEventListener("click", () => dialog.showModal(); );
Closing a dialogue box also requires JavaScript:
const closeButton = document.querySelector("dialog button"); closeButton.addEventListener("click", () => dialog.close(); );
Unless the box contains a form using method="dialog", which allows it to close automatically on submit without JavaScript:
<dialog> <form method="dialog"> <button>Submit</button> </form> </dialog>
The dialog element was developed to be accessible out of the box. It traps focus, supports the Esc key, and behaves like a proper modal. But to help screen readers announce dialogue boxes properly, you’ll want to add an aria-labelledby attribute. This tells assistive technology where to find the dialogue box’s title so it can be read aloud when the modal opens.
<dialog aria-labelledby="dialog-title"> <h2 id="dialog-title">Keep me informed</h2> <!-- ... --> </dialog>
Most tutorials I’ve seen include very little styling for dialog and ::backdrop, which might explain why so many dialogue boxes have little more than border radii and a box-shadow applied.
Out-of-the-box dialogue designs
I believe that every element in a design — no matter how small or infrequently seen — is an opportunity to present a brand and tell a story about its products or services. I know there are moments during someone’s journey through a design where paying special attention to design can make their experience more memorable.
Dialogue boxes are just one of those moments, and Mike Worth’s design offers plenty of opportunities to reflect his brand or connect directly to someone’s place in Mike’s story. That might be by styling a newsletter sign-up dialogue to match the scrolls in his news section.
Mike Worth concept design, designed by Andy Clarke, Stuff & Nonsense.
Or making the form modal on his error pages look like a comic-book speech balloon.
Mike Worth concept design, designed by Andy Clarke, Stuff & Nonsense.
dialog in action
Mike’s drop-down navigation menu looks like an ancient stone tablet.
Mike Worth, designed by Andy Clarke, Stuff & Nonsense.
I wanted to extend this look to his dialogue boxes with a three-dimensional tablet and a jungle leaf-filled backdrop.
Mike Worth, designed by Andy Clarke, Stuff & Nonsense.
This dialog contains a newsletter sign-up form with an email input and a submit button:
<dialog> <h2>Keep me informed</h2> <form> <label for="email" data-visibility="hidden">Email address</label> <input type="email" id="email" required> <button>Submit</button> </form> <button>x</button> </dialog>
I started by applying dimensions to the dialog and adding the SVG stone tablet background image:
dialog width: 420px; height: 480px; background-color: transparent; background-image: url("dialog.svg"); background-repeat: no-repeat; background-size: contain;
Then, I added the leafy green background image to the dialogue box’s generated backdrop using the ::backdrop pseudo element selector:
dialog::backdrop background-image: url("backdrop.svg"); background-size: cover;
Mike Worth, designed by Andy Clarke, Stuff & Nonsense.
I needed to make it clear to anyone filling in Mike’s form that their email address is in a valid format. So I combined :has and :valid CSS pseudo-class selectors to change the color of the submit button from grey to green:
dialog:has(input:valid) button background-color: #7e8943; color: #fff;
I also wanted this interaction to reflect Mike’s fun personality. So, I also changed the dialog background image and applied a rubberband animation to the box when someone inputs a valid email address:
dialog:has(input:valid) background-image: url("dialog-valid.svg"); animation: rubberBand 0.82s cubic-bezier(0.36, 0.07, 0.19, 0.97) both; @keyframes rubberBand from transform: scale3d(1, 1, 1); 30% transform: scale3d(1.25, 0.75, 1); 40% transform: scale3d(0.75, 1.25, 1); 50% transform: scale3d(1.15, 0.85, 1); 65% transform: scale3d(0.95, 1.05, 1); 75% transform: scale3d(1.05, 0.95, 1); to transform: scale3d(1, 1, 1);
Tip: Daniel Eden’s Animate.css library is a fabulous source of “Just-add-water CSS animations” like the rubberband I used for this dialogue box.
Changing how an element looks when it contains a valid input is a fabulous way to add interactions that are, at the same time, fun and valuable for the user.
Mike Worth, designed by Andy Clarke, Stuff & Nonsense.
That combination of :has and :valid selectors can even be extended to the ::backdrop pseudo-class, to change the backdrop’s background image:
dialog:has(input:valid)::backdrop background-image: url("backdrop-valid.svg");
Try it for yourself:
Conclusion
We often think of dialogue boxes as functional elements, as necessary interruptions, but nothing more. But when you treat them as opportunities for expression, even the smallest parts of a design can help shape a product or website’s personality.
The HTML dialog element, with its built-in behaviours and styling potential, opens up opportunities for branding and creative storytelling. There’s no reason a dialogue box can’t be as distinctive as the rest of your design.
Andy Clarke
Often referred to as one of the pioneers of web design, Andy Clarke has been instrumental in pushing the boundaries of web design and is known for his creative and visually stunning designs. His work has inspired countless designers to explore the full potential of product and website design.
Andy’s written several industry-leading books, including ‘Transcending CSS,’ ‘Hardboiled Web Design,’ and ‘Art Direction for the Web.’ He’s also worked with businesses of all sizes and industries to achieve their goals through design.
Visit Andy’s studio, Stuff & Nonsense, and check out his Contract Killer, the popular web design contract template trusted by thousands of web designers and developers.
#:has#2025#Accessibility#ADD#amp#animation#animations#applications#aria#Art#Article#Articles#Assistive technology#attention#background#background-image#book#Books#border#box#box-shadow#Branding#change#Color#content#CSS#css animations#data#Design#designers
1 note
·
View note
Text
ToolsToEdit.in – Your Ultimate Free Toolkit for Everyday Digital Tasks
In today’s fast-moving digital world, being productive means using the right tools at the right time. But what if you could access over 30+ essential online tools in one place—without paying a cent? That’s exactly what ToolsToEdit.in offers: a centralized, no-cost platform built for students, teachers, professionals, content creators, and anyone who wants to get things done—fast and efficiently.
🌐 What Is ToolsToEdit.in?
ToolsToEdit.in is a multi-purpose online toolkit that combines the functionality of dozens of individual tools into one convenient, browser-based hub. From quick calculations to SEO audits, PDF conversions to text clean-up—this platform is designed to simplify your work, save you time, and help you perform complex tasks with just a few clicks.
👥 Who Is It For?
This site isn’t just for techies or web developers. ToolsToEdit.in is built for everyday users:
🎓 Students can calculate percentages, solve EMI questions, or convert between binary and text.
👨🏫 Teachers can create resources, check text readability, or compress files.
🧑💻 Content Creators & Bloggers can analyze SEO, clean content, and manage PDFs.
👥 General Users can generate strong passwords, spot phishing links, and much more.
🔧 Key Tool Categories and Features
Here’s a breakdown of what ToolsToEdit.in offers:
🧮 Calculator Tools
No need for separate apps—just launch and use:
BMI Calculator – Check body mass index.
Discount Calculator – Know how much you’re saving.
EMI Calculator – Plan your finances smartly.
Age Calculator – Get accurate age from date of birth.
Percentage Calculator – Solve quick percentage problems.
✍️ Text Utilities
Content handling made easy:
Word Counter – Know your length before publishing.
Case Converter – Switch between uppercase, lowercase, and more.
Remove Duplicate Lines – Clean up large text files.
Find & Replace – Mass replace words or phrases.
Binary ⇄ Decimal/Text Converters – Useful for coding and education.
Text Encoder/Decoder – Encrypt and decode web-safe content.
🔐 Security Tools
Keep your data secure:
Password Generator – Create complex passwords.
Password Strength Checker – Test how secure your password is.
Phishing URL Detector – Protect yourself from scams.
🔍 SEO Optimization Tools
Get your website found:
Meta Tag Analyzer – Improve search engine visibility.
Mobile-Friendly Test – Make sure your site works on smartphones.
Page Speed Analyzer – Identify and fix performance issues.
Sitemap Generator – Generate XML sitemaps for indexing.
Keyword Density Checker – Analyze your content for keyword balance.
Robots.txt Generator – Guide search engine bots effectively.
🎨 Design & Image Tools
Handy for bloggers, designers, and developers:
Color Picker Tool – Find and copy hex codes easily.
CSS Gradient & Animation Previews – Visualize effects before using them.
Box Shadow & Border Radius Preview – Quick CSS styling helpers.
Image Compressor – Reduce image file sizes without losing quality.
Image to Base64 Converter – Embed images in web code.
Image Color Picker – Get exact color details from any picture.
📄 PDF Tools
Manage documents like a pro:
Merge PDF Files – Combine multiple documents into one.
PDF to Image/Text/Word – Convert PDFs into different formats.
Image to PDF Converter – Make professional documents from images.
💡 Why ToolsToEdit.in Stands Out
✅ No Installations: Everything runs right in your browser.
✅ Free Forever: No subscriptions, no sign-ups, no hidden fees.
✅ Mobile-Friendly: Use it seamlessly across devices.
✅ Time-Saving: Get tasks done in seconds.
✅ Clean UI: Easy to use even for beginners.
📢 Final Thoughts
In a world of scattered tools, ToolsToEdit.in brings clarity and convenience. Whether you're a digital marketer doing an SEO audit, a student calculating your GPA, or a teacher preparing resources—this site empowers you to work smarter, not harder.
Visit www.toolstoedit.in and explore the full suite of tools today. It’s time to edit, create, calculate, optimize, and convert—all in one place.
1 note
·
View note
Text
Step-by-Step Guide to Choose the Best Website Development Services in India
Define Your Website Goals
Before you start searching, understand what you want your website to achieve. Ask yourself:
Do you need an e-commerce platform, a corporate site, or a personal portfolio?
Do you want to generate leads, provide information, or sell products?
Are you looking for custom website development or CMS-based solutions?
Tip: Clarity on goals helps in shortlisting companies that specialize in your type of project.
2. Choose Between Freelancers and Web Development Agencies
In India, you’ll find both individual freelancers and full-service website development companies. Here's how to decide:FreelancersAgenciesLower costFull team of expertsLimited scalabilityScalable and resource-richBest for small projectsBest for large, complex websites
Choose an agency if you need full-stack development, post-launch support, UI/UX design, SEO, or branding services.
3. Check Technical Expertise
The best web development services offer expertise in:
Frontend: HTML, CSS, JavaScript, React, Angular, Vue.js
Backend: PHP, Node.js, Python, Java, .NET
CMS: WordPress, Magento, Shopify, Joomla, Drupal
eCommerce: WooCommerce, Magento, Shopify, OpenCart
Databases: MySQL, MongoDB, PostgreSQL
Ask what technology stack they use and whether it aligns with your project needs.
4. Review Portfolios and Case Studies
A company’s portfolio is proof of its capabilities. Check:
Industry experience (healthcare, e-commerce, education, etc.)
Design aesthetics and UI/UX quality
Functionality and responsiveness
Innovation and customization levels
Case studies show how they’ve solved real-world business problems.
5. Read Client Reviews and Testimonials
Look for:
Google reviews
Clutch and GoodFirms ratings
Testimonials on their website
Red flags to avoid:
Overly generic or fake-looking reviews
Lack of client references
Poor feedback on delivery time or support
6. Check Communication and Project Management
Good communication is critical. Ask about:
Assigned project managers or single points of contact
Tools used: Slack, Trello, Asana, Jira
Frequency of updates
Time-zone compatibility
A transparent and structured communication process ensures smooth execution.
7. Evaluate Design and User Experience (UX) Capabilities
Your website must not only look good but also function intuitively. Look for:
Mobile responsiveness
Intuitive navigation
Page speed optimization
SEO-friendly layout
Accessibility compliance
A visually appealing, easy-to-navigate website improves conversion rates.
8. Understand the Pricing and Packages
Don’t just go for the cheapest option. Compare:
Fixed price vs hourly billing
What’s included (hosting, domain, maintenance)
Hidden costs (extra revisions, support, API integration)
Pro tip: Request a detailed quote and a scope of work document before starting.
9. Assess Support and Maintenance Services
The relationship shouldn’t end after the website goes live. Choose a company that offers:
Regular backups
Security updates
Bug fixing
Speed optimization
Tech support via email/chat/call
Ask if they offer AMC (Annual Maintenance Contracts) for ongoing support.
10. Verify Legal and Contractual Aspects
Make sure everything is documented:
NDA (Non-Disclosure Agreement)
IP rights (you should own the website)
Payment terms
Delivery timelines
Penalty clauses for delays
A professional contract protects both parties.
🌐 Top Qualities to Look for in a Website Development Company in India
FeatureWhy It MattersProven track recordEnsures reliabilityDiverse tech stackOffers flexibilityDesign and branding capabilitiesBuilds a cohesive online presenceSEO knowledgeHelps your site rank on GoogleTransparent communicationAvoids misunderstandings
📌 Final Checklist: Questions to Ask Before Hiring
Can you show me websites you’ve built in my industry?
What technologies will you use and why?
Will I be able to update content myself (CMS)?
What is your post-launch support model?
How do you handle delays or scope creep?
Will my website be SEO-optimized?
🔍 Why Choose Website Development Services in India?
India is a global IT hub, and here’s why it’s a smart choice:
Cost-effective yet high-quality services
Access to a large pool of skilled developers
English-speaking professionals
Flexible engagement models
Round-the-clock support due to time zone advantage
💡 Conclusion
Choosing the best website development services in India comes down to understanding your needs, evaluating expertise, and ensuring transparency. A well-developed website is an investment — it can enhance brand visibility, improve customer engagement, and drive conversions.
Take your time, do your research, and partner with a company that aligns with your goals
0 notes
Text
Best Web Design Company: Why Choose Local Expertise for Your Online Presence

In today’s digital world, having a strong online presence is no longer optional—it’s essential. Whether you’re a small business, a startup, or an established brand, your website is often the first interaction potential customers have with your company. For businesses in Udaipur, choosing the best web design company in Udaipur and a skilled WordPress development company in Udaipur can be the key to creating a powerful digital identity that drives results.
But what makes a web design company the best? Why is WordPress development crucial? And how does hiring a local company in Udaipur benefit your business? Let’s explore all this and more.
Why You Need a Professional Web Design Company in Udaipur
Your website is your digital storefront. If it looks outdated, loads slowly, or doesn’t function properly on mobile devices, you risk losing potential customers. A professional web design company in Udaipur offers:
Custom Design: Tailored layouts and visuals that reflect your brand identity.
Mobile Responsiveness: Ensuring your website performs well on all screen sizes.
SEO Optimization: Structuring your site for higher visibility on Google.
Fast Loading Speeds: Reducing bounce rates and improving user experience.
Secure Hosting & Maintenance: Keeping your site up-to-date and protected.
Choosing a local team means easier communication, cultural understanding, and accountability.
WordPress Development: A Game-Changer for Modern Websites
WordPress powers over 40% of the websites on the internet, making it the most popular content management system (CMS) globally. Whether you want a blog, portfolio, business website, or an eCommerce store, WordPress development companies in Udaipur offer:
Custom WordPress Themes and Plugins
WooCommerce Development for Online Stores
User-Friendly Dashboards for Easy Content Updates
Search Engine Friendly Architecture
Scalable and Secure Solutions
Partnering with a WordPress development company in Udaipur ensures your site is both functional and future-ready.
Key Benefits of Hiring a Local Udaipur Web Design & WordPress Development Company
1. Face-to-Face Communication
Working with a local agency allows for in-person meetings, better collaboration, and a stronger understanding of your needs.
2. Understanding of Local Market
A web design company based in Udaipur knows the local business environment and can tailor strategies that appeal to your target audience.
3. Cost-Effective Solutions
Compared to metropolitan cities, agencies in Udaipur often provide high-quality services at more competitive rates.
4. Quick Support and Maintenance
Having your development team in the same city means faster response times when technical issues arise.
What to Look for in the Best Web Design Company in Udaipur
To ensure you partner with a reliable and result-driven company, consider these factors:
✔ Portfolio and Experience
Review their previous work to see if they’ve handled projects similar to yours. A diverse portfolio often means the company can adapt to various industries.
✔ Client Reviews and Testimonials
Look at client feedback to gauge satisfaction and quality of service.
✔ Technical Expertise
The best companies offer comprehensive services—HTML, CSS, JavaScript, PHP, WordPress, eCommerce, and more.
✔ Post-Launch Support
Your site needs updates, bug fixes, and backups. Choose a company that offers long-term maintenance and support.
✔ Transparent Pricing
Ensure the company provides clear quotes and no hidden charges.
Udaipur: A Growing Hub for Digital Excellence
Known as the “City of Lakes,” Udaipur is fast becoming a hub for digital and IT services. A number of startups, freelancers, and agencies are thriving in the city, offering world-class web solutions at affordable prices. This makes it easier for local businesses to access quality web services without having to look to major metro cities.
From hospitality and tourism to real estate and retail, Udaipur’s local industries can benefit immensely from a professionally designed website and a solid WordPress foundation.
Services Offered by Top Web Design and WordPress Development Companies in Udaipur
Custom Web Design
Responsive Web Development
WordPress CMS Integration
E-Commerce Website Development
SEO and Digital Marketing
Website Redesign and Maintenance
Speed Optimization
UI/UX Design
Content Strategy and Copywriting
These services ensure your website not only looks great but also performs efficiently.
Why WordPress Is the Right Choice for Your Business
Still not sure if WordPress is for you? Here's why it's ideal:
Open Source & Free
Highly Customizable
SEO Friendly
Vast Community Support
Regular Updates & Security
Built-In Blogging Functionality
A skilled WordPress development company in Udaipur can tailor this powerful platform to suit your unique business needs.
Final Thoughts: Build Locally, Grow Globally
Your website is more than just an online presence—it’s a business tool that can generate leads, build credibility, and drive conversions. By choosing the best web design company in Udaipur and a proficient WordPress development company in Udaipur, you invest in long-term digital success.
Udaipur’s local web experts understand both global trends and local dynamics, giving you a strategic edge. From design to deployment, support to scalability, your business will be in capable hands.
0 notes
Text
5 Proven Tips on Selecting the Right Web Development Company
In today’s digital landscape, choosing the right web development company in the UK can make or break your online presence. Whether you’re a startup, a small business, or an enterprise, a well-designed and functional website is crucial. With so many options available, how do you ensure you select the best website development company in the UAE? Here are five proven tips to help you make the right choice.
1. Assess Their Experience and Expertise
Before hiring a UI web development company in Canada, check their experience in the industry. A company with years of experience is more likely to understand your needs and deliver a robust solution. Look for:
Portfolio of past projects
Expertise in various programming languages and frameworks
Experience in developing websites for businesses in your niche
For instance, Bigladder Technologies provides cutting-edge web development services across the UK, Canada, UAE, and India, catering to diverse industries.
2. Check Client Reviews and Testimonials
Reviews and testimonials offer insight into a web development company’s credibility. Look for feedback on:
Quality of work
Communication and responsiveness
Adherence to deadlines
A reputable website development company in India will have positive client testimonials. Check their Google reviews, social media pages, and third-party review sites like Clutch or Trustpilot.
3. Evaluate Their Technical Skills
A UI web development company in UK must be proficient in the latest technologies, including:
HTML, CSS, JavaScript
CMS platforms like WordPress, Shopify, or Magento
Custom web application development
Responsive and mobile-first design principles
If you need an eCommerce website, ensure they have expertise in Shopify or WooCommerce. Similarly, for custom applications, look for Laravel, Node.js, or React developers.
4. Understand Their Design and Development Process
A structured development process is essential for a smooth experience. Ask about their workflow, which should typically include:
Requirement analysis
Wireframing and UI/UX design
Development and testing
Deployment and maintenance
A good website development company in UAE will keep you involved at every stage, ensuring the final product meets your expectations.
5. Compare Pricing and Support Services
Budget is a critical factor when choosing a web development company in Canada. However, the cheapest option isn’t always the best. Look for:
Transparent pricing with no hidden costs
Post-launch support and maintenance
Scalability for future upgrades
A professional UI web development company in India will offer competitive pricing while maintaining quality standards.
Selecting the right website development company in the UK requires careful consideration of their experience, expertise, reviews, technology stack, workflow, and pricing. A reliable web development company in UAE like Big Ladder Technologies LLP ensures your website is not just visually appealing but also functional, secure, and scalable. Are you looking for a trusted UI web development company? Contact Bigladder Technologies LLP today to turn your vision into reality!
0 notes
Text
SEO for Developers: Technical Tips to Boost Your Website’s Ranking
As a developer, you might think SEO (Search Engine Optimization) is a marketer’s job. But the truth is, technical SEO is the backbone of every high-ranking website—and it’s your expertise that ensures search engines can crawl, index, and understand your site. At Coding Nectar (codingnectar.com), we’ve helped countless developers bridge the gap between code and visibility. Here’s how to optimize your website’s technical foundation for better rankings.
1. Start with a Lightning-Fast Website
Page speed isn’t just a ranking factor—it’s a user experience game-changer. Google prioritizes fast-loading sites, and studies show that 53% of users abandon pages that take longer than 3 seconds to load.
What to do:
Compress Images: Use modern formats like WebP and tools like Squoosh or ImageOptim.
Minify Code: Remove unnecessary characters from HTML, CSS, and JavaScript.
Leverage Caching: Implement browser and server-side caching (e.g., Redis, Varnish).
At Coding Nectar, we use automated build tools like Webpack to bundle and optimize assets during deployment. For example, lazy-loading images with <img loading="lazy"> can cut load times by 20-30%.
2. Master Mobile-First Indexing
Google now uses mobile-first indexing, meaning it primarily crawls the mobile version of your site. If your site isn’t responsive, you’re invisible to most search traffic.
What to do:
Test Responsiveness: Use Chrome DevTools or Google’s Mobile-Friendly Test.
Avoid CSS/JS Blockers: Ensure critical resources load first.
Use Fluid Layouts: Replace fixed pixels with rem, em, or % units.
Pro Tip: At codingnectar.com, we design all client projects with mobile-first frameworks like Tailwind CSS to ensure seamless responsiveness.
3. Fix Crawlability Issues
Search engines rely on crawlers to index your site. If they hit roadblocks, your content won’t rank.
What to check:
robots.txt: Ensure you’re not accidentally blocking critical pages.
XML Sitemap: Generate and submit a sitemap via Google Search Console.
HTTP Status Codes: Fix 404s (broken links) and 301-redirect old URLs.
Example: A client at Coding Nectar saw a 40% traffic boost after we fixed crawl errors caused by misconfigured rel=canonical tags.
4. Structure Data with Schema Markup
Schema markup helps search engines understand your content, increasing chances of earning rich snippets (e.g., star ratings, FAQs).
What to add:
JSON-LD: Embed structured data for articles, products, or events.
Breadcrumbs: Improve navigation and SEO with BreadcrumbList schema.
Tool Recommendation: Use Google’s Structured Data Testing Tool to validate your markup.
5. Optimize for Core Web Vitals
Google’s Core Web Vitals measure user experience through metrics like:
LCP (Largest Contentful Paint): Load time for the main content.
FID (First Input Delay): Time until the site becomes interactive.
CLS (Cumulative Layout Shift): Visual stability during loading.
What to do:
Prioritize above-the-fold content.
Defer non-critical JavaScript.
Use font-display: swap to prevent layout shifts from fonts.
Case Study: After optimizing Core Web Vitals for a SaaS platform, Coding Nectar reduced their CLS score by 75%, boosting organic traffic by 28% in 3 months.
6. Secure Your Site with HTTPS
HTTPS is a non-negotiable ranking signal. It encrypts data and builds user trust.
Steps:
Buy an SSL certificate (many hosts offer free Let’s Encrypt integration).
Force HTTPS by redirecting HTTP traffic via .htaccess or NGINX configs.
Update internal links to use https://.
7. Audit Regularly with SEO Tools
SEO isn’t a one-time task. Use tools like:
Google Search Console: Track performance and errors.
Ahrefs/Screaming Frog: Analyze backlinks and technical issues.
Lighthouse: Audit performance, accessibility, and SEO.
Pro Tip: Coding Nectar offers custom SEO audits (codingnectar.com/seo-audit) to identify hidden issues like duplicate meta tags or slow API calls.
Final Thoughts
Technical SEO isn’t about chasing algorithms—it’s about building websites that are fast, accessible, and easy for search engines to love. By focusing on speed, mobile optimization, structured data, and regular audits, you’ll create a foundation that drives organic growth.
At Coding Nectar (codingnectar.com), we blend cutting-edge development with SEO best practices to help businesses rank higher and convert better. Ready to optimize your site? Let’s turn your code into a traffic magnet.
1 note
·
View note
Text
How to Choose the Best Website Designing Company for Your Brand
In the current age of the digital world, your website is the face of your business. It does not matter if you are a startup, small business or even a large corporation; having a professional and visually appealing website will greatly contribute to your online success. It is important to note that choosing the right website designing company can be a difficult process. If you want to hire the Best Website design company in Cochin, this guide is going to simplify this decision for you.
Why Your Business Needs a Professional Website
Reasons Why a Professional Website is Necessary For Your Business A website that's designed professionally is much more than just being online. It provides:
Building brand credibility and trust
Improving search engine rankings
Enhancing user experience
Increasing conversions and sales
Keeping you ahead of the competition
To achieve these benefits, you need to choose a website designing company in Cochin that aligns with your business goals.
Key Factors to Consider When Choosing the Best Website Designing Company in Cochin
1. Define Your Website Goals and Requirements
Before you begin your search, outline what you need from your website:
Do you need an e-commerce website or an informational site?
Are you looking for a custom website design or a template-based design?
What features do you require, such as SEO optimization, mobile responsiveness, or integrations?
2. Check the Company’s Portfolio and Experience
A reliable website design and development company in Cochin should have a strong portfolio showcasing previous projects. Look for:
Industry experience and expertise
Variety of website designs
User-friendly interfaces and seamless navigation
Mobile and SEO-friendly designs
3. Read Client Testimonials and Reviews
Customer reviews and testimonials provide insights into the company’s credibility. Check:
Google reviews and ratings
Social media feedback
Case studies and client success stories
4. Evaluate Their Expertise in Website Design and Development
A professional website design company in Cochin should have expertise in:
UI/UX design
HTML, CSS, JavaScript, and other coding languages
CMS platforms like WordPress, Shopify, Magento
Custom website development
5. Assess Their SEO and Digital Marketing Capabilities
A well-designed website should also rank high on search engines. Ensure the company offers:
SEO-friendly website structures
Fast-loading pages
Mobile Optimization
On-page and technical SEO services
6. Consider Their Support and Maintenance Services
Website maintenance is crucial for security and performance. Ask about:
Ongoing technical support
Website updates and bug fixes
Security monitoring and backups
7. Compare Pricing and Packages
While cost shouldn’t be the only deciding factor, it's essential to find a website design service that offers:
Transparent pricing
Value-for-money packages
No hidden charges
Benefits of Hiring a Local Website Designing Company in Cochin
Partnering with a website designing company in Cochin has several advantages:
Personalized Service: Local companies understand the market and can provide tailored solutions.
Easy Communication: Face-to-face meetings and real-time support are more accessible.
Faster Turnaround Time: Proximity allows for quick project execution and delivery.
Better Understanding of Local SEO: They can optimize your website for local search rankings.
Red Flags to Watch Out For
While searching for the best website designing company in Cochin, be cautious of these warning signs:
Lack of a portfolio or case studies
Unrealistic promises, such as instant SEO results
Hidden costs and unclear pricing
Poor communication and slow response times
No clear contract or project timeline
FAQs About Website Designing Services in Kochi
1. How much does a website design service cost in Cochin?
The cost depends on factors like the complexity of the design, the number of pages, the features required, and whether it's a custom or template-based design.
2. Can I update my website content after it’s built?
Yes, if your website is built on a CMS like WordPress or Shopify, you can easily update the content yourself. Otherwise, you may need developer assistance.
3. Do website designing companies also offer SEO services?
Many website design services in Cochin provide SEO services to improve search engine rankings and increase traffic.
4. Will my website be mobile-friendly?
Yes, a reputable website design and development company in Cochin ensures mobile responsiveness as part of the design process.
Your website is a critical aspect of your brand's overall success. You can easily ensure a website that is professional, high-performing, attracts traffic, and drives conversions, by choosing the right website designing company in Cochin. If you're in search of professional website designing services in Kochi, make sure you find a company that has a strong portfolio, great client reviews, and specializes in SEO-friendly websites. Are you ready to Build Your Dreamy Website? Connect with the Best Website design company in Cochin and grow your business substantially!
#digital marketing#ecommerce web development#seo services company#website designing company in kochi#ecommerce website development in kochi
0 notes
Text
[TLDR; When used as a snippet, the CSS below hides the tags, the cssclasses and the "add property" button from the Obsidian editor, while not hiding them from the sidebar (meaning you can still easily edit them from there), provided that you create a cssclass called 'hide_properties' and apply it to the note(s) in question.]
Started using Obsidian yesterday and after struggling for like. Half an afternoon + the whole evening. On trying to clean up my properties for looks sake, I wanted to share the CSS snippet I managed to figure out in case someone needed something similar.
To be clear, I didn't come up with the original CSS, but I messed around to see what combination would make it work like I wanted and figured I might as well share.
Here is the CSS (you can just directly paste this into a snippet, just remember to create the hide_properties cssclass and apply it to your note):
.hide_properties { div.metadata-property[data-property-key="tags"] { display: none; } div.metadata-property[data-property-key="cssclasses"] { display: none; } } .workspace-leaf-content[data-mode="source"] .markdown-source-view.hide_properties .metadata-add-button { display: none; } .workspace-leaf-content[data-mode="preview"] .markdown-preview-view.hide_properties .metadata-add-button { display: none; }
I use tags. A lot. Or I expect to, anyway. I've been told it's not conventional to use Obsidian this way, but it's more convenient for me to have both tags and internal links to organize different types of notes in different ways, so I wanted to be able to add things in the properties (such as internal links) without having all the tags in the way visually once the note was more or less done.
Anything inside the brackets of .hide_properties {} will only apply to the hide_properties cssclass. You have to do it this way for hiding the tags and the cssclasses properties from the editor IF you don't want them to also be hidden in the sidebar. This doesn't matter for the add property button because the one that is being hidden here is only the one from the editor. The one from the sidebar should not be affected either way.
The 'preview' mode is reading mode and the 'source' mode is the editing mode. There was another syntax I could use for this, but for some reason it didn't let me remove the button in both the editing and reading modes at once (i.e., it only accepted to remove it in reading mode for some reason). So I opted for this one instead.
Also of note: I use the MySnippets plugin, and it's just made things so much quicker to figure out. I highly recommend it for quickly editing CSS snippets without having to navigate to the folder each time (also it creates the snippets in the right format for you. Basically, much less of a headache).
I got the CSS to hide the properties from here, and to hide the add property button here. An additional thanks to this page as well because it helped me figure out what the editing mode was called in the code.
Before:
After:

Note the lack of change in the sidebar:

1 note
·
View note